
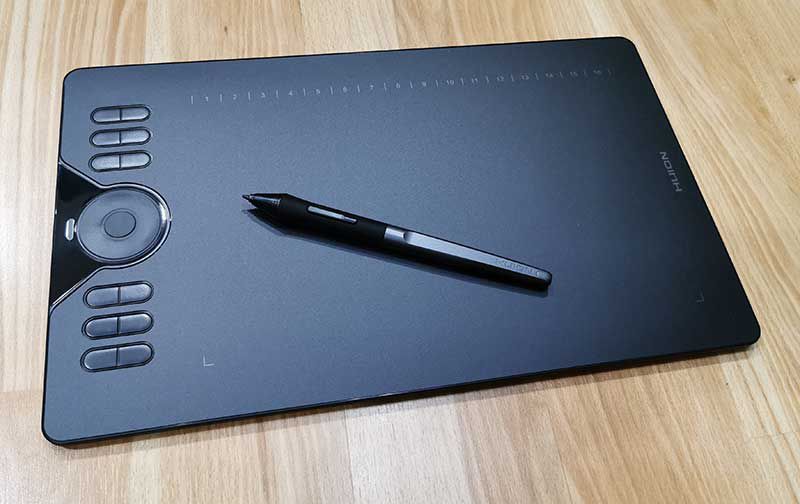
REVIEW – Do you wish your laptop had a real number pad on it? There are definitely times where I’ve had a project pop up during a trip where a full size keyboard was nowhere to be found. Voamoko’s Type-C Wireless Numeric Pad with USB Hub might just be the solution that you can keep in your bag without taking up much space.
What is it?
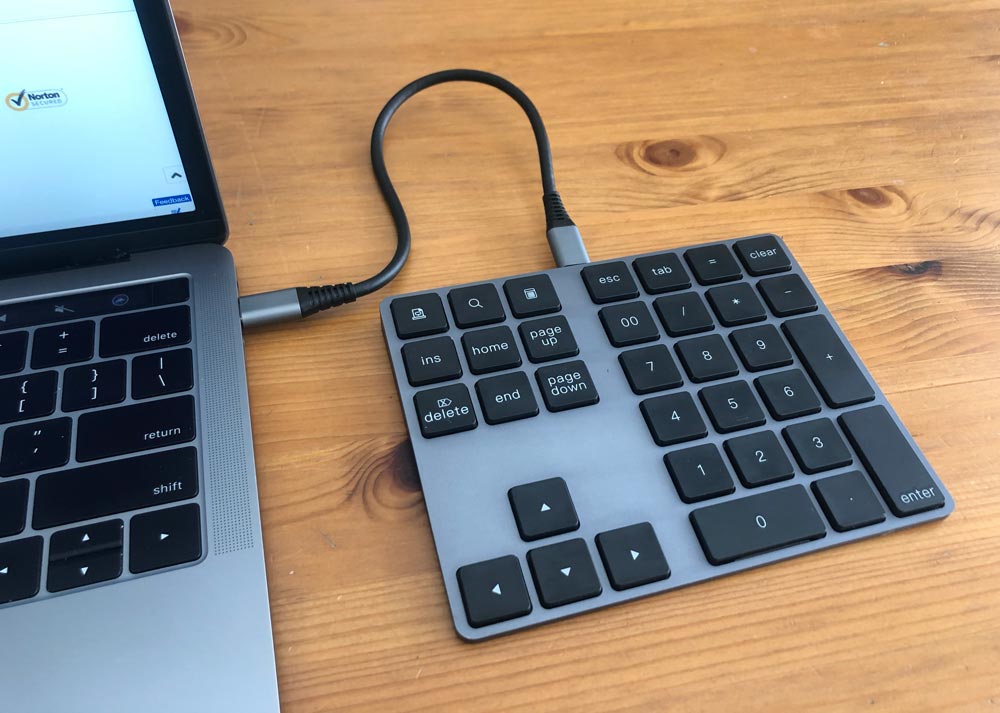
The Type-C Wireless Numeric Pad with USB Hub is a portable number pad that you can use with your laptop for the feel of a full size numeric keyboard without the bulk. The built-in USB hub adds some needed backwards compatibility to newer computers.
What’s in the box?
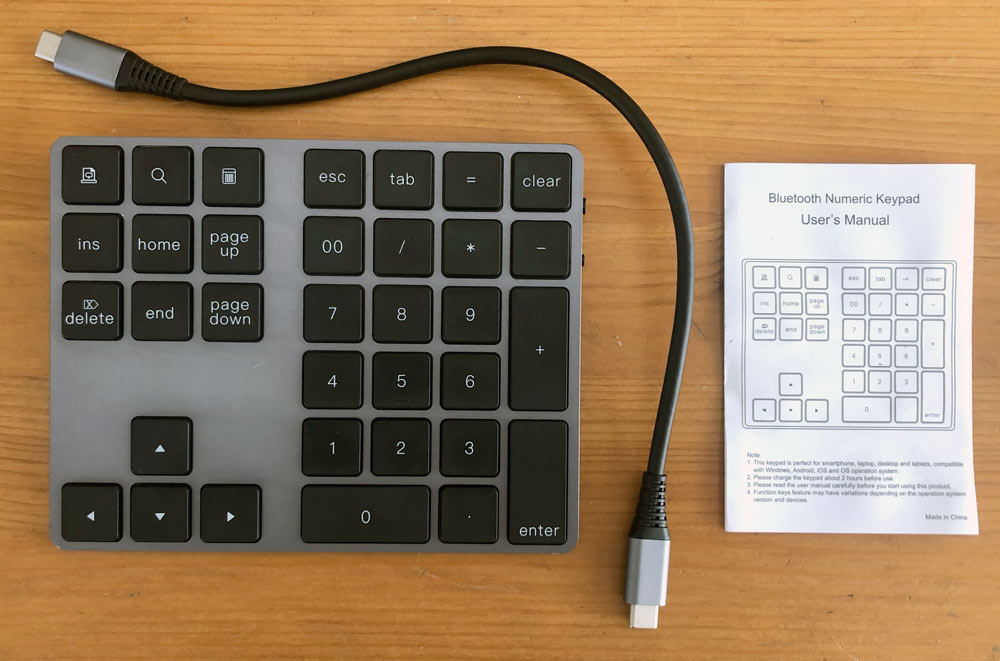
- Numeric key pad
- USB cable (Type-C to Type-C)
- User manual
Hardware specs
– Support: Windows/macOS/iOS/Android (Some shortcut keys are not supported on macOS & iOS)
– Keyswitch life & response: 500 million strokes times & 5 millisecond
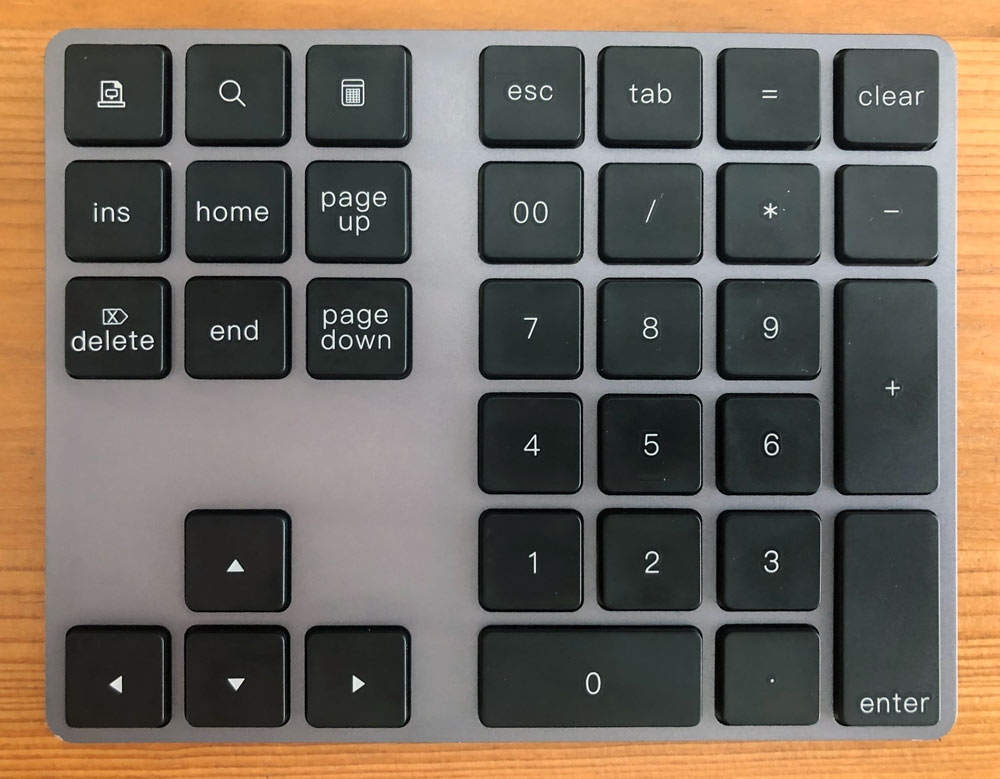
– Design: 34 key aluminum keypad
– USB hub: Two USB-A 3.0 ports (when connected with USB-C cable)
– Wireless: Bluetooth 3.0 for keypad only functionality
– Controls: Power switch, BT pairing button and LED indicator
– Power: Input of 5V at 100mA, Output at 900mA per port
– Duration: 2 hours to charge, 50 hours use, ~2 months standby
– Dimensions: ~ 5.5″ x 4.5″ and 0.5″ at top of the ramped design
Design and features
Voamoko’s numeric pad was clearly designed to aesthetically match MacBooks from Apple. It’s available in both silver and space gray so you can complete your kit. It’s also compatible with PCs running Windows and iOS devices.
The solution provides a true number pad for anyone craving that extended keyboard feel that’s missing from almost all laptops. Because it’s Bluetooth you can move it exactly where you need it.
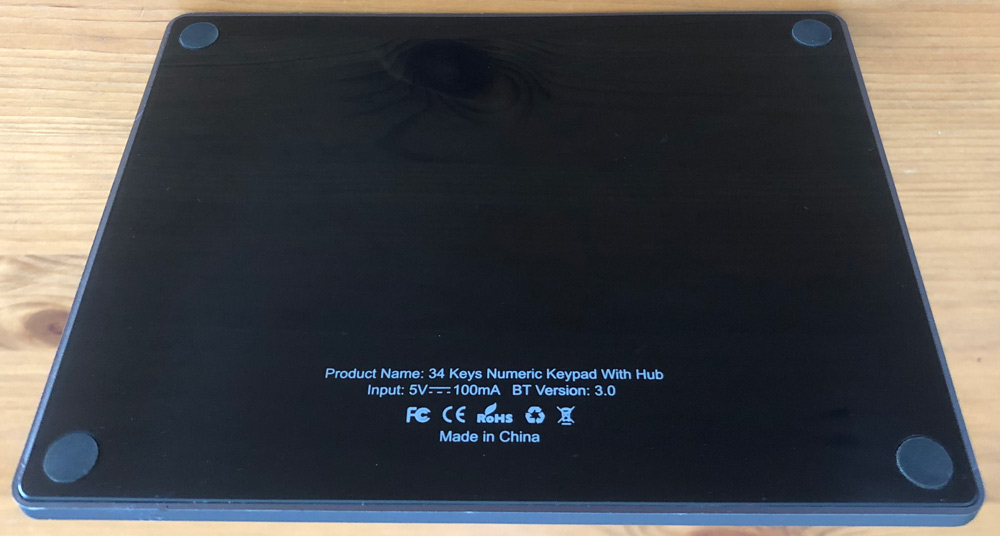
The bottom is plastic which helps with wireless signals and the four rubber feet keep it from moving around.
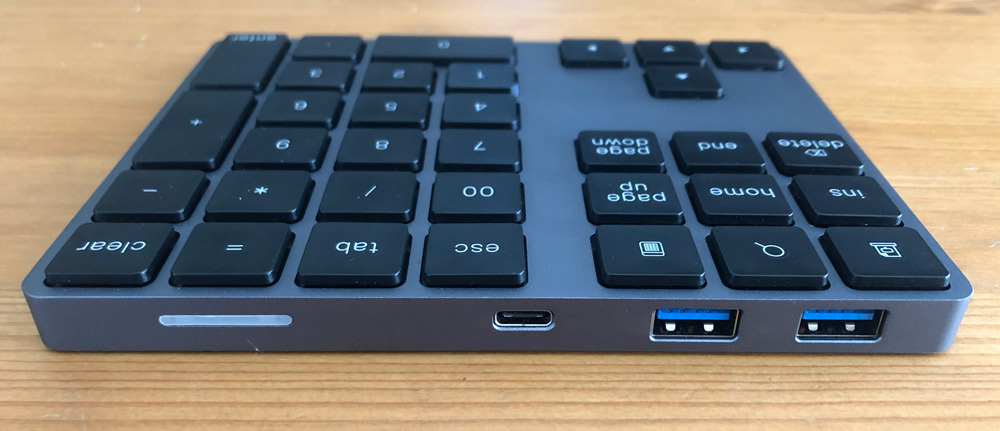
It also adds two USB-A ports when connected with the included USB-C to C cable, which makes it easier to continue using any peripherals you haven’t upgraded to USB-C.
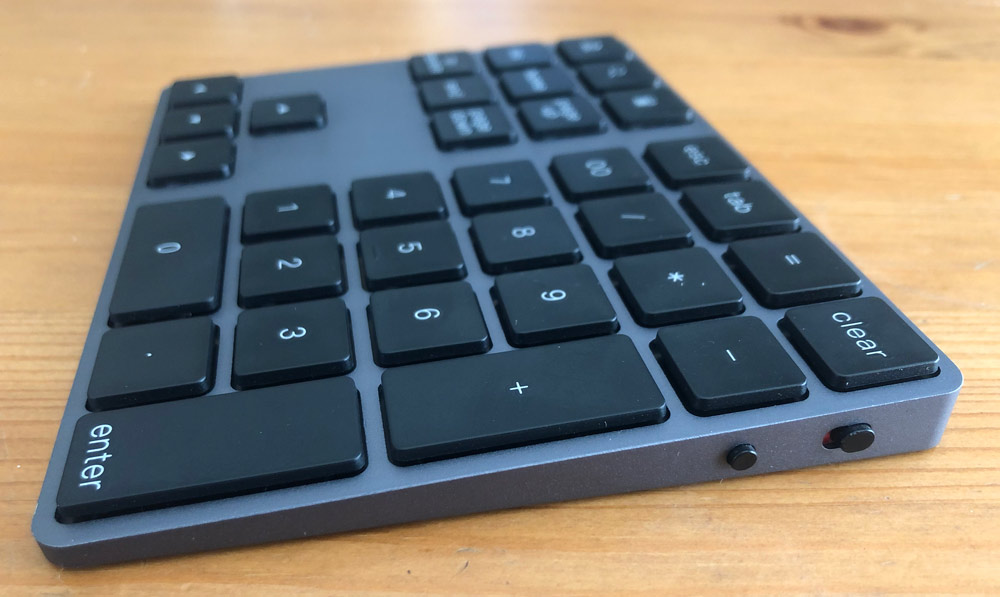
A power switch and a paring button can be found on the right side where you can see the tapered design very similar to the Apple Magic Trackpad.
Setup
First you’ll need to connect the keypad’s USB-C cable and connect it to your computer or a wall adapter.
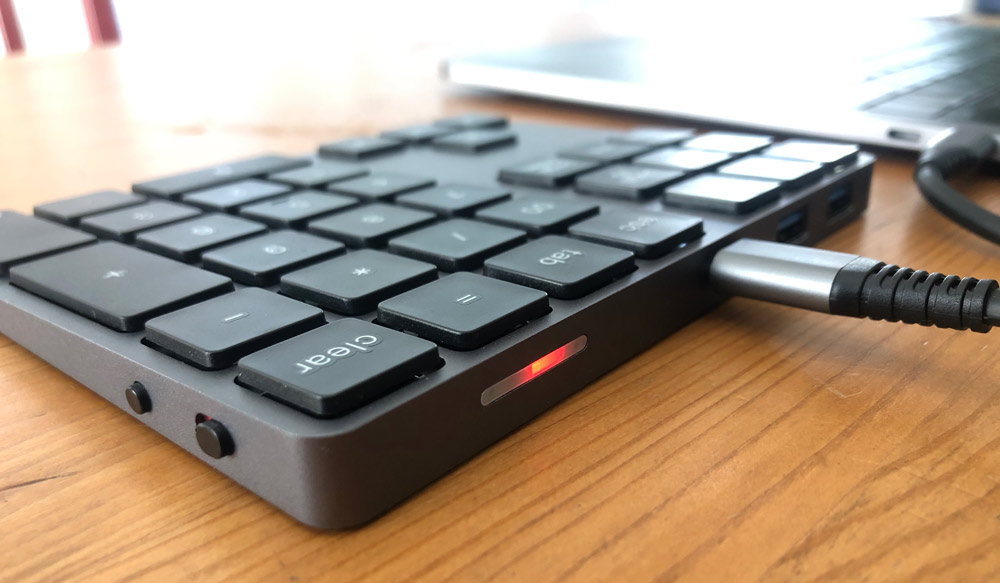
You’ll see a solid red light at the back of the keypad confirming it’s charging. Allow about 2 hours for a full charge. Note that you will not be able to use the keypad until you setup Bluetooth.
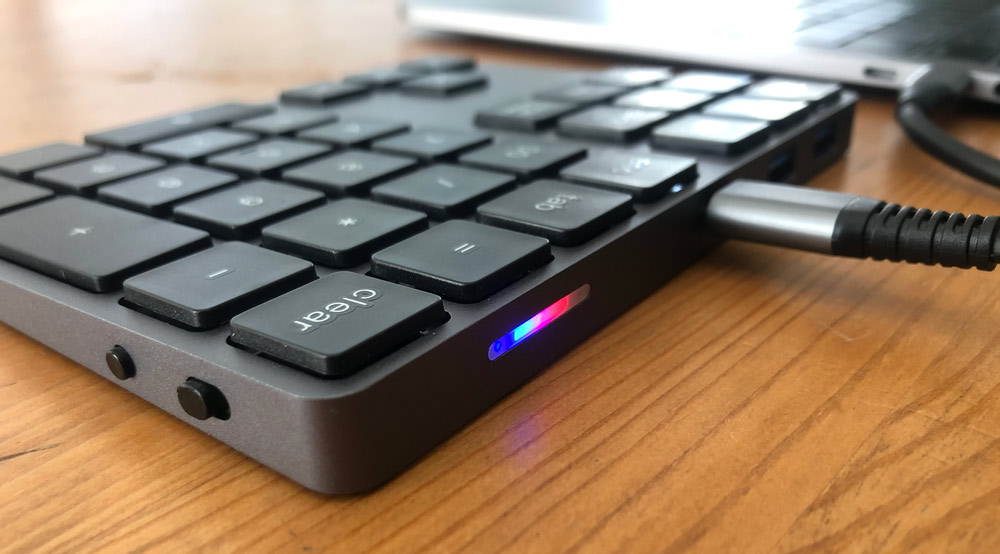
Slide the switch so that green is showing (instead of red) and then press the small round button to place it in pairing mode. On the back you’ll now see a flashing blue light next to the red light. On you computer open your Bluetooth preference panel, look for “Bluetooth Keypad” and click connect.
Performance
I use a standing desk and a large monitor at work with Apple’s Magic Trackpad 2 and full-size Magic Keyboard with Numeric Keypad. It’s a great setup as I work in spreadsheets and gantt programs regularly. The funny part is that I’m actually not at my desk for the majority of the day. When I’m in meeting rooms and elsewhere I’m limited to the numbers along the top of my Macbook Pro. Definitely works, but it’s just not the same as having a number pad when you’re really trying to enter numbers quickly and accurately.
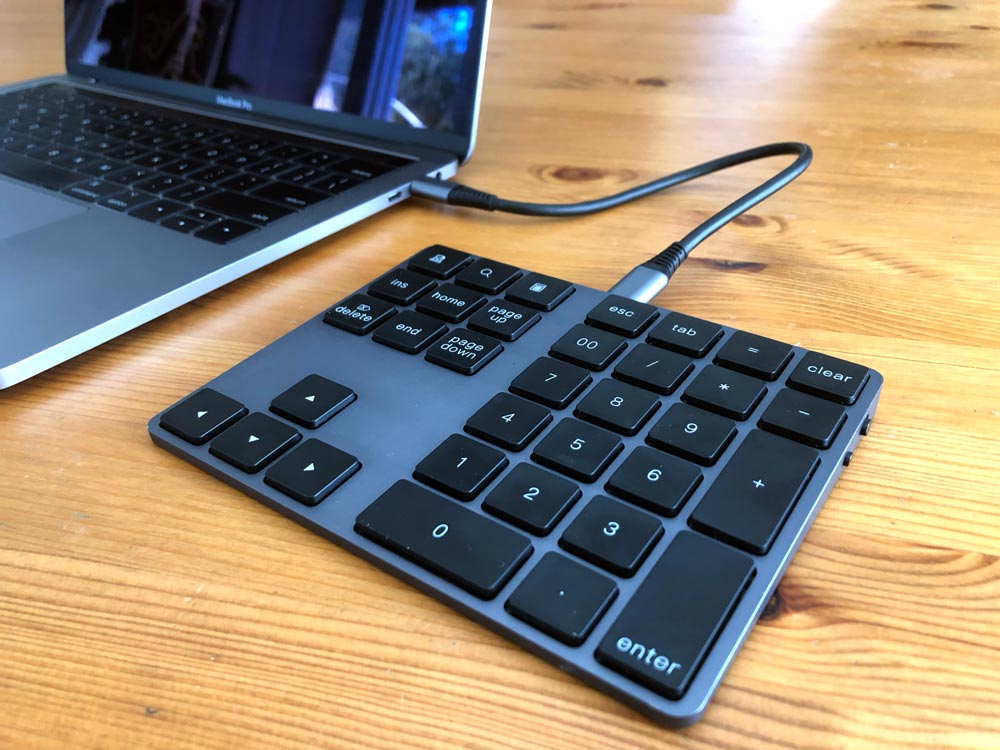
The Voamoko Numeric Pad straight up solves this problem. It’s lightweight, small and fits in a back pocket or between your hand and the laptop you’re lugging around anyway. Just place it next to your computer and switch it on.

When placed directly next to the right side of my 15″ laptop it’s lays out just like the keys on my Magic Keyboard.
The USB hub is a great feature as you likely have some hard drives, peripherals or that USB-A to lighting cable that came with your iPhone that you connect to your computer with some frequency. It’s a welcome benefit that doesn’t add volume to the keypad in any negative way. It does mean that you need to keep that cable handy or always hanging out of the back of the keypad.
That included cable is short (only x inches) with straight connectors. I connect it to the right side of my laptop since I’m right handed. Does that mean that this could be a great solution for left handed users? As “I’m am not left-handed” (Princess Bride sword fighting scene playing in my head now), I can’t speak to if that would actually be a benefit since you’re likely used to standard key layouts. But back to my previous point, connecting it to the right side ports pushes it further away from my laptop to a point that it starts to feel awkward.
This is either not an issue at all, or an easily remedied problem. If you are only using the number pad functionality and charge the keypad when not it use, you won’t run into this issue. If you want the USB hub functionality, a cable with a 90º connector on the computer end of the cable, or just a longer cable that can reach around to ports on the left side will solve the problem.
As for the actually hub functionality, the USB 3.0 seems to work great. I connected a 3.0 Seagate drive through the keypad and moved a large file (1.36GB) from my computer to the drive in about 10 seconds.

There also seems to be no issue using both USB ports simultaneously. As with any hard drives, make sure your cables are fully pushed in and try not to bump things around while working with them. They all tend to disconnect way too easily.
I was also able to easily pair it with my iPad Pro. I’m not sure I’ll be using it in that scenario very often, but it’s great to know that it can. Finally, there is no backlighting on the keypad which is to be expected, but just wanted to make sure you know.
What I like
- Number pad with my laptop!
- Lightweight and low profile
- Wireless in number pad only mode
- USB 3.0 hub when used with cable
What I’d change
- Longer cable to reach to far side of laptop
Final thoughts
If you miss having a numeric pad when you’re on your laptop, this is a great solution. If you need a USB-A 3.0 ports on your laptop, this is a great solution. Either of those alone plus the solid build quality, portability and price puts the on the Voamoko Type-C Wireless Numeric Pad with USB Hub on the recommended list for me.
Price: $49.99
Where to buy: Amazon or Voamoko
Source: The sample of this product was provided by Voamoko.
Filed in categories: Reviews
Tagged: Computer Gear, Keyboard, USB hub
Voamoko Type-C Wireless Numeric Pad with USB Hub review originally appeared on The Gadgeteer on August 6, 2019 at 8:00 am.
Note: If you are subscribed to this feed through FeedBurner, please switch to our native feed URL http://the-gadgeteer.com/feed/ in order to ensure continuous delivery.

 )
)


 technology


