MEATER Block wireless meat thermometer review

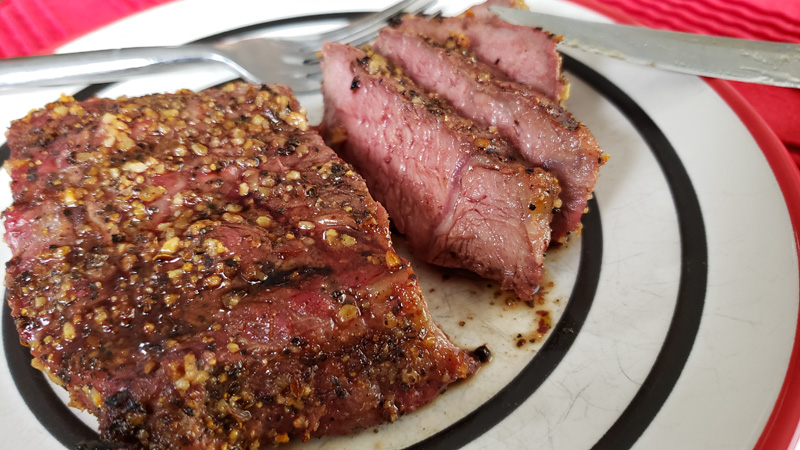
REVIEW – Last year I reviewed both the MEATER and MEATER+ smart wireless meat thermometers. I have used them many times over the past year, even purchasing a few as gifts for family and friends. As the story goes, MEATER announced the Block around the middle of last year but has taken over a year to bring it to market. The Block enables you to monitor the internal temperatures of four pieces of meat simultaneously. Allowing you to precisely cook each piece (hopefully) exactly as desired. Let’s see if it was worth the wait 😉 .

What is it?

The Block unites four (4) MEATER wireless probes under one control unit. The Block communicates with each of its numbered probes then passes that temperature data to your smartphone helping you cook your food to perfection. Not only is the hardware very well done but so is the MEATER app and ecosystem, all working together to cook your meal with much less worry or guessing.
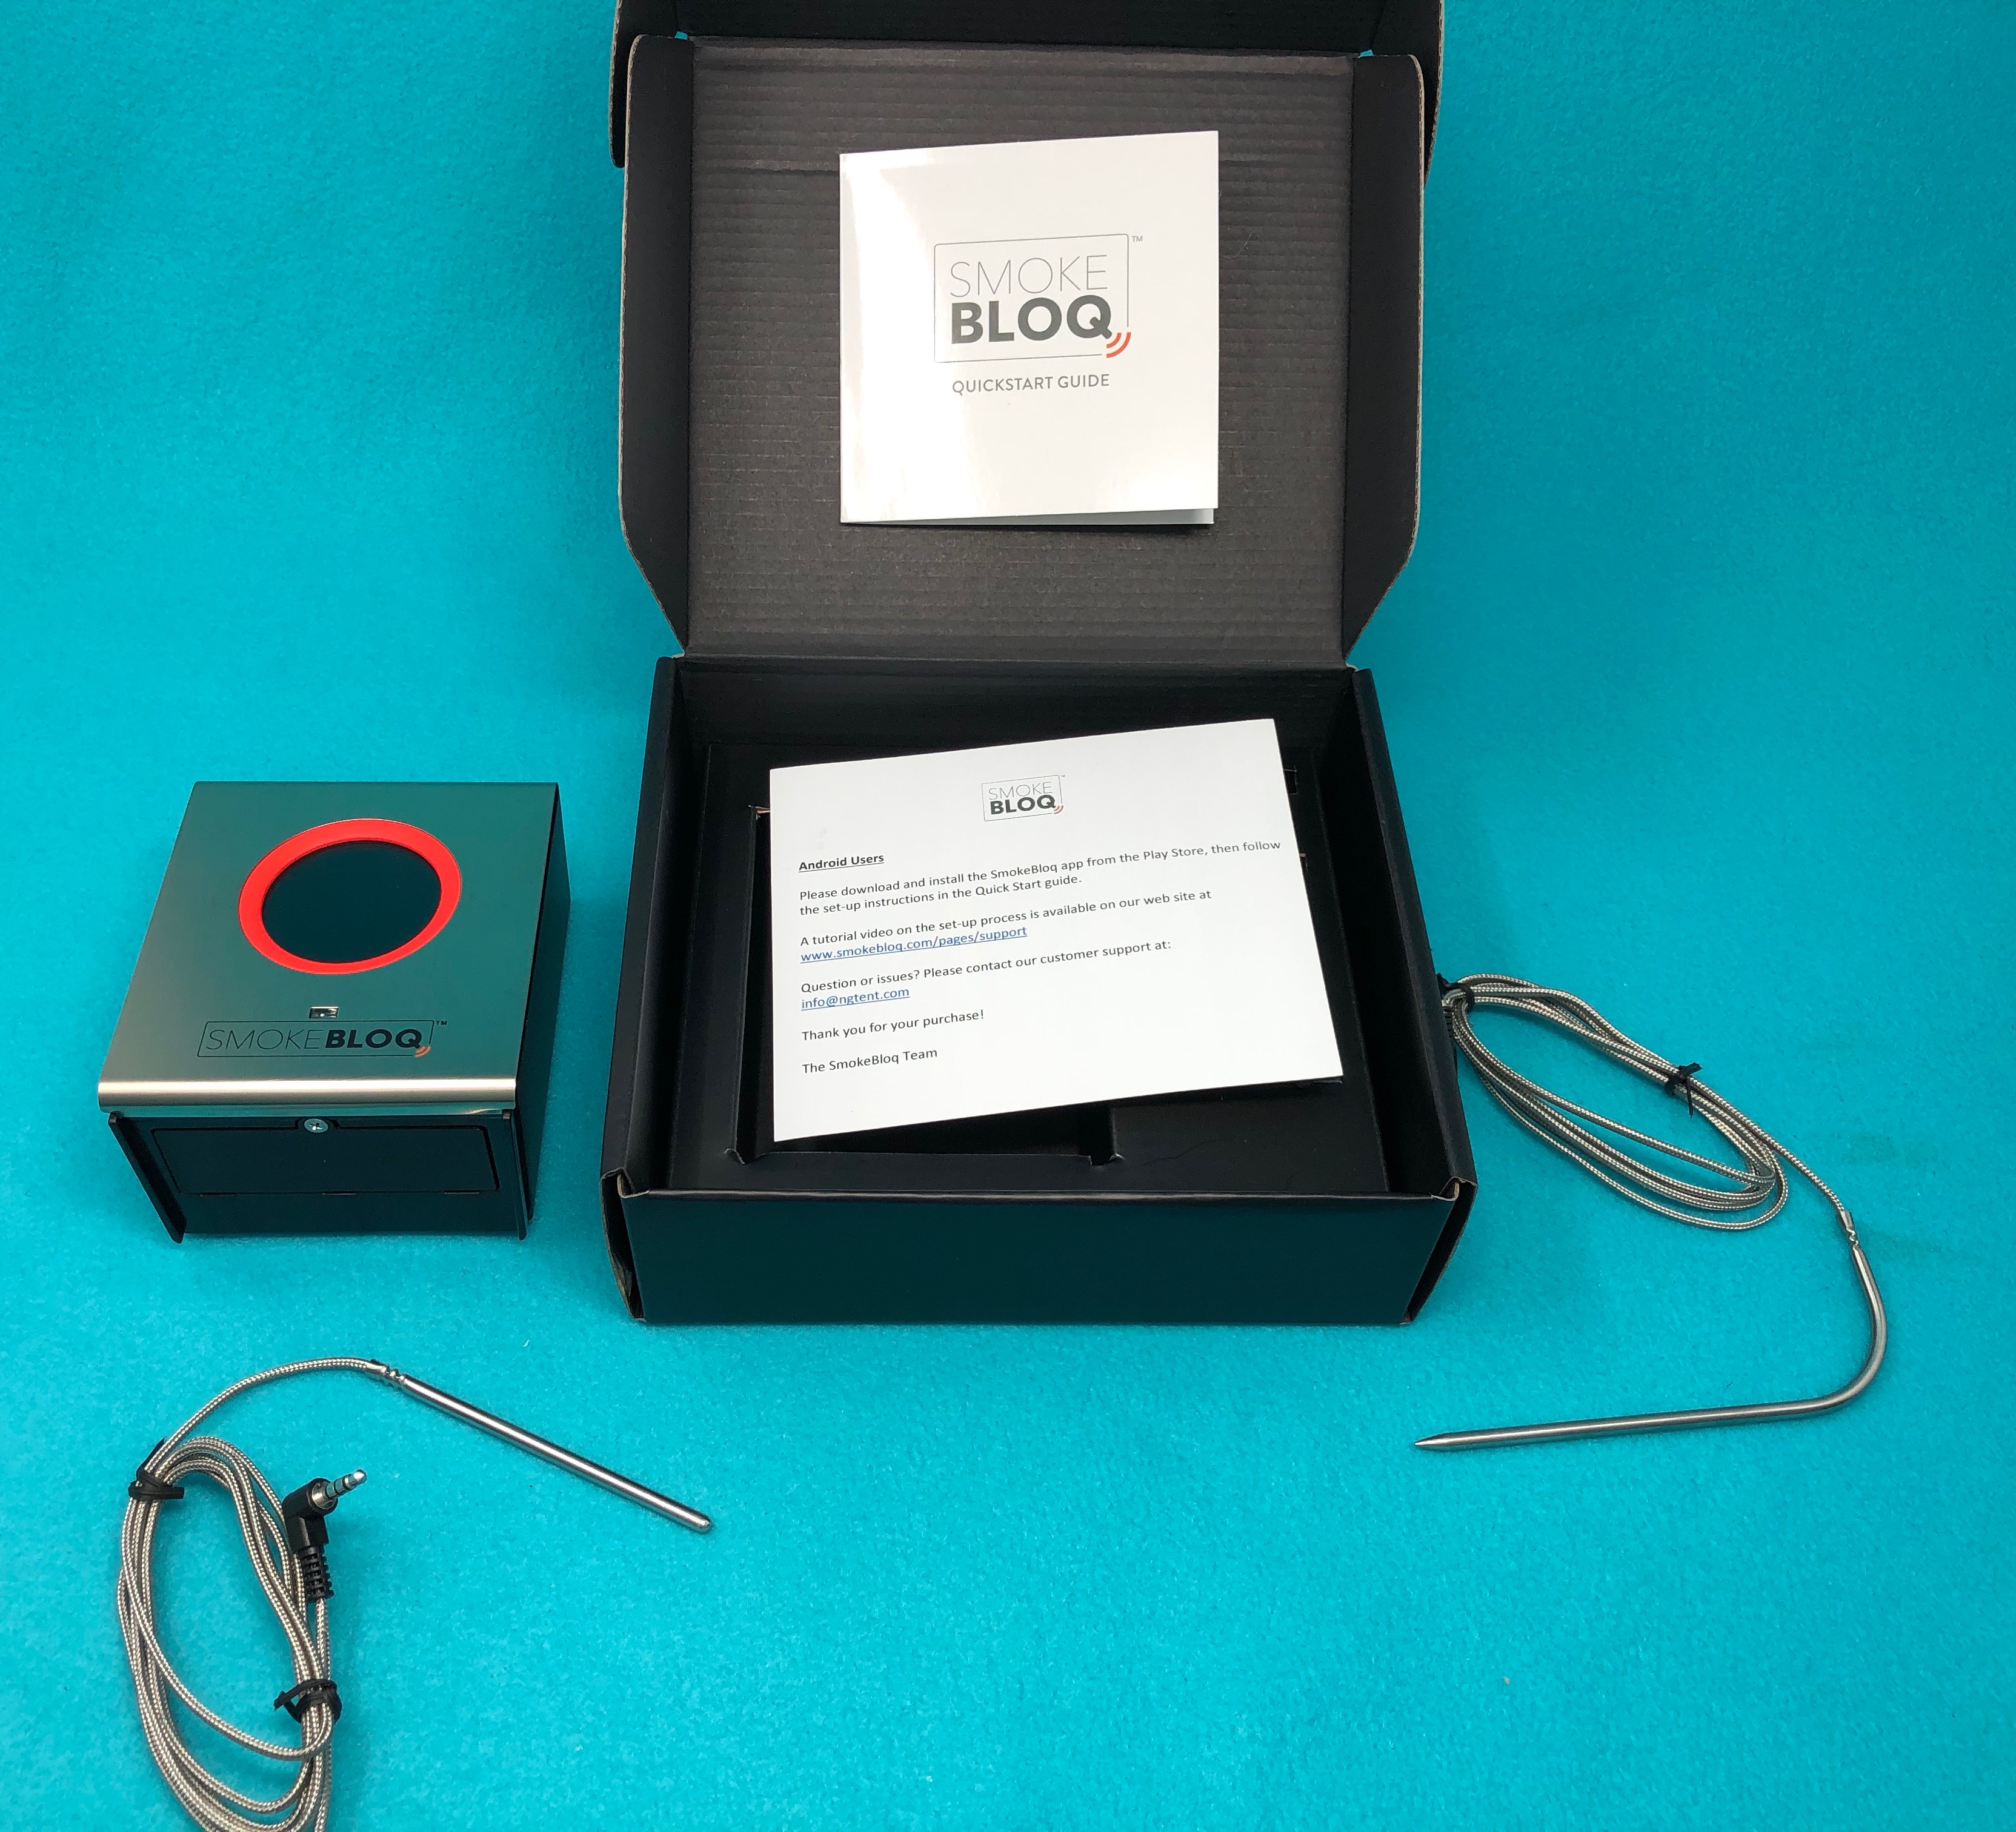
What’s in the box?

  • 4x MEATER probes
  • 1x MEATER Block charger
  • 4x AA batteries

Hardware specs

  • Store and charge your MEATER probes
  • 50 hours of continuous cooking with 4x AA batteries
  • Real wood to match any kitchen or outdoor decor
  • Crisp OLED display with touch capacitive control
  • Built-in speakers for audible alerts
  • Max outdoor operation temperature: 140°F
  • Dimensions: 132mm L x 39mm W x 157mm H

Design and features

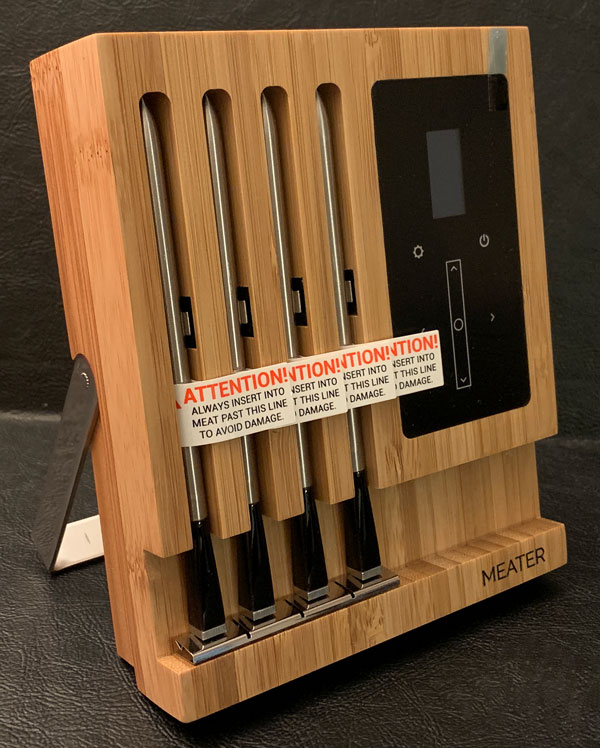
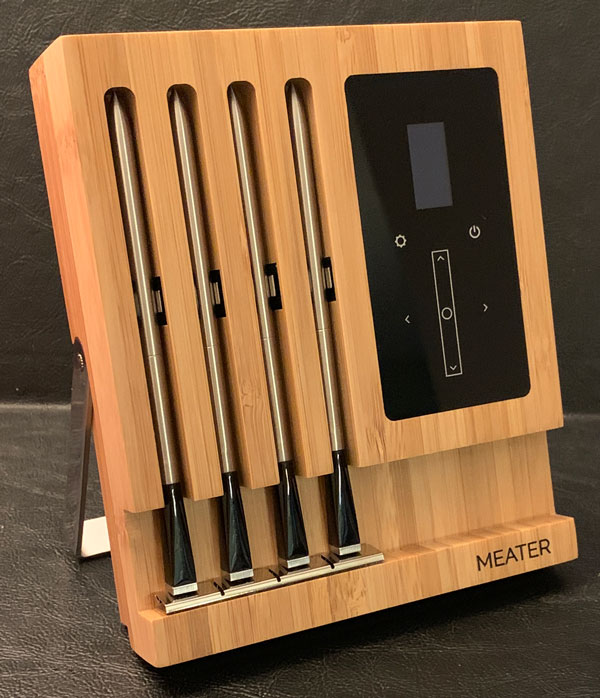
The MEATER Block combines four (4) MEATER+’s into a single device that not only stores, charges, and monitors each probe but can also acts as a standalone, disconnected wireless thermometer and cooking assistant. While surprisingly minimalist, the control screen does a solid job of bringing the MEATER ecosystem to you even when disconnected from the App or Net.

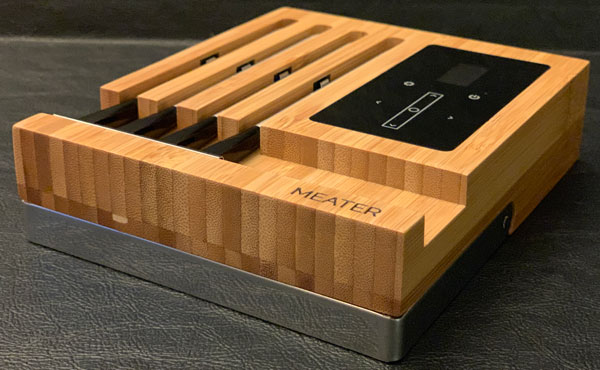
The build quality of the Block is excellent, made from the same bamboo as the MEATER and MEATER+. The designers have embedded the control screen into the right side of the Block and a stainless steel foldout stand for propping the Block upright on your counter or BBQ.

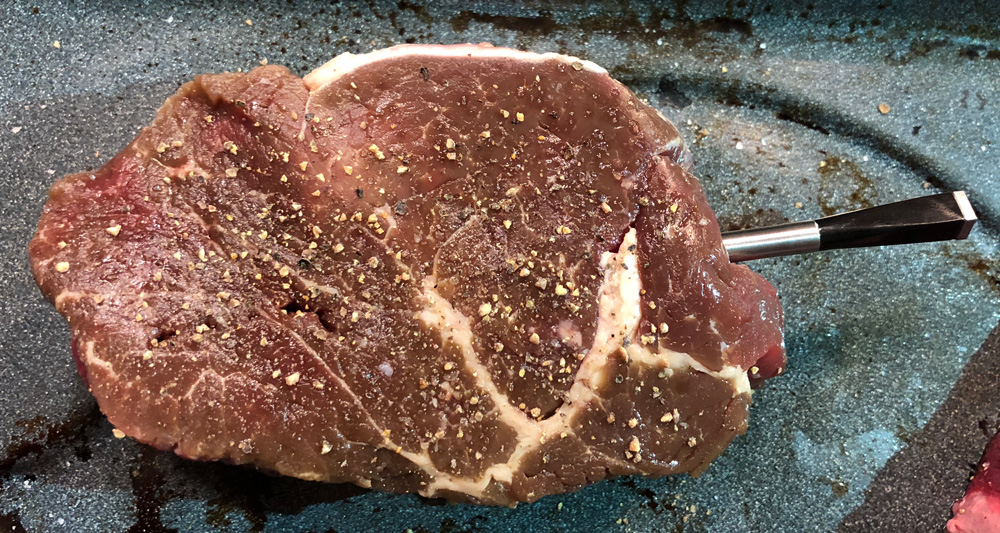
Like the original MEATER and MEATER+, the Block’s probes are wireless with dual sensors created with the sole job of helping you cook your food to perfection. The probes are made from stainless steel and hardened, heat resistant plastic. Best I can tell, the probes themselves have not changed, much if at all, since the original MEATER was released last year.

Probe Specs

  • Stainless steel, water resistant and easy to clean
  • Wireless up to 165 feet (50 meters)
  • Bluetooth 4.0 wireless connection
  • MEATER Sense™: 2 temperature sensors in 1 probe
  • Maximum internal temperature: 212°F (meat)
  • Maximum ambient temperature: 527°F (cooker)
  • Rechargeable: Over 24 hours of continuous cooking
  • Dimensions: 130mm length and 6mm diameter

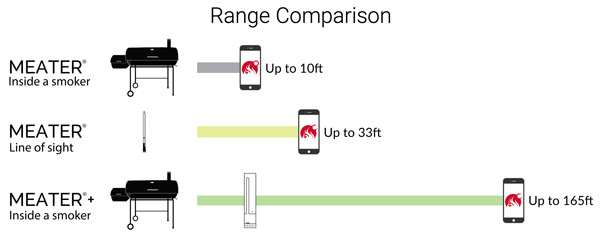
The part of the equation that has changed/been improved from the original is the bamboo charger (both the Meater+ and the Block) also acts as a repeater to boost the signal from the probe and thus the overall range.

Each of the probes is numbered, enabling you to keep better track of doneness of each piece of meat. As you can see, the numbers go from 1 thru 4 and are machined into the base of each probe.

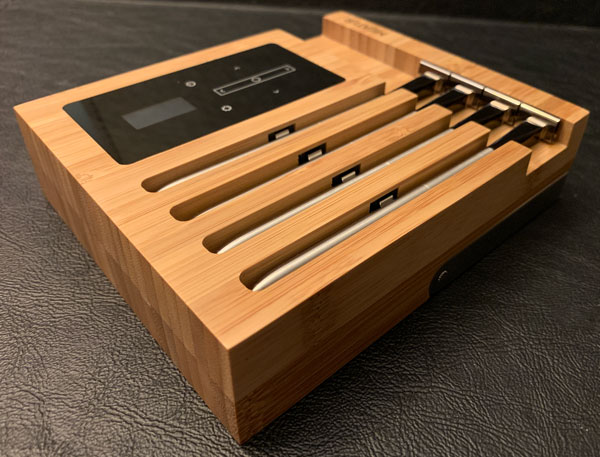
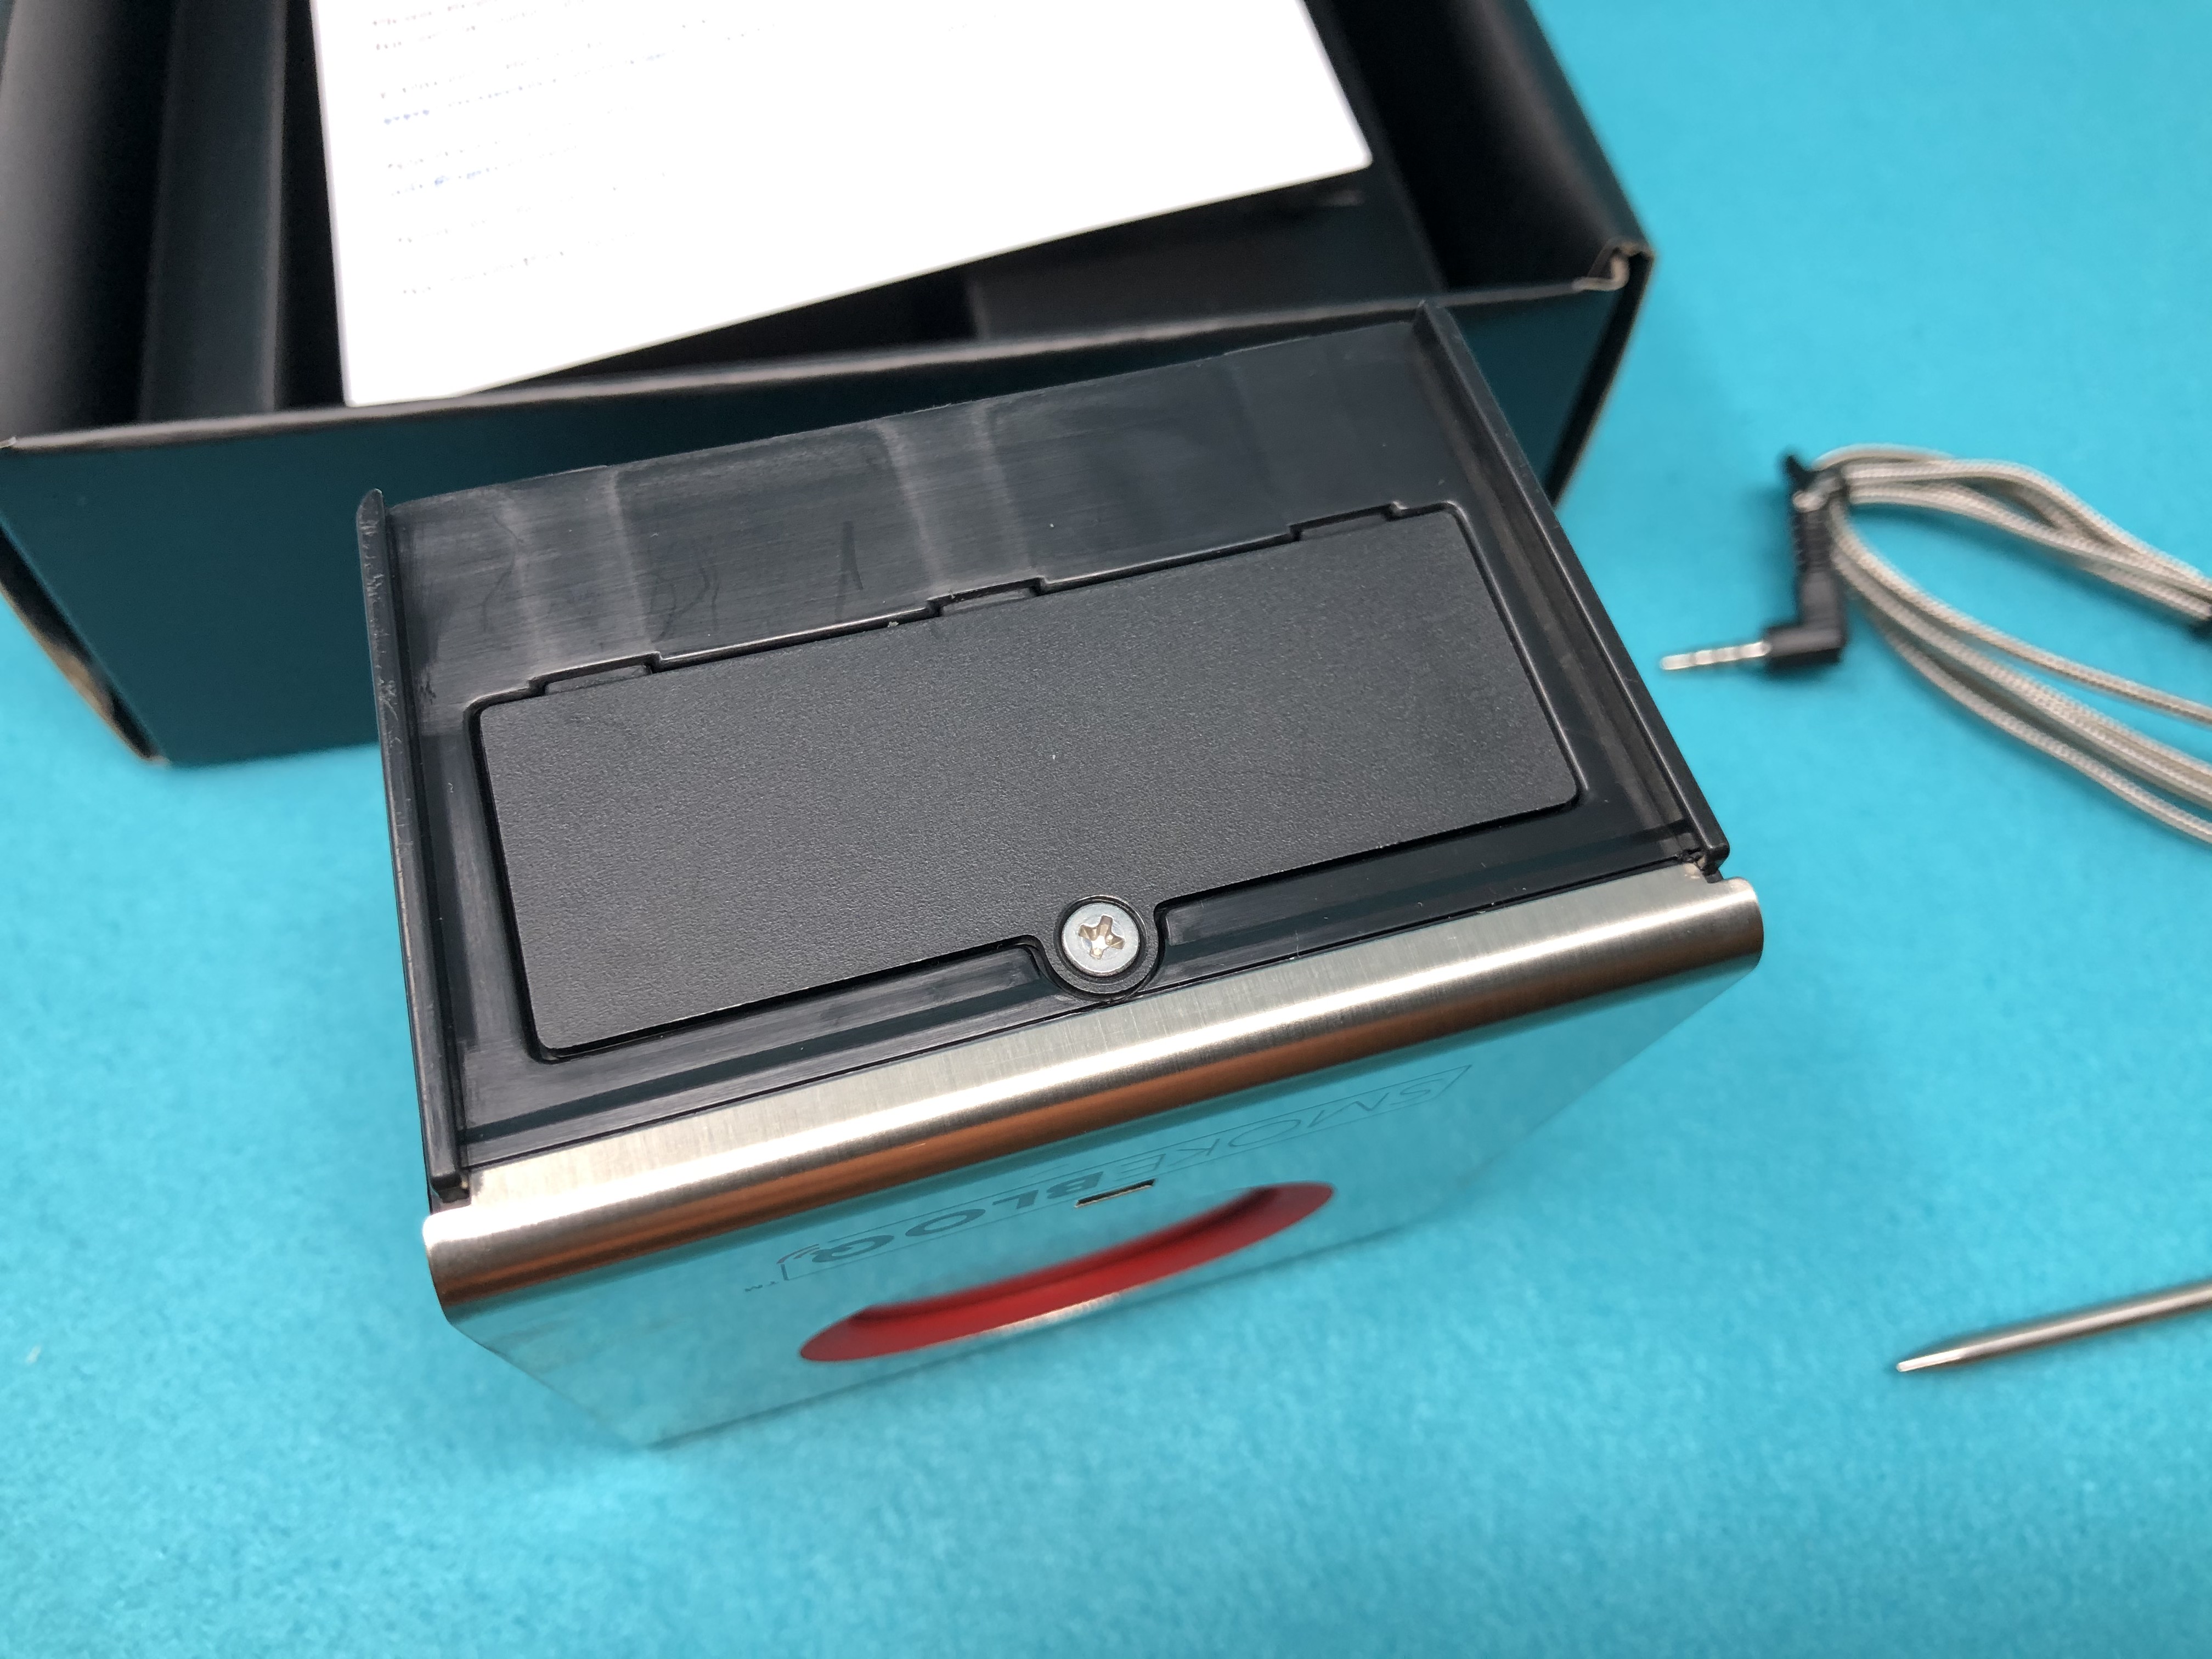
Each of the routered slots securely hold and charge the probes.

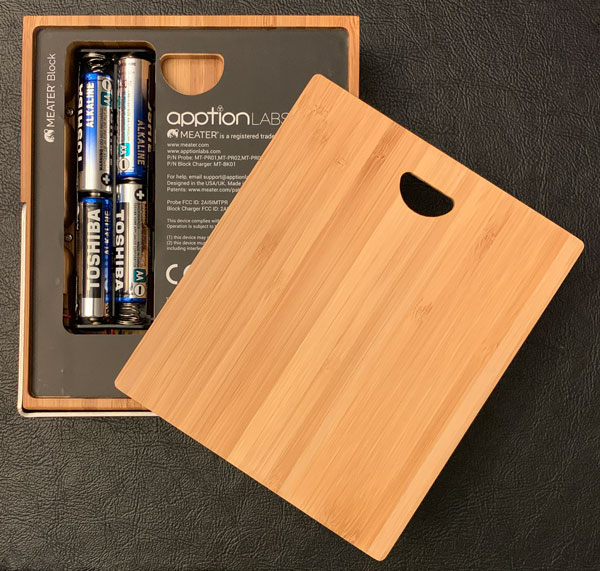
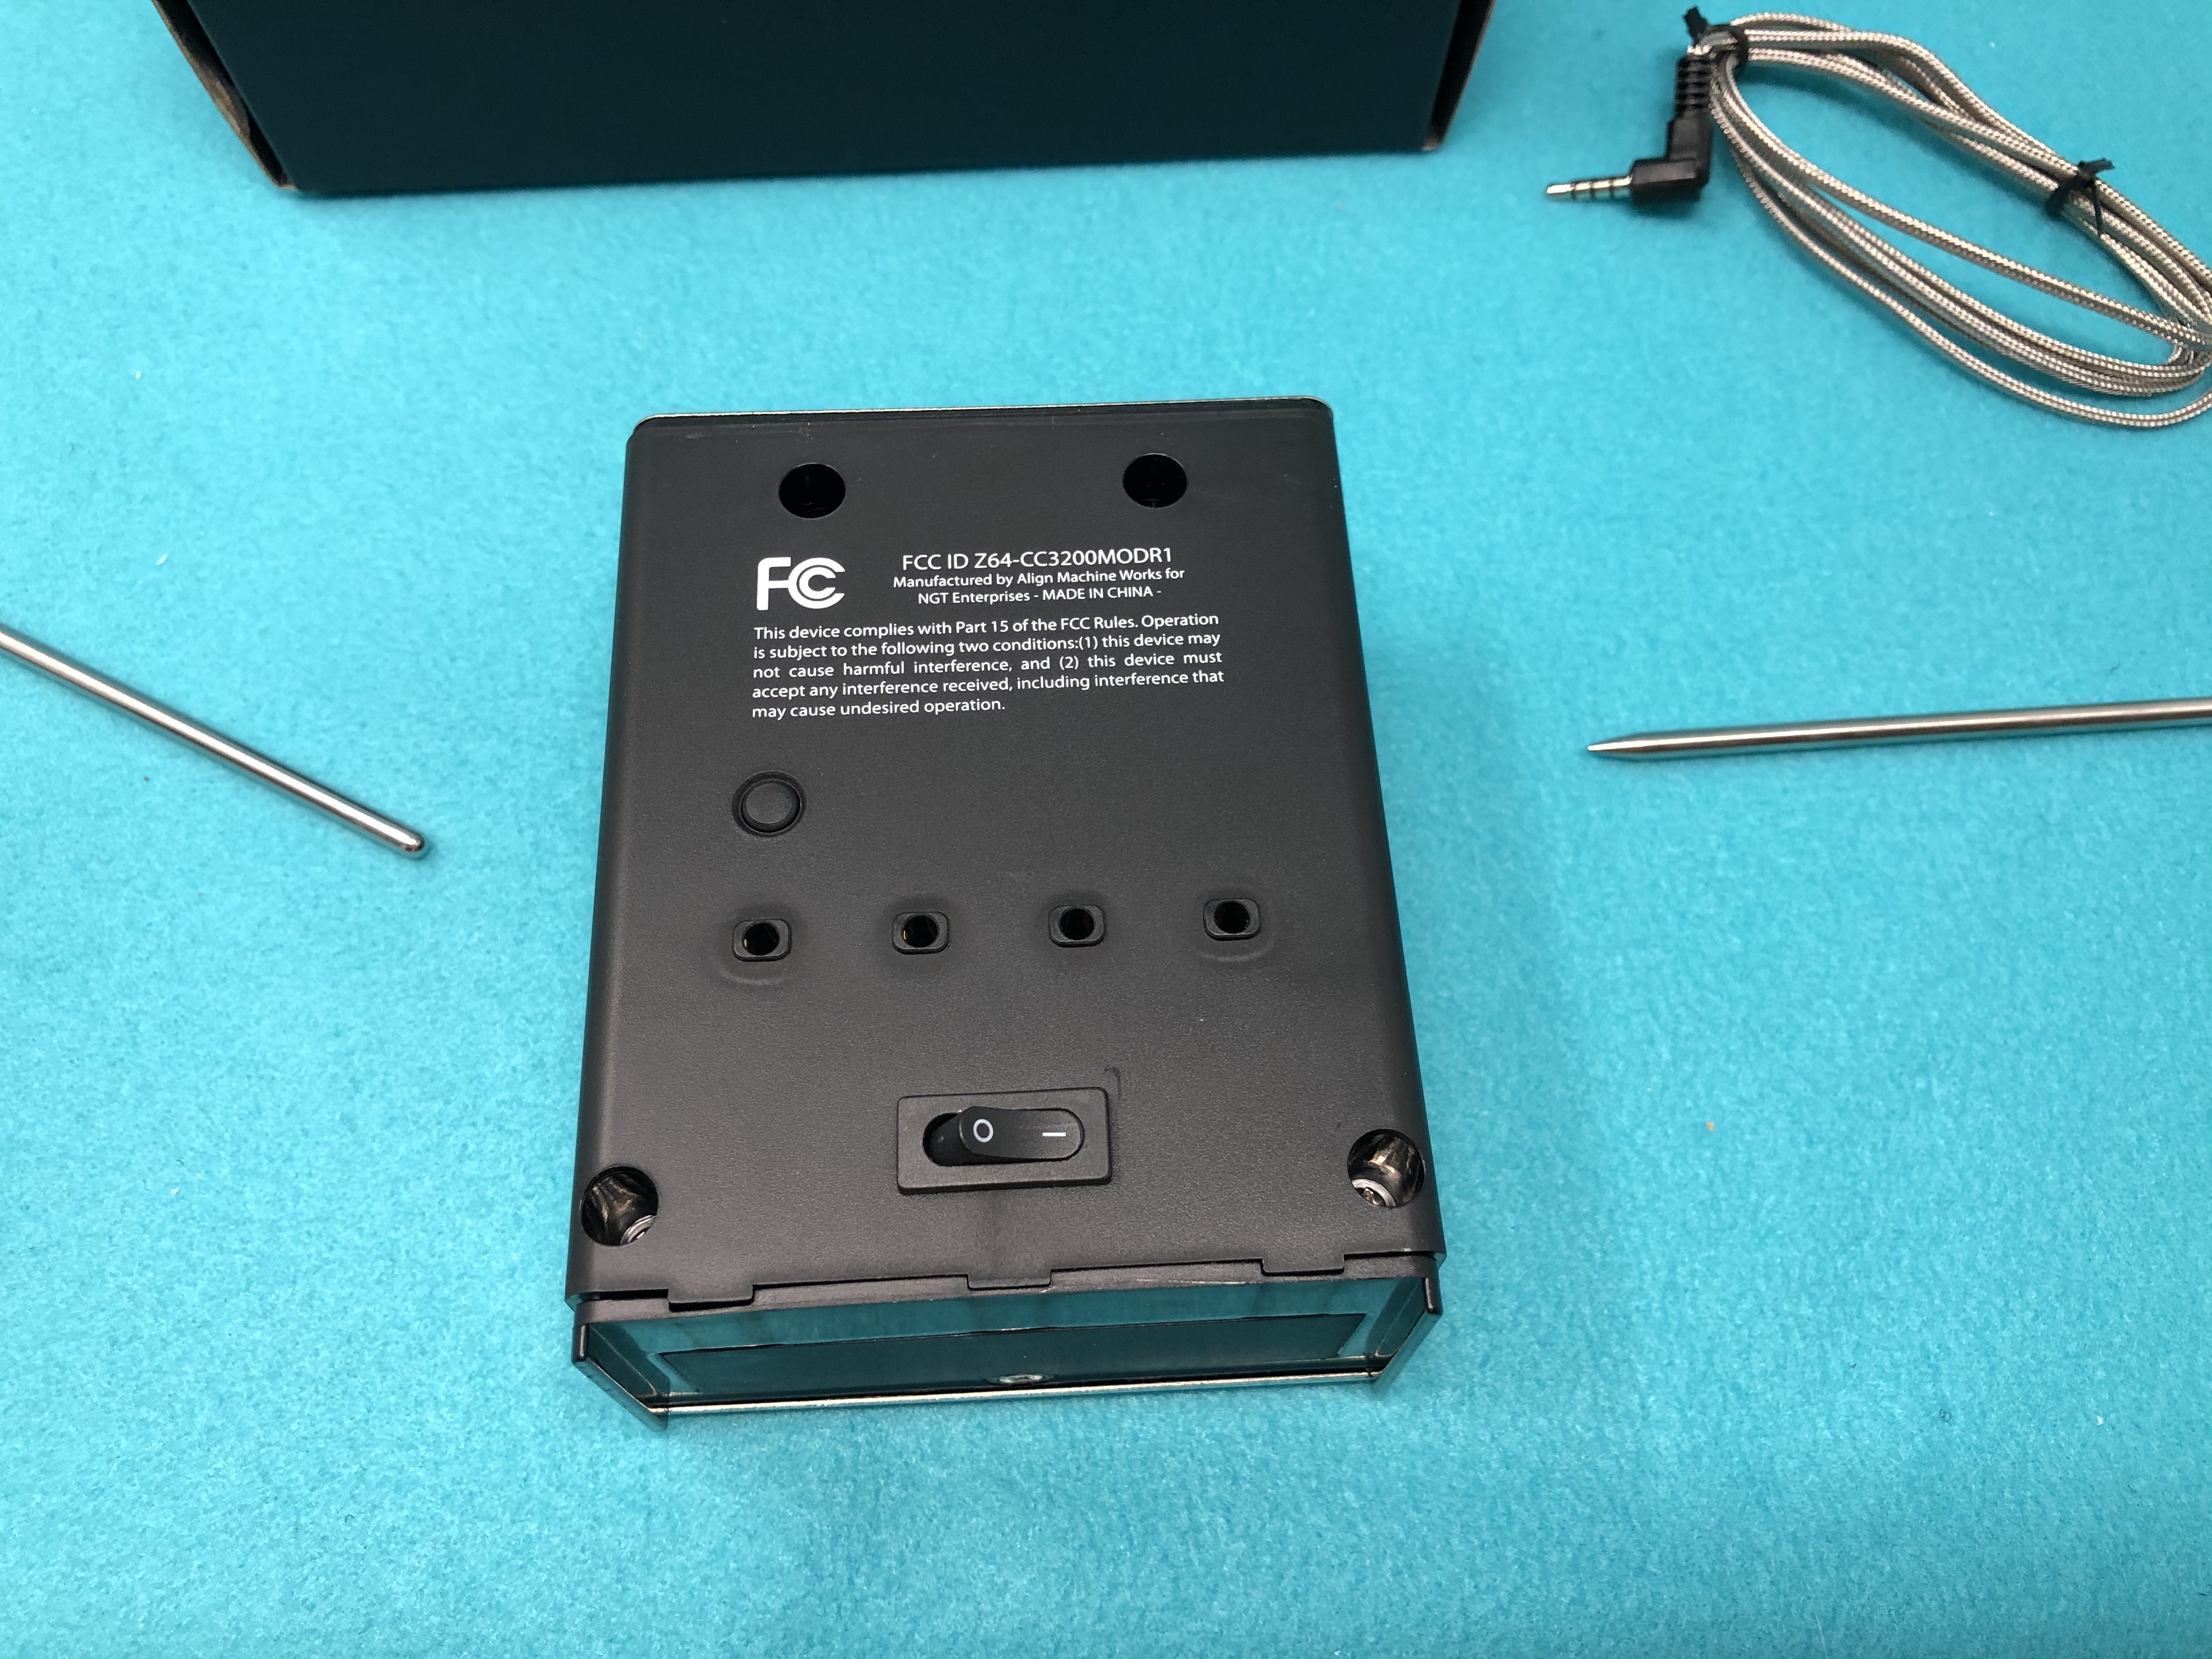
The MEATER Block is powered by four AA batteries, providing 50 hours of continuous cooking before needing to be replaced. The back cover is held in place by small embedded magnets.

The MEATER Block probes have to be inserted into the meat beyond the line machined into the metal casing to protect the main sensor from damage due to high temperatures.

The ambient sensor is meant to monitor the cooking temperature of the oven or BBQ. It is located in the black plastic end of the probe.

Setup

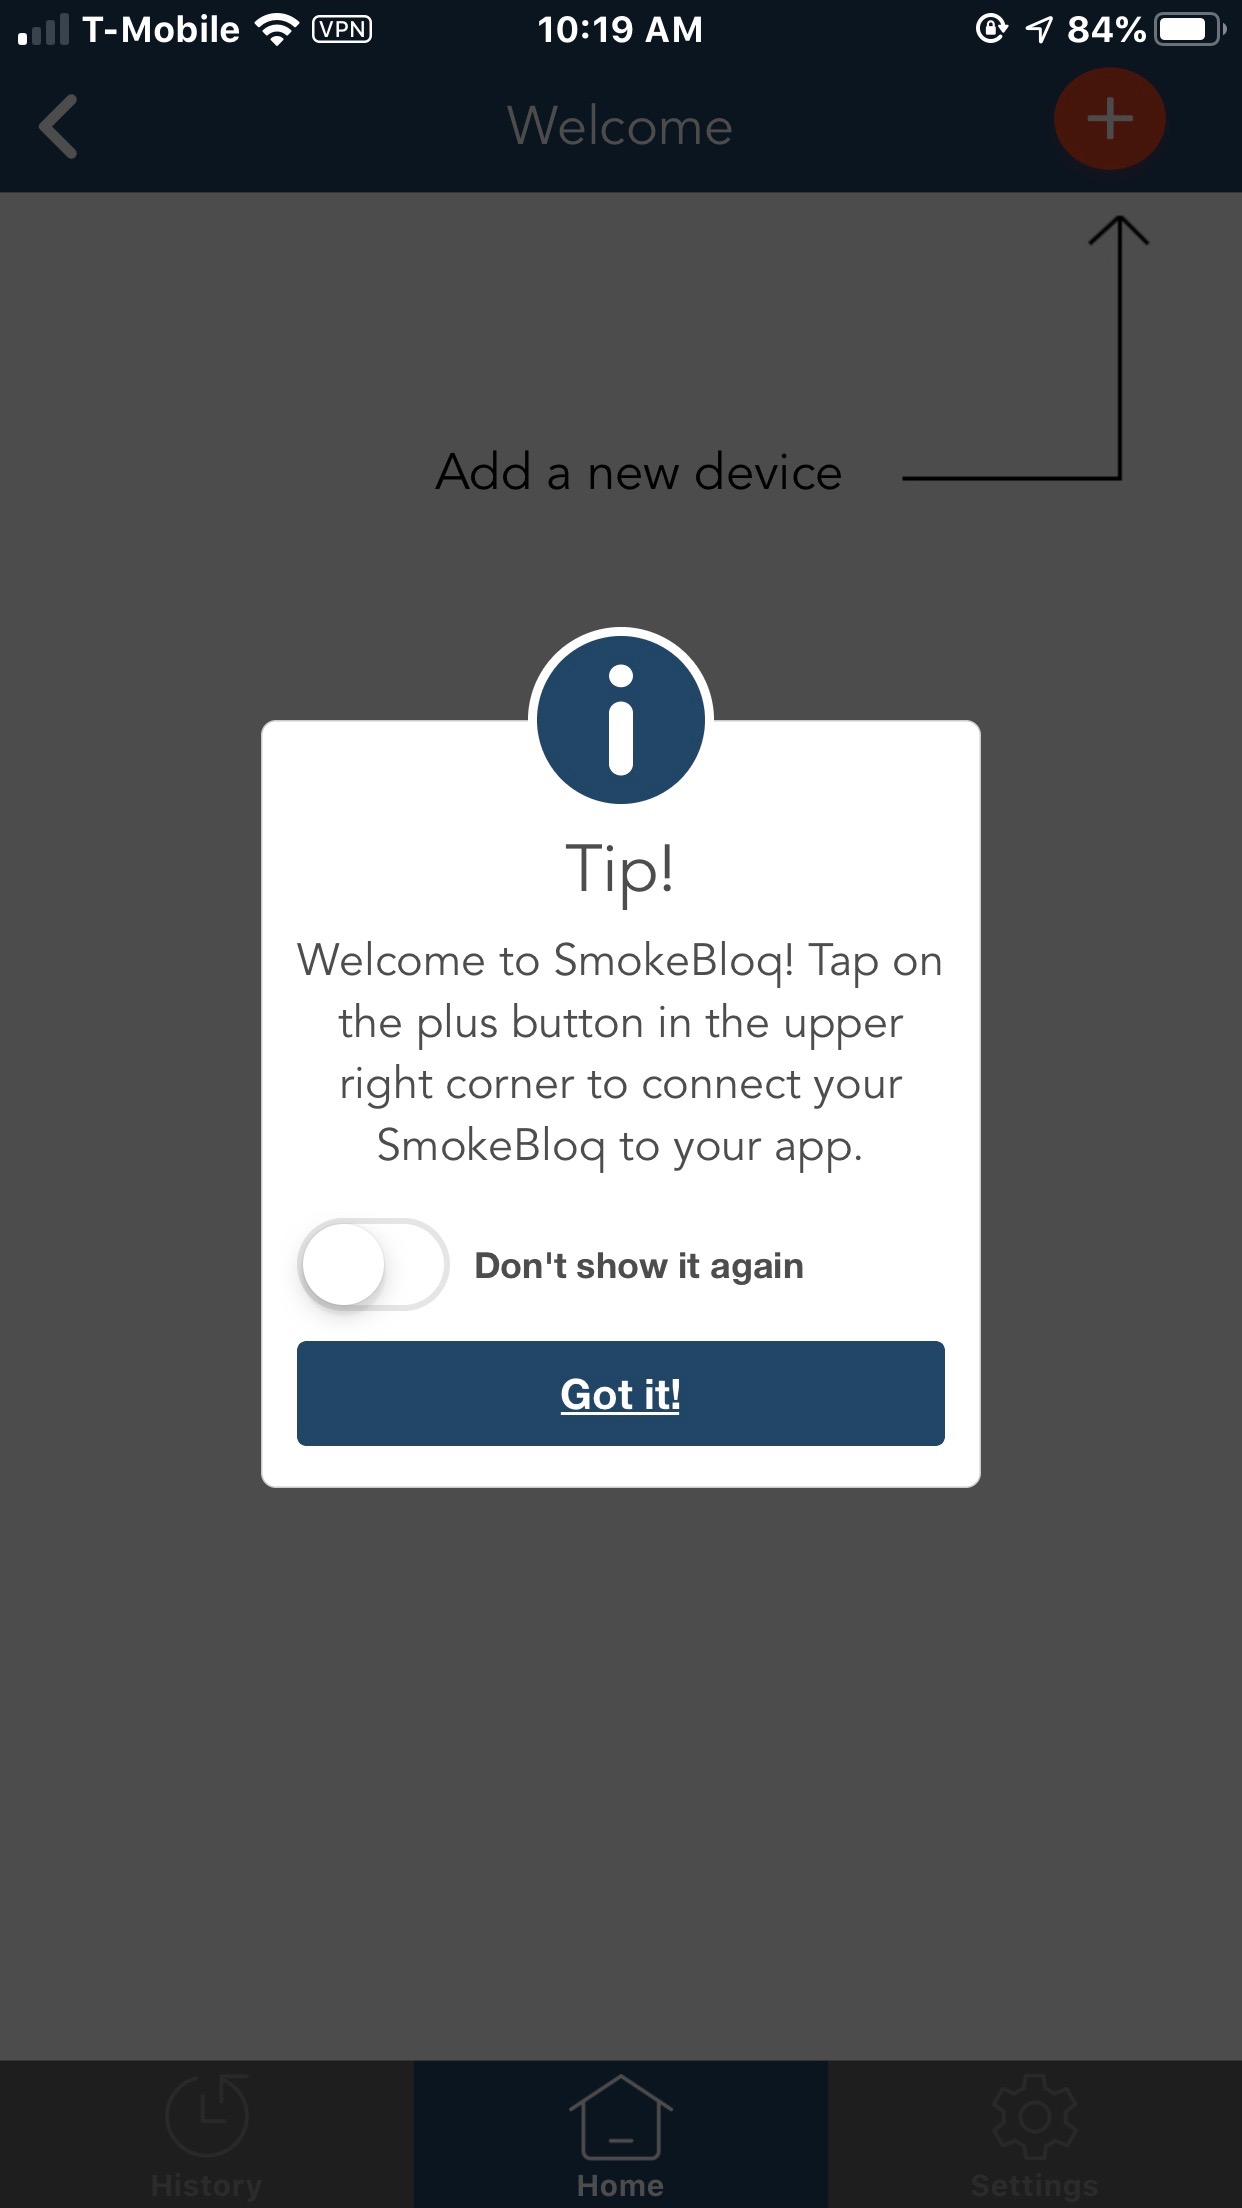
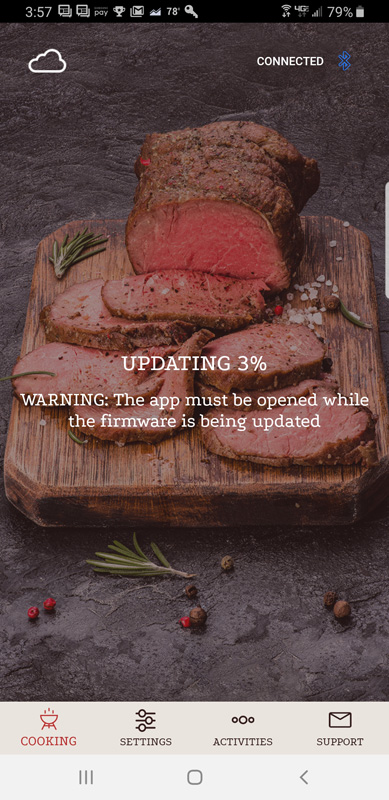
Alright Houston, we have a problem…as this review saga goes, I had struggled to and discovered a relatively large stumbling block setting up the MEATER Block.

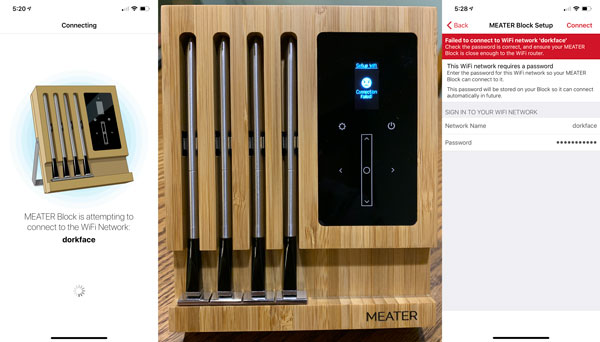
No matter how much/hard I tried, I could not, for the life of me, get the Block connected to our WiFi router. I confirmed our password, attempted to log the Block into our network countless times, moved the Block to within a few feet of our router, put in fresh batteries, reset the device, etc. After all of that, I consulted the MEATER support page and found that Asus routers often have issues with products like the Block using the IoT. The support page suggested turning on an unlocked guest network to see if the Block could connect to that…sadly that was a failure as well. Plus I purchased the Asus router specifically because it was more secure and really did not want to punch holes in that security just to get the Block connected. To confirm I didn’t get a bad review unit or that I was doing something wrong, I connected the Block to several other routers and all of them connected quickly and easily, just as expected.

Performance

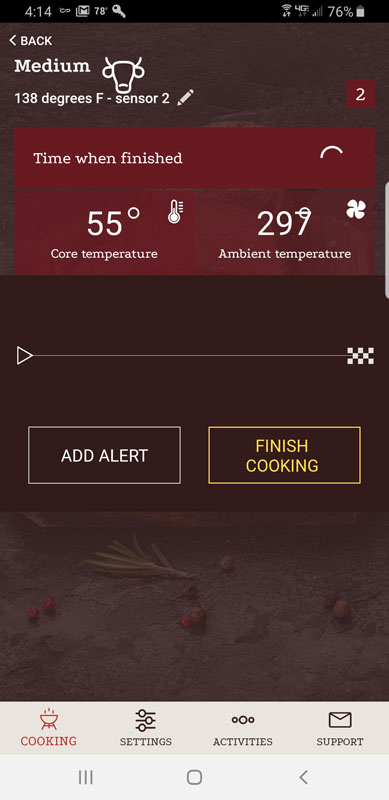
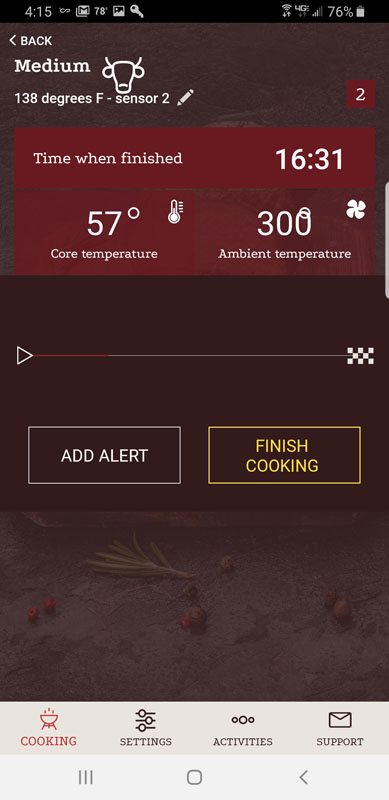
Well, this setback forced me to dive deeper into the MEATER Block’s standalone mode. The standalone mode allows you to use the Block when there is no WiFi or smart device connection. The Block communicates with all four of its probes via Bluetooth and the tiny screen displays the cooking status of up to all four pieces of meat.

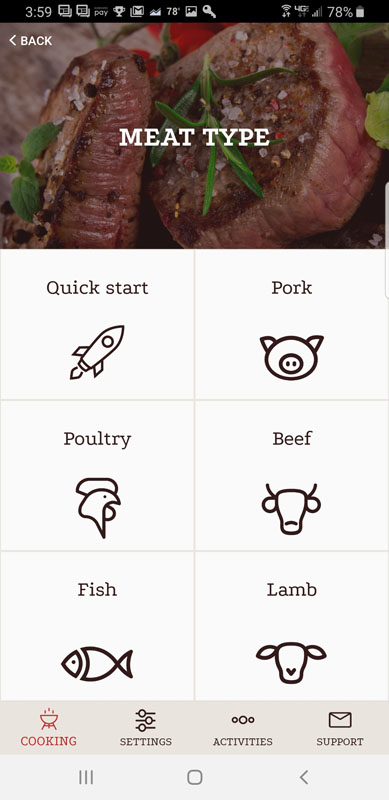
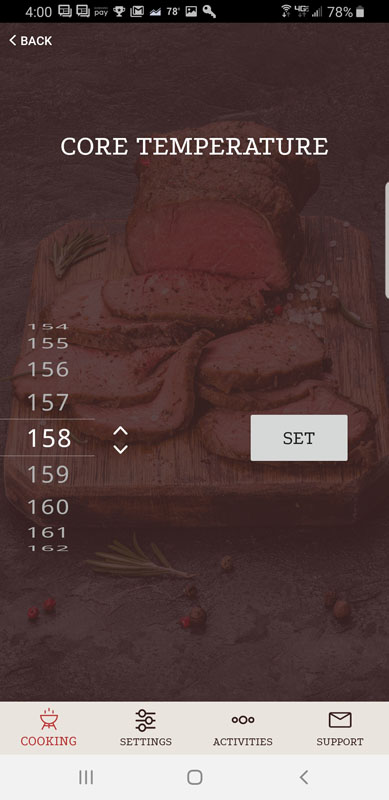
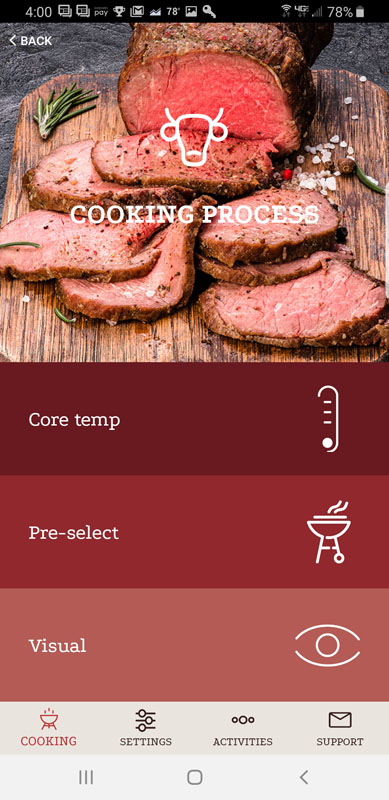
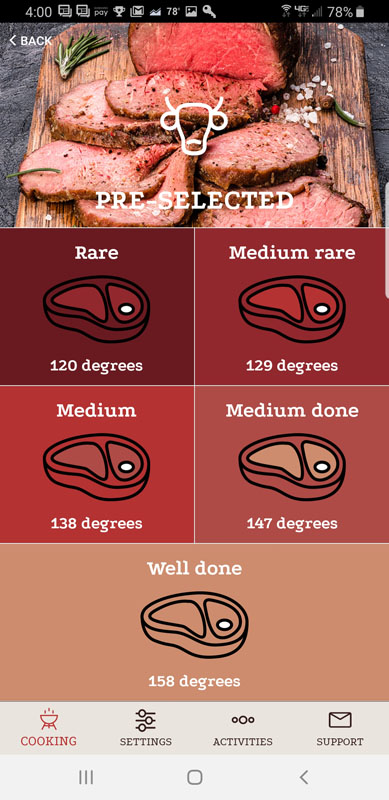
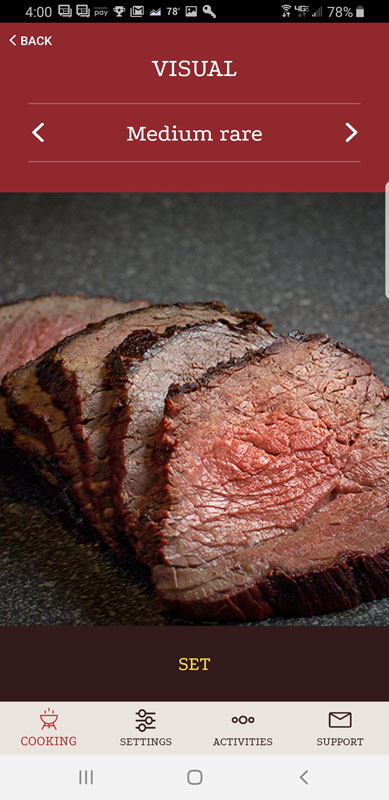
The black control panel with its tiny OLED screen enables you to program each of the probe’s cooking profile just like the MEATER app on your smartphone. You select the type of meat (beef, chicken, pork, etc), cut of meat (filet, prime rib, loin, etc), and doneness (rare, medium-rare, medium, medium-well, well) and the built-in MEATER database leads you thru the cooking process, similar to the App. That said, while the built-in interface works well enough and is a great backup plan, the App is easier, quicker, and more intuitive to use.

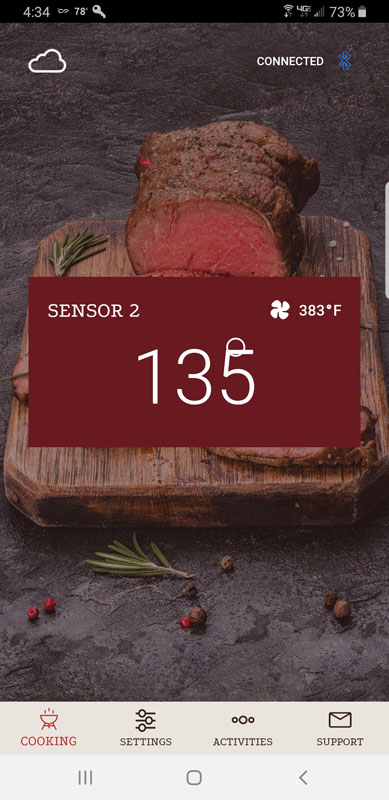
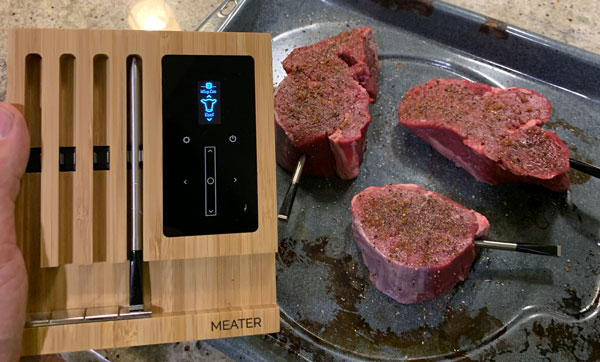
Like the App, the Block’s screen shows a status bar/doneness graphic while on the grill, when to remove/rest the meat, and when the meal is ready to eat. I set one probe to rare, medium-rare, and the third for medium. the latter two turned out perfectly but the rare one was a bit over done.

What I like

  • Well made and thought out design
  • Monitors four (4) pieces of meat @one time
  • Truly wireless
  • Excellent range (improvement over the original)
  • Water resistant, dust-proof, easy to clean
  • Built-in dual sensors
  • Excellent app/ecosystem/standalone mode

What I’d change

  • Won’t connect to my router/limits functionality

Final thoughts

Even with the struggles and very frustrating time I had trying to get the MEATER Block fully operational, this well done, wireless multi-probe thermometer system came through. The MEATER ecosystem is excellent and I wish I could have gotten it working. But I am glad I was able to try out the standalone mode as a backup since I have used the App quite a bit over the past 18 months. Just bad luck that I recently purchased a router that does not play nicely with the Block. Overall, I would still recommend MEATER products and ecosystem to those wanting to take the stress out of cooking and grilling. The Block is a nice upgrade/enhancement in the MEATER lineup, enabling you to monitor multiple pieces of meat vs just tracking one and guessing on the rest.

Price: $269
Where to buy: The BLOCK is available directly from Meater.com and Amazon
Source: The sample of this product was provided by MEATER.

Filed in categories: Reviews

Tagged: , ,

MEATER Block wireless meat thermometer review originally appeared on The Gadgeteer on September 6, 2019 at 8:00 am.

Note: If you are subscribed to this feed through FeedBurner, please switch to our native feed URL http://the-gadgeteer.com/feed/ in order to ensure continuous delivery.

SmokeBloq WiFi meat thermometer review

REVIEW – Minding the matter that is on the fire while cooking can be a confusing and difficult task. Sure, you can toss a few pieces of steak or chicken onto a grill and watch it carefully, but what if you’re cooking large pieces for hours? Grilling thermometers have been around for a while, but SmokeBloq wireless meat thermometer has just released one with four inputs that are weatherproof and which connects directly to your Wifi, rather than just with Bluetooth. I was sent a unit to test.

What is it?

A plastic box with a thin, bent metal face with 4 inputs on the back and a round LCD display on the front for monitoring your cooking.

What’s in the box?

  • SmokeBloq
  • Pointed Meat probe
  • Rounded Grill probe

Design and features

The control unit itself is a plastic box 4.25″ x 2.25″ x 3.25″. There is a trap door on the bottom where you insert 4 AA batteries. On the back, there is a toggle switch for off-on and 4 inputs for probes. The probes are ~4 foot long cables with a metal sensor clamped onto one end, and a right-angle earbud-looking .125″ plug on the other. They are made with a metal over-braiding to withstand the heat. While two probes are included in the box, there is a special currently running where you can get another just for mentioning a coupon code. (This is a $22 value – check the link below for details.)

Setup

Setting up the hardware is nothing – insert 4 AA batteries, plug in the probes to the correct ports, and flip the switch. The temperature immediately starts to show on the LCD screen, going from one probe to the other after a few seconds.
The software setup is a bit more complicated. You have to download the software to your device, then join the SmokeBloq’s Wifi network. You then enter your wifi credentials into the software, and this is transferred over to the device, and it should be able to join your network.


During setup, I found some issues with iOS 13 beta and the app. There are new privacy safeguards related to reporting the WiFi SSID without asking permission and other parts of the setup that iOS 13 doesn’t allow. (See the circled area on the screenshot above. When done on my wife’s iOS 12 unit, this filled in our WiFi network name automatically without asking permission.) On a random Saturday, I posted a request about this to the company website, expecting nothing beyond an automated reply before the next week. Imagine my surprise when I got a reply and request for more information and had a back-and-forth with the company in less than an hour! I tried the install on my wife’s iPhone 8, which is the only iOS device in the house still running iOS 12, and the experience was flawless. Seeing the difference should help them update the app before this Fall’s release of iOS 13. But still, something to note.

Performance

Once you’ve got the unit synced to your device (it can be connected to more than one), you set up a cook session. This is done by clicking the “+” button, choosing what type of food you’re going to cook, and setting up the minimum and maximum temp for each probe.

Once you’ve set that up (or before, your call), insert the probes into the meat.

I used one for the meat, and one for the oven. I found the temperature varied a good bit between our oven and the probe, however. I’ll need to spend more time with it to get a better feel for how to set things up and how to monitor long-cycle cooking. It’s not something I’ve done very often.

The main unit works very well. If there is only one probe attached, it’s a constant read. If there are two or more, it cycles through them continually.

When you’re looking at the back of the unit, port one is on the right. It’s a little thing, but on the next plastics run, adding port numbers to the mold would be a great help to those of us who forget the starting place.

The temp probes are very accurate and instant-reading, which is great. This can be irritating, however, if you set up a cook session before you’re ready to be bombarded with alerts that your meat is below the minimum temp and your oven or grill is too hot/cold.

Maybe they can have a once-and-done button for warnings for when you open the lid and heat escapes, or for when you’re just starting out, rather than getting a beep every few minutes? Otherwise, be sure you’re ready to get readings before you set up your cook on your device.

What I like

  • Weatherproof unit
  • multiple inputs
  • Wifi, rather than BlueTooth, gives better range

What I’d change

  • A way to calm the alerts when starting a cook
  • Port numbers for probes

Final thoughts

Spring and Fall call to me to be on the deck behind a grill. I love to grill in Summer, too, but only briefly, and after the heat of the day has passed. Southern winters are short, but there are periods when grilling is possible, but staying out with the items being cooked is a bit rough. Wireless connected grill thermometers have been a thing almost since the first iPhone made touchscreen apps with BlueTooth a real thing. These made real the wonder of grilling while being inside, rather than hovering over the heat. The SmokeBloq folks have created a quality product that can add a lot of flexibility and creativity to your hobby or professional time behind the grill. I hope to be using mine for many seasons to come.

Price: $139.99 (currently includes a free extra meat probe – $22 value)
Where to buy: SmokeBloq Website and Amazon
Source: The sample of this product was provided by SmokeBloq.

Filed in categories: Reviews

Tagged: ,

SmokeBloq WiFi meat thermometer review originally appeared on The Gadgeteer on September 3, 2019 at 11:00 am.

Note: If you are subscribed to this feed through FeedBurner, please switch to our native feed URL http://the-gadgeteer.com/feed/ in order to ensure continuous delivery.

Dress up your Instant Pot to look like R2-D2 because why not?

NEWS – The popular Instant Pot is one of my most used and favorite products that I’ve ever reviewed. Others must feel the same because there’s an Etsy shop called InstantWraps that offers skins to turn your Instant Pot pressure cooker into something that looks more fun than just a cooking appliance. The InstantWraps shop offers wraps that will turn various Instant Pot models into R2-D2 (shown above and below), BB-8, Wonder Woman, and a variety of other patterns.

The wraps are made of non-adhesive waterproof high-quality plastic that wraps around the cooker and attaches in the back with magnets. That means you can easily change out the look of your Instant Pot to match your mood or party theme. Each wrap is priced at $11 and you can see them all by visiting InstantWraps on Etsy.

Filed in categories: News

Tagged: , ,

Dress up your Instant Pot to look like R2-D2 because why not? originally appeared on The Gadgeteer on August 28, 2019 at 12:00 pm.

Note: If you are subscribed to this feed through FeedBurner, please switch to our native feed URL http://the-gadgeteer.com/feed/ in order to ensure continuous delivery.

UTEN Vacuum Sealer review

REVIEW – With only the two of us in our household, grocery shopping can be a bit of a challenge.  Many items come in bulk or in large quantities.  I often end up buying food items and have them go to waste because it is more than I need.  I have been wanting a vacuum sealer for a while, so when this popped up I jumped at the chance to review it.  Let’s see if it helps to solve some of my bulk food issues.

What is it?

The UTEN vacuum sealer is exactly what it says it is.  It is a vacuum food sealer.  It can seal bags and it also comes with a hose attachment to let it vacuum the air out of storage containers that have the proper fitting.

What’s in the box?

The sealer came well packaged in a basic cardboard box.  It had a nice film strip over the top of the sealer to protect the finish.  There is an extra strip of protective film over the stainless stripe at the bottom of the top cover.  That is what the blue-colored stripe is.  The following items were inside the box.

  • Five large (9.84 x 13.78 in), ten medium (7.87 x 11.81 in), and five small (5.91 x 9.84 in) vacuum bags
  • The vacuum sealer
  • Suction hose attachment
  • User manual

Hardware specs

  • Voltage: 110V
  • Frequency: 60Hz
  • Motor Power: 125W
  • Vacuum Degree: -40 ~ -55Kpa
  • Sealing Width:0.1in
  • Sealing Length: ≤ 11.8in
  • Dimension: 14.4*4.5*2.4in
  • Net Weight: 0.98Kg

Design and features

I really love how the vacuum sealer has a storage compartment for the power cord.  It makes putting the appliance away very easy.  Cabinet space is a premium in my kitchen and I was able to just slide this puppy into a very small spot.

The picture above shows the sealer opened up.  The sealer has four different options.  The first is just vacuum.  You would use this if you had a separate storage container you wanted to suction the air out of using the hose attachment.  The hose attaches to the protrusion just on the right side of the drip tray.  The seal button can be used if you have a roll of vacuum bags.  You would use it to make the initial seal on the bag.  The next button is the food button.  I have more information on it below.

Performance

I purchased two containers of chicken wings.  One was drumsticks and the others were the flats.  There were way too many for a single serving for my husband and myself, so I decided to use those as my test subjects.  When sealing food in vacuum bags, you first choose if the food is dry or moist.  The moist option will take longer to seal.  In the case of the chicken, I chose the moist option.

I loaded the bag up with the wings and then placed the open end of the back to where the opening was over the drip tray.  The silver band at the bottom is where the heat will be used to seal the bag.  I closed the sealer making sure both buttons on the side of the sealer popped out with clicks letting me know it was closed all of the way.  I then pressed the last button on the right labeled ‘Vac Seal/Cancel’.   That button vacuumed out the air and then sealed the bad with the heat strip.  Any time during the process I could have pressed cancel to stop it.

The above picture shows the chicken wings fully sealed.  I think it did a great job.  I ended up making three bags of wings.  I placed a video below showing the vacuum process.  The blue blinking light stops when the sealing process is complete.

What I like

  • Very reasonably priced.
  • Gets the job done exactly like it is supposed to
  • Nice storage compartment for the power cord.
  • Very compact

What I’d change

  • Nothing that I can think of!

Final thoughts

If you have been thinking about getting a vacuum sealer then don’t wait any longer.  You will have a tough time beating the price.  Maybe other sealers have more features, but this one gets the job done and is very easy to store.

Price: $39.99
Where to buyAmazon
Source: The sample of this product was provided by UTEN.

Filed in categories: Reviews

Tagged: ,

UTEN Vacuum Sealer review originally appeared on The Gadgeteer on August 26, 2019 at 11:01 am.

Note: If you are subscribed to this feed through FeedBurner, please switch to our native feed URL http://the-gadgeteer.com/feed/ in order to ensure continuous delivery.

CookPerfect wireless meat thermometer review

REVIEW – Is anything better than a perfectly cooked meal? The main course, done exactly to your liking, makes for the perfect dining experience. But, how do you know when your main course is done?  And, what if folks like things done to different levels?  CookPerfect can help with its dual-probe wireless meat thermometer.

What is it?

The CookPerfect is a wireless meat thermometer that supports two independent temperature probes. It connects to their app on your Android or IOS device via Bluetooth to provide cooking progress and tells you when the meat is done.

What’s in the box?

  • CookPerfect main unit
  • Temperature probe with storage spool (a second probe/spool was also included for this trial)
  • Screwdriver
  • AAA batteries (2)
  • Quick start guide

Hardware specs

  • Width: 76mm
  • Height: 25mm
  • Probe length: 100mm (134mm overall)
  • Probe cable length: 1m
  • Bluetooth range: 100m
  • Battery life: 150 hours
  • Temperature range: -40C – +300C
  • Water resistance: IP45 (Protected from tools and small wires greater than 1 millimeter. Protected from low-pressure water jets from any direction)

Design and features

The top and bottom of the main unit are covered in shiny stainless steel.  It’s pretty but prone to fingerprinting and spotting. The bottom has a magnet in the base so you can stick it on ferromagnetic surfaces (think: steel).

The round main unit has two probe connectors on opposite sides of the unit.

While they resemble USB ports, the probe connector is a proprietary design.

Setup

Setup involves two steps:

  1. Install the batteries by removing the back of the unit with the included screwdriver, installing the batteries, and reinstalling the back
  2. Download the CookPerfect app to your Android or IOS device (and let it update the firmware…)

Performance

To begin cooking, attach one, or both probes to the main unit.  Connecting a probe powers-up the unit.  The center blue light flashes until it makes a Bluetooth connection to your device, at which point, it turns solid blue. Each probe has its own status light.  Flashing means it is connected.  Fast flashing means the internal temperature is within five degrees of the target.  Solid green means cooking is done.

Once the app is open and a probe is connected, insert the probe into the meat to the scribe mark on the probe.  The probes have multiple sensors along its length allowing for a more accurate core temperature reading. The exposed end of the probe has an ambient temperature sensor so the app can tell what the temperature is in the grill or oven.

Each probe can be programmed for a different cook level or even different type of meat.  To start, after selecting the probe to set up, you get a meat selection grid:

You choose the meat you are cooking, or, just pick quick start and select a target temperature.

If you go the meat choice route, you are presented with three options:

You can just choose the target temperature (same screen shown above), choose target doneness level or pick your doneness level by photo.

Here is the doneness selection screen:

And if you don’t know what those terms mean, you can use the visual doneness selection menu:

To me, the visual guide seems kind of silly, but I guess they are designing for newbie cooks who might know well done from medium-rare.

Once you get the probe in and the meat on the grill or in the oven, clicking Start Cooking brings up the status screen.

Note that the design of the screen needs work.  As long as temperatures are two digits or less, it looks good, but if the temp hits three digits, the degree symbol gets stuck behind the last digit.  Not a big deal, but lack of attention to this makes one wonder what else got missed in the app.

The Time when finished indicator remains a spinning circle for the first five minutes of cooking until the app calculates the remaining time based on internal temperature changes and ambient temperature in the grill or oven. Then it is replaced by an end time estimate in military time.  There is no option for a twelve-hour display.

Note that this screen doesn’t show Bluetooth status.  To make sure that the app is still connected to the CookPerfect, you need to go back a screen to the probe screen.

This screen has the same issue with the degree symbol.  It shows both the core temperature and ambient temperature along with the Bluetooth connection status but doesn’t show the estimated completion time. It sure would be nice to see everything on one screen.

Once cooking the target temperature is reached, the app sounds an alarm, letting you know it’s time to get the meat out of the grill or oven.

All this is fine and good, but it is only of value if the results are perfect.  I targeted medium steaks and the app used an internal temperature of 138 degrees Fahrenheit as the target temperature.  The steaks were perfectly cooked, just as we wanted.

Other niceties in the app include the ability to set multiple alarms based on cook time.  For example, you can set an alarm to let you know when there are 15 minutes remaining in the cooking time, perhaps so you can pop the dinner rolls in the oven or prepare the salad. You can choose between Celcius or Fahrenheit displays, but as I mentioned above target completion time is only in 24-hour format.

The biggest problem I have with the CookPerfect is that the Bluetooth range is nowhere near the 100-meter advertised range.  Granted, my situation isn’t ideal. My house is built with metal studs, and that certainly negatively affects Bluetooth range.  Even so, if the CookPerfect is supposed to have a 100-meter range, you’d think it would work from about 10-meters, even through the two walls between my living room and my grill. But it doesn’t. The Bluetooth disconnected constantly, forcing me to move more in a line-of-sight to my grill. I have another Bluetooth meat thermometer that has the same problem, so this isn’t unique to CookPerfect.  Its promised range is way more than my other thermometer so I was hopeful, but alas, I am disappointed.

What I like

  • Simple setup
  • Temperature sensors seem pretty accurate based on the cooking results
  • The probe cable is sufficiently long to allow easy placement in the grill or oven
  • You can create alarms based on remaining cooking time to help with meal prep

What I’d change

  • Improve Bluetooth range
  • Fix user interface display issues
  • Show time in 12-hour format as an option
  • Have a single screen that shows both cook progress and Bluetooth connection status
  • The app is pretty basic and doesn’t provide resting time after the cook
  • Change the battery compartment to not need a screwdriver to open

Final thoughts

Overall, the CookPerfect is a capable wireless meat thermometer.  It produces great results and is pretty easy to use. Its app is far less sophisticated than others I have used and there are some nagging display issues that I hope can be fixed with a software update. If your needs are basic and the range isn’t an issue, the CookPerfect will most certainly improve your meat cooking results.

Price: $99.99
Where to buy: Amazon
Source: The sample of this product was provided by CookPerfect.

Filed in categories: Reviews

Tagged: ,

CookPerfect wireless meat thermometer review originally appeared on The Gadgeteer on August 12, 2019 at 8:00 am.

Note: If you are subscribed to this feed through FeedBurner, please switch to our native feed URL http://the-gadgeteer.com/feed/ in order to ensure continuous delivery.