Pearl RearVision wireless rearview camera review


We have reviewed numerous dash cams over the years, but I believe that this is the first backup cam that we’ve reviewed. If I’m wrong about that, then the Pearl RearVision rearview car camera is definitely the first wireless backup cam that we’ve ever reviewed on The Gadgeteer. Let’s put the car in reverse and check it out.

What is it?

The Pearl RearVision is a backup camera for your vehicle that doesn’t require you to route wires for power or to a display. It uses a solar charger to keep its battery charged and it uses WiFi and Bluetooth to transmit images to a smartphone.

What’s in the box?

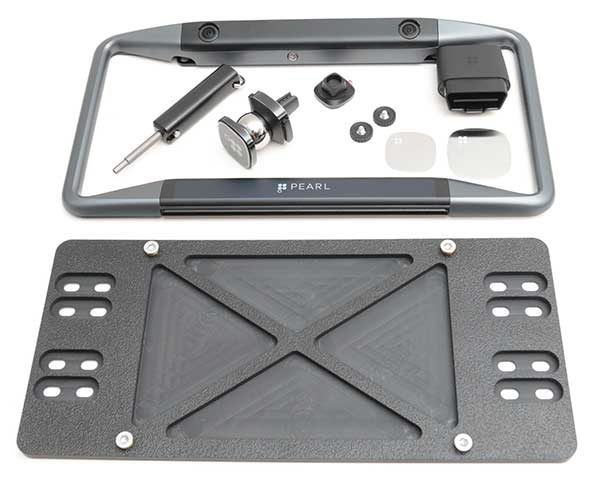
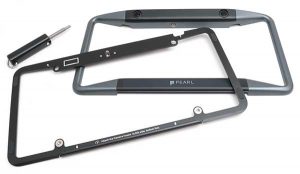
Pearl RearVision license plate frame camera
License plate frame adapter
OBD adapter
Smartphone car mount
Installation tool

Design and features

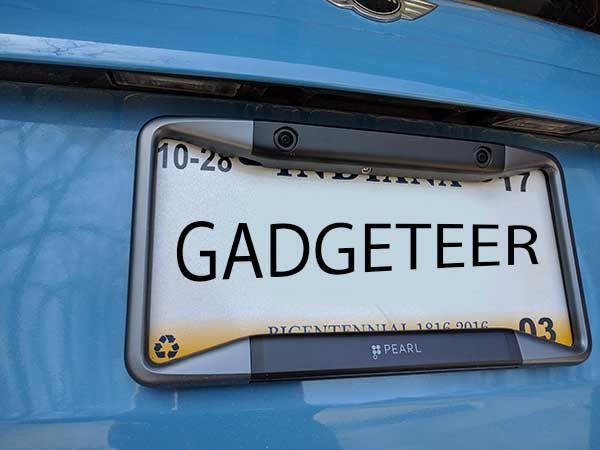
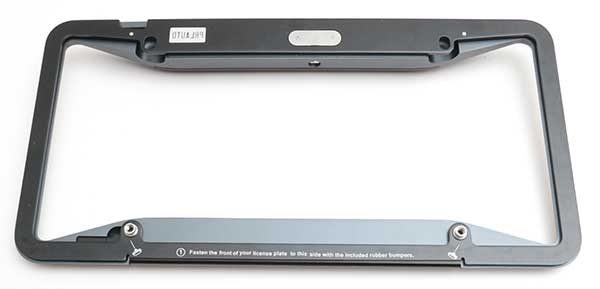
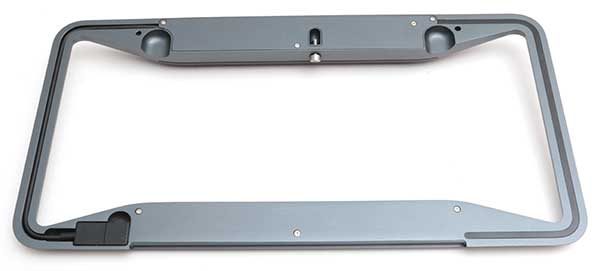
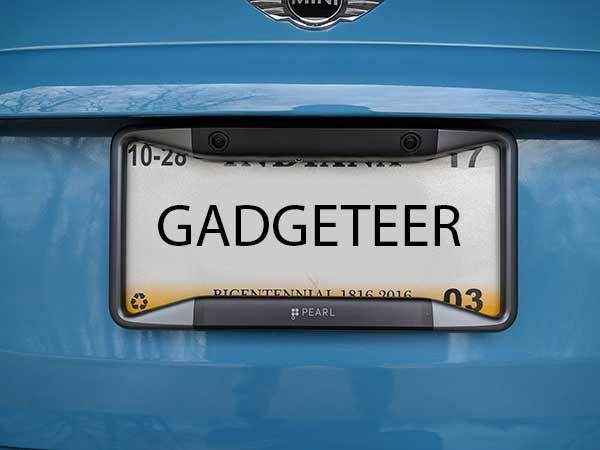
The Pearl RearVision looks like a license plate frame, but the frame has two cameras along the top edge. The cameras have up to 180° field of view and a special coating that repels water. One of the cameras has infrared for night vision, and the other one is optimized for daytime.

The frame also has a built-in solar panel that charges the internal battery on bright sunny days, as well as cloudy days.

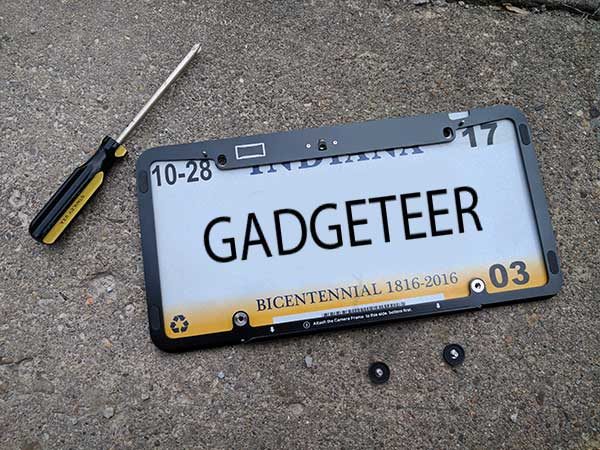
The frame is composed of two pieces that include the black metal frame that installs on the rear of your vehicle.


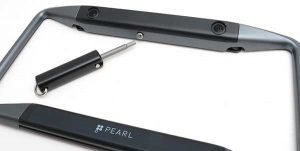
A special tool is included with the RearVision. This tool is used to detach the RearVision from the metal frame so that it can be installed on the vehicle.

Although the Pearl RearVision does not require any wiring to a power port inside your car since it can use solar power to charge its internal battery, you can also charge it with the built-in USB cable.


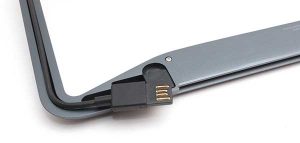
The USB cable is integrated into the frame with a rubber cover that protects the connector from moisture and weather.

Installation of the Pearl RearVision rearview camera

Although not required, the first thing I did before installing the Pearl RearVision was to charge it using the built-in USB cable.

I then took the RearVision, the special tool install tool, the included OBD adapter, and my Nexus 6P Android smartphone out to the garage.

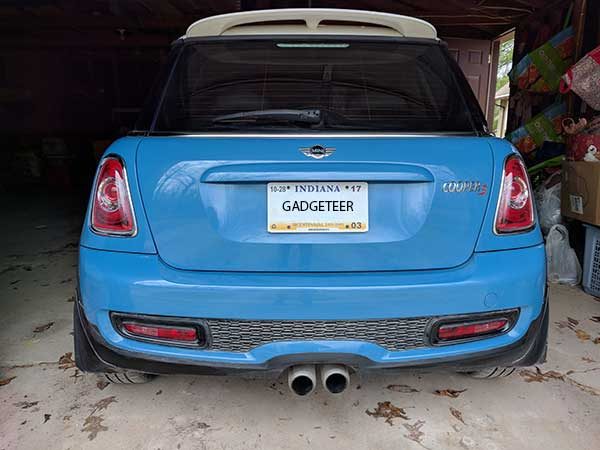
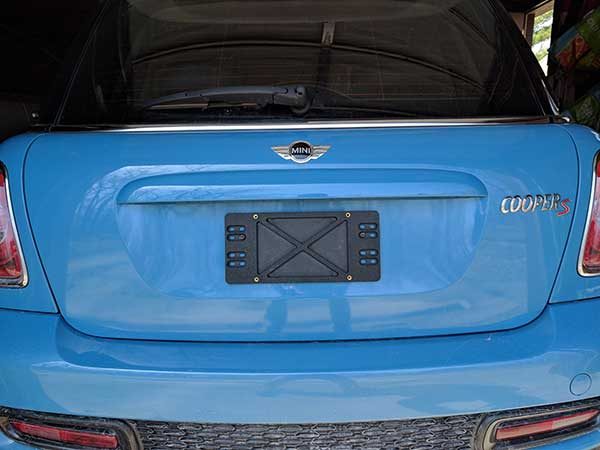
First I removed my existing license plate which was attached to the back of my 2013 MINI Cooper with 4 Phillips screws. Note that the Pearl RearVision is compatible with cars 1996 and newer.

I then attached the RearVision frame to my license plate using the provided screws and then attached the frame and plate to my MINI using 2 of the original screws that were holding the license plate in place.

The RearVision hooks to the bottom of the frame and then snaps in place. The special install tool is used to tighten the theft-resistant set screw which holds the camera securely to the frame.

Looks great, although I was a little concerned that the frame covers and partially obscures some of the info on my license plate including the state and expiration info. I haven’t been pulled over by a cop yet, so I guess it’s not a problem.

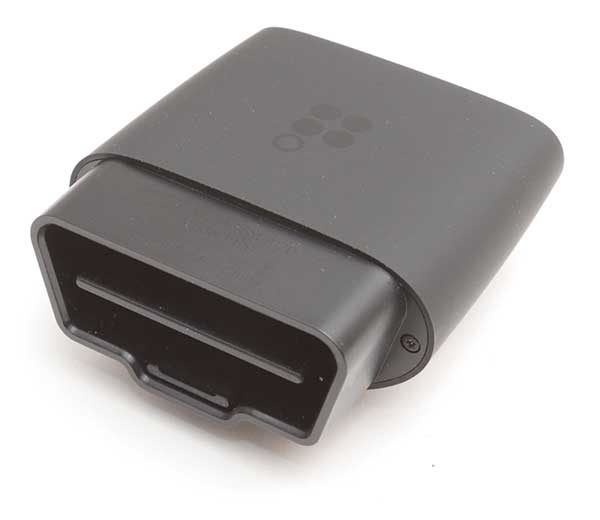
The next step of the installation is to plug the OBD adapter into the OBD port in the MINI. This adapter communicates to your phone and the RearVision frame using Bluetooth and WiFi and has a built-in speaker for audio alerts.

The OBD port in my MINI is located under the dash on the driver’s side. The location of this port varies per car make and model.

Installing the adapter is easy but awkward because I had to do it mostly by feel.

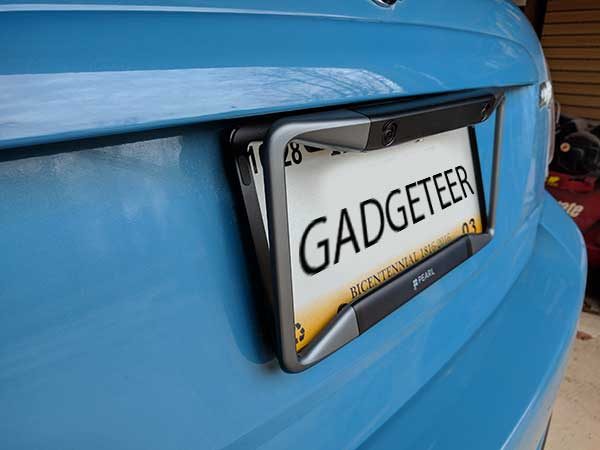
I thought I was all set until I needed to get into my trunk and discovered that the top edge of the RearVision camera blocked access to the trunk latch. Whoops… Lucky for me, the folks at Pearl had included an adapter plate which I didn’t think I needed to use. Wrong!

I removed the RearVision, installed the adapter plate which lowers the frame to allow access to the trunk latch. The extra step was easy, but I felt foolish for not noticing the problem the first time around.

Ahhh, that’s much better.

Note that the frame adapter is not included with the RearVision. But if you find that you need it, they will send you one for free according to their installation troubleshooting page.

You can use the included magnetic car mount to locate your smartphone inside your vehicle for optimal viewing. I skipped this step because I already use the iOmount iOauto Pro mount in my MINI.

After the RearVision is installed on the outside of the car and the OBD adapter is installed inside the car, the last step is to install the mobile app which detects the OBD adapter and RearVision camera to complete the setup.


There is a setting in the Pearl app to automatically launch the app when you put the phone on the included magnetic mount, so the mount must have an NFC chip in it (I am just guessing and haven’t proven this theory). I have noticed that my Nexus 6P will sometimes (not always) automatically launch the app when I get in the car and turn on the screen even if the Pearl app wasn’t the last app that I had been using. This doesn’t happen every time though.

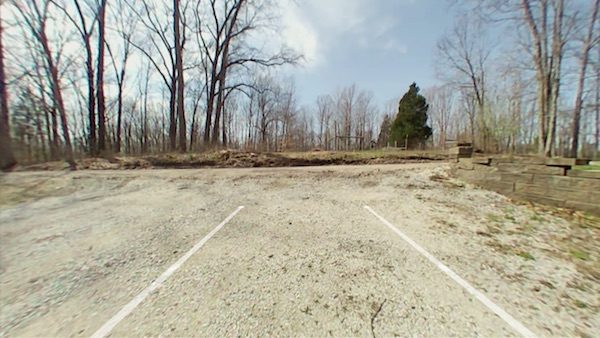
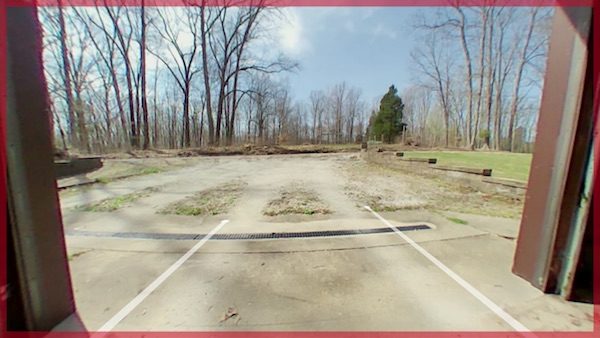
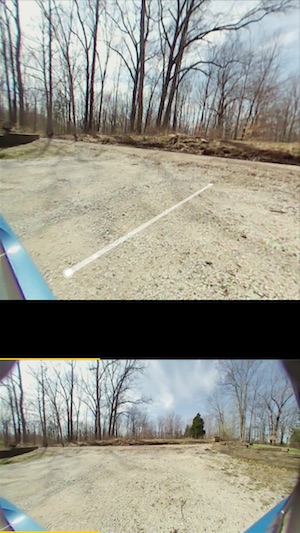
The app shows a live view with white guidelines to help you avoid obstacles. These guidelines can be calibrated through the app’s settings by doing a few easy measurements.

The image will show ripples, a red border will show along the edges of the screen and the OBD adapter will sound an audible alert if there’s an obstacle in the path of the car. I tested this by walking behind the car. The RearVision also picked up my cat Max as he walked behind the car.

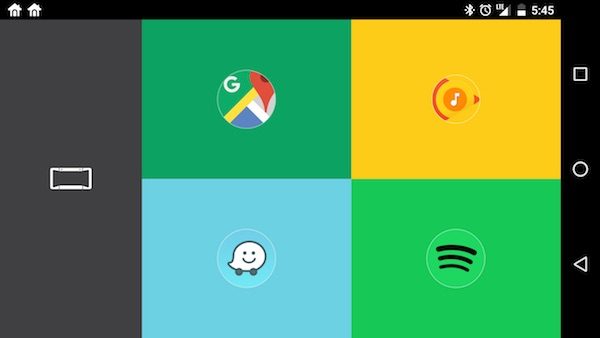
The RearVision live view disappears after a minute and then shows the app launcher screen that you see above. You can modify the delay from 10 seconds to 2 minutes before the launcher appears.

The launcher can be customized to add apps from a list of music, navigation, and utilities. Unfortunately, you can’t add your own apps to the list.

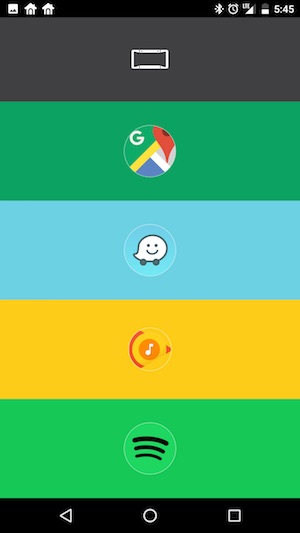
You can change the view from landscape to portrait mode.


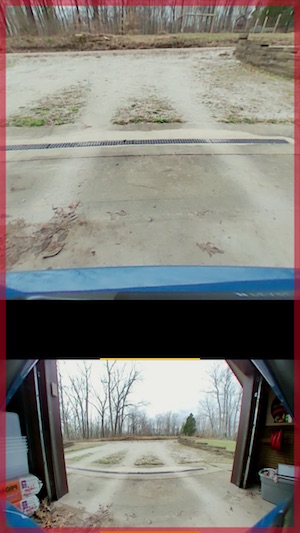
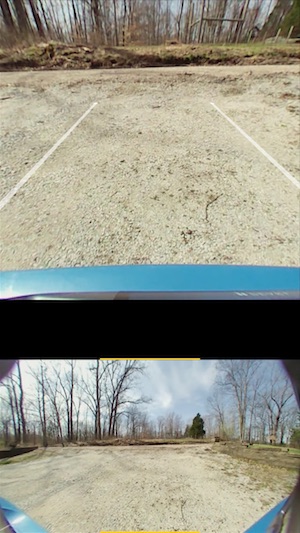
In portrait view, the backup camera shows a split screen that has a wide angle and zoomed views. You can swipe the top to zoom the edges.

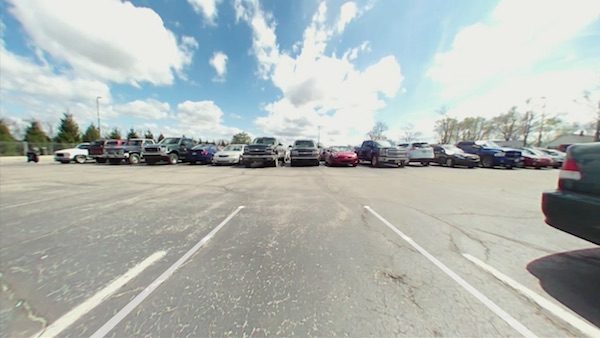
I have been testing the Pearl RearVision rearview camera for several weeks. It works well 90% of the time and provides a clear view of what is behind my vehicle.


The view from the RearVision cameras works equally well in daylight and night.

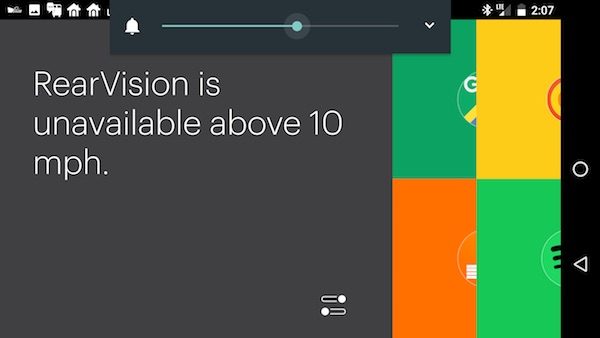
If you try to access the cameras while you’re driving, you’ll see this message.

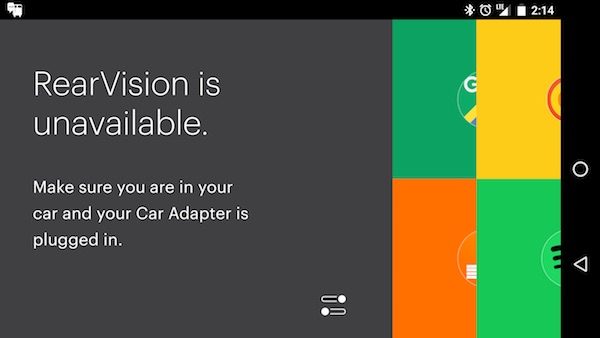
I’ve seen the message above on more than one occasion. I’ll usually have to close the app, toggle Bluetooth off and on, and relaunch the app to fix the issue. After a recent update to the system, I don’t believe I’ve seen the message, so it could have been a bug that has been fixed.

See it in action

I’ve been using the RearVision for several weeks now and it works well although it hasn’t alerted me of obstacles (yet).

Sorry for the jerky video. I was holding a phone in one hand to capture the video and trying to drive backwards with the other hand while just looking the display.

It has been tough making myself look at the screen since my brain is programmed to only use my rear view and side mirrors when I’m backing up. When you’ve been driving for 30+ years like I have, it’s hard to teach an old dog new tricks 🙂

Something to consider before buying the Pearl RearVision

It’s important to realize that to use the Pearl RearVision camera, you have to have your phone with you. Without it, you will not be alerted of obstacles in your path. If someone borrows your car and doesn’t have the paired phone, it will not work.

Final thoughts

I like the Pearl RearVision rearview camera because it doesn’t require a complicated/expensive install or modification of your vehicle. The all wireless design including the solar charging frame makes this rearview camera system attractive to people who want a quick and easy setup. However, the price of this system is considerably higher than other DIY backup cameras systems with dedicated displays. Pair that with the fact that you MUST use your phone with it are issues to keep in mind before considering a purchase.

Source: The sample for this review was provided by Pearl. Please visit their site for more info and Amazon to order.


Product Information

Price: $499.99
Manufacturer: Pearl Auto
Retailer: Amazon
Requirements:
  • 1996 or newer vehicle
  • iOS or Android device
Pros:
  • Easy to install
  • Solar powered and wireless
  • Simple app
Cons:
  • Expensive
  • May need a frame adapter which is not included in the package
  • Only works if paired with an iOS or Android device
  • Can't record video or take snapshots

Filed in categories: Car Gear, Reviews

Tagged: ,

Pearl RearVision wireless rearview camera review originally appeared on on April 20, 2017 at 8:08 am.

Note: If you are subscribed to this feed through FeedBurner, please switch to our native feed URL http://the-gadgeteer.com/feed/ in order to ensure continuous delivery.

CARLOCK advanced real time car tracker & alert system review

Aside from a house, a vehicle may be one of the priciest purchases a person will make. That being the case, most people want to make sure they protect their investment. One of the easiest ways to protect that investment is to know where the vehicle is at all times.

Carlock is a small device that fits into your vehicle’s On-board Diagnostic port (OBD) and tracks your vehicle by GPS. It can send alerts if your engine is started, someone’s tampering with the car, or the vehicle is moved while you’re away from it.

Design

Carlock is a very simple device.


It’s a small, square device, with a 16 pin plug. It has branding on one end of the device; other than that it’s an extremely plain device.

The entire device is about the same length and width as a debit/credit/gift card.

There isn’t much to the design of the Carlock. It’s a very plain device, but that doesn’t matter much because it will be tucked away under the dashboard and won’t be seen.

Setup

Of all the devices I’ve reviewed for the Gadgeteer, this has to be one of the easiest installations I’ve ever encountered.


First, you’re going to locate your vehicle’s OBD port. It’s going to be located somewhere under the driver-side dashboard.

If you’re having trouble locating it, you can use this OBD locator site.

Once you’ve located the OBD port, you plug the Carlock device into it.

That’s all there is to physically installing the device.

Once the device is physically installed, you download the app and create an account with Carlock.

This is also a simple process.


First, you enter the activation code and serial number that came with your device. Then you enter some biographical information and the make/model of your vehicle.

Once that is complete, you’re ready to use the device.

Use

The first time you open the app, it will instruct you to drive for a bit before it can detect your location.


After about 5 minutes, the app should find your location. Your location is updated approximately every 30 seconds while driving, and every 30 minutes while stationary.

For most people, the most important aspect of the Carlock is its security features.

In the picture above, the vehicle is “disarmed”. You can drive the vehicle and you won’t receive any movement alerts.

As you can see in the diagram above, arming your vehicle is simple.

If your vehicle is moved while armed, an alarm on your phone will go off and the app will show your vehicle’s current location and path it took to get there.

Along with notifying you when your vehicle moves, Carlock can also alert you when the engine is started, if the vehicle vibrates excessively, and if Carlock is removed from the OBD port.

Most of us probably wouldn’t remember to always arm and disarm our vehicle; fortunately, the app has an “AutoLock Scheduler” that allows you to set the times you want the vehicle to be monitored.

Perhaps you’re not concerned with security, but rather the safety of those driving the vehicle.

Carlock is also able to monitor speeding, fast acceleration, sudden braking, and harsh cornering. If Carlock detects any of the above, it can send an alert to your phone.

Additionally, the app scores how the vehicle was driven over the previous month and keeps a log of trips and notifications.


This is an excellent way to keep tabs on younger drivers you may have in your household.

Cost

The device itself costs $59.94. That’s not a bad price for a security device with so many features; however, there is also a subscription that must be purchased in order to take advantage of the device’s abilities.

You have two options for the subscription service. You can pay $113 upfront for an entire year of service, or you can pay $9.60 a month.

In my opinion, neither price is too prohibitive; although, the savings for the yearly plan is negligible at $2.20.

Depending on your car insurance company’s policies, you may be able to get a discount for using Carlock.

Conclusion

Carlock packs a lot of punch for being in such a small package.

It’s incredibly easy to install and doesn’t require any upkeep, yet still manages to monitor your vehicle’s security and the driving habits of those using your vehicle.

Whether or not it’s a sound purchase depends on the user.

Is your neighborhood safe, do you have young drivers in your home, or are you looking for an inexpensive way to lower your insurance rates? These are all questions you need to ask before purchasing Carlock. Depending on the answer, Carlock may be for you.

Source: The sample for this review was provided by Protectus Technologies, Inc. Please visit their site for more information and Amazon to order.


Product Information

Price: $59.94
Manufacturer: Protectus Technologies, Inc.
Retailer: Amazon
Requirements:
  • Compatible vehicle with an OBD diagnostic port
  • Check vehicle compatibility here:
  • https://www.carlock.co/features-device/#will-it-work-in-my-car
Pros:
  • Easy install
  • Generally affordable
  • Great way to monitor young drivers
  • Insurance discount?
Cons:
  • None

Filed in categories: Car Gear, Reviews

Tagged:

CARLOCK advanced real time car tracker & alert system review originally appeared on on March 27, 2017 at 8:10 am.

Note: If you are subscribed to this feed through FeedBurner, please switch to our native feed URL http://the-gadgeteer.com/feed/ in order to ensure continuous delivery.

Autobrain review

If you are the parent of a teenager, a baby, or you are concerned about the driving of your elderly parent, the following review will probably be of interest to you. Autobrain has developed a device that you simply plug into your vehicle’s diagnostic port and it transforms your car into a connected smart car. Let’s take a detailed look… 

Installation and Setup

Installation of the device itself couldn’t be more simple. You just plug it into your diagnostic port on your vehicle.  Then you download the app, sign up for an account and then take it for a drive!  You will see lights blinking on the device, sort of like the random blinking that happens on a modem.  The directions say that it could take up to 12 hours for the app to sync with your car, but once my account was set up it only took about an hour. I did have to call because my account was partially set up already because of the fact I am reviewing it, so there was a bit of confusion, however, the gentleman on the phone was very helpful and got me going in no time.

Using the Device

There are 4 modes that you can choose from: Family Safety Mode, Teen Safety Mode, Senior Safety Mode, and Safe Baby Mode.  You can switch between these modes using the mobile app (which is free from the App Store or Google Play) and your desktop computer.  The program looks the same on the app and the computer, so switching between them is very easy to do.

All of the modes have settings that you can change to customize them to your specific needs. If you have a teenage driver that you’d like to keep track of and see how good they are driving then teen mode is the obvious choice.  It will give you a driving score that is calculated by taking any instances of speeding, hard braking or hard accelerations and gives you a numbered driving score with 100 being perfect.  The data that you can get from this program is amazing.  For each trip you can see how many miles were driven, how long it took and what the fuel cost was.  I could have used this to charge my kids a fee for having to make extra trips in the car when they forgot things for softball practice back in the day!

For each mode you can set up parameters that will alert you when a person goes outside of what they call a “Safe Zone” that you create.  To create it, you put in an address and then how many miles from that address a person is allowed to go. You will then get an alert on your phone when someone is out of the safe zone. You can actually drive yourself crazy with the amount of alerts you could get from this device.  You can get an alert when someone speeds, when the car starts, when the car is driven between certain hours of the day/night, when it parks, when the car leaves and arrives home school or work, or any other address that you add.

The alerts are almost immediate.  When I would park my car, I would have barely closed the door and I would get a notification that I had turned my car off.  I would probably not set up all these alerts if I was monitoring someone’s driving because it would drive me nuts! Unless it was my grandma because she rarely goes anywhere.

The Teen, Family and Senior Modes are all very much alike, but the Safe Baby Mode is a tad different.  While in this mode, you will get an alert to remind you to take the baby out of the car every time the ignition is turned off.  This may seem like a silly thing, but apparently, this sort of thing happens as evidenced by the news reports, so better to be safe than sorry! You can turn this mode on in addition to any of the other modes.

Roadside Assistance and Car Health Detection

Another great benefit to having this gadget plugged into your diagnostic port is that it can detect mechanical issues with your car.  If an issue is detected, an Autobrain mechanic would contact you and give you an estimate on how much the repair should cost. No more questioning whether or not a mechanic has overcharged you which allows you some added bargaining power at the repair shop.

You also get 5 free tows 35 miles or less each time, free lockout services if you lock your keys in your car, emergency battery boosts if your battery dies (which shouldn’t happen because you would get notified if your battery was getting low), emergency fuel delivery if you should happen to ignore the low fuel alert that Autobrain sends you, tire change services and most importantly, emergency crash response should you get into an accident.

Using the App

The screenshot below is what the main menu looks like on the computer and it’s identical on the phone.  On the computer however, to the right side of this menu is a map that shows you where your car is (see next pic), and where it has been.  It will tell you the places the driver stopped, and for how long. It will allow you to choose the specific day and you can follow along the route that the car was driven.  You can even see where the driver had to brake too hard or accelerate way too fast.

Below is what the map looks like in the browser on your computer. You can see all this on the app on a phone or tablet too, it’s just you can only see half of it at a time.  As you can see on this trip we took in Family Safety Mode, there were 2 hard breaks, and apparently I was speeding 5 times!  Of course, I did all this to “test” the device and make sure I got the alerts 😉  My score is an F because if you speed….automatic F!  Tough crowd.

Share the Love

You are issued a promo code when you sign up (it’s found in your app settings under Free Service) and if you give it to a friend and they sign up, they can get the device with a one month trial for only $19.97, plus YOU get one month of service for free as well.  This is cheaper than you can get it through the Autobrain website, which is $49.97 with a one-month free trial. Also keep in mind that if you don’t like it, you can send it back and get a refund and they will even send you a postage paid envelope! With no risk and no contracts…it’s a no-brainer!

All in all, I am pleased beyond belief with the functionality and the ease of use of this product. It’s like having Onstar or AAA service, with all the control right at your fingertips. The only thing that I couldn’t figure out, and it’s not that big of a deal really is how they compute the driving score.  I tend to be a perfectionist and a fairly good driver, and I get 93’s on my score and there are no alerts that I’ve hit the brakes or excelled too hard. Now that my girls are not really new drivers anymore, I plan on using this device (which they love) instead of Onstar because they are too far away now to rescue them if they have a flat tire or lock their keys in their cars. It’s a wonderful piece of mind for all of us!

Source: The sample for this review was provided by Autobrain. Please visit their site for more info.


Product Information

Price: $49.97 plus 1 free month service. $9.97 per month thereafter.
Manufacturer: Autobrain
Requirements:
  • A vehicle
  • A diagnostic port
  • A driver
  • A computer, smartphone or tablet
Pros:
  • Easy to setup and install
  • Cheaper than Onstar
  • 24/7 roadside assistance included
  • Low monthly cost and no contracts
Cons:
  • Difficult to figure out how the driving score is calculated.

Filed in categories: Car Gear, Reviews

Tagged:

Autobrain review originally appeared on on March 13, 2017 at 8:07 am.

Note: If you are subscribed to this feed through FeedBurner, please switch to our native feed URL http://the-gadgeteer.com/feed/ in order to ensure continuous delivery.