REVIEW – I saw a t-shirt on Etsy that said, “A bad day flying is better than a good day working,” and in the middle was a picture of a quadcopter drone. I love my job, but after a couple of weeks of flying Altair Aerial’s Outlaw SE, I’m inclined to agree with that t-shirt.
What is it?
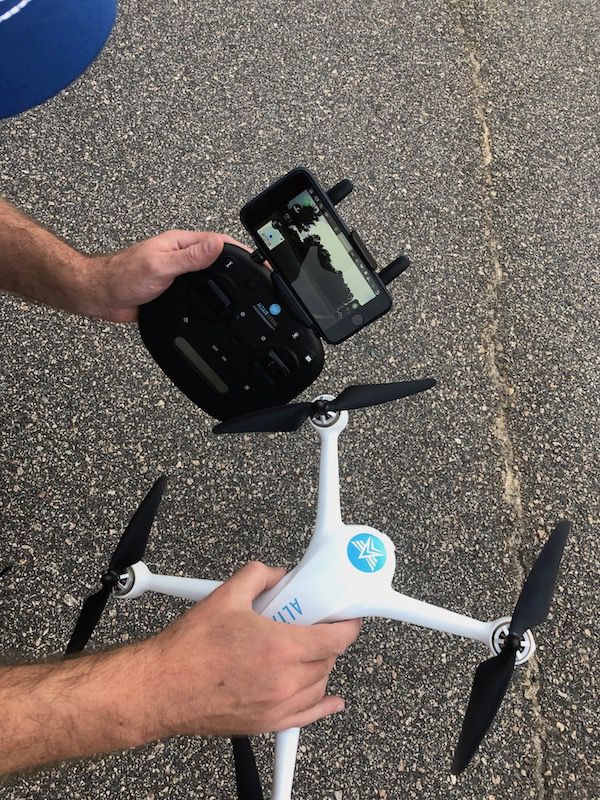
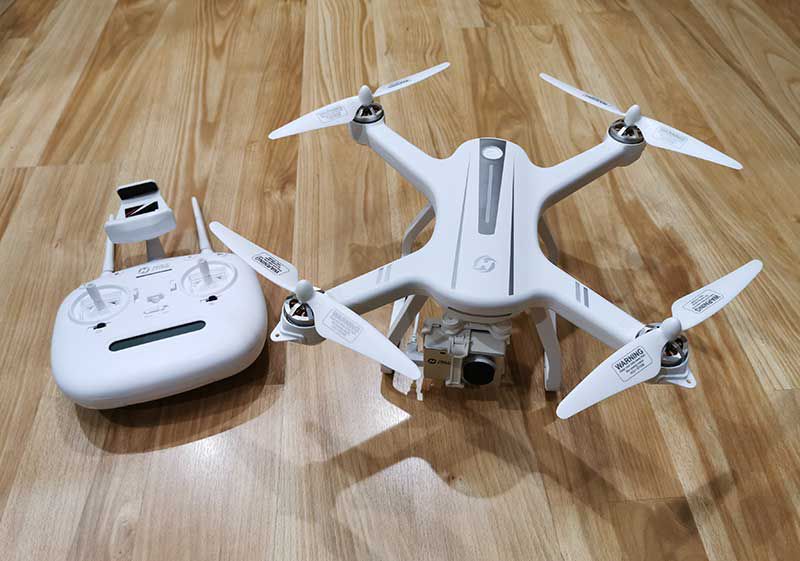
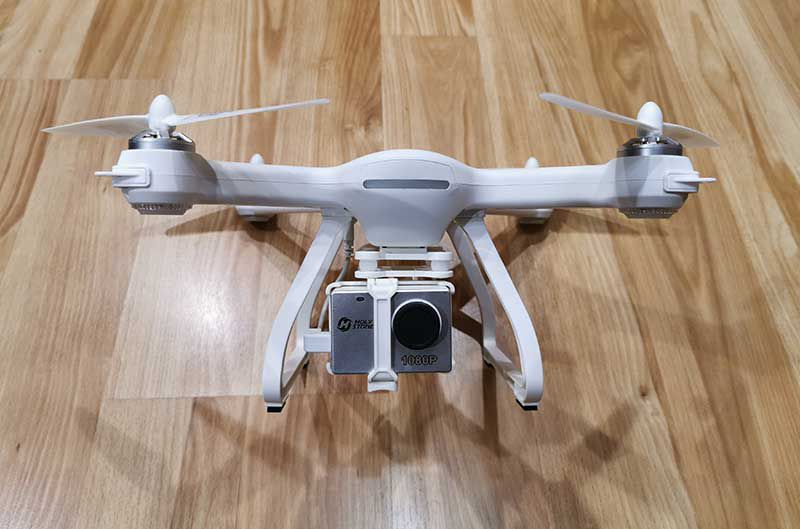
The Altair Aerial Outlaw SE is a quadcopter with a built-in 1080p HD camera that offers a first-person view (FPV) via a mobile app. Altair describes it as a “GPS-capable all-skill-levels drone with Return Home & Follow Me functions that offers a professional-grade feature set.”
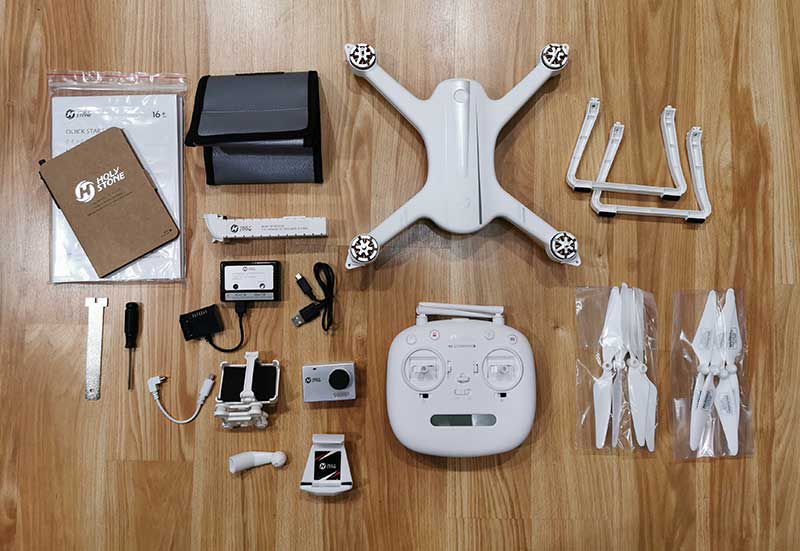
What’s in the box?
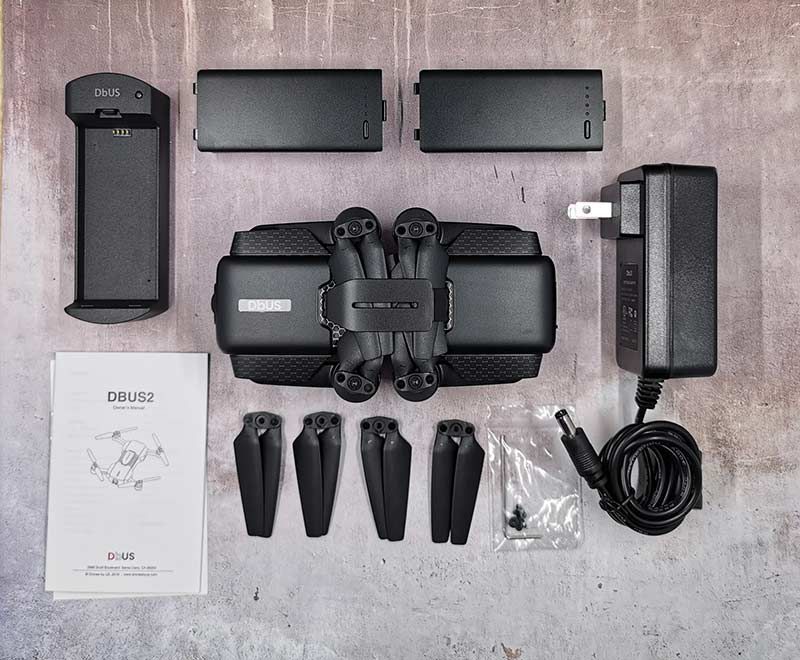
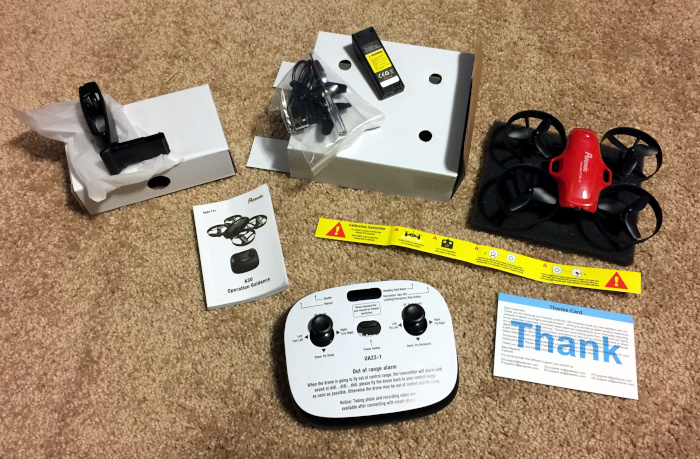
- The drone
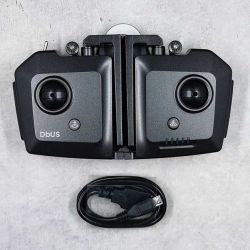
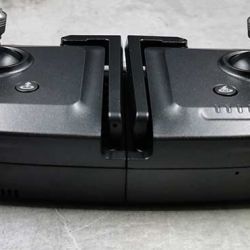
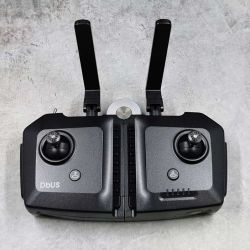
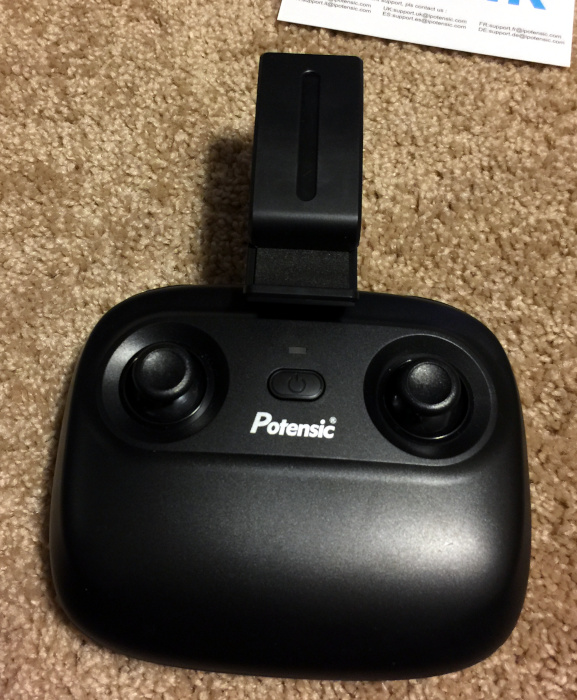
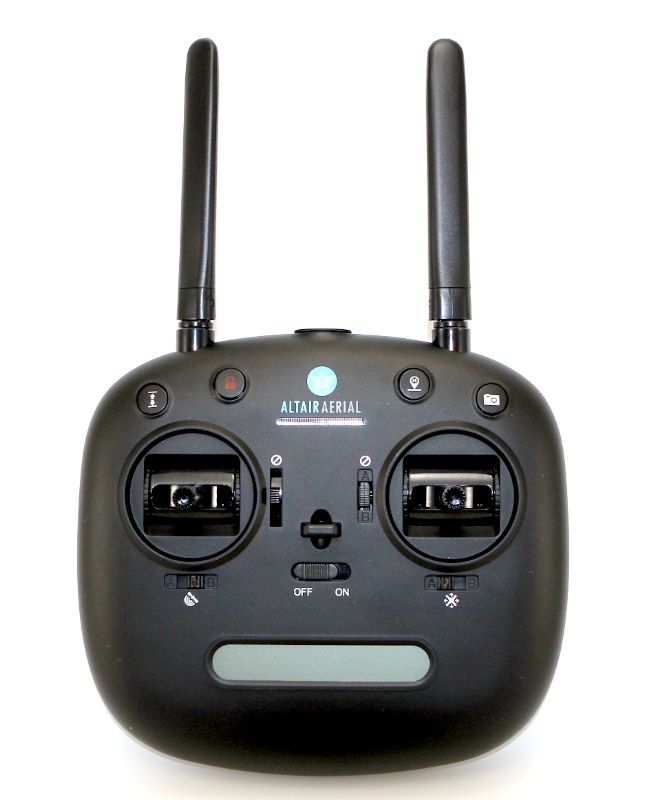
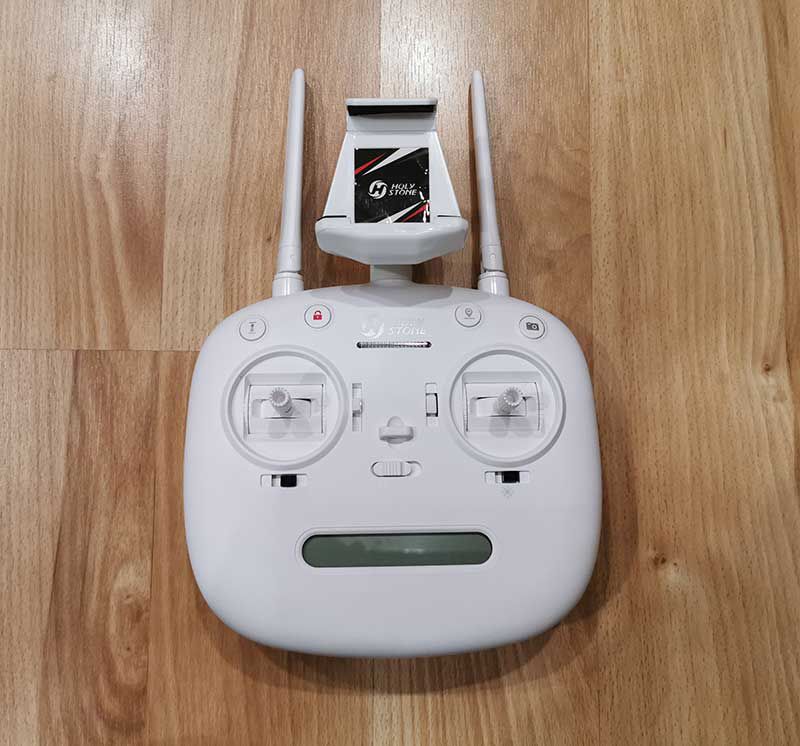
- A handheld controller
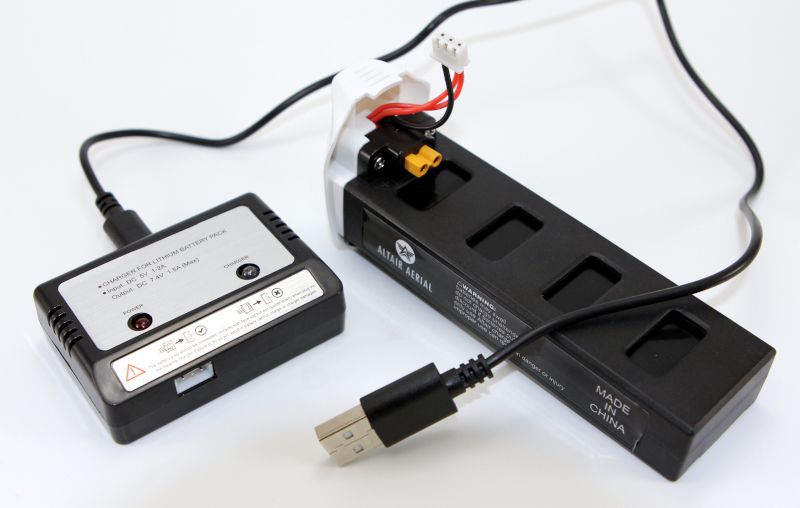
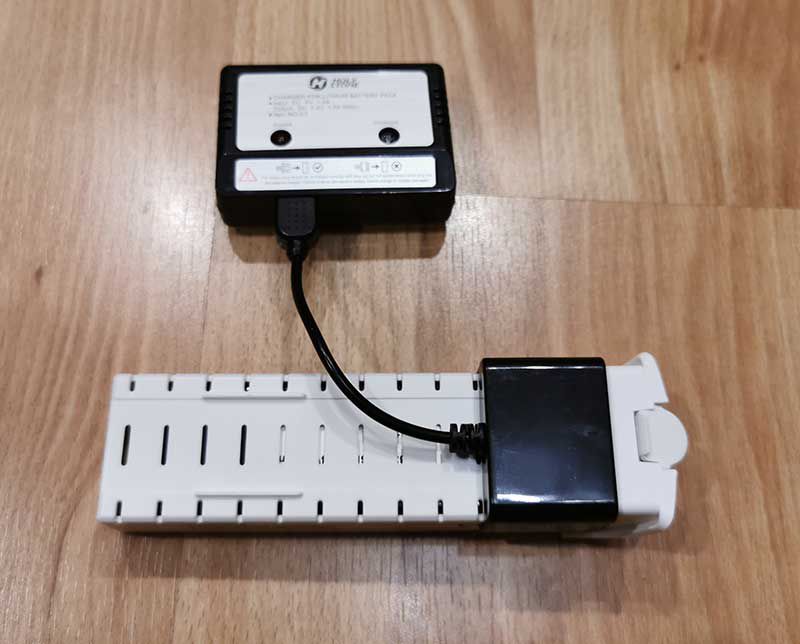
- A battery and a charger
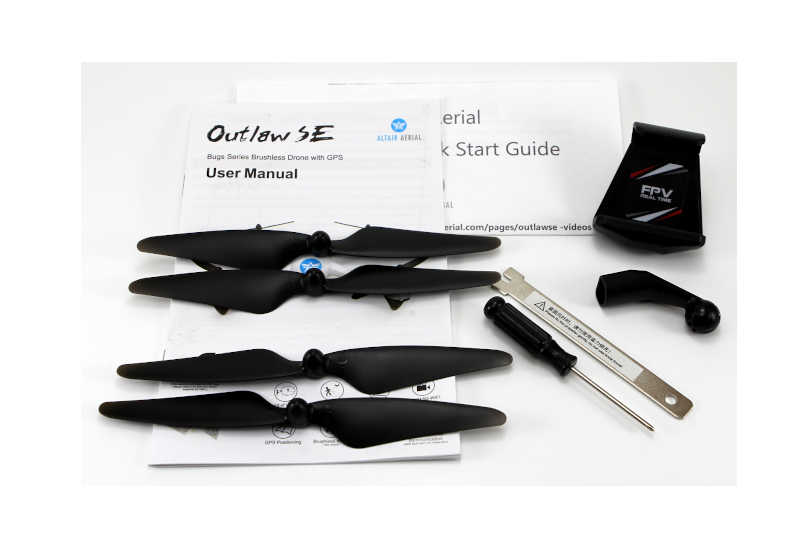
- 4 spare propellers with tools for changing
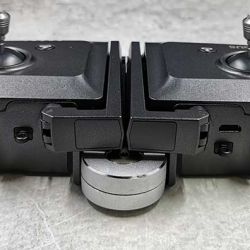
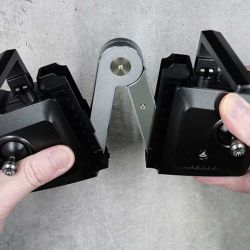
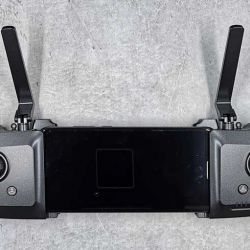
- A kit for attaching a mobile phone to the controller
- A quick start guide
- A manual with 19 pages of English instructions
Hardware specs
- Camera: built-in 1080p HD
- Range: up to 1950 feet
- Connectivity: GPS and WiFi
- Flight Time: 18-20 minutes
- Battery: Lithium Ion
- Dimensions of body: 10 x 10 x 3 inches
- Length of each propeller: 7.5 inches
- Weight: 2.8 pounds
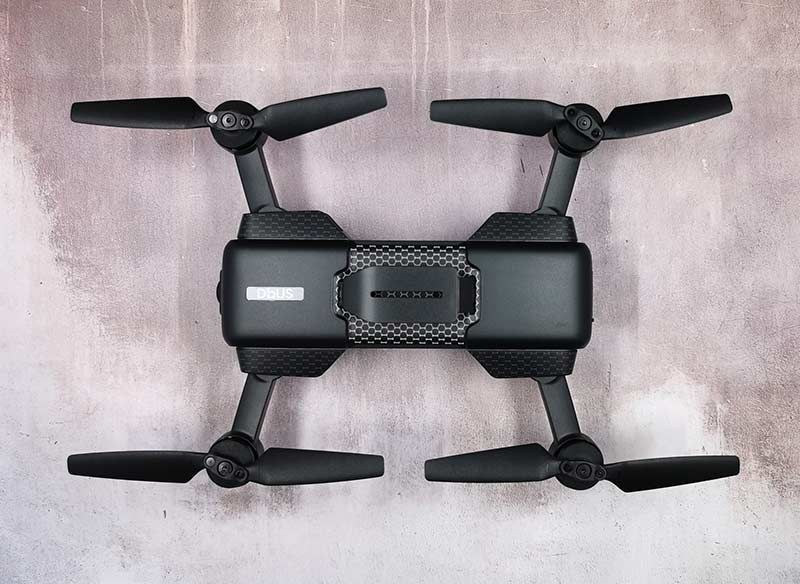
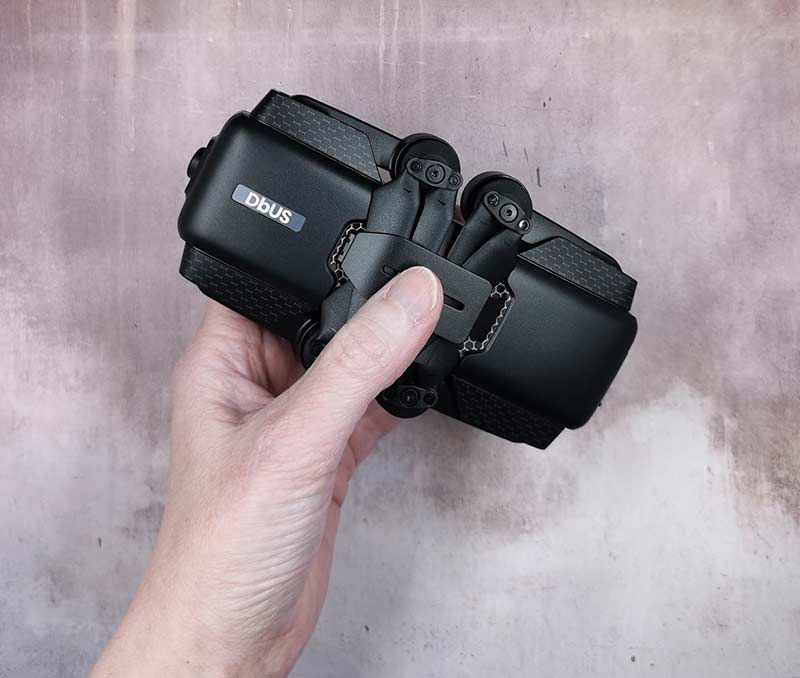
Design and features
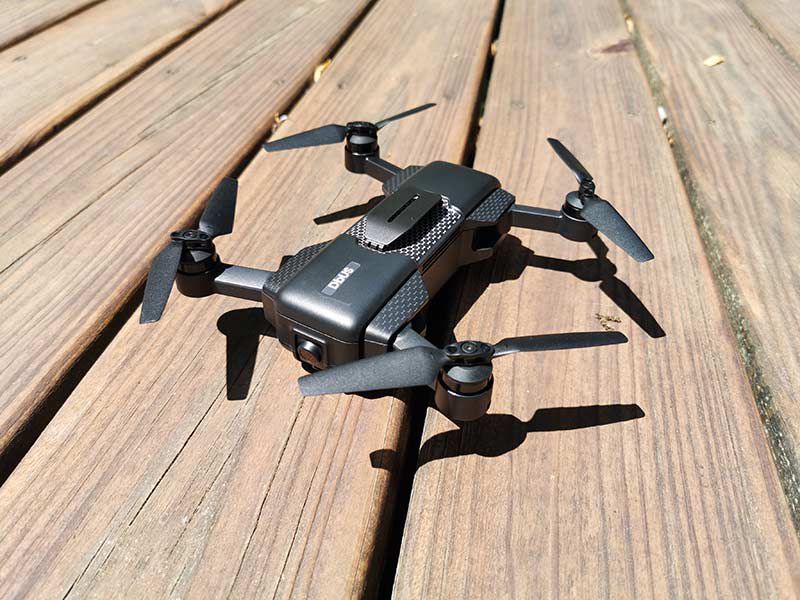
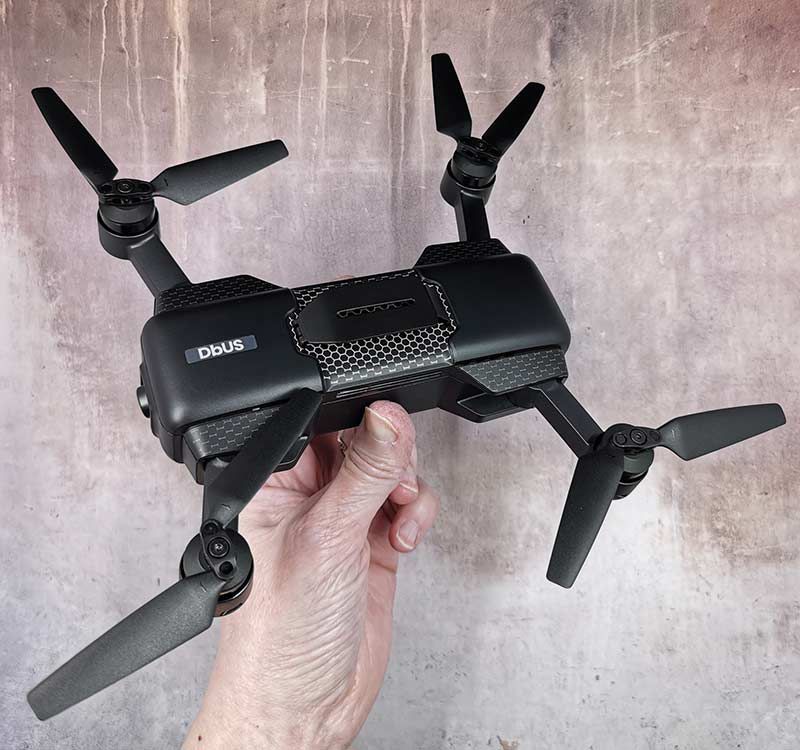
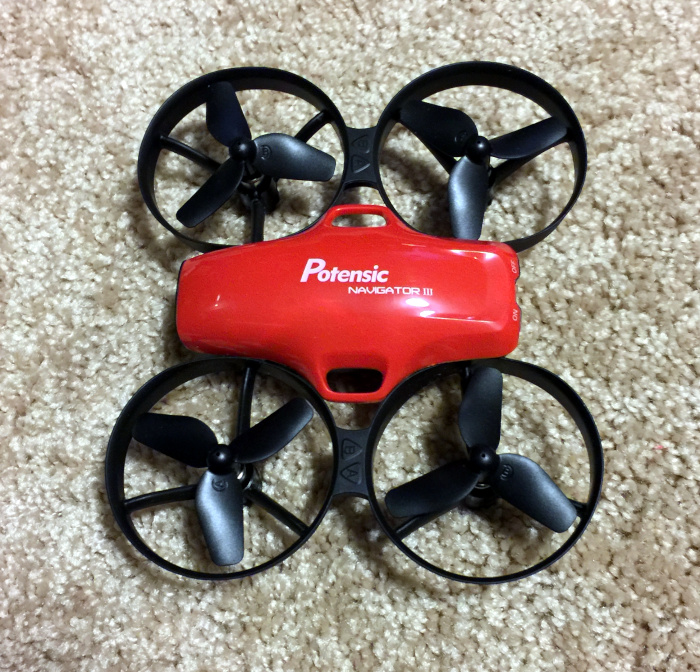
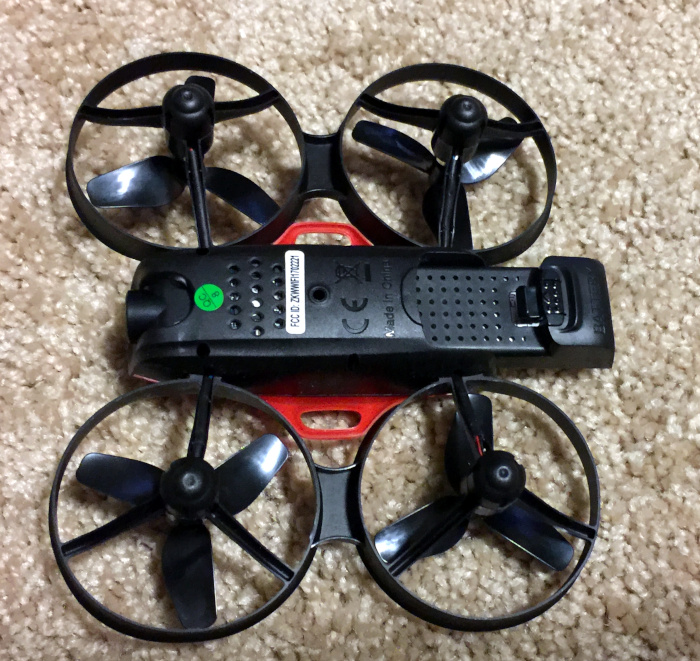
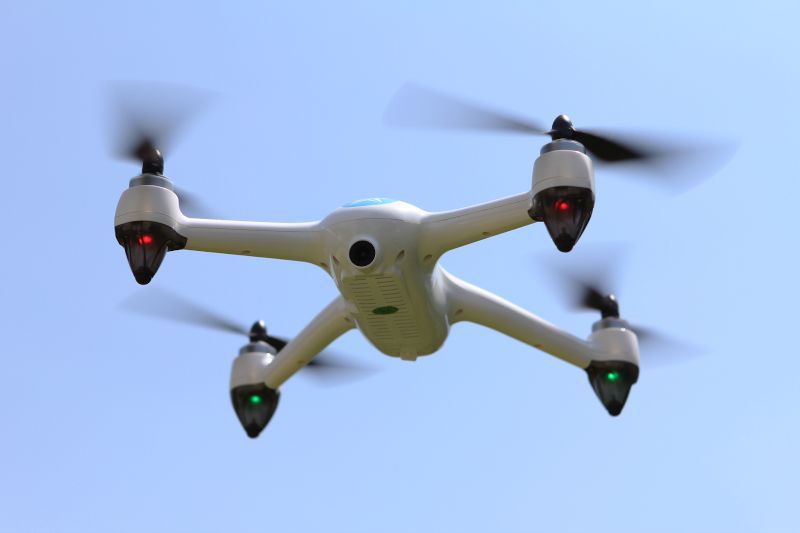
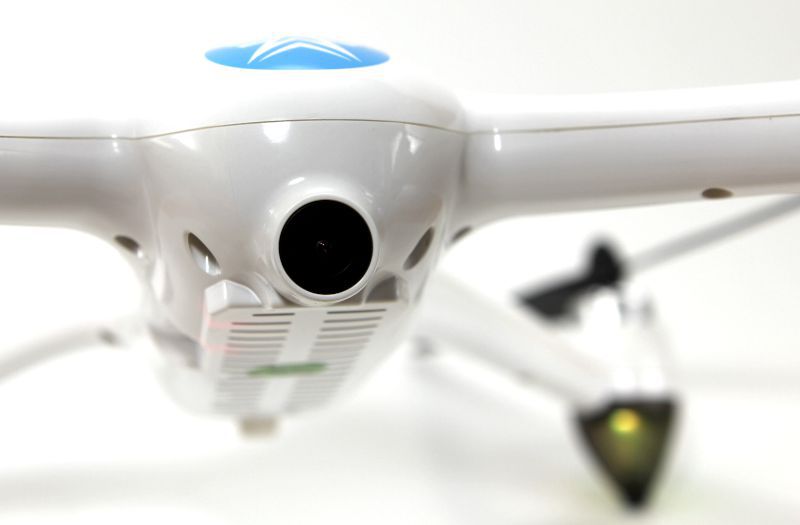
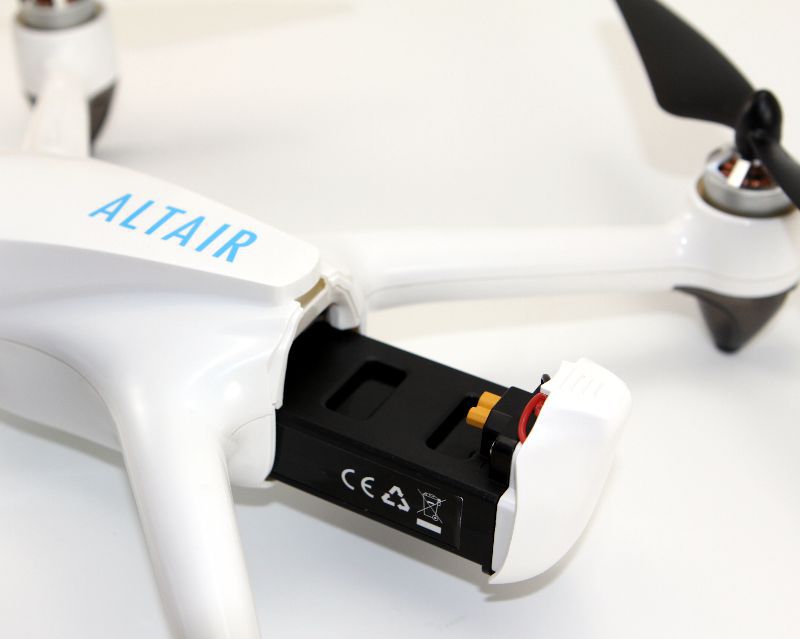
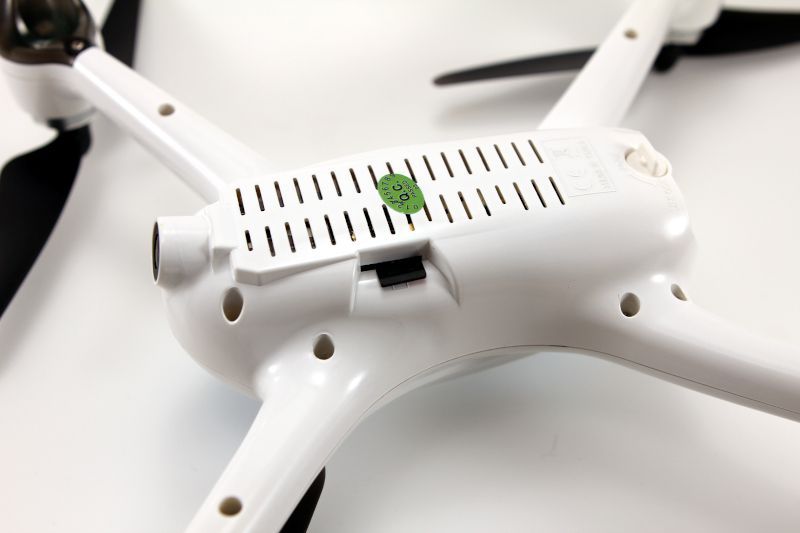
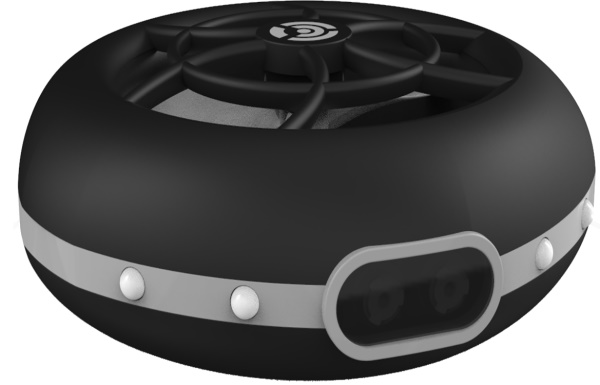
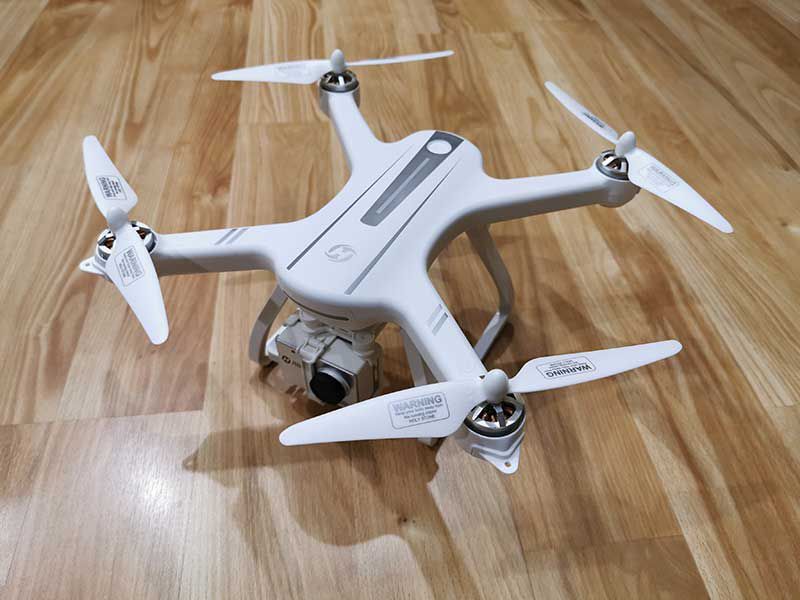
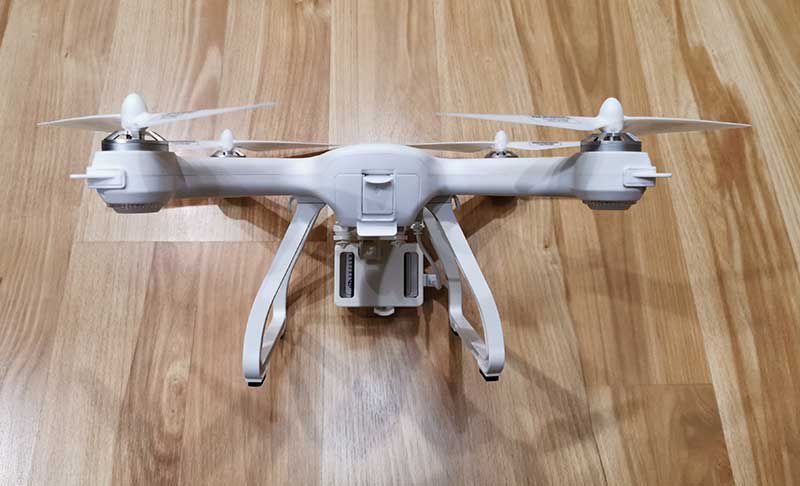
The Outlaw SE is a sleek-looking drone in a white, plastic body. The built-in camera glares out the front of the body, like a cyclops looking for its next victim.
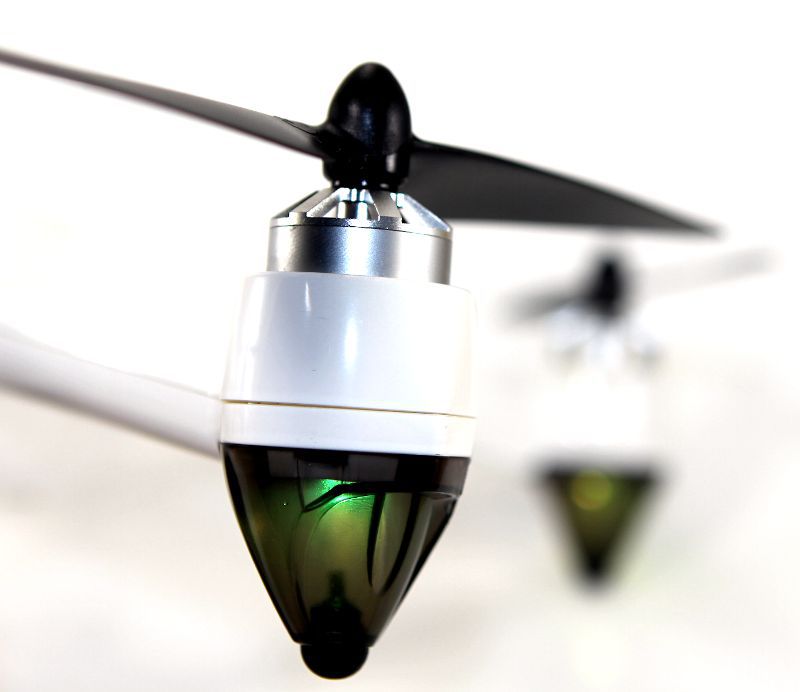
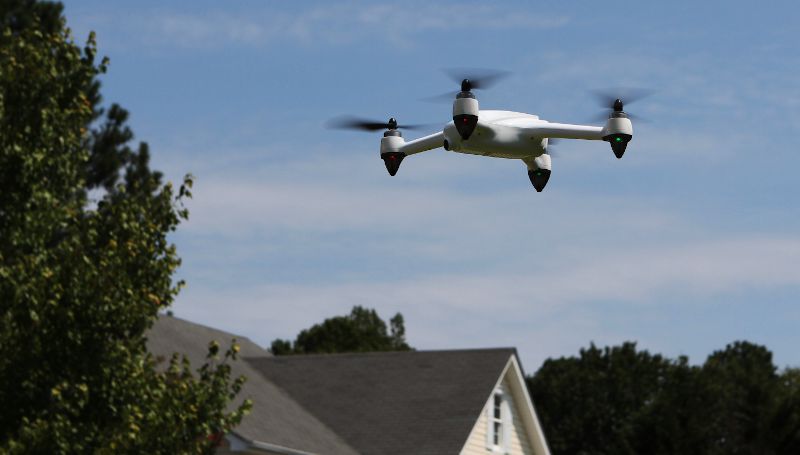
Under the end of each arm is a light that can be green, red, or yellow. They make it easy to see the drone, especially at dusk, and can be used to distinguish the front of the drone from the back.
Installation and setup
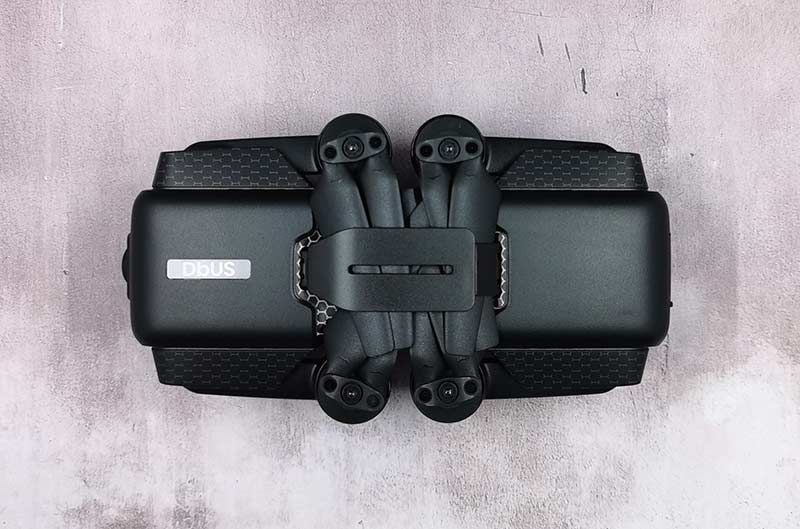
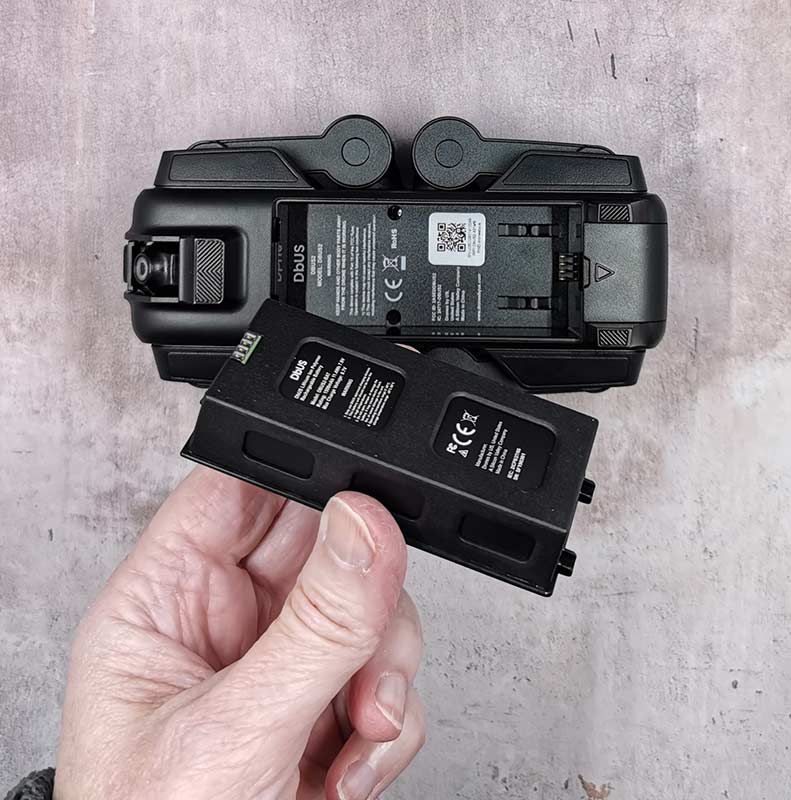
When I opened the box, I was pleased to find that I would not have to assemble the Outlaw. The only thing not connected out of the box is the battery. That was easy!
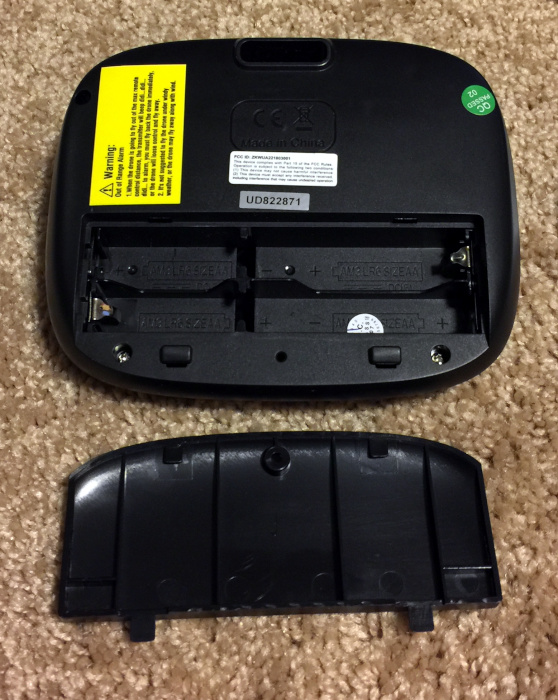
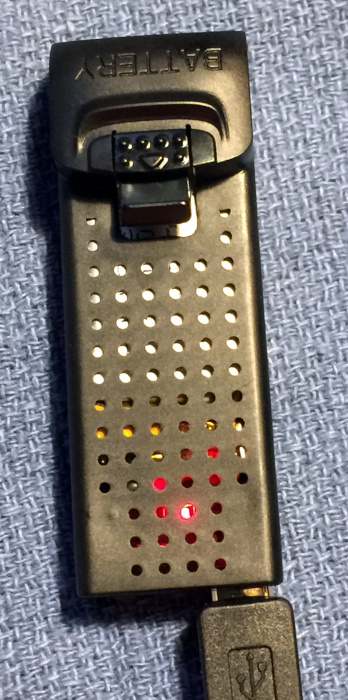
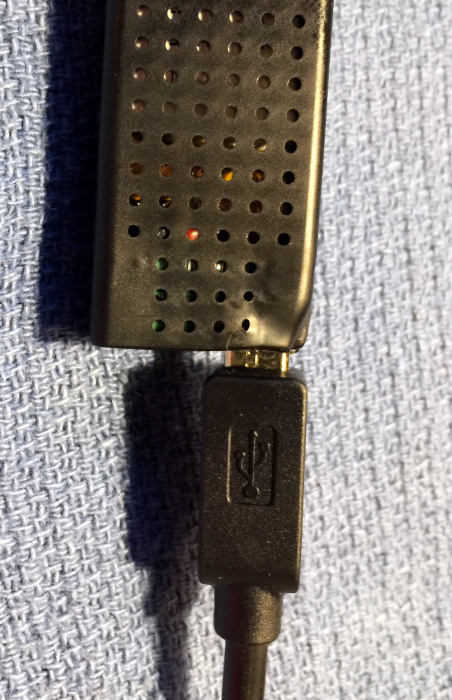
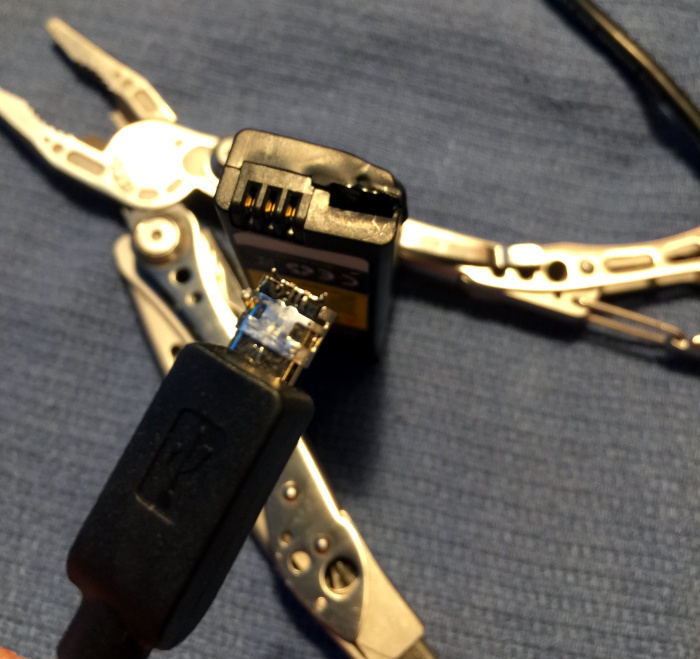
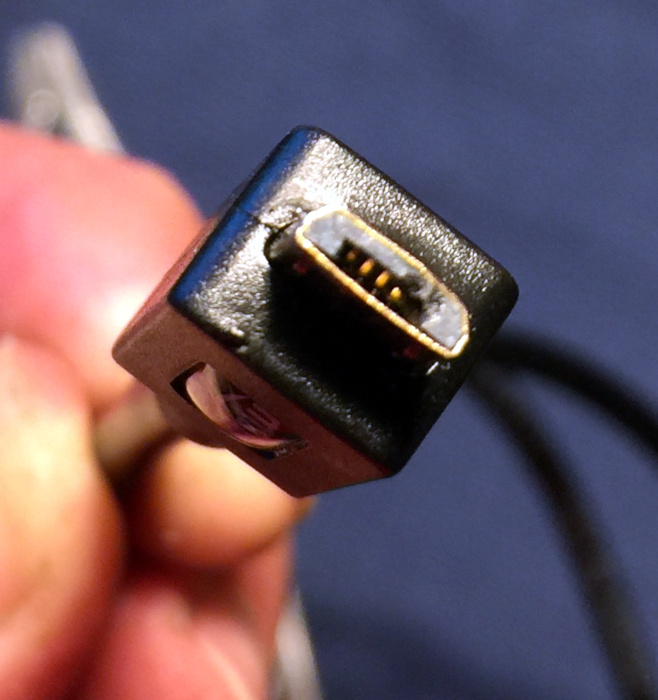
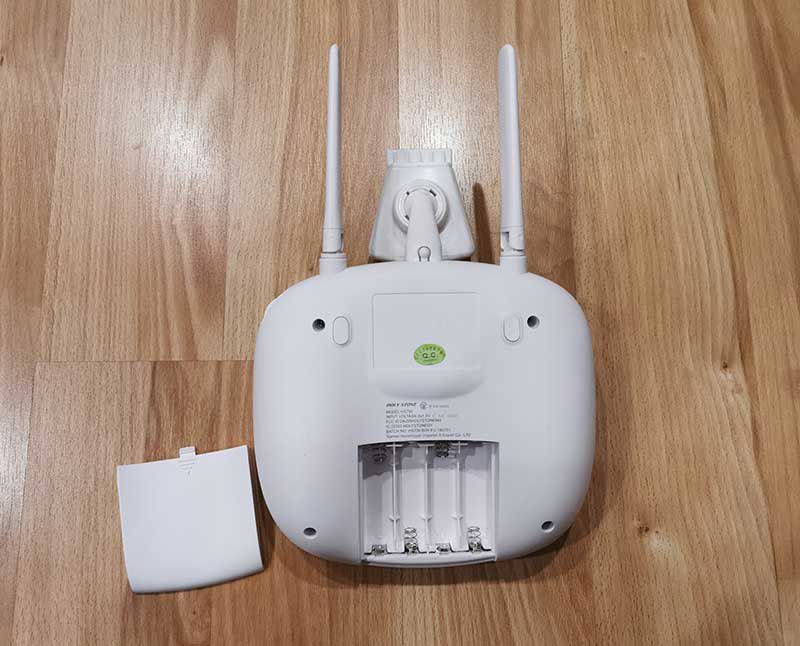
The first thing to do is charge the drone’s battery, which takes nearly 5 hours. The battery has a small cable tucked into a little space that can be pulled out in order to connect it to the battery charger. The USB cable is connected into the battery charger on one end and into a USB power source on the other. I’m a bit concerned about this little cable that connects the battery to the charger. It’s fairly fragile and rather hard to pull out of the charger. Short of the crashing the drone—which I did once—I’m fairly sure that this is what is going to break first, and I wish there were a sturdier connector here. The battery provides 18-20 minutes of flight time, and additional batteries can be purchased from Altair. The controller also requires batteries, a set of 4 AAs, which are not included. It chews through these batteries at a surprisingly fast pace, so it might be a good idea to use rechargeable ones.
Altair Aerial has a set of videos on their website that are both instructional and informative, so the next thing to do is watch them all.
The final thing to do is carefully read through the manual, which explains each of the Outlaw SE’s many features. I found the manual to be pretty easy to understand, especially since I had already seen “Mike from Altair” demonstrate what to do in the videos.
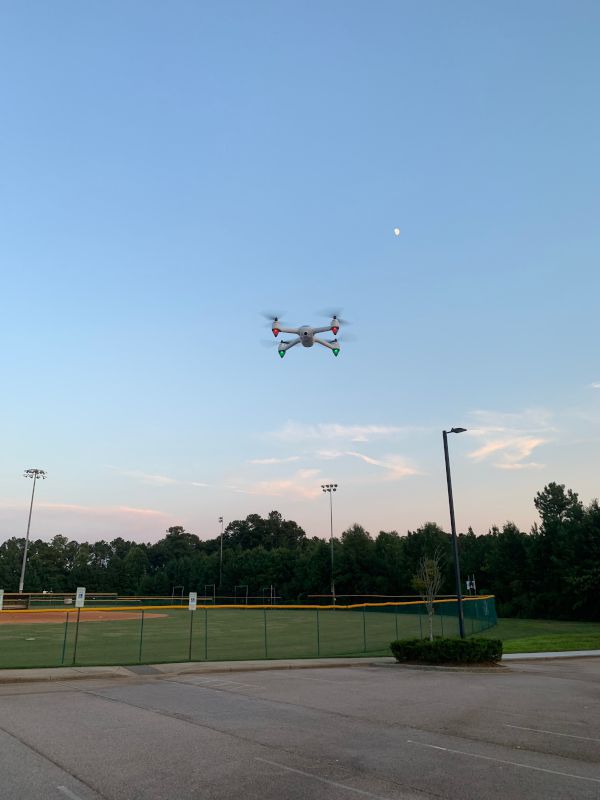
Once the battery was fully charged, it was time to head out and have some fun. For my first test, I took my daughter and the dog out to a city park where’s there was a huge parking lot and four baseball diamonds. I wanted lots of space around me while I learned to fly this thing. As the videos and manual explains, there’s a set of pre-flight setup steps that you have to go through before flying the drone: Turn the controller on, insert the battery and lock it in place, and wait for the controller to sync with the drone.
Perform compass calibration by rotating it horizontally and then vertically. Finally, it was ready, and I hit the unlock button on the controller. Zoom! The propellers started!
Fun Factor
Flying this drone is a blast! It’s got a lot of power and moves up and forward plenty fast. It’s also agile and turns on a dime. The range is fabulous, and I can easily fly it to the edge of my vision. My favorite time to fly is just before dusk, as it’s easier to see the lights under the props and know exactly where it’s at and which direction it’s facing. If you want to have some fun with a quadcopter, this is a great choice.
Controller Features
The controller has a button for automated takeoff and landing. Once the propellers start, you can tap this button and it will gracefully takeoff for you and ascend to a height of about 6 feet; now you’re ready to take control and fly. If the aircraft is already flying, you can this tap button once again, and it will automatically land the drone. The landing process is a bit slow, as the drone descends cautiously, but the result is a landing that is surprisingly gentle.
The Outlaw SE is GPS-enabled, which enables a feature called attitude hold. Once you turn on the GPS mode via the controller, the drone will hover in the same spot (both altitude and position) whenever you’re not controlling it. This requires more than 7 GPS satellites to be available—the number is displayed on the controller—and generally, I found that I had 10 or 11. In my experience, the SE needs anywhere from 10 to 60 seconds of flight time before the GPS hovering kicks in, after which it does an amazing job maintaining its position. I’ve only crashed the Outlaw SE once, and it happened right after take-off. There was a bit of wind, and the GPS had not yet kicked in. Before I knew it, the drone blown away from me, hit a tree, careened across a parking lot, and crashed into the road. Surprisingly, nothing was broken. Once that GPS kicks in, however, it’s super stable and much easier to control, even with a bit of wind.
When the drone is in GPS mode, it has a return to home capability. When you press the return button, the Outlaw SE will ascend to a safe height and then head back in a straight line to the location where it first established a GPS connection. This feature will activate automatically if the drone loses connectivity with the controller or if the battery gets too low and the drone is over 300 meters away.
In an email, one of Altair’s employees wrote, “The Outlaw is our most advanced drone and it is a little more complicated to use than the others.” Similarly, the manual says, “This aircraft is applicable for pilots aged 14+ who are with skilled flying experience.” Setting aside the poor grammar in this sentence—the manual could definitely use a good editor—I was a bit concerned that I would not be able to handle this drone, as I had never flown one previously. I had no reason to fear. It takes off for me. It hovers in place. It comes home when I call it. It lands for me. It’s like having a “get out of jail free” card! These features give rookie pilots like me a lot of confidence that they can get out of a jam and safely land the aircraft. Even if you are not “with skilled flying experience,” you should find this drone to be very approachable.
The drone has two modes for controlling it, headless mode and normal mode. In headless mode, the idea is that there is no head (or front) of the UAV. The pilot faces the same direction as the drone faces when it takes off, and from then on he can fly without worrying about the orientation of the craft. Forward is forward, back is back, etc. It’s supposed to be very natural and thus easier to fly. For whatever reason, it didn’t feel very natural to me, so most of the time I flew in normal mode. In this mode, the drone has a front and a back, kind of like a car. You put it in “drive” to go forward and put it in “reverse” to go backward. You can turn left or right and even rotate left and right. I really appreciate that Altair designed two different modes; you can try both and use whichever mode feels more natural to you!
Photos and Videos
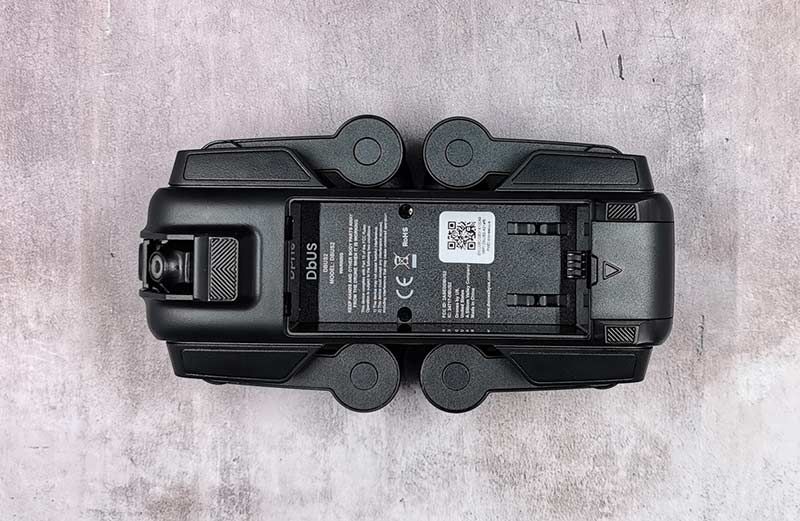
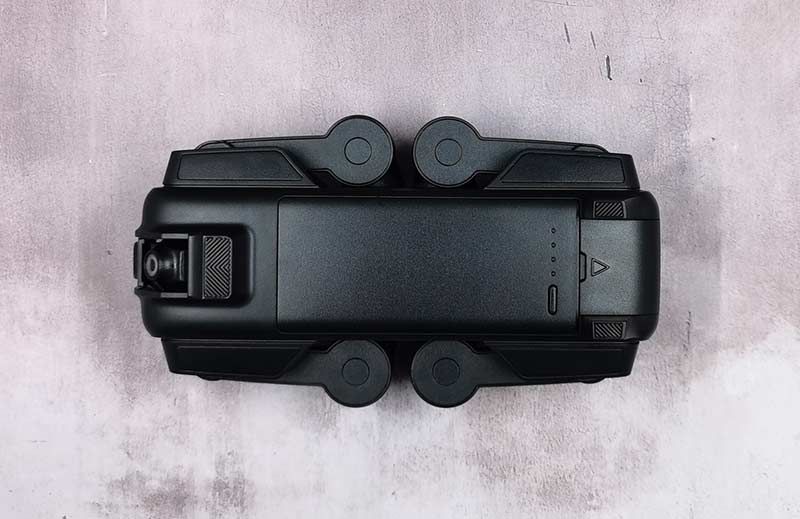
Flying the drone is a blast, but it can also take pictures! The drone has a built-in camera, and the only thing that you need to take stills or video is a memory card, which is not included. The manual says that it requires a “TF card,” an outdated term for a micro SD card, so I popped in my 64 GB Samsung EVO Micro SDXC card. While flying, you can press a button on the controller and take a picture. Although the controller beeped each time I pressed the picture button and the photo icon flashed on the controller to let me know that it took the picture, when I brought the drone home and put the SD card into my computer, there were no photos. I tried a handful of things, but I couldn’t get this to work. Eventually, I went to Altair’s contact page, found their support email, and sent them four specific questions about taking photos. The good news is that their support team was quick to reply; the bad news is that they would not answer all my questions, even though I asked a couple of times. I had to do some extra experimentation in order to figure out how to make this work. The bottom line is that you need a class 10 micro SD card that is 32 GB or less—no hope of using that new 1 TB card—and format it card as FAT32 on a Windows 10 machine. If you format it as Journaled on a Mac, or if you buy the wrong type of card, it won’t take any pictures. It would be nice if the controller gave some sort of indication of an error when it can’t record a picture; it’s a bit frustrating to return home and find an empty card. To use the SD card, flip the drone over and insert it into the SD slot in the bottom.
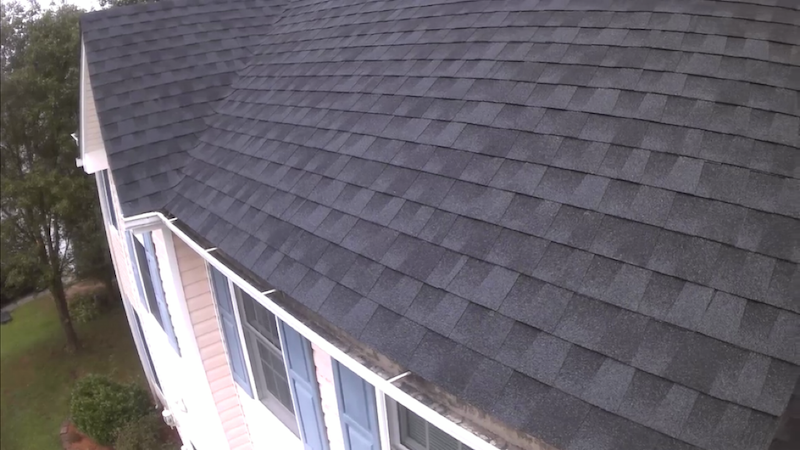
The Outlaw SE takes 1920×1080 still pictures. The quality of photos is ok but not great. They are a bit fuzzy, presumably because there is no image stabilization. Occasionally there is a horizontal line through the picture, such as in the picture below of the houses in my neighborhood. It also appears that the drone uses a wide-angle lens, as there is some distortion. Don’t expect the pictures to look as good as those taken with your new Samsung or Apple phone.
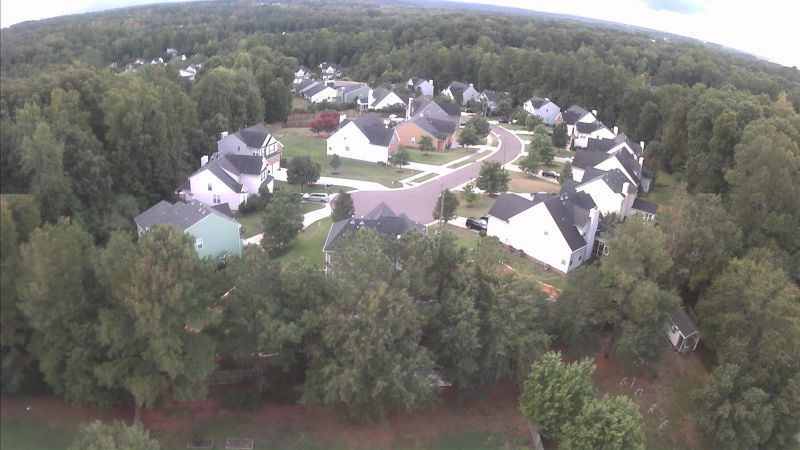
On the other hand, can your mobile take pictures from 400 feet in the sky? I don’t think so! The key to great photos is getting shots that you simply can’t get without using a drone.
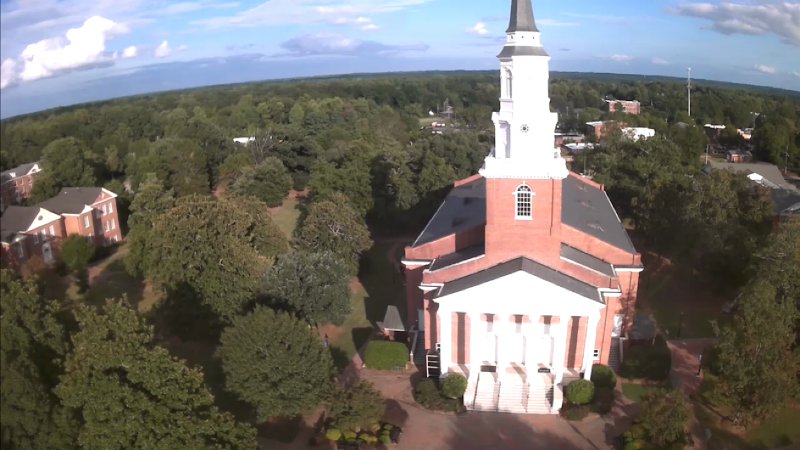
The same button used to take photos is used to take video, except that you press and hold for a second to start recording and press and hold again for a second to stop. The video icon flashes on the controller while video is recording. The resulting video is similar to the photos: It’s not the highest quality, but the views can be simply amazing. Note that the videos do not have any audio, so you may want to use a video editor to add a soundtrack or do a voice-over.
Mobile App Features
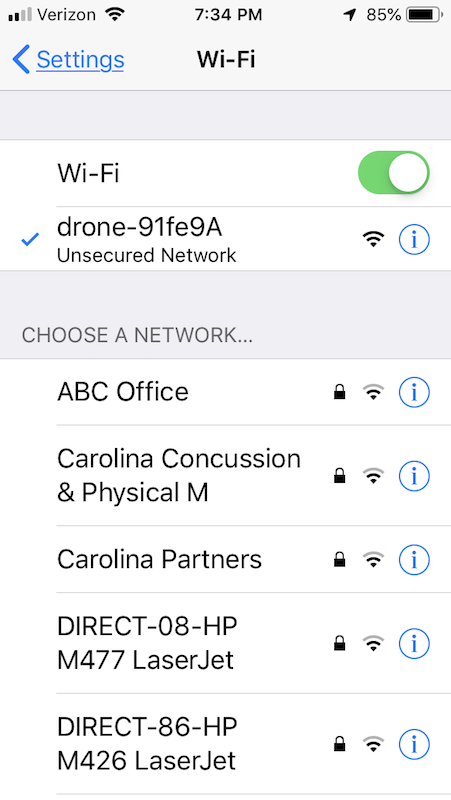
The drone can also be connected to your mobile phone via WiFi. The manual says that your phone requires 5G WiFi, which is a term that means that your phone should support 802.11ac. If your phone was made any time in the last 5 years, it supports 5G WiFi. (Confusingly, this is not the same as a 5G phone, which is a reference to a cellular standard.) The manual has QR codes to the Apple and Google app stores, where you can download the X-DRONE app. Oddly, the app in the Apple store is developed by “zhaoxuan cai,” not by Altair Aerial; it appears that they are recommending the use of a third-party app instead of developing their own. During the pre-flight setup steps, just before doing compass calibration, you can connect your phone to the Outlaw’s WiFi.
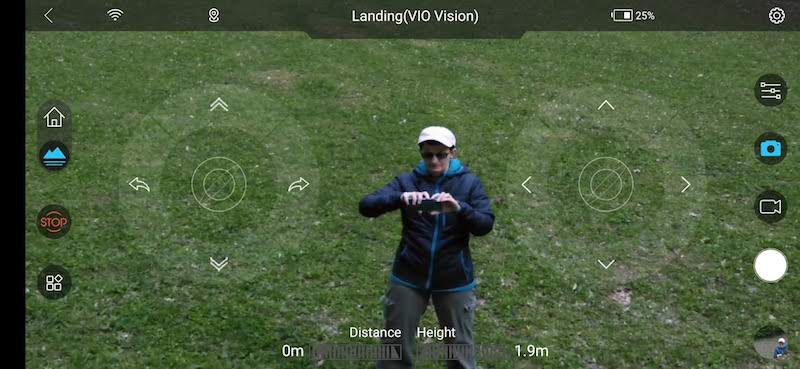
The angle of the camera is fixed, so by using your phone as a preview, you can see exactly what the camera is seeing. This makes it easier to fly and easier to photograph.
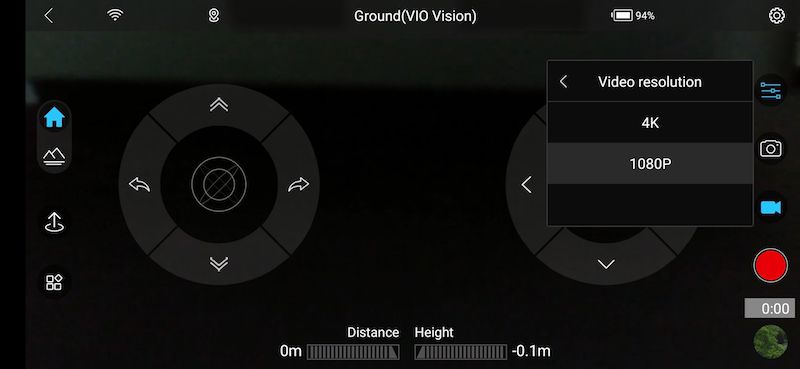
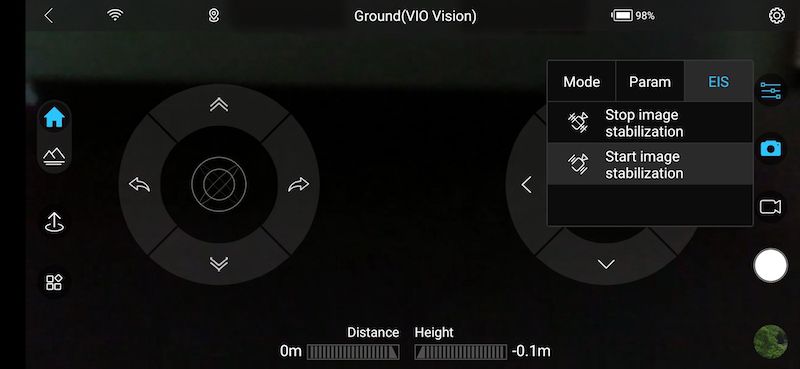
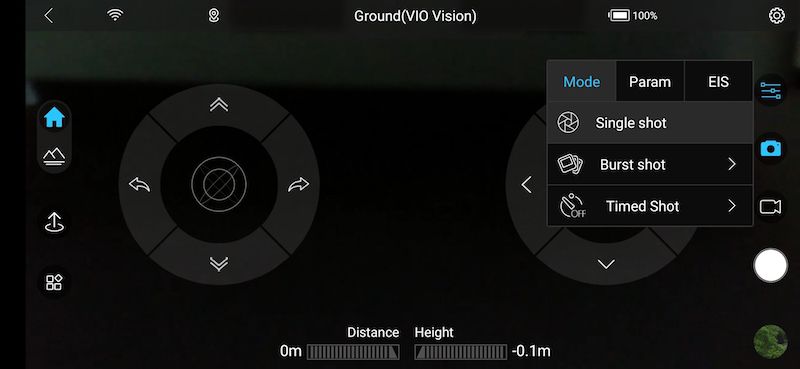
While the app is undoubtedly cool, it’s UI is rough around the edges, and unfortunately, the Outlaw’s manual provides no help on how to use it. The English in the app is broken, and the only instructions that the app itself provides is one screenshot that is a bit hard-to-read and rather cryptic.
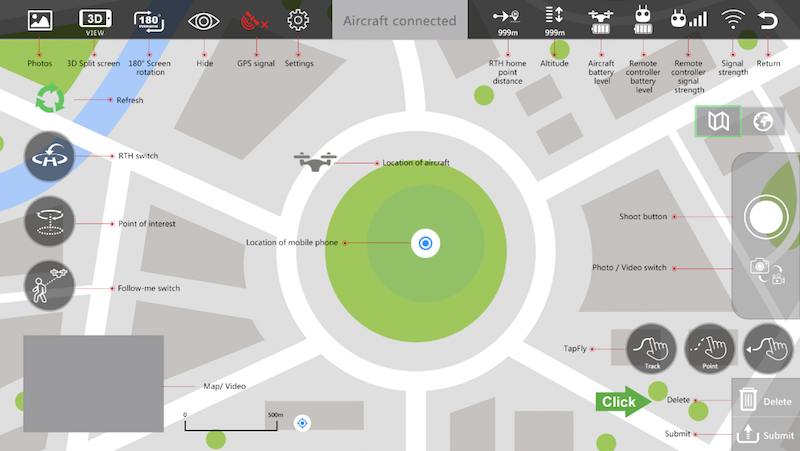
I honestly don’t know what all of these mean, and it’s tough to try and figure things out while flying, especially when you only have 20 minutes of battery life. Consider this to be a challenge: You’ll get to explore all of these features for yourself! Here’s what it looks like while in use.
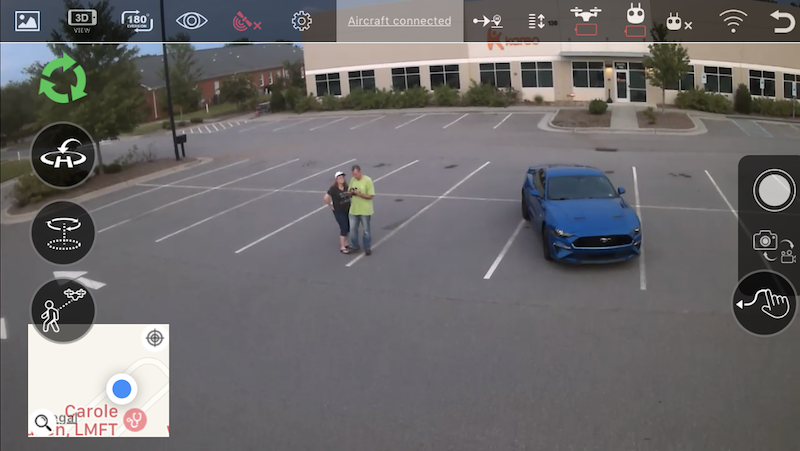
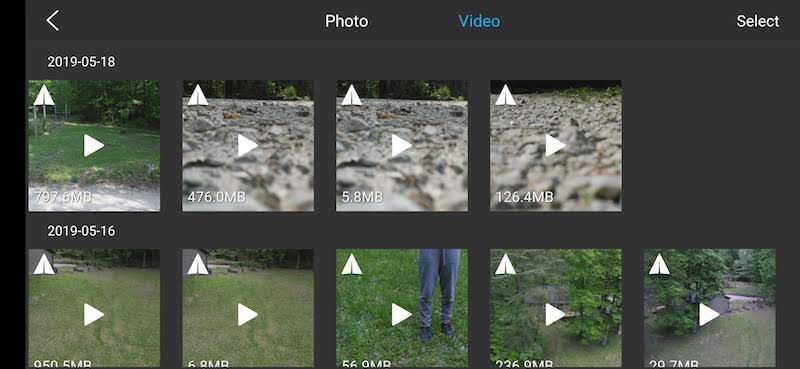
The best part is the buttons on the right (Shoot and Photo/Video switch), which make it easy to take photos and videos. Additionally, you can save photos and videos directly to your phone; this saves you from having to buy a micro SD card, assuming you have the extra space on your phone.
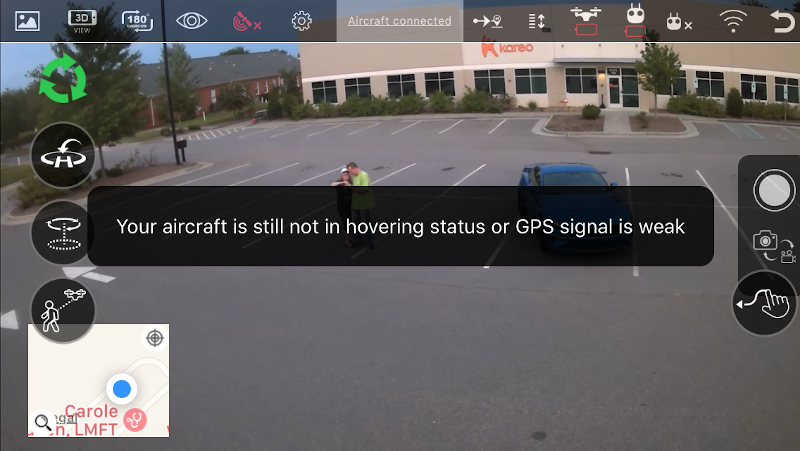
The icons in the upper right are mostly informative, and some are duplicates of what is displayed on the controller. Try as I might, I couldn’t get some of the buttons to work. The Point of interest, Follow-me switch, and Tapfly buttons all gave me an error, “Your aircraft is not in hovering status or GPS signal is weak.” I don’t understand this error message, since the drone was in GPS mode at the time and was hovering in place while I was pressing buttons. Perhaps some things don’t work because it’s a third-party app? I’m not sure.
The green refresh icon in the upper left can be used to resync the display, which can be necessary when the Outlaw gets too far away. It’s worth noting that while the range of the drone is over 1950 feet, the range of the mobile is limited by the use of WiFi; in my testing, I only got about 50 feet worth of range before the app would disconnect. It’s best to use the app for close-range flying, perhaps when you’re trying to do something very precise, like checking your gutters for leaves.
Although I was underwhelmed with mobile app, I don’t feel like it’s a significant loss, as you can totally have fun and take pictures and videos without it.
Rules and Regulations
One quick note for new operators: Many states have rules for flying drones, so make sure that you read up on the rules for your locale before flying. For example, here are the rules for recreational operators in the state of North Carolina, which is where I live.
What I like
- Great performance and range
- Lots of features that make it easy to fly
- Built-in camera that’s easy to use
What I’d change
- An explanation in the manual of which micro SD card to buy and how to format it
- An error message (or beep) when a picture cannot be taken
- A better-designed mobile app
Final thoughts
I was a bit nervous about flying my first drone, but between the instructional videos, detailed manual, and great safety features, Altair Aerial has made certain that I have nothing to fear. I enjoyed flying the Outlaw SE and enjoyed taking photos with it. It’s a well-designed gadget. There are a lot of drones that you could buy, but if you’re in the market for a mid-ranged drone, the Outlaw SE would be a great choice!
Price: $264.90 ($33.80 for each extra battery)
Where to buy: Altair Aerial’s online store and Amazon
Source: The sample for this review was provided by Altair Aerial.
Filed in categories: Reviews
Tagged: Drone
Altair Aerial Outlaw SE Drone with 1080p HD Camera review originally appeared on The Gadgeteer on September 3, 2019 at 9:00 am.
Note: If you are subscribed to this feed through FeedBurner, please switch to our native feed URL http://the-gadgeteer.com/feed/ in order to ensure continuous delivery.
 That crash was due to flying it into a tree branch because I miss judged just how fast this little drone can fly and that’s something that you’ll want to keep in mind if you end up buying one.