How to Calibrate Your Monitor to Perfection for Free

Every consumer-grade monitor that you buy has its default picture settings dialed in by the manufacturer to look absolutely terrible in your office. This is because monitor manufacturers know that properly-calibrated displays appear washed out under bright showroom lighting. Getting the best out of your monitor therefore calls for toning down the gaudy default settings to suit milder home lighting conditions. Read on to learn how to optimally calibrate your display with nothing more than your eyes and freely available calibration tools. Related: How to Color Calibrate Your Monitor in Windows 10 (and Why You Might Want To) Dialing in Your Display’s Settings First… Read more

BenQ SW270C Photographer Monitor review


REVIEW – Whenever I write a review, I always assume a position of impartiality. Having said that, many of the readers that follow my reviews know that I love BenQ equipment and especially BenQ monitors. When I heard about the BenQ SW270C Photographer Monitor, I was beyond excited about the opportunity to test and review it. Let’s see if I am still excited after taking it for a spin!!

What is it?

The BenQ SW270C Monitor is a 27-inch Photographer Monitor with, 2K Adobe RGB, Uniformity Technology for Screen-Wide Color Accuracy, 99% Adobe RGB Color Space with IPS Technology and multiple built-in ports including USB-C Connectivity with Power Delivery. BenQ has also included a Hotkey Puck that simplifies switching between modes. The Hotkey Puck is programmable so that it can be used to quickly adjust the displays settings.

What’s in the box


1 x BenQ SW270C LCD Monitor
1 x Monitor Stand
1 x Monitor Base
1 x Shading hood for landscape orientation
1 x Hotkey Puck G2
1 x Video Cable: DP to mini DP
1 x USB Cable
1 x Power Cord
1 x Quick Start Guide
1 x CD-ROM

Design and features

Specifications
Screen Size: 27″
Panel Type: IPS
Backlight Technology: LED backlight
Resolution (max.): 2560×1440
Brightness: 300
Native Contrast(typ.): 1000:1
Viewing Angle: (L/R;U/D) (CR>=10), 178/178
Response Time: 5 ms (GtG)
Refresh Rate: 60Hz
Aspect Ratio: 16:9
Display Colors: 1.07 billion colors
Color Gamut: 99% Adobe RGB, 97% P3, 100% sRGB
Display Area(mm): 596.7×335.6
Pixel Pitch (mm): 0.2331
PPI: 109
DCR (Dynamic Contrast Ratio) (typ.): 20M:1
Color Bit: 10bits
Headphone Jack: Yes
Segment: Photographer
Product Color: Gray
Color Mode: Adobe RGB / sRGB / B&W / Rec. 709 / DCI-P3 / Display P3 / M-book / HDR / DICOM/Calibration 1 / Calibration 2 / Calibration 3 / Custom 1 / Custom 2
HDR: HDR10
Display Mode: Full, Aspect Ratio, 1:1
Color Temperature: 5000°K / 6500°K/ 9300°K / User Mode
Gamma: 1.6 – 2.6, sRGB
K Locker: Yes
OSD Language: 18 Languages (English / Francais / Deutsch / Italiano / Espanol / Polish / Czech / Hungarian / Romanian / Netherlands / Russian / Swedish / Portuguese / Japanese / Chinese / S-Chinese / Arabic/Korean)
PIP/PBP: Yes
HDCP: 2.2
VESA Wall Mount: 100x100mm
AMA: Yes
Display Screen Coating: Anti-Glare
3D-LUT: 16bits
Delta E: <= 2 (avg)
Uniformity Technology: Yes
Hardware Calibration: Yes
Video Format Support: Yes
Gamut Duo: Yes
Black & White mode: Yes
Black Level: Yes
Hotkey Puck G2: Yes
Factory Calibration Report: Yes
HDMI: HDMI (v2.0)x2
DisplayPort: DisplayPort (v1.4)
USB 3.1 Hub: USB Downstream x 2, Mini USB x 1
USB 3.1 Hub: USB Upstream x 1
USB Type-C: Yes (PD60W, DP Alt mode, Data)
Card Reader: SD/MMC type
Support Format: SD/SDHC/SDXC/MMC
Voltage Rating: 100~240V
Power Supply: Built-in
Power Consumption (based on Energy Star): 36.1W
Power Consumption (stand by mode): 0.5W‎
Power Consumption (sleep mode): 0.5W
Dimensions (HxWxD mm) (w/o Base) (with shading hood): 372.2 x 626 x 238.04
Dimensions (HxWxD mm) (without shading hood): Landscape: 504.5-611 x 613.8 x 213.4; Portrait: 733.4 x 380.7 x 223.2
Dimensions (HxWxD mm) (w/o Base): 368.9 x 613.8 x 62.65
Dimensions (HxWxD mm): Landscape: 504.5-614.3 x 626 x 334.8; Portrait: 744.6 x 381.1 x 334.6
Software: Palette Master Element
Support Calibrator: X-Rite i1 Display Pro / i1 Pro /i1 Pro 2 /i1 Studio , Datacolor Spyder 4/5
Hor. Frequency (kHz): 27~140Khz
Ver. Frequency (Hz): 24~76Hz
Video Bandwidth (MHZ): 600M Hz
Compatibility: Mac Compatible, Windows® Compatible, Windows®10, Windows®8.1, Windows®8, Windows®7

The monitor base is a relatively large and weighty base that provides a firm platform for the monitor. In the middle towards the rear, there is a circular cutout that is the receiver for the monitor stand. Underneath there is a wing screw that screws into the monitor stand to lock the two together.

The picture below shows the monitor stand with the locking plate at the top the connects into the VESA receptacle on the back of the monitor to connect the two. Right below the VESA plate, you can see 2 tracks that are the sliding tracks that allow for height adjustment, and below that there is a pass-through hole for cable management. Underneath the stand, there is the plate that connects to the monitor base. There is also a circular slot to accommodate the Hotkey Puck.


The next picture shows the Hotkey Puck in the monitor stand.


Underneath the monitor, there are the connectivity ports. As shown below from left to right they are the headphone jack, USB port (upstream; connecting to the PC), USB-C port, DisplayPort socket, 2 x HDMI socket, Hotkey Puck / Hotkey Puck G2
socket, and the AC power input jack.

When facing the front of the monitor there are 3 ports on the left side. As shown below, they are from top to bottom, an SD card slot and 2 USB ports.

On the bottom right of the front of the monitor, there are the control buttons. From left to right they are 5 control buttons and the on/off power button.


1. Press any of the control keys.
2. The hotkey menu is displayed. The left three controls are custom keys and are designated
for specific functions.
3. Select (Menu) to access the main menu.
4. In the main menu, follow the icons next to the control keys to make adjustments or for
selections.

Performance

The monitor arrived well packaged and padded. Out of the box, the components are easy to assemble and putting the monitor together only took a few minutes. Adding the hood took a bit longer but was easy once I figured out how the pieces connect to form the hood and how they attach to the monitor. Youtube videos helped me to better understand the process.  Before I added the hood, I took the time to play around with the monitor rotation. Since the hood attachments that come with this model only work for use in landscape mode, I took a picture without the hood to show the rotation capability. (This monitor rotates 90 degrees to be used in either portrait or landscape mode.)

Once I set up the monitor with the hood attached, I took the following pictures from both the left and right perspectives to show how it looks installed.


On the top of the hood, there is the sliding door that provides access to the screen for using a calibration device without having to remove the hood.


I connected my iPad Pro 12.9″ to the monitor and edited some pictures using Adobe Lightroom on my iPad with the BenQ connected via USB-C  as an extended monitor. Having the larger real estate along with accurate colors is great especially as my eyes get older.


To try to illustrate some of the visual benefits of the monitor including the color representation and the hood effect, the picture below shows the same picture twice. On the left, it is opened via Photo Viewer on my BenQ PD3200U, and on the right is it opened in Adobe Lightroom on this BenQ SW270C monitor.

I also edit photos in PortraitPro, and the experience with this monitor including the amazing colors is also great.

What I like

  • The build quality
  • The connectivity options
  • The stability
  • The features
  • The color accuracy
  • The detachable hood
  • The overall functionality

What I’d change

  • Include the extra hood sections needed to use the hood in Portrait Mode as well
  • (Personal wish) – A 32-inch or 35-inch version would be greatly appreciated!! 🙂

Final thoughts

I am a huge fan of BenQ monitors, and the BenQ SW270C Photographer Monitor does not disappoint. As a photographer, I spend a lot of time editing photographs on my iPad and my studio PC. This monitor allows me to connect my iPad to it via USB-C and also to use it as an extended monitor on my desktop PC. When connected to my iPad, the Power delivery feature ensures that my iPad remains charged. Whichever way I decide to use the monitor, the colors are precise and brilliant and it is just a joy to use even more so when I have hundreds of photos to edit and in some cases color-correct. I am currently using it with its stand on my desk but I plan to mount it on the wall with an arm that allows for even more movement. The included hood is perfect for viewing true color representation, and for increasing accuracy, especially since ambient lighting or stray lighting becomes less of a factor. The sliding opening in the hood is perfect if there is a need to use a color correcting tool. I have such a tool, but I have had no issue with the colors right out of the box. The Hotkey Puck is also a nice convenient tool albeit that I do not use it very often. I give the BenQ SW270C Photographer Monitor a very well done, and two thumbs way up!!!

Price: $799.99
Where to buy: Amazon
Source: The sample for this review was provided by BenQ

Filed in categories: Reviews

Tagged:

BenQ SW270C Photographer Monitor review originally appeared on The Gadgeteer on August 26, 2019 at 8:00 am.

Note: If you are subscribed to this feed through FeedBurner, please switch to our native feed URL http://the-gadgeteer.com/feed/ in order to ensure continuous delivery.

Lepow 15.6-inch USB-C portable display review

REVIEW – I switched from a huge 27″ iMac to a MacBook more than 7 years ago and although I still use an external monitor with it when I work in my office (Gadgeteer HQ), I sometimes wish for some extra screen real estate when I’m working away from home. One solution is to buy a bigger MacBook, but that’s not a solution I want to take. Another solution is a portable monitor like the Lepow USB-C display. Let’s check it out.

What is it?

The Lepow USB-C display is a 15.6-inch portable display that connects to laptops and mobile devices with a USB-C cable.

Hardware Specs

Screen size: 15.6 inch
Visual area: 344.16 x 194.59mm
Panel type: IPS
Dimensions: 368 x 225 x 8.8 mm
Aspect ratio: 16:9
Resolution: 1920×1080
Display color: 16.7M
Color temperature: 6800K
Visual angle: H: 85/85Min V:85/85Min
Contrast ratio: 1000:1
Brightness: 300cd/m2
Output interface: 3.5mm headphone jack
Speaker: 1Wx2

What’s in the box?

  • Lepow USB-C monitor
  • Magnetic cover
  • Screen protector
  • USB-C to USB-C cable
  • HDMI to mini HDMI cable
  • USB-A to USB-C cable
  • User Guide

Design and features

The Lepow 15.6-inch USB-C portable display immediately reminded me of a supersized iPad Pro with an Apple smart cover. It’s designed like a slab/tablet, without a built-in stand. That’s what the case is for.

The display has slim bezels and a dark grey shell that holds a matte screen that unfortunately is not a touchscreen.

Both sides have ports and speaker vents. The left side has a mini HDMI port, the main USB-C port, and a 3.5mm headphone jack.

The right side has another speaker vent, a power button, a roll key for menu selections, and a PD USB-C port.

The monitor does not have a built-in battery so it requires an outside power source. It can pull power from a laptop, a smartphone, a tablet, or you can connect a USB-C cable and an AC adapter to the USB-C PD port on the side and use that to power the monitor and charge the device (laptop, phone, etc.) connected to the other USB-C port on the opposite side of the monitor.

As mentioned above, the Lepow monitor does not have a built-in kickstand, but the included smart cover not only protects the screen when you’re not using the display, but it can fold into a stand.

The cover has grooves so you can customize the viewing angle and small magnets at the edges hold the cover to the monitor for ease of use.

Using the Lepow USB-C portable monitor with a laptop

I tested the Lepow monitor with my 2016 12in MacBook and my Huawei P30 Pro smartphone, both of which have a USB-C port for easy connection. The Lepow also has a mini HDMI port that you can use with the included mini HDMI to HDMI cable to connect the monitor to full-sized HDMI port.

One of the best things about the monitor is that it doesn’t require its own power source because it pulls the power it needs from the connected device. That means that you won’t need to carry a bulky power supply with you or need to be near a wall outlet to use the display because it powers on as soon as it’s connected to the laptop or phone.

By default, the monitor is in landscape orientation when connected to a macOS or Windows laptop.

However, you can go into the settings on the computer to rotate the display like you see above. The only problem is that when you physically rotate the Lepow USB-C monitor, the folding cover doesn’t make a very sturdy stand in that orientation. And even worse is the fact that there’s the cable sticking out of the top of the monitor when it’s in this orientation and the monitor will rest on the roll key which when pressed, will bring up the onscreen menu. All that said, it is doable in portrait orientation, just not very convenient compared to a traditional landscape orientation.

The monitor’s built-in speakers on both sides of the display are not impressive when it comes to volume or audio quality. Even at full volume, the audio is weak and definitely not loud enough if you’re using the monitor in a noisy environment.

Using the Lepow USB-C portable monitor with a smartphone or tablet

If you happen to own a smartphone or tablet that allows for video out though USB-C like the Huawei P30 Pro (shown above) or a Samsung Galaxy device, the Lepow monitor can turn your mobile device into a computer-like device with a full screen experience.

Depending on the device that you use, it really does feel like your phone becomes a computer. With the Huawei connected to the Lepow, it becomes a touch pad.

I tested the monitor with normal everyday activities like using it to surf my favorite sites, work in spreadsheets, work in documents, editing images using Photoshop, and watching videos. Note that I did not use the monitor for gaming as I don’t play games. But for all the tasks that I did try with the Lepow, it worked fine.

The colors are good, the image was clear and crisp, and viewing angles are decent. I’m not going to say that the Lepow is better than my BenQ 27inch monitor which has a resolution of 2560×1440, but the Lepow’s 1920×1080 resolution is perfectly adequate for its intended use as a portable companion monitor for travel or small workspaces.

One thing I did notice early in the review process was that the monitor defaults to 30% brightness and doesn’t save changes to the brightness setting or other settings. So even if the computer times out and the monitor goes idle, when you wake it back up, the Lepow screen’s brightness goes back down to 30%.

I also noticed that routing all the audio through the Lepow monitor’s built-in speakers was not a very good experience. Volume levels are low even with the volume setting cranked to the max.

What I like

  • No power adapter needed
  • Portable
  • Pass through power port

What I’d change

  • It would be nice if settings were saved between sessions
  • Volume through the built-in speakers is very weak

Final thoughts

There are 100’s of excellent full-sized monitors on the market but the selection of ultra-portable monitors is limited, especially monitors that only need a USB-C connection to work. No bulky AC adapter needed.

If you don’t mind that the monitor doesn’t save settings like brightness and volume, the Lepow 15.6-inch USB-C portable display has a lot going for it. It has a nice screen, with vivid colors, and crisp text. It’s portable enough to fit in a gear bag along with your laptop and it comes with a magnetic case that doubles as a stand.

Price: $169.99
Where to buy: Amazon
Source: The sample for this review was provided by Lepow.

Filed in categories: Reviews

Tagged: ,

Lepow 15.6-inch USB-C portable display review originally appeared on The Gadgeteer on August 14, 2019 at 9:00 am.

Note: If you are subscribed to this feed through FeedBurner, please switch to our native feed URL http://the-gadgeteer.com/feed/ in order to ensure continuous delivery.

BenQ ZOWIE XL2411P 144Hz 24-inch e-Sports Monitor review

REVIEW – Without a doubt, the two most important components of a good gaming system are the video card and the monitor.  The monitor is what gamers are looking at while playing, and the video card is what renders the games on the monitor.  When I designed my current system, I included a GeForce GTX 1070 Ti, a solid, mid-range video card.  For a monitor, I use a Dell UltraSharp U2715H.  This monitor is a compromise for a gaming system.  On the one hand it’s wonderfully large (27 inches), has great resolution (2560 x 1440), and includes a wealth of ports (including DP, mDP, 2xHDMI, 5xUSB); on the other hand, it has a60 Hz refresh rate and a lethargic 8 ms response time.  It’s a great general-purpose monitor, but it’s not ideal for video gaming, especially for fast-paced, first-person shooter (FPS) games.  This is why I was super excited to get an opportunity to review the BenQ ZOWIE XL2411P gaming monitor.

What is it?

BenQ is a Taiwanese company that sells projectors, monitors, speakers, gaming accessories, and other digital products.  ZOWIE is their line of gaming products, and the XL Series is their premier line of monitors targeted at competitive esports gamers.  The BenQ ZOWIE XL2411P is an entry-level gaming monitor that offers good specifications at a reasonable price point.  It’s targeted at video gamers, especially those who play competitive FPS games like Overwatch, CS: GO, and Rainbow Six Siege.

What’s in the box?

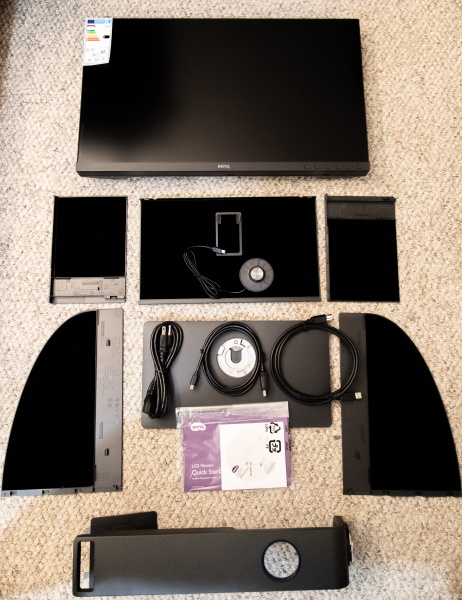
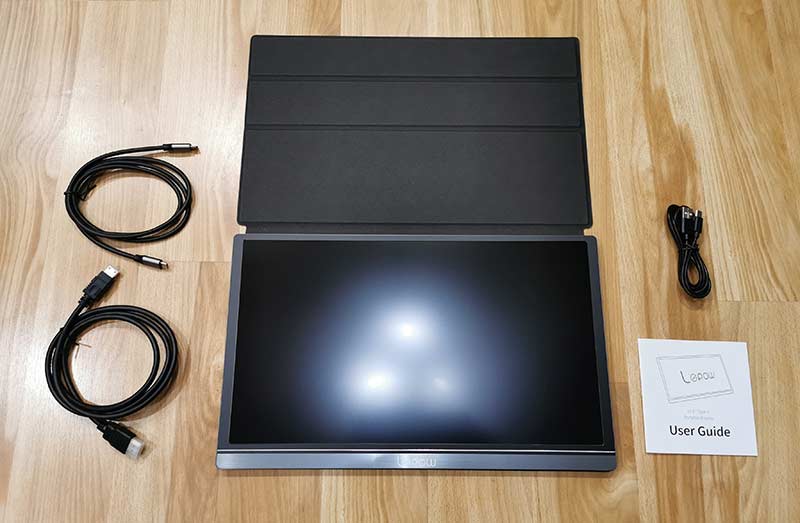
  • The monitor (aka the panel)
  • The base
  • The stand arm
  • Power cord
  • Display port to display port video cable

Surprisingly, there were no manuals, quick start guides, or CD-ROMs included with the monitor.  It’s possible that they were not included because BenQ sent me a refurbished monitor instead of a new one.

Hardware specs

  • Panel Type:  TN
  • Refresh Rate:  144 Hz
  • Response time‎:  1ms (GtG)
  • Resolution:  1920 x 1080
  • Pixel Pitch:  0.276 mm
  • Size:  24 inches
  • Aspect Ratio:  16:9
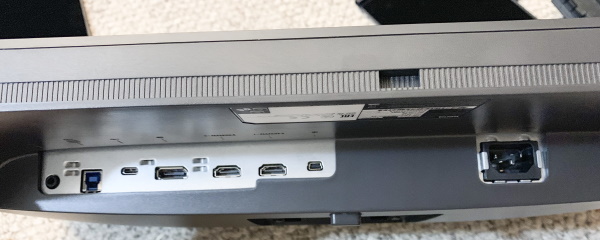
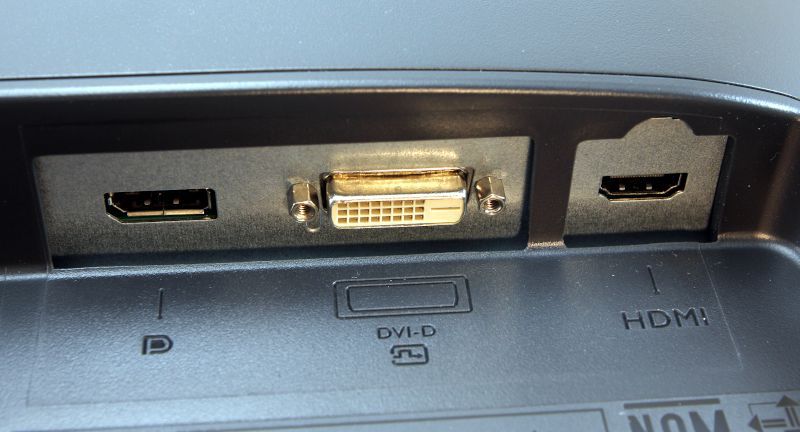
  • Video Ports: DisplayPort, DVI-DL, and HDMI
  • Other Ports:  Audio jack
  • VESA mount:  100 x 100 mm
  • Panel Dimension:  22.5 x 13.5 inches
  • Max/Min Height:  22/17.5 inches
  • Weight:  12.8 pounds

Design and features

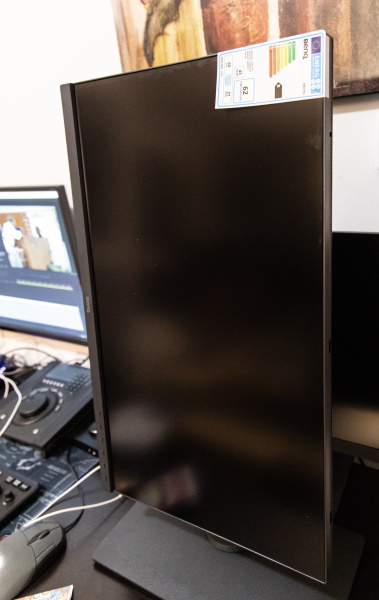
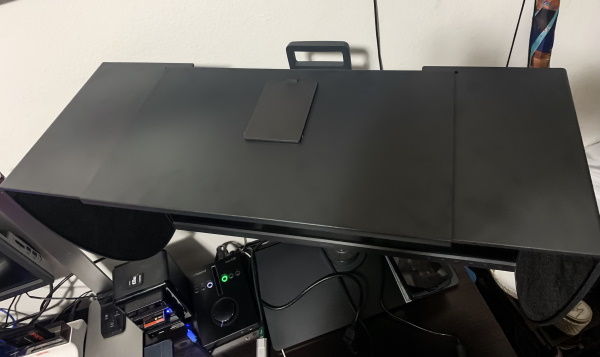
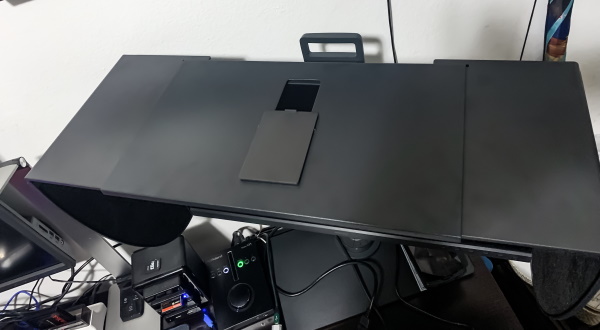
When it comes to consumer products, some companies have a “form over function” design philosophy—I’m looking at you, Apple.  With the XL2411P, BenQ has taken the opposite approach of “function over form.”  It’s made out of black plastic, has a nearly ¾-inch bezel all the way around, and doesn’t have any sort of visual bells or whistles.  You might say it’s rather pedestrian to look at.  But this is totally ok, because BenQ has decided to invest in what’s really important for gaming:  The panel.

Installation and setup

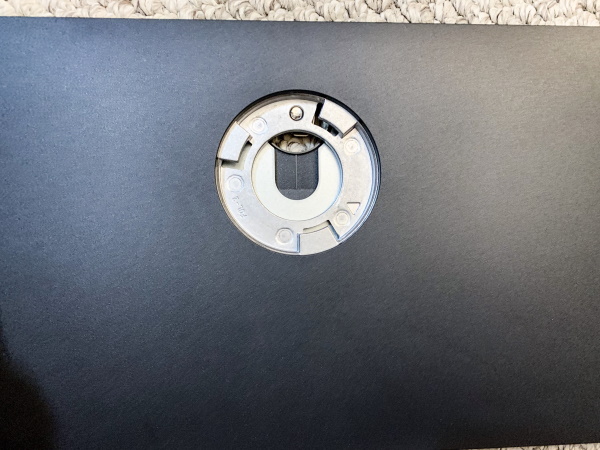
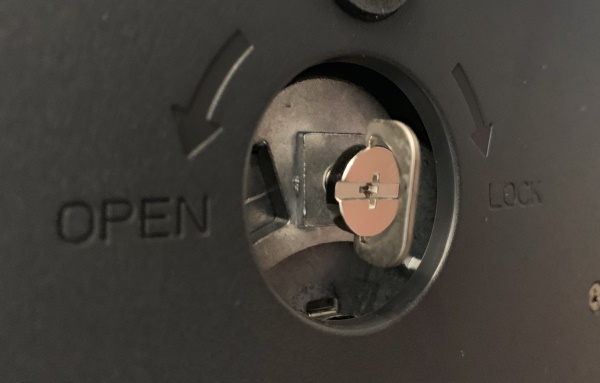
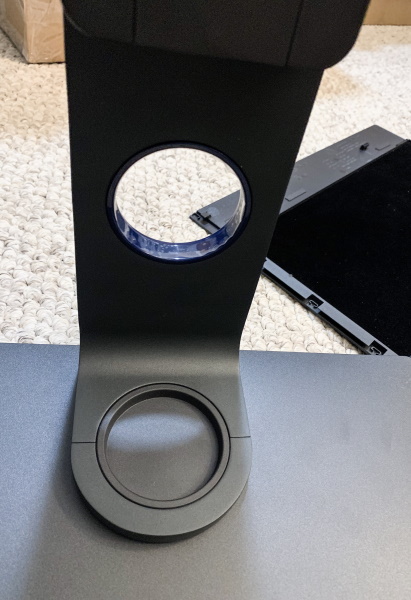
The first step for installation is to connect the arm onto the base.  On the bottom of the base is a thumbscrew.  I inserted the arm into the base and tightened the thumbscrew until it was snug.

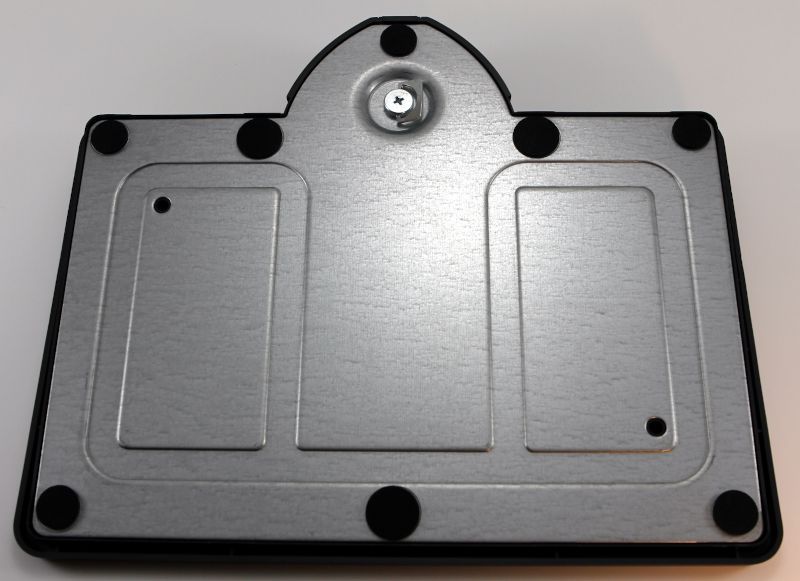
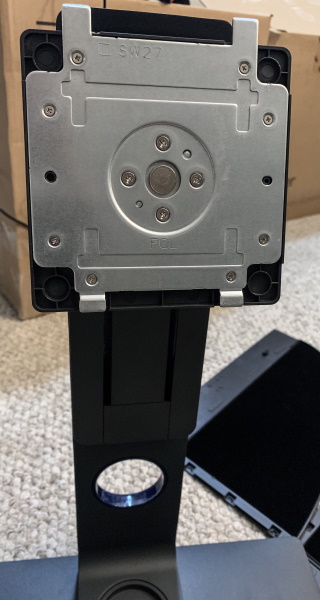
The second step was connecting the panel to the arm, which I found easier to do with the help of a second person, and it requires a medium-sized Phillips screwdriver (not included).  I removed the four screws from the back of the panel, and while my wife held the panel up to the arm, I reinserted the screws.  All of these pieces seem very solid and sturdy; short of giving it a good, hard shove, this monitor’s in no danger of tipping over.  The base has a built-in little tray for storing small items; I promptly put the remote to my speakers in there.

The third step was to insert the power cable and the video cable.  I used the display port cable to connect it to my computer.

On the back of the monitor arm is a pair of small plastic arms used for cable management.  When I tucked the power cable and the video cable into them, however, they warped and looked like they were going to snap off, so I removed the cables and just left this alone.  I prefer the hole-in-arm solution that their XL2430 monitor uses, which is also what my Dell uses.

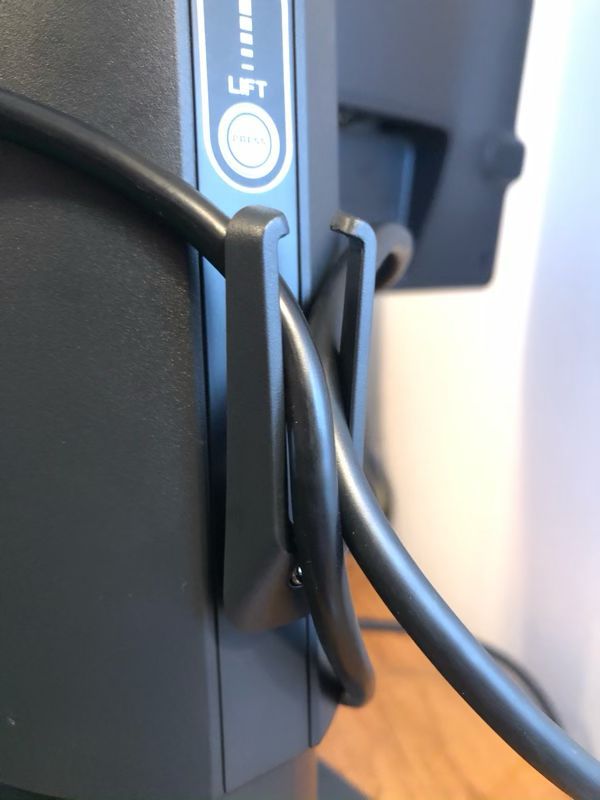
This monitor is quite flexible.  The panel can be raised up 4.5 inches by pressing the height release button on the back of the arm, and it can be freely tilted in any direction up, down, left, or right.  This allowed me to position the monitor in my optimal viewing position.

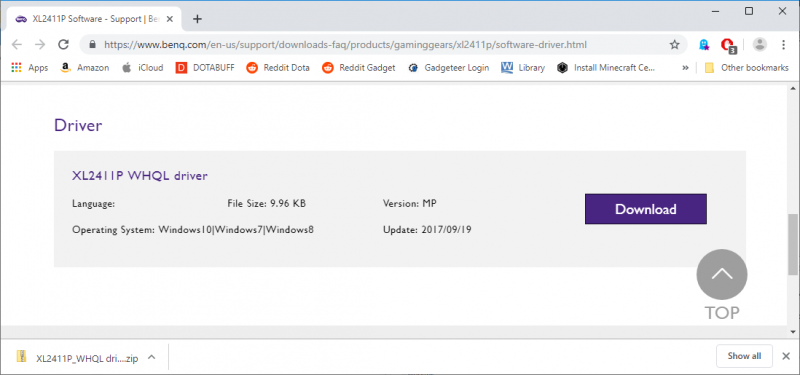
When I started up my computer, Windows 10 used a default driver for the monitor, and that worked, but as it’s a gaming monitor, I thought it would be best to install a specific driver.  I found a driver on BenQ’s website and installed it.

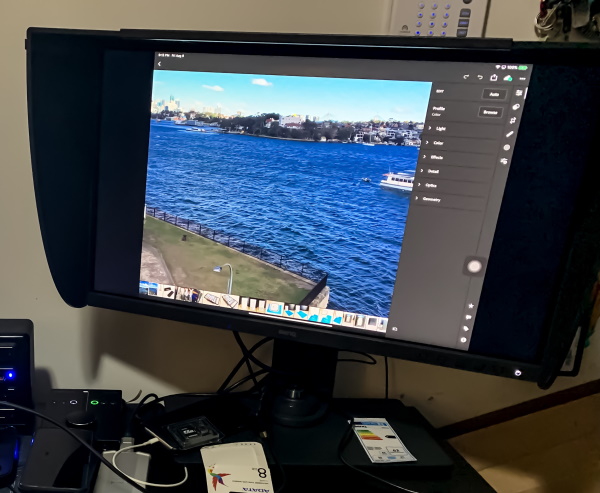
When I turned this monitor on, the first thing I noticed was that the colors were really washed out in comparison to my Dell, and there were two reasons for this.  The first reason is that my Dell is an IPS panel, whereas the XL2411P is a TN panel.  IPS panels are known for their color accuracy, whereas TN panels are known for their fast response time.  There’s also a third type, a VA panel, that takes a middle road.  The BenQ monitor has a much crisper image, especially when objects are moving quickly in a game, but the colors are likely to be less vibrant.

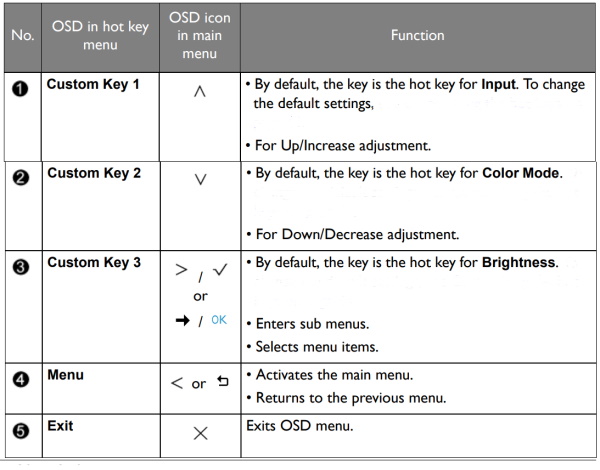
The second reason is that the default settings for the monitor are less than ideal.  The XL2411P has a host of settings that you can use to adjust the display image, including brightness, contrast, color temperature, hue, color vibrance, and sharpness.

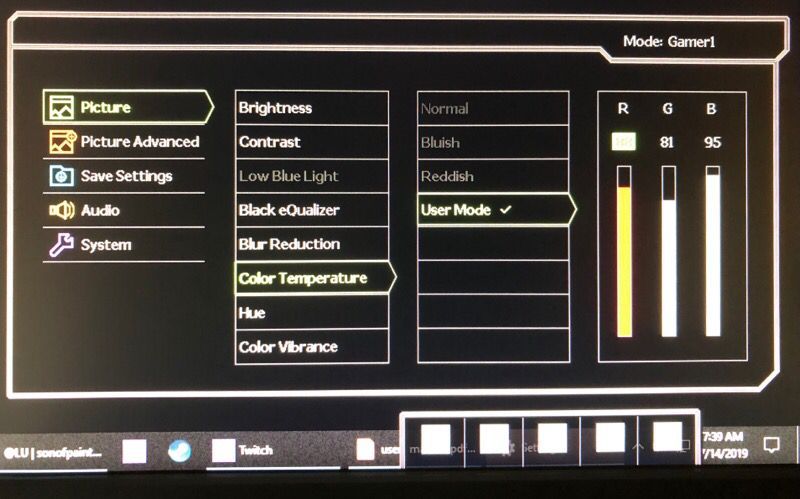
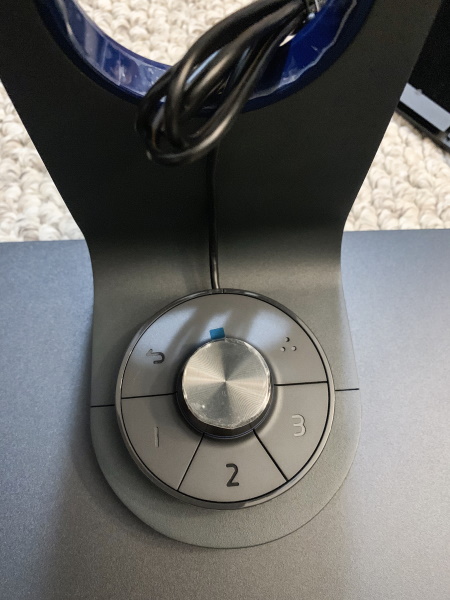
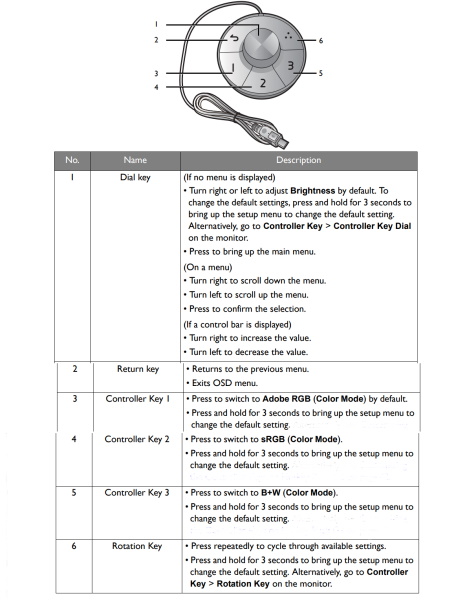
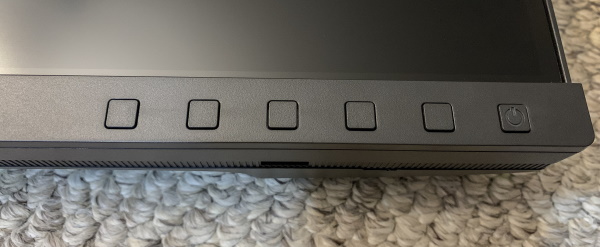
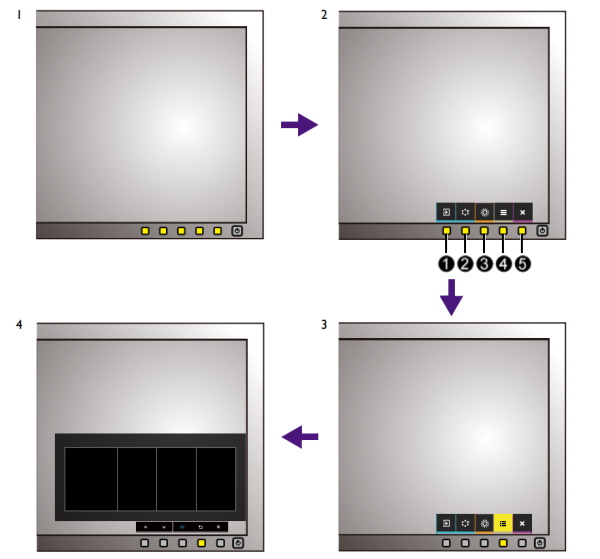
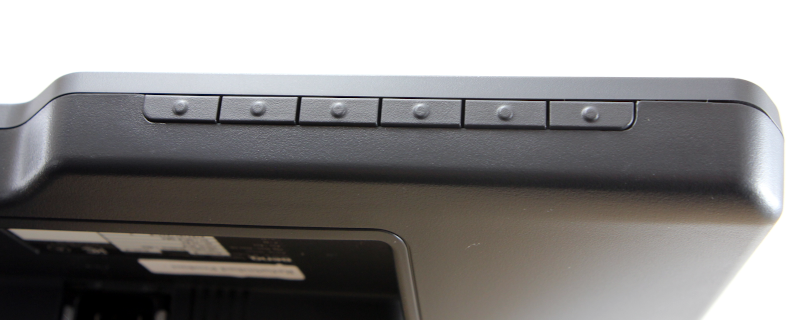
This monitor has 8 pre-defined groups of settings, which it calls picture modes.  You can test any of these, but if none of them suit your fancy, you can choose your own settings and save it in one of three slots.  The modes and settings can be configured with the control keys found on the lower right of the monitor.

With so many choices, it can be a bit intimidating to figure out what the optimal settings should be. The good news is that a host of other people have had this same issue, and a quick search online returns many suggestions.  I tried a few of the suggestions and then began tweaking things until I found a set that worked for me.  If you buy this monitor, you’ll definitely want to spend some time tweaking it for your own tastes.

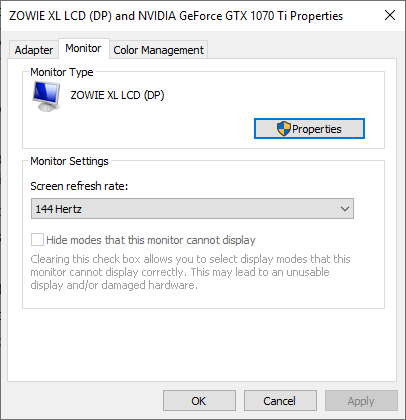
The final step in setting up the monitor was to set the refresh rate.  On Windows 10, I found this setting by going to:

  • Settings
  • System
  • Display tab (on the left)
  • Advanced Display Settings
  • Display Adapter Properties (which opens a new window)
  • Monitor tab

Set the screen refresh rate to 144 Hertz.

If you want to learn more about this monitor, you can download and read the user manual.

Panel Features

The XL2411P has a refresh rate of 144 Hz.  The higher the refresh rate, the more images per second, the smoother the game appears to be.  60 Hz is fine for ordinary activities; 144 Hz is great for gaming, especially for FPSs; and 240 Hz is for those at highest levels of competitive gaming.

This monitor has a response time of 1 ms (GtG).  The grey-to-grey (GtG) response time is a measurement of how long a pixel takes to changes colors.  The lower the value the better, and the higher the refresh rate, the more important it is to have a lower response time.  Low response times prevent ghosting, which is where fast-moving objects on the screen leave a trail behind them as they move across the screen.  Most monitors are under 10 ms; my Dell, for example, has a response time of 8 ms.  Gaming monitors should have 5 ms or less, and a 1 ms response time is good.   To achieve a 1 ms response time, the XL2411P has a feature known as advanced motion acceleration (AMA) that must be enabled using the control keys.  This drives more voltage to the liquid crystals, thus producing images faster.

BenQ’s monitor also has a feature known as the Black eQualizer.  In some games, enemies will tend to hide in dark corners of the map in order to ambush other players.  The Black eQualizer can be used to lighten up these dark spots, making it easier to see other players.  This will slightly decrease overall image quality, but that’s a small price to pay for avoiding ambushes.

It’s Color Vibrance feature makes it possible to tune the colors so that images are more realistic and colors are more vibrant.  This is more of a “personal preference” feature than it is a “make the game easier” feature.  It’s Flicker-Free Technology is an eye strain reducing feature.  Normally LED panels don’t have flickering, but apparently, it can be an issue when using poor cabling or outdated graphics cards, and this can cause eye strain when gaming for a long time.  The XL2411P eliminates this flicker, thus increasing eye health and comfort.
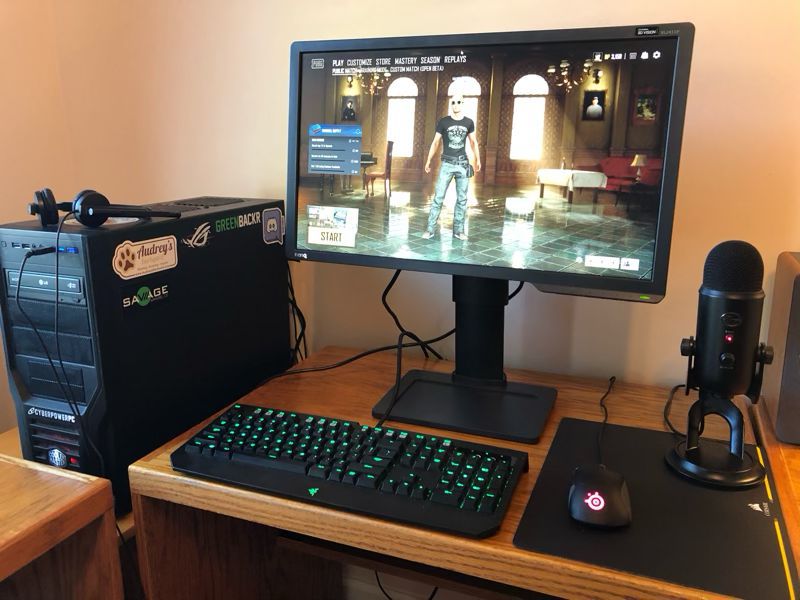
My Testing

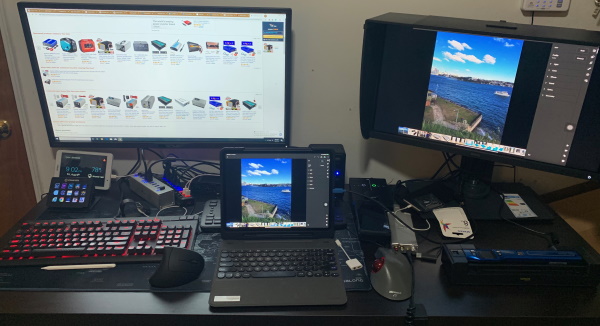
Reading a list of features is fine, but the real test comes when playing games.  I began by testing the monitor with Dota 2, a multiplayer online battle arena (MOBA).  First, I tried various ways to create rapid movement, such as panning back and forth and zipping around with Storm Spirit’s ultimate.  Second, I played many games, switching back and forth between my Dell monitor and the BenQ ZOWIE monitor.  When it comes to movement and refresh rate, I honestly can’t tell any difference between these monitors.  I doubt this due to any lack in the XL2411P; rather, I think this is more about Dota, which is a slower-paced game that doesn’t take advantage of the XL2411P’s capabilities.  I can, however, see a difference in appearance.  Dota is sharper and more vibrant on the Dell, which is probably due to it having an IPS panel and a higher resolution.

I continued testing with Player Unknown’s Battle Grounds (PUBG), a battle royale game, using a first player perspective (FPP), my personal preference.  In this game, I can definitely tell a difference.  When looking around in game, I can visibly see the game refresh faster with XL2411P.  Trees and rocks look crisper, and cars that are driven are clearer.  Now if the monitor could help me shoot straighter, that would be something!

Expert Testing

I don’t play very many FPS games, so I decided to get some expert help from a couple of guys who do.  My son, Jacen, is the President of Liberty University’s Gaming Club and Director of Liberty Esports.  Jacen and his business partner, Jaden, started the College Call of Duty League (CCL) where universities compete against each other regionally and nationally each year.  Jacen (pictured left) plays on Liberty’s Overwatch and Dota teams.  His friend, Trevor Ray (pictured right), is the manager of Liberty’s Dota team, and he plays on Liberty’s Dota and Rainbow Six Siege teams.

Together they tested the ZOWIE monitor on four FPS games, CS:GO, Rainbow Six Siege, Apex Legends, and Overwatch, and the following is a summary of their thoughts.

The Black eQualizer definitely made it easier to spot enemies who were trying to hide in CS:GO and Rainbow. These games are more realistic, and they tend to have dark places on the map.  This feature was not as useful in Apex and Overwatch, as they are already very bright games.

The high refresh rate and low response time were helpful in all the games, but they were most noticeable in Rainbow, Apex, and Overwatch, as these games have a lot of very fast movement.  They saw no trace of ghosting, especially once they set the AMA to the highest setting, “premium.”  Even when they were zoomed in with a sniper rifle and tracking an enemy across the screen, there were no signs of blurring or trails.

Jacen preferred the sturdier base of the XL2411P over the base of his monitor, an MSI Optic G24C.  Trevor liked the UI of the XL2411P as well as its rich set of features and options; he found changing the settings with the control keys to be easier on the BenQ than with his monitor, an AOC G2460P.  Both of these guys, however, echoed my observations that the color on the XL2411P was worse; they spent more time on the BenQ adjusting the settings than they did on their own monitors, though in the end they were happy with their settings.  Here are the settings that Trevor uses, if you need something to get you started:

  • Brightness: 15
  • Contrast: 50
  • Low Blue Light: 0
  • Black eQualizer: 2
  • Blur Reduction: off
  • Color Temp: R:92 G:92 B:97
  • Hue: 50
  • Color Vibrance: 11
  • AMA: Premium
  • Instant Mode: ON
  • Sharpness: 7
  • Everything else:  Default

In addition to gaming, Trevor ran a set of tests designed to detect backlight bleeding.  This is a problem common with TN panels where excess light from behind the panels “bleeds” around the edges, causing a visual distraction. Trevor ran the Eizo Monitor Test, which can highlight backlight bleeding, as well as other problems.  I’m happy to report that he found no sign of this problem on the ZOWIE monitor.

In summary, Jacen and Trevor declared the XL2411P to be a solid monitor that is good for gaming and a great value at its price point, so long as you are willing to spend some extra time adjusting the settings.  If buying a new monitor now, Trevor asserted that he would definitely consider buying the BenQ over his AOC, as it can take advantage of his EVGA GTX 1070 video card.  Jacen, however, gave a more nuanced answer.  If gaming on a laptop—he games on a Razer Blade 14 RZ09—he would probably stick with his MSI, as all the video ports on his MSI are capable of 120 Hz, the max refresh rate that his Razer can push, whereas on the BenQ, only the DP port can do 120 Hz.  If, however, he switched to a desktop with a more capable video card, which he would prefer to do, then yes, he would also consider buying the BenQ over his MSI.

The experts have spoken.

Extra Features

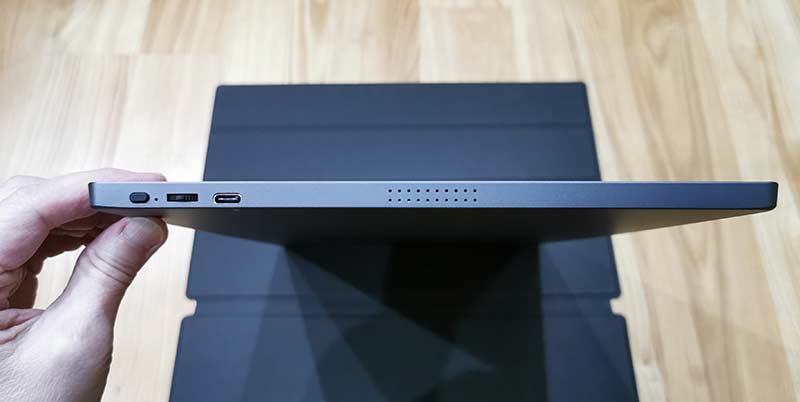
There are no built-in speakers on the XL2411P, but it does have an audio jack on the left side, which works great.

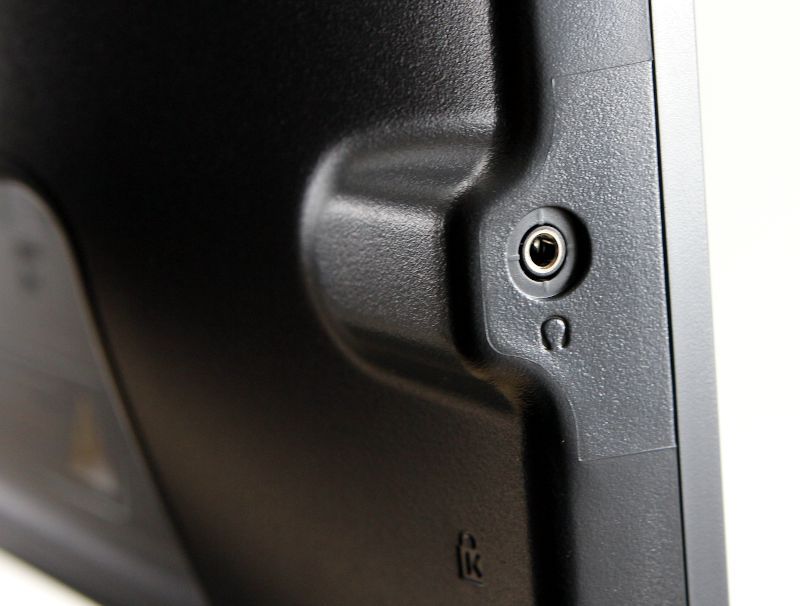
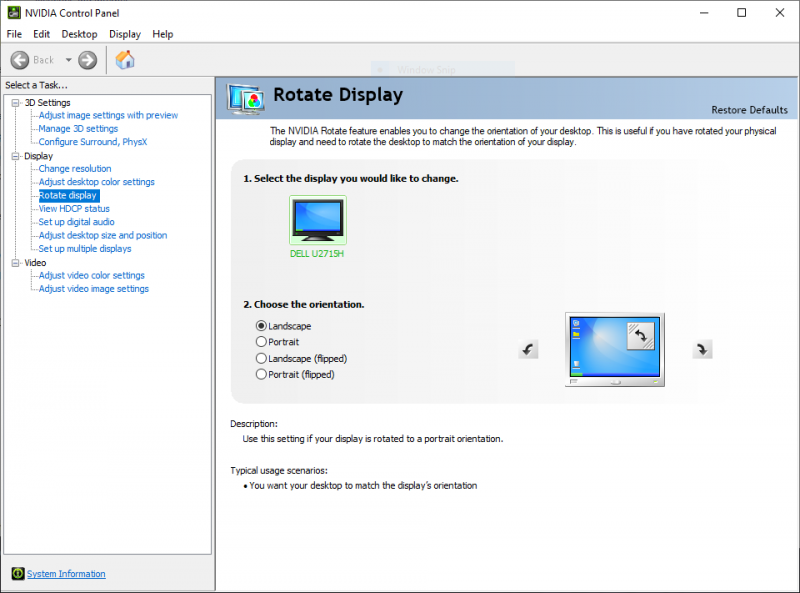
The monitor can also be rotated 90° so that it’s in portrait mode.  On my PC, I used the NVIDIA Control Panel to let Windows know that I wanted to rotate the display.  This feature is typically used with Microsoft Word or other editing tools where it’s advantageous to see an entire page of text at once.  I’m honestly not sure how this would be useful for a gaming monitor, but it’s here if you need it.

The XL2411P also has a Kensington lock slot on the back to help secure the monitor if necessary.

What I like

  • Great set of features, like the Black eQualizer, especially for this price point
  • High refresh rate, low response time
  • Solid base, flexible arm for adjusting the panel

What I’d change

  • Improved default color settings
  • Studier cable management system

Final thoughts

If you’re looking to get into the fast-paced world of competitive FPS video games, or if you want to upgrade your current monitor without breaking the bank, then I think you should take a hard look at the ZOWIE XL2411P monitor.  It may not be the most attractive monitor on the outside, but it’s got it where it counts, a rich set of features that are going to help you take your game to the next level.  Just keep in mind that you will have to spend some extra time configuring this monitor.  I think, however, that you will find it to be worth the time you spend.  Game on!

Price: $199 (new), $187 (refurbished)
Where to buy:  BenQ Direct (new, refurbished) and Amazon
Source: The sample for this review was provided by BenQ.

Filed in categories: Reviews

Tagged: ,

BenQ ZOWIE XL2411P 144Hz 24-inch e-Sports Monitor review originally appeared on The Gadgeteer on August 13, 2019 at 8:00 am.

Note: If you are subscribed to this feed through FeedBurner, please switch to our native feed URL http://the-gadgeteer.com/feed/ in order to ensure continuous delivery.

Get your colors right with Datacolor SpyderX

NEWS – Monitor calibration has long been a staple activity of professional photographers.  Monitors inherently have variations that affect how colors are displayed.  Couple that with changes in ambient light in the room, due to sun angle, cloud cover or electric light type and the colors you see on the monitor can really change.  Without calibrating your monitor, those amazing colors you see when editing your photos could look completely different when your photos are printed.

Calibration tools have typically been cumbersome, slow to use and require some advanced knowledge to get good results.  Datacolor has been a player in the calibration tool market for many years and has offered Spyder calibration tools that help photographers ease that burden.  Their new SpyderX Pro and Elite are the latest versions of that popular tool.

SpyderX offers a one-click wizard and can calibrate your monitor in less than two minutes. For users that require more monitors for their workflow, the software can calibrate multiple monitors, .  Having all your monitors look exactly the same is a huge benefit when dragging windows from monitor to monitor.

SpyderX is available in two versions.  The Pro version is targeted at serious photographers who want to ensure that their image colors match their original vision.  The Elite version has more advanced settings for professional photographers. With its ease of use and speed, SpyderX removes any excuses for not calibrating your monitor and getting images with colors you expect. The Pro version is $169.99 and available from Datacolor or Amazon. The Elite version is $269.99 and available from Datacolor or Amazon.


Filed in categories: News

Tagged: ,

Get your colors right with Datacolor SpyderX originally appeared on The Gadgeteer on February 15, 2019 at 10:00 am.

Note: If you are subscribed to this feed through FeedBurner, please switch to our native feed URL http://the-gadgeteer.com/feed/ in order to ensure continuous delivery.