One of the most useful technologies that has come out the past few years has been Tile, that little Bluetooth wafer you attach to anything you are afraid of misplacing. For me, although I liked the concept of using Tile with something like my keys, the extra item hanging from my keychain just wasn’t worth the extra bulk it brought. My keys have constantly been a source of annoyance because no matter how I placed them in my pocket, they were uncomfortable. Especially with those really long key fobs. So when KeySmart, the expert in minimalist key chain design, combined a killer keychain design with a built-in Tile, well, I was more than excited to try it.
What is it?
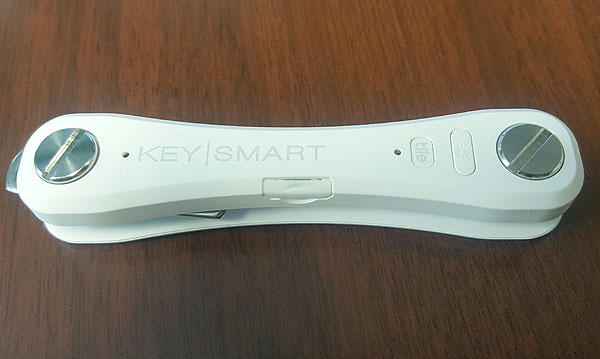
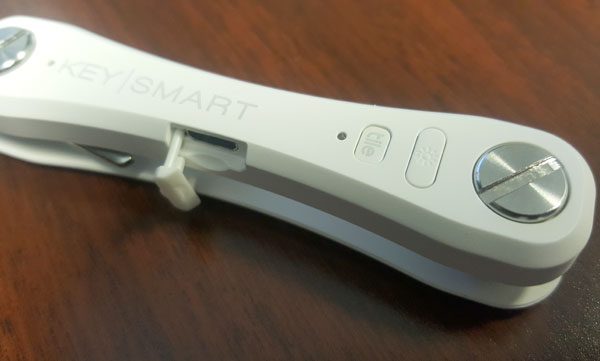
It’s a minimalist keychain that can hold 8-10 keys comfortably. It has a built-in LED flashlight, powered by a rechargeable internal battery, and it has a Tile Bluetooth locator built-in as well.
Hardware specs
The built-in 40 mAh battery provides, according to KeySmart, about 90 days of juice before it needs to be recharged. (I was only able to get about 60 days of use before it died on me.) It is just a tad under 4 inches long, about ¾ inches wide, and with my 6 keys and spacers between them it is about ¾ inches thick. The more keys you have, the thicker and heavier it gets. It also has a micro-USB port for charging.
What’s in the box?
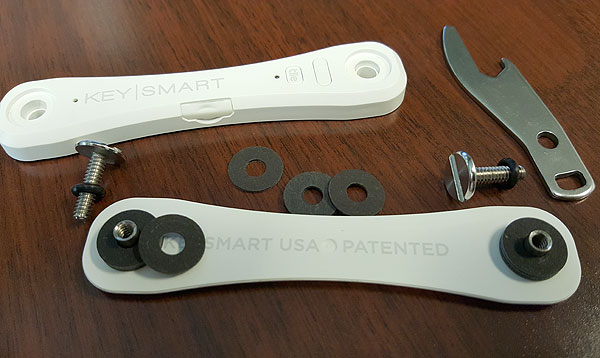
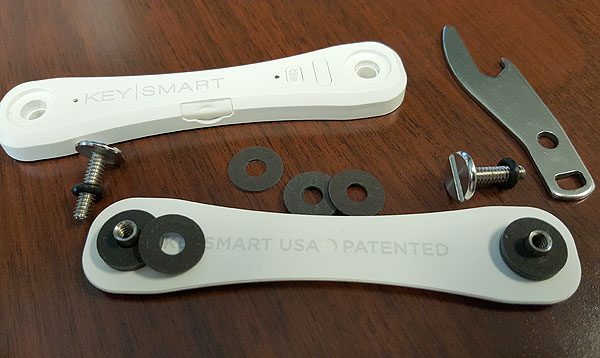
You get a KeySmart keychain, and a USB charging cable. Included is a bottle opener attachment that also provides an eyelet where you can attach your large key fob. You’ll also get a bunch of round separators that you can put between the keys inside the KeySmart.
Design and features
As far as the design of the product goes, I like it. The ends of the KeySmart are slightly wider than the middle, so it is quite easy to hold in your hand. The ends are also rounded, so no sharp edges to poke or prod you. The integration of the LED flashlight button on top is a nice touch. For the keys on that end of the KeySmart I can press the button to illuminate the keyhole in dark situations like at night. Nice.
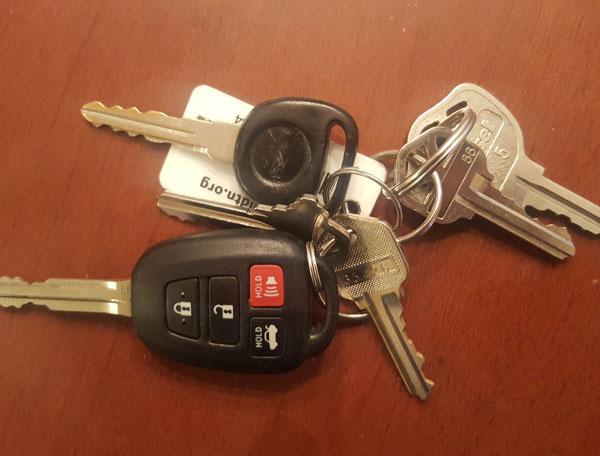
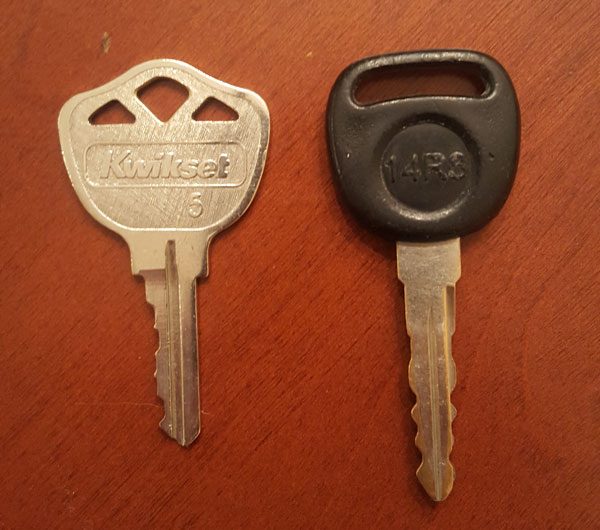
There are some keys that I have found won’t work very well with KeySmart. I have one key that has a really big head on it and it sticks out of the KeySmart quite a bit, so I got a copy made with a smaller head that fits much better. I also have an old key to one of our family cars where the head is encased in a thick black plastic. (Both keys are pictured below). That key is just awkward in the KeySmart, so I chose not to add it and I keep it in a drawer at home.
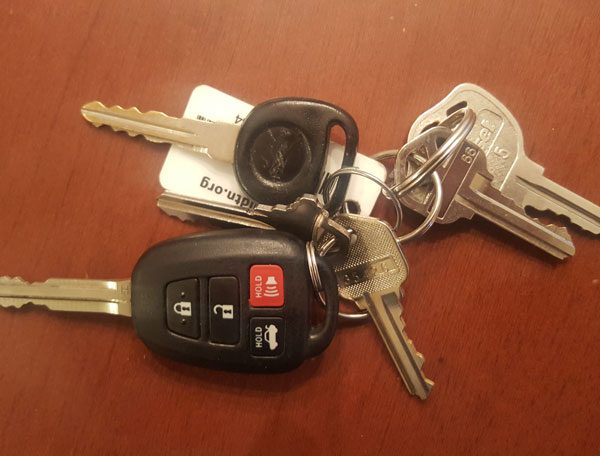
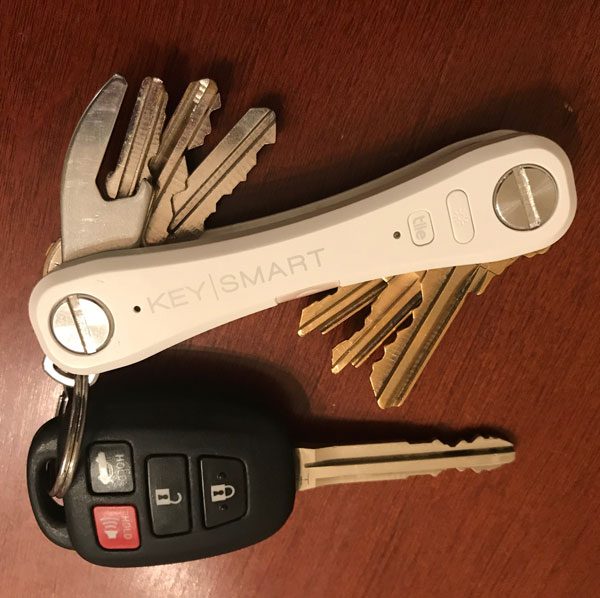
And here is an example of what my keys looked like before and after:
Installation
Getting started with KeySmart is pretty easy. To start using the Tile functionality you download the free Tile app, create an account (if you don’t already have one), attach the KeySmart to your account, and you are ready. As far as getting your keys added, it takes a bit more effort. You use a screwdriver or even a coin to remove the 2 screw posts on the ends of the KeySmart and deatach the 2 halves, add your keys to each end in the order that you desire, put the KeySmart back together, and you are ready to go.
Performance as a keychain
So there are some things I like and don’t like about the KeySmart as far as a keychain. It is an awesome way to organize your keys and keep them in line. I won’t be going back to my old keychain set up, that’s for sure. But I think as a keychain it isn’t perfect. For example, it can be awkward flipping out an individual key from the KeySmart with just one hand. I usually end up flipping out all of the keys and have to rotate back in the keys I don’t want to use. You can adjust the tightness of the screw posts on the ends of the KeySmart, so of course the tighter you have it set the harder it is to flip an individual key out, and of course the looser you have it set the more likely it is that the keys will flop about and negate one of the benefits of the KeySmart which is keeping your keys under control. I suppose I would call this a minor complaint but it is an issue for me because I have to flip out most the keys on a daily basis.
One other issue I have found is that the keys that are on the end of the KeySmart that has my key fob on it are harder to use. Let me try to describe it. My key fob is attached to the bottle opener attachment, which is lined up with the keys on that end of the KeySmart. So when I have to use one of those keys I have to rotate the key fob out of the way, which then causes the can opener to rotate out along with the key I am trying to use. It is just awkward. So I keep my most-used keys on the other end of the KeySmart. Again, this is a little annoyance, and as I said, I won’t stop using the KeySmart just because of this.
Tile features
If you already use any Tile products, you won’t be disappointed because it works great with the KeySmart. Basically, I see 2 common scenarios where the Tile feature is valuable. If you are around your house or office and you can’t find your keys, you simply open the Tile app on your phone and press the button to locate your KeySmart, which will then start playing a little audible tune to help you locate them. And if you can’t find your phone then you press the Tile button on the KeySmart and your phone will start playing a little tune to help you find it, even if your phone is on silent. Really nice.
The other scenario is if you misplace your keys someplace and have no idea where. The Tile app will show you a map of where your keys were last located when they were last near your phone. All you have to do is go back to that vicinity and look for your keys. And when your keys get close to your phone the app will indicate such. An additional Tile feature is that if another Tile user gets close to your KeySmart that has been lost, their Tile app will notify the Tile website that it has been located and will notify you where it is approximately located. Pretty cool.
I should also mention something really important at this point. The only way that this Tile feature works is if you have both Bluetooth and Location Services activated on your phone at all times. The KeySmart connects to your phone via Bluetooth and then Location Services lets the Tile app keep track of where the KeySmart currently is. So if you don’t have those 2 features on at all times, the Tile feature of the KeySmart isn’t really working for you.
One feature I hope that is added to the KeySmart that I currently have in the MYNT Tracker is that when I walk away from KeySmart and get beyond the Bluetooth range I wish my phone would start ringing so that I could simply go back and retrieve my KeySmart instead of realizing later that I left it somewhere and have to go through the motions of finding it using the Tile app. Avoiding that whole scenario up front seems like a great idea.
Positives
- Awesome key organizer
- Built-in flashlight is very handy
- Tile integration works flawlessly
Negatives
- Using more than 10 keys could make it too bulky
- Using your keys with one hand can be awkward
- Some keys will simply be too big or thick for KeySmart
Final thoughts
If you want to organize your keys then this is an excellent solution that will work with most keys. It is clean and easy to carry and you won’t be poked and prodded in your pocket or purse, and the flashlight is pretty handy. The Tile feature works great and just as you would expect, as long as you are willing to keep your Bluetooth and Location Services on at all times and live with the battery hit you will take. I live with the minor annoyances of using the keys with one hand, but they aren’t enough to cause me to give it up. If you often lose your keys are phone, this product is essential for you. For those of you who never lose either of those things, then you’ll still be happy with the KeySmart.
Price: $59.99
Where to buy: KeySmart and Amazon
Source: The sample of this product was provided by KeySmart.