The Omni Group outlines its plans for OmniFocus 3

The Omni Group, lauded purveyor of Mac and iOS productivity tools, recently rolled out their 2018 Roadmap, detailing plans and updates for several of their applications — particularly OmniFocus 3.

I’ve been an on-and-off user of OmniFocus for several years, usually dabbling and experimenting for a few weeks with different setups that I’ve seen online, and always going back to a simpler task application. I do like a lot of what OmniFocus does. For me, it’s heavy program that requires a lot of finesse and experience to get the most out of it.

But from their post, it sounds like it’s going to get a bit more approachable.

The next big update of OmniFocus promises to focus on…

  • swapping out contexts for tags (about time)
  • better manual sorting
  • more flexibility with scheduling and notifications
  • an updated design (yay!)
  • Javascript-based automation
  • task collaboration (also yay!)
  • introduction of a web-based app

No mention of when the new version will be available, other than sometime this year, but Omni Group is currently offering TestFlight signups on their website. I’m excited for the update and for what seems like steps toward simplifying their powerful task manager. I’m sure have my eye on it when it launches.

Check out the full details on the Omni Group’s blog.

PhotoLemur v2.2 Spectre photo software review

Back in May, I reviewed the first version of PhotoLemur, a Mac app that lets you computationally enhance photos for better colors, light, skies, and faces.  Well, here in this holiday time of year, the elves have been busily applying their digital hammers and saws to the code and have offered a significant upgrade. I was given an opportunity to test the new program and want to share my findings with you. I started this review working with version 2, but it’s been recently upgraded to 2.2 Spectre, and it’s quite a bit improved!

Note: Photos may be tapped or clicked for a larger image. Images may take some time to load.

What is it?

The first version of PhotoLemur was a one-trick, one-shot, stand-alone deal: Here’s your photo, or here’s your photo with our program applied. Take it or leave it. In version 2.2, they have the same singleness of purpose and application (you can’t select a single area and change just it – it’s still all-or-nothing on the photo itself), but the level of change and enhancement can now be modulated. Also, in addition to stand-alone, there are plug-ins for the two largest photo-editing programs: Adobe LightRoom and Apple Photos.

Design and features

The interface is almost identical: open an image, and you’ll see a partition with your original photo on the left, and the enhanced version on the right. But in the right corner beside the “Export” button, there is a new button with a paintbrush. When you click on this, you are able to view the entire altered photo. There is a slider at the bottom where you can basically choose the amount of processing you want to use. Rather than the 100%, all the way to the right (which was the original version’s only setting), there is now an infinite slider where you can say “For this photo, I only need 40% Lemur, but for this other one, it needs maybe 70% Lemur.” (And, yes, I am officially verbifying a noun, and you can’t stop me! It’s the 21st century, and making up new words is a cottage industry these days.)

I ran a couple dozen photos through PhotoLemur during the first review, mainly from my back-catalog of early digital photos, and there were some really nice changes that were made to these images. For this next version, I decided to up the challenge. I have been using quite nice computational cameras for the last few years: an iPhone 6s Plus and recently an iPhone 8 Plus. In spite of this, there are some photos that need to be “fixed” – the sky is wrong, or the grass is wrong or the skin tones are wrong or whatever. No matter the finesse of the algorithm, the final judgment is always the viewer’s eyeballs. Here are a few representing varying levels of Lemur. Above, a night scene, just as it’s begun to snow. Note the details in the building to the right under the software’s effects, as well as the patterns in the sidewalk where the snow was drifting.

The finish of the process has changed as well. The initial version was pretty cut-and-dried – hit export, choose a filename and location, and your freshly Lemured photo is ready to go, and the program is ready to start on another. Now, there are sharing options for email, online storage, social media, other programs to move the photo to… It’s a whole new world!

If you’re in the plug-in version, it will save to your camera roll. In standalone, you can also add a group of photos and work through them, rather than having to hunt down each one individually.

The second photo was taken with normal room lighting (all digital) of a broken part I had to return. Note the noise created by the bead-blasted finish on the MacBook Pro’s palm rest in the 100% correction.

 Tech Requirements

  • Windows

    • Intel® Core i3 or AMD Athlon® 64 processor; 2 GHz or faster processor
    • 4 GB of RAM (8 GB recommended)
    • 1024 x 768 display (1280×800 recommended)
    • 4 GB of available hard-disk space
    • DirectX 10-capable video adapter
    • Microsoft Windows 7, 8,10 (64-bit)
    • Internet connection and registration are necessary for required software activation, validation of subscriptions, and access to online services.
  • MacOS

    • Multicore Intel processor with 64-bit support*
    • 10.11 (El Capitan), 10.12 (Sierra)
    • 2 GB of RAM (8 GB recommended) 1024 x 768 display
    • 1 GB of Video RAM (VRAM).
    • 4 GB of available hard-disk space
    • Internet connection and registration are necessary for required software activation, validation of subscriptions, and access to online services.

Performance

The photos load fast, and once it is loaded, the changes are all updated instantly. You only have to swipe the dividing line to see before and after or the paintbrush to decide how much effect you’d like.

What I Like

  • Easy interface – two sliders
  • Solid upgrade with great user-oriented enhancements.
  • Much better pricing strategy
  • no confusing tools or masks
  • Integration into existing photo software is amazing!

What could be Improved

  • Limited – full frame editing only
  • No way to know what will be changed or enhanced – it’s a black box

Final thoughts

The bottom line is this: How much do you want to post-process your photos? When I first started in digital photography 20 years ago, I had to run every photo through some sort of software, originally because I knew little about the mechanics of how the process worked and was just shooting things and expecting that to fix my lack of knowledge and preparation, as well as the shortcomings of my beginner-level equipment. Over time, as I started to learn how to adjust settings to prevent some of the things I had to correct post-capture, I was able to edit less, but also to move into less intrusive tools.

Now, with hardware tools at a level where you really don’t have to worry about all those mechanics, the software options have come down to tiny tweaks that you may or may not care about. Many look at a photo and say to themselves, “Yeah, that’s how I remember it.” A few will want to change how those memories are stored. If you’re one that wants to fix certain things in photos “just so,” you may want to consider PhotoLemur. At $30, for me, I’d probably have bought it after trying the free version. Let me show you a photo that sold me, which I took just last spring. Just another day on the Salisbury Plains, right?

At 40% Lemur, the difference in the grass, the sky, the colors of the stones all were amazingly more real.

But at 100% Lemur, it pops your eyes out!

If you’re not one who wants to tweak, it may help with your back-catalog, but then, your current photo software may do more than you will ever use. Know it’s out here, and, if the need presents itself, grab it. You may find you are a tweaker more than you realized. You are, after all, reading a gadget website. ;-).

Price: $29 for one device/$49 for 5 devices
Where to buy: The software is available through the company website.
Source: The sample of this product was provided by PhotoLemur.

Other Gadgeteer posts that you might like…

PhotoBulk 2 image editing software for macOS review

So there you are, staring at that big batch of beautiful images on your desktop that needs to be prepped for publishing and/or distribution. Image editing can be a time-intensive task when done manually, especially if you’re dealing with a lot of content. You could be in for a long night. Enter PhotoBulk 2 for the macOS, an app that enables you to batch process common image editing tasks like resizing, converting formats, optimizing, and renaming. You can even create custom watermarks that include both text and graphics.

How does it work? Will it save you some precious sleep? Let’s go find out!

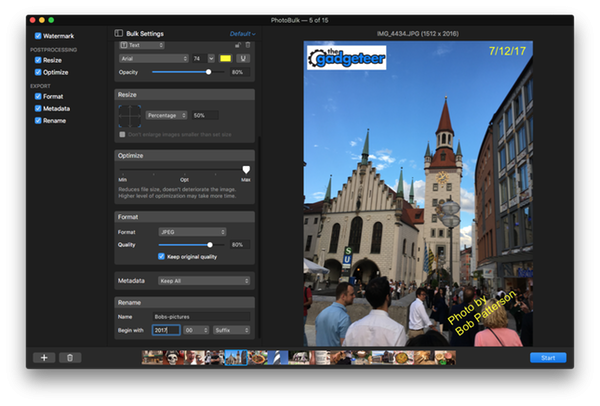
PhotoBulk 2 is the latest update to Eltima Software’s well-received bulk image editor, with a bunch of new enhancements and features. The interface is wonderfully simple. Select the batch of images you want to edit, which will then appear in a carousel at the bottom of the app window. Then you can select from a menu of 6 processing functions to apply to the batch, which can be toggled independently.

Watermarking

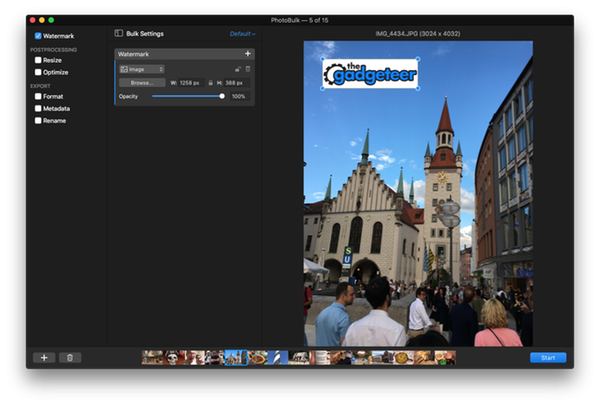
You have four watermark options to choose from, each of which is customizable to your specifications. Check the “Watermark” box to set your options, at which point you can any combination of watermarks you like.

You can import an image (like your logo) which can be resized, rotated, and set to the opacity of your preference.

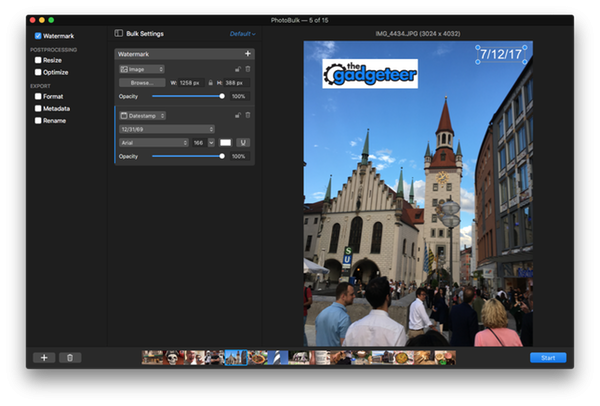
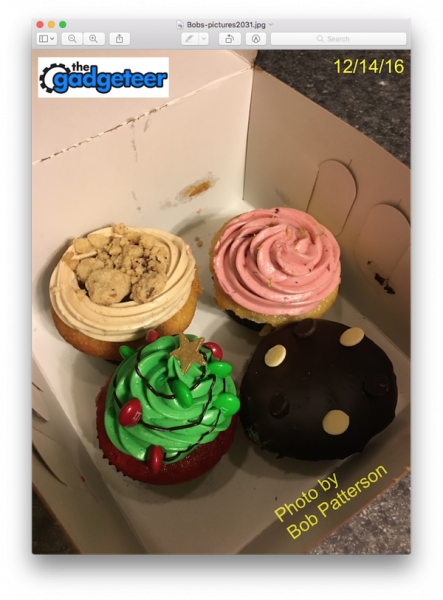
You can also add a date stamp for the image, with complete control over the font, size, color, positioning, and opacity. The date is automatically pulled from the photo metadata. You can also rotate the text placement if desired.

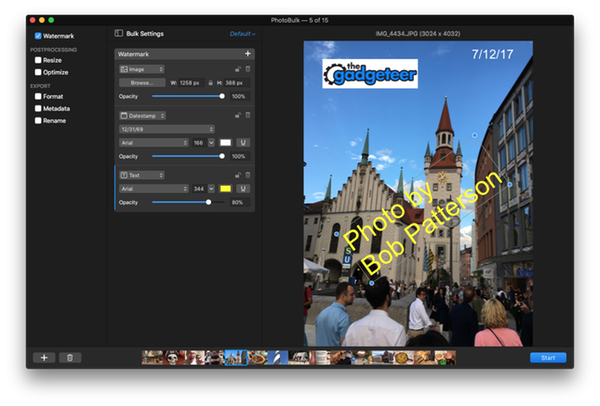
Additional text (like a byline or web site address) can also be added. As with the date stamp, you can customize all aspects of the text presentation (font, size, color, position, opacity, and rotation). Double-click on the text window to type your text, which can include multiple lines if desired.

Finally, there’s a “script” watermark (not shown here) that will automatically wash the formatted text across the entire image in a repeating pattern. This is especially useful if you want to embed a copyright tag, and can be formatted like the other text options (except for rotation).

The chosen options appear in the preview window, and you can toggle through images in the carousel to see the final results.

Post processing options

You have two post-processing options you can toggle: resizing and optimization.

The resizing process has 5 options that enable some pretty sophisticated flexibility. You can resize each image to a fixed height, a fixed width, a specific height & width for a “max size” to resize everything up to the largest possible size specified. Any of these choices also have a toggle that prevents the batch from enlarging images that are smaller than the set size. You can also set a generic “percentage” resizing that applies to every image in the batch.

Optimizing is an automated process that reduces the file size without deterioration. You can set your options on a sliding scale.

As with watermarks, you can use the preview window (and the carousel) to see how the selected options will impact your final images.

Export options

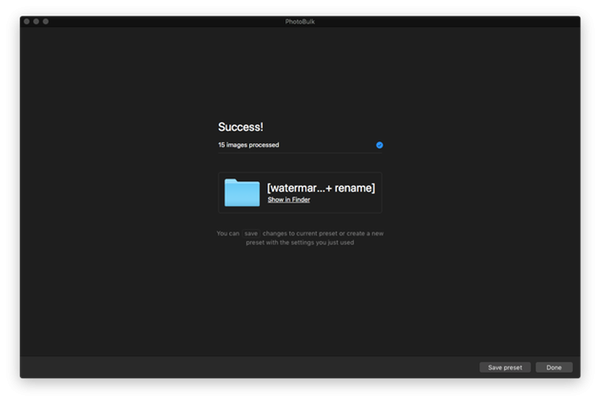
After you’ve set your desired watermark and post-processing options, you can set up the details for the final file exports. Note that PhotoBulk 2 enables you to choose your destination folder (or create a new one), retaining your original images if you want to process them again.

The “format” option allows you to export your final images to JPEG, PNG, GIF, BMP or TIFF format. You can also select the quality level for JPEGs if desired. You can also use the “metadata” option to keep or discard GPS data, camera info data, and copyright/contact info data embedded in the image. You can edit these options, but you can choose to keep or discard the data.

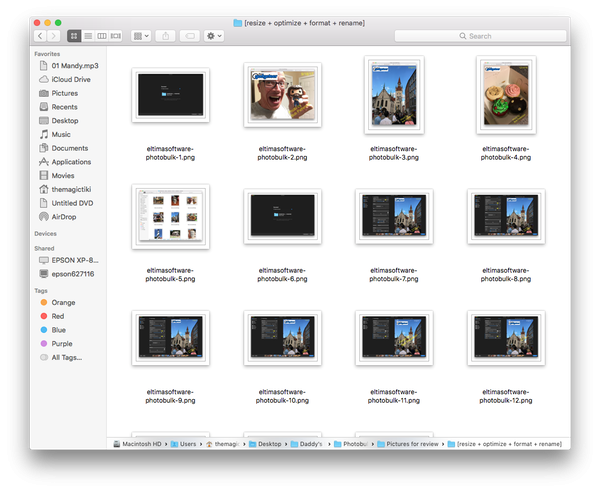
Finally, you can set your renaming options for the images if desired. You can pick a generic image name and append a common prefix or suffix to the file name, including sequential numbering with up to 4 digits (such as 1, 01, 001, or 0001). When I set up the processing for this review, this made it a snap to standardize my file naming. Here’s a screenshot of the output folder. No selecting and renaming for every picture!

Processing and saving your preferences

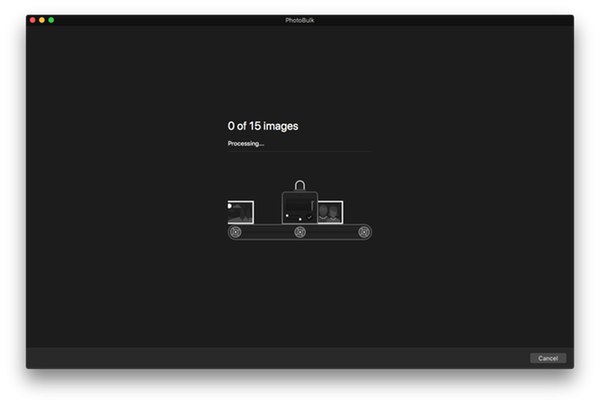
Once you have all of your options set, you press “start” to begin the processing. PhotoBulk 2 lets you choose your destination folder, and off you go!

You have the ability to save your presets for future use, including the watermarking options. We use a standard image sizing and naming convention for our work here at The Gadgeteer, which I now have set for bulk processing of my review photos. I also do illustration work as a hobby, and I can save a different batch setting for managing the images I put up on my website or in social media. I can also change preset options and save them for future processing (like changing copyright dates with the new year). It’s a nice option that saves a bunch of time.

General notes on use

I really like the PhotoBulk 2 package. The user interface is intuitive and easy to use, enabling you to be up and running with a few minutes of orientation. Eltima also does a nice job with tutorials and support to help you along the way if needed. The app is also very fast, significantly faster than the previous edition based on my research.

You should note that the same watermark settings are applied the same way to all photos in the batch, regardless of the image size. It looks like PhotoBulk defaults to a standard xy measurement for positioning from the image edges, and uses the same size specifications for watermark options. I tested three photos here to show this. The first two are the same vertical orientation and size, while the third image is horizontal in orientation and 50% smaller. Check it out:

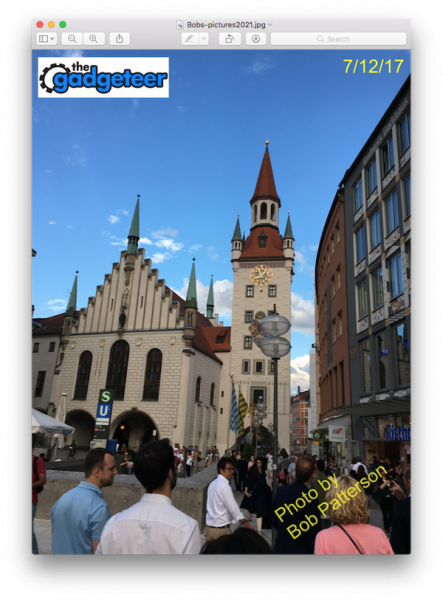
See the difference? If you’re processing a bunch of images that are the same (or close to the same) dimensions, this probably won’t be an issue for you. If you have dramatically different sized images in your collection, however, you may want to set up two different batches. Again, you can check all the images in the preview screen before you run them out.

Finally, please note that this app is designed specifically for use on the Mac desktop. If you’re on a windows device or an iPhone or iPad, you’ll need to look elsewhere for a batch processing solution.

Conclusions and Pricing

If you need a simple batch processing app with robust watermarking, formatting and export features, you can’t go wrong with PhotoBulk 2. With a clean, easy-to-use interface and intuitive functionality, I really like it as a massive time saver. It’s also bargain priced at $9.99. Check it out at the PhotoBulk web site or buy it at the macOS app store!

Source: the sample for this test was provided by Eltima Software. Please visit their site for more information.


Product Information

Price: $9.99
Manufacturer: Eltima Software
Retailer: macOS app store
Pros:
  • Intuitive, easy to use interface
  • Robust processing capabilities
  • Versatile watermarking options
  • Great value for under $10
Cons:
  • Only works on the macOS… no support for iPhone or iPad use

Filed in categories: Reviews

Tagged: ,

PhotoBulk 2 image editing software for macOS review originally appeared on The Gadgeteer on November 28, 2017 at 9:00 am.

Note: If you are subscribed to this feed through FeedBurner, please switch to our native feed URL http://the-gadgeteer.com/feed/ in order to ensure continuous delivery.

Night Shift available now on the Mac desktop

Apple has finally rolled out Night Shift on the newest update to macOS Sierra. Night Shift is a program that gradually removes the blue light of your display to help relieve eye strain and help you sleep better. A similar program, f.lux, has been available cross-platform for a while now, but Apple decided to include a similar software on iOS and now macOS. Check your Mac for update 10.12.4 if you are looking forward to this feature for your desktop.

Filed in categories: Health, Fitness, Sports, News

Tagged: , ,

Night Shift available now on the Mac desktop originally appeared on on April 2, 2017 at 8:59 am.

Note: If you are subscribed to this feed through FeedBurner, please switch to our native feed URL http://the-gadgeteer.com/feed/ in order to ensure continuous delivery.