GameSir G6 Mobile Gaming iPhone Touchroller review

REVIEW – Love mobile gaming but hate the virtual controls? GameSir might have just the solution for you with their G6 iPhone Touchroller (an amalgam of Touchscreen and Controller). Does it score a victory royale or an epic fail? Read on!

What is it?

The GameSir G6 Touchroller is a hybrid game controller developed specifically for mobile games. It combines the advantages of an actual analog controller and touch screen control, so you can use the left controller to move or jump while focusing on the precise aiming on the right touch screen. It is only compatible with iPhone.
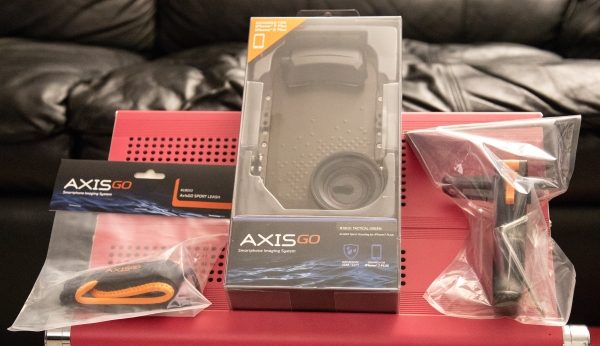
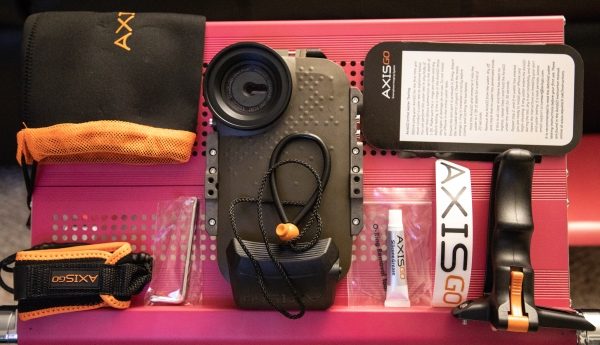
Maybe nabbing that victory royale on iOS will be a bit easier.

What’s in the box?

  • GameSir G6 Mobile Gaming Touchroller
  • Micro-USB Cable
  • User Manual

Hardware specs

  • Wireless Technology: Bluetooth 5.0
  • Working Platforms: iOS 9.0 or later only
  • Compatible Mobile Phone Size: length less than 6.57 in.
  • Battery Capacity: built-in 240mAh rechargeable Lithium battery
  • Working Time: 7080 hours
  • Charging Time: 23 hours
  • Charging Voltage: 3.7V5V
  • Connectivity: Micro-USB (for charging)
  • Up to 3 million keystroke trigger lifespan
The left side has two shoulder buttons, a joystick, 4 buttons configured in a d-pad shape, and two additional buttons.

Design and features

The GameSir G6 Touchroller is a bit of an odd cookie.

Mobile game controllers aren’t a new concept and have been around for a few years in many iterations and sizes. I have a SteelSeries Nimbus that I break out to use with my iPhone every once in a while, offering a wireless control solution very similar to a PlayStation controller. GameSir’s G6 Touchroller tries to make the best of both worlds: external controllers and smart on-screen control schemes.

I’ll elaborate. If you’ve played Fortnite or PUBG or any good modern mobile game, chances are you’ve used the default touchscreen control interface. You know. All those little semi-transparent virtual buttons on the top, bottom and sides of the screen.

A lot of the major iOS game releases that rely on virtual controls are smartly positioned so your thumbs, while also holding on to your phone, can easily reach all the buttons necessary to play the game. It’s not a perfect setup, but it works in a pinch because it’s a mobile device, and the developer is doing the best they can.

Now, most games are controlled in the same way, with the left thumb moving your character and the right thumb performing actions like aiming, jumping and firing. So for most virtual controls, the on-screen movement is handled with a virtual joystick. This remains one of the most obnoxious methods of controlling your character… it’s just plain hard to get it right, since there are no physical borders for your thumb sliding around on the screen. It’s easy to move your thumb right off the edge of that virtual space, bringing your character to a halt.

The right thumb doesn’t have much of a problem, though, once it gains the muscle memory of knowing where to tap on the screen to perform an action. In most cases, it’s quite good.

The right side has only one shoulder button.

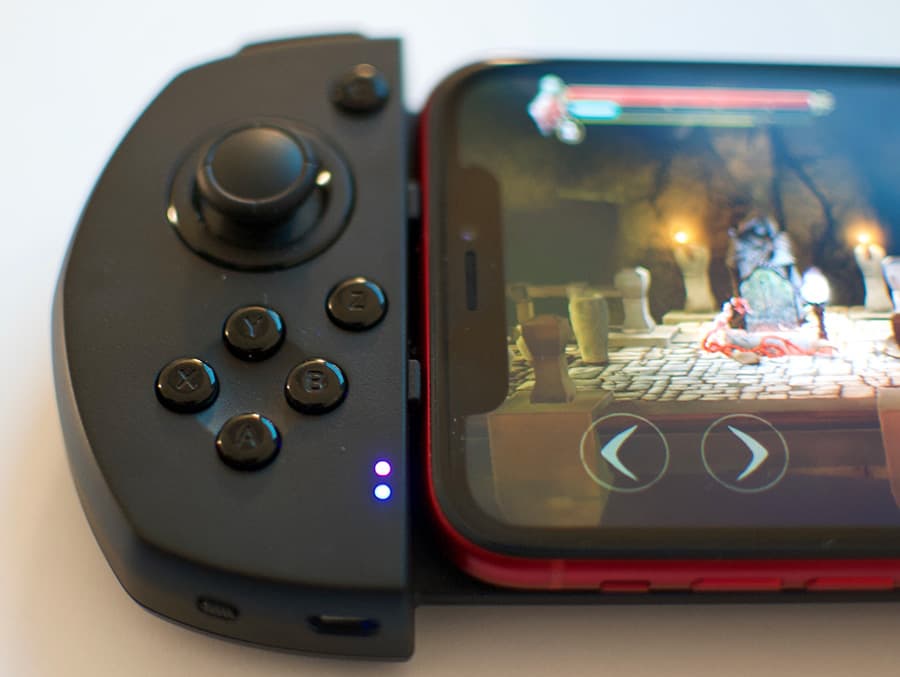
This is exactly the problem the Touchroller attempts to fix. It gives your left thumb the more traditional control setup of a console gaming system, while keeping your right thumb free to use the touch controls that are inherently good in many iOS games.

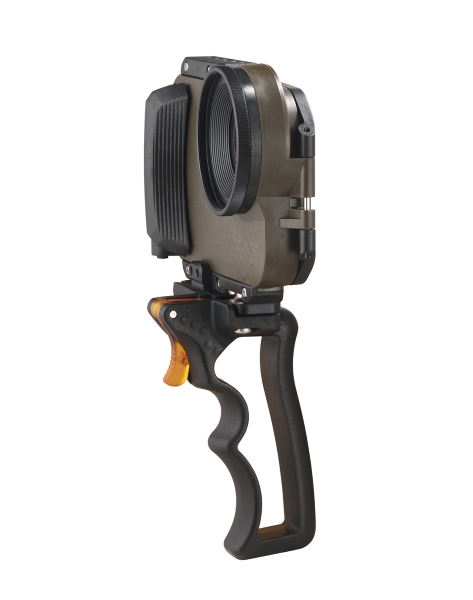
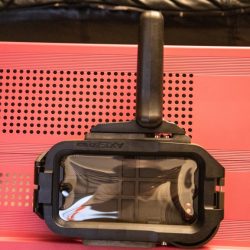
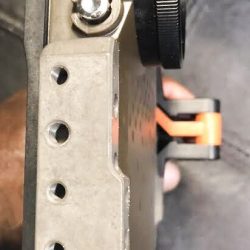
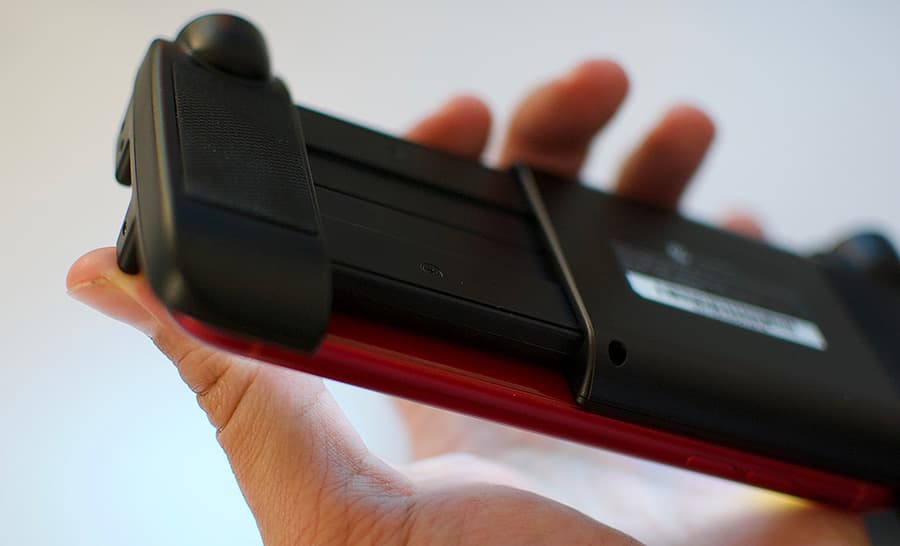
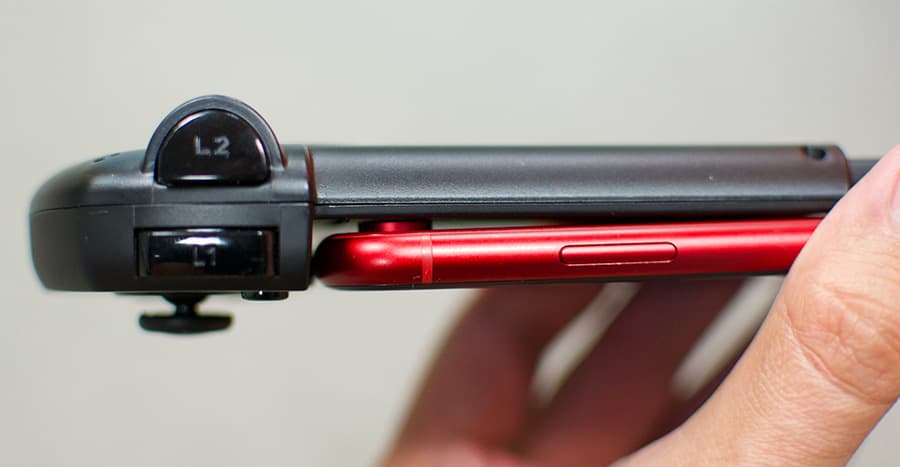
Getting the phone mounted in place is simple. The right side of the Touchroller extends to accommodate even the largest iPhone, the Max model. Just extend the side and slide your phone. There is a strong spring and grippy pads that keep the phone firmly in place.

This bit extends out and automatically springs back to hold the phone tightly in place.

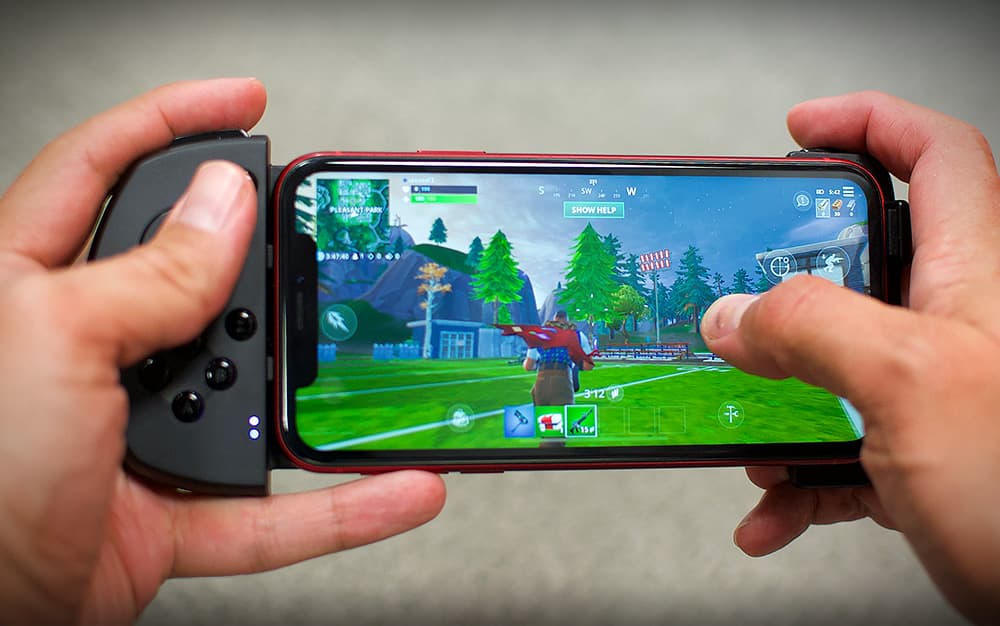
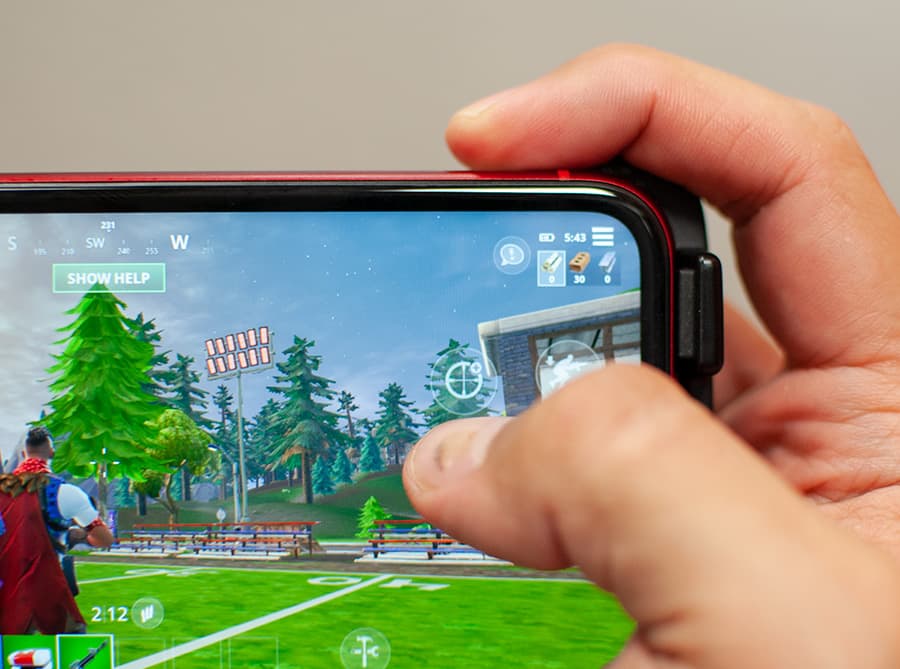
I tested several games with the Touchroller… Fortnite (which I probably don’t have to explain), Grimvalor, a side-scrolling platformer, and Death Road to Canada, which controls sort of like an old-school isometric beat-em-up. All of these games feature virtual joysticks and buttons.

Each of these games recognized the controller immediately upon launch, although it took a lot of trial and error to see what buttons on the controller did what, but once I got used to the layout, I was up and running with much tighter control.

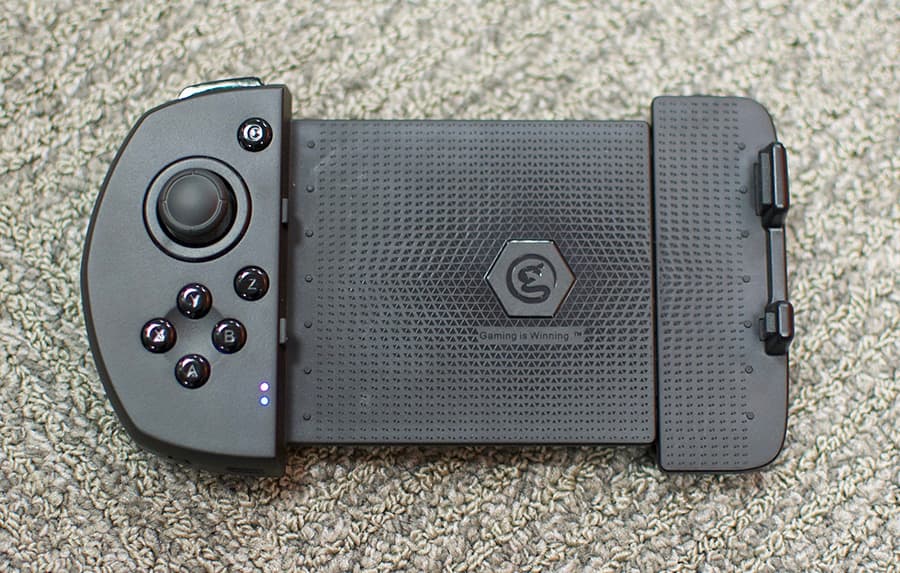
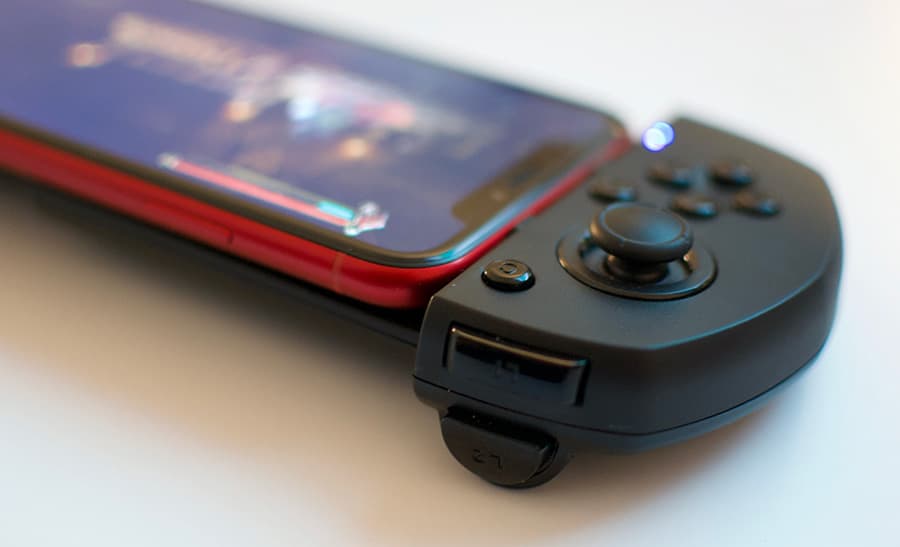
The joystick, probably the best feature, is smooth, and comparable to a gaming console. The buttons have a nice clickiness to them, especially the shoulder buttons, which feel more triggery, having a bit more travel than the face buttons. And there are plenty, provided you can figure out what they all do. They are programmable, as well, but that’s something I’ll address in the Weird Issue section.

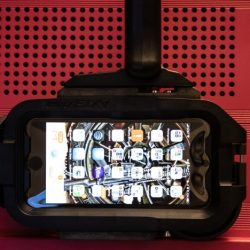
Overall, the Touchroller feels good in my hands. I like that my hands don’t cover up as much of the screen, too. It’s more comfortable to hold for long stretches, and the phone never felt like it was going to pop out.

Let’s get to the oddities…

Some Weird Issues

One problem I ran into was with the initial setup. Pairing the Touchroller via Bluetooth was easy, but there’s an extra step detailed in the tiny instruction booklet that states “Press Y+power buttons simultaneously, the LED mode indicator light will flash pink and then remain lit.” You need to do this after pairing, so it’s almost like it needs to pair twice. Fortunately, you only have to do this once, but it’s a strange very important extra step.

This isn’t quite GameSir’s fault, but since the surface that the phone rests on is flat, the obnoxious camera bump on my XR made it sit a little off. Since the grips on the right side have such a low profile, using the Touchroller works better without a case on your phone.

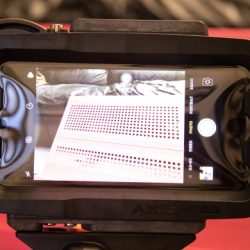
Another oddity with this Touchroller is in the proprietary software. Using the G-Crux app, you are able to download control settings for specific games, or, if one does not exist, you can upload a screenshot into the app and map the controller buttons on top of the virtual controls, programming the physical buttons to correspond with the game’s controls. It’s pretty in-depth, and I imagine that once you get through mapping those buttons, it’ll work fine from that point, but I did not have the patience to try that.

Fortunately, you can search for what I’m assuming are user-made game controls and download them in the app. It’s a lot of setup. The games that I tested just sort of “worked.” I say sort of because even though they controlled well, there were buttons that went unused that could have been mapped to other virtual buttons. I didn’t feel the need to try to mess with that.

One last big caveat. With the launch iOS 13 literally a little over a month away, which promises compatibility with Xbox and PS4 controllers (I know right?!), it’s tough to recommend picking up an iPhone-specific controller if you’ve got a spare game system controller laying around. I’d wait to see how that pans out. Personally, I can’t wait to give that a try, because to me the PS4 controller is bonkers good.

What I like

  • makes controlling most games much easier
  • easier to hold the phone for long stretches

What I’d change

  • Initial setup and customization for specific games can be confusing
  • I found myself missing the right joystick in some FPS games
  • PS4 and Xbox controllers will soon be supported (sorry MFi manufacturers)

Final thoughts

Overall, I do like the G6 Touchroller, mostly because the games that I tested it with seem well-suited for it. Most modern games that use touch controls have the buttons smartly mapped onto the screen, and the addition of a physical stick and shoulder buttons to these touch controls enhances the controls a lot more than I would have thought.

Price: $42.99
Where to buy: GameSir’s website and Amazon
Source: The sample of this product was provided by GameSir.

Filed in categories: Reviews

Tagged: ,

GameSir G6 Mobile Gaming iPhone Touchroller review originally appeared on The Gadgeteer on August 17, 2019 at 11:00 am.

Note: If you are subscribed to this feed through FeedBurner, please switch to our native feed URL http://the-gadgeteer.com/feed/ in order to ensure continuous delivery.

Adonit PhotoGrip Smartphone Camera Grip review

REVIEW – The cameras in smartphones are truly a technological marvel, rivaling most modern digital cameras and pushing the boundaries of what an average user can capture. But grabbing on to a slab of glass isn’t the easiest way to get a decent snap. Enter the Adonit PhotoGrip, a classic take on modern smartphone photography.

What is it?

The Adonit PhotoGrip is a smartphone camera grip that makes single-hand camera operation easier through its clamp-on grip and detachable Bluetooth shutter remote.

Hardware specs

The PhotoGrip can support smartphones within a width range of 62.5mm – 85mm, which I believe encompasses even the widest of phones, such as the Galaxy Note 9 and any plus model of iPhone. The maximum depth of phone it can handle is 10mm. Really, it seems like the only limitation on the model of phone you can use is if it happens to be too narrow to place in the grips, something like an iPhone 5, for instance.

Add some grip on that thin phone.

It does require Bluetooth to operate as there is no direct connection with the phone. The internal battery in the shutter remote is good for 20 hours of continuous use (or 72,000 photos, so you could potentially take 1 photo per second for 20 hours) and charges in just 40 minutes.

What’s in the box?

Comes with everything shown here.
  • camera grip
  • built-in mini (and I do mean mini) stylus
  • mini tripod
  • neck strap
  • carrying pouch
  • user manual
  • USB cable (typical A to micro-B type you have a million of)

Design and Features

The PhotoGrip’s design is actually quite simple. It consists of a solid block of grippy silicone-wrapped plastic attached to a spring-loaded clamp. I tend to get a bit nervous with devices that put a great deal of pressure on the sides of what feels like an impossibly thin device. I know that most phones are pretty resilient, with all the initial backlash of the iPhone + series “bendgate” still fresh in my mind, I try to be as careful as possible with grips and cases that threaten to put extra pressure on my phone.

This seems OK in that regard, it’s just a thought I had every time I popped that grip on my phone.

The entire functionality of the device is built into the detachable shutter button, which is essentially just a tiny Bluetooth remote that sends a “Volume Up” command to the phone, which is, of course, the shutter button on most devices when in camera mode. I did try the button when my phone wasn’t in camera mode and sure enough it simply adjusted the volume up one notch.

The real hero.

When attached to the phone, wielding the grip with one hand feels very much like a compact digital camera. Using two hands for extra stability is recommended, as pushing the shutter button on top of the grip tended to shift the camera just enough to cause some shaking, as it would with any other camera. Two hands, people.

The PhotoGrip is plenty comfortable, though, and it goes a long way toward making a thin sheet of glass and metal feel more like a standard camera.

Just like the simulations!

The detachable shutter control is brilliant, so much so that I’d even taken to using it without the grip when trying to line up a group shot. There have been plenty of times when having a tiny button to snap multiple shots without the whole “set 10-second timer, run back to group, take shot, rinse and repeat” routine would have been great. Not only that, but the battery is rechargeable, and lasts for about 20 hours. So nice.

The PhotoGrip also has a standard 1/4” tripod mount on the bottom, which means you can slap your phone on any old tripod you might have laying around.

Aw, cute little tripod.

The mini-tripod is cute, though, and a nice little addition. It can certainly work well enough in most situations.

That stylus, though … 1 3/4” inches of aluminum concealed in the side of the grip … is nigh unusable. Think of a mini-golf score pencil. Now snap that in two. And that’s what you’re working with. Your mileage may vary, but in every instance I used it, the added accuracy of the fine point wasn’t worth the awkwardness that came with it. Still, it’s hard to fault them for including one.

What is this, a tripod for ants?!

I think they included it because of the “markup” functionality in many photo editors. Even in the iOS Photos app, there is a mode to draw/write directly onto photos, although I couldn’t tell you the last time I did this.

A valid use case.

Lastly, Adonit packed in a neck strap that I ended up not using because I couldn’t figure out exactly where it clipped to on the PhotoGrip itself. That’s just as well, I don’t relish the thought of dangling my $800 phone from my neck secured with a tiny spring clip.

What I like

  • remote is tiny and works over long distances
  • grip can be attached to any standard tripod mount
  • adds some stability and standard camera feel

What needs to be improved

  • stylus isn’t much more useful than a finger and potentially easy to lose
  • grip is a bit tough to attach/detach

Final thoughts

Given the high quality of recent smartphone cameras, adding what feels like a standard camera grip onto your phone greatly enhances its stability and control. The detachable shutter is wonderful and adds versatility to the grip’s functionality. It would make a great, and affordable, addition to any mobile photog’s tech bag.

Price: $39.99
Where to buy: You can purchase the PhotoGrip in black or yellow directly from Adonit on their website and Amazon
Source: The sample of this product was provided by Adonit. To find out more and check out their line of mobile accessories, visit their website.

Filed in categories: Reviews

Tagged: ,

Adonit PhotoGrip Smartphone Camera Grip review originally appeared on The Gadgeteer on December 9, 2018 at 10:00 am.

Note: If you are subscribed to this feed through FeedBurner, please switch to our native feed URL http://the-gadgeteer.com/feed/ in order to ensure continuous delivery.

Blackloud Soundot AF1 FM radio earbuds for iOS review

REVIEW – Do you still enjoy listening to FM radio? I listen to it every day on my drive to and from work. But have you ever wanted to listen to FM radio with your smartphone but not using a streaming service like iHeart Radio which uses your data? Then you will be interested in learning more about Blackloud’s Soundot AF1 earbuds for the iPhone or iPad.

What is it?

The Soundot AF1 earbuds from Blackloud look like any other pair of wired earbuds, but there are two notable exceptions. First of all, they have a lightning connector instead of a 3.5mm headphone jack. So right away, you know that these headphones are for iPhones and iPads (USB-C version coming in 2019). The other difference is that you can listen to FM stations using these earbuds and your iOS device, without using any of your data. Kinda…

What’s in the box?

Blackloud Soundot AF1 earbuds
2 extra sets of eartips
Drawstring storage pouch
Quick start guide

Design and features

From all outward appearances, the Soundot earbuds look unremarkable unless you count the snazzy red color of the aluminum housings. The earbuds have an in-line 3-button control for volume adjustments and play/pause operations. The earbuds also have an in-line microphone so you can use them to make and receive calls as well as listening to audio.

The app


To use the Soundot earbuds to listen to FM radio, you have to install the Soundot app and you’ll have to log in to the app using your existing Google, Twitter, or Facebook account, or by creating a Soundot account. Then you can plug in the earbuds and you’ll be greeted with a simple interface for tuning FM radio stations.

There’s a tuning dial in the center of the screen that you can use to zero in on a known station, or you can also use the scanning buttons to find stations. At the bottom of the screen, there are 6 presets that you can use for your favorite stations.

The app also features an EQ for fine tuning the sound and a lock screen widget for quick control.

What the app doesn’t feature is RDS (Radio Data System) to display the song title and artist info. That is a feature that is coming soon. Another thing to be aware of is that you have to have a network connection (cellular or WiFi) in order to first set up the app which requires that you sign in either with your existing Google, Facebook, or Twitter account, or you can create an account with an email address.

Then when you do want to use the Soundot when you have no cellular or WiFi connection, you will have to click past the No Network error message, which is a little confusing as it leads you to believe that the product is not going to work without being on the network.

If you can get past these caveats, the FM radio sound quality is decent, but that all depends on how strong the FM stations are in your area. I was able to pull in the biggest stations without any issues.

I can see how an accessory like this one would come in handy during a natural disaster when cellular, and internet connectivity isn’t available, but a mobile device like an iPhone only has so much battery life and in a disaster, electricity is probably the first thing to go. I think a regular battery-powered radio or one with a crank that you can use to generate a few minutes of use without needing batteries would be a better option.

What I like

  • Good sound quality
  • Dongle-less lightning connector earbuds

What needs to be improved

  • Don’t require a login or account
  • Add RDS capability
  • Price is too high

Final thoughts

Some phones (maybe all of them?) have a built-in FM chip, but the carriers don’t allow you to use that chip to listen to FM radio. Why? I’m sure it has to do with money like everything else. The Blackloud Soundot AF1 earbuds give you back the freedom of listening to FM radio on your iOS device as long as it has a lightning connector and you can log in to the internet for the initial setup which for me seems to defeat the point… but if you don’t mind these restrictions, or the price, head over to Blackloud.com and check them out on your own.

Price: $79.89
Where to buy: Blackloud
Source: The sample for this review was provided by Blackloud.

Filed in categories: Reviews

Tagged: , ,

Blackloud Soundot AF1 FM radio earbuds for iOS review originally appeared on The Gadgeteer on October 8, 2018 at 9:00 am.

Note: If you are subscribed to this feed through FeedBurner, please switch to our native feed URL http://the-gadgeteer.com/feed/ in order to ensure continuous delivery.

Kingston DataTraveler Bolt Duo review

REVIEW – Phones and even tablets often serve as the most-used, or even the only, camera that most people have these days.  The cameras on most of these devices take great pictures, so they are a good, convenient method of documenting your daily life.  The problem with relying on a mobile device as your camera is that there isn’t unlimited space to store your pictures plus the apps and other data you need.  There isn’t always an easy method of transferring your photos to another device so that you can delete some images to free up space again.  In the past, I have reviewed a flash drive that allowed you to transfer images from your mobile device to a computer, but that device had some problems.  (It worked great, but it turned out to rely on an app that wasn’t written for it nor supported for it.)  There are no such problems that I encountered when I was reviewing the Kingston DataTraveler Bolt Duo flash drive for Apple mobile devices.  Let’s give it a closer look.

The Kingston DataTraveler Bolt Duo (seen at the top in an image from Kingston, but all others are my own images) is a flash drive with a Lightning connector on one end and a USB 3.1 plug on the other.  It’s Apple® certified, so it’s designed to work with most models of the iPhone and iPad.

Please forgive the dust and lint on the silicone sleeve.  It is a dust magnet!

Hardware specs

  • Connections: 1 Lightning, 1 USB 3.1 Gen 1
  • Dimensions: 1.6″ x 0.48″ x 0.26″ alone; 2.6″ x 0.79″ x 0.43″ in keychain accessory
  • Weight: 0.25 ounces alone; 0.51 ounces in keychain accessory
  • Compatible with:  iPhone 5, iPhone 5s, iPhone 6, iPhone 6+, iPhone, 6s, iPhone SE, iPhone 6s+, iPhone 7, iPhone 7+, iPhone 8, iPhone 8+, iPhone X, iPad (4th generation), iPad Air, iPad Air 2, iPad (2017), iPad Mini, iPad Mini 2, iPad Mini 3, iPad Mini 4, iPad Pro (1st generation), iPad Pro (2nd generation)
  • OS support:  iOS 9.0 and newer
  • Warranty:  2-year warranty with free technical support
  • Capacity:  32GB with storage for up to 8000 photos or two hours of video; 64GB with storage for 16,000 photos or 4 hours video; or 128GB with storage for 32,000 photos and 8 hours of video

Setup

Setup couldn’t be simpler.  You plug the Bolt Duo into your iPhone or iPad and follow the prompt to install the app from Apple’s App Store.

Once it’s installed, you’ll see options and the capacity of your Bolt Duo.  You’ll see that I received the 64GB drive.

The app has three options:

  • Transfer photos or videos to the Bolt drive
  • Capture photos or videos using the Apple device’s camera and microphone directly to the Bolt drive
  • View the contents of the Bolt drive on the Apple device

Each time you plug the Bolt into the iPhone or iPad, you’ll be prompted to allow the app to access the Bolt device.  You’ll also be asked to allow the app to access the device’s camera and/or microphone when you want to capture images or videos directly to the Bolt.

Performance

Of course, I started out by transferring images from my iPad to the Bolt Duo.  It took at least five minutes to transfer the 2000 images and videos I have on my iPad to the flash drive.

You can choose to copy over all photos and videos, only photos, only videos, only things in a Favorites album, or you can select only certain images/videos to transfer.  You can also keep everything on the iPad/iPhone or you can choose to delete them as they copy.  I retained all mine on the iPad.

After the transfer was complete, I used the app to View the contents of the flash drive.  Without looking at each and every one of the 2000 items on my iPad, it seemed that everything was copied to the Bolt.

I used the Capture option to store a photo directly on the Bolt.  After allowing the app to access the camera and mic, taking a picture with the app was as easy as taking a picture directly on the iPad.  There are only three camera modes in the app, though.  You can take a regular photo, a square photo, or a video.  Once the photo was snapped, it showed up on the Bolt in a new album, called Bolt Camera.  There was no appreciable delay in saving the image to the flash drive.

I next plugged the Bolt Duo into my MacBook Pro and checked out the contents of the Bolt using Finder.

You can can see the drive shows up in Finder as KINGSTON.  You’ll also notice there are two folders – one for the images captured directly onto the Bolt and one for my iPad’s images.  When I opened the iPad folder, placeholders were quickly populated for the images, but it was slow actually drawing the images.

I tried copying a picture from my computer to the Bolt, then transferring it to my iPad Pro.  It worked flawlessly.  You use the iPad’s “share” button to save the image to the tablet.

Since there was still a lot of free space on the Bolt drive, I downloaded the app to my iPhone and plugged the drive into my phone.  I was able to copy all my phone images to the Bolt Duo without having to first remove the images from the iPad.  There are now three albums on the Bolt, as you can see from the screen capture from my iPhone.

What I like

  • Small form-factor that can be easily carried with you
  • App is simple and easy to use
  • Quickly backs up images from the Apple device to the Bolt Duo
  • Can skip using the device’s storage and save images or videos directly to the flash drive
  • Didn’t require a driver to use the Bolt on my MacBook Pro

What needs to be improved

  • Nothing

Final thoughts

The Kingston DataTraveler Bolt Duo is a great way to transfer images from a mobile device to your computer so you can free up space on the Apple device – or just as a backup, even if you don’t need to save space on your mobile device.  You can also use the Bolt to transfer pictures back to the mobile device, if needed.  And you can store images and videos directly to the Bolt without using any space on your iPhone or iPad.  The app is simple and easy to use on both iPad and iPhone.  And you can backup both your iPhone and your iPad, or even your family’s devices, to the same Bolt Duo.  It may be perfect for its intended functions.

Price: $44.99 for the 64GB model reviewed here
Where to buy: Kingston or Amazon
Source: The sample of this product was provided by Kingston

Filed in categories: Reviews

Tagged: ,

Kingston DataTraveler Bolt Duo review originally appeared on The Gadgeteer on September 17, 2018 at 9:00 am.

Note: If you are subscribed to this feed through FeedBurner, please switch to our native feed URL http://the-gadgeteer.com/feed/ in order to ensure continuous delivery.

AxisGo iPhone water housing review

REVIEW – As a photographer/videographer, I love capturing many types of footage including seaside videos of the waves crashing against the shore and even some underwater footage when I get the right opportunity. Watertight enclosures for my high-end DSLR cameras are expensive, and the risk of damage to a $5000 plus camera is always on my mind. Since cell phones are now capable of decent video footage, I was intrigued by this water housing that allows you to use your iPhone 7 Plus or 8 Plus to shoot footage and take pictures without the risk of water damage.

What is it?

The AxisGo System is a sealable watertight enclosure for the iPhone 7/8, 7/8 Plus and iPhone X, allowing users of all skill levels to use their compatible smartphone as a professional-grade underwater camera.

What’s in the box

1 x AxisGo System Sport Housing with Standard Lens Port
1 x AxisGo Pistol Grip/Control handle
1 x Silicone Sealant (O-Ring Grease Tube)
1 x Angled Phillips Screwdriver
! x Storage Pouch
1 x Wrist Strap
1 x Lanyard
1 x O-Ring Removal Tool
1 x Instruction Card
1 x AxisGo Sticker

Design and features

The AxisGo iPhone Underwater enclosure is made by AquaTech and is designed to provide an airtight seal around your phone while aligning the camera lens in the correct position allowing you to take photos or shoot videos. The body of the apparatus seems to be constructed of some type of polycarbonate material and aluminum, and the viewing/touch cover is made from a hard-coated polycarbonate membrane that is strong but flexible and it works well for navigating the home screen that is sealed within the AxisGo housing.


On the back of the AxisGo, there is the sealed lens, the attached pistol grip (optional)  with the trigger that allows you to start and stop recording and to take snapshots, the removable lens, and the hinge that allows the back device to open and close. On the front, there is just the viewing /touchscreen.


The pictures below show the iPhone within the case with the screen visible, and with the screen in video mode showing an image while recording.


On one edge of the enclosure, there is an on/off button for power and phone lock functions, and on the other edge buttons for video start/stop and snapshot controls (Also normally used at the volume control buttons). To take pictures and videos, you use the normal camera app that comes with your Android/IOS phone, and the buttons on the sides of the case mirror the buttons on the sides of your phone. For example, with the camera app on the iPhone, once in the app, either one of the volume buttons can be used to take a photo of start and stop video recording. Once you open the app on your phone and choose the desired mode (video/photo), you squeeze the trigger to perform the functions.


The picture on the left also shows the various threaded mounts that are available for attaching accessories. Similar mounts are also available on the opposite side if/when the pistol grip is removed. The picture on the right below shows how the pistol grip trigger engages the button to perform the start/stop video and snapshot functions.


Performance

The ideal test for this type of device would be to go diving with it in 60 to 90 meters of water. Since I was unable to do so, my plan was to attach it to a monopod and submerge it in the ocean at the water’s edge and let the waves that come crashing in have a go at it. I must say the I was quite worried about the possible fate of my iPhone, so the first thing that I did was to follow the instructions and submerge the housing in my bathtub full of water and thrash it about as hard as possible to reveal any possible leaks. The instructions did indicate how to adjust if necessary to fix any leaks, but my test revealed that the housing was perfectly sealed when closed.

Since the leak test was very successful, I felt more confident and headed out to the beach. I am happy to report that as the video below shows, it took a beating and my iPhone remained completely dry. The video is also very clear and the polycarbonate touch screen cover does not affect the operation in any way.

After using the AxisGo housing, I actually really like it. I can see it being a really nice option the next time I go to the Caribbean and go diving near the reefs. If is do use it, I will definitely provide an update. The housing is well made and should provide years of trouble-free use.

What I like

  • The build quality of the enclosure
  • The ability to mount it in various ways via the 1/4-20″ threaded mounts
  • The secure watertight seal that is creates
  • The additional lenses that are available – https://aquatech.net/collections/axisgo-lens-ports
  • The Pistol Grip functionality that allows you to start and stop recording and to take photos

What can be improved

  • For what it is designed to do, I cannot think of anything that would make it better

Final thoughts

If you are an underwater photographer/videographer whether professional or just an enthusiast, the AxisGo iPhone water housing is the perfect solution for you if your smartphone phone is the recording device of your choice. This underwater housing is well built, and the materials used should withstand the elements for many years without rusting or leaking. Even if you want to shoot footage at the water’s edge like I did, and you are concerned about the water and salt. etc damaging your phone, this housing will work well. There are also enough optional accessories like lenses, etc, that make it flexible enough for you to enjoy shooting a variety of underwater footage. From my experience with it, I give it a thumbs up!!

Price: $199.00
Where to buy: Aquatech.net
Source: The sample for this review was provided by Aquatech.

Filed in categories: Reviews

Tagged:

AxisGo iPhone water housing review originally appeared on The Gadgeteer on September 8, 2018 at 9:00 am.

Note: If you are subscribed to this feed through FeedBurner, please switch to our native feed URL http://the-gadgeteer.com/feed/ in order to ensure continuous delivery.