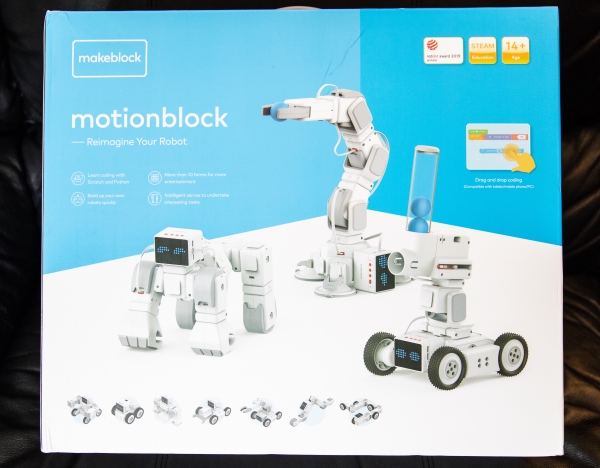
 REVIEW – I have always been a fan of all things robotic, and it seems that my 5-year-old son has the same addiction. Over the past 2 years, I have probably purchased over a dozen robots for him. This time around, I got the chance to test and review the Makeblock Motionblock Robot Kit which is much too advanced for my son, so now daddy gets to have some fun!!
What is it?
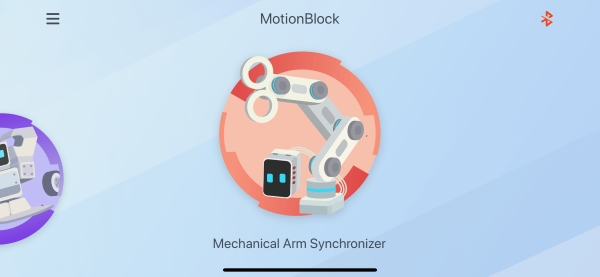
Featuring a modular and programmable design this Motionblock kit makes robot building easy and fun, including the capability to build and design beyond the designs included in the user guide. The parts in the kit include intelligent servos for fluid and flexible movement. You can construct a Mechanical Arm Synchronizer that allows you to have the robot mimic movements and you can use the built-in motion recording function to teach your robot predetermined actions. Makeblock also provides a free app and coding software that adds to the limitless possibilities.
What’s in the box
This kit comes with a main outer box that contains two inner boxes labeled Box 1 and Box 2.
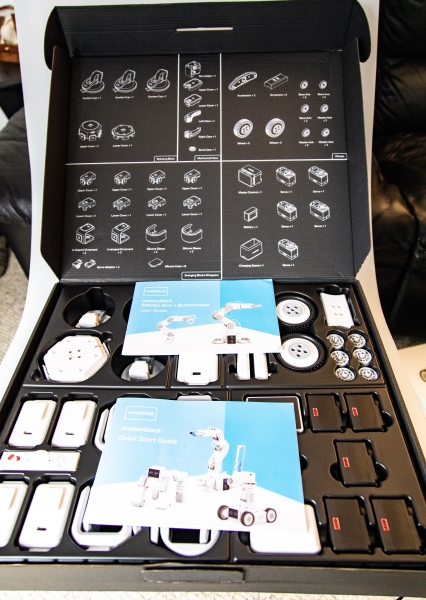
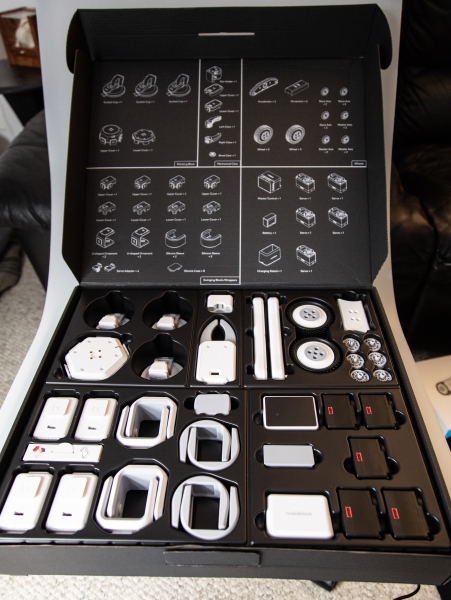
Box 1
1 x User Guide
1 x Quick Start Guide
Rotating Block
3 x Suction Cup
1 x Upper Cover
1 x Lower Cover
Mechanical Claw
1 x Pen Holder
1 x Upper Cover
1 x Lower Cover
1 x Left Claw
1 x Right Claw
1 x Bevel Clever
Wheels
2 x Accelerator
2 x Ornament
6 x Slave Axis
6 x Master Axis
6 x Wheel
Swinging Blocks Wrappers
4 x Upper Cover
4 x Lower Cover
4 x U-Shaped Ornament
4 x Silicone Sleeve
8 x Silicone Case
4 x Servo Adapter
Controls
1 x Master Control
5 x Servo
1 x Battery
1 x Charging Stand
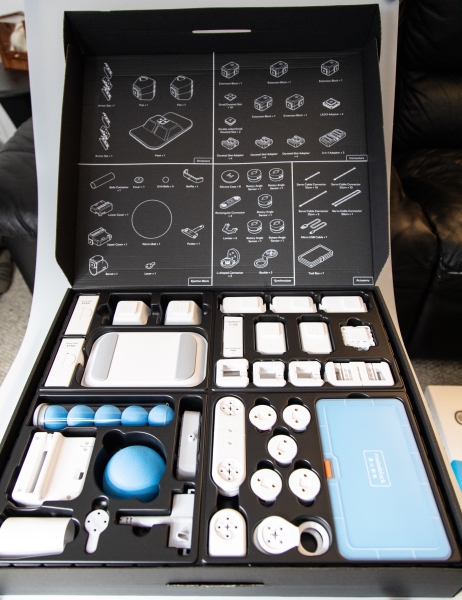
Box 2
Ornament
2 x Armor Set
2 x Fist
1 x Foot
Ejection Block
1 x Balls Container
1 x Cover
5 x EVA Balls
1 x Baffle
1 x Lower Cover
1 x Upper Cover
1 x Barrel
1 x 70MM Ball
1 x Putter
1 x Lever
Connectors
5 x Extension Block
10 x Small Dovetail Slot
2 x Double-sided Small Dovetail Slot
2 x LEGO Adapter
12 x Dovetail Slot Adapter
3 x 2-in-1 Adapter
Synchronizer
8 x Silicone case
5 x Rotary Angle Sensor
3 x Rectangular Connector
3 x Limiter
2 x L-Shaped Connector
2 x Buckle
Accessory
10 x 10cm Servo Cable Connector
10 x 20cm Servo Cable Connector
5 x 25cm Servo Cable Connector
1 x 50cm Servo Cable Connector
1 x Micro USB Cable
1 x Toolbox
Design and features
Specifications
Master Control: Bluetooth module, 12 × 16 LED dot screen, servo expansion interface × 4, micro USB port × 1
Support OS: iOS, Android, Windows, and MAC
Connection: Bluetooth, USB cable
Power: Lithium battery
Working Voltage: 5V
Battery Capacity: 7.4V 1500mAh
Number of Servos: 5
Materials and Parts: ABS+PC
Operating Temperature: 0°C~50°C
Accessories: Micro USB Cable, rubber cable, battery charger, rudder adapter plate
Package Dimension: 476 × 156 × 410 mm
The Makeblock Motionblock Robot Kit comes with two main boxes that make up the entire kit, and within those two boxes, there are a large number of parts. This kit is somewhat difficult to describe in detail since you almost have to see it to get a sense of all that can be designed/constructed, from the models in the user guide and also from your imagination. Here are some of the main features:
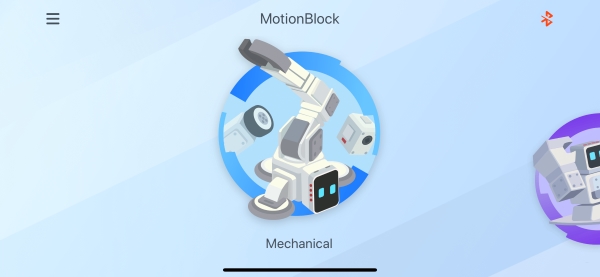
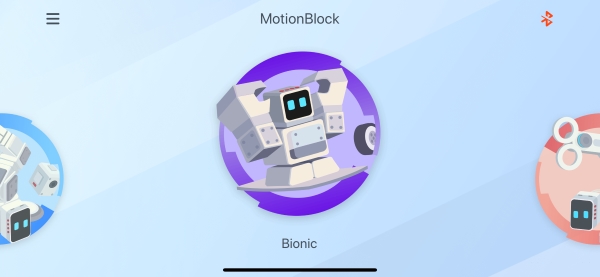
- More Fun with 10+ Forms: Build one of the ten cool preset forms, such as Fighter, Gorilla, Dog, Robotic Arm, etc., or even create whatever you can imagine exploring tons of fun.
- High-Performance Intelligent Servos: The intelligent servos geared in MotionBlock makes it easily imitate behaviors of many animals and perform task high stability of control and strong capacity of bearing.
- Easy to Build and Transform: With dovetail groove design, kids can easily create different robot shapes or change the angles and numbers of the modules as they imagine.
- Control Mode with Synchronizer: Robot can be manually controlled to move and act as intended with Synchronizer without using any software.
- Free App to Control and Code: With Makeblock App and mBlock 5, programming your MotionBlock with Scratch is as simple as stacking building bricks. For the mBlock 5 on PC-end, you also convert your Scratch code to Python with just a simple click on your Devices.
All of the parts are made to fit perfectly with each other, and with the additional coding ability, innovative designs and movements can be created.
Performance
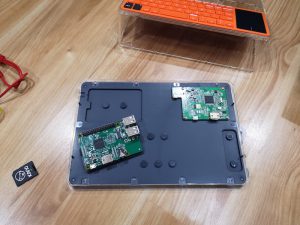
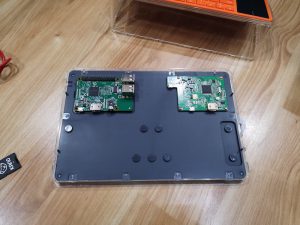
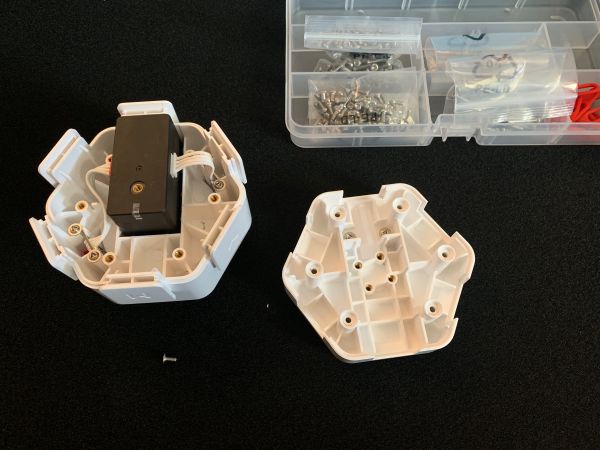
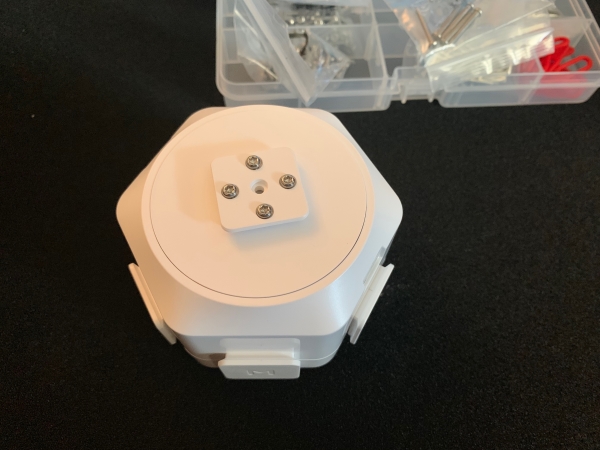
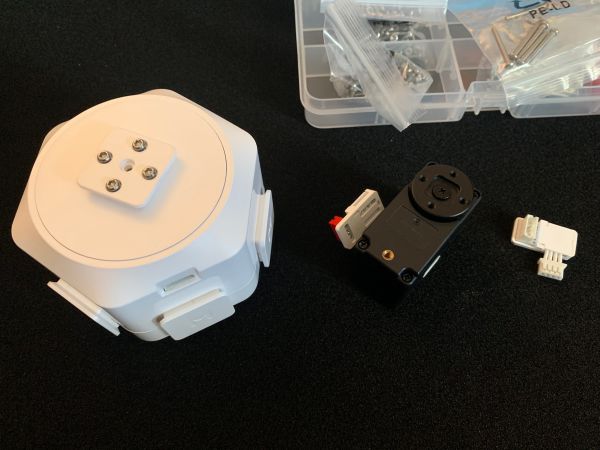
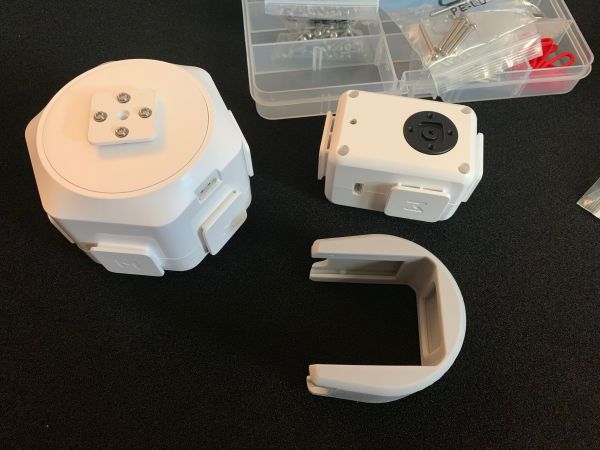
When you first open the boxes that make up this kit the view of the parts is both impressive and intimidating. The only way to approach this is to dive right in.
The first thing that I did was to download the app. I use an iPhone, and I had to search for it via the app store because my scanner had a problem reading the QR Code provided in the manual. I do think that the issue is with the printed QR Code. Once you install the app and click on it, it shows you the various initial models that you can build, and you can just click on whichever one you decide. Here are a few screenshots from the app:
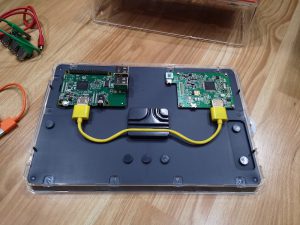
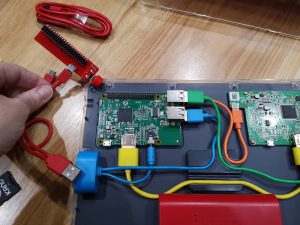
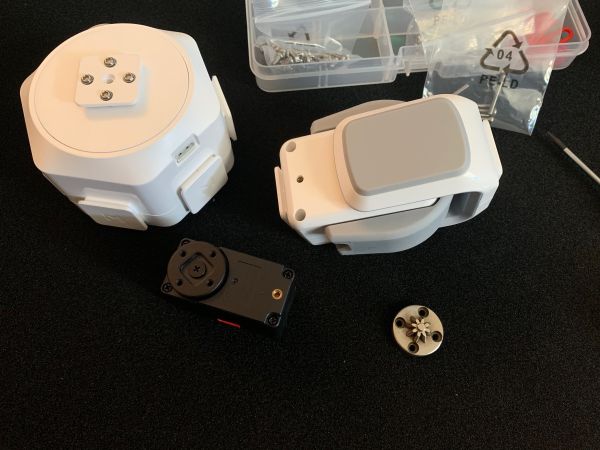
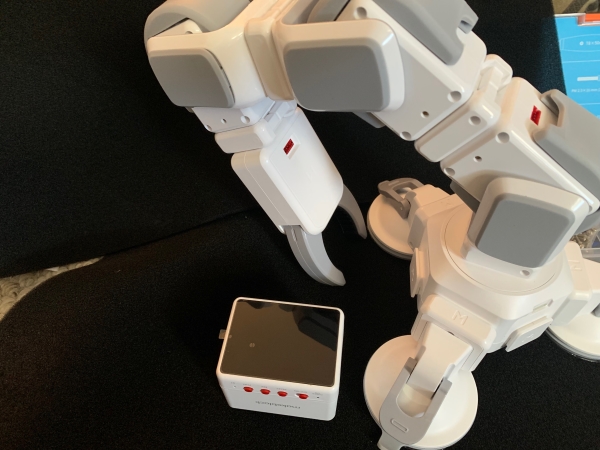
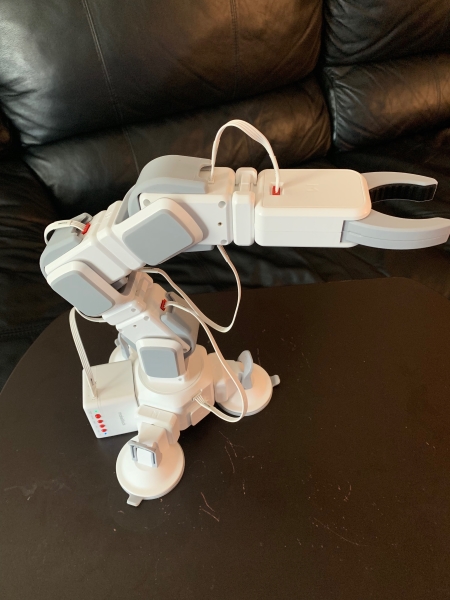
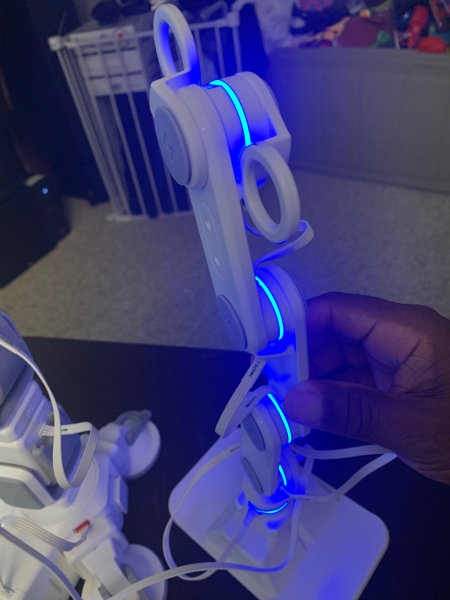
Your selection takes you through detailed steps to build your robot model. The instructions are clear and very easy to follow. There are many steps and building the robot takes some time. I think I took a bit over 2 hours to build the arm. After the final step, the app then guides you through the Bluetooth connections steps and then the operational steps. In my case of building the mechanical robot arm, there were almost 70 steps. Since it is not possible to include all of the steps in this review, I am showing a few photos below from the process:
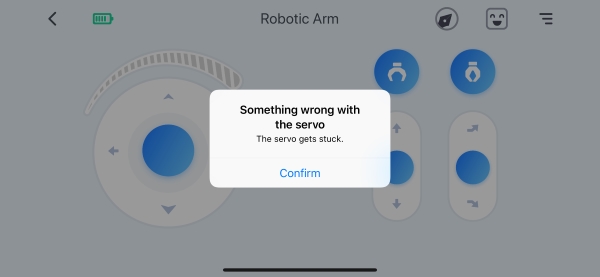
When I used the app to control the arm, it would initially work as designed, but once the arm was bent more than approximately 15 degrees past straight vertical, it would flop to the ground, in my case the lowest position was the table surface, and I would get the following error in the app:
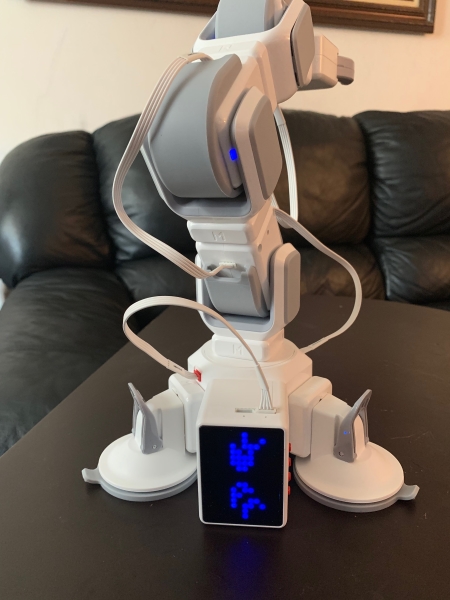
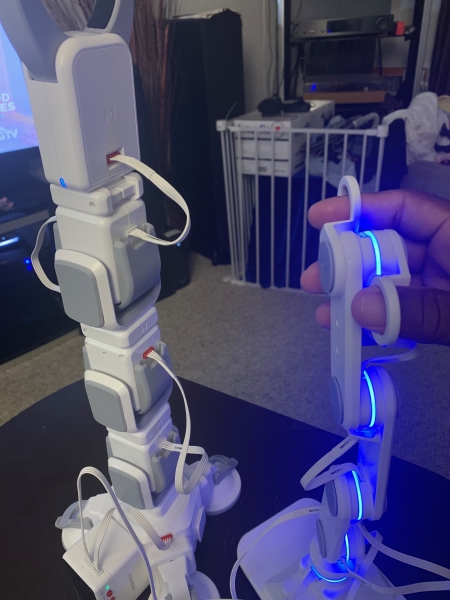
I also built the Mechanical Arm Synchronizer to control the arm and to see some synchronized movements.
Controlling some movements worked well, but as soon as I increased the bending angle, the arm would fall. In my personal opinion, the Servo motors need more power and more resistance once powered so that they can support the weight of the arm as the gravitational force acts on it once the angle changes.
The following is a test video of the Mechanical Arm Synchronizer controlling the robotic arm:
What I like
- The build quality
- The creative options for robotic models
- The functionality concept
What I’d change
- The strength and resistance of the servo motors
Final thoughts
I love most things robotic and while I do think that this is a great kit, my first impression is mixed. I love the concept and my first builds were mostly successful except for controlling the robotic arm once gravity steps in. I am not sure if a firmware upgrade can fix this and if so if one is available. I am also not sure if I am operating it 100% correctly, but then again, this is a test and review from a regular customer like myself. This kit has tons of possibilities and I will be exploring many more build options. I have to say that the overall quality of the parts is good. The only issue I encountered with the quality of the parts was a damaged silicone cover as shown below. The one on the right is the way it is supposed to be.
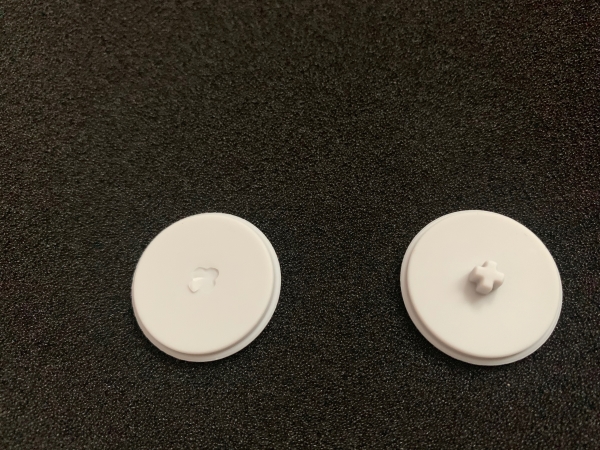 Since this is only a cover, it has no operational impact. Overall, I am enjoying this kit, and looking forward to upgrades from Makeblock.
Price: $499
Where to buy: Makeblock website
Sample: The sample for this review was provided by Makeblock
Filed in categories: Reviews
Tagged: Educational, Kid Gadgets, STEM
Makeblock Motionblock Robot Kit review originally appeared on The Gadgeteer on July 25, 2019 at 9:00 am.
Note: If you are subscribed to this feed through FeedBurner, please switch to our native feed URL http://the-gadgeteer.com/feed/ in order to ensure continuous delivery.