OLFA Professional 18mm Heavy-Duty Aluminum Utility Knife (MXP-AL) review

REVIEW – If you are like me, you are always looking for the utility knife that you just saw yesterday, and then when you find it, the knife blade is dull. Sometimes I end up just hunting down one of the snap-blade knives that I keep in my junk drawer for emergencies and half the time the plastic blade holder is structurally unsound, the latching mechanism doesn’t work, or the blade just isn’t strong enough to do the job at hand. The OLFA Professional MXP-AL Heavy Duty Aluminum Utility Knife can come to your rescue.  It has performed every task I’ve thrown at it in the past month, with one exception (see below).

What is it?

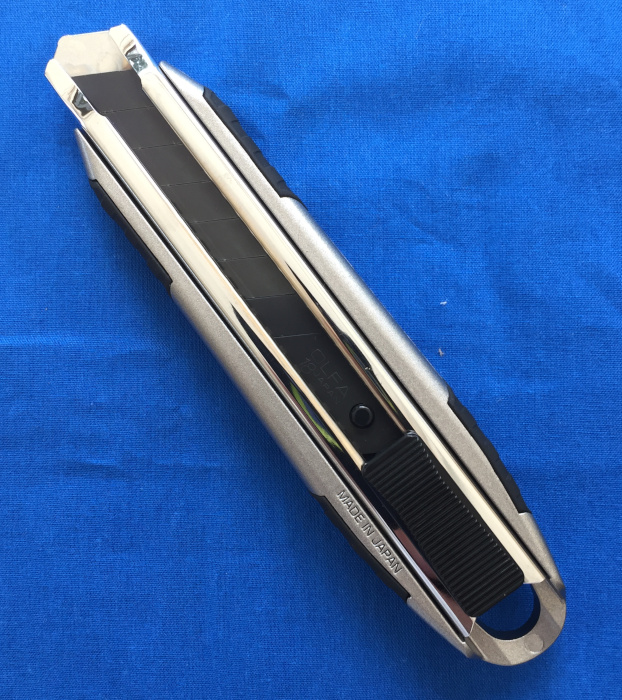
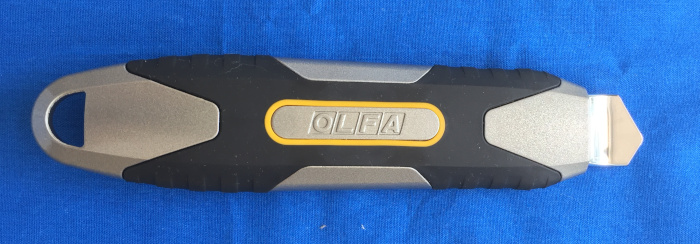
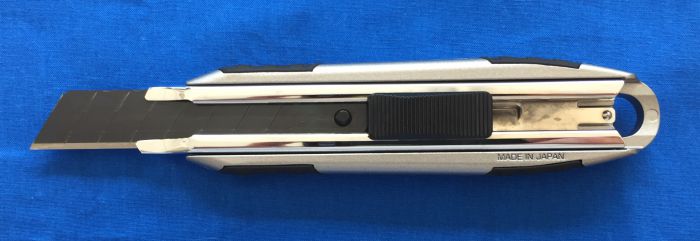
The OLFA Professional MXP-AL Heavy Duty Aluminum Utility Knife is the ultimate evolution of the snap-blade utility knife. It is made from die-cast / machined aluminum with non-slip inserts and uses generously-sized 18mm coated blades that cut smoothly through most materials with minimal friction.

What’s in the box?

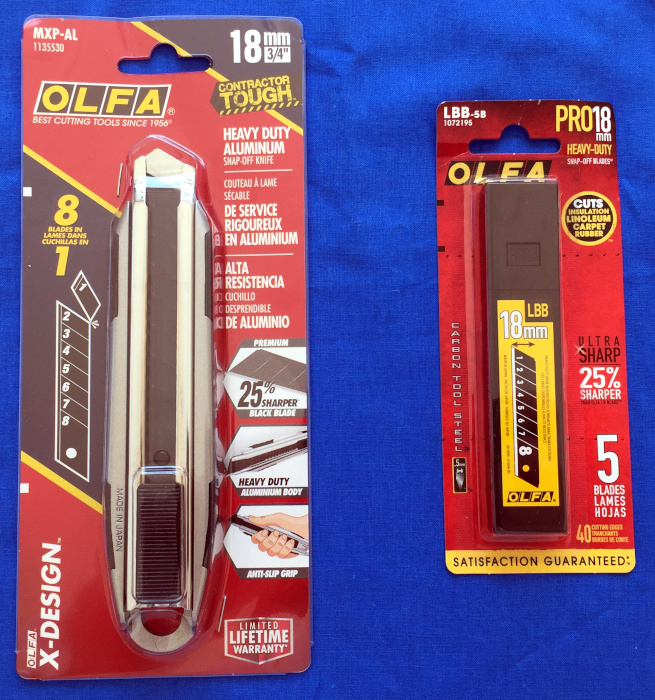
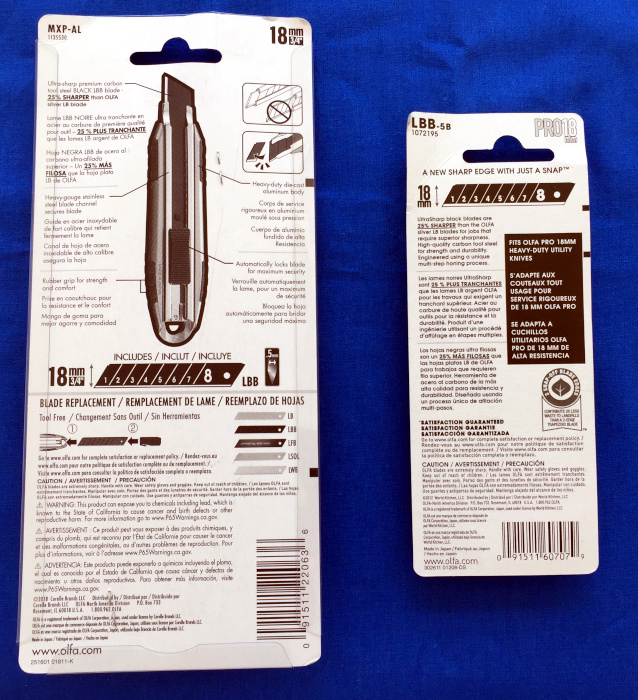
I was sent one OLFA Professional Heavy Duty Aluminum Utility Knife (auto-lock version) and one spare pack (5) heavy-duty blades. The knife is packaged in vacuum-formed sleeve with a cardboard backing. The package is closed with staples. The blades arrived in a plastic box with lid. The box of blades was in a similar sleeve / card package.

Hardware specs

The knife is 165 mm long and 33 mm wide. The main body of the knife is 17 mm thick with the thumb-activated slider that extends / retracts the blade extending another 7 mm above the body. The knife weighs in at a study 123 grams, making it as heavy as many traditional utility knifes that use the single-edge trapezoidal blades.

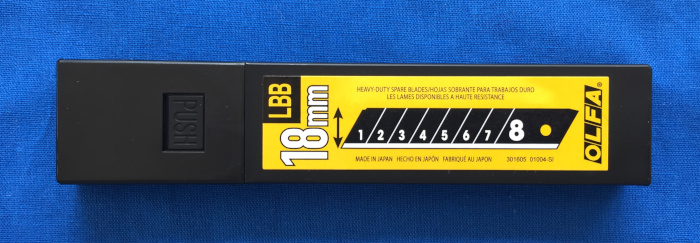
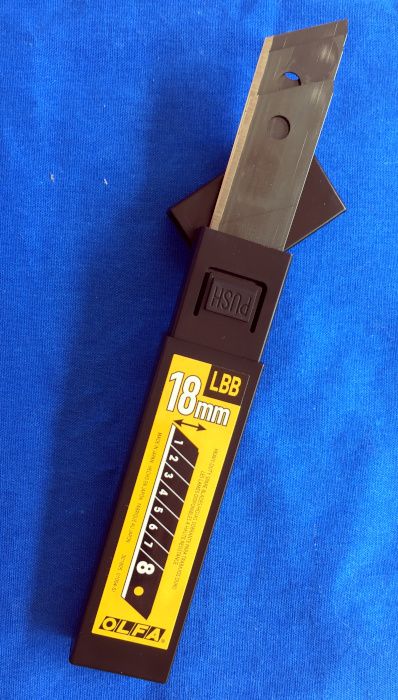
Each of the replaceable blades has 8 sections with the first 7 being removable. Replacement blades come in a medium-duty plastic case that has a good latch and friction holding the lid on.

Both the knife and the blades are manufactured in Japan.

Design and features

Setup

The knife came preloaded with a blade so there was no set up needed, other than removing the knife from the package. However when it is time to reload the knife, it is simply a matter of sliding the thumb lever out the back of the knife and nesting a new blade on the stud and inserting the blade and lever back into the knife.

Performance

I put my test knife through a battery of real-world tests during the past month. I carried it in my day bag as a tool knife, I used it around the house and garage, and I even took it out to summer camp with my scout troop.

During these adventures, I did not test the knife on any of the substrates listed on the packaging (linoleum, carpet, or rubber), however I used the knife for a variety of other activities which included

  • opening boxes by cutting packing tape, fiber-embedded paper tape, fiber-embedded strapping tape, industrial plastic strapping, cutting through multi-layered cardboard
  • cutting industrial plastic pallet wrapping
  • cutting batt insulation
  • stripping Romex wire (not cutting the wire to length, though)
  • cutting vines
  • scraping liquid masking from the corners of window panes
  • sharpening carpenters’ pencils
  • cutting rope and paracord
  • cleaning up rough edges / beveling sawed PVC pipe
  • smoothing / beveling holes drilled through wood
  • cutting dispensing tips on glue and caulk
  • cutting and shaping saddle leather (cutting pieces from a full-thickness shoulder)–this was about as close as I came to cutting linoleum or carpet

The knife performed most of these tasks with ease.

As you might expect, many of these operations took a toll on the first and second exposed blade sections. I ended up using 6 of the 8 sections on the first blade. Cutting leather definitely required a new blade section.

Breaking off the worn section of the blade simply required the precision use of a pair of pliers (my Leatherman Free P2). Like most heavy snap-blade refills, you need to precise when lining up the edge of the pliers, otherwise the worn section may not come off cleanly, and you will need to make a second snap to remove the remainder of the old blade section. This is both a minor annoyance and a testament to the strength of the blades.

The only problems I had were when trying to bevel thick PVC pipes and wood. When beveling the PVC pipe, I felt that the amount of torsional force that I was applying to the blade was probably going to exceed the breaking strength of the score lines on the blade, so I did switch to a traditional single-piece blade utility knife. When beveling wood I hit a knot, and the blade embed itself in the knot and the blade broke off at the score line. This may have been due to the stress I put on the blade when attempting to bevel the PVC weakening the score line, or it may have simply been operator error (I’m going to go with the latter being the main culprit). This type of cutting is not something that snap-blade knives are designed to do, so it was really a torture test for the blade. I was wearing cut-resistant gloves and proper eye protections when performing these more adventurous cuts and the blade that broke did so cleanly and remained embedded in the wood. No catastrophic failure of the blade occurred.

In addition to the standard and heavy-duty single-edge snap blades, a single piece serrated-edge knife refill is available. This blade is designed for cutting foam board and insulation. A second model of this knife is also available with a manual ratcheting lock, rather than the auto-locking thumb lever.

What I like

  • Robust-feeling knife
  • Feels good in your hand — good gripping surfaces
  • Blades are long lasting and snap away cleanly

What I’d change

  • It would be nice to have a dedicated blade snap off tool either on the knife or the blade case

Final thoughts

This OLFA Professional Heavy Duty Utility Knife has outperformed every snap-blade knife that I’ve ever owned. It has also outperformed many of the traditional utility knives that I’ve used over the years. It will take a lot of effort to wear out the blade holder and the blades have lasted longer than any other snap-knife blades that I have used. Just use the knife for the type of cutting that snap-blade knives are intended and don’t try carving wood.

Price: $ 16.49
Where to buy: OFLA Professional US retailers include Amazon (only one with the knives listed as in-stock)FastenalHome Depot, Lowes, Grainger, ULINE, and MSC Industrial Supply
Source: The sample of this product was provided by OLFA.

Filed in categories: Reviews

Tagged: ,

OLFA Professional 18mm Heavy-Duty Aluminum Utility Knife (MXP-AL) review originally appeared on The Gadgeteer on July 13, 2019 at 11:30 am.

Note: If you are subscribed to this feed through FeedBurner, please switch to our native feed URL http://the-gadgeteer.com/feed/ in order to ensure continuous delivery.

Plott Cubit review

REVIEW – Redecorating generally means there will be math to do.  Making sure pictures are hung at the right height is made that much more difficult if there are multiple pieces competing for attention on the same wall.  And if you are anything like me, then you revel in OCD, which means you will end up patching holes in the wall as you move things around to get them in the right spot.  The Cubit from Plott wants to help you solve this problem so you “hang once and done”.  How well does it deliver on this promise?  Read on to find out…

What is it?

The Plott Cubit is self-described as the “Ultimate Home Improvement Tool”.  Pairing up with an augmented reality application on your phone, the Cubit is a connected two-dimensional laser (and analog) measuring tool.

What’s in the box?

  • The Cubit measuring tool
  • A USB charging cable (you will need a wall transformer if you do not have an open USB port somewhere)
  • Some basic instructions

Design and Features

The Cubit has X and Y axis lasers to handle the measuring backed up by an analog roller. Here is the bottom of the device:

The charging port, the Y axis laser and the analog roller balls are on the bottom of the Cubit.  The black wheel on the right side is there as a guide and does not actively measure anything.

The left side of the Cubit has the X axis laser.  As you can see in the first picture above, the Cubit has an LCD screen that shows you the battery state, the level state of the device (to help you move in straight lines – good to have when rolling along the wall, but a traditional level works better when trying to plumb a picture), a unit of measure indicator (so you can tell whether you are using Imperial or Metric measurements), the direction of measurement (up/down/side-to-side) and, of course, the actual measurement.  When placing objects in the AR app, the Cubit will also display a directional arrow that helps you get to the nail placement and other real-world locations referenced in your AR design.  More on how that works in a moment.

The front also has the main button where you can turn the Cubit on or off, clear the current measurements and change the Guide mode.  Non-Guide mode allows you to measure independent of the app and Guide mode helps the app figure out where the device is on the AR surface (aka, your wall).  Communication between the device and the app is through Bluetooth, but you pair with the Cubit in the app and not through your Bluetooth connections.  That seems to indicate to me it is a Bluetooth Low Energy device, but nothing in the instructions specifically say it is.  If you have an older device or one that does not support this standard, this might not work for you.

The screen can be a little difficult to read – it is a black and white LCD with pretty low contrast, so if you have a bright room (or use it outdoors), it is hard to see.  Also, I often found that I had to move my hand around on the device in order to let the lasers do their work, and sometimes that meant covering the display.

Finally, on top of the Cubit there is a “mark” button used to capture a reading – think of it as a shutter button on your camera that captures a point in time for your measurement.

How it works

After you open the box and plug the Cubit in to charge, head to the Google or Apple app store to download the Plott app.  Although there are some measurements you can take using the device without the app, you need the app to fully appreciate the things Cubit can do.  Thankfully Plott does not make you sign up for an account – everything happens locally on your phone.

With the app installed and the Cubit charged, we are ready to start.  Open the app and select Let’s Plott to begin a project – this button in the app essentially creates a virtual folder on your phone to group the items you create.  This is a high-level grouping, though, and not an actual project.  Once the container is created, you can start an actual project.  If you are a professional interior designer, for example, this could correspond to a client with multiple projects clustered inside for that client.  Once you’ve given your container a name, you can start your first project.  You are prompted to select an outdoor project where you can use the Carta (a wheeled companion device from Plott that lets you measure and plan walkways, decks, etc.) or an indoor project using the Cubit.  Select indoor, give the project a name, and you are ready to start.

The first step is to take a picture of the wall to use as a background for the augmented reality work – and this is where I had my first problem.  We have an open floor plan house with 12 foot ceilings, which means our walls are both long and high.  There does not appear to be a way in the app itself to stitch together multiple pictures, so at best I can only get a small portion of a wall.  This screenshot does not do complete justice to the issue.  The picture I took to get here was in landscape mode, and properly cropped before being accepted as the background.  In the image below the background is scrollable right and left, so you can see the entire background – but the main work in the app is done in portrait.

Back to my issue, though.  The wall where this is taken is 12 feet high, but I am only able to get back far enough to capture about 6.5 feet.  And the entirety of the wall is 21 feet. but I can only grab about 10 feet successfully.  There is no ability within the app to take multiple pictures and stitch them together into a complete background.  There is an AR mode for setting a background image that could theoretically work, but I could never get it to capture the entire wall.  Whether that is because of lighting or something else in the app, every time the app would stop scanning the surface of the wall and just take what it had up to that point.  And without an ability to import a self-stitched photo into the project, I ended up having to break up the wall into multiple projects.

And that’s where I encountered the second issue.  Because I did not have a solid endpoint (like a corner or doorway) I had to either “eyeball” the reference point where the Cubit could begin measurement of the horizontal and vertical axis’s, or I had to get out a tape measure to figure out where the background edge should start in the real world.  Both methods lead to a slight deviation in actual size, so measurements will not be as precise as if you could position the Cubit at an aforementioned origin point like a corner or doorway.

Issues aside, once you have your background selected, the app will ask you for the dimensions of the background, and this is the first place where the Cubit comes into play.  You place the Cubit at an appropriate X-Y intersection (like the wall edge and the ceiling) and let the dual lasers measure to the opposite side of the space.  Pressing the mark button on top sends the measurement back to the app.  Because I was working with segments of my wall, in order to get accurate measurements I had to tape pieces of cardboard at the end of the space in the background image so the lasers would not project to the next wall end.

With the wall now measured, you are ready to add an object like a picture.  Press the Object button in the app and add your object – in my case, a framed piece of art.  Again, you go back to the camera (or add from the library if you have previously used the app).  Once you’ve taken the picture and cropped it, you can roll the Cubit across the edge to capture the height and width of the picture.  That information is stored with the image so you can import it into future projects.  Next, you have to “flip” the object so you can take a picture of the back.  This picture allows you to select the place where you will hang the picture – the wire or sawtooth hardware that the hook rests on.

And your object now shows up on your background.  Move it around as you like until you find the place that works for you.  Tap the “Change Reality” button once to set the picture where you want it, and in an odd choice, tap the nail indicator on the object and tap the “Change Reality” button a second time.  The object is now set in the room, and you can use the Cubit from the X-Y origin point to move to where you will insert the nail.

The final problem – if you use a wire on the back of your picture and a standard picture hook, the app does not compensate for the arc the wire will create, so depending on how much excess wire you have, the picture could end up 1-3 inches lower than expected, perhaps more.

What I like

  • The combination roller and laser systems seems suited to measuring physical objects very well – wish the app supported that outside of the auspices of a “project”
  • If you are a professional designer and use this often, it could be a great tool with some changes

What needs to be improved

  • The app is not very intuitive to use and does not allow common functions like importing existing objects or images
  • It is far too easy to have measurements that do not match the real world, making the entire point of the device somewhat moot – you can get measurements with a photo that are sufficient to have custom clothing made, so why can’t this be more accurate without workarounds?
  • When used for the primary purpose – hanging a picture – there is no way to adjust for the method in which you hang the picture accurately, so your results may not end up as intended – again, you can’t devise workarounds, but it sort of defeats the point for ease of use
  • Even if you are willing to work within these issues, it can be hard finding a retailer who has the Cubit in stock

Final thoughts

I think with some work on the app this could be a very useful device for the professional designer.  To me, though, it is a LOT of work over a more manual approach to accomplish what should be a reasonably simple and straight-forward task.  If Plott can overcome some of the issues I encountered, this could become a very interesting tool.  As it stands now, however, the app and device combination will end up making more work with less desirable results.

Price: $109.99
Where to buy: NewEgg
Source: The sample of this product was supplied by Plott.

Filed in categories: Reviews

Tagged: ,

Plott Cubit review originally appeared on The Gadgeteer on May 30, 2019 at 10:00 am.

Note: If you are subscribed to this feed through FeedBurner, please switch to our native feed URL http://the-gadgeteer.com/feed/ in order to ensure continuous delivery.

Slitit helps you open plastic packaging the easy way

NEWS – Eleven years ago I reviewed the Zibra Open It! and I still use it today when I receive or buy a product that is packaged in a sealed clamshell plastic container. That tool has worked pretty well over the years but I just stumbled upon the Slitit package opener tool while surfing for cool products to share with all of you this one looks like it can do the job much easier and faster.

The Slitit package opener isn’t designed like a heavy duty pair of sheers. It’s just a hollow plastic tube with a blade on one side that makes it easy to slice through the edges of blister packs and sealed clamshell package. Want one? You can buy a Slitit for $9.95 from The Grommet or Amazon.

Filed in categories: Reviews

Tagged:

Slitit helps you open plastic packaging the easy way originally appeared on The Gadgeteer on May 23, 2019 at 1:09 pm.

Note: If you are subscribed to this feed through FeedBurner, please switch to our native feed URL http://the-gadgeteer.com/feed/ in order to ensure continuous delivery.

Level up your DIY game with LumiLevel

CROWDFUNDING NEWS – Are you a DIYer that needs to keep things on the level?  This can mean hanging things, building things, installing plumbing lines and so on.  Lots of things are simply better if they are straight side-to-side or up-down.  Kickstarter project LumiLevel looks to level up your game with their new digital level.

Rather than using typical bubble tubes to determine if your picture on the wall with look good, or have people tilting their heads, LumiLevel uses a series of  25 lights that provide a level indicator ten times wider than a bubble level. This improves visibility from the side and since it produces light, in poor lighting conditions.

Each light represents 2°, allowing for precise leveling.  In addition, once you get to the middle light, the unit switches to micro measurements, giving you 1/100th of a degree accuracy.

The level operates in both horizontal and vertical orientation and switches automatically when you reorient the level.

If you are working on plumbing, the level is preprogrammed with EZ-Pitch slopes for 1/8″, 1/4″, 3/8″, and 1/2″ per foot slopes. The concave top side of the level fits perfectly on pipes to help in level alignment.

Other features include magnets on one edge for attaching to steel framing, gesture control, like shaking to turn on all lights for use as a flashlight and tilting back and forth to enable sound leveling assistance.

The project was funded in only 36 hours and as of this writing, has raised, $13,469 of their $3,724 goal. The numbers are not in even amounts as this is a Canadian project and Kickstarter converted to US dollars.

Rewards start at CA$49 for a 12″ LumiLevel, CA$59 for a 24″ LumiLevel and CA$99 for a duo-pack with one 12″ and one 24″ LumiLevel.

The campaign is scheduled to end on Sunday, June 2, 2019, at 10:15 PM EDT with rewards scheduled to ship to backers in October 2019. For more information, and to watch a video demoing its features, visit their campaign on Kickstarter.

Filed in categories: News

Tagged: , ,

Level up your DIY game with LumiLevel originally appeared on The Gadgeteer on May 7, 2019 at 8:00 am.

Note: If you are subscribed to this feed through FeedBurner, please switch to our native feed URL http://the-gadgeteer.com/feed/ in order to ensure continuous delivery.

Level up your DIY game with the Shaper Tools Origin router

NEWS – Hobbists, makers, and wood crafters will want to check out the Shaper Tools Origin router. It uses computer-guided technology to make sure the shapes that you want to cutouts to be as precise as possible.

This router can cut inlays like the one you see above. Check out the video below to see how it works?

The Shaper Tools Origin router looks like an awesome tool, but the price will probably turn off all but woodworking pros. Starting at $2400, it isn’t going to be a spur of the moment purchase, but wow would it make a great father’s day gift! Head over the shapertools.com for more info on the Origin router.

Filed in categories: News

Tagged: ,

Level up your DIY game with the Shaper Tools Origin router originally appeared on The Gadgeteer on April 30, 2019 at 10:00 am.

Note: If you are subscribed to this feed through FeedBurner, please switch to our native feed URL http://the-gadgeteer.com/feed/ in order to ensure continuous delivery.