Cecilia Lambert 12L camera bag review

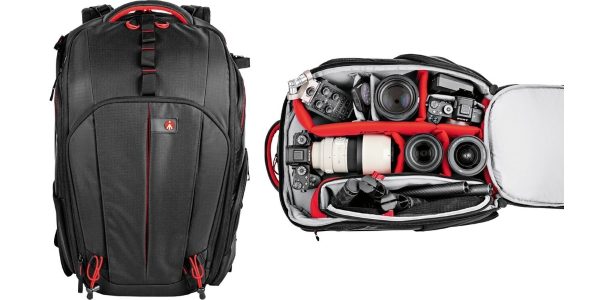
REVIEW – My ideal travel camera bag is a messenger/satchel style bag. Whether I’m walking, cycling or riding a motorcycle, this style of bag allows me to easily swing the bag around, get out my camera gear, take the shot, replace my camera and then swing the bag back around. Much easier than having to remove a backpack, open it, get the gear out, close the backpack, put it somewhere, take the shot, replace the camera gear, close up the backpack, put the backpack back on….you get the idea.  In the past I’ve just used standard messengers (e.g Timbuk2) so when Cecilia offered to sent one of their line of camera bags I put my hand up to review. How did it work out?  Read on:

What is it?

Cecilia is an American company with a 160-year heritage in the leather industry, which shows in the quality of the quality materials used in its products. For their camera messenger line, they offer two options: the Tharp 8L  or the Lambert 12L.  Of course, you don’t have to use it as a camera bag, it can also be used as an EDC, something I’ve been doing for the last few weeks during the week and then as a camera bag on the weekends. In the end, I opted for the Lambert as the larger size made it just a little bit more flexible.

Lambert Specification

  • Exterior: 10.75″H x 15.25″W x 5.75″D (27.3cm x 38.7 x 14.6cm)
  • Interior: 10″H x 14.75″W x 4.25″D (25.4cm x 37.5cm x 10.8cm)
  • Weight: 2.75 lb (1.25 kg) (Cotton twill)
  • Weight: 2.8 lb (1.27 kg) (Leather)

What’s in the box?

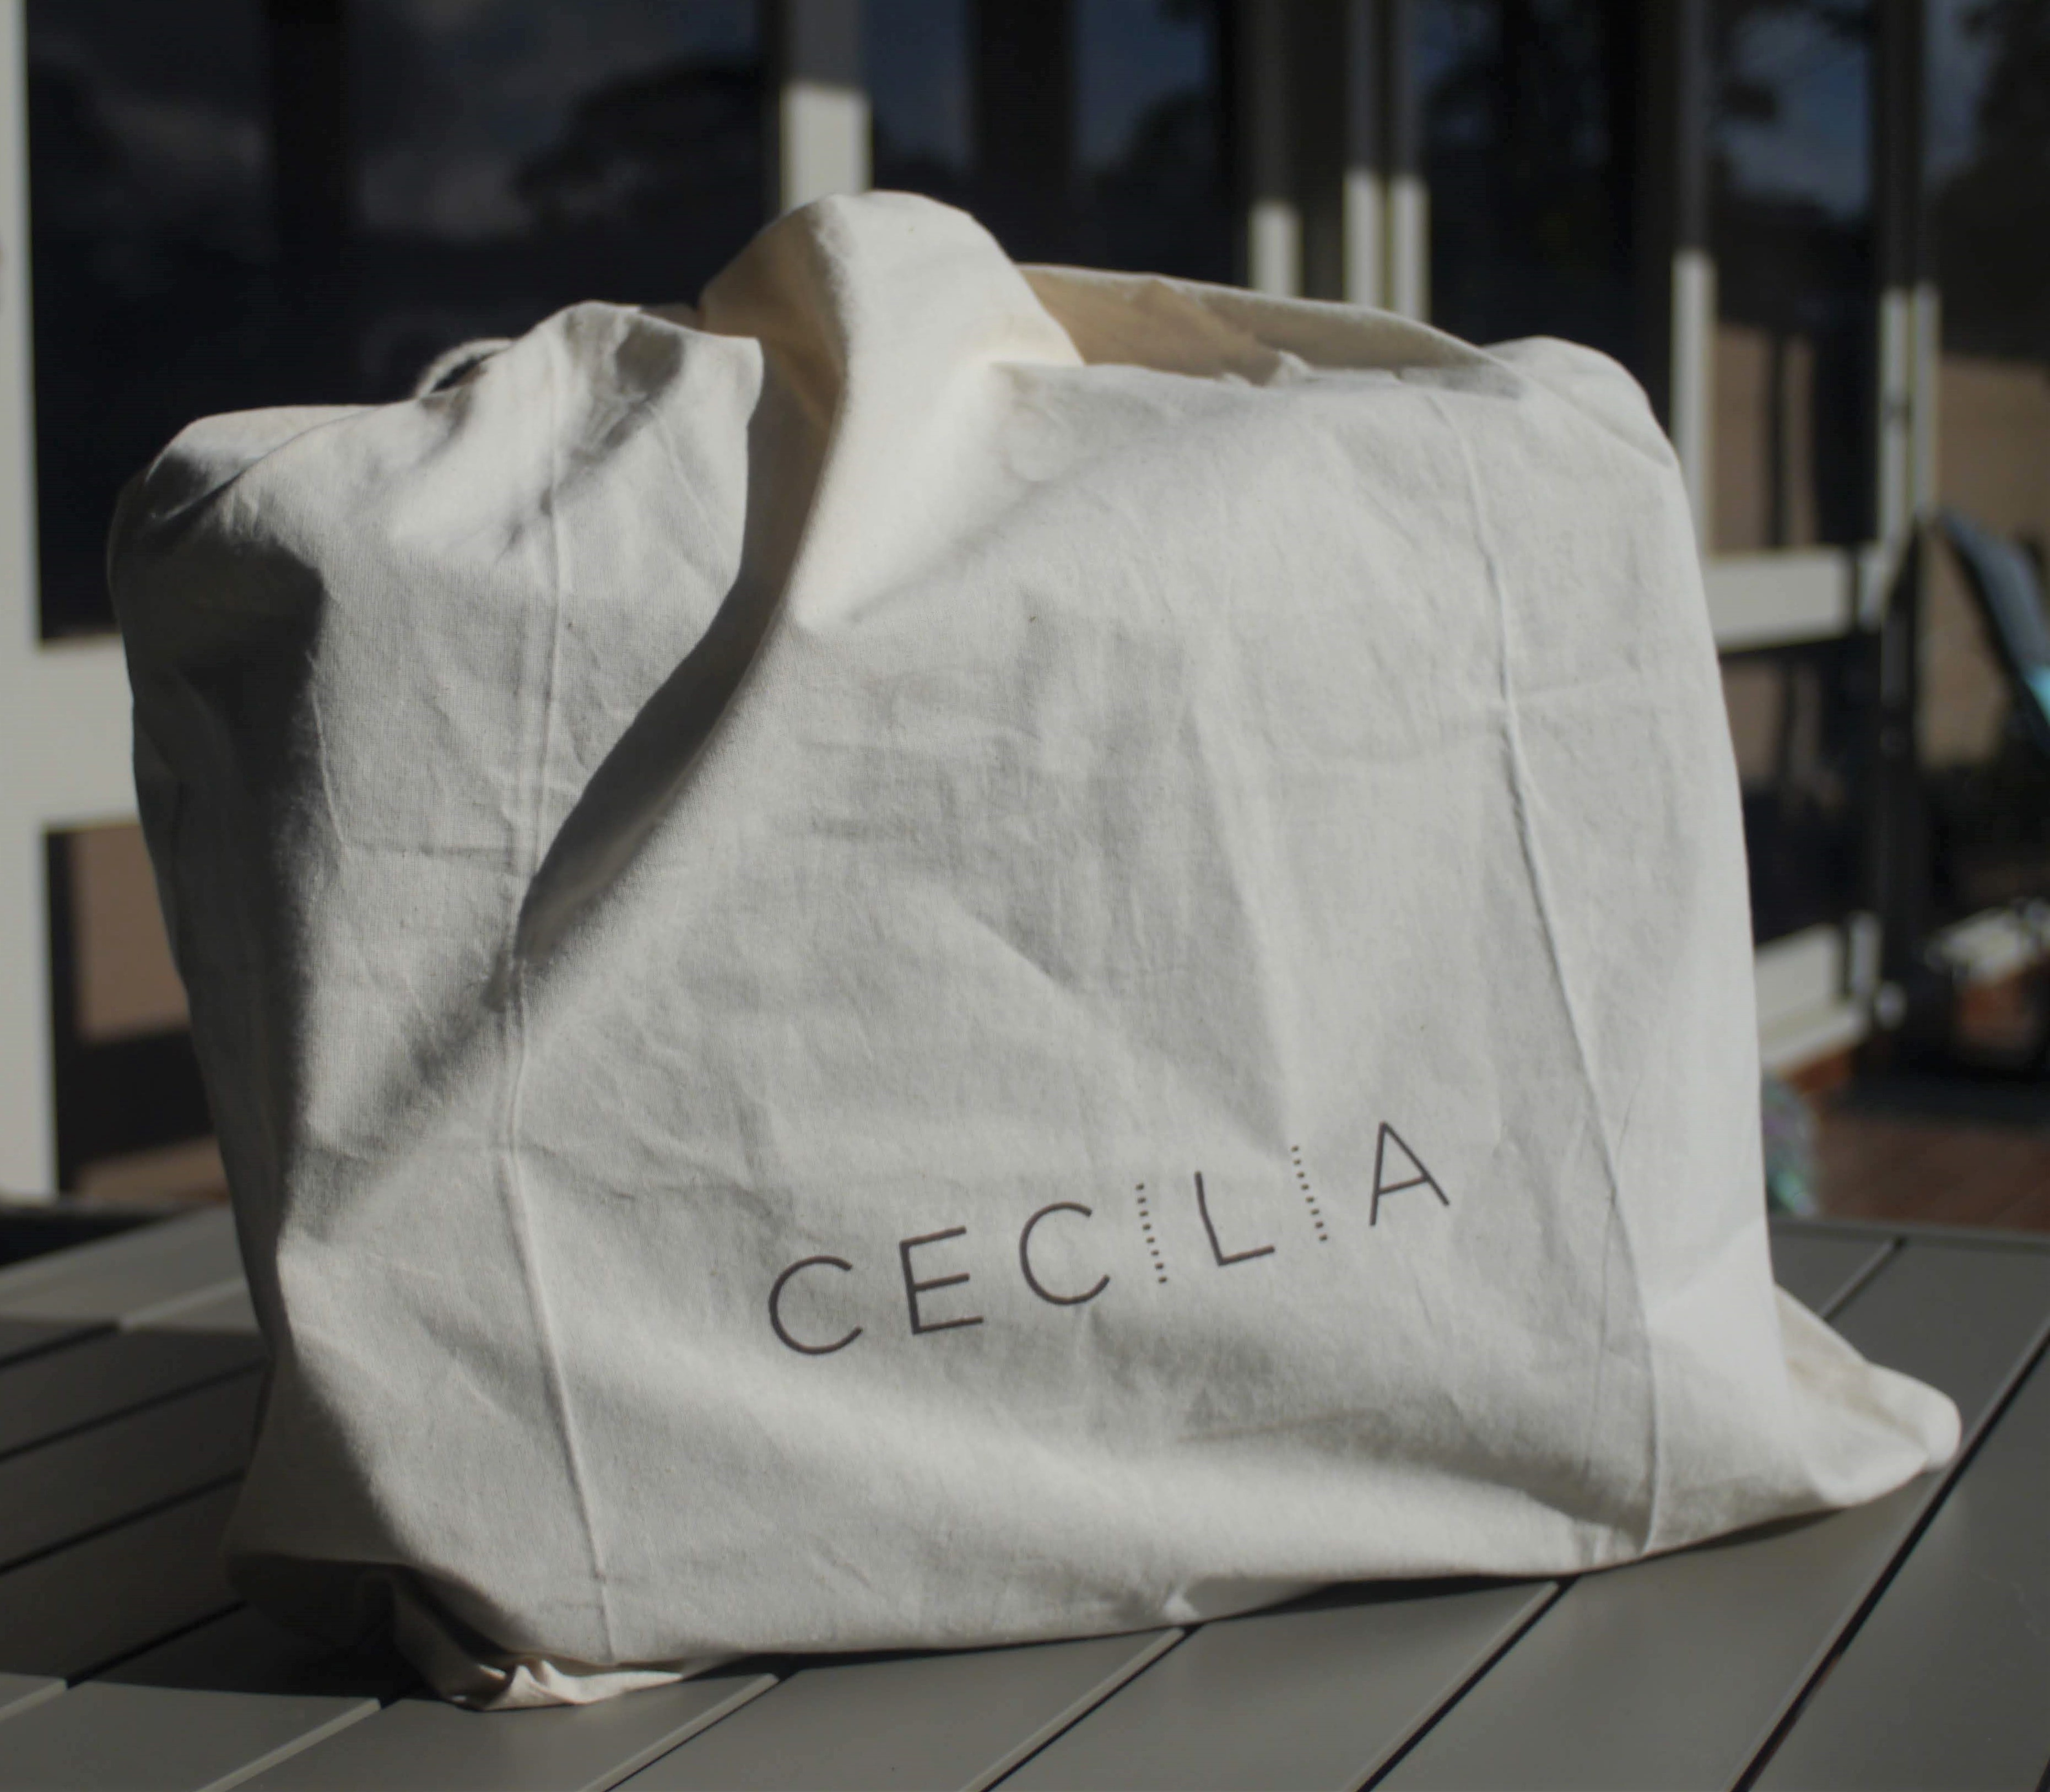
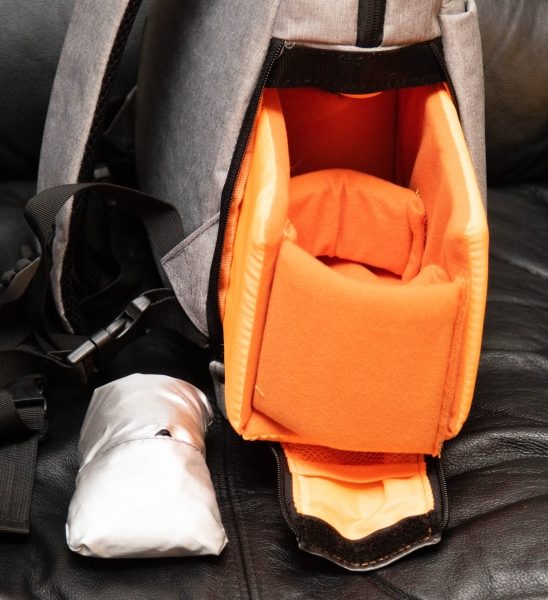
The Lambert came in a nice reusable cloth bag.  It was really nice not to get something in a plastic bag that’s just going to be thrown away (recycled). I’m sure I can find a use for this bag somewhere in the future.

Design and features

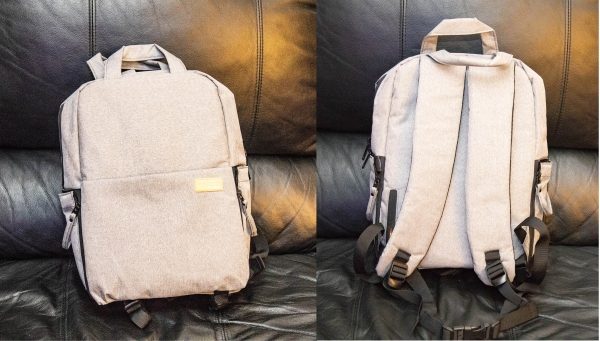
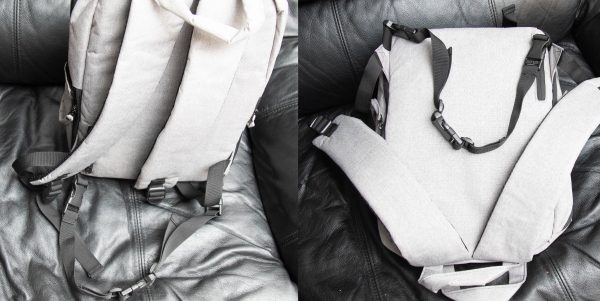
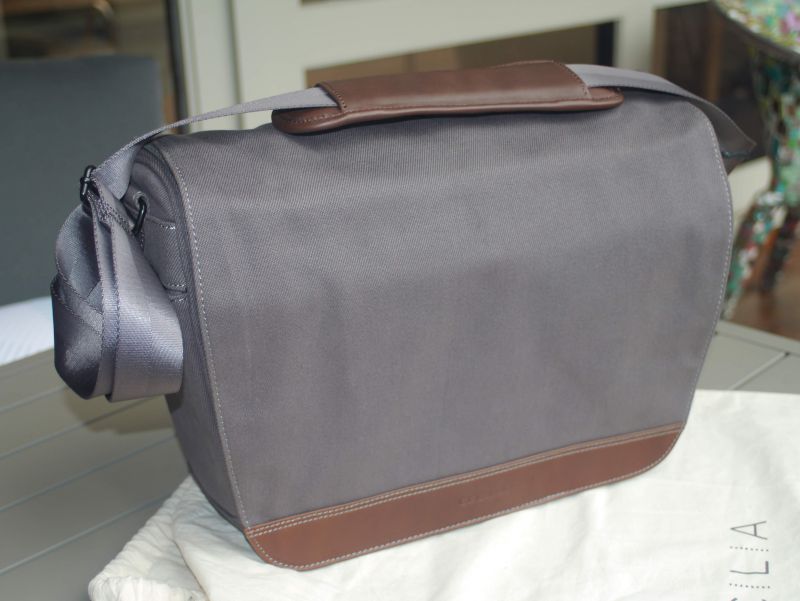
Given their heritage in leather they offer both lines in either a black or chestnut leather and also a charcoal cotton twill. I decided to go for cotton twill as I really like cotton/canvas type bags and I thought it was (to me) more aesthetically pleasing with its charcoal twill and chestnut leather trim. The leather trim on the main flap and on the shoulder pad really offsets the charcoal twill nicely.  The strap is nice and strong and all hardware is painted metal.

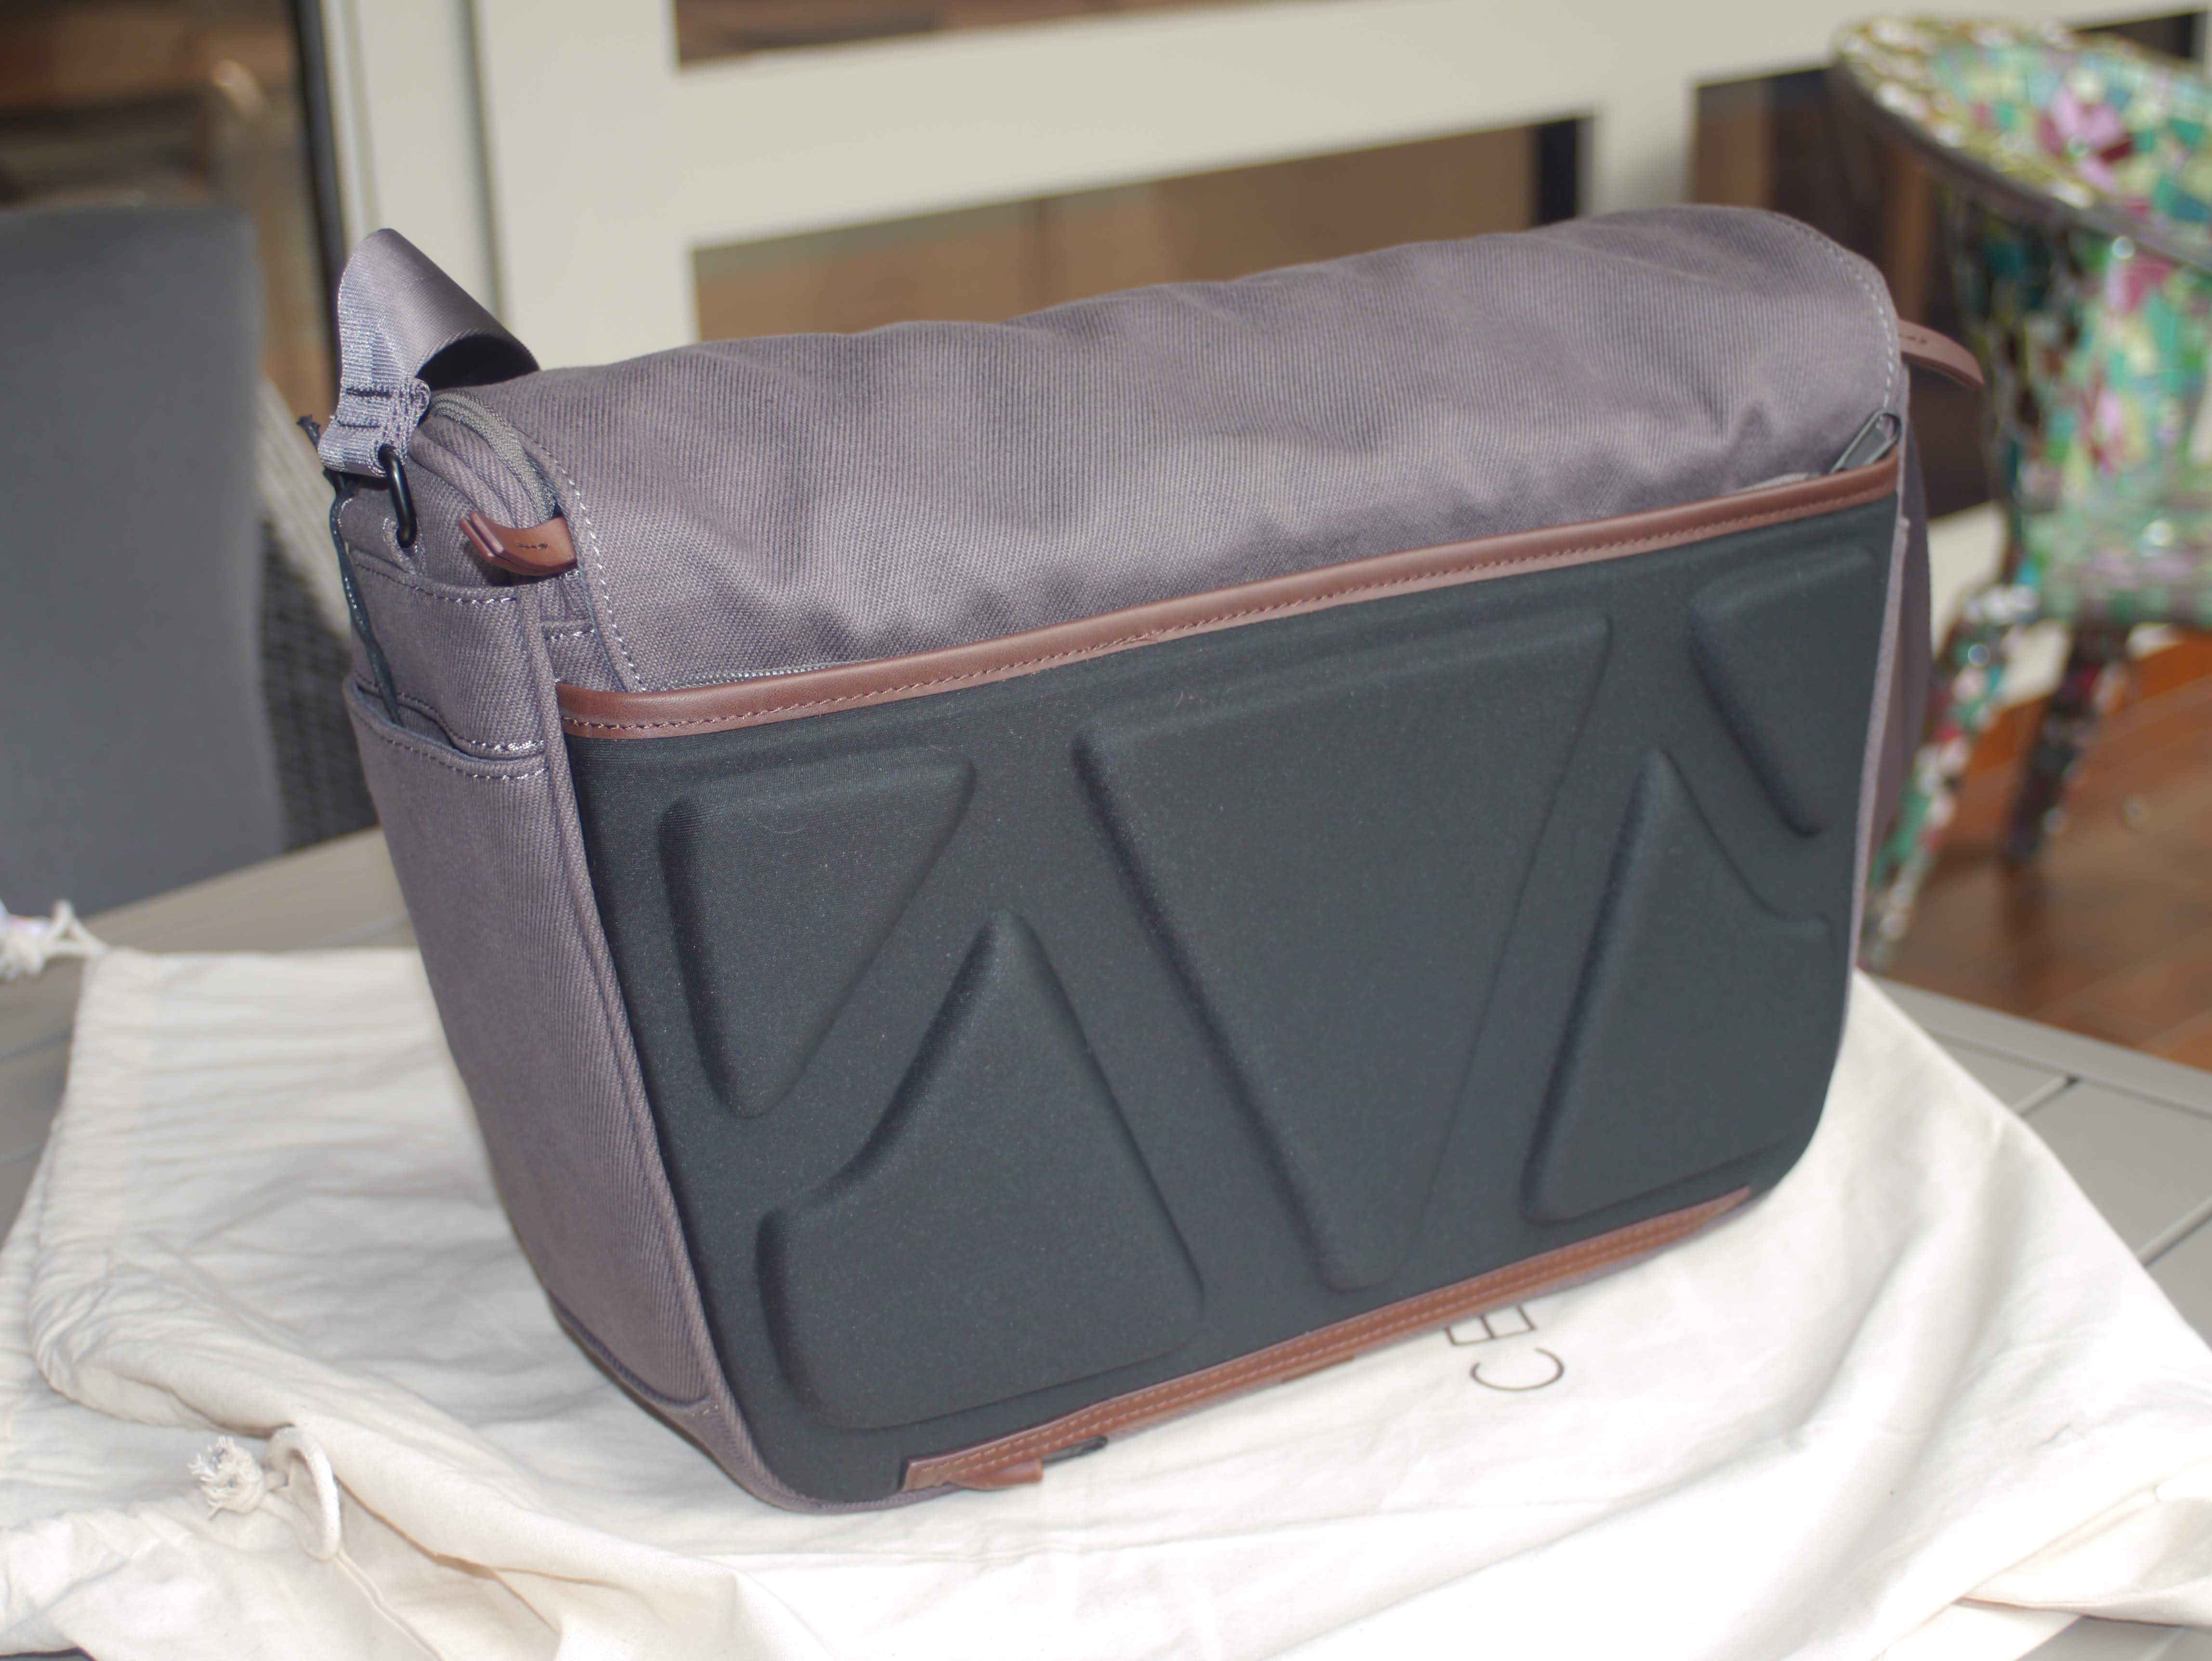
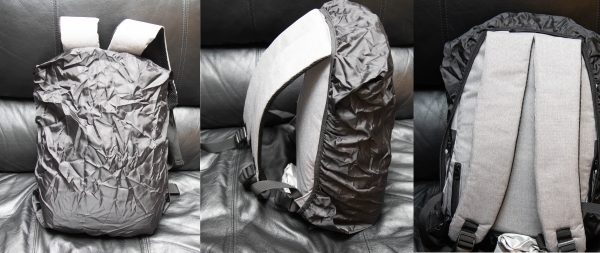
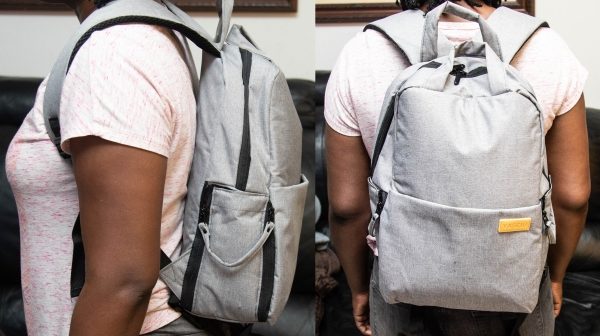
On the back is a nice closed cell foam pad for both comfort and or airflow.  On the top of the pad is a zip so that you can use it as a pocket to store say documents or magazines but if you also open the bottom zip then it becomes a pouch to put on the handle of your roller luggage.

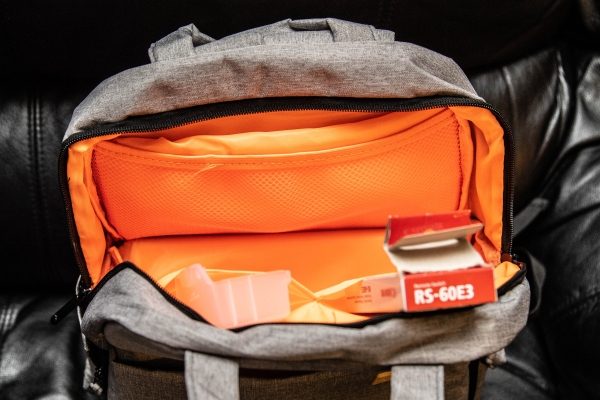
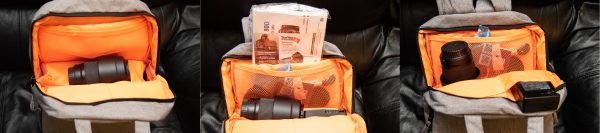
Open up the flap and there are 2 big pockets on the front.  Perfect to store all those little bibs and bob that you don’t want tumbling around in the main compartment or that you want easy access to.  There’s also some airflow padding on the shoulder pad.  On the back is a laptop/tablet sleeve for up to a 13.3″. The positioning of this is very handy because you can just open the flap and get your notebook out, especially useful if you’re going through the x-ray machine at the airport.  You don’t have to open the main compartment to get your laptop out for scanning.  When closed the main flap is held in place with magnets.  You can see the two magnets on the bottom of the front pockets. This is great as, while velcro is probably stronger, you don’t get that “RIIIIP” sound when you open the bag.  Nice and discrete especially if you’re taking photos or using the bag in a quiet environment.

The front pockets are nice and big and zippered so things won’t fall out. They’re perfect for things like battery packs or sd cards, a pen, a notebook or similar. For me, they’re big enough that I can fit my whole hand in if I need to “rummage” around in the pocket to find something small.

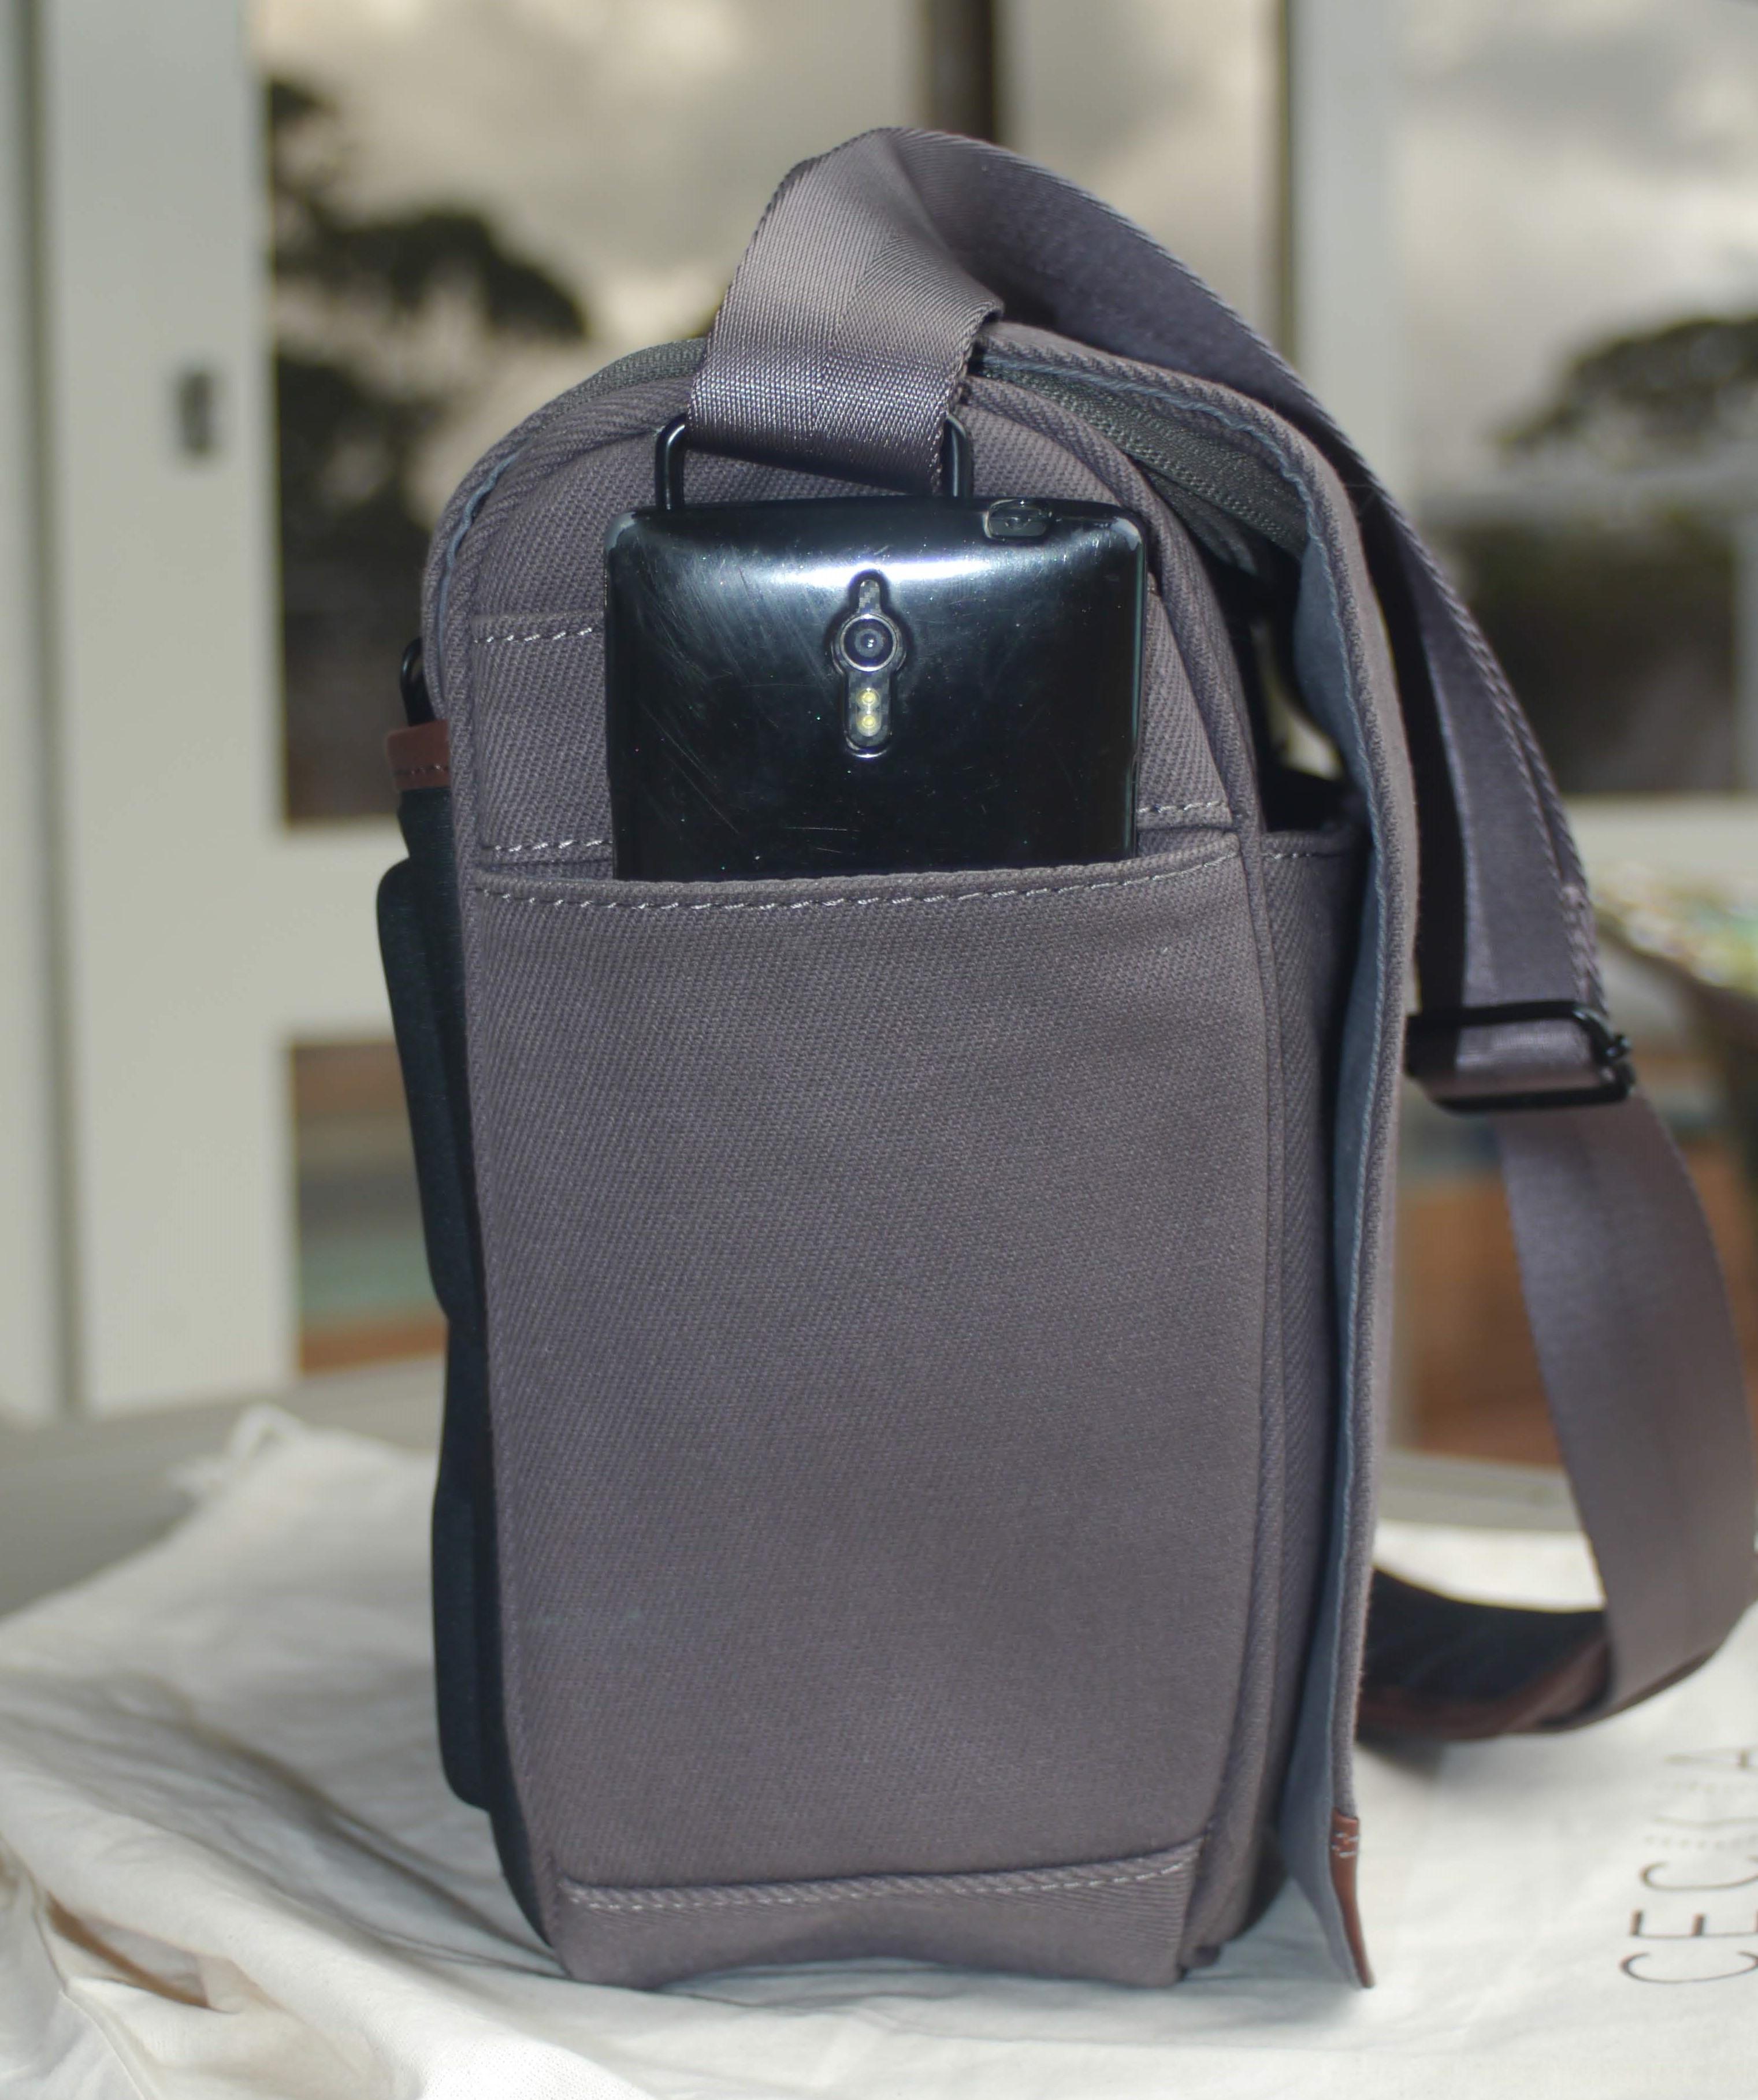
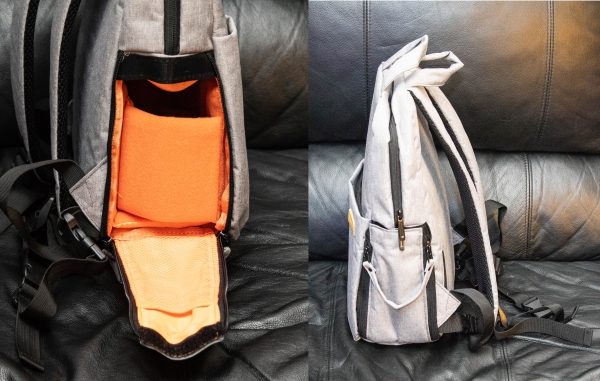
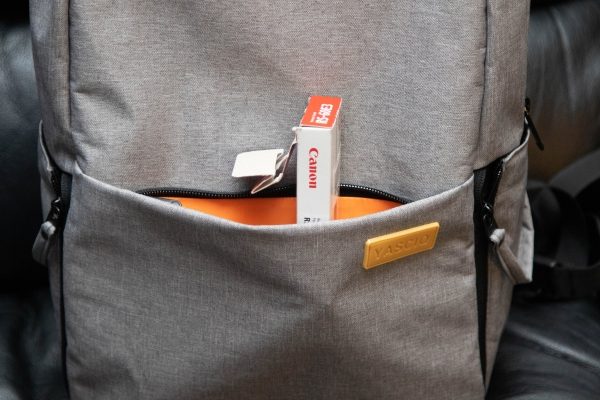
There are also two pockets on the sides.  They are quite deep and not overly expandable so ideal for a small notebook or your phone.  You wouldn’t want to put something too small in there though as they’d drop to the bottom and would make it hard to get it out.

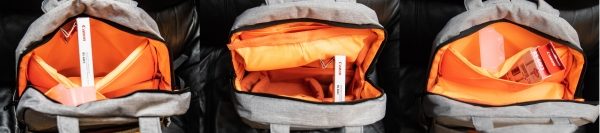
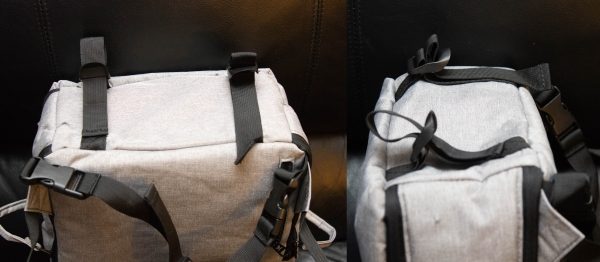
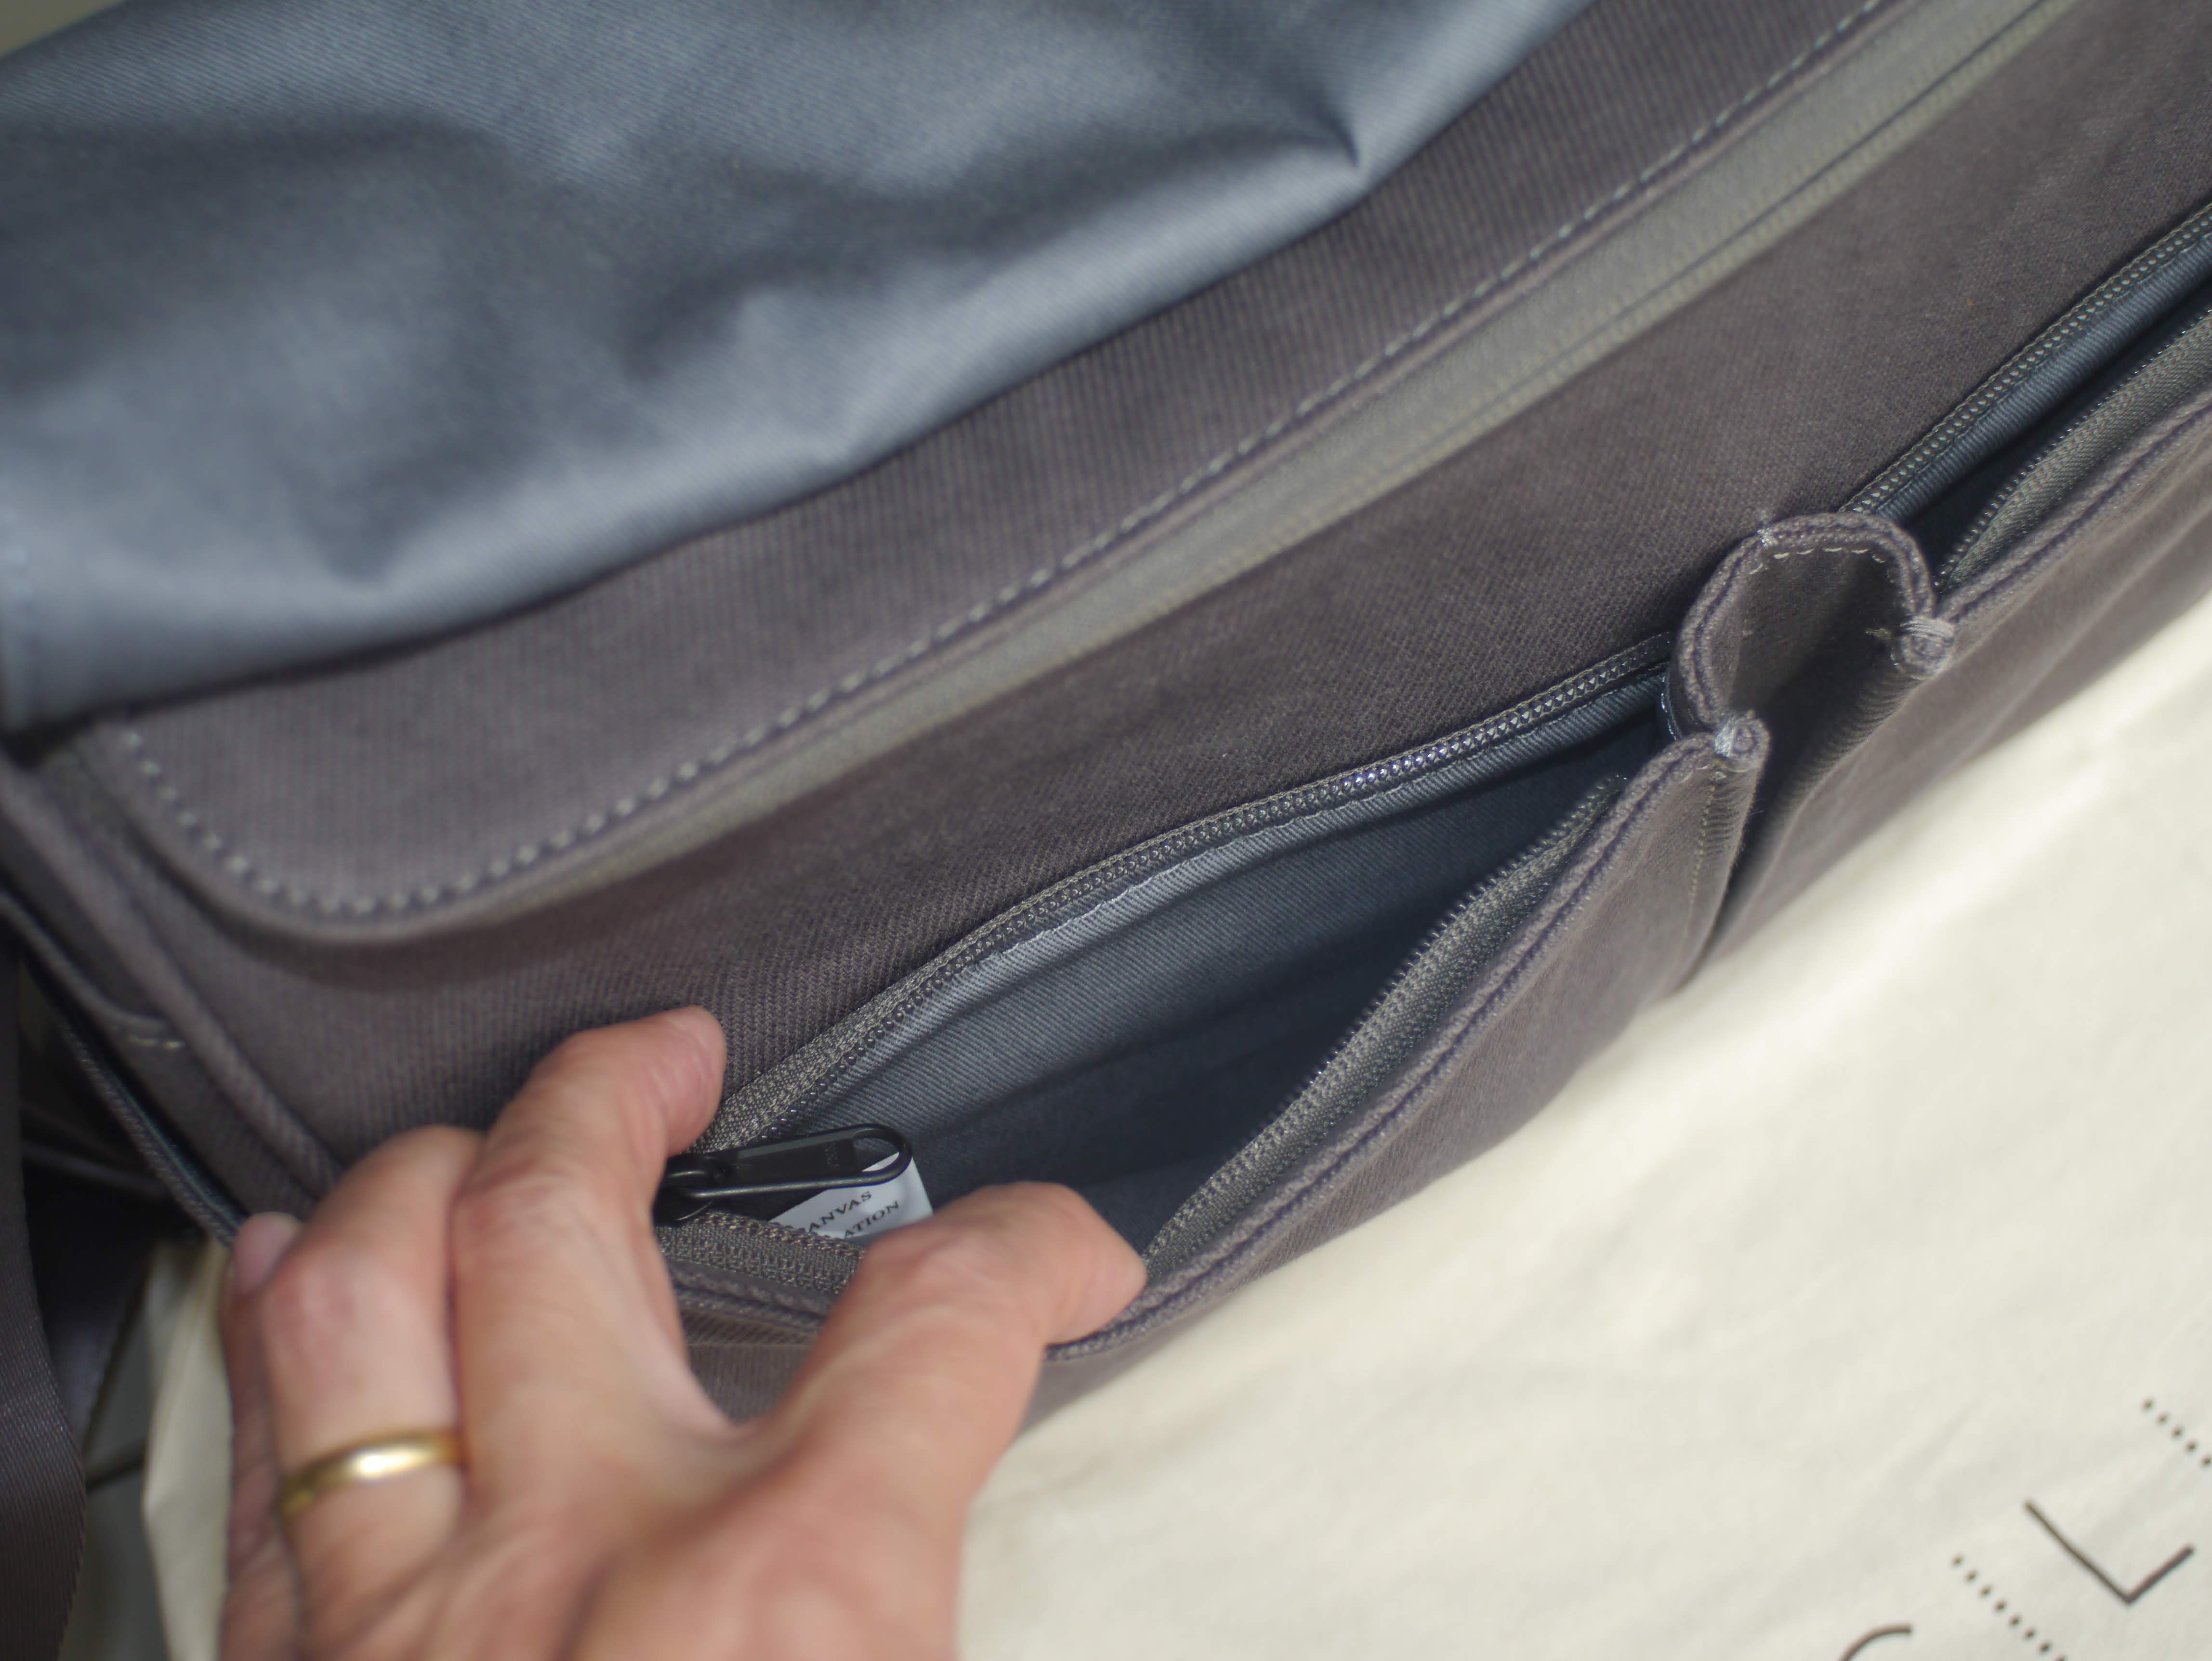
The bag comes with two “modes”. Firstly there’s secure mode.  Do up the main zipper and no matter what you do nothing will come out of the main compartment.  Again your notebook is in the back of the bag and can be easily accessed in this mode without opening the main compartment.  Also, note the two leather tags on the zippers which makes it easy to access the zippers. Note the 3 round magnets on the top of the main compartment.

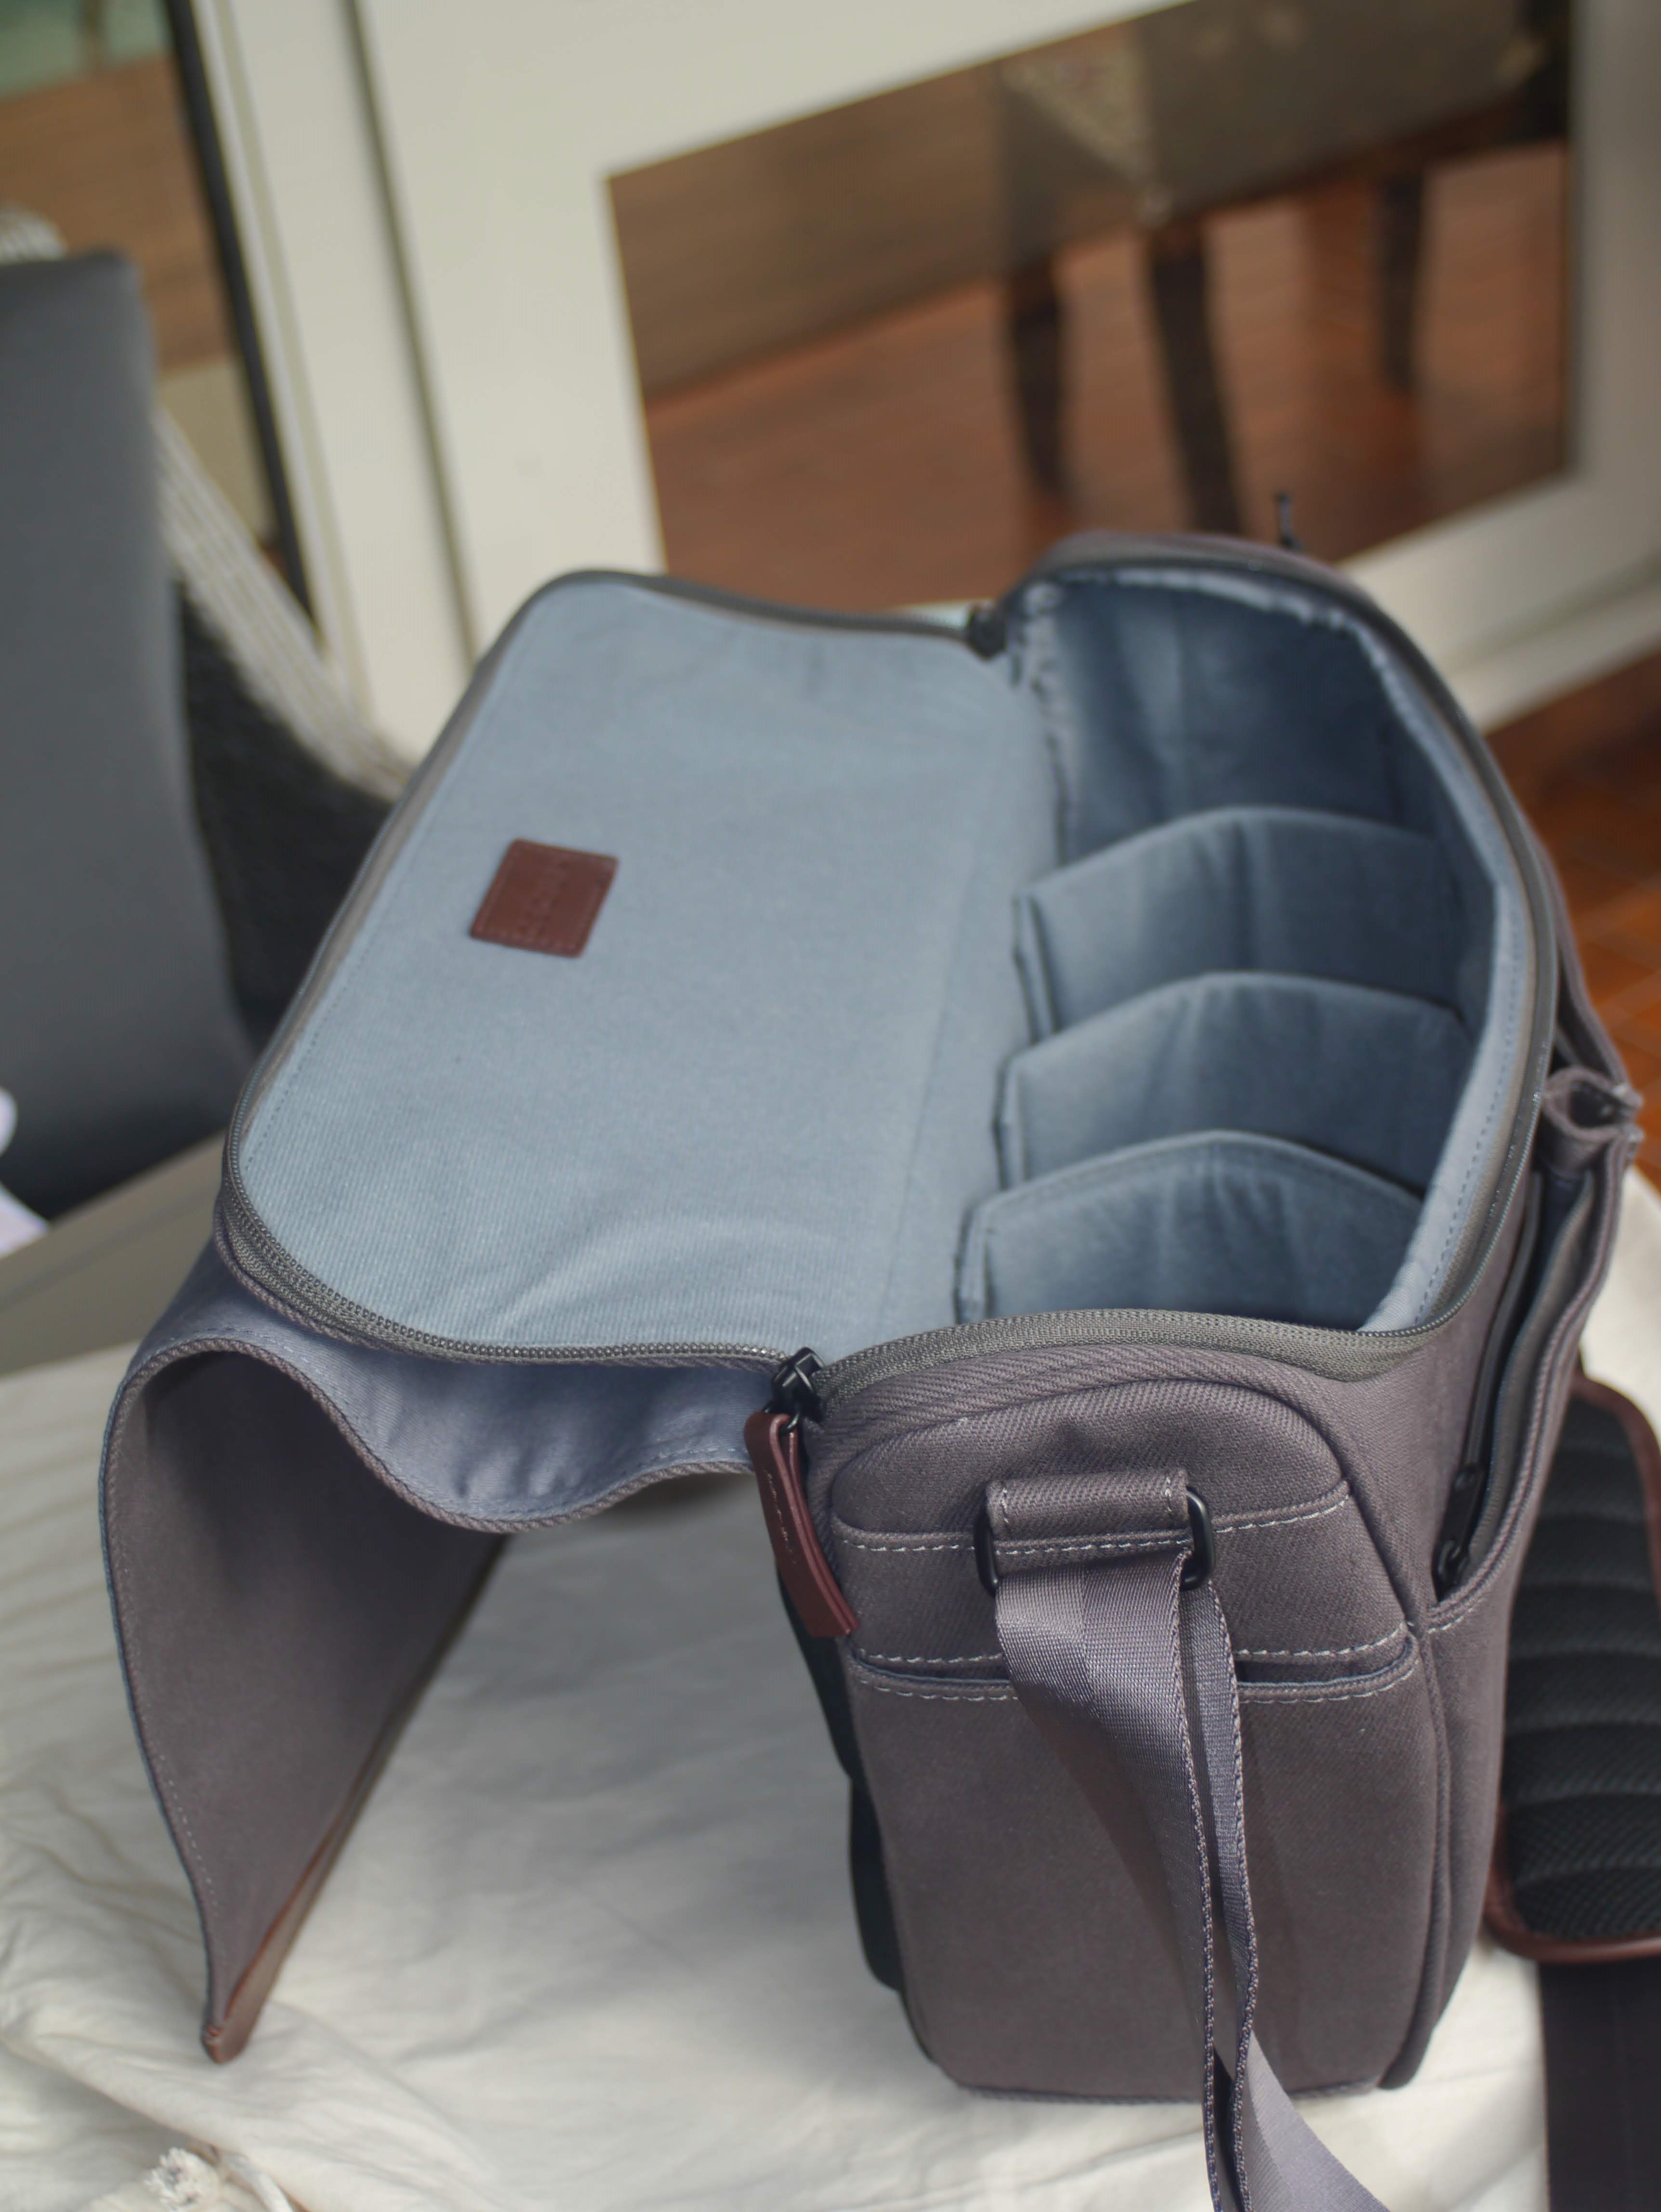
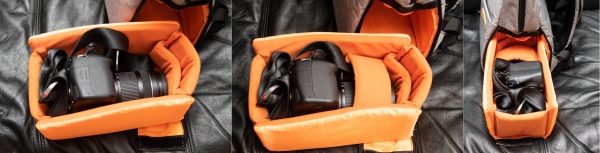
The other mode is “shooting” mode.  This is where the magnets indicated above come into play.  With the main compartment unzipped, the corresponding magnets on the flap mean that opening the flap also opens the main compartment.  This is great if you’re in a situation where you’re putting your camera in and out of the bag frequently. You get quick access to the main compartment and your equipment without having to muck around. The inside is nicely padded and has a soft fleece lining. Because of the foam padding the bag stands by itself.

Equipment

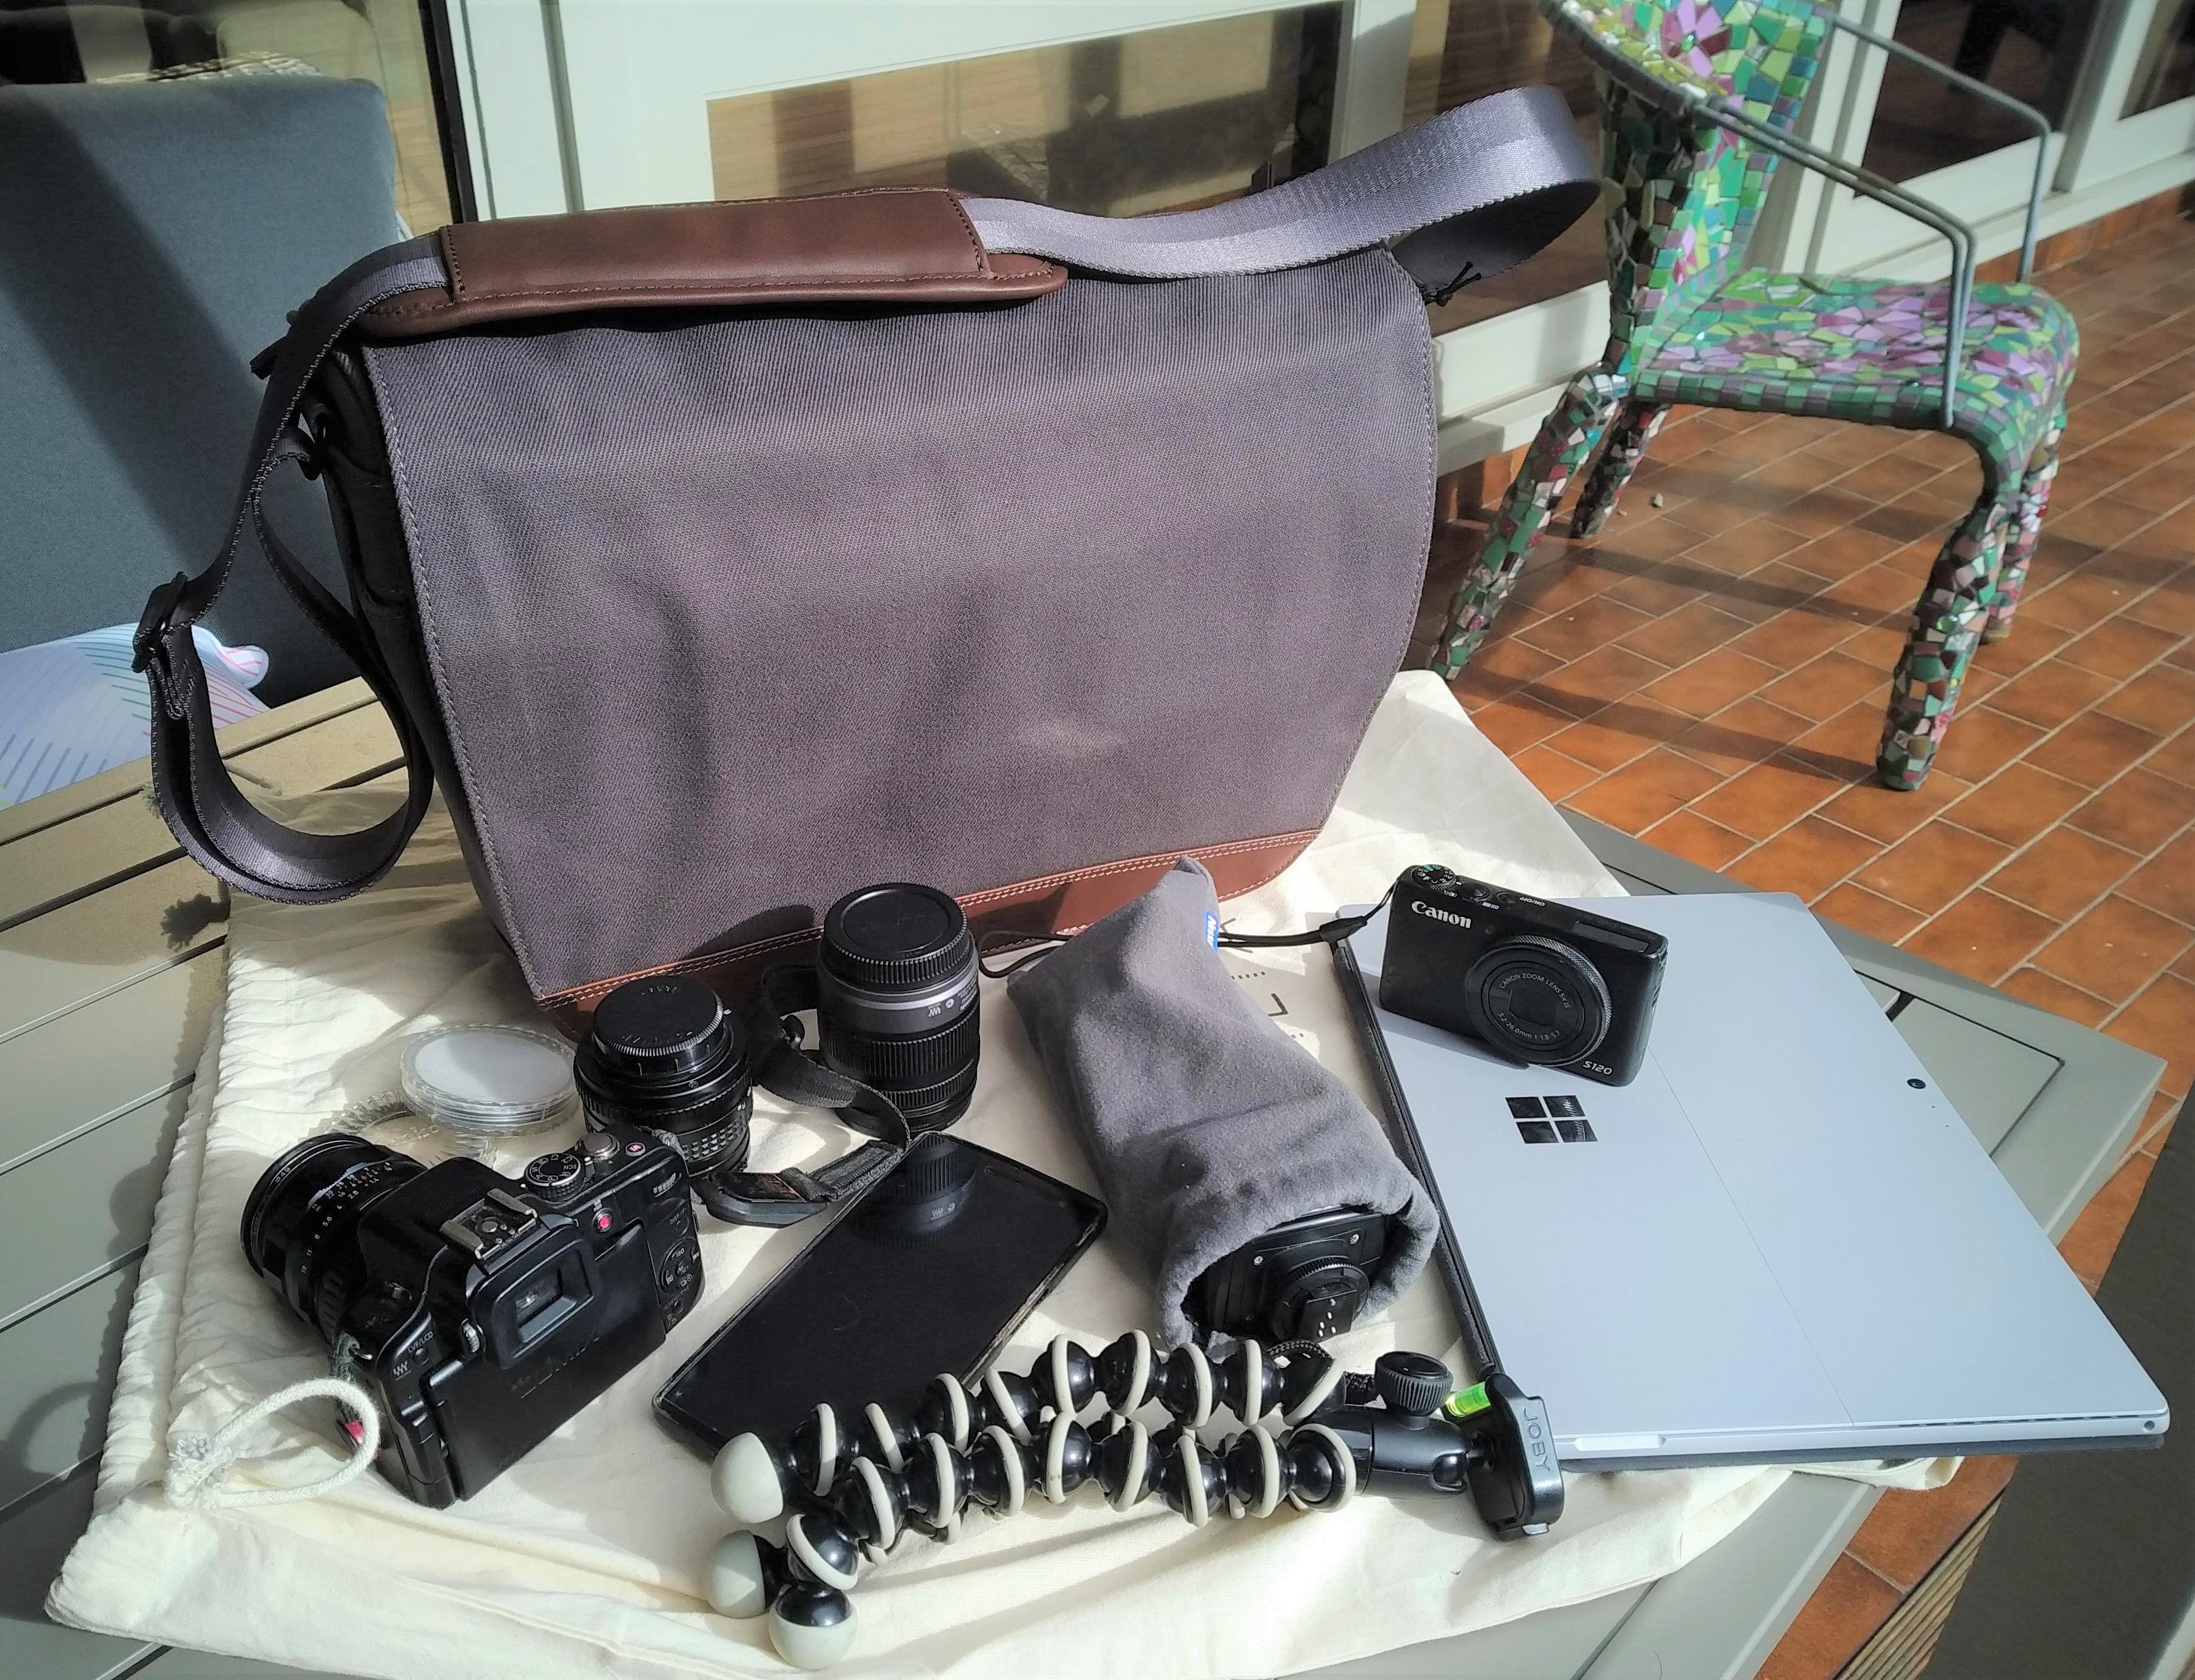
So there’s my collection of camera gear I normally carry around with me: a Panasonic G3 micro 4/3rd mirrorless,  2 Takumar circa 1970s prime lenses passed down  to me from my father ( 50mm/f1.4, 25mm/f2.5)  the standard Panasonic 14-90 zoom, a Nillkin flash (hardly use), my Gorilla pod  and a Canon S120.  A bit of a sad collection of (old) gear for a Gadgeteer to have, but they do the job and do it well.

Inside is three removable velcro attached dividers. When I use a messenger, everything just “rattles around” in the main compartment meaning I have to rummage around to find what I want. In this system, everything in its place and a place for everything.  Additionally, the bag being padded means that I can put all my gear in “naked” whereas with a standard messenger each component goes into some sort of individual protection. This makes it quicker and easier to grab and use something and then put it back in the bag.

What I like

  • I really do like the cotton twill with leather trims.
  • The foam back pad makes it comfortable to carry.
  • The compartments and padding make it easier to store and use my equipment.
  • The “secure” and “shooting” modes are really convenient.
  • It’s easy to get access to your notebook/tablet.
  • The bag stands by itself.
  • When used as an EDC rather than a camera bag, it limits how much I carry (12L).

What needs to be improved

  • With my previous canvas/cotton bags, the bottom corners tend to be the first to go. Given their heritage of leather, perhaps some leather corner protectors would add some additional protection and longevity.
  • Having a briefcase/grab handle would make it just a little bit more versatile on the go.
  • While the twill is coated to make it water resistant, if it got caught in a big downpour, your expensive camera gear would get soaked and water would stay in the padded foam.  A (built-in?) rain cover would protect against this. 
  • You can see the magnets are imprinting on the twill. Not sure what will happen longer term.

Final thoughts

As mentioned, I’ve been using this as an EDC for work during the week and carrying around my Surface Pro, an umbrella, my lunchbox, and various little bits and pieces.  As an EDC, this is a great bag for that.  However, because it’s a fix shape and size as an EDC for me it’s not flexible enough. Often a package might arrive or I need to take some additional stuff to or from work so I need a more flexible size/shape bag.

During the weekend however, it’s been used as a camera bag.  My biggest disappointment is that I don’t have enough gear to properly fill the bag 🙂 That being said, the smaller amount of gear makes it much easier to see, grab and use the correct gear.

These aren’t the cheapest bags around but they’re well thought out and well made, and if you’re looking something a bit fancier than that old ballistic nylon bag these certainly fit the bill.

Price: $289 – Cotton Twill / $439 – Leather
Where to buy: Direct from Cecilia
Source: The sample of this product was provided by Cecilia.

Filed in categories: Reviews

Tagged: ,

Cecilia Lambert 12L camera bag review originally appeared on The Gadgeteer on June 11, 2019 at 10:07 am.

Note: If you are subscribed to this feed through FeedBurner, please switch to our native feed URL http://the-gadgeteer.com/feed/ in order to ensure continuous delivery.

Adonit PhotoGrip Smartphone Camera Grip review

REVIEW – The cameras in smartphones are truly a technological marvel, rivaling most modern digital cameras and pushing the boundaries of what an average user can capture. But grabbing on to a slab of glass isn’t the easiest way to get a decent snap. Enter the Adonit PhotoGrip, a classic take on modern smartphone photography.

What is it?

The Adonit PhotoGrip is a smartphone camera grip that makes single-hand camera operation easier through its clamp-on grip and detachable Bluetooth shutter remote.

Hardware specs

The PhotoGrip can support smartphones within a width range of 62.5mm – 85mm, which I believe encompasses even the widest of phones, such as the Galaxy Note 9 and any plus model of iPhone. The maximum depth of phone it can handle is 10mm. Really, it seems like the only limitation on the model of phone you can use is if it happens to be too narrow to place in the grips, something like an iPhone 5, for instance.

Add some grip on that thin phone.

It does require Bluetooth to operate as there is no direct connection with the phone. The internal battery in the shutter remote is good for 20 hours of continuous use (or 72,000 photos, so you could potentially take 1 photo per second for 20 hours) and charges in just 40 minutes.

What’s in the box?

Comes with everything shown here.
  • camera grip
  • built-in mini (and I do mean mini) stylus
  • mini tripod
  • neck strap
  • carrying pouch
  • user manual
  • USB cable (typical A to micro-B type you have a million of)

Design and Features

The PhotoGrip’s design is actually quite simple. It consists of a solid block of grippy silicone-wrapped plastic attached to a spring-loaded clamp. I tend to get a bit nervous with devices that put a great deal of pressure on the sides of what feels like an impossibly thin device. I know that most phones are pretty resilient, with all the initial backlash of the iPhone + series “bendgate” still fresh in my mind, I try to be as careful as possible with grips and cases that threaten to put extra pressure on my phone.

This seems OK in that regard, it’s just a thought I had every time I popped that grip on my phone.

The entire functionality of the device is built into the detachable shutter button, which is essentially just a tiny Bluetooth remote that sends a “Volume Up” command to the phone, which is, of course, the shutter button on most devices when in camera mode. I did try the button when my phone wasn’t in camera mode and sure enough it simply adjusted the volume up one notch.

The real hero.

When attached to the phone, wielding the grip with one hand feels very much like a compact digital camera. Using two hands for extra stability is recommended, as pushing the shutter button on top of the grip tended to shift the camera just enough to cause some shaking, as it would with any other camera. Two hands, people.

The PhotoGrip is plenty comfortable, though, and it goes a long way toward making a thin sheet of glass and metal feel more like a standard camera.

Just like the simulations!

The detachable shutter control is brilliant, so much so that I’d even taken to using it without the grip when trying to line up a group shot. There have been plenty of times when having a tiny button to snap multiple shots without the whole “set 10-second timer, run back to group, take shot, rinse and repeat” routine would have been great. Not only that, but the battery is rechargeable, and lasts for about 20 hours. So nice.

The PhotoGrip also has a standard 1/4” tripod mount on the bottom, which means you can slap your phone on any old tripod you might have laying around.

Aw, cute little tripod.

The mini-tripod is cute, though, and a nice little addition. It can certainly work well enough in most situations.

That stylus, though … 1 3/4” inches of aluminum concealed in the side of the grip … is nigh unusable. Think of a mini-golf score pencil. Now snap that in two. And that’s what you’re working with. Your mileage may vary, but in every instance I used it, the added accuracy of the fine point wasn’t worth the awkwardness that came with it. Still, it’s hard to fault them for including one.

What is this, a tripod for ants?!

I think they included it because of the “markup” functionality in many photo editors. Even in the iOS Photos app, there is a mode to draw/write directly onto photos, although I couldn’t tell you the last time I did this.

A valid use case.

Lastly, Adonit packed in a neck strap that I ended up not using because I couldn’t figure out exactly where it clipped to on the PhotoGrip itself. That’s just as well, I don’t relish the thought of dangling my $800 phone from my neck secured with a tiny spring clip.

What I like

  • remote is tiny and works over long distances
  • grip can be attached to any standard tripod mount
  • adds some stability and standard camera feel

What needs to be improved

  • stylus isn’t much more useful than a finger and potentially easy to lose
  • grip is a bit tough to attach/detach

Final thoughts

Given the high quality of recent smartphone cameras, adding what feels like a standard camera grip onto your phone greatly enhances its stability and control. The detachable shutter is wonderful and adds versatility to the grip’s functionality. It would make a great, and affordable, addition to any mobile photog’s tech bag.

Price: $39.99
Where to buy: You can purchase the PhotoGrip in black or yellow directly from Adonit on their website and Amazon
Source: The sample of this product was provided by Adonit. To find out more and check out their line of mobile accessories, visit their website.

Filed in categories: Reviews

Tagged: ,

Adonit PhotoGrip Smartphone Camera Grip review originally appeared on The Gadgeteer on December 9, 2018 at 10:00 am.

Note: If you are subscribed to this feed through FeedBurner, please switch to our native feed URL http://the-gadgeteer.com/feed/ in order to ensure continuous delivery.

The Lowepro PhotoStream SP 200 Roller Camera Bag will ride with you on every shoot


NEWS – For the many years that I have been a photographer, I have always struggled with finding the right equipment bag for event photography such as weddings. For quite a while I felt like this was my personal issue, but the more I chatted with fellow photographers, the more I realized that we all seem to be dealing with this type of struggle, and we all have accumulated numerous bags along the way of this relentless and never-ending search.

This summer, I have been using my Lowepro 400AW backpack exclusively, and primarily because I have been shooting outdoors a lot and it functions well when walking around. Also, I have taken a break from or maybe just surrendered to the futility of the search, at least for a bit.

However, just the other day I became excited again when I came across the LowePro PhotoStream SP 200 Roller Bag. After looking at some YouTube videos and seeing the capacity, strength, and all-around versatility, I am thinking that this may just be the version of the LowePro bag I am seeking. It can hold 2 DSLR camera bodies, several lenses depending on the size, a laptop, and it seems to have enough space for all of the necessary accessories. It also works as a carry-on and seems like it can take a beating and still keep your equipment safe.

If you would like to learn more about the LowePro PhotoStream SP 200 Roller Bag, or if you would like to purchase one, you can head over to B&H Photo Video or Amazon and pick one up for $299.95.

Filed in categories: News

Tagged: ,

The Lowepro PhotoStream SP 200 Roller Camera Bag will ride with you on every shoot originally appeared on The Gadgeteer on August 13, 2018 at 8:00 am.

Note: If you are subscribed to this feed through FeedBurner, please switch to our native feed URL http://the-gadgeteer.com/feed/ in order to ensure continuous delivery.

The Ouh Snap SnapBag Daily review

Whether you are an amateur or professional photographer, there are always days when you need to travel light and without any bulky backpack. You just need to take along a basic camera with a couple of lens, or maybe even a small video camera. You also need space for the other knickknacks that you would need while you are out and about. If this describes you, then the Ouh Snap SnapBag Daily may be the perfect match.

What is it?

The Ouh Snap SnapBag Daily is a camera backpack that can comfortably carry all of your daily photography essentials, and other small items, in an organized and convenient way.

What comes with it

The Ouh Snap SnapBag Daily comes with a removable camera storage compartment, and a rain cover.

Design and features

The backpack is well made, with very comfortable adjustable shoulder straps, zippers on each side to allow you to remove the padded camera storage from either side, and brand name tag on the outer zippered pocket.


Once you remove the camera storage compartment, you can fit a mid-size DSLR with a mid-size lens attached. A DSLR with an extended battery grip attached to it, will not fit. There is a removable velcro strap that you can secure over the lens to provide for extra protection.

On the front of the bag there is a zippered pocket that can hold accessories like batteries, and keys, memory cards, etc.

When you open the zipper at the top of the bag, there are several accessory/storage pockets. On one side there are two small pockets that are about five inches deep and each one is about half the width of the bag. The pockets are above the lower camera compartment.

On the other side of the bag there is a pocket that spans the width of the bag and is about five inches deep as well.  It is a fully padded pocket. In front of it, there is a second pocket that has a netted front and a thin cloth divider between the net and the front of the back pocket. These are also great for storage. As you can see in the picture below on the right, there is a divider that separates the top half of the bag from the bottom half containing the camera. This allows you to remove the camera storage container and the divider, and use the entire space as one bag. You also have the option to remove the divider and access the camera from the top of the bag.

As you can see in the pictures below, the top half of the bag offers lots of storage.

There is a waist strap with buckles that can be secured around your waist, and will keep the bag more stable if you have a need to do so.

On the back of the exterior of the bag, there is another small accessory pocket.

At the bottom of the bag there are two adjustable straps that can be used to carry a small tripod, or a rolled up blanket, or anything else similar.
The included rain cover has elastic around the edges, and you simply stretch it over the exterior of the bag to cover the open areas that would not be protected by your back.

As you can see below, the bag fits very well as a backpack, and my wife really enjoys using it.

What I like

• The material used to make the bag
• The fit and comfort it provides
• The padded interior
• The number of interior and exterior pockets
• The removable padded tray for the camera
• The flexibility to keep the bag in 2 sections or to make it one larger bag

What can be improved

The only improvement that I would recommend, is for a better designed rain cover that would include a more secure attachment to the SnapBag, so that it cannot easily come off on its own.

Final thoughts

The Ouh Snap SnapBag Daily is a really nice backpack for carrying your daily photography “stuff” along with some other personal items. The bag is lightweight and well made, and just looks nice. It has become the daily-use backpack for my wife who is an amateur photographer, and a mom. She loves it, and in my opinion, for her to endorse it makes it a worthy bag.

Price: $39.95
Where to buy: OuhSnap
Source: The sample for this review was provided by OuhSnap

The post The Ouh Snap SnapBag Daily review appeared first on The Gadgeteer.

Filed in categories: Reviews

Tagged: , , ,

The Ouh Snap SnapBag Daily review originally appeared on The Gadgeteer on May 23, 2018 at 12:00 pm.

Note: If you are subscribed to this feed through FeedBurner, please switch to our native feed URL http://the-gadgeteer.com/feed/ in order to ensure continuous delivery.

The Manfrotto Pro Light Cinematic Backpack Balance can carry it all


So for this episode of “I am still desperately trying to find the right photography gear bag for myself”; I am focusing on a new bag just released by Manfrotto.

Although specifically designed to accommodate a fully set up Ronin M/MX, the Manfrotto Pro Light Cinematic Backpack Balance seems to be a bag that may also work well for my DSLR with the extended battery grip attached, and with either my Sigma 70-200mm or Canon 24-105mm attached. Of course I always walk with additional gear for both photo and video opportunities, so the additional space is great.

This bag is still relatively compact, and is touted to meet most aircraft carry-on requirements. Internally, it is lined with 3D shock absorbing foam and structural reinforcement board. The fabric is soft so that it will not scratch the gear. It is made of “water-repellent ripstop nylon/polyester, with hollowed ITW Nexus buckles and Duraflex hardware”. There are external accessory pockets to hold various accessories, including straps to carry a tripod or monopod. There is also a dedicated compartment for your laptop, and a sun/rain cover is included to “seal” the deal.

The Manfrotto Pro Light Cinematic Backpack Balance can be purchased from B&H Photo Video for $279.99.

The post The Manfrotto Pro Light Cinematic Backpack Balance can carry it all appeared first on The Gadgeteer.

Filed in categories: News

Tagged: ,

The Manfrotto Pro Light Cinematic Backpack Balance can carry it all originally appeared on The Gadgeteer on May 5, 2018 at 10:00 am.

Note: If you are subscribed to this feed through FeedBurner, please switch to our native feed URL http://the-gadgeteer.com/feed/ in order to ensure continuous delivery.