

To host a website on a server, you’ll need to get your hands dirty and set up the whole environment by yourself. Below, you’ll find a generalized example of how to get things done using a virtual private server running Ubuntu 18.04
In short, you’ll need to:
- Perform the initial server setup
- Set up a DNS zone and point your domain
- Install a software stack
- Create a virtual host
- Get your website up and running
P.S. If you don’t want to go through this complicated steps, consider getting a web hosting.
1. The First Server Setup Steps
If you decide to rent a dedicated server or a VPS, you’ll first need to lay a solid foundation. This involves accessing your server through a terminal or an SSH client and making security tweaks and updates.
Connect to Your Server
Start by connecting to your server. The following command will do the trick:
ssh root@your_server_IP -port
When connecting for the first time, you may be prompted to add your server IP to the list of known hosts. Type in yes to proceed and you’ll then be prompted to enter the root password.
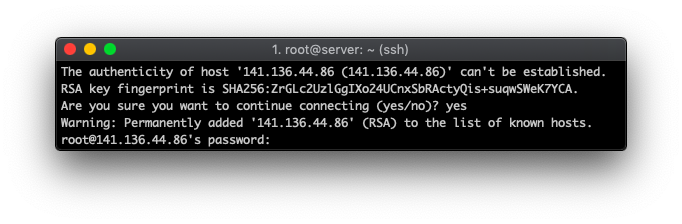
Here’s an example of what you should see on your screen if everything went right.
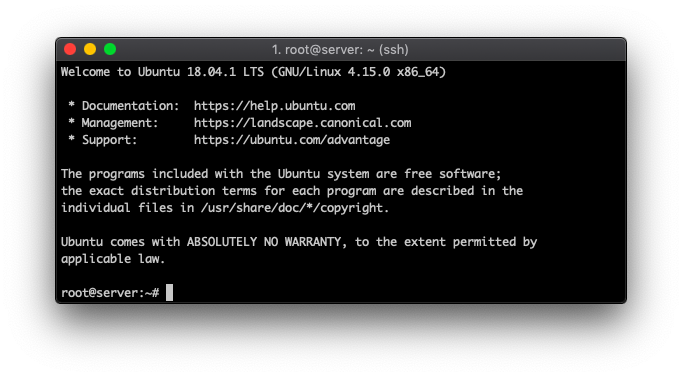
Get the Latest Updates
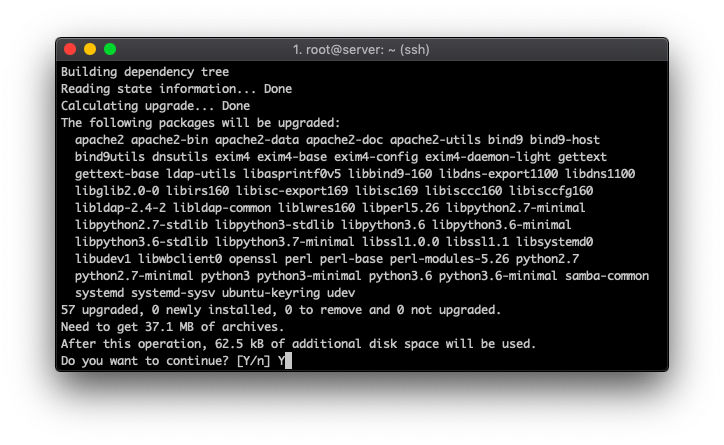
Run the following commands to get the latest updates for your Ubuntu 18.04 server:
sudo apt update
sudo apt upgrade
When running the second command, you’ll see a confirmation screen. Type in Y to proceed.
Create a New User
Next, you’ll need to add a new user, as using the root one for everyday tasks is not recommended. Let’s call it webmaster. To begin the user creation, execute:
adduser webmaster
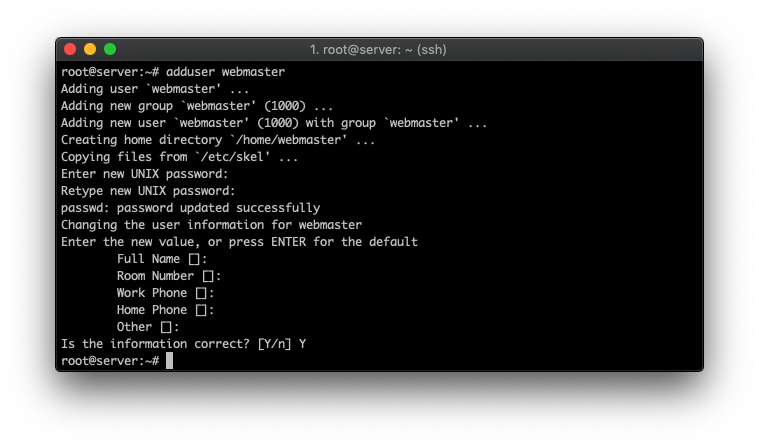
Once you create a password, you’ll be prompted to enter the general details (which you can leave blank). Then, type in Y to confirm the new user creation.
By default, the new user won’t have enough privileges to do everything you need, hence you’ll need to add them manually. Here’s how you do it:
usermod -aG sudo webmaster
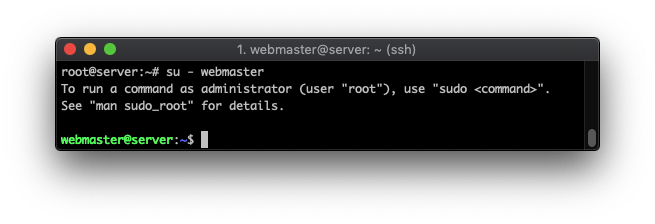
That’s it! Your new administrative user is ready. To start using it instead of root, execute:
su – webmaster
Set Up Public Key Authentication (Optional)
Using a password to authenticate leaves you vulnerable to brute-force attempts and puts your server in a moderate risk (especially if you’re lazy to set up a unique and strong password).
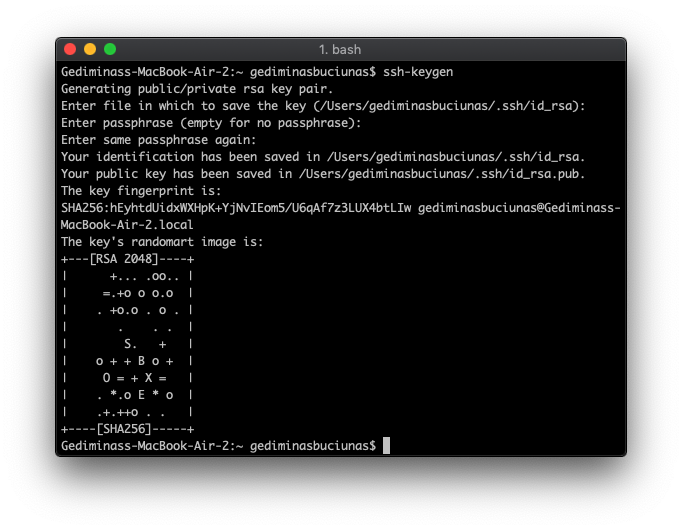
A great way to improve server integrity is to use SSH keys instead of a regular password. The steps should be identical regardless of which Linux distribution you’re running. To begin log out of your server and execute the following command on your local computer to create a new public key:
ssh-keygen
You’ll be asked to enter an additional passphrase and the location of where to save the public key. By default, it saves everything to /Users/Your_User/.ssh directory (which you can keep unless you have other plans in mind).
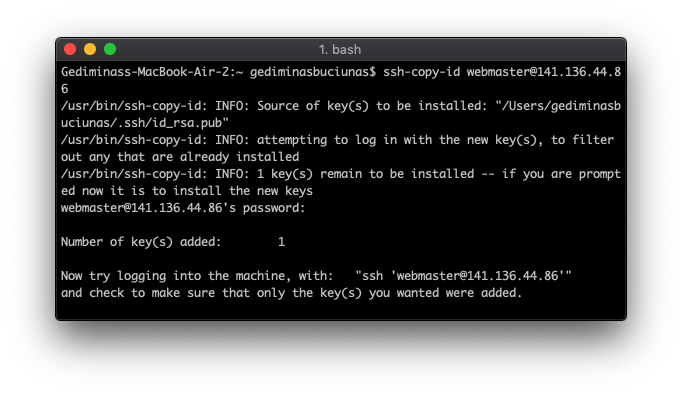
As soon as it’s finished, copy over the SSH key to your server by using:
ssh-copy-id webmaster@your_server_IP
You may also do the same for your root user just in case:
ssh-copy-id root@your_server_IP
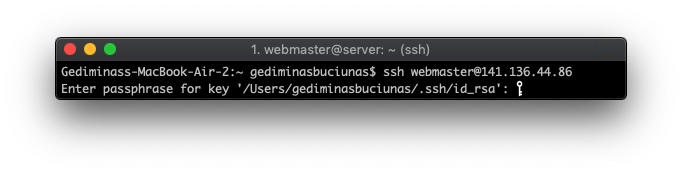
Finally, you’ll need to login to your server again. Only this time, you’ll be using the SSH key and its passphrase to authenticate. If your password is guessed by someone, they will be unable to log in, as the public key is required to make a successful connection.
Disable Password Authentication (Optional)
Since you’re now able to access your server with the newly generated SSH key, it’s advisable to disable the regular password authentication. To do so, we can use the nano text editor:
sudo nano /etc/ssh/sshd_config
Look for a line that says #PasswordAuthentication yes, delete the # and change the yes to a no. The final result should look like:
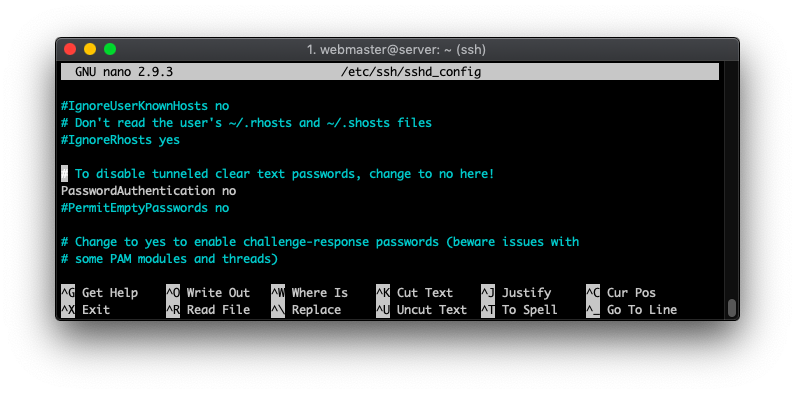
To save these changes and exit the nano editor, press CTRL+X, type in Y and press Enter. And finally, apply everything by reloading the sshd service:
sudo systemctl reload sshd
And that’s it! You’ll now use a public key to authenticate instead of a password, which is considered a more secure way to access and manage a server.
Set Up a Firewall
Last, but not least, it’s advisable to use a firewall to protect yourself from the dangers lurking on the web. Uncomplicated Firewall is one of the best tools for the job. To set it up, execute:
sudo apt-get install ufw
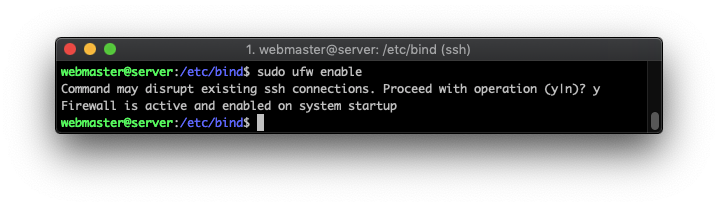
When installed, the firewall will not work unless turned on manually. You can enable it by using:
sudo ufw enable
To check if it’s up and running, execute:
sudo ufw status verbose
2. Set Up a DNS Zone
The next challenge will be creating a DNS zone, which acts as the binding material between a domain name and a server. We can break it down into two smaller steps:
- Setting up a DNS zone within your server
- Creating custom nameservers at your domain registrar
Create a New DNS Zone
To make a new DNS zone, we’ll be using a tool called bind9. In the end, this is the service that allows us to load a website through a domain name instead of an IP address.
To install Bind9 on your Ubuntu 18.04 server, execute:
sudo apt-get install bind9
Once installed, all the files will be available in the /etc/bind directory. Let’s navigate to it first:
cd /etc/bind
To keep everything neat and organized, we’ll create a separate directory for our DNS zones:
sudo mkdir -p zones
Let’s create a new DNS zone file for our domain. We’ll be using domain-example.com for demonstration purposes (you should replace it with your actual domain name).
sudo nano zones/domain-example.com
DNS zone snippet example:
;
; BIND data file for domain-example.com
;
$TTL    3h
@       IN      SOA     ns1.domain-example.com. admin.domain-example.com. (
                          1        ; Serial
                          3h       ; Refresh after 3 hours
                          1h       ; Retry after 1 hour
                          1w       ; Expire after 1 week
                          1h )     ; Negative caching TTL of 1 day
;
@       IN      NS      ns1.domain-example.com.
@       IN      NS      ns2.domain-example.com.


domain-example.com.     IN      A       YOUR_SERVER_IP
ns1                     IN      A       YOUR_SERVER_IP
ns2                     IN      A       YOUR_SERVER_IP
www                     IN      CNAME   domain-example.com.
mail                    IN      A       YOUR_SERVER_IP
ftp                     IN      CNAME   domain-example.com.
domain-example.com.     IN      MX      10      domain-example.com.
Make sure to replace all instances of your Your_Server_IP and domain-example.com with the actual values. Save the zone file by pressing CTRL+X and then typing Y to confirm the changes.
Next up, we’ll need to edit the local configuration and specify the location of our newly created DNS zone. This ensures that the server knows which zone file belongs to which domain name.
sudo nano named.conf.local
Paste down the following lines at the bottom of the file while replacing domain-example.com with your actual website address.
zone "domain-example.com" {
       type master;
       file "/etc/bind/zones/domain-example.com";
};
Press CTRL+X and input Y to save your changes and exit the nano editor.
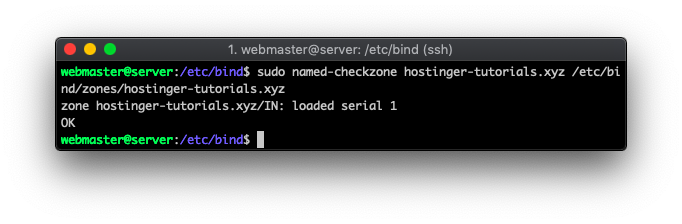
You can also test out whether everything was added and configured correctly by executing the following command:
sudo named-checkzone domain-example.com /etc/bind/zones/domain-example.com
Lastly, run these two commands to restart your server’s DNS service and to make sure it’s running:
sudo /etc/init.d/bind9 restart
sudo /etc/init.d/bind9 start
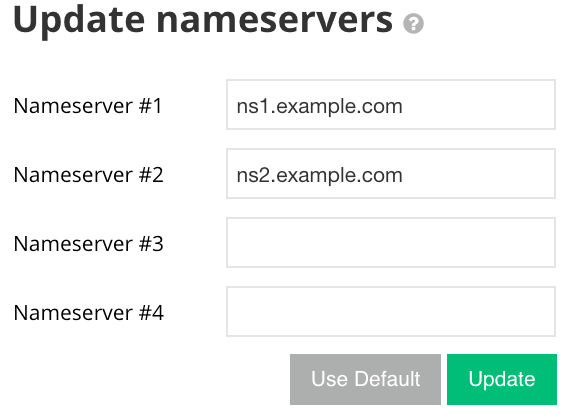
At this point, the DNS zone is ready from your server side. To finalize it, you’ll need to create custom nameservers entries within your domain registrar.
Create Custom Nameservers For Your Domain
Since we specified two nameservers (ns1.domain-example.com and ns2.domain-example.com) in our DNS zone example, we’ll need to create these entries at the domain registrar and use them.
Here’s how the entries should look like:
| Custom Nameserver | Points to |
| ns1.domain-example.com | Your_Server_IP |
| ns2.domain-example.com | Your_Server_IP |
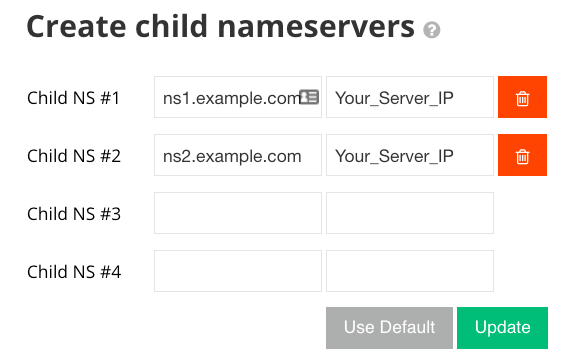
Once created, you’ll need to point your domain to these new nameservers.
3. Install LAMP Stack
LAMP is one of the most used software stacks of the web. It stands short for Linux, Apache HTTP Server, MySQL/MariaDB, and PHP. Before hosting a site, you’ll need to make sure all these ingredients are available at your server. Here’s how the process of setting them up would look using Ubuntu 18.04:
Apache
Apache HTTP Server may already be included in the default packages that come with your server. If not, then execute:
sudo apt-get install apache2
Since there’s a firewall, we need to make sure these ports are open as Apache won’t work properly otherwise. Here’s what you should allow through the firewall:
sudo ufw allow 80/tcp
sudo ufw allow 443/tcp
Then, restart it to make sure the changes are applied:
sudo ufw reload
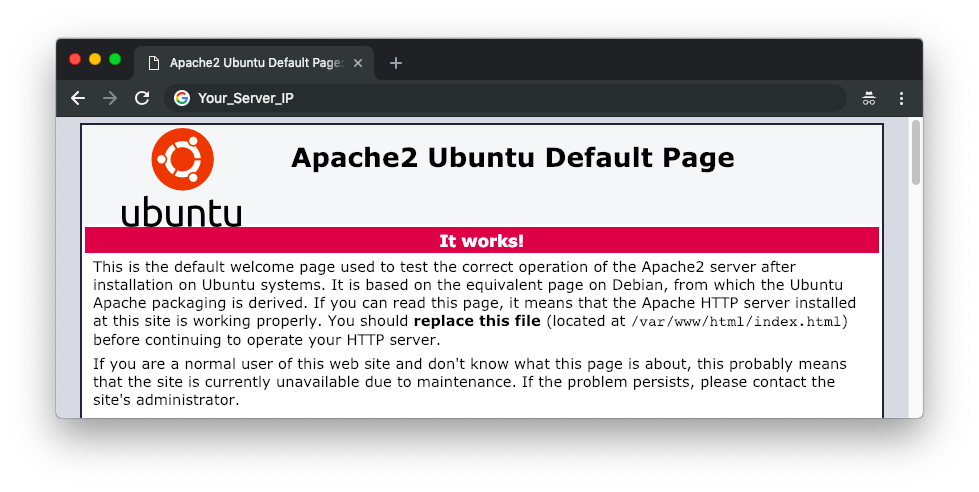
At this point, here’s what you should see by visiting the IP address of your server through a browser:
PHP
To get the latest PHP version with a few extra modules that WordPress needs, execute:
sudo apt-get install php php-common php-mysql php-gd php-cli

You can check which PHP version was installed on your server by typing:
php -v

MySQL/MariaDB
MariaDB and MySQL are two of the top choices for your database server in Linux. For this example, we’ll use MariaDB. To install it on your server, execute:
sudo apt-get install mariadb-server mariadb-client
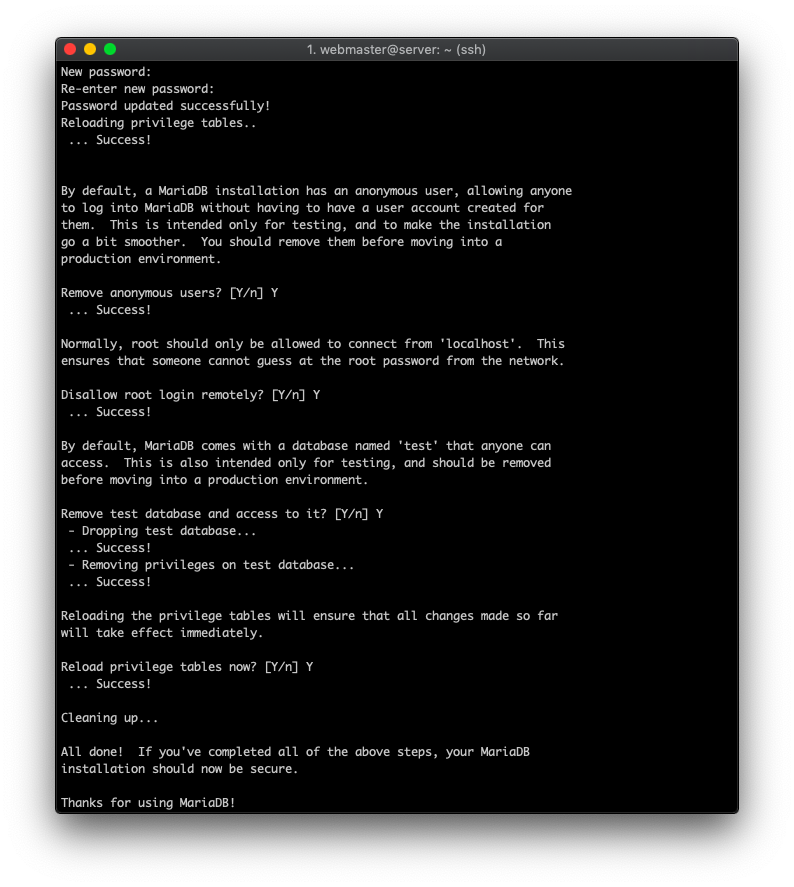
Once done, you’ll need to use an additional script that comes with the package. It will establish the basic security measures for your database server. Start it by typing:
sudo mysql_secure_installation
At the very first step, you’ll be asked to provide the root MySQL password. Press the Enter button to continue as it’s not created yet. Then follow the rest of the instructions that pop up in the command line interface.
Finally, you can check if my database server is operational by running:
sudo systemctl status mysql
4 Create a Virtual Host
The next task will be creating a dedicated directory for your website files. Start by changing your working directory:
cd /var/www/html
Use this command to create a folder for your domain and an additional one within in:
sudo mkdir -p domain-example.com/public_html
Then, make the webmaster user we created previously the owner by using:
sudo chown -R webmaster:webmaster domain-example.com/public_html
You’ll also need to make sure that read permissions are applied to the Apache root directory. In this case:
sudo chmod -R 755 /var/www/html/
At this point, Apache gets all the settings from the 000-default.conf file. We’ll need to copy the contents of this file and create a separate one for our domain name. The easiest way to copy a template of the virtual host configuration is by using the following command:
sudo cp /etc/apache2/sites-available/000-default.conf /etc/apache2/sites-available/domain-example.com.conf
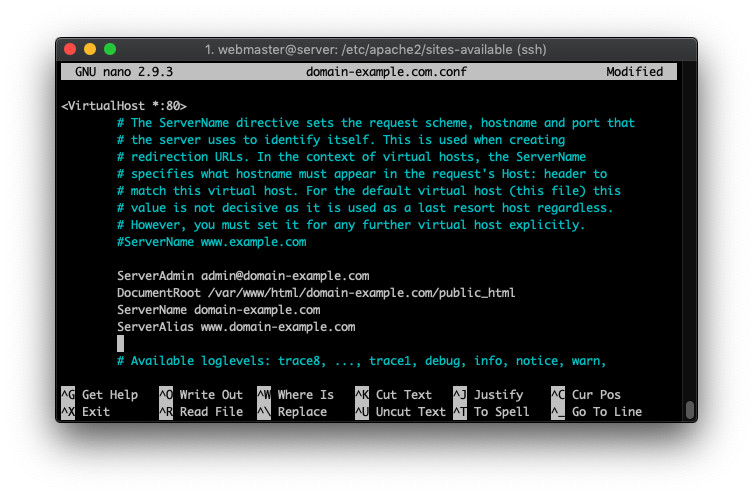
Essentially, this makes a copy of the file under a different name in the same directory. This is the file that tells your Apache web server the location of a domain’s root directory, error log, and other important paths. To change its content, we’ll use nano:
sudo nano /etc/apache2/sites-available/domain-example.com.conf
Apache config example:
<VirtualHost *:80>
        # The ServerName directive sets the request scheme, hostname and port that
        # the server uses to identify itself. This is used when creating
        # redirection URLs. In the context of virtual hosts, the ServerName
        # specifies what hostname must appear in the request's Host: header to
        # match this virtual host. For the default virtual host (this file) this
        # value is not decisive as it is used as a last resort host regardless.
        # However, you must set it for any further virtual host explicitly.

        ServerAdmin admin@domain-example.com
        DocumentRoot /var/www/html/domain-example.com/public_html
        ServerName domain-example.com
        ServerAlias www.domain-example.com

        # Available loglevels: trace8, ..., trace1, debug, info, notice, warn,
        # error, crit, alert, emerg.
        # It is also possible to configure the loglevel for particular
        # modules, e.g.
        #LogLevel info ssl:warn

        ErrorLog ${APACHE_LOG_DIR}/error.log
        CustomLog ${APACHE_LOG_DIR}/access.log combined

        # For most configuration files from conf-available/, which are
        # enabled or disabled at a global level, it is possible to
        # include a line for only one particular virtual host. For example the
        # following line enables the CGI configuration for this host only
        # after it has been globally disabled with "a2disconf".
        #Include conf-available/serve-cgi-bin.conf
</VirtualHost>
Make sure to replace all instances of domain-example.com with your actual domain name. To save the file, press CTRL+X and confirm by typing Y. The final result should look like:
At this point, you’ll need to turn off the default virtual host configuration file and use the newly created one. This command will disable it:
sudo a2dissite 000-default.conf
Then, add the recently created configuration file as shown below:
sudo a2ensite domain-example.com.conf
Lastly, you’ll need to restart Apache for the changes to apply. You can do that by running:
sudo systemctl reload apache2
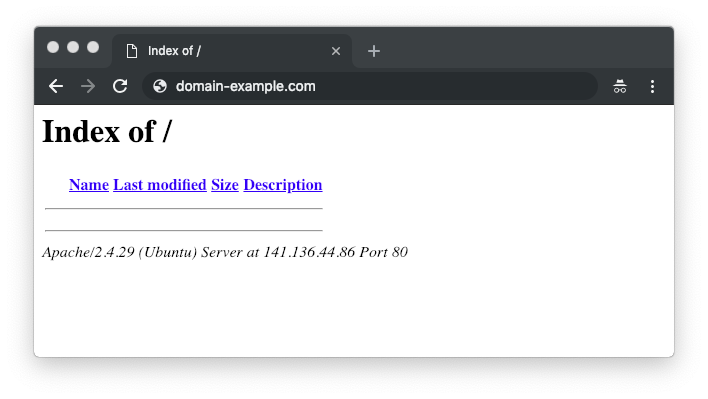
You successfully installed LAMP on your server. Since your domain is already pointed to the server, you may need to wait a few hours for the DNS to fully propagate. Then you should see a similar screen when visiting your domain through the browser.
5. Set Up WordPress (or Upload a Website)
Since the initial server setup is finally complete, it’s time to host a website on it. In this section, we’ll show you a generalized example of how to get a WordPress site up and running.
Create a New MySQL Database and User
Start by accessing the MySQL interface through the terminal:
sudo mysql
>Use the following syntax to make a new database:
CREATE DATABASE wpdatabase;
Then, create a new user and specify the password:
CREATE USER 'wpuser'@'localhost' IDENTIFIED BY 'SuperSecurePassword123';
Next, assign administrative privileges to your newly created user with:
GRANT ALL PRIVILEGES ON wpdatabase.* TO 'wpuser'@'localhost';
That’s it! Your MySQL user and database are ready for action. To turn off the interface, type in:
exit
Move WordPress Files to Your Server
Last, but not least, we have to get the actual website files uploaded to the root directory of your domain. There are two approaches that we’ll describe step-by-step:
- Using the wget command to get the latest WordPress version
- Configuring an FTP client (such as FileZilla)
Method 1: Using the Command Line Tools
The first way is to use a command called wget. To use it on your server, you’ll have to install it:
sudo apt-get install wget
Then, change your working directory to the root folder of your domain name:
cd /var/www/html/domain-example.com/public_html
Use the wget command to download the latest version of WordPress from the web:
wget https://www.wordpress.org/latest.zip
Then, extract all the contents of the archive by using:
unzip latest.zip
By default, all the files will appear in a new directory called wordpress (which may result in your website working via domain-example.com/wordpress). For everything to work correctly, we’ll need to move all the files out of that directory to the one above. Here’s how to do it:
cd wordpress
The following command will move all files from the current directory to your specified location:
sudo mv * /var/www/html/domain-example.com/public_html/
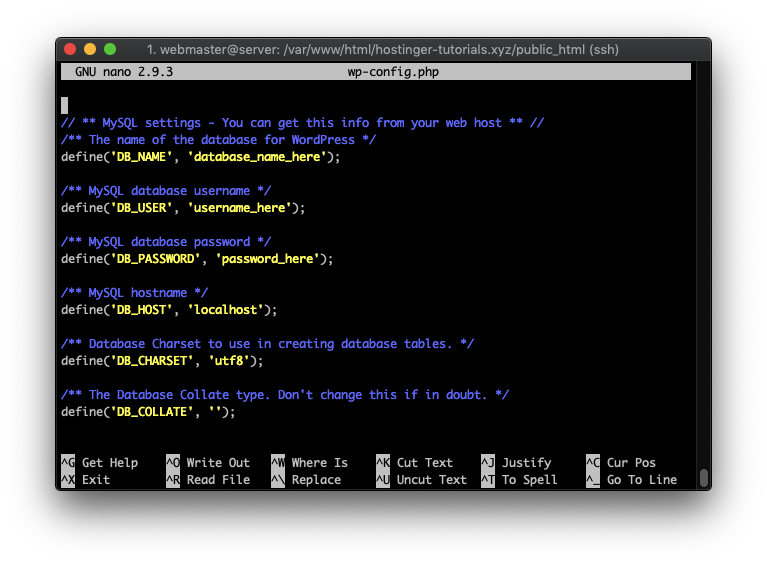
Before starting the installation, you’ll need to prepare your wp-config.php file. Since only a sample one is provided. Start by renaming it:
sudo mv wp-config-sample.php wp-config.php
Then, edit the file using nano and add the MySQL database configuration details.
sudo nano wp-config.php
Make sure to update the MySQL User, Database, and Host sections with the values that you created previously.
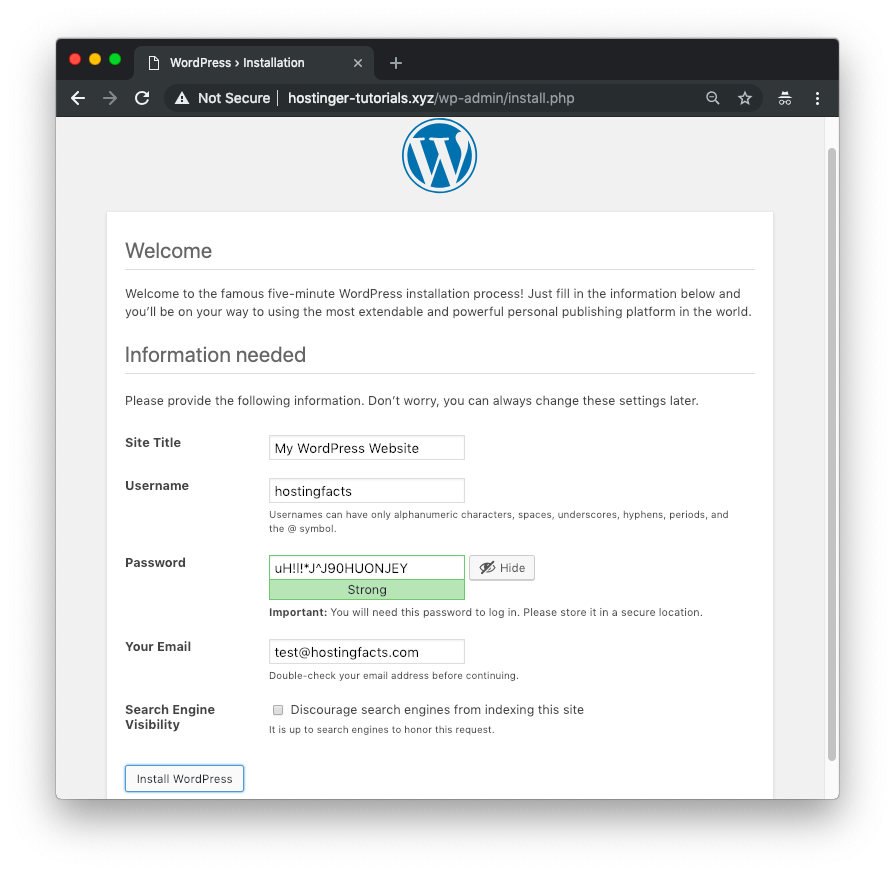
Lastly, visit your domain name in the browser and you’ll see the initial WordPress setup screen.
Once you finish it, you can install a migration plugin such as All-in-One WP Migration to import an existing WordPress website.
Method 2: Using an FTP Client
Alternatively, you can use an FTP client such as FileZilla. In case you configured an SSH key and disabled password authentication, you’ll need to use it to log in instead of the regular username and password combination. To configure the SFTP connection:
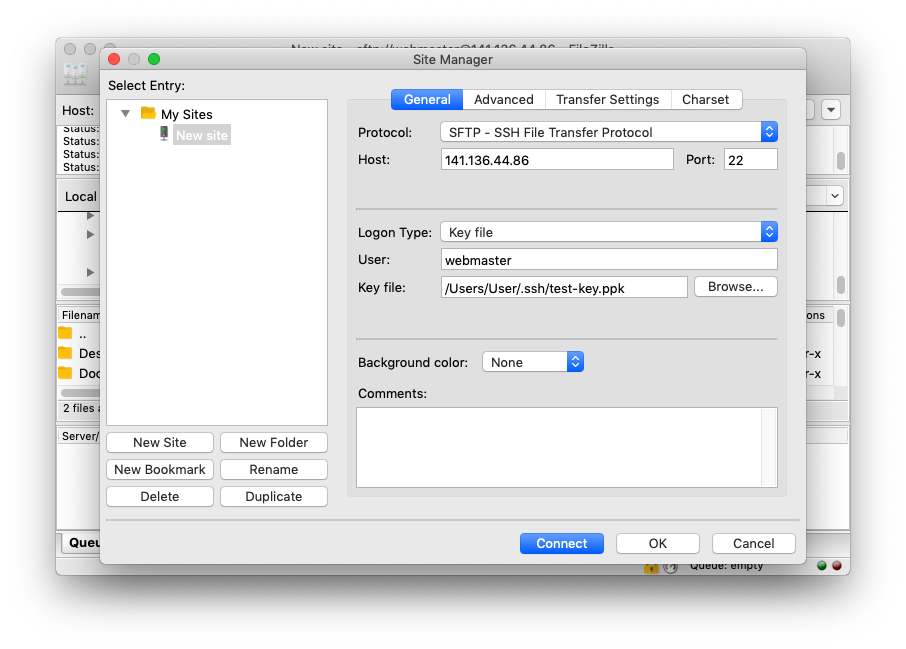
- Go to FileZilla Site Manager and add a New Site.
- Set the protocol to SFTP – SSH File Transfer Protocol.
- Enter your server IP in the Host field and set the port to 22.
- Set the login type to Key file.
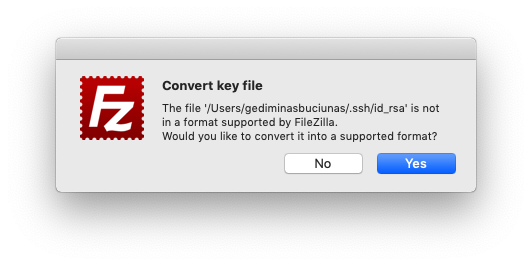
- Specify the path to your SSH key (e.g. /Users/Name/.ssh/id_rsa).
- FileZilla will convert it into a .ppk file, which you can then use to make a connection.
The final configuration should look something like this:
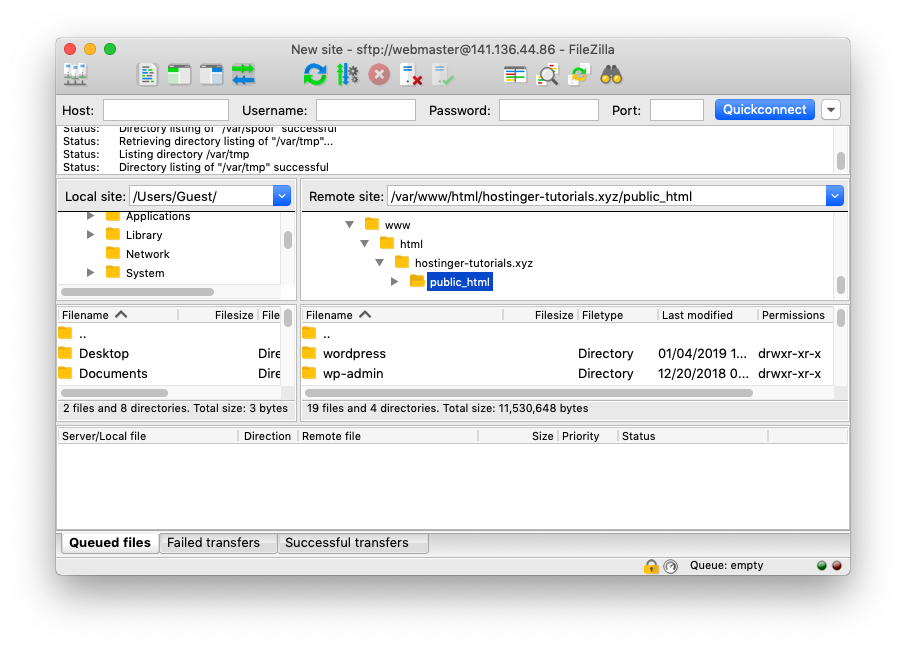
Now, you’ll be able to access your server via FTP and upload any files directly from your computer.
Congratulations! You’ve learned how to host a website on a virtual private server running Ubuntu 18.04. Everything from the initial server setup to preparing the software stack has been covered. All that’s left is to grab a server and get your hands dirty!
This article was published with the help of Hostinger.com.
The post How to Host a Website (Step-by-Step) appeared first on HostingFacts.com.