HyperX QuadCast USB Gaming microphone review

REVIEW – I record training videos in my day job so it is important that my voice is captured under the best possible conditions.  For a while I used a HyperX gaming headset but I had complaints from my audience that the sound was a little “tinny” and that plosives were a real problem.  I switched to a Blue Yeti mic and while the sound was greatly improved, between the size of the mic and the pop filter I disliked the amount of space the solution consumed on my desk – not to mention how it blocked the bottom of my monitor when in the desk stand.  So when the opportunity came up to review HyperX’s new gaming mic, I jumped at the chance.  Would this be the best of both worlds?  Read on to find out…

What is it?

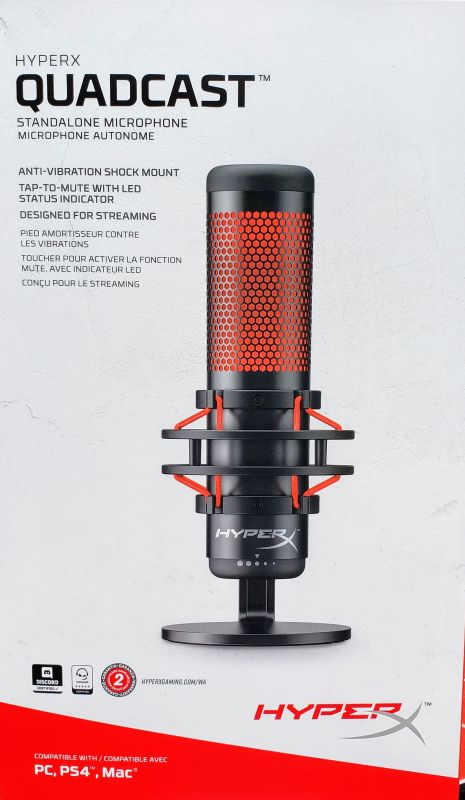
The HyperX QuadCast is a standalone USB microphone aimed at the gaming community.

What’s in the box?

  • HyperX QuadCast microphone with built in pop filter
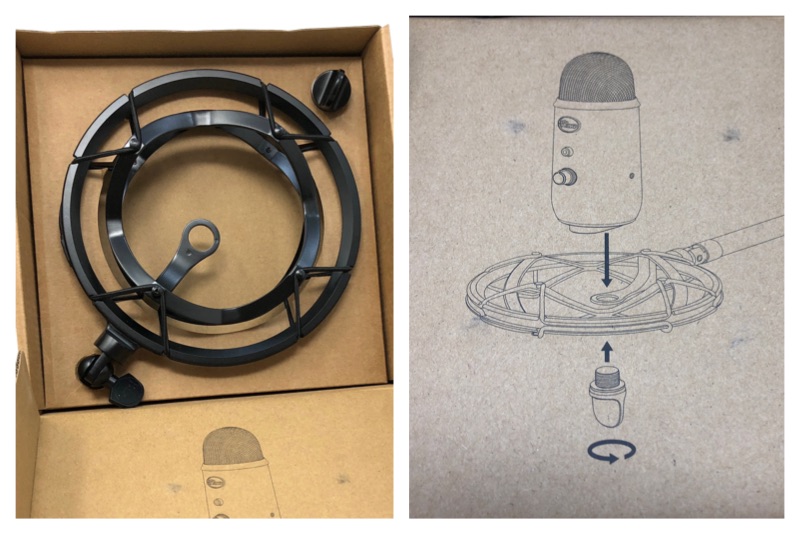
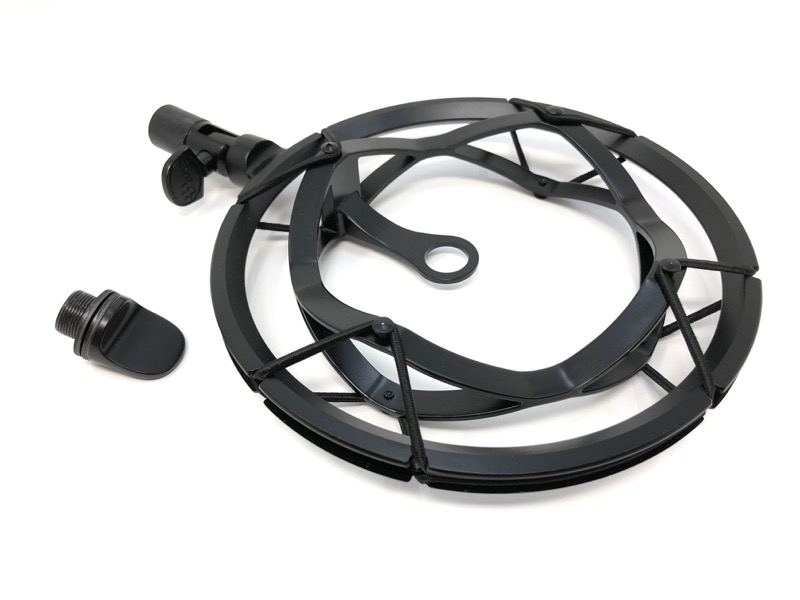
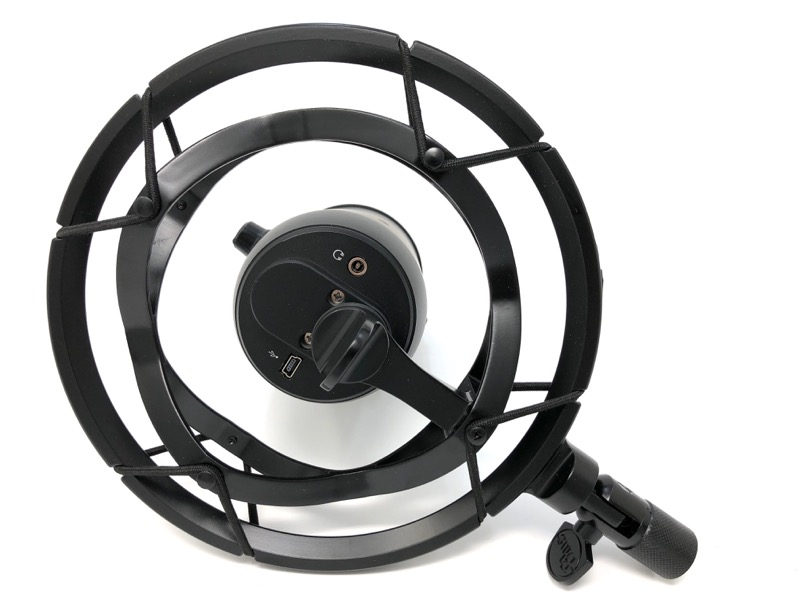
  • Shock mount
  • Desk stand
  • Mic mount adapter
  • Micro USB to USB type A cable

Design and Features

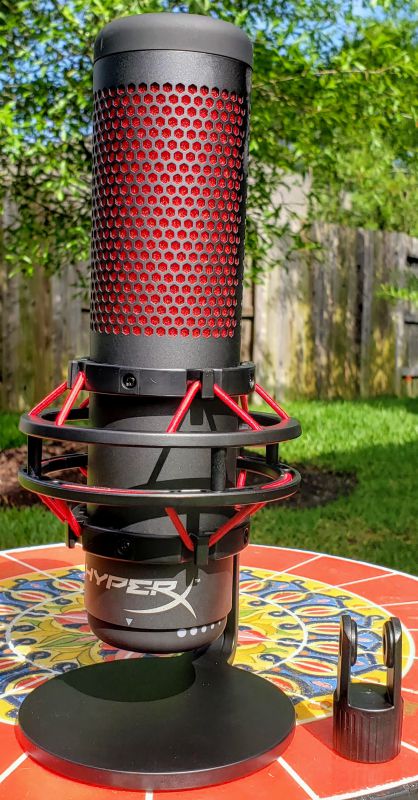
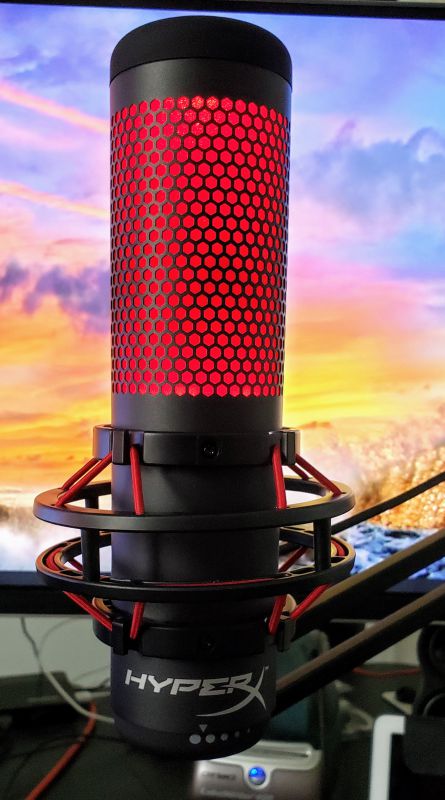
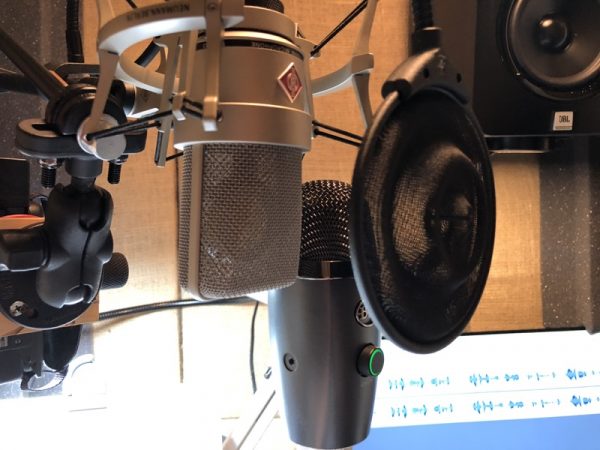
The body of the mic is metal which gives it a solid feel and the impression of longevity.  Top to bottom, the mic is about 8.5 inches tall, so it is by far not the shortest mic out there.  With the shock mount, it is 4 inches wide, but that is a tad less wide than competitors so what you lose in height you make up for here.  The top half of the mic glows red when the mic is on and not muted.  Here is the mic connected to my mic arm:

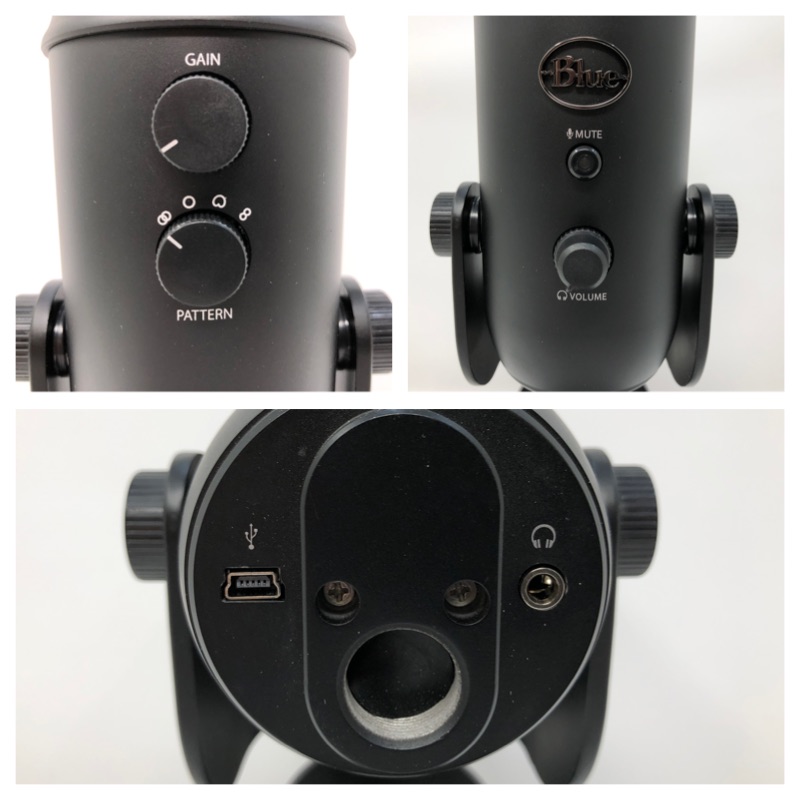
On the bottom of the mic is the gain control – simply rotate to increase/decrease the input volume.

On the back of the mic is the polar pattern selector.  Starting on the left side, you have:

  • Stereo – collects sound from the left and right sides of the mic
  • Omnidirectional – gets sound from every side, so great if you are recording a meeting or other event where you can’t control sound source
  • Cardioid – only from the front of the mic, which is the go-to for streaming and podcasting
  • Bi-directional – front and rear (as opposed to stereo’s right/left), a great choice for interviews

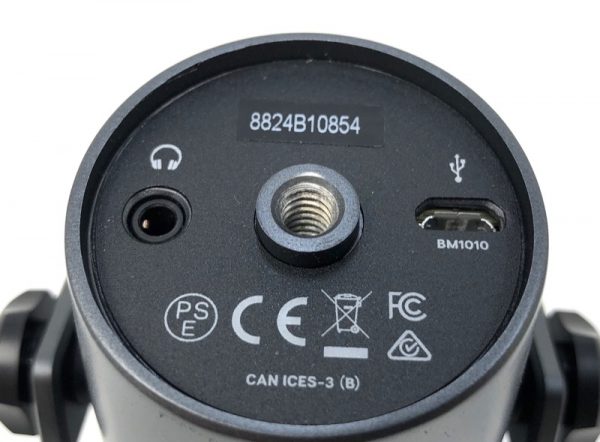
Behind the mic mount is the micro-USB plug and the monitor jack.  While it might seem like an awkward place to put these connections, there is actually plenty of room and will allow you to run the cable attached to the boom arm.  This makes the connections less messy on your desk.

The top of the mic has the mute button.  Simply tap the button to mute/unmute.  When muted, the red glow dims considerably, giving you a visual cue that your sound is off.

The on-paper specs for the QuadCast are similar to the Blue Yeti – sampling at 48 kHz and 16 bit depth, and a response range of 20 Hz to 20 kHz.  Not as good as a studio mic, but more than you need for most purposes.  The sound is warm and seems perfectly matched for voice recording, whether that’s spoken word or singing.  After sampling with this mic and the Yeti I find I prefer the quality the QuadCast produces – it just feels richer and like it has more depth, something my voice could use help with.

The mic is plug and play on Windows – plug it in and the OS finds it.  A few seconds later you are good to go.  No special drivers or other software needed.

A word on the pop filter – it stops a fair amount of plosives (the sound most people make when words start with the letters “B” or “P”) but it is not a match for a real external pop filter.  After a few recordings I added my trusty Knox filter and the quality of recordings improved.  I am willing to concede that it is perhaps the way I speak, but just be aware you may have this issue as well.

And a word on the gain control.  You’d think that you would want to turn the volume up to 100% in Windows and then use the gain control to adjust the actual volume.  You’d think wrong – that produces a “static-y” white noise that sounds horrible.  In testing I found that for solo, cardioid recording I needed to keep Windows and the mic volumes both at about 50% to get the best quality and volume.  Bi-directional, I needed to bump up the mic volume to get a balance between front and back.  Never, though, did I adjust Windows volume beyond 50%.

What I like

  • The sound is warmer and fuller than comparably priced mics
  • Intelligent design – everything you need is easily accessible
  • The polar patterns gives the mic a wide range of applications – it isn’t a “one trick pony”

What needs to be improved

  • The pop filter should be higher-quality
  • You should be able to turn off the red glow – while you would lose the muted visual cue, the glow can be distracting to the eye

Final thoughts

As a first standalone effort, the QuadCast comes off as remarkably polished and ready for (almost) any kind of use.  The sound quality is at least as good and perhaps subjectively better than other mics in the same price range.  While on paper the mic is priced higher than others, by the time you factor in a shock mount and adapter, it might actually be less money.  Because of the red glow I am not sure I would want to use this as a gaming mic, but for podcasts, videos and other uses it seems like a great device.

Price: $139.99
Where to buy: Amazon
Source: The sample for this review was provided by HyperX

Filed in categories: Reviews

Tagged: ,

HyperX QuadCast USB Gaming microphone review originally appeared on The Gadgeteer on May 23, 2019 at 9:30 am.

Note: If you are subscribed to this feed through FeedBurner, please switch to our native feed URL http://the-gadgeteer.com/feed/ in order to ensure continuous delivery.

How to Deactivate the Microphone in Windows 10

There are various security measures you can take when using your Windows 10 computer. For example, many users decide to cover up the webcams, while others choose to deactivate their computer’s microphone. If you rarely use the microphone, deactivating it is a good security measure, so you don’t run the risk of someone listening in on your conversations. The following guide will show you the different methods you can try to turn off your computer’s microphone. Related: How to Fix Microphone Not Working Issue in Windows 10 How to Disable the Microphone in Settings on a Windows 10 Computer In your computer’s settings there is… Read more

Blue Ember XLR Studio Microphone Review

REVIEW – Blue is an audio company known best for making many different types of microphones for podcasts, streamers, musicians, and audio professionals. Many podcast and Youtube content creators feature their products in their videos and shows, and I’ve always wanted to try one for myself since I wanted to start streaming on Twitch, as well as use it for online gaming chat. I got the chance to review the new Blue Ember XLR Studio microphone, so let’s take a look!

What is it?

The Blue Ember microphone is a studio microphone for recording, podcasting, and live-streaming. The XLR connection means that it delivers more crisp, clear sound rather than a USB connection and also reduces background noise.

Hardware specs

  • Transducer Type: Condenser capsule
  • Polar Pattern: Cardioid
  • Frequency Response: 38 Hz-20 kHz
  • Sensitivity: 12 mV/PA
  • Output Impedance: 40 ohms
  • Rate Load Impedance: 1k ohm
  • Maximum SPL: 132 dB SPL
  • Power Requirements: +48V DC Phantom Power
  • Weight: 0.84 lbs
  • Dimensions: 8.62″ x  1.5″ x 1.26″

What’s in the box?

  • Blue Ember microphone
  • stand mount
  • stand adapter
  • user manual

Design and features

The Blue Ember XLR Studio microphone is heavyweight, sleek and features a metallic blue-grey body with a black capsule. The thin body of the design makes it easy to position in smaller spaces, such as a computer desk or small music studio. It doesn’t take up a lot of real estate if you’re using it on camera, due to the fact that you speak into the side of the capsule rather than the front like a traditional microphone. It’s important to note that an audio mixer is that supports an XLR input is needed. You will also need a microphone stand or a desktop boom arm to hold the microphone. Blue supplies a small stand mount and stand adapter so that you can connect the mic to the stand.

Setup

Setup was a bit more complicated for me due to the nature of the Blue Ember having an XLR connection rather than a native USB connection. If you’re using it on a PC like I am, you will need an audio mixer that support an XLR input which then connects to a computer via USB. I was fortunate to have my brother lend me an XLR cable and a Behringer XENYX Q1202 audio mixer, but there are plenty of other options out there smaller/inexpensive mixers.

Performance

Compared to an old microphone I used to use, the Blue Ember mic’s sound blew me away. The crisp clear audio that I got was a huge improvement from the background noise I was used to getting with a microphone with USB connection. This makes sense since XLR connections are traditionally used for professional audio.

For this first sample, I just spoke a couple of sentences, in as quiet of a room as I could, with the audio mixer settings that I found appropriate for a speaking voice. I’m not an audiophile, but I liked how these settings worked for me chatting through discord for gaming, or if I do a Twitch broadcast.

For this sample, I read the intro paragraph off of Blue’s website:

If you’d like to hear more examples of the Blue Ember with musical instruments or singing, head over to their website or SoundCloud for better samples!

What I like

  • Wonderful, crisp sound
  • Thin design for out-of-the-way placement on camera
  • Solid weight and good feel in hand

What needs to be improved

  • Extra equipment needed to connect to a PC, such as an audio mixer, cables and mic stand

Final thoughts

For the value, the Blue Ember microphone is definitely recommended if you want some awesome quality audio for a podcast, stream, or video recording. It’s a wonderful upgrade to anyone looking to sound more professional, but note you will also need extra equipment for a full setup.

Price: $99.99
Where to buyBluedesigns.com and BHPhoto
Source: The sample of this product was provided by Blue Microphones

Filed in categories: Reviews

Tagged:

Blue Ember XLR Studio Microphone Review originally appeared on The Gadgeteer on February 22, 2019 at 9:00 am.

Note: If you are subscribed to this feed through FeedBurner, please switch to our native feed URL http://the-gadgeteer.com/feed/ in order to ensure continuous delivery.

Blue Yeti Nano USB microphone review

REVIEW – What if you took the Yeti USB microphone and took a shrink ray to it? That was my thought when I saw the Blue Yeti Nano microphone. But how does it sound, and what features would be missing from the smaller package? I tried out the Nano to find out.

What is it?

The Yeti Nano is a high-quality USB microphone designed for professional podcasting that comes in four different colors.

Hardware specs

Power Required/Consumption: 5V 150mA
Sample Rate: 48kHz
Bit Rate: 24bit
Capsules: 2 Blue-proprietary 14mm condenser capsules
Polar Patterns: Cardioid, Omnidirectional
Frequency Response: 20Hz – 20kHz
Sensitivity: 4.5mV/Pa (1 kHz)
Max SPL: 120dB (THD: 0.5% 1kHz)
Dimensions (mic w/stand): L: 4.29” (10.9cm) W: 3.78” (9.6cm) H: 8.31” (21.1cm)
Weight: 1.39lbs (0.63 kg)
Headphone Amplifier
Impedance: >16 ohms
Power Output (RMS): 130mW
THD: 0.009%
Frequency Response: 15Hz – 22kHz
Signal to Noise: 100dB
System Requirements
Operating System: Windows 7, 8.1, 10 or macOS (10.10 or higher)
USB Compatibility: 1.1/2.0/3.0

What’s in the box?

Yeti USB microphone (including desktop stand), USB cable, 3/8” to 5/8” adapter

Design and features

The Nano really does look like a smallish version of the regular Yeti. It comes attached to a handsome desk stand.

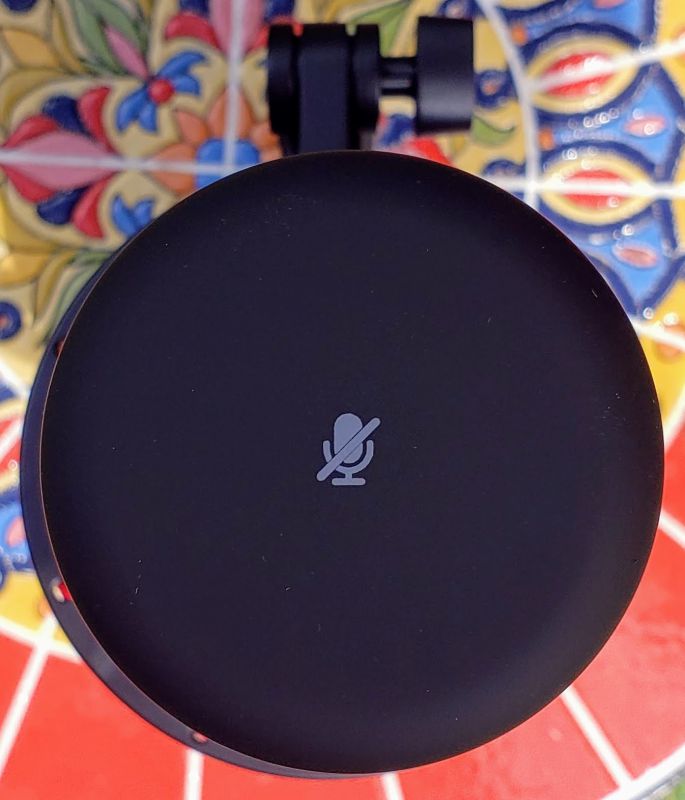
The only control on the front is a volume knob. It also doubles as a mute button.

There’s only one button on the back to select between microphone patterns. You can choose between cardioid or omnidirectional.

I was elated to find a threaded adapter on the bottom for boom stand users like me. There’s also a low-latency headphone jack and a microUSB port.

Here’s a nice design feature: There’s a notch at the base of the stand to allow your cables to exit gracefully. I like it!

Blue was good enough to include a threaded adapter so you can use a standard microphone stand.

Setup

The Nano was detected by my Apple laptop without issue. Once powered up, the volume knob turns red for mute, and green for on. Pressing the rear button toggles between mic patterns.

Performance

I returned to my recording booth and placed the Nano next to my studio mic, the Neumann TLM103 connected to a tube preamp.

Then, I spoke an excerpt from “Mrs. Frisby and the Rats of NIMH” and recorded on both mics simultaneously. No processing was done whatsoever. The Nano was plugged directly into the computer with no further modification.

What I like

I have no complaints about the sound quality of the Nano- unless I compare it to my studio mic. It’s a very unfair comparison because my Neumann mic setup plus tube preamp costs over 10x as much vs. the Nano. However, there’s a LOT of fiddling involved to get my studio setup dialed in just so. There’s virtually no setup at all with the Nano. It is the closest thing to plug and play.

I also noticed that the Nano “only” comes with two mic patterns (cardioid and omni), but it’s all most podcasters or voiceover artists would need. If you need a figure-8 pattern for interviews with a single mic, you’d be better off with the standard Yeti.

What needs to be improved

None. For this price, it’s hard to go wrong.

Final thoughts

If you’re looking for a starter USB mic that has everything you need and nothing you don’t, the Yeti Nano is a fine choice.

Price: $99.99
Where to buy: Blue Designs and Amazon
Source: The sample of this product was provided by Blue Designs.

Filed in categories: Reviews

Tagged:

Blue Yeti Nano USB microphone review originally appeared on The Gadgeteer on September 13, 2018 at 11:30 am.

Note: If you are subscribed to this feed through FeedBurner, please switch to our native feed URL http://the-gadgeteer.com/feed/ in order to ensure continuous delivery.

Blue Designs Compass microphone boom arm review

One of the golden rules of audio is to put the microphone where the sound is. For recording purposes, this means placing the microphone close to your mouth, but not in an obtrusive way. Blue Designs, the makers of the popular USB Yeti Microphone, introduces a sleek adjustable boom arm with good looks to boot.

What is it?

The Compass is sold as a standalone product, which is good news for those of us with (too) many microphones and other audio gear. It looks like a desk lamp but without the springs and knobs you normally find on such a thing.

Hardware specs

  • Boom Type: Extruded aluminum
  • Desktop Mount: C-clamp
  • Rotation: 360 degrees
  • Max Horizontal Reach: 32”
  • Max Weight Hold: 2.4lbs (including mic and shockmount)
  • Cable Management: Hidden-channel cable management
  • Threading: standard 5/8” threading, adapter for 3/8” threading

What’s in the box?

In the box, you’ll find the compass desktop boom arm, C-clamp for desktop mount, and a 3/8” to 5/8” adapter.

Design and features

In order to test the Compass with the corporate brethren, I was given a Yeti Microphone (in black) to test, alongside a Radius III shock mount (an update from previous versions).  All three items are available as a package called the Yeticaster.

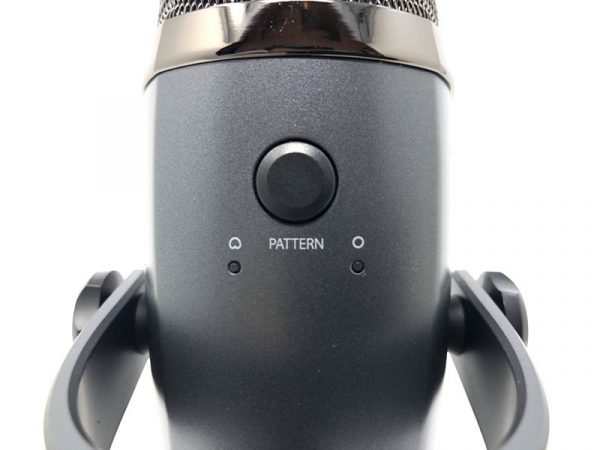
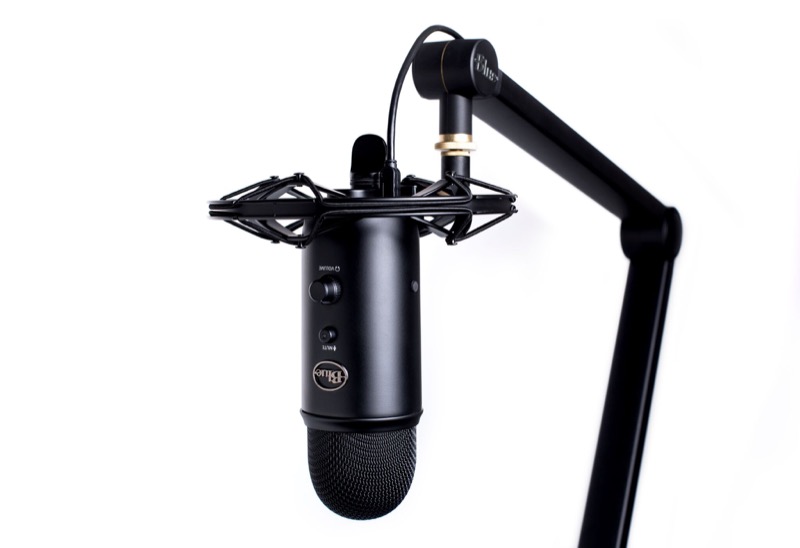
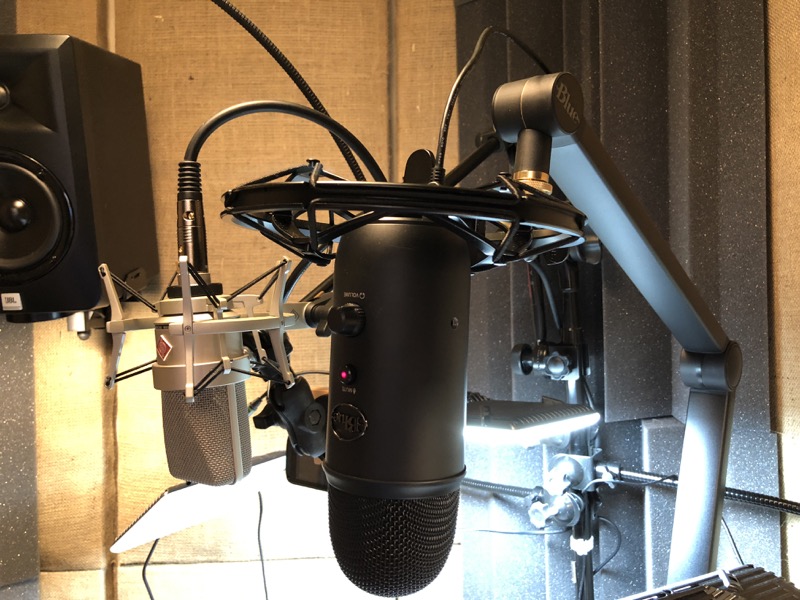
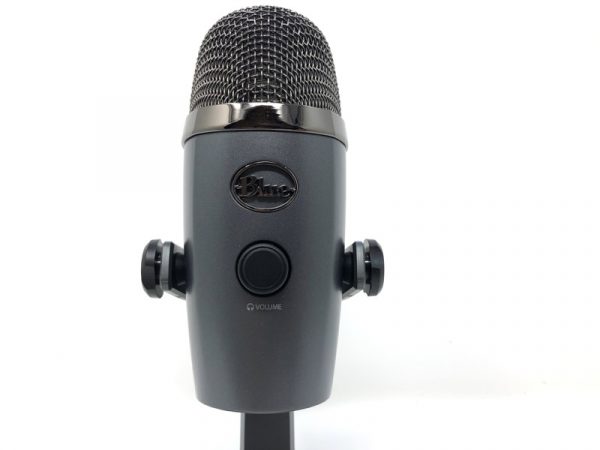
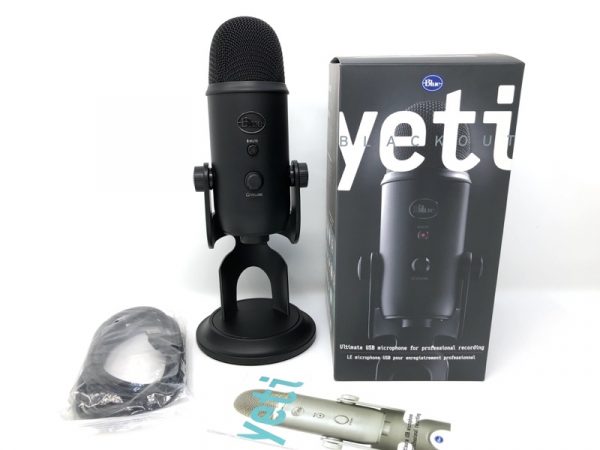
The Yeti should be a familiar sight by now.  This one is called the “Blackout” which matches the Compass arm perfectly.

Here’s a peek at the Yeti’s controls, including gain, pattern selection, mute, headphone volume, mini-USB, mic stand thread and headphone output.

The Radius III shock mount comes in a plain cardboard box with a clever diagram for assembly.  For the Yeti microphones, a thumb screw attaches to the base of the mic.

There are only two pieces in the entire box, in matching black.

Setup

The thumb screw is shown attached to the bottom end of the Yeti mic. The four elastic bands isolate the microphone from external vibrations.

The compass arm has a channel with snap tabs that hold cables in place.  You’ll need a fingernail to pry the tabs open.


When fully assembled, the matte black color is really sleek.

Performance

My recording booth setup is pretty cramped. I put the Yeti/Compass/Radius combination next to my Neumann TLM103 mic setup and recording a track side by side.

I read an excerpt from The Hitchhiker’s Guide to the Galaxy.  Don’t panic!  Both tracks were recorded simultaneously with the same settings on each with no processing.  The Yeti was set for a cardioid pattern.

As I had expected, the Yeti sounded very good. The Neumann had much, much more low end made more apparent by my deep voice. Your results will vary heavily on recording environment. I was recording in a treated room that was specially built for audio.

What I like

  • Handsome hardware at a reasonable price
  • Yeti punches above its price point and is fine for 99% of your average podcaster

What needs to be improved

  • Compass tension adjustment knob could use a little more “grip” or meat. Right now they’re a sliver of plastic.

Final thoughts

If you’re looking for a slick, adjustable microphone boom arm, the Compass boom arm is the way to go. The matching Radius III shock mount pairs perfectly with the Yeti USB microphone, or purchase all three as a bundle with the Yeticaster kit.

Price: $99.99 (Compass), $129 (Yeti microphone), $49.99 (Radius iii) or $199.99 (all three, the YetiCaster Kit)
Where to buy: Blue Designs
Source: The sample of this product was provided by Blue Designs.

The post Blue Designs Compass microphone boom arm review appeared first on The Gadgeteer.

Filed in categories: Reviews

Tagged:

Blue Designs Compass microphone boom arm review originally appeared on The Gadgeteer on April 30, 2018 at 11:00 am.

Note: If you are subscribed to this feed through FeedBurner, please switch to our native feed URL http://the-gadgeteer.com/feed/ in order to ensure continuous delivery.