REVIEW – My wife and I love our basement theater room and especially enjoy turning out all the lights and watching our movies like we’re actually in a theater. We had read over and over how LED back lighting made the viewing experience even better. A couple of years ago, we bought a strip light that stuck to the back of the TV and was USB powered, however, it frequently fell completely off the television, the stickers were just not strong enough and it also would not turn off with the TV and had to be plugged in every time. I definitely wanted an upgrade and then the Govee TV LED Backlights popped up for review.
What is it?
These are multi-color LED lights powered by either USB or power adapter – that connects to Alexa or Google applications for home control. It has a wired remote with push button controls as well. It uses 3M stickers on the backing to apply to the desired surface.
What’s in the box?
Power cord with controls
Adhesive Clips
Power adapter
Cleaning swap
User manual and install instructions
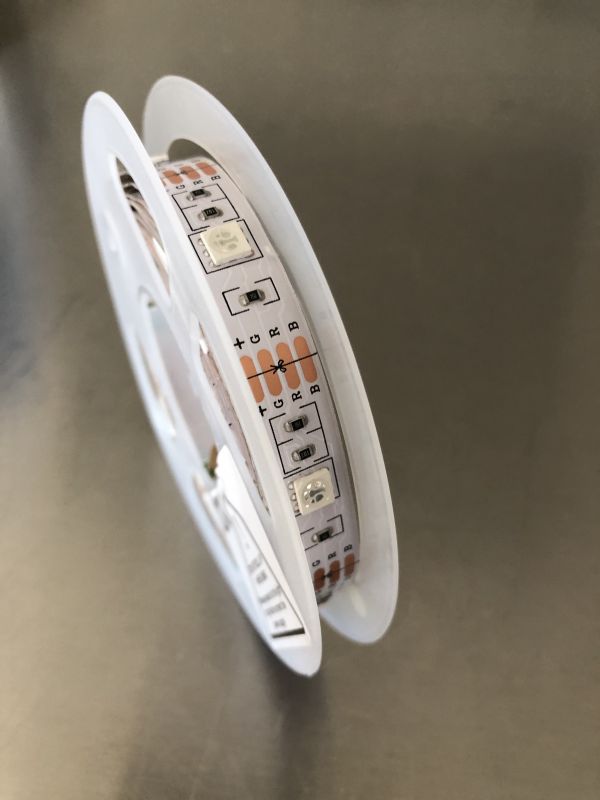
Reel of LED back lights
Design and features
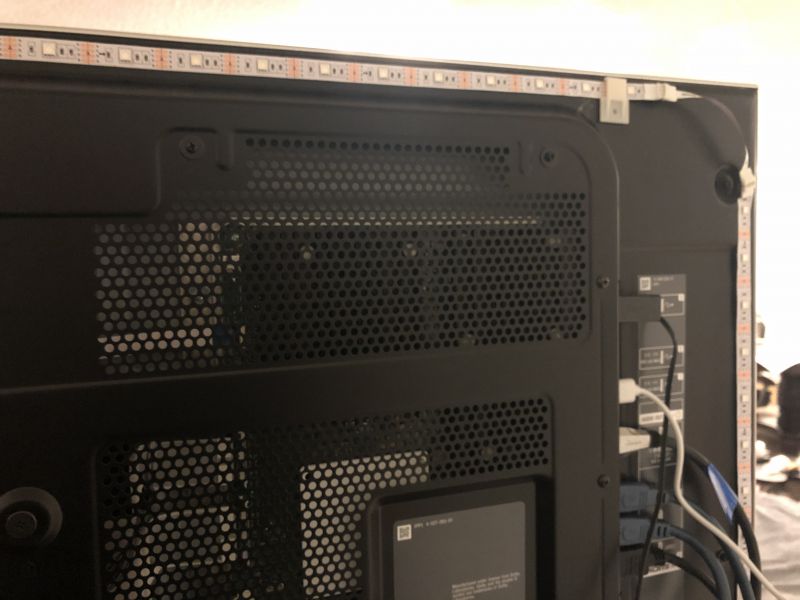
It is a fairly simple design with the reel of LED lights designed to be taken off incrementally, the pull off tape removed and then applied to the desired surface. As I worked my way around the back of the TV, I also applied clips along the top of the screen to lessen the effect of gravity on the strips sticking, which was the downfall of our original lighting. Simply plug the lights into the USB adapter and then into the TV USB slot and you’re ready to go.
After downloading the app, you’re able to connect your phone to the corded remote, although the app is not required to use as all features can be accessed via the wired controller. There are three basic settings: Music, Color and Scenes. Music will change the color based on the ambient music in the room, color allows you to select the specific color, and Scenes is preloaded with 7 different colors for Movies, Dating, Candlelight, Romantic, Breathe, Blinking and Energetic settings. Brightness can be adjusted from 0 to 100%, however if using the USB port on the TV we have found you can only go up to 20% so you will need the included wall power adapter if you want to get the full 100% – however we actually enjoyed the quality at 20% and left it plugged into the TV USB port.
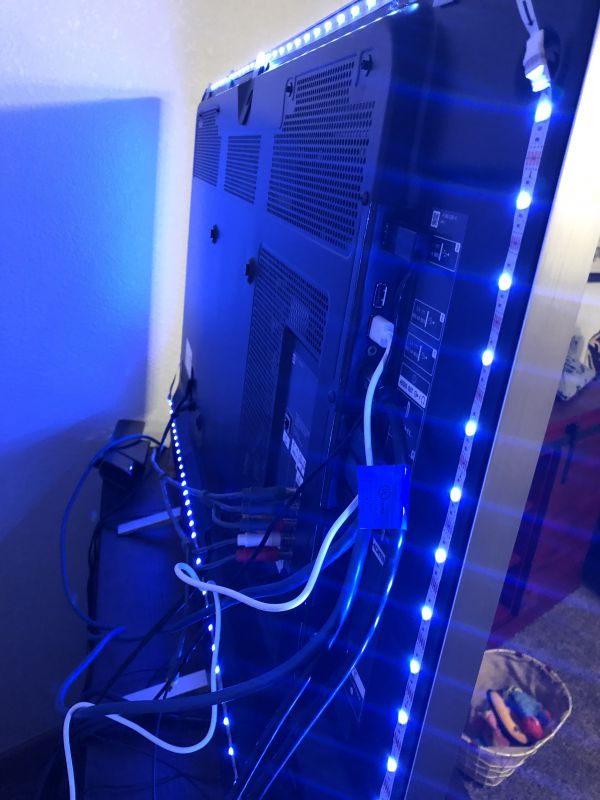
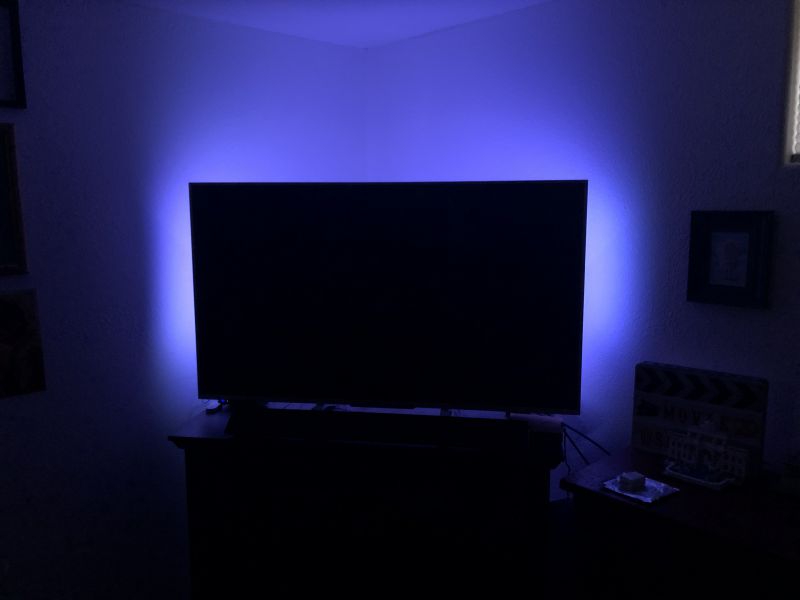
So here you can see the halo it provides behind the television. At first I thought this would be a distraction, however we both found over time that it lessens strain on the eyes and also makes it much easier to transition back to regular lighting once you’re done watching television. As you can see below, it doesn’t have a negative effect on viewing either, as we purposefully picked a rather dark scene from a recent show that we remembered being difficult to see during the first viewing:
Performance
Overall, the performance of the lighting was great. We were able to customize the color to best suit our viewing experience and should we ever have a party, we have built in lighting that will change with the music! Our previous lighting had one color and nothing more than an on/off setting. The strips have stayed adhered to the back of the television without a problem and the controls on the phone or the physical controller both work ideally. It is a bit frustrating that we can’t use it at full power via the USB port on the TV but it is easily remedied by the plug power adapter that is included with the unit. Finally, you can connect it to your smart phone via the company’s app and then also connect it to Google and/or Alexa for voice controls. It integrated nicely into our collection of smartphone controlled devices.
What I like
Strong adhesive – stays in place once installed
Customizable colors
Easy smartphone integration and controls – straight forward product with simple controls
What I would change
Honestly, this is the first product I’ve reviewed where I can’t really think of much to improve on. It does what I expect of it and I wouldn’t change a thing.
Final thoughts
I’m thoroughly impressed and delighted with the Govee TV Backlight, it has performed very well and met every expectation. Additionally, it comes at a very reasonable price at $21.99 via Amazon but keep an eye out as I believe they run promotions as well for even more value. I’m glad I was able to pick this item up, it has definitely made our theater room viewing experience better overall.
Price: $21.99 Where to buy: Amazon Source: The sample of this product was provided by Govee.
Note: If you are subscribed to this feed through FeedBurner, please switch to our native feed URL http://the-gadgeteer.com/feed/ in order to ensure continuous delivery.
REVIEW – Watching movies and listening to music are two things that I do frequently and as much as a few times weekly when I have some time to relax and unwind. Even when just watching television, I like to have the experience include nice clear and defined audio. These days, there is a multitude of soundbars on the market and they all seem to tout their features as better than the others hoping for a bigger share of consumer interest and purchases. One such entry into this crowded market is the Wohome S9920 Soundbar. Here is the summary of my review.
What is it?
The Wohome S9920 is a 2 channel system soundbar that is 40 inches long that can produce up to 80 Watts of audio output from 6 built-in drivers. It offers several connectivity options along with a remote control for convenience. It is also wall mountable.
What’s in the box
1 x Wohome S9920 Soundbar
1 x Wall Mounting Template
2 x Wall Mounting Brackets
1 x AC Power Adapter
1 x Remote Control
1 x Optical Audio Cable
1 x 1/8” to RCA Audio Cable
2 x Wall Anchors and Screws
1 x Quick User Guide
1 x User Manual
1 x Satisfaction Contact Card
Design and features
Specifications: Input: Bluetooth, AUX in, 3.5mm in, USB, optical, coaxial Distortion: <1% Frequency response: 40HZ-20K HZ Speakers: 4*15W full Range+2*10W Tweeters Audio: 3D Surround Sound System: designed with DSP Technology Output: 80W STN: ≥105dB Input power: DC 19V, 3.4A Channels: 2 Dimensions: 4.0 x 4.1 x 39.7 in
On the back of this sleek 40-inch soundbar, there is a wall mount hanger on each side that allows you to mount it to a wall using the included hardware and template to accurately drill the mounting holes accurately.
Also on the back of the soundbar, there are the connectivity options. As shown in the picture below from left to right, the connections are the optical port, the coaxial input jack, the left and right RCA input jacks, the auxiliary input port, a USB port, the power port, and the on/off switch.
On one side of the soundbar, there are control buttons that allow you to manually turn the power on or off, raise or lower the volume and pause or play the sound. The power button also shares the mute function.
On the front of the soundbar, there is a LED that is red when the power switch is on but the audio is turned off either via the manual button on the side or by the remote, and blue when the audio power is turned on.
Performance
Once I removed the soundbar from the box, setup was very easy. I decided not to mount it on a wall, but rather I choose to rest in on one of the shelves of my TV stand. Once I connected the AC adapter and the optical cable, it was ready to go. I powered it on and it immediately worked. I already had a soundbar that was connected via the optical connection, so I just had to swap the optical cable to this one. There was no additional configuration needed. After testing the optical connectivity, I then tested via the auxiliary port by connecting to the 3.5mm audio output port on my BenQ projector. Again, it worked like a charm. I was also able to test using the 3.5mm to RCA cable via the RCA inputs since my projector has the 3.5mm audio output. It worked with no issues. My plan is to use this soundbar dedicated to my projector and it passed all of my requirements with the exception of what I deem to be a major flaw that stops it from being a completely versatile soundbar. There is no output port to connect a subwoofer. This is not a deal breaker for listening to music, but a bigger deal when watching movies, and especially movies that take advantage of low frequencies for their special effects. In my opinion, the lack of this option was a big miss and a lost opportunity to appeal to a larger consumer base.
The option of using the USB port works by inserting a USB drive with music on it. I am not sure if all types of music files will play, but .mp4 files do. This feature may appeal to some, but with streaming or network drives being commonly used these days, I don’t have much use for it.
I do use this Wohome soundbar every evening when I play my Contemporary Jazz via Pandora as a part of my relaxation and bedtime wind down. I love the Bluetooth capability that paired very easily and works flawlessly. The sound and frequency separation are adequate both for television and music, and there is no discernable distortion even at the maximum volume. The lows, mids, and highs are well balanced and provide a pleasant listening experience, and for movies, the 3D and surround sound features work as expected. The soundbar is not exceptionally loud, but very adequate for my 240 square foot room. Despite the lack of the option to add on a subwoofer, it is adequate for relaxation music and works well for a genre like jazz.
What I like
The sound
The Bluetooth connectivity
The sleek look and finish
The ease of operation
The variety of connectivity options
What can be improved
The ability to connect a subwoofer should be included
Batteries for the remote should be included
Final thoughts
The Wohome S9920 Soundbar has filled a desired need of mine to have a dedicated soundbar for use with my projector. In that capacity, it works well but loses big points for not having a subwoofer output. I also use it almost every night at bedtime to listen to my Contemporary Jazz as I drift off to sleep and it fits that role perfectly both in function and in audio capability. It is a good deal for the price, and if you do not want or need to connect a subwoofer, it is a winner. For folks like me, it gets a well done but could be better!!
Price: $109.98 Where to buy: Amazon Source: The sample for this review was provided by Wohome.
Note: If you are subscribed to this feed through FeedBurner, please switch to our native feed URL http://the-gadgeteer.com/feed/ in order to ensure continuous delivery.
REVIEW – Over the years, I have purchased and listened to many soundbars. I still have my Yamaha SoundBar that I purchased for almost $2k, and that was over 10 years ago. My living room Tv is without one, and sometimes the TV speakers do not reproduce the dialogue clearly so that the words separate from the other noises and allow me to understand all that is being said. The Zvox AccuVoice AV203 Sound Bar TV Speaker with Hearing Aid Technology promises to do just that. Let’s see how this test turned out.
What is it?
The AccuVoice AV203 is a dialogue enhancement speaker that offers six levels of voice boost using patented hearing aid technology. Each new level delivers stronger dialogue emphasis while minimizing the non-vocal parts of the soundtrack.
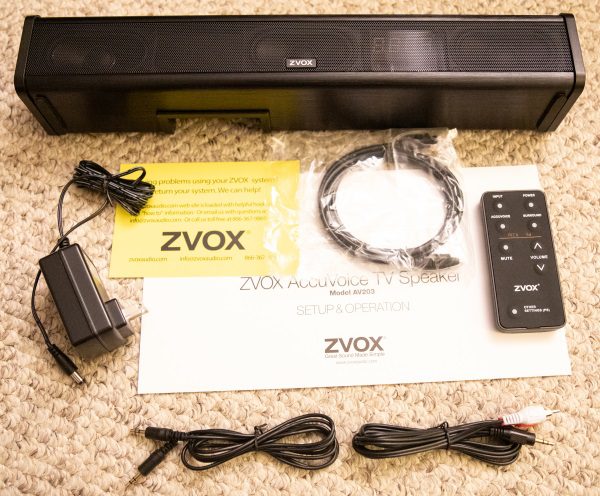
What’s in the box
1 x AccuVoice AV203 Sound Bar TV Speaker with Hearing Aid Technology
1 x Optical Audio Cable
1 x Remote Control
1 x AC Adapter
1 x Instruction Booklet
1 x Warranty/Support Leaflet
1 x RCA Audio cable
1 x 1/8’ Audio cable
Design and features
Specifications: • Dimensions: 17″ W x 3.1″ D x 2.9″ H • Weight: 2.8 pounds. With box and packing: 4.9 pounds. • Amplifier: high-efficiency 24-watt Class D digital amplifier. • Rear inputs: (1) (Toslink) digital input, (1) analog/digital 3.5mm input, (1) headphone/subwoofer 3.5mm output.
• Three full-range speakers.
• Includes hanger slots on back panel for wall-mounting.
• 100-240 VAC, 50/60 Hz.
• One year limited parts and labor warranty.
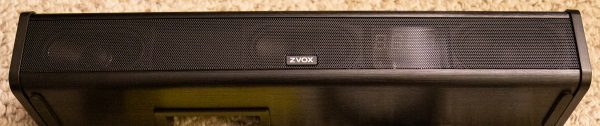
On the front of the soundbar, there is a speaker grille that goes from on end to the other with a < .05″ bezel on each side. The brand name is in the center.
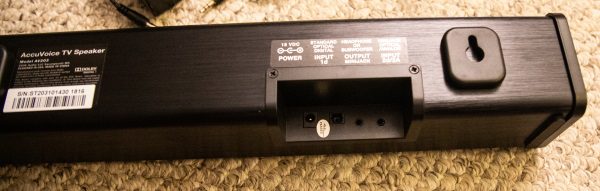
At the back of the soundbar, there are 4 input jacks. From left to right as shown below: AC Power Jack; Optical Digital Input; Headphone or Subwoofer Output; Optical/Analog Input.
On the left side of the soundbar, there is a manual control pad that allows you to power on/off and to raise or lower the volume.
Performance
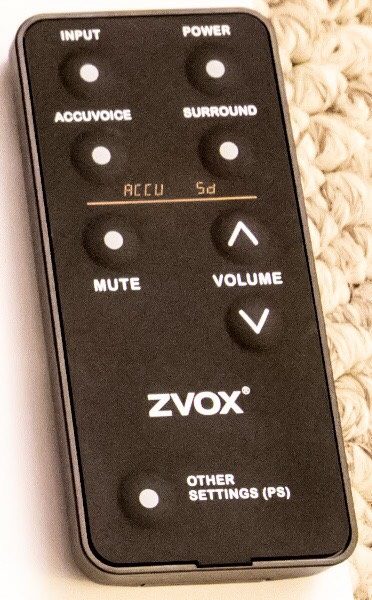
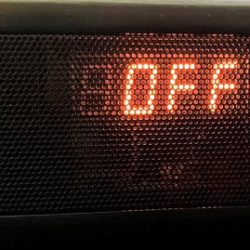
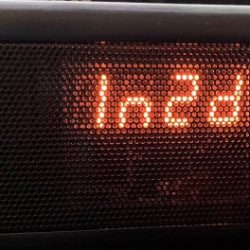
This soundbar performs very well and makes it so very easy to hear the dialogue over other background sounds. The front of the soundbar has a mesh type grille, with the branding in the center and the LED display underneath the grille on the right. Once you connect to power, you can use the remote control or the manual buttons on the side to turn it on/off or to manipulate the volume. The display shows the command you choose.
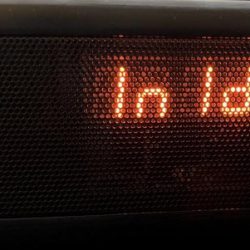
Once powered on, you can select the input that you used by clicking on the input button on the remote. The input selections show on the display.
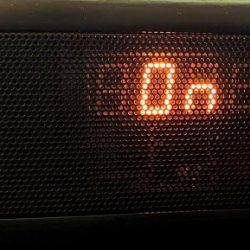
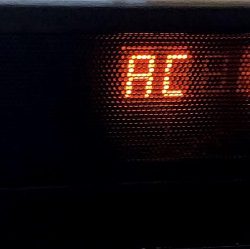
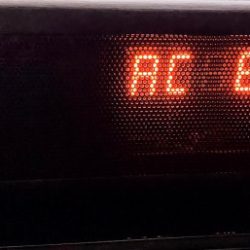
The AccuVoice sound selection goes from AC 1 to AC 6, with each selection raising the dialogue presence and lowering all other background sounds. This includes lows, mids, and highs, so you would make your selection based on what you are watching. For example, if watching a musical show, I choose AC 1 to leave the lows, mids, and highs as very present. For a movie that is focused on the dialogue, I choose from AC 3 to AC 6 depending on how much clarity I want/need. The voice enhancement versus the lowering of the background noise is gradual per each selection.
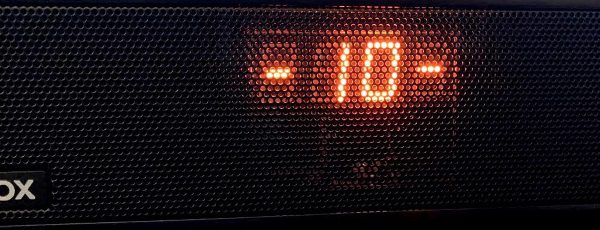
You can use the remote control or the control buttons on the side to raise or lower the volume. The volume level shows on the display.
As you can see from the picture of the remote control, there are additional features like virtual surround sound, etc. You can read about all of the features on the Zvox website.
What I like
The compact and non-intrusive design
The build quality
The sound
The connectivity options
The ease of installation and use
What can be improved
For my personal use, I can’t think of anything
Final thoughts
After listening to many soundbars including expensive ones and many that are deemed to be of audiophile quality, I had my doubts about this AccuVoice AV203 SoundBar. It is much smaller than my expensive Yamaha soundbar that boasts something like 50 drivers, and the Yamaha really does sound great especially when watching movies with a ton for background sound effects. However, the Accuvoice turned out to be the perfect fit for my living room TV, and unlike my Yamaha, the ability to manipulate the sound via the selections to actually produce exceptionally clear dialogue is quite amazing and pleasing to me. Since it also includes the ability to add a subwoofer should I choose to, I have no complaints. I give this device two thumbs way up!!!!
Price: $269.99 Where to buy: Amazon Source: The sample for this review was provided by Zvox.
Note: If you are subscribed to this feed through FeedBurner, please switch to our native feed URL http://the-gadgeteer.com/feed/ in order to ensure continuous delivery.
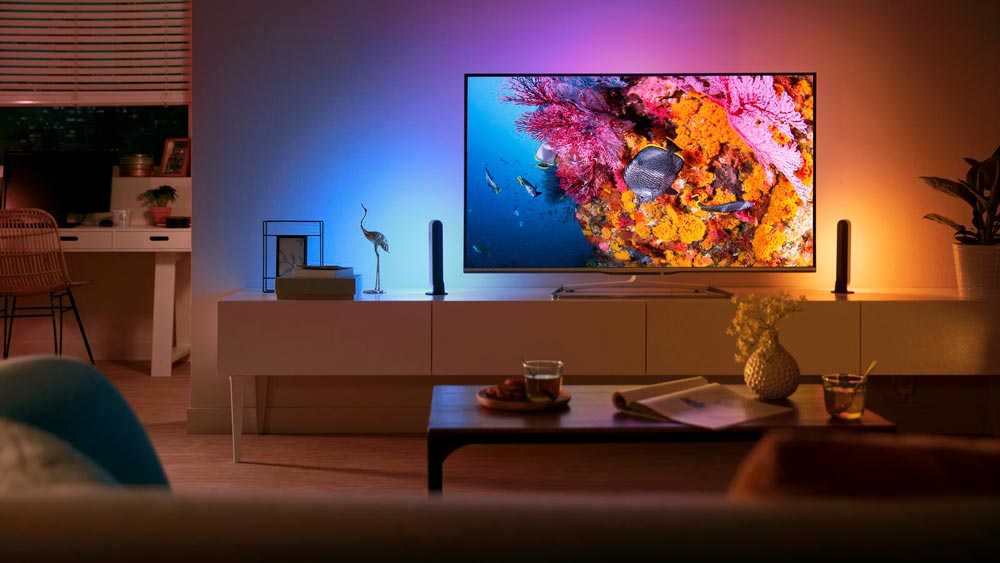
NEWS – Philips latest smart lighting product is the Play light bar. You choose from 16 million colors to enhance the atmosphere of your room. The light bar integrates into your existing Hue lighting and pairs with your Hue bridge. It can then be controlled by the Hue app or by the variety of 3rd party apps for the Hue lighting system. It also can be controlled by Hue switches or with Amazon Alexa, Apple Homekit, and Google Home, which allow you to control your lights with your voice. You can also set timers, notifications, alarms, and sync it to music (using the Hue Sync app), and more, as you can with other Hue lights.
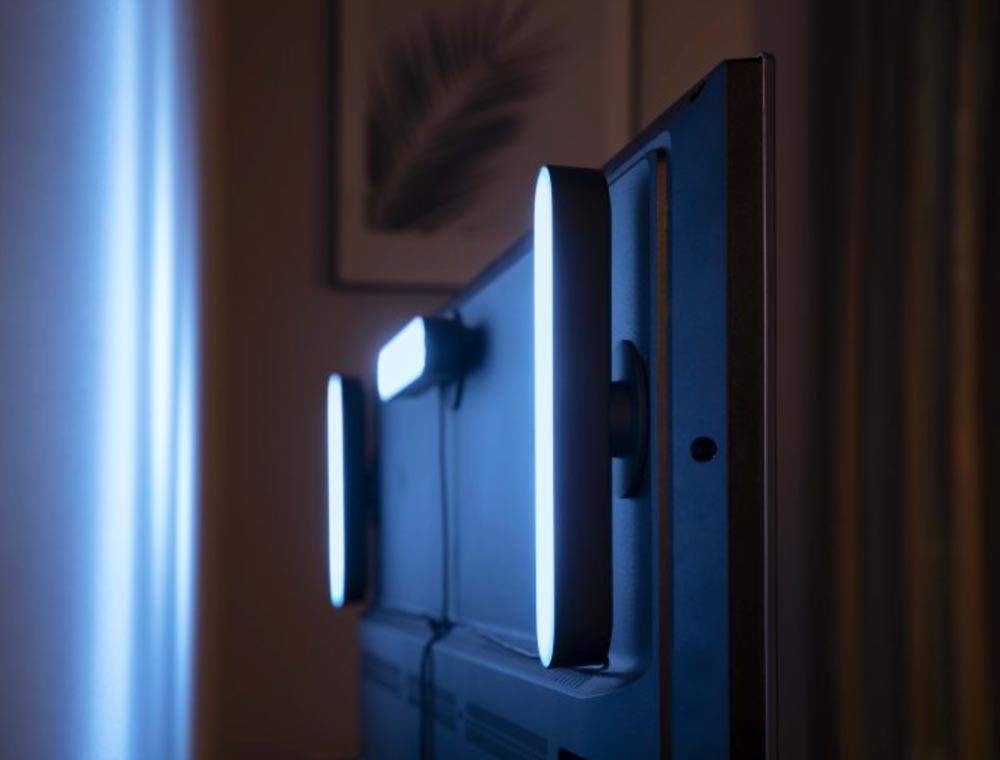
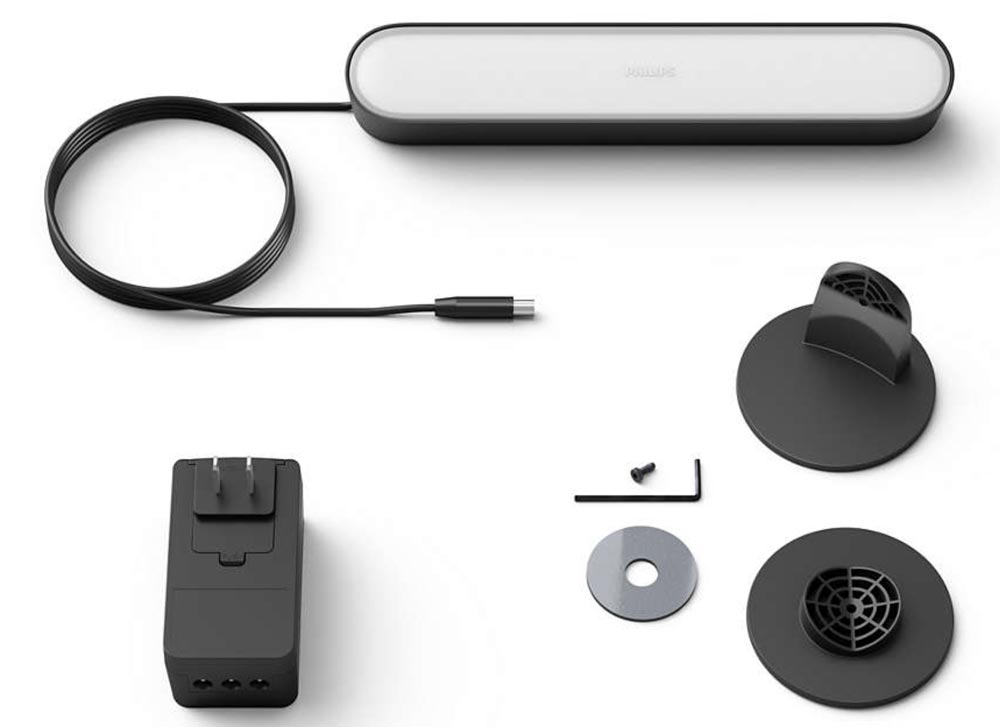
Play can be added to the back of your TV for backlighting using the included clips and double-sided tape. Add the stand, and Play will stand on a table to serve as an accent light. Or you can lay it on the floor to wash a wall with color. It can even be used as under-cabinet lighting for kitchen counters. Up to three Play light bars can be connected to a single power supply.
Philips Hue Play will be available with a single light bar for $69.95 or with two light bars for $129.95. A separate light bar will be available to expand the kit to the maximum three bars. Shipping is expected in October. Learn more at Philips.
Note: If you are subscribed to this feed through FeedBurner, please switch to our native feed URL http://the-gadgeteer.com/feed/ in order to ensure continuous delivery.
It’s hard to get the same movie-watching experience at home as you have at the theater. Some things are better at home (cheaper popcorn, more comfortable seats, no talking strangers), but other aspects, like ambient lighting, are more difficult to control. Room lights can wash out the TV screen, but watching in a dark room can cause eyestrain and means bathroom trips without those neat little pathway lights theaters have.
Dr. Andrew Weil describes an experiment that determined people experience less eyestrain when they watched a movie against a lighted wall. I don’t know about your setup, but there’s no room behind my TV for a lamp to light the wall. A lot of ingenious companies have come up with LED light strips that attach to the back of the TV to wash the wall with light. Some of these are static lights of a single color, but some companies have come up with systems to wash the wall in moving colors that match what’s on the TV screen. The Gadgeteer was recently offered the chance to review the Minger LED Smart TV Backlight kit with Camera which promises to wash the walls with moving colors. Since I was already looking for a backlight for my TV, I asked to be given the chance to review the Minger kit. Let’ see how it works.
What’s in the box?
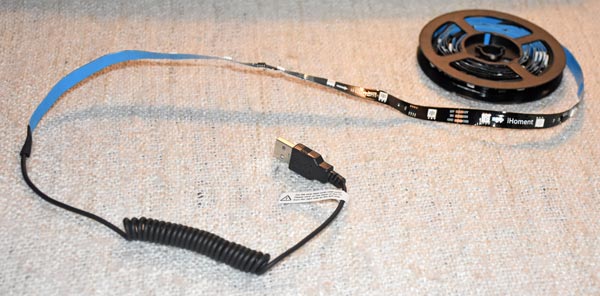
The first component is the 8.5 feet of LED strip lights. This kit is sized to fit a TV with a 55″ – 65″ screen. They also offer a kit for a 46″ – 55″ screen. I received the larger kit for my 65″ Samsung TV. The strip was nicely coiled around this film reel, so there were no kinks. The back of the strip has a press-to-stick adhesive to make applying it to the TV simple. It’s actually three strips of lights, with permanent connectors already joining the strips. This makes fitting it around the corners at the sides of the TV a snap.
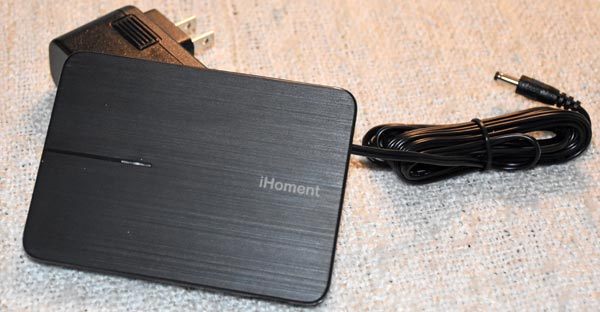
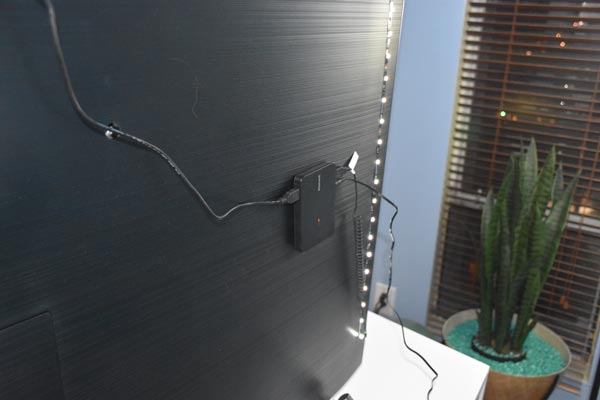
The controller box also has adhesive on the back to attach it to your TV. There are three connectors on the box. Two USB connectors attach it to the camera (on top of box) and to the light strip (bottom of box). You also attach the included AC power supply to the bottom of the box.
Please note that the seller calls this the Minger system, but some of the components are marked iHoment, and the controller app is called iHomentLight.
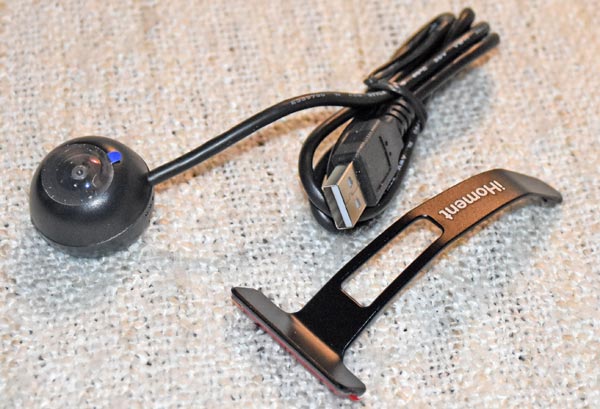
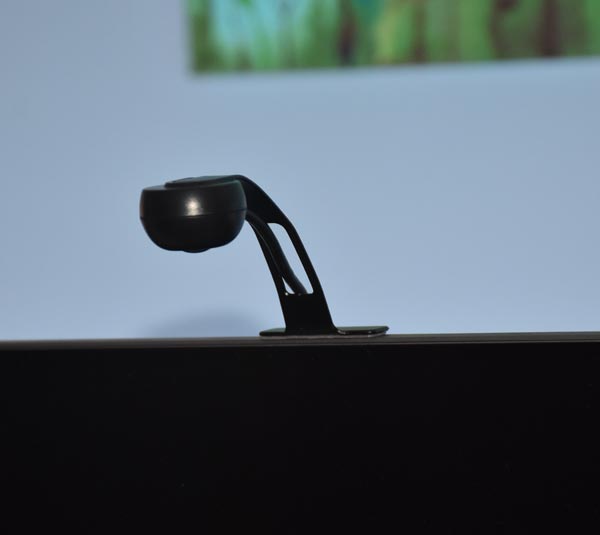
Instead of reading signals through the TV’s HDMI cable, and thus limiting the equipment it can work with, the Minger system attaches a camera to the top of the TV to “see” what’s on the screen. The stand attaches to the TV with an adhesive base. The camera plugs into the iHoment controller attached to the back of the TV.
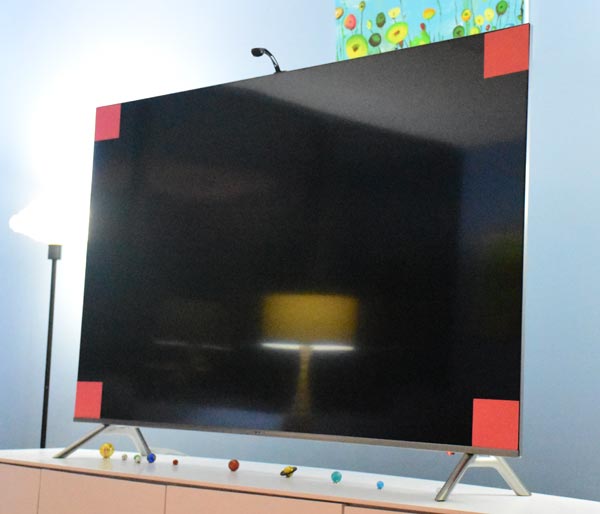
These four red cards are used for calibrating the Minger system. They have adhesive strips on the back so you can attach them to the four corners of the TV’s screen. They remove without leaving behind a residue.
Lastly, you’ll get a detailed set of installation instructions. The included paper tape measure is needed for installation. You’ll use it to find the middle of the top of the TV so you can apply the strip lights evenly on the top and sides of the back of the TV.
Setup
The installation guide has illustrations and instructions in three languages for each step. You first find the midpoint of the top of the TV, and center the long strip to the top using the adhesive back. The short strips attach to the sides, with the end with the USB plug on the right side (as you face the back of the TV) and the end with no connector on the left side.
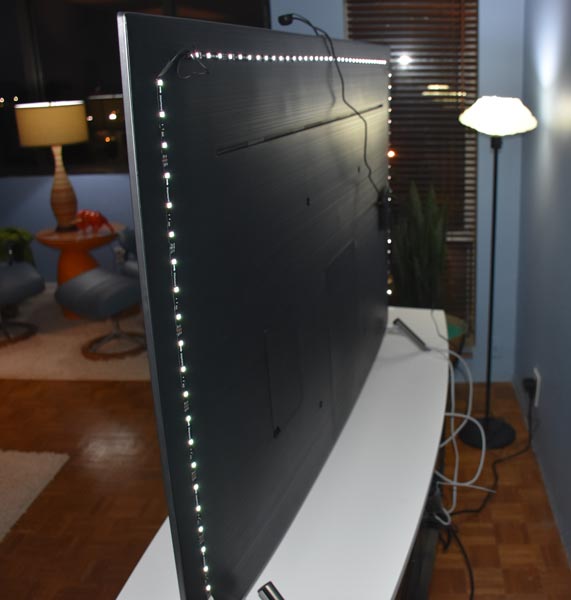
The adhesive on the strips attaches easily with light finger pressure. The back of my TV isn’t smooth plastic; it has thin, raised lines on the surface. I’ll need to periodically check it for a while to be sure it’s sticking well to the textured surface over time.
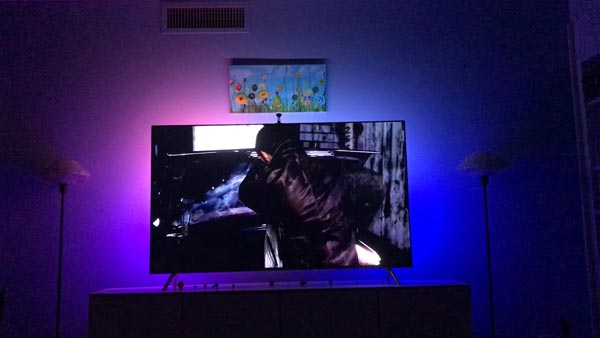
I couldn’t move the TV far enough from the wall to get a great picture, but you can see the installed light strips from this angle.
The pictures on the manufacturer’s website show the controller box beautifully centered on the TV, but I can’t do that with my TV for two reasons. First is there’s a bunch of connectors and plugs in the center of my TV, and they are hidden behind a removable door. Secondly, my TV has a cable guide system to hide all the cables so nothing is visible below the TV. I need to guide the power cable over to one of the TV’s legs so I can conceal it with the rest of the cables. I’ll probably end up just using some 3M Command cable guides to run it down the back of the leg and behind my media cabinet.
This is the camera adhered to the top center of the TV. I was really unhappy at first about having something sticking up off the TV in front of my picture my daughter painted for me, but the camera is pretty discreet.
Here’s the TV with everything installed and ready for calibration. I turned off the TV and left on the room lights so the camera could “see” the color of the calibration patches, as instructed. I pushed the TV and media cabinet back into place so the TV would be lighted as it normally is in my living room.
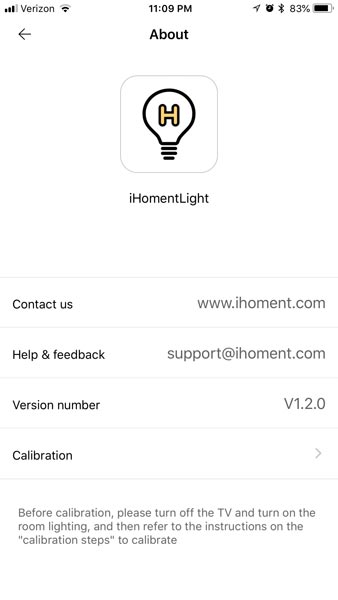
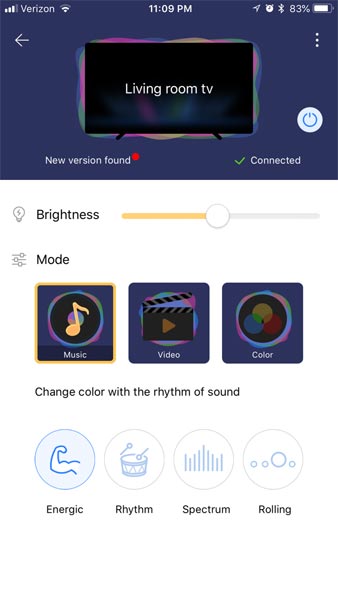
I downloaded the iHomentLight app from the Apple App Store to my iPhone 7 Plus. (The app is designed to fit the iPhone screen, but it will run on the iPad, if needed. There’s also an app for Android.) After connecting to the iHoment controller via Bluetooth, I was able to select the calibration setup from the app. The app walks you through every step of calibration.
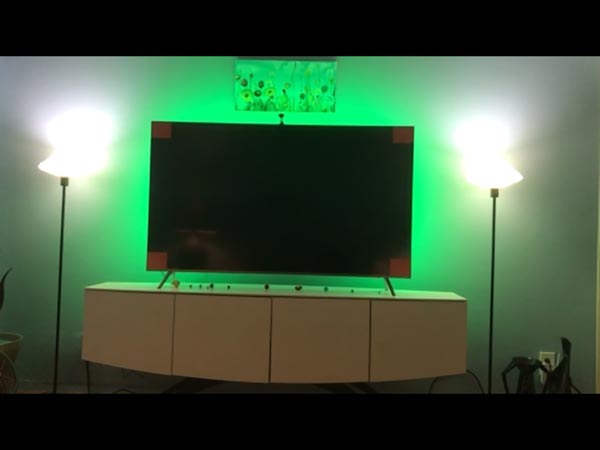
During calibration, the lights blink and change. When calibration is complete, the backlights turn to steady green.
I’m ready to start watching TV!
Performance
This is how my living room normally looks while I watch TV. I turn off all the other lamps in there because they cause screen glares and reflections. I leave on the lights flanking the TV so we can see if we need to leave the room. It’s okay this way, but the two lamps can be a bit harsh, even when I dim them. The lede photo (at the top of this review) shows my TV with the Minger lights in use.
By the way, the images you’ll see in photos and in the short videos are from Thor: Ragnarok, Annihilation, and episodes of the Supernatural TV show.
There are three modes for the light strips. First up is the Color mode. This allows you to choose a color by selecting one of the pre-selected colors or by scrubbing the slider bar to choose a custom color from the gamut.
For this picture, I choose the static red color, with the brightness setting maximized. I wouldn’t use red, but the static color is a nice way to add some light to the room without using those lamps to the side of the TV. If I were going to use static, I’d select a blue and dim it down a bit.
By the way, my living room is painted a medium blue. This color will impact the appearance of the colors the Minger system is shining onto the wall behind the TV. They will differ from the actual color and brightness you’d see against a white wall.
The next mode is Video. This mode uses the camera to monitor either Part of the screen (the edges) or All of the screen to select the colors for the strips. With All selected, the camera seems to select the color in the center (from left-to-right) of the screen, about a third of the way down from the top to use for all of the lights on all three strips. With Part selected, the camera monitors the edges of the screen and selects different colors for the various positions of the light strips, so it seems the color is bleeding off the TV screen onto the wall. Part monitoring is shown in the above video. All other clips for the Video mode show All monitoring.
You can also choose Dynamic or Mild for the speed of the color changes. The Dynamic changes are quick and abrupt – suitable for action movies, especially. The Mild changes are slower and less abrupt. Again, I’ll try to show this in videos.
Something I noticed that didn’t depend on the settings in Movie mode was that the color changes seen on the wall lagged a bit behind the color changes on the screen. (I’m sure this was an artifact of the time needed for the camera to read the color, send it to the controller box, where it was evaluated, and instructions then sent to the light strips.) This was especially true when the action on the screen was changing rapidly. While I was carefully watching the performance of the Minger system for this review, I was aware of the lag. When I was just watching a show, I wasn’t really aware of the color lag. It didn’t bother me that the color on the wall didn’t match what was showing in that portion of the screen when using Part mode any more than having the entire wall washed with a single, but changing color when using All mode.
I did enjoy the changing color display on the wall behind the TV regardless of what mode I was using. I didn’t prefer the Part or All option over the other. I just liked the movement of the colors that mimicked the action on the screen.
I didn’t dislike having a single, unchanging color on the wall with the Color mode. That was actually a nice ambient light that was easy on the eyes, but I did prefer the motion of the Video mode.
You’ll notice a power button at the top of the app screen. Because the light strips aren’t plugged into the TV itself, you’ll need to open the app and turn on the lights manually each time. This also means that you can use the light strips even with the TV off. The system uses a microphone to “listen” to ambient sounds and creates a light show based on what it hears.
My video shows the color display while listening to Gary Numan’s I Am Ruin from his Savage (Songs from a Broken World) album. The lights were also just as happy to dance to the sounds of a conversation I was having with my husband. I can’t imagine what it would do at a party with music playing and a lot of people all talking at once!
I’m sure that there are many other light kits on the market that do what the Minger system does, but most of the other kits I’ve seen cost much more than the $60 this system costs. I haven’t tried any of the other systems, but I think they’d have a hard time performing so well that I’d be willing to pay a premium for them when the Minger kit does such a great job.
What I like
Easy installation
Neat installation with only one wire coming off the TV
Lots of color modes so I can customize how I like it best
Nice ambient lighting for the room without reflections or glare on the TV screen or bright lights shining in your face
Can create a light show for music without having the TV on
Could even use the kit as an accent light for the room without watching TV or listening to music
Using a camera means you don’t have to insert it into the cabling path of your home theater setup
Camera also means you can use it with older TVs without HDMI
What needs to be improved
Some people may be bothered by the slight lag in the color change, especially action movie fans
Final thoughts
The Minger kit is still installed on my TV, and it will stay there. My husband, daughter, and I all agree that the Minger LED Smart TV Backlight kit with Camera makes watching TV and movies at home more like going to the theater. It’s a keeper!
Price: $59.99 Where to buy: Amazon 20% Off Code on Amazon: WFW5U34K (Expired 07/15). Source: The sample of this product was provided by Govee for Home
Note: If you are subscribed to this feed through FeedBurner, please switch to our native feed URL http://the-gadgeteer.com/feed/ in order to ensure continuous delivery.