We’ve needed a new color printer for a while now and I was fairly sure that I would go with a color laser printer because of their dependability and beautifully clear print qualities. However, when the Gadgeteer was offered the Epson WorkForce ET-16500 EcoTank Wide-format All-in-One Supertank printer that will print large formats like 11″ x 17″ and 13″ x 19″ and even copy or scan pages up to 11″ x 17″ I volunteered to review it. Additionally, the printer scans double-sided documents via the Auto Document Feeder, collates your copies, and has supersized ink tanks that can be refilled by replacement bottles of ink thus making the purchase of ink vastly cheaper than replacing ink cartridges or laser cartridges. But beware – this is a massive printer (with a price tag to match) meant for use in home, small and medium businesses and possibly overkill for home personal use. This review is the War and Peace of reviews (as my husband describes it) – you could wait for the Audible version, but hopefully, the section titles will help you navigate to the areas of interest.
Package Contents
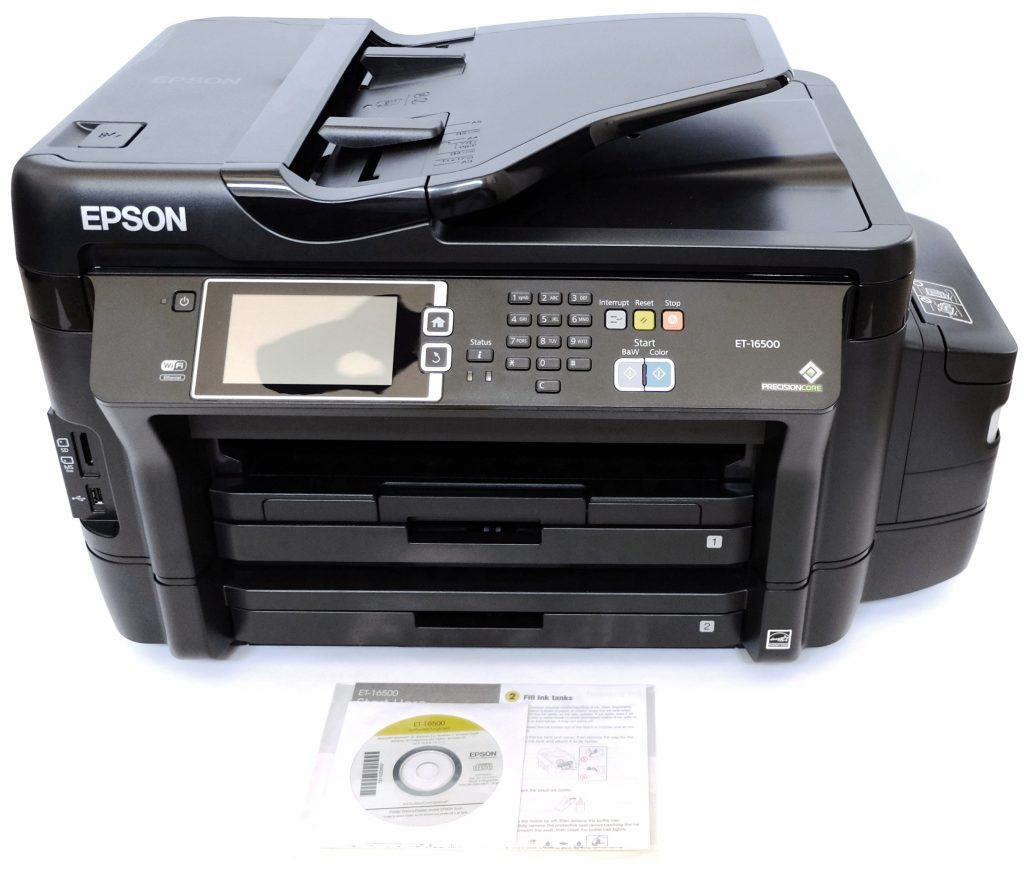
- WorkForce ET-16500 Wide-format EcoTank all-in-one
- Manual/Start Here guide
- CD-ROM for product setup
- Power cord
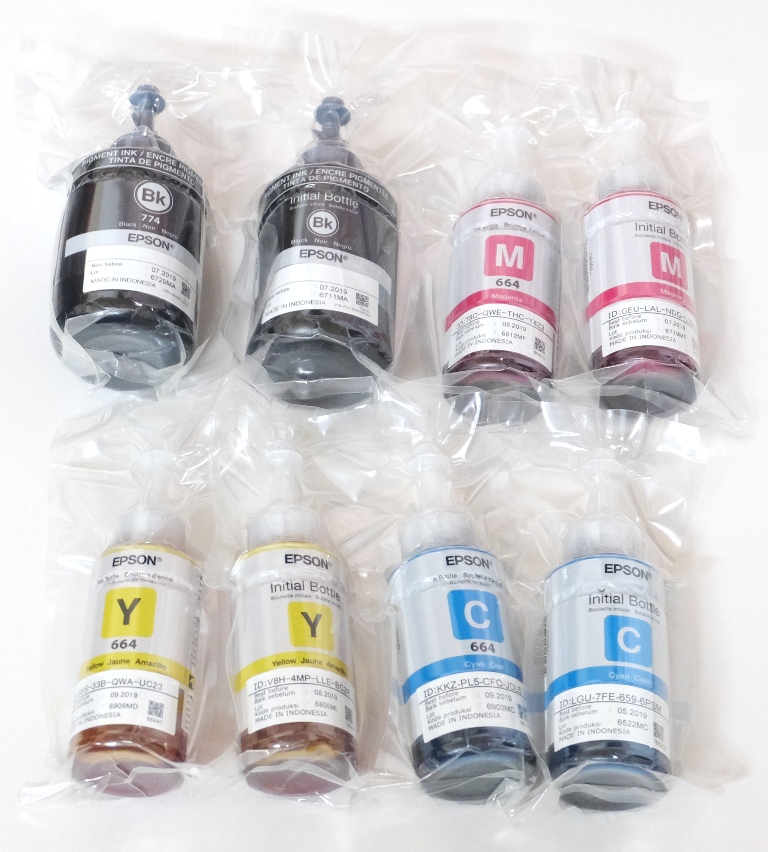
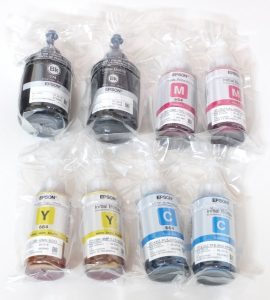
- Included ink in the box:
- Initial bottles: 1 bottle 774 Black (140 mL) and 1 bottle each 664 Cyan, Magenta, Yellow (70 mL)
- Extra bottles: 1 bottle 774 Black (140 mL) and 1 bottle each 664 Cyan, Magenta, Yellow (70 mL)
Technical Specifications
Print:
- Printing Technology: Powered by PrecisionCore™ 4-color (CMYK) drop-on-demand inkjet technology
- Minimum Ink Droplet Size: 3 droplet sizes, as small as 2.8 picoliters
- Maximum Print Resolution: 4800 x 1200 optimized dpi
- ISO Print Speed:
- Black: 18 ISO ppm
- Color: 10 ISO ppm
- 2-Sided ISO Print Speed:
- Black: 8.7 ISO ppm
- Color: 6.0 ISO ppm
Ink:
- Ink Type: EcoTank Ink Bottles
- Ink Palette: Cyan, Magenta, Yellow, Black
- Ink Configuration: 4 individual ink bottles
- Replacement Ink:
- 774 Black Ink Bottle
- 664 Color: Cyan, Magenta, Yellow
- Ink Yield Information:
- ISO Yield, Epson Methodology
- Black: 6,000
- Color: 6,500
Copy:
- ISO Copy Speed:
- Black: 16 ISO cpm
- Color: 8.8 ISO cpm
- Copy Quality: Color/Black-and-White: Standard/Best
- Copy Quantity: 1 – 99 (PC-free)
- Maximum Copy Size: 11″ x 17″
- Copy Features:
- Automatic 1-sided to 2-sided
- 2-sided to 1-sided
- 2-sided to 2-sided
- Fit to Page
- Automatic Reduction and Enlargement (25 – 400%)
- ID Copy
- Adjustable Copy Density
- Collate
- Preview
- Resize
- Remove Punched Holes
- Remove Shadows
Scanner:
- Scanner Type: Color flatbed / ADF
- Photoelectric Device: 11.7″ x 17″ max
- Optical Resolution: 2400 dpi
- Hardware Resolution: 1200 x 2400 dpi
- Maximum Resolution: 9600 dpi interpolated
- Color Bit Depth: 48-bit color input / 24-bit color output
- Other Scan Features: Scan to PC, Cloud, Corporate Email or Email (via Epson Connect), Memory device, Network Folder
Fax:
- Fax Settings: Black & White and Color
- Fax Speed: Up to 33.6 Kbps – as fast as 3 sec per page
- Memory: Up to 550 pages
- Speed Dials: 200 (max.)
- PC Fax: Supported
Connectivity:
- Standard Connectivity:
- Hi-Speed USB
- Wireless (802.11 b/g/n)
- Wi-Fi Direct
- Ethernet (10/100 Mbps)
Mobile Printing:
- Epson Connect: Epson® Email Print, Epson Remote Print, Epson Scan to Cloud, Epson iPrint™ App (iOS®, Android), Epson Print and Scan App (Windows®)
- Other: Google Cloud Print™, Android printing, Fire™ OS printing, Mopria® Print Service
Paper Handling:
- PC-Free Paper Support:
- Plain (letter, 8.5″ x 14″, A4)
- Photo (4″ x 6″, 5″ x 7″, 8″ x 10″, letter, A4)
- Paper Sizes: 3.5″ x 5″, 4″ x 6″, 5″ x 7″, 8″ x 10″, 8.5″ x 11″, 8.5″ x 14″, 11″ x 17″, 13″ x 19″, A4, A6, A3, A3+, half letter, executive, user definable (3.5″ x 5″ – 13″ x 47″)
- Maximum Paper Size: 13″ x 47″
- Paper Types:
- Plain paper
- Epson Bright White Paper
- Epson Presentation Paper Matte
- Epson Premium Presentation Paper Matte
- Epson Premium Presentation Paper Matte Double-sided
- Epson Premium Photo Paper Glossy
- Epson Ultra Premium Photo Paper Glossy
- Envelope Types: No. 10
- Input Paper Capacity: 500 sheets plain paper
- Cassette 1: 250 sheets plain paper
- Cassette 2: 250 sheets plain paper
- Rear feed: 1 sheet
General:
- Operating Systems:
- Windows 10
- Windows 8, 8.1 (32-bit, 64-bit)
- Windows 7 (32-bit, 64-bit)
- Windows Vista® (32-bit, 64-bit)
- Windows XP SP3 (32-bit)
- Windows XP Professional x64 Edition
- Mac OS® X 10.6.8 – 10.11.x
- Server Systems:
- Windows Server® 2012 R2
- Windows Server 2012
- Windows Server 2008 R2
- Windows Server 2008
- Windows Server 2003 R2
- Windows Server 2003
- Temperature:
- Operating: 50° to 95° F (10° to 35° C)
- Storage: -4° to 104° F (-20° to 40° C)
- Humidity: Operating: 20 – 80% RH
- Storage: 5 – 85% RH (no condensation)
- Sound Level: Power: 6.4 B(A)
- Pressure: 48 dB(A)
- Dimensions:
- Printing: 26.2″ x 32.2″ x 16.5″ (W x D x H)
- Storage: 26.2″ x 19.1″ x 16.5″ (W x D x H)
- Weight: 50.7 lb
Printer Details:
- Display: 4.3″ color LCD touchscreen
- Printer Language: Epson ESC/P®-R
- Software Included: Epson printer driver, Epson Scan
- Monthly Duty Cycle: Up to 20,000 pages (Recommended monthly page volume up to 1,300 pages)
- Telecom Regulations: FCC Part 68 (USA), IC/CS03 (Canada)
Power:
- Rated Voltage: AC 100 – 240V Universal (Automatic)
- Rated Frequency: 50 – 60 Hz
- Power Consumption:
- Approx. 20 W ISO 24712 (Standalone copy printing)
- Approx. 8.9 W (Standby)
- Approx. 1.9 W (Sleep)
- Approx. 0.4 W (Power off) ENERGY STAR® qualified
- Rated Current: 0.5A – 0.3A
Design & Build Quality

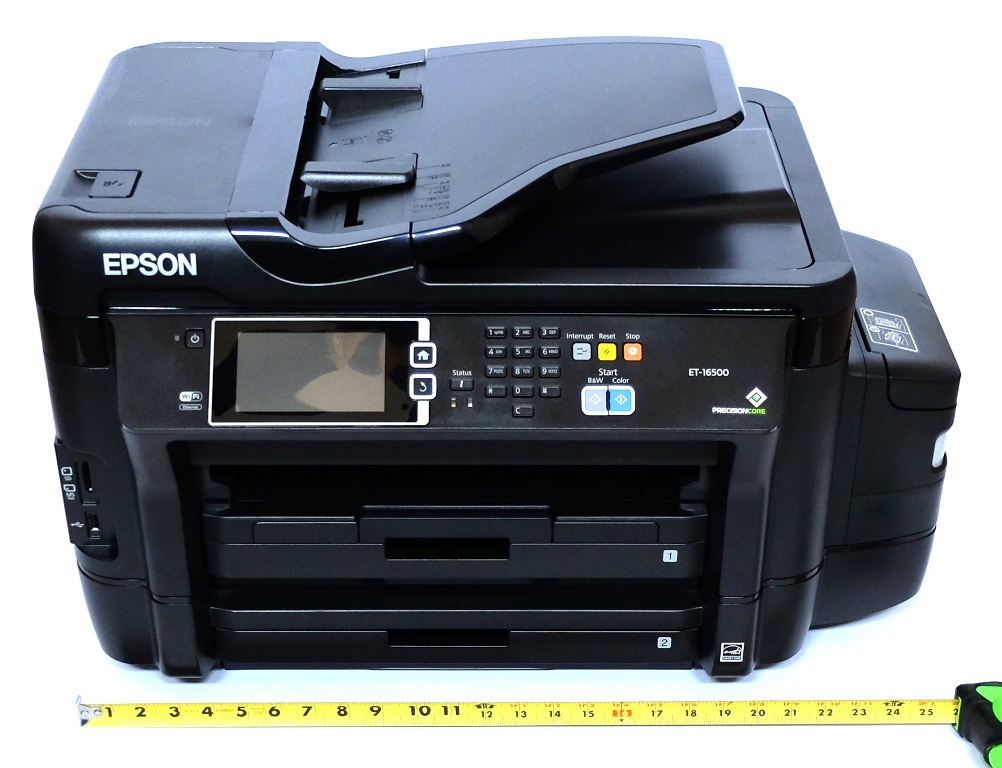
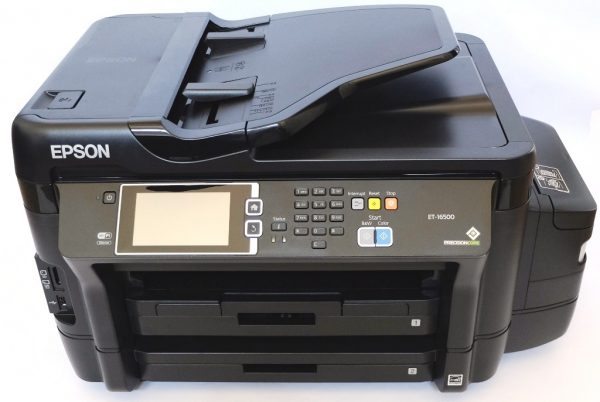
First Impression: The very first thing I noticed about the WorkForce ET-16500 Wide-format EcoTank all-in-one printer is that it is a massive printer and is intended for small (or home offices) to medium businesses. Its storage size is 26.2″ W x 19.1″ D x 16.5″ H, but when printing with the paper catching tray extended it is 26.2″ W x 32.2″ D x 16.5″ H. It is also very heavy weighing about 50.7 pounds. This is no wimpy printer and you’ll need to figure out where to put this beast should you decide to purchase it.
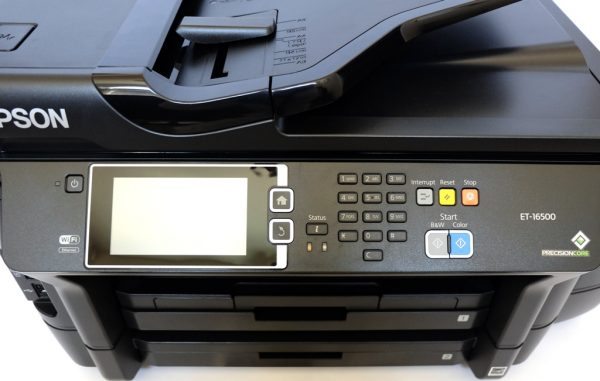
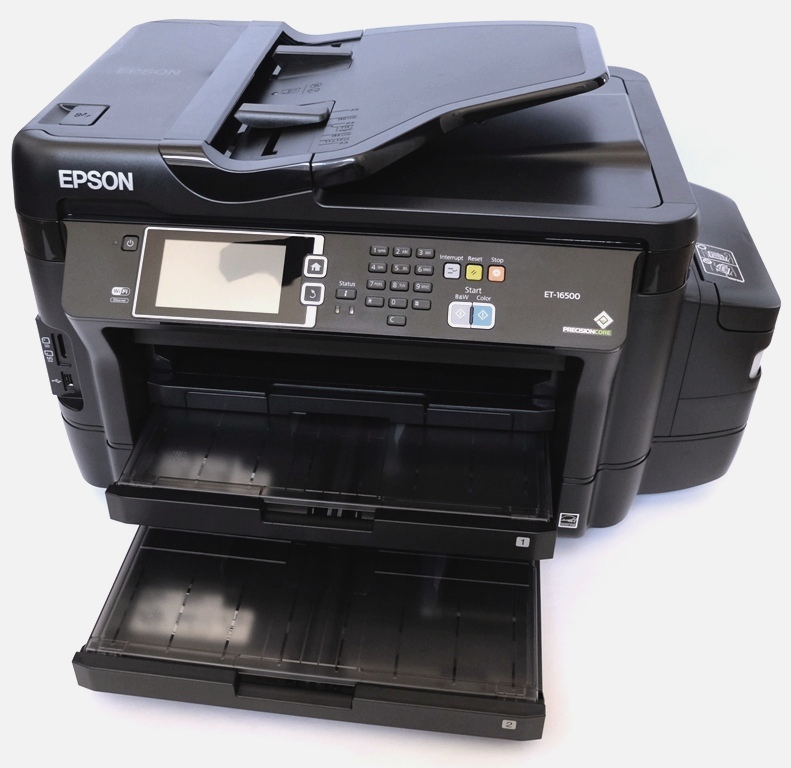
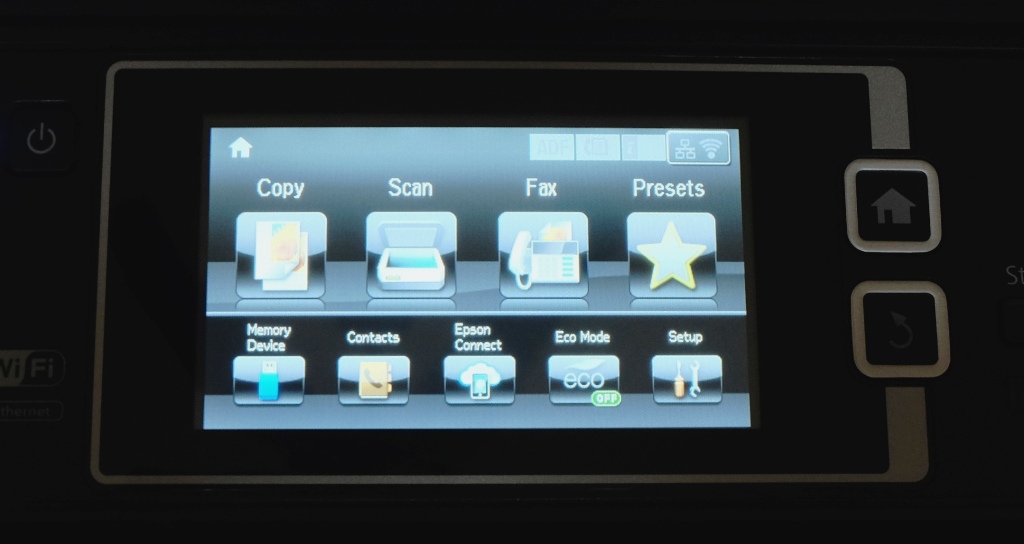
Front: The Epson ET-16500 printer has a 4.3″ color LCD touchscreen control panel making navigating around through the menus much faster than having to use arrow keys. There are several buttons: Power, Home, Back, Information/Status, numeric keypad, Cancel (“C” under the numeric keypad), Interrupt, Reset, Stop, “B&W” Start, and the “Color” Start buttons.
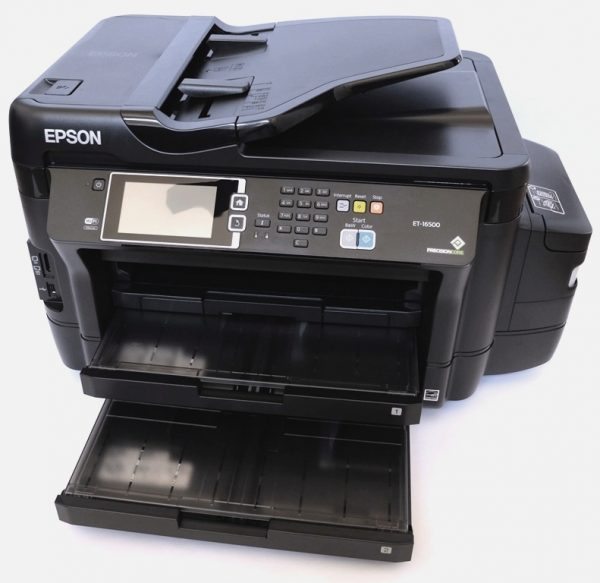
The printer has two paper cassettes with covers that will hold up to 250 sheets each (print side down).
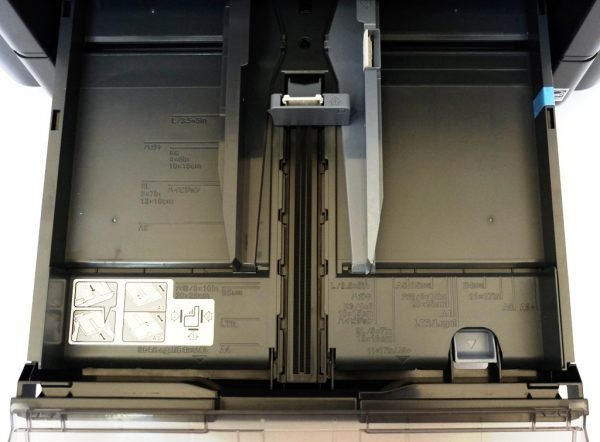
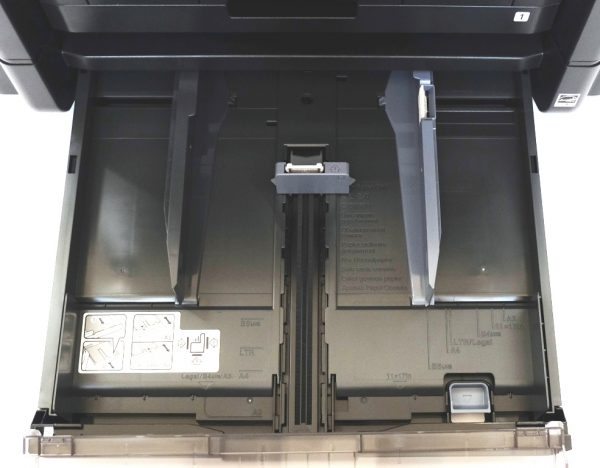
Paper cassette 1 (on the left in the above photo) is capable of holding the following paper sizes: 3.5″ x 5″, 4″ x 6″, 5″ x 7″, 8″ x 10″, 8.5″ x 11″, 8.5″ x 14″, 11″ x 17″, 13″ x 19″, A4, A6, A3, A3+, half letter, executive, user definable (3.5″ x 5″ – 13″ x 47″).
Paper cassette 2 (on the right in the above photo) is only capable of holding letter/legal, 11″ x 17″, A3, A4, B4, and B5 plain paper only.
There are edge guides within each cassette that adjust according to the paper size inserted. To accommodate the larger format paper sizes, the cassettes extend out further by pulling on a gray tab inside the cassette (on the right side near the front edge in the above photos). Each cassette extends out two “clicks”. As you pull out the extended portion of cassette 1, the first click accommodates A3, B4, legal, and C4. The second click accommodates A3+ and 11″ x 17″. The first click in cassette 2 accommodates A3, B4 and legal while the second click accommodates 11″ x 17″.
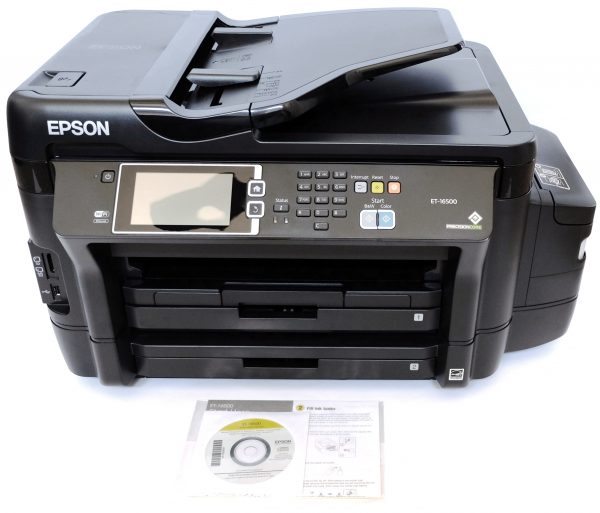
 Just above paper cassette 1 is the output tray, output tray extension, and the paper stopper. The output tray is extended in the photo above to accommodate longer sheets of paper.
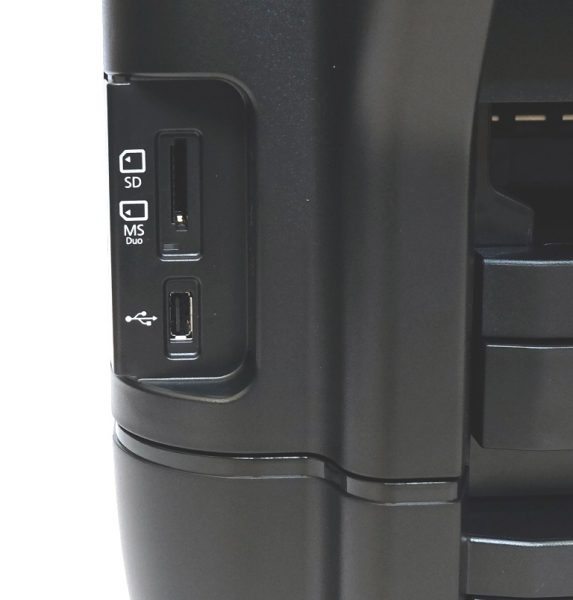
The printer does not need to be connected to a computer or mobile device to be used. There slots for SD cards and a USB thumb drive/USB portable backup drive located on the front of the printer.
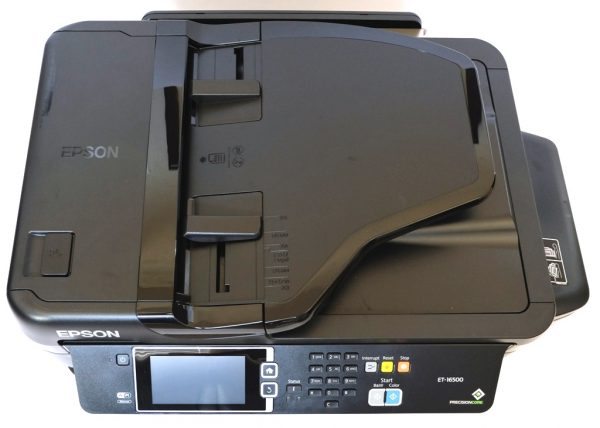
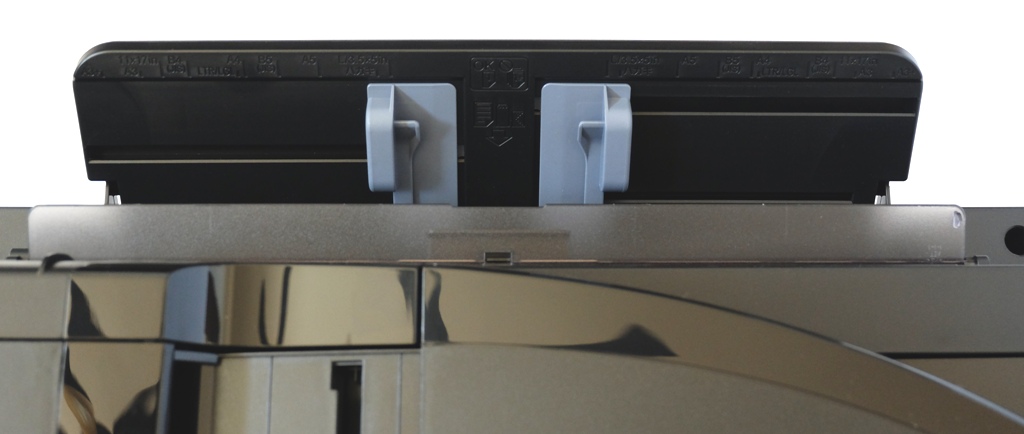
Top: The top of the printer has the Automatic Document Feeder (ADF) input tray which has edge guides to adjust to the paper you insert. Just under it is the ADF output tray.
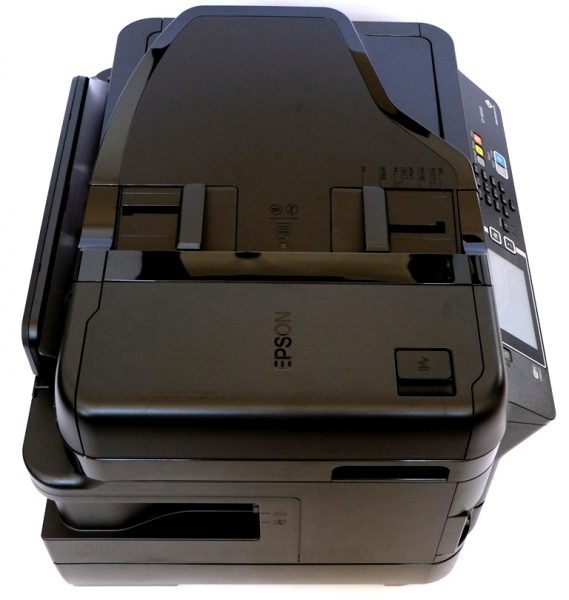
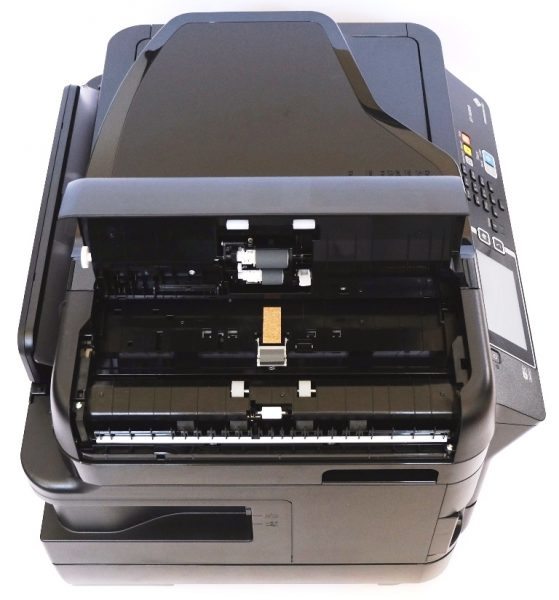
The left top of the printer contains the ADF cover and has an ADF lever to allow access to the internal portion of the ADF.
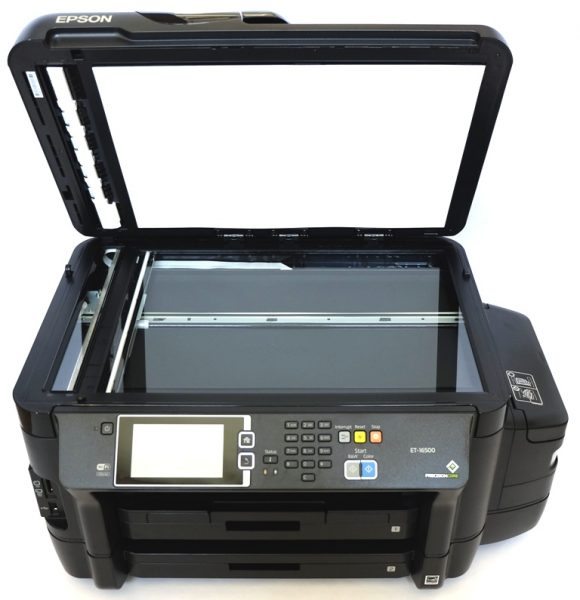
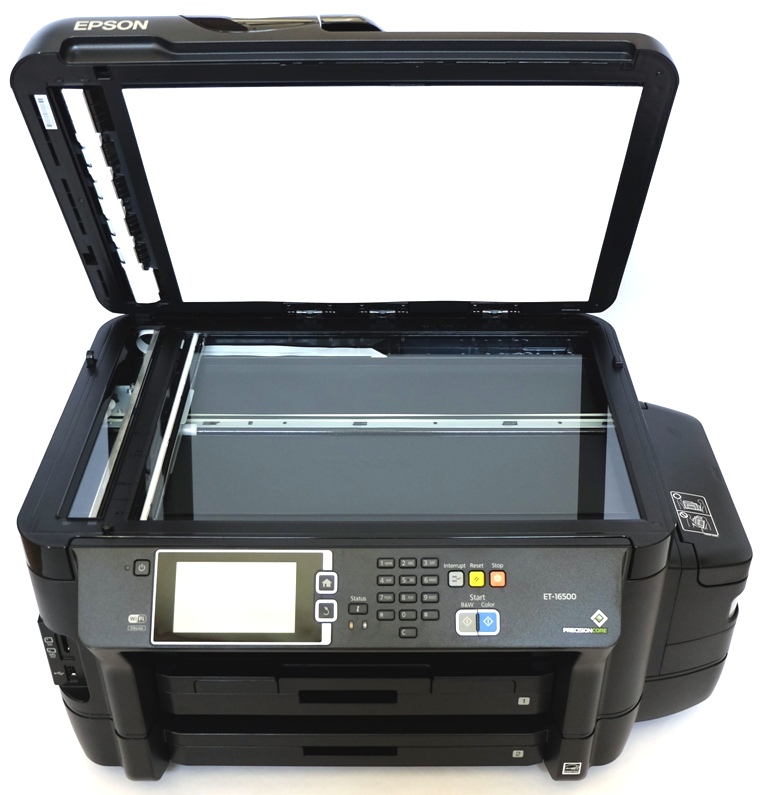
Lifting the scanner’s document cover reveals the scanner glass which is 17.25″ L x 12.125″ W.
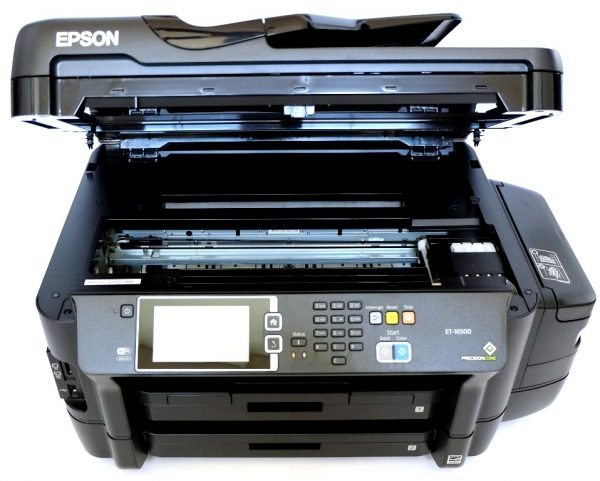
You may also lift the scanner and access the internal area of the printer (the print head, etc.) when necessary.
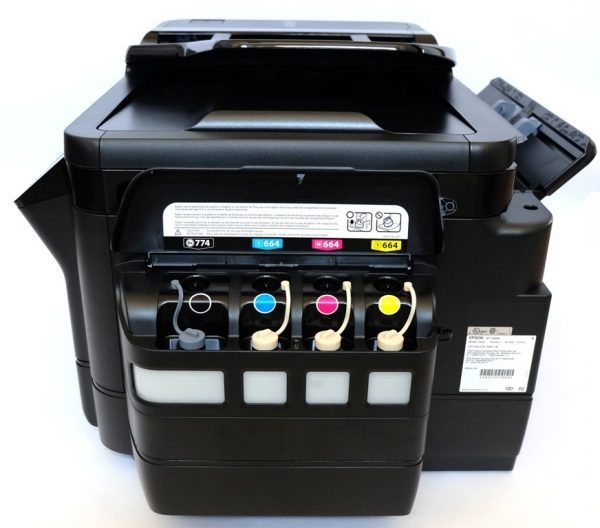
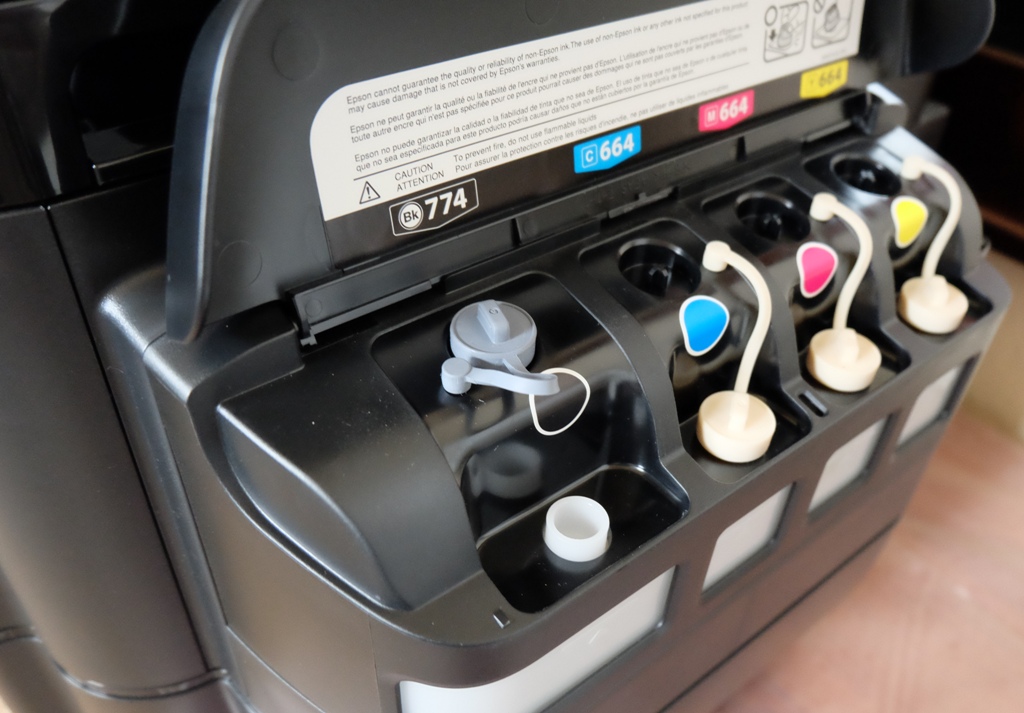
Right Side: The right side of the printer contains the supersized ink tanks readily displaying ink levels (the white translucent plastic). Flipping up the lid to the ink tank unit allows you easy access to the tanks to refill them.
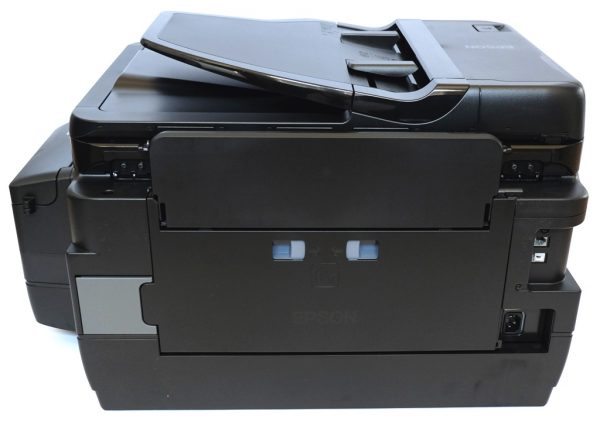
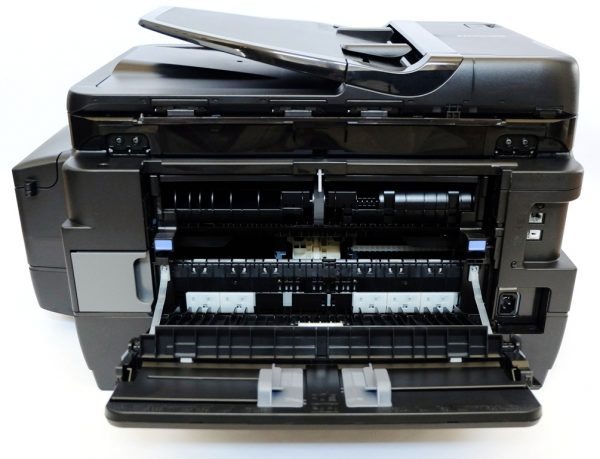
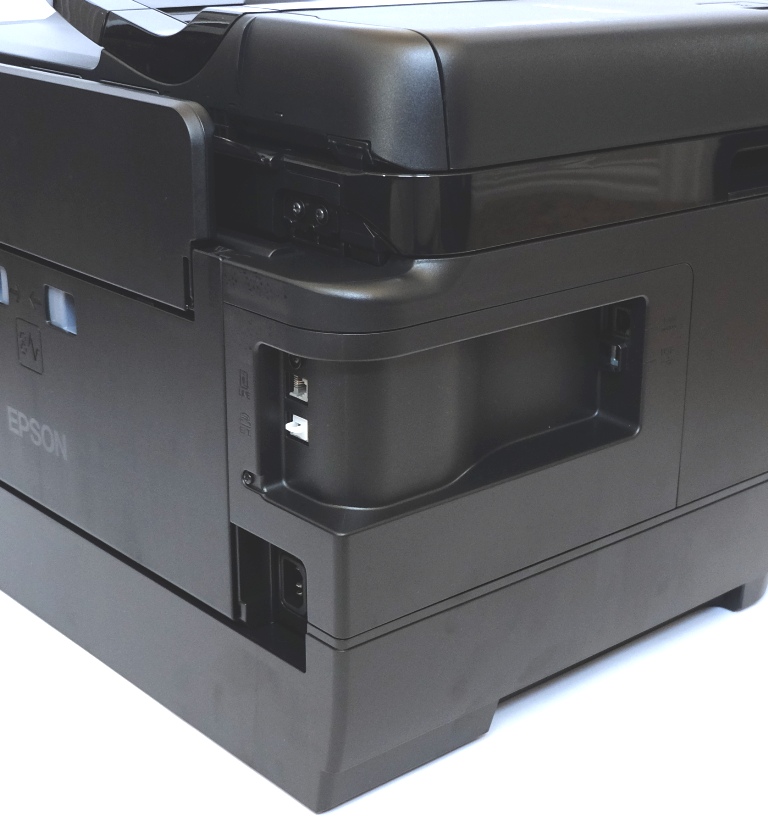
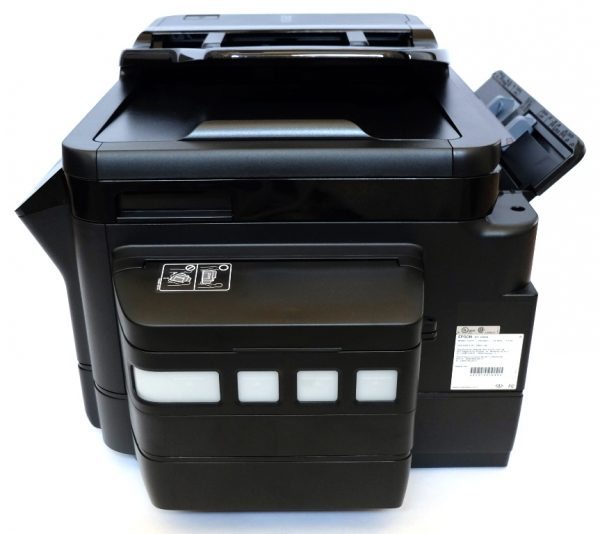
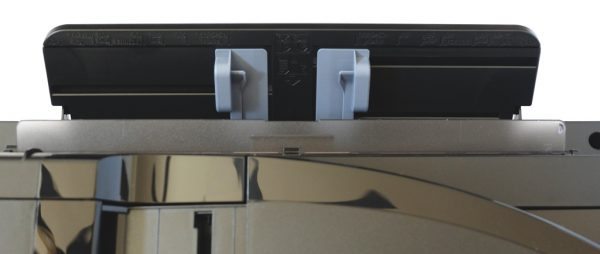
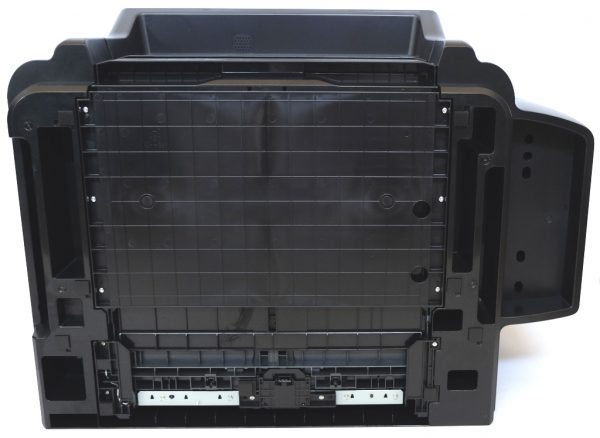
Back: The back of the printer contains the Maintenance box (gray box on the left side of the printer in the above photos which pulls out once the back is opened) and has a rear cover for the duplexing unit which may be accessed by pressing the tabs together (shown in the right photo above). According to Epson, “The maintenance box stores ink that gets flushed from the system during print head cleaning. When… the maintenance box is at the end of its service life, you need to replace it.”
Also on the back portion of the printer is the rear paper feed slot with its edge guides. NOTE: this tray will only accommodate one sheet of paper at a time, print side up.
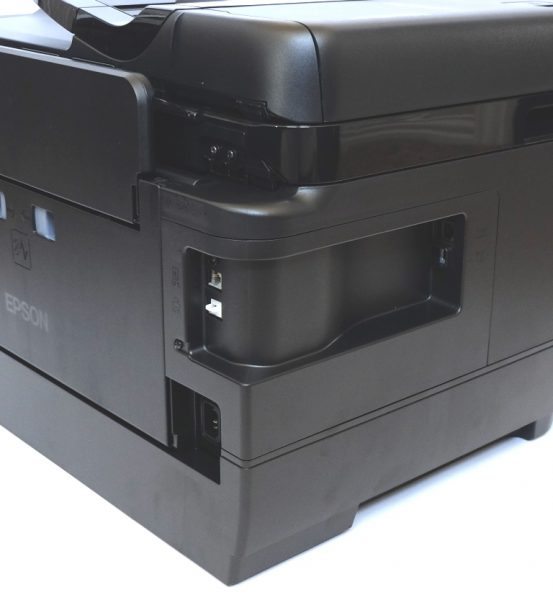
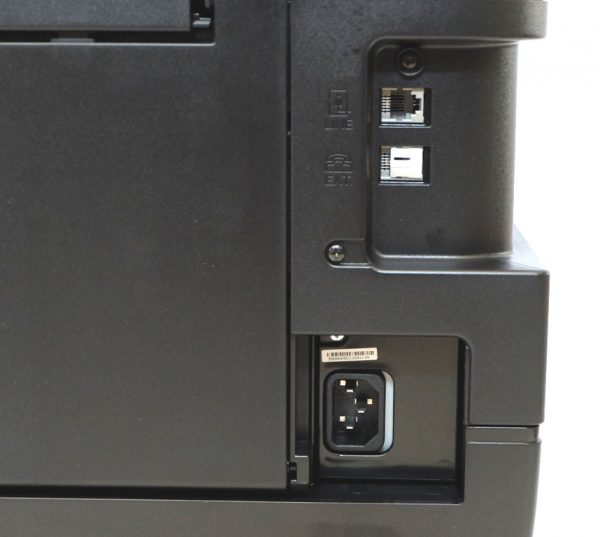
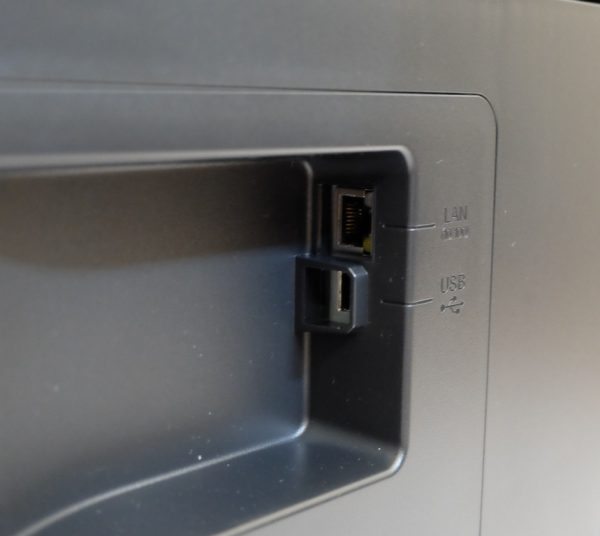
Also on the back of the printer is a phone line port, extension port, and power port as well as an Ethernet and USB port along the left side of the printer.
Bottom: The bottom of the printer has four rubber pads to prevent scratching your furniture.
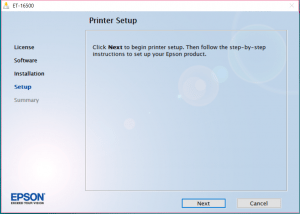
Printer Setup

Filling Ink Tanks: One of the first things that I needed to do was fill the ink tanks with their respective ink. But before that, I covered the furniture on which the printer rests with plastic, just in case there was an ink spill or leak. When you get ready to fill or refill the ink tanks, there’s a convenient place to store the rubber caps that cover the tanks located just above them.

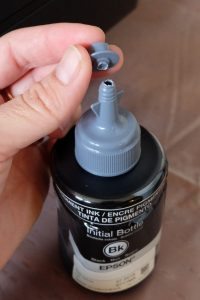
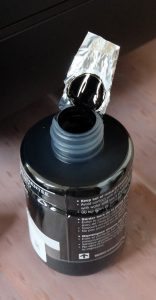
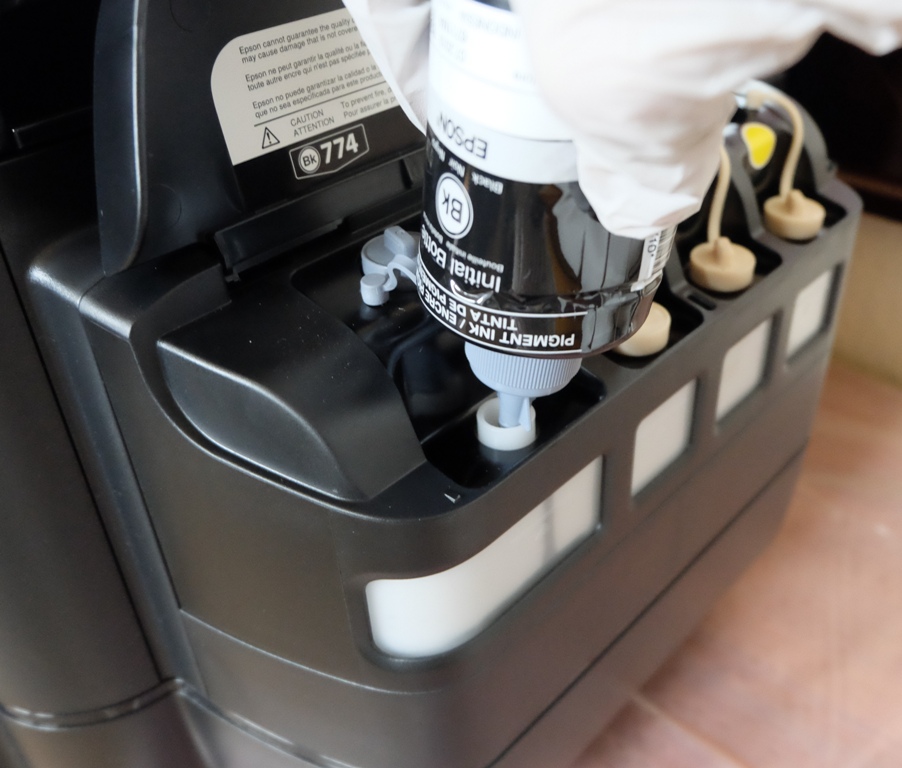
Each ink bottle comes shrink wrapped in plastic to ensure ink quality and probably to ensure that if the bottle leaks or ruptures, it won’t cause a mess. After peeling off the shrink wrap of each bottle (do this only when you are ready to use the ink), I needed to snap off the tip of each of the ink caps (as shown above). I also needed to remove each of the caps to very carefully remove the ink bottles’ seals (you’ll want to wear gloves for this to avoid getting ink on your hands).
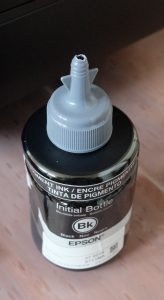
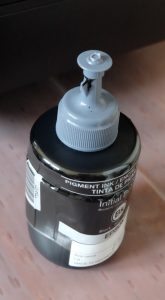
I then replaced the caps of each to prepare for filling the ink tanks. I had to gently squeeze the bottles to empty the contents into the ink tanks. You must empty the entire ink bottle contents even though the ink levels will be above the fill lines of the tanks. The excess ink will be used up during the ink initialization process. When I was finished emptying the contents into the tanks, I then inverted the snapped off the tips of the caps to place them on the top of the empty ink bottles in order to safely dispose of them.
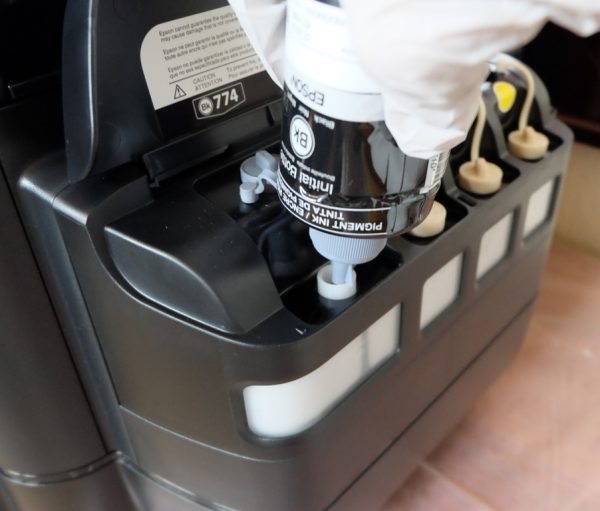
Filling the ink tanks can be messy so I wore rubber gloves as well as having already placed plastic underneath the ink tanks. When filling the ink tank, I was able to see the level of each. After filling each tank with its respective ink, I replaced the rubber cap firmly on each tank to seal the tops.
NOTE: Ink Shelf Life: It is suggested by the User Guide that you use up the ink in the printer within six months. I contacted Epson support and found that as long as you periodically print using this printer, the ink in the tanks will last up to two years. If you go without printing for a prolonged period of time, the ink head can become clogged and if that happens you will have problems printing and you will have to change the ink in the tanks.
Just like the ink in the ink tanks, opened bottles of ink should last for about two years as long as you store them at room temperature and away from sunlight and heat.
Unopened bottles of refill ink will last two years. So, if you don’t print a lot during a year, you may consider holding off on buying ink until you’re close to running out.
NOTE: Ink Specifications: I contacted Epson support three times to obtain the ink specifications for this printer and received three different answers (once through email and twice through calls because the information given didn’t make sense). The representative who seemed the most knowledgeable stated that the color and black inks are pigment based and are therefore supposed to be fade and water resistant (versus dye based inks which are not). However, my tests found that when water was dropped on a color document and rubbed around, the color text and color images bled, especially blue. Black seemed more resistant to bleeding when water was dropped on it, but a couple of passes over the same text using highlighters smeared the black ink too.
Powering On Printer and Ink Initialization: Next, I needed to turn on the printer and was prompted to enter the correct language, country, daylight savings time (winter or summer), date format (mm.dd.yyyy, yyyy.mm.dd, dd.mm.yyyy), the current date, the time format (12h or 24h), and the current time. At this point, I was instructed to see the setup manual to complete the initial ink charging.
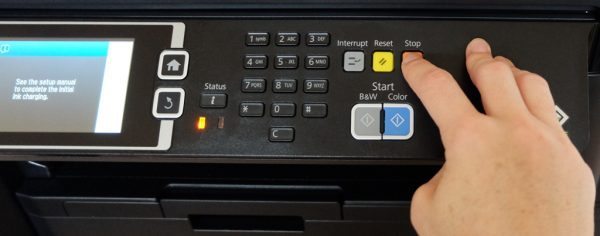
To complete the ink initialization, I needed to press the Stop button for three seconds.
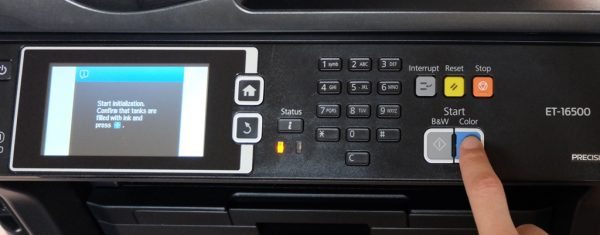
Then I was asked to confirm that the ink tanks were full, after which I was directed to press the “Color” Start button.
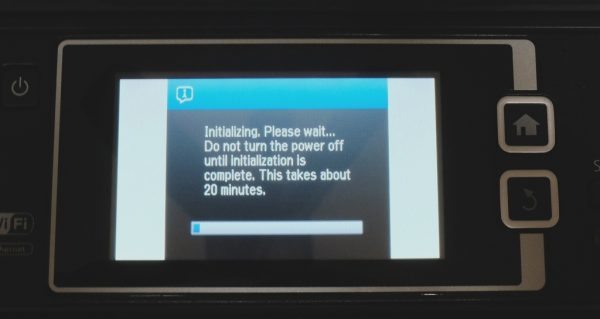
There is a warning that pops up on the screen indicating that the initialization process may take up to 20 minutes to complete. Hopefully, you don’t have any emergency printing or copying needs during this time!
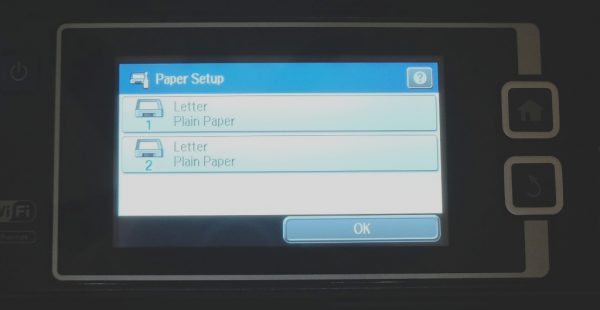
After the initialization was completed, I was prompted by the control panel to insert paper and select the paper size and type under the “Paper Setup”.
Fax Setup (Bypassed): The next screen was the Fax Setting Wizard for which you could choose “Close” or “Start”. I chose to close the fax setup. Does anyone use this anymore? I’m guessing yes since it is still an integral part of printers sold today. I haven’t had a physical phone line in my house for years and hence, I did not test this feature.
WiFi Setup: At this point, I started the Network setup. The User Guide stated that I could install the software on my computer which would then take me through the steps to set up the printer on my WiFi network. But when it came to that point, it told me that it could not find my printer and that I should perform the setup directly on the printer. Even though I chose to perform a WiFi (802.11 b/g/n) setup, you can connect the printer to a computer or device using high-speed USB cable, WiFi Direct (allows guests to connect directly to the printer to print), or Ethernet (10/100 Mbps) connection.
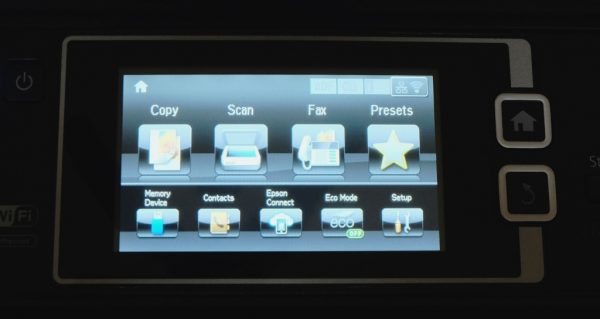
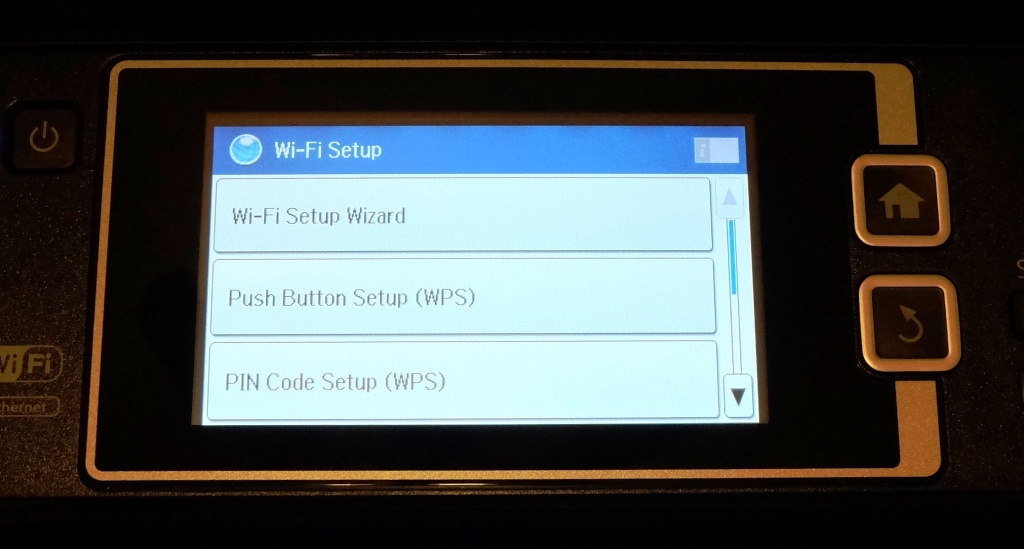
To start the WiFi setup process directly on the printer, I tapped on the Ethernet/WiFi Signal Icon button located in the upper right-hand corner of the touchscreen control panel (above “Presets”).
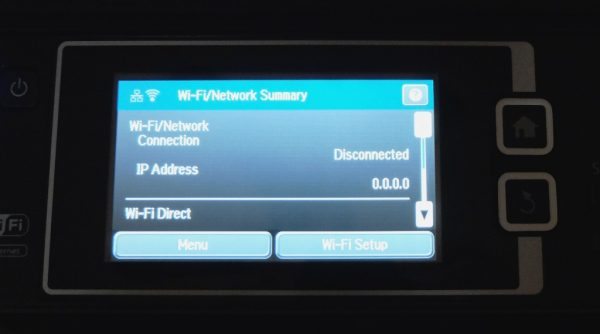
I then selected the WiFi Setup button…
 …then tapped on the WiFi Setup Wizard, selected my network from the list of detected networks, entered my network password, and confirmed my WiFi settings by tapping on the OK button on the last screen.

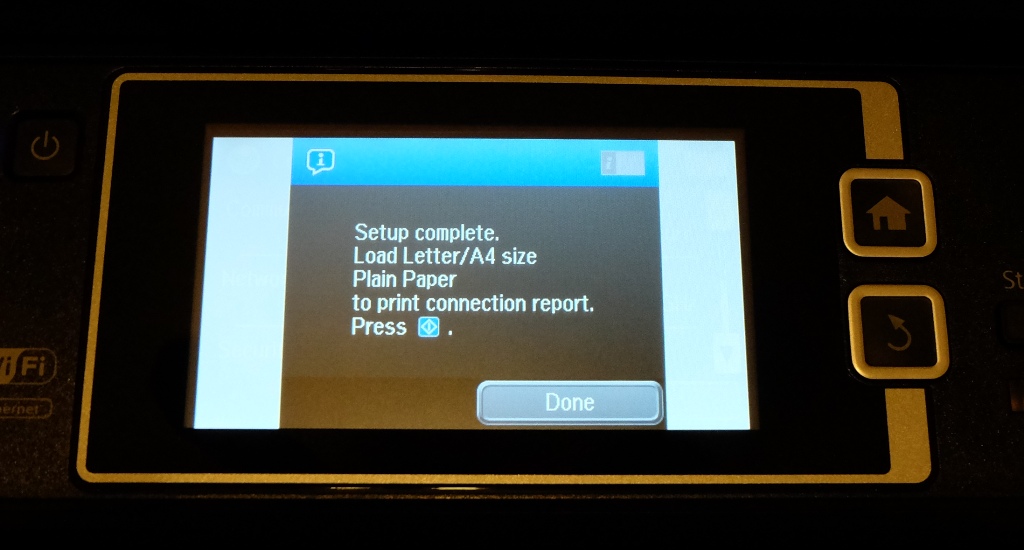
The printer was now connected to my WiFi network. To print the connection report, I needed to press the “Color” Start button.
Software Installation
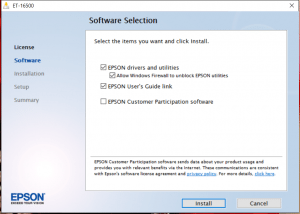
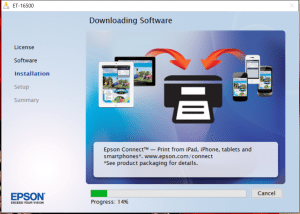
Computer and Laptop Driver and Software Installation: Now I needed to install the drivers and software for the printer onto my Dell computer and two Dell laptops. (Note: images may be clicked on to view a larger size.) The printer comes with a CD containing the drivers and software for the printer. You can also download these from Epson’s website.
When installing the software on my computer, the install process froze at 12% and needed to be restarted, after which there were no problems.
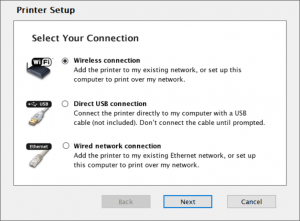
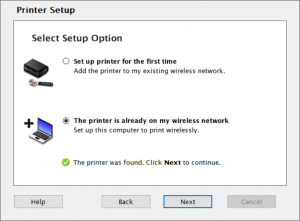
I selected that I wanted to setup the printer using a wireless connection. At the time of the software installation, I had already entered my network information directly from the printer’s control panel so I needed to select “The printer is already on my wireless network”. After selecting that, the software found my printer…
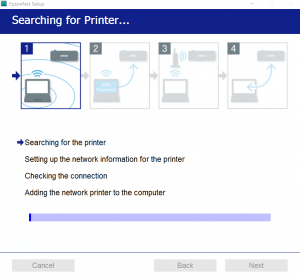
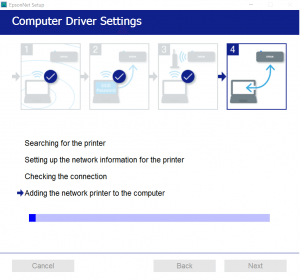
…and added it to my computer.
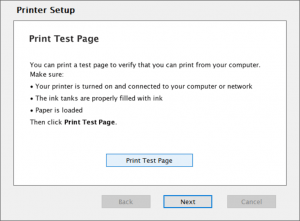
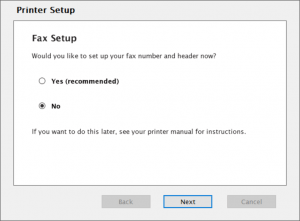
I was able to successfully print a test page from my computer and two laptops. I opted not to set up the Fax functionality.
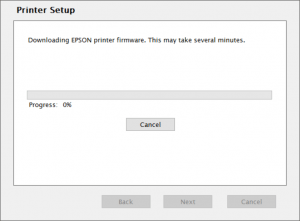
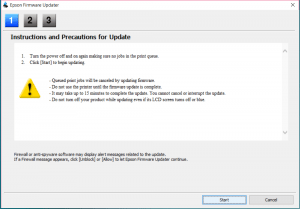
Firmware Update: Next, the setup CD then searched for updated firmware and downloaded it. I needed to be sure that I did not have any print jobs in the queue and was warned not to use the printer while updating the firmware. Updating could take up to 15 minutes.
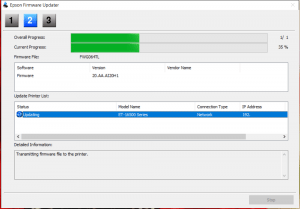

While the setup on one of my laptops was trying to transfer the firmware from the laptop to the printer, it froze up and failed to proceed. However, when performing the setup on my other laptop, it was successful; the firmware was transferred from the laptop to the printer, the printer was restarted, and the update was then completed.
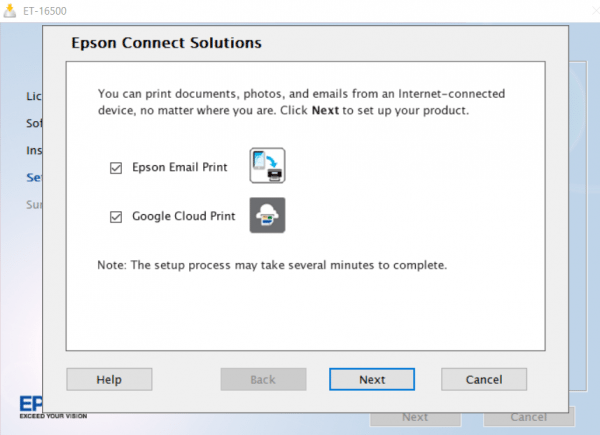
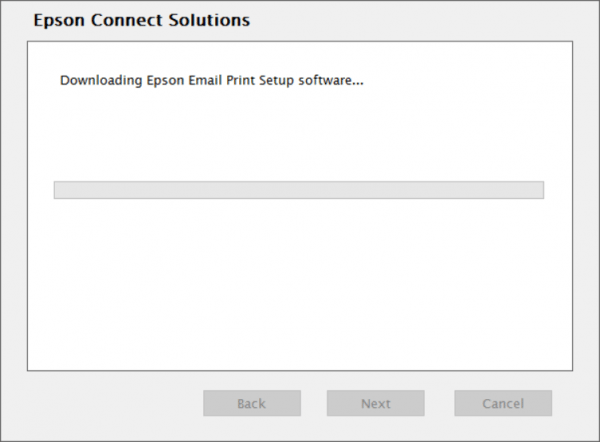
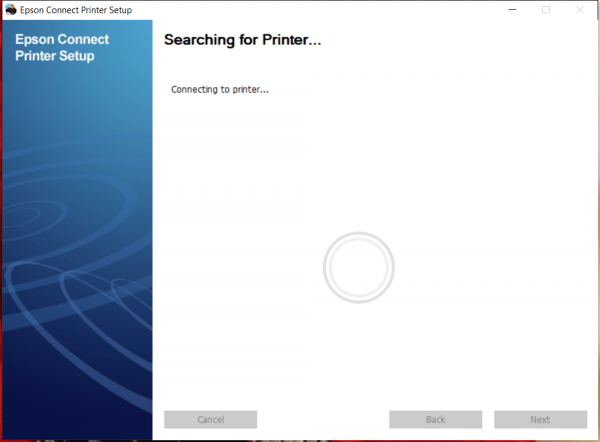
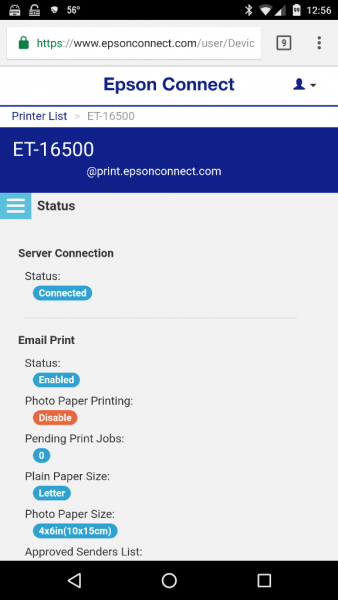
Epson Connect Setup: The setup CD then launched into the setup for Epson Connect (sets up an email for the printer which allows the user to email print jobs to the printer). When the setup reached the “Searching for Printer” section, it could not find my printer during the laptop installation. The CD setup finished after that point. I then searched the user manual (which was downloaded onto my computer during the installation) for Epson Connect information and was told to enter the printer’s IP address into a browser to view the online printer options and settings. I was unable to do this successfully on my computer (firewall issue perhaps? I didn’t dig to find out), but I was able to on my Nexus 6 phone.
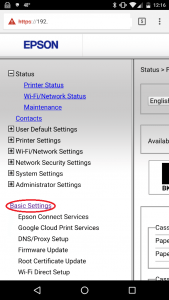
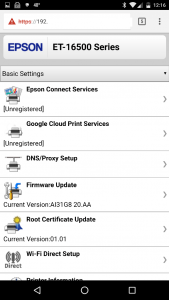
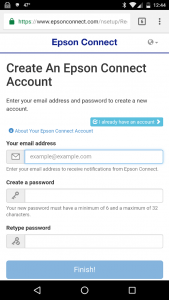
When viewing my printer’s options online, I selected “Basic Settings” which led me to Epson Connect Services which required that I create an Epson Connect Account. After doing so, I was given an email address for my printer which was a whole bunch of random letters and numbers. Thankfully, I was able to change the email address to something a little more memorable.
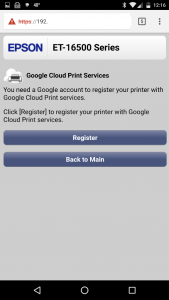
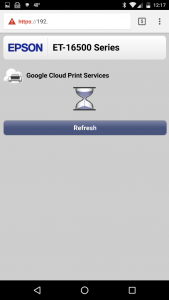
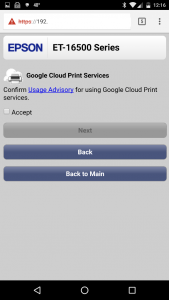
Google Cloud Print Setup: I then registered my printer in order to use Google Cloud Print Services. “Google Cloud Print is a service that connects your home and work printers to the web. Since your printer is connected to the web, you can print to it from anywhere, using any Internet-connected device, including PCs, Macs, Chromebooks, phones, or tablets” (from the Google Cloud Print help website).


The printer was confirmed and I was ready to use Google Cloud print from any of my devices connected to my Google account.
Use
Printing
With this printer, you can print from your computer/laptop, memory devices (thumb drives, SD cards), or any internet-connected device using Google Cloud Print. You can also email the printer directly to print the email and its attachments or you can use the Epson iPrint app to print from your Android or iOS devices.
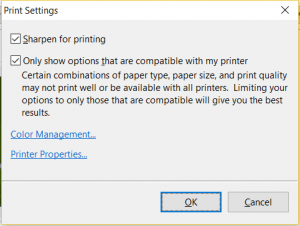
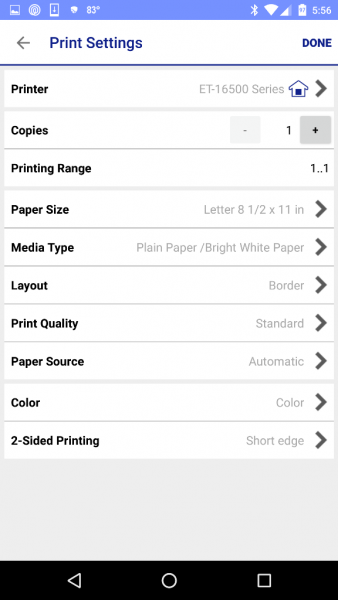
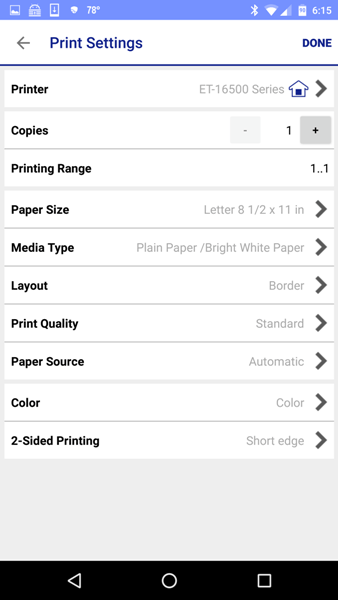
- Computer/Laptop Printing (not Mac): Printing from applications on my computer and laptops was straightforward and there were no issues. However, in order to change the default settings, I needed to right click on the printer icon located in the taskbar and select “Printer Settings” to make sure that the settings I wanted every time I printed were the default settings. Or if you don’t have the Epson printer icon in your taskbar, you may set your own default printer preferences by right-clicking on the Start menu then selecting the Control Panel > Devices and Printers > double click on the Epson ET 16500 printer (Epson ET- 16500 Series) > click on “Customize your printer” link > click on the Preferences button and then select all your desired default settings.
- Single-sided print speeds: I was able to print about 10 pages per minute (ppm) for color documents and about 17 ppm for black and white documents.
- Double-sided print speeds: I was able to print about 9 ppm in black and 6 ppm in color.
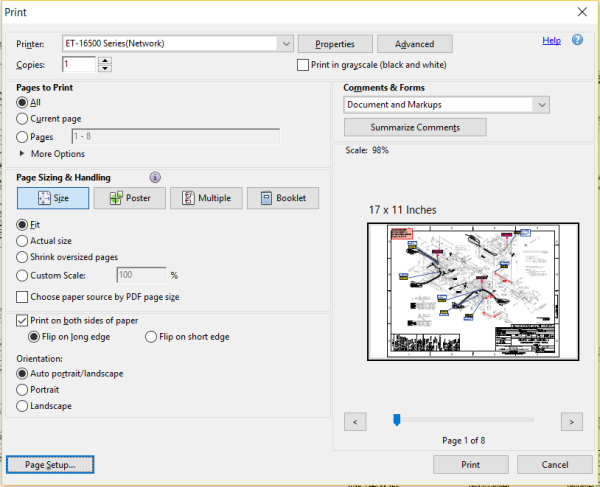
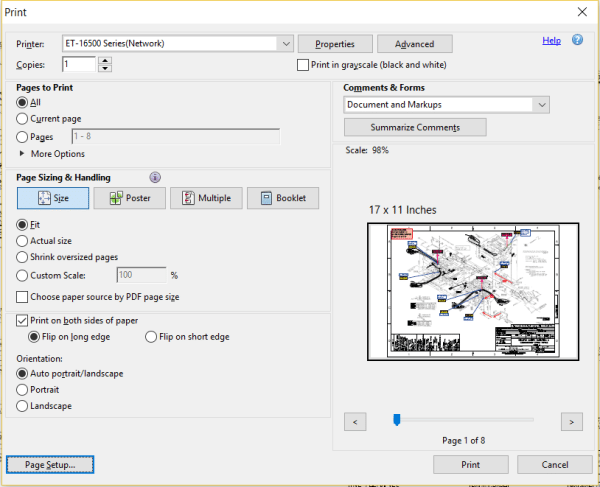
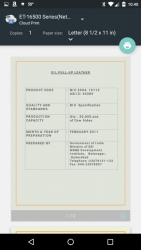
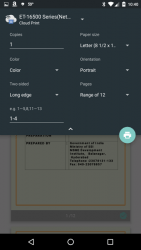
- Large format printing: I was able to print several color and black and white documents on 11″ x 17″ and legal sized paper (by clicking on the Page Setup button located in the lower left corner of the print settings shown in the screenshot above).
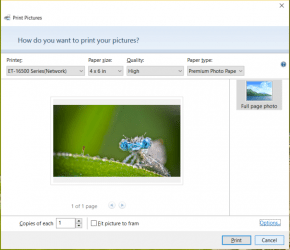
- Printing photos: When printing photos, you can select paper size, quality, and paper type. To get to the printer properties to change those settings, you’ll need to click on the “Options” link located near the bottom right corner of the left screenshot above. I found that when printing photos of people, the colors seemed a little washed out.
- Water resistance and using highlighters on a printed page: As I stated before, my tests found that when water was dropped on a printed color document, the text and color bled when rubbed, especially blue. Black seemed more resistant to bleeding when water was dropped on it, but using highlighters smeared the black ink too if you went over the print with more than one highlighting pass which is something that our laser printer does not do.
- Printing from Memory Device: When I tried printing a photo from a flash drive inserted into the printer, I found that in order for it to print correctly (print the whole photo on 4″ x 6″ paper) I needed to place my 4″ x 6″ photo paper in cassette 1 instead of using the rear paper tray. NOTE: the rear tray can only handle one sheet of paper at a time. If you wish to print several photos, you should place your multiple sheets of photo paper into cassette 1.
-
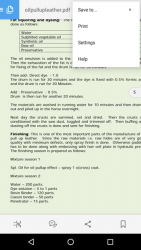
- Google Cloud Print: Since I had connected the Epson ET-16500 to Google Cloud Print, I was able to print from within apps (e.g. Adobe Acrobat) on my Nexus 6 phone as shown in the screenshots above. I could also print any document, PDF file, photo, spreadsheet, etc. by sharing it (by tapping on the “Share” button) with a Cloud Print app on my Nexus 6 phone.
- Email Printing: By emailing the printer directly from my iPod Touch 6G and Nexus 6 phone, I was able to successfully print an email with a Word document attachment and one with a photo attachment. NOTE: This is also the only way to print an Evernote note (by sharing the note from within the Evernote app then entering the printer’s email address in the “Send to” line). This is the case, even though the iPrint app shows that you can connect to Evernote via Online Storage in the iPrint app. Once connected, you only see the folders and not the individual notes to print.
- Epson iPrint Mobile App Printing: After downloading the Epson iPrint app on my Nexus 6 phone and iPod Touch 6G, I needed to configure the app.
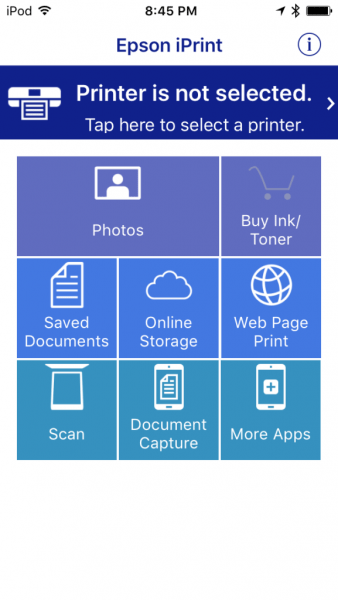
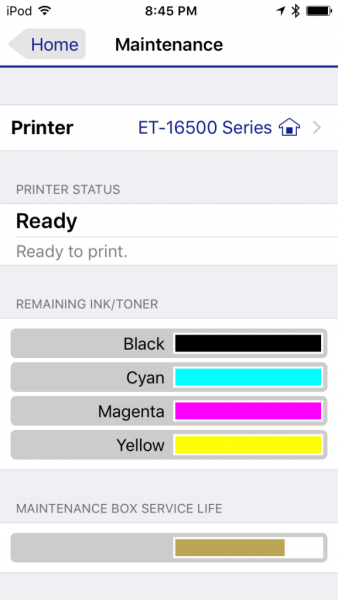

To configure the app, I needed to select the correct Epson printer to be used with the app (first screenshot above). After selecting my printer, the app was populated with my printer properties (second screenshot above). I could now print from within the iPrint app (third screenshot above).
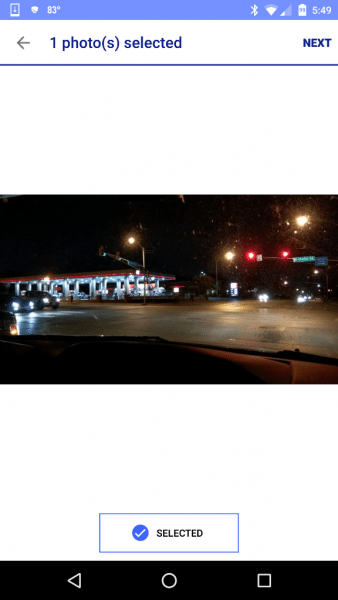

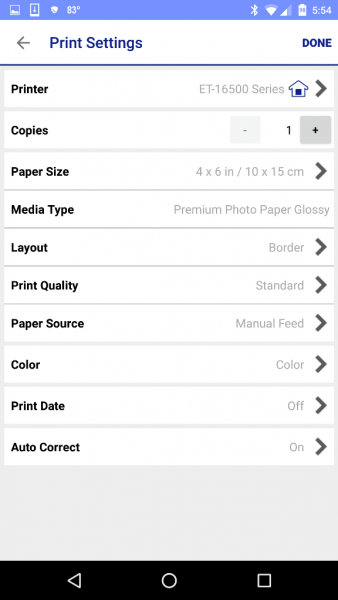
iPrint app – Photos: Printing photos from the iPrint app is easy. Just tap on the Photos button within the iPrint app, select the location of the photo you would like to print (from Camera, Screenshots, Downloads, etc.), select the photo to print, and before printing, you can check to make sure that all the settings are correct (e.g. Paper size, Manual Feed tray, etc.) by tapping on the gear icon located on the upper right corner of the screen (center screenshot). Next, tap on Done which takes you back to the photo and then tap on the Print button.
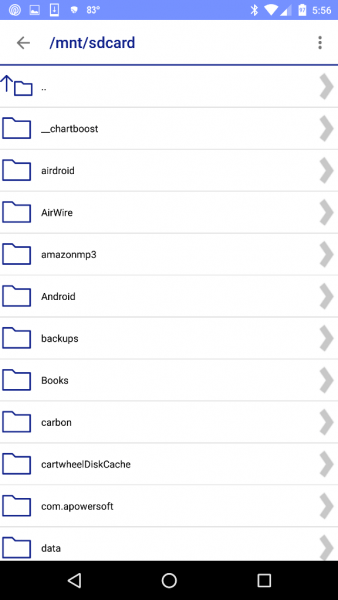
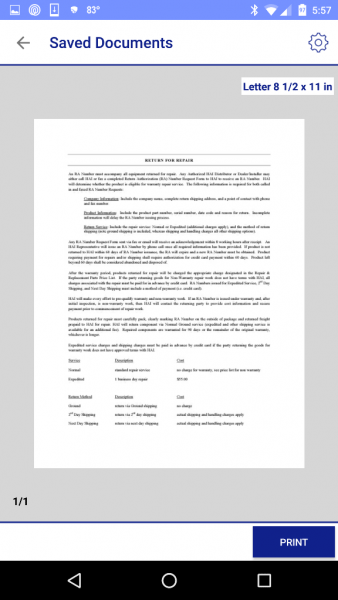
iPrint app – Saved Documents/Online Storage: Printing files stored on my phone (i.e. PDF files) from the iPrint app was straightforward. If you need to adjust the settings of the document (how many copies, print range, black and white or color print, 2-sided printing, etc.) you can tap on the gear icon in the upper right corner of the app (center screenshot). Printing from Online Storage was the same process as printing from local storage.
When tapping on the Saved Documents or Online Storage (i.e. Dropbox) buttons on the home screen of the iPrint app, I found that if I wanted to print anything other than PDF or photo files, the iPrint app would inform me, “You can upload the document and convert to PDF on Google Drive. OK?”. I was only given a choice between “OK” and “No”. If I chose OK, the file uploaded to Google Drive and converted to PDF so that I could print. While doing so there was a warning that said, “This file may not be displayed or printed correctly.” If I selected that I didn’t want to convert it, it did not give me the option to print. This was frustrating. Outside of the app, I was able to open DOCX files and print directly from the WPS Office app or OfficeSuite Pro app using the Print function within the apps (which uses Google Cloud Print) without having to convert to PDF. For other files, I could tap on the Share button to share them with the Epson iPrint app to print the file but if it was a DOC type file, I had to convert to PDF first.

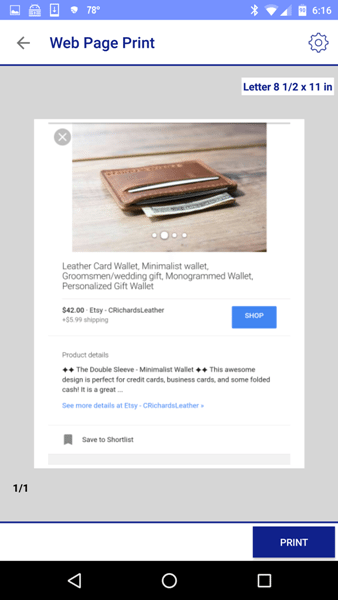
iPrint app – Web Page Print: Web Page Print required that you copy and paste the URL of the page you want to print, tap on the printer icon located in the upper right corner of the screen (first screenshot above), check the settings (gear icon), then tap on the Print button.
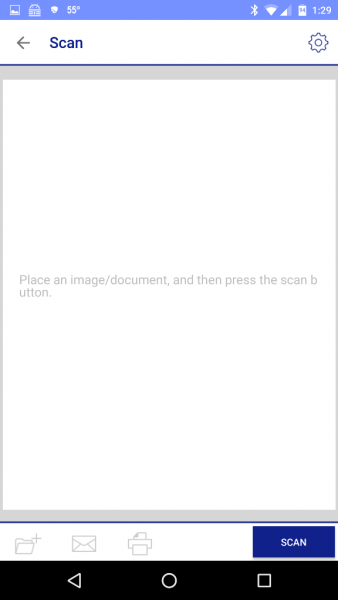
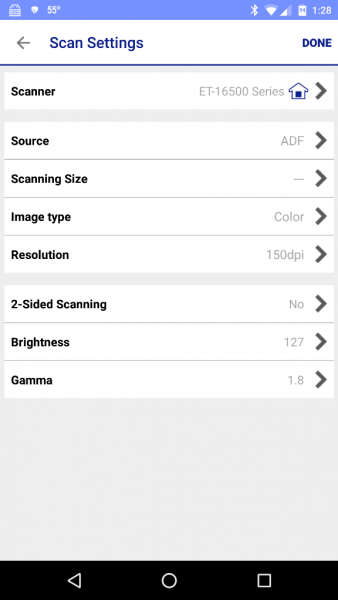
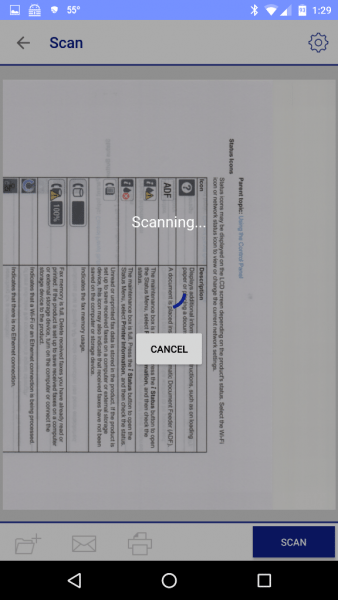
iPrint app – Scan: Scanning documents using the iPrint app is also fairly straightforward. You’ll want to make sure that all the settings are correct before scanning (e.g. scanning from ADF or Document Table, etc.), tap on Done, then tap on Scan. After scanning, I could save the scan to my phone’s local/cloud storage or email the scan or print the scan by tapping on one of the three icons located at the bottom left of the app screen (shown in the left and right screenshots above).
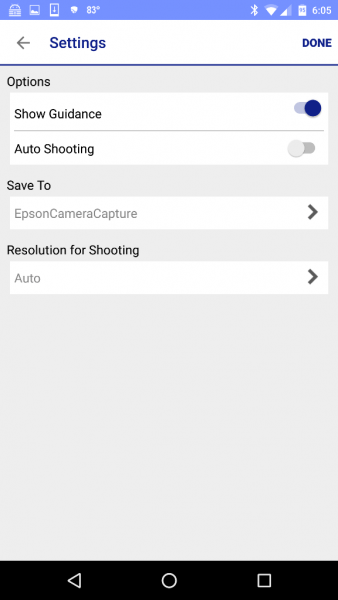
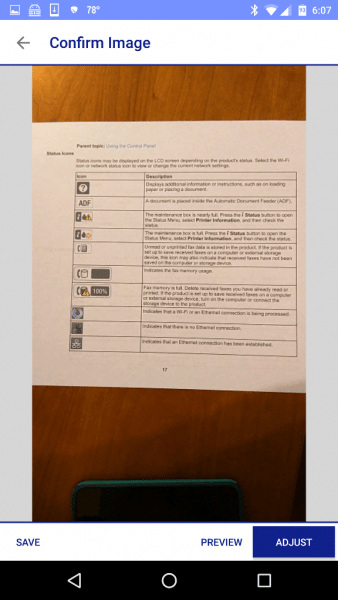
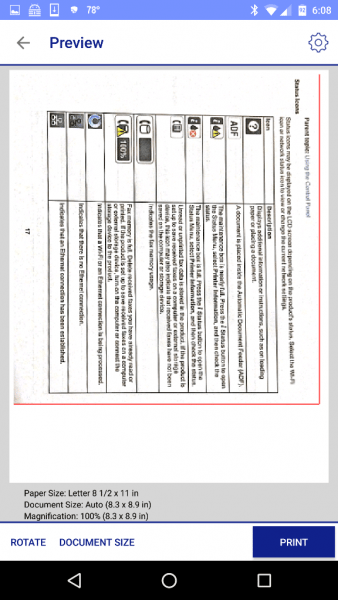
iPrint – Document Capture: After tapping on Document Capture, you may want to check the settings to make sure that you will be saving the document to the location of your choice. You then take a picture of the document using your mobile device’s camera, you can then adjust the photo, select the Save button located on the lower left corner of the screen (third screenshot above), then tap on the Preview button, check the settings of the document, and finally, tap on the Print button.
Copying
- This printer allows me to use the scanning bed or ADF to make copies. It will make 2-sided to 2-sided copies using the ADF which is something I was missing with my older printer. It also makes 1-sided to 2-sided and 2-sided to 1-sided copies. And it collates – another feature that is wonderfully useful but was missing in my old printer. When collating, it prints out a complete copy of the document before starting on a second copy of the document, etc.
- I was able to complete 16 black and white copies per minute (cpm) copying one page of a document using the flatbed scanner. I was also able to do 6 color cpm of one color page of a document using the flatbed scanner.
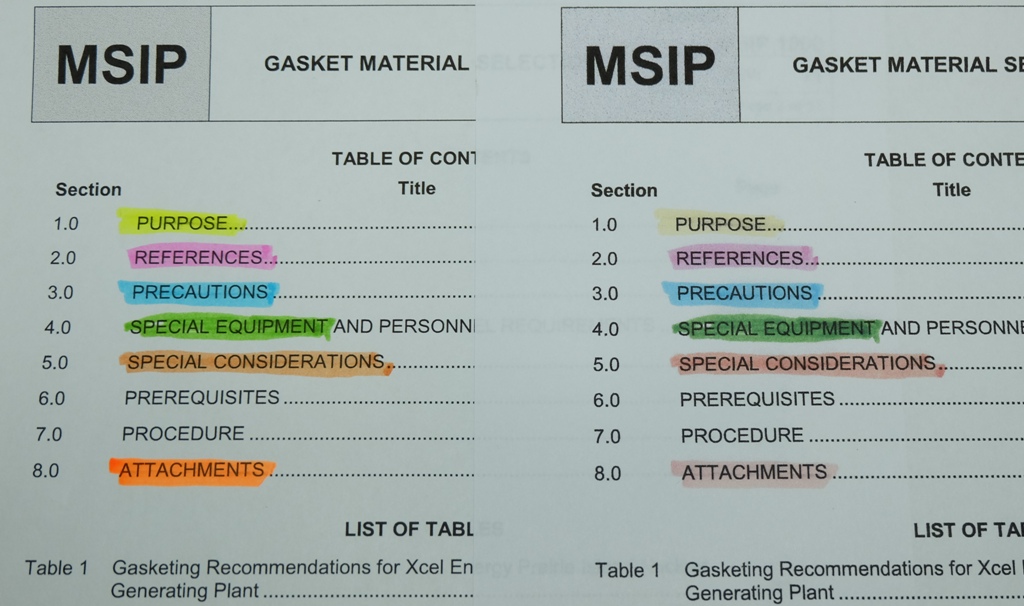
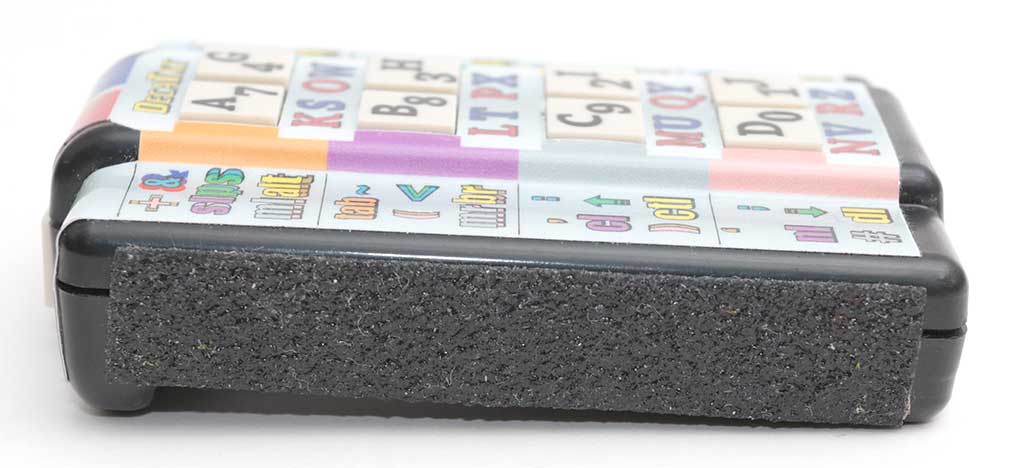
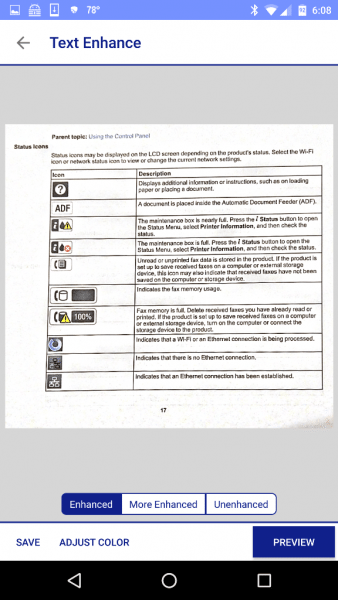
 The left portion of the above photo is a page printed using the Epson ET-16500. The right side of the photo is the copied version of the page on the left. The scanner was able to capture and copy my different highlighting colors on a document. It captured my pink, blue and green highlighting marks fairly accurately but my bright fluorescent yellow highlighter looked a little like a faint dull yellow color, and my bright fluorescent orange looked like a dull red/brown color on the copy (as shown in the photo above which has not been altered). Also, notice the slight smearing of the word “Purpose” which was passed over twice with a fluorescent yellow highlighter.
- Maximum Copy Size: 11″ x 17″
Scanning
When scanning documents, you can use the scanning bed or ADF. You can scan from your computer or laptop using the Scan 2 software, directly from the printer, or from your mobile device using the iPrint app.
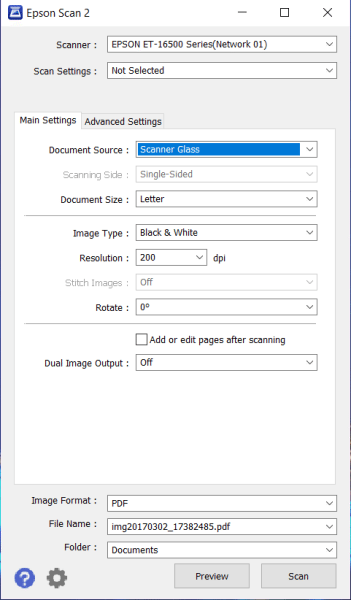
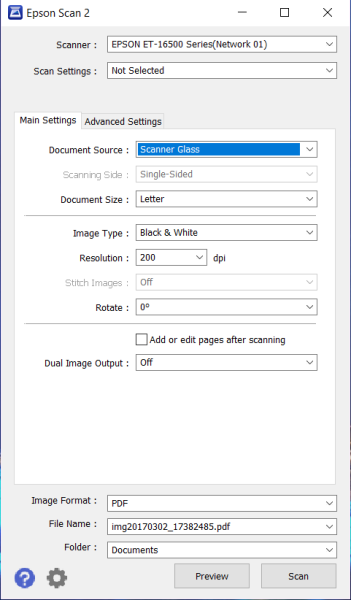
- Scanning using a computer/laptop: The above screenshot illustrates scanning using the Scan 2 software on a computer or laptop. This is straightforward and very easy to use.
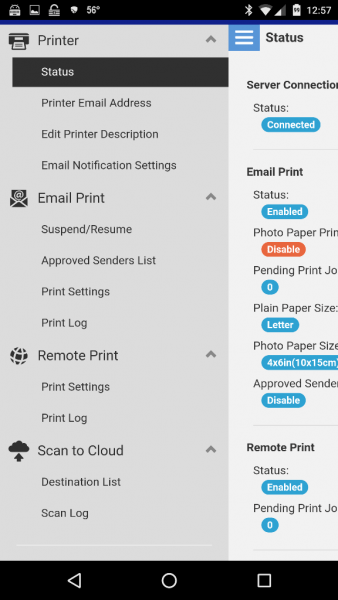
- Scanning directly from the Printer: Tapping on the Scan button on the printer’s touchscreen control panel you can scan a document to Memory Device, Cloud, or Computer. To Scan to Cloud, you must first set up a destination list. A destination list is a list of cloud sites that you would like to save your scanned documents to. You’ll need to set this up via epsonconnect.com. After logging into esponconnect.com, tap on the menu icon in the upper left of the screen. Under Scan to Cloud, tap on Destination List.
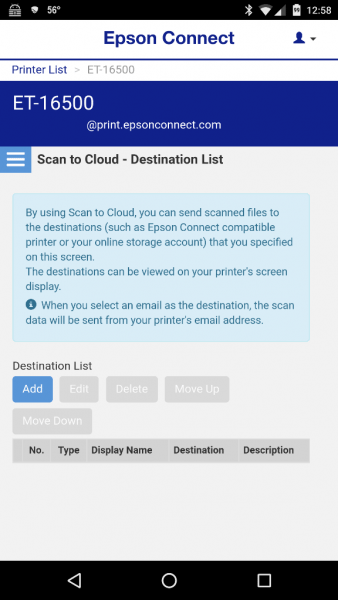

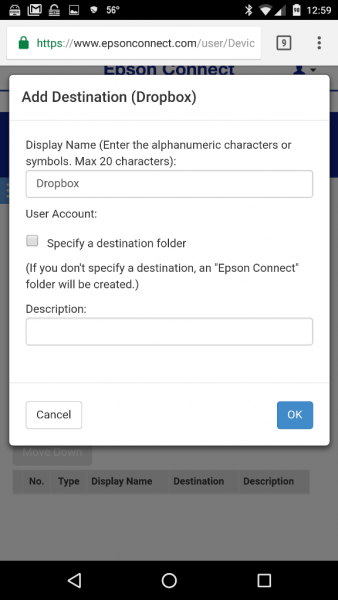
Follow the prompts to select your cloud accounts.
- Scanning using the iPrint app: This was covered earlier. If you use the iPrint app, you can scan to local storage, cloud storage, email, or print the scanned image.
- Maximum scanning size is 11.7″ x 17″.
There are so many things that this printer can do. Please see the complete User Guide (HTML, PDF) and Administrator’s Guide (HTML, PDF) for more information.
Final Thoughts
The Epson WorkForce ET-16500 Wide-format EcoTank all-in-one printer is a hefty printer with a lot of functionality. Printed documents are clear and almost laser quality. A couple of the notable things I liked about the printer was that it scans double-sided documents via the ADF and makes double-sided copies of them. It also collates the copies and it prints on large paper sizes. In addition, if you find that you print frequently, you may save money on ink refills. The refill bottles of black ink (part number 774) cost $19.49 and the refill bottles of cyan, magenta, and yellow inks (part number 664) are $12.99 each. The black will yield 6000 pages and the colors 6500 pages. The maintenance box (part number T671100) costs $14.99.
A few of the downsides to this printer are that the printer is large (26.2″ W x 32.2″ D x 16.5″ H when paper catching tray is extended) and weighs almost 51 pounds. The printer is also very expensive up front but you might save on ink costs if you find that you print frequently. Furthermore, the ink will smear somewhat if water is dropped on it and rubbed (especially the blue ink) or if you use highlighters and go over the print with more than just one pass. And finally, the colors of some of my printed photos look a bit washed out.
Based on the fact that I don’t print as frequently as someone with a home or small business, I would not have spent $999.99 on this printer. However, for someone who needs a printer with additional printing features above that of a personal printer and who has heavier printing needs, this may be a wise purchase in the long run.
Source: The sample used in this review was provided by Epson. Please visit their website for more information or B&H Photo to purchase one.
Product Information
| Price: |
$999.99 |
| Manufacturer: |
Epson |
| Retailer: |
Amazon |
| Pros: |
- Ink bottles replace cartridges and may save you money on refilling the printer's ink tanks
- High quality print
- Prints large page sizes
- Scans and copies large paper sizes
- Scans double-sided documents via the ADF
- Collates
|
| Cons: |
- Expensive for a home printer
- Ink refilling can be messy
- Ink tanks could leak
- Printer is very large for home personal use (51 pounds, 26.2" W x 32.2" D x 16.5" H)
- Color ink bleeds when wet
- Black ink bleeds when using highlighters
- Some photos appear washed out
|
Filed in categories: Computer Gear, Reviews
Tagged: Printer
Epson WorkForce ET-16500 Wide-format EcoTank all-in-one printer review originally appeared on on March 9, 2017 at 8:00 am.
Note: If you are subscribed to this feed through FeedBurner, please switch to our native feed URL http://the-gadgeteer.com/feed/ in order to ensure continuous delivery.