NazTech MagBuddy phone mount system review

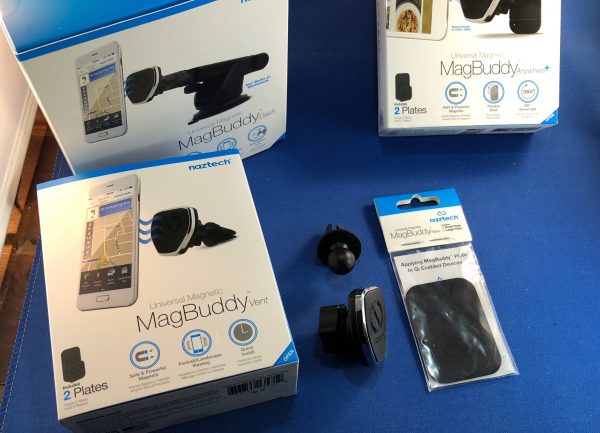
Car mounts for phones have been around as long as mobile phones have been around. With the rise of SmartPhones, their need has only grown, since the phone in your car often takes the place of that glove box full of maps (or the dedicated GPS device), your box of mix-tapes (or mix CDs), and the car club guide for your vacation spot. Naztech recently sent us three models (Vent, Dash, and Anywhere+) of their MagBuddy series to test. I’ve given them a run through and am ready to share the results with you.

Note: Photos may be tapped or clicked for a larger image.

What is it?

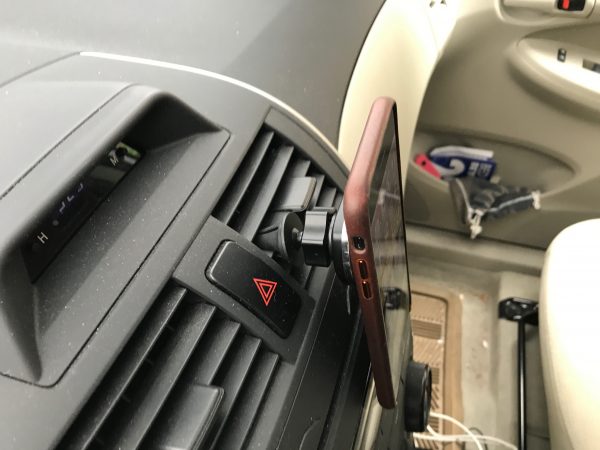
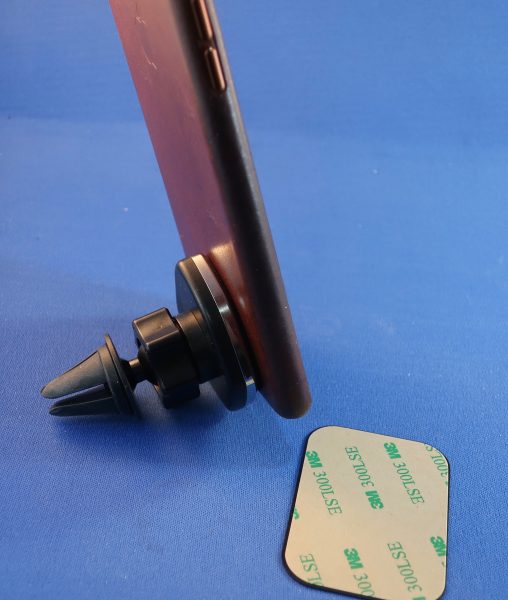
The MagBuddy system consists of three parts: a holder of some type, the adjustable magnetic headpiece that attaches to the holder (which I have dubbed the MagHead, for this article), and a flat steel piece that affixes to your device or case. The last two pieces are the same for each system, but the holder varies. There is a suction mount unit with an adjustable arm to control the height and angle of the magnetic head, one that clips onto your AC/Heat vent, and one that will stick to any flat or slightly curved surface permanently. I’ll discuss each one below.

What’s in the box?

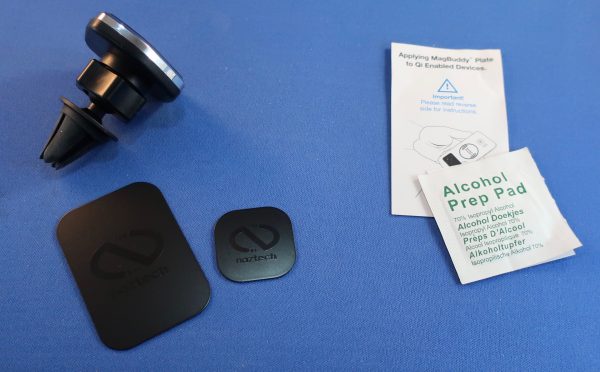
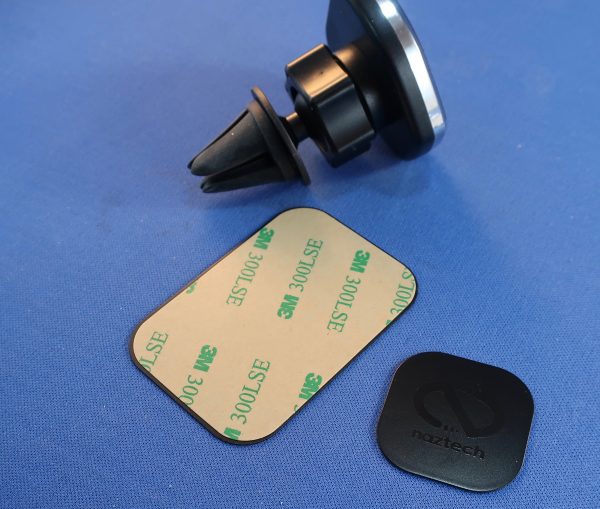
Each box contains a MagHead, two steel plates (small and large) and a holder, as well as an alcohol prep pad. You can buy plates and Mag heads separately.

Design and features

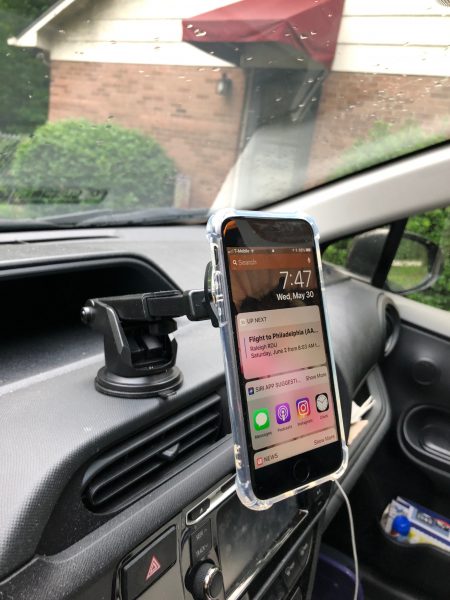
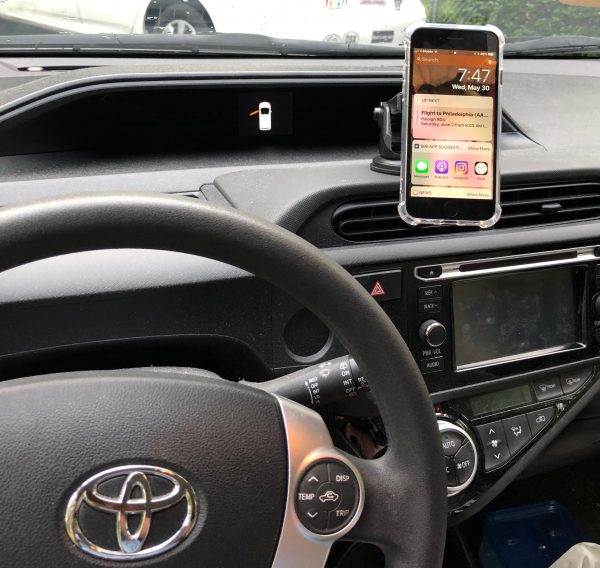
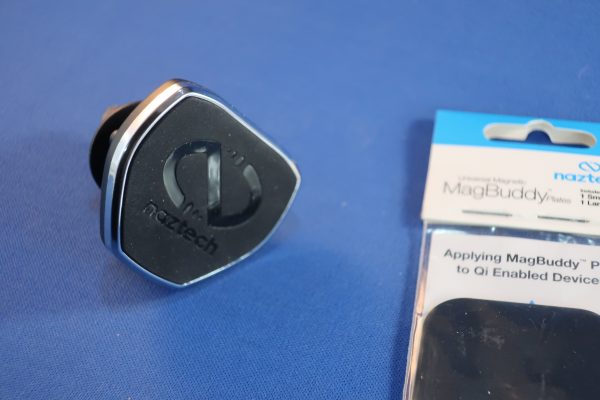
The MagHead is a roughly triangular piece of molded plastic 1.75″ across with a screw clutch socket on the back. The holder’s ball snaps into this and can be tightened so that the Mag head is steady. The face of the MagHead is covered with a soft rubbery material – not quite silicone or neoprene, but somewhere in between. The edges around the plastic under this pad are edged in a thin silver metal. Embedded within the head are strong magnets that will grab on to anything steel quite tightly. This is where the steel plates come in. The large plate is 1.75″ x 2.5″, and the smaller plate is 1.25″ square. Stick one to your phone, iPad, back-up camera monitor or whatever else you want to hold onto, and the MagHead will hold it – up to a point. If you put it on an iPad Pro and go off-roading, I don’t think it will hold for long. But I used it with an iPhone 8 and have had no problem with bumpy roads, railroad tracks and the like encountered on a normal city street. We are using it with the MacBuddy Dash stuck to the windshield, because the dash on the car it’s in is textured, and the suction cup doesn’t hold very well there. (Note the texture on the dash in the photo below.)

Setup

The first thing you’re going to want to consider is where will be the best place for your device. Note that the Anywhere or Anywhere+ model holder can be stuck to any smooth, quasi-flat surface. This doesn’t have to be in a vehicle. You could put one up in a back room for staff to use for pricing or break schedules on an iPad. Or mount your phone to your mirror in the bathroom to check the news or listen to a podcast while prepping for your day, without worrying about knocking your phone onto the tile floor – or worse. Also, the Dash model with the adjustable arm would be just as happy affixed to your monitor support or desk, so that your iPad or Phone is just under your monitor. It’s a hugely flexible system, and once you have the plate on your device, you can easily swap between holders.

Performance

As mentioned earlier, you’ll need to use a steel plate that matches the size of the device you want to be held, and any case you put over the plate may loosen the MagHead’s grip. I had the large plate inside my iPhone 8 Plus leather case (above), and the first bump I hit sent the phone into the floorboard. Even that thin layer of leather was enough to loosen the MacHead’s grip.

My wife’s iPhone 8 has Qi charging, but when it’s inside the case with the steel plate on it, the phone doesn’t charge in a Qi charger. Pop it out of the case, and it charges as expected.

What I Like

  • There are two plates included with each mount, and more can be bought.
  • Can be used by multiple devices, and each device can attach to any holder.
  • Fully adjustable for different viewing angles.
  • Sturdy, yet easy to mount device onto.

What needs to be improved

  • Larger items may break loose.
  • You have to use the metal plates, which may affect wireless charging of device.
  • The plates can be mounted to the case or your device.
  • Some cases may weaken the grip if mounted directly to the device and covered by a case.
  • Metal plates on the back of phones that have Qi charging are going to have problems. Period.
  • The Silicone band of the bicycle handlebar model would be a nice individual sale, like the steel plates. It would enable the connection through my leather case to be secure on rougher roads.

Final thoughts

Phones do everything nowadays. There are so many different uses that we can’t be without them for very long. This is never more true than when we’re driving, it seems, especially when you’re in an area you don’t know well. All the questions about routes, service stations, food, and parking that come up in any normal car trip are easily solved by using your phone. Having it in a single place where it can be referenced without taking your eyes off the road and the instrument panel makes using it for navigation safer. Having it be adjustable so that a rider can adjust audio settings is also a plus. This series of holders offers something for everyone: an adjustable swivel-arm model to attach by suction to the windshield or dash, an air vent clip model, and a model that sticks to almost any surface to offer the swivel head, magnetic snap-on mount.
If you aren’t worried about losing the Qi charging feature, it’s fantastic. Otherwise, there are compromises. You may find an area of your phone where the plate doesn’t block the charging connection, but will it hold your device securely enough over construction and off-road driving?

Pricing is reasonable, and there is a wide variety of holder styles to choose from. $29.99 for cupholder model; $24.99 for Bike mount, CD slot mount, dash mount, windshield mount, or Anywhere+; $19.99 for headrest mount, air vent mount, Anywhere, or desktop. Extra plates, $9.99 for a set of two (one of each size).

Price: Varies depending on the item
Where to buy: The Naztech website or Amazon
Source: The sample of this product was provided by Naztech.

Filed in categories: Reviews

Tagged: ,

NazTech MagBuddy phone mount system review originally appeared on The Gadgeteer on June 20, 2018 at 11:00 am.

Note: If you are subscribed to this feed through FeedBurner, please switch to our native feed URL http://the-gadgeteer.com/feed/ in order to ensure continuous delivery.

Zyxel Multy Pro Tri-Band modular WiFi review

With more and more connected gadgets arriving in our homes, WiFi bandwidth can become a huge bottleneck. Zyxel’s expandable Multi Pro tri-band modular WiFi helps to keep your signal strong, even in the furthest reaches of your home.

What is it?

Zyxel’s Multy WiFi system is comprised of one or more AC3000 wireless routers. The first unit connects to an internet connection and broadcasts a strong, stable signal. Adding one or more Multy units allows continuous daisy-chaining to enable home WiFi to reach the furthest areas of your home.

Hardware Specs

  • Fast, comprehensive WiFi coverage
  • Room-to-room roaming
  • Easy set-up within minutes
  • Guest network
  • Compatible with Alexa
  • Speed Rating (per unit)
  • Number of Bands: Tri-band
  • Coverage: Up to 7500 sq. ft./696 m2
  • Wireless Standard: IEEE 802.11 b/g/n 2.4 GHz – 256QAM support, IEEE 802.11 a/n/ac 5 GHz (Wave 2) – 256QAM support
  • Wireless Transfer Rate: (Transmit & Receive): 1733Mbps* for 5 GHz (dedicated backhaul),866Mbps* for 5 GHz,400Mbps* for 2.4 GHz
  • WiFi Features: Daisy Chain, Bridge Mode, MU-MIMO, Beamforming, Auto path selection, Single WiFi NameAP Steering, Band Steering, Optional to separate 2.4G and 5G WiFi network
  • Plastic housings
  • Dimensions: 7 x 2 x 9.3 inches
  • Weight: 1.96 pounds.

What’s In The Box?

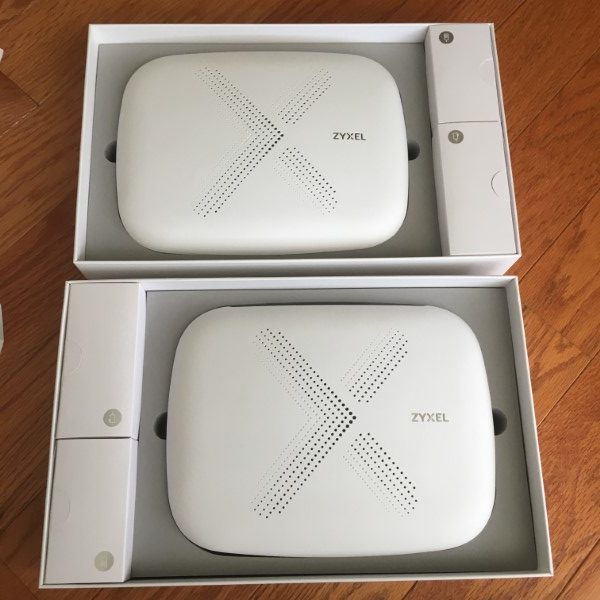
  • Two Multy WiFi routers
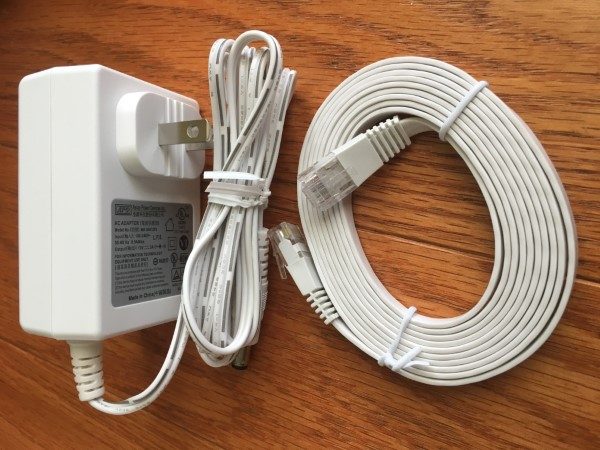
  • Two power supplies
  • Two Ethernet cables
  • Two Instruction manuals

Design and features

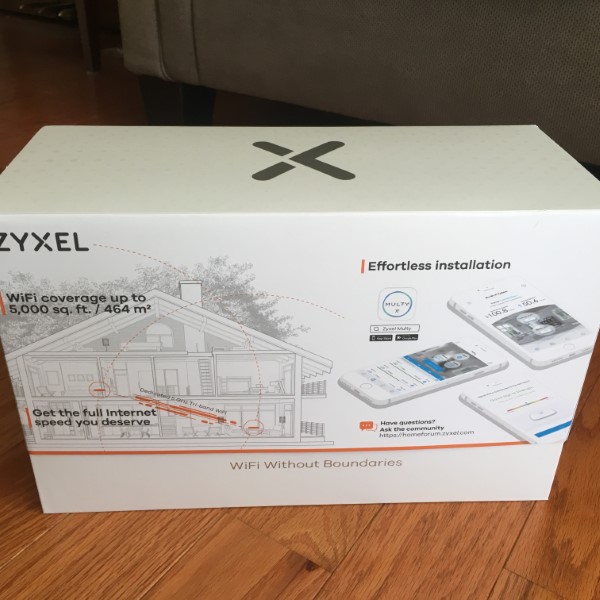
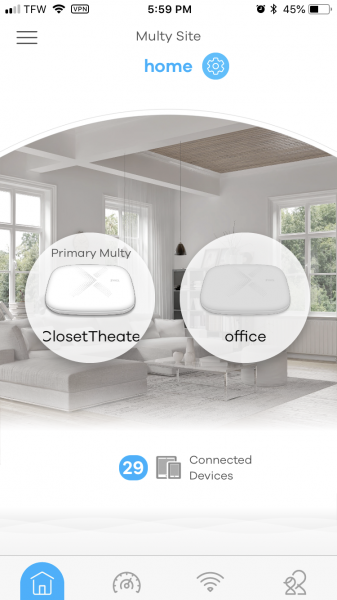
Zyxel’s Multy Pro system arrives in handsome packaging. The two Multy routers are identical. I elected to locate the primary router in a centrally-located location on the first floor of my home. Connections were simple – Internet connection from my ISP modem and power. I downloaded the iOS app and followed the simple instructions and was up and running in minutes.

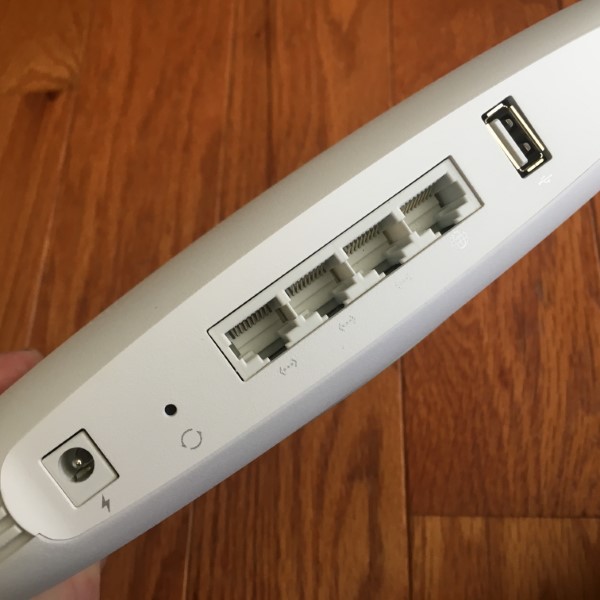
Next, I located the second Multy WiFi in a room with sporadic WiFi and continued with the set-up in the app. The second unit needs power only. The second unit daisy-chains WiFi, using the same SSID and password. Additional Multy units can be added to bring that elusive WiFi signal to all the deep, dark corners of your castle. Communications between the two Multy units is deliciously fast at 1733Mbps. Since the bases have 3 Gigabit Ethernet ports, using the full bandwidth is as easy as plugging in the cables.

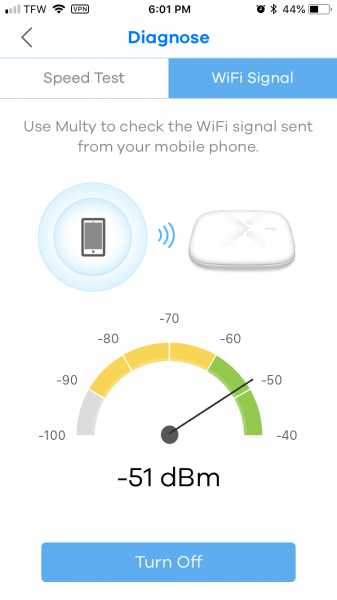
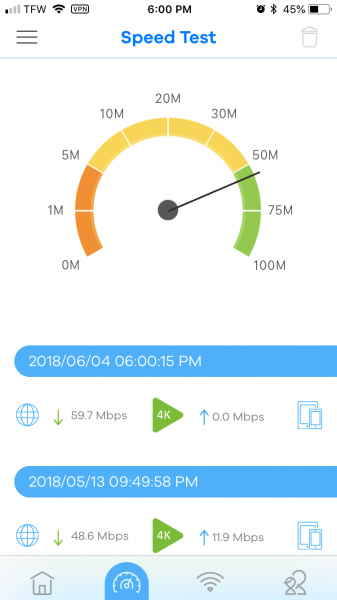
After getting the system up and running, I ran several speed tests in different locations in my home with impressive results. Signal strengths even at the furthest reaches of my home were at worst, a very respectable -51dB. My daughter was the first to comment that she had experienced many fewer dropouts and faster speeds on her bedroom computer and iPhone.

Looking to tweak the settings I tried to find a way to change the default IP address of 192.168.212.1 to find there isn’t an easy way to do this. I contacted Zyxel Technical Support and was provided with a way to make the changes using Putty, but elected to just leave it at the default. Next, I looked for a way to plug in an 8TB USB hard drive into the “Master” Multy to use as a backup for all of the computers on my network but was unable to locate anything in the app to enable this capability. Zyxel’s technical support informed me that this is not currently a feature, but may be implemented in the future.

I’ve used Zyxel’s Multy Pro system over the past three weeks. I’ve experienced excellent performance, few dropouts and a very strong and stable signal everywhere. The system is even powerful enough to blast WiFi all through my property so I can listen to internet radio while mowing my entire lawn.

What I like

  • Attractive design
  • Easy configuration
  • Strong, stable WiFi
  • Crazy fast backhaul
  • 3 Gigabit Ethernet ports per hub
  • Capable app

What needs to be improved?

  • Configuration options are very limited. An advanced user configuration option would be welcomed.
  • The inclusion of  USB port functionality for storage

Final thoughts

Zyxel’s Multi WiFi system is ideally suited for large homes where configuration tweaking isn’t necessary. Its sleek design, intuitive setup, and solid performance have earned it a position as the ranking WiFi router in my home.

Price: $299.99 two-pack
Where to buy: Amazon
Source: The sample for this review was provided by Zyxel.

Filed in categories: Reviews

Tagged: ,

Zyxel Multy Pro Tri-Band modular WiFi review originally appeared on The Gadgeteer on June 20, 2018 at 9:00 am.

Note: If you are subscribed to this feed through FeedBurner, please switch to our native feed URL http://the-gadgeteer.com/feed/ in order to ensure continuous delivery.
Xiaomi 360 3.5K Sphere camera review

What features do a stand-alone camera need to make it compelling enough that you would want to buy one when the cameras in our phones are already so good? How about the ability to capture 360-degree images and videos? Let’s take a look at the Xiaomi 360 3.5K Sphere camera to see if it should earn a spot in your gear bag.

What is it?

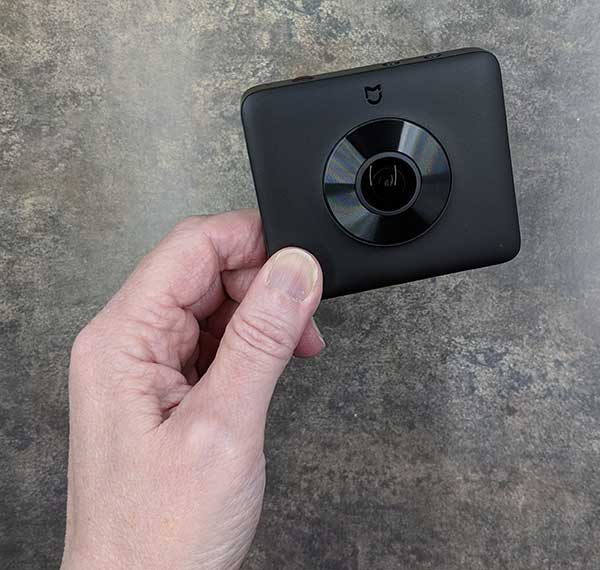
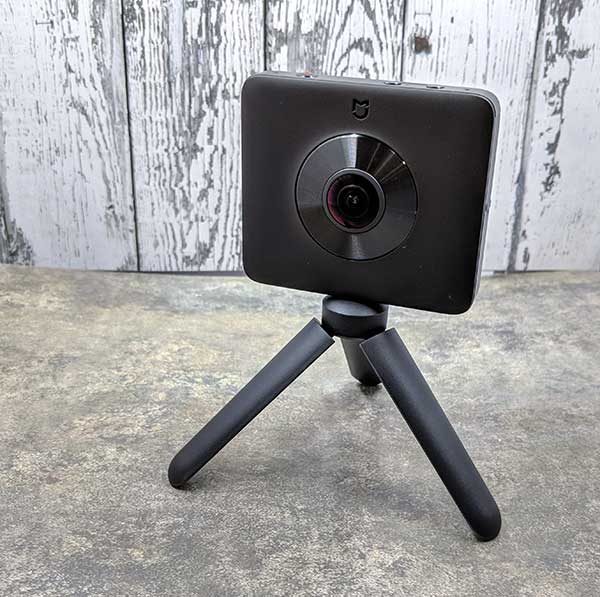
The Xiaomi (pronounced as: show me) 360 3.5K Sphere camera is a small stand-alone dual-lens camera that can capture 3.5K 360 degree images and video.

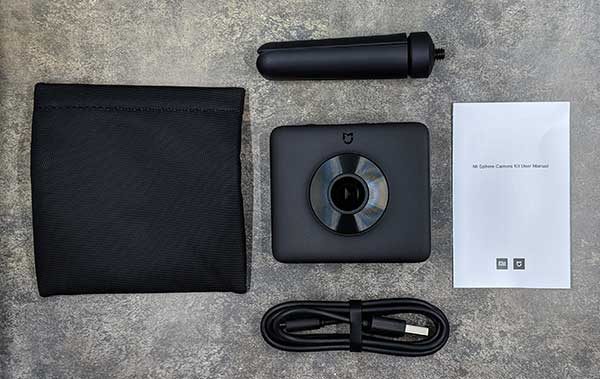
What’s in the box?

Xiaomi 360 3.5K Sphere camera
Pouch
Tripod/selfie stick
micro USB charging cable
User manual

Hardware specs

23.88 MP
Dual 1/2.3″ Sony image sensors that support up to 3456×1728/30fps or 2304×1152/60fps
6-axis electronic image stabilization
microSD card slot – requires U3 cards
Built-in microphone
1600mAh lion battery for up to 200 photos or up to 90 minutes video recording
Operating temperature is 14℉ to 113℉ (-10 degree Celsius to 45 degree Celsius)
IP67 water/dust rating
WiFi connection to mobile device
1/4″ threaded socket

Design and features

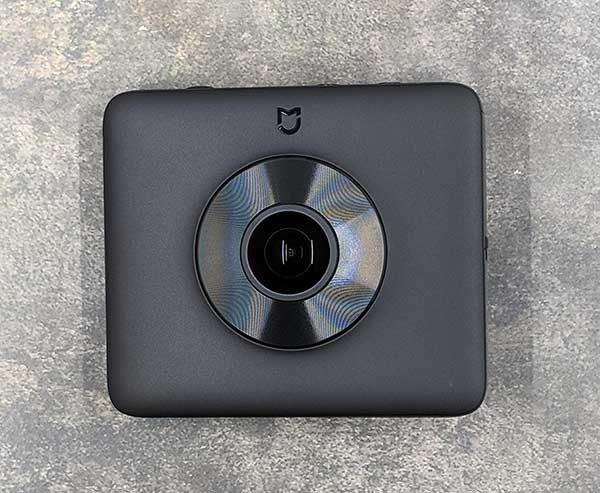
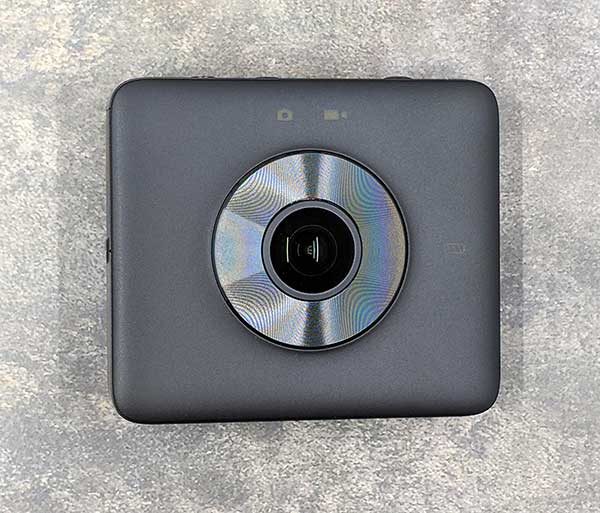
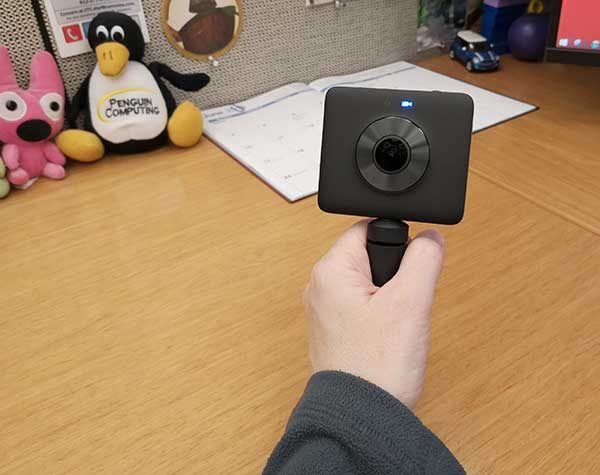
The Xiaomi Sphere Camera has a unique form factor compared to other standalone action cameras. It’s about 3.0 x 0.5 x 2.7 inches. Both sides of the camera have a bulging 190-degree wide-angle fisheye lens that helps to eliminate blind spots that other 360-degree cameras can suffer from.

One side of the camera surrounding the lens is made of a matte black plastic with a logo at the top and nothing else.

The other side of the camera is also matte black plastic and has the other lens and two status icons that light up in blue to show the current camera mode, which is either image capture mode, or video capture mode. Either icon will light up in blue when that mode is active. The camera will remember the last setting and will power up in the last mode that you used.

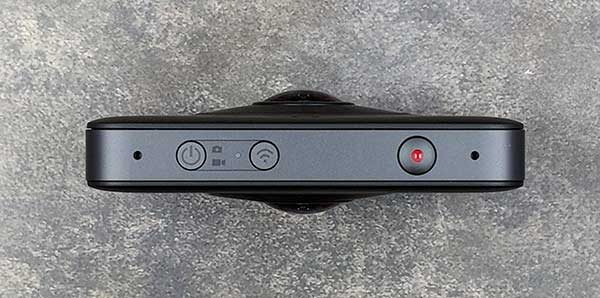
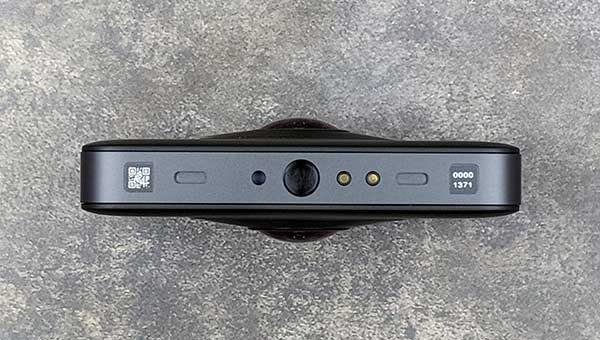
The frame of the Xiaomi Sphere Camera is made of aluminum and the top edge of the camera has a microphone, a power button which doubles as the mode selector, a WiFi button, a capture button, and another microphone.

The buttons have some tactile feedback when you press them, but they aren’t very “clicky”. It’s also pretty easy to accidentally toggle power on the camera without realizing it and/or switch modes since the power button is used for both actions. One good thing is that as long as you’re not in a noisy environment, you’ll know when the camera powers on, powers off, and the mode is changed because the camera plays a 4 note tone when powering on and off and a 1 note tone when changing modes. Note that it is possible to adjust the volume of these audible notifications and even turn them off.

On the bottom edge of the camera is a standard sized threaded tripod socket and some electrical contacts for an optional charger or another accessory which does not ship with the camera.

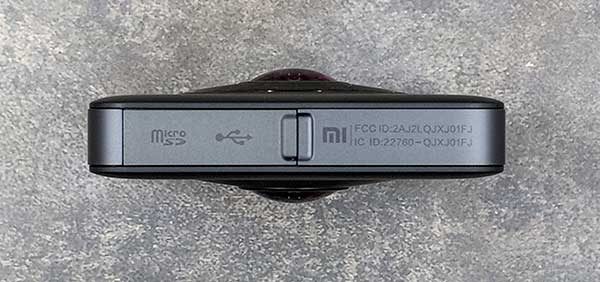
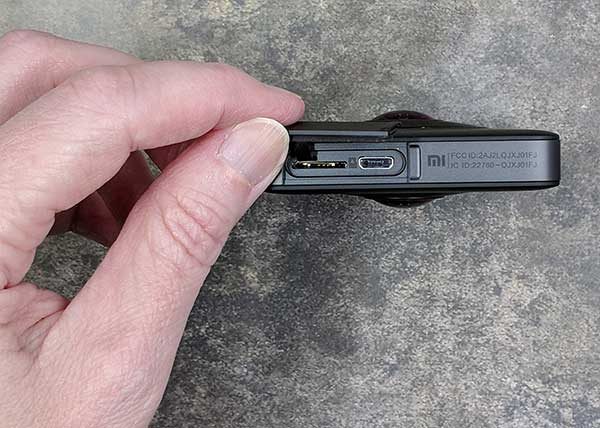
One side of the camera has a cover that protects the charging connector and built-in memory card slot.

The Xiaomi Sphere Camera charges with a micro USB cable and it uses microSD cards to store the captured images and video. Note that the camera does NOT come with a microSD card. It’s up to you to provide your own memory card.


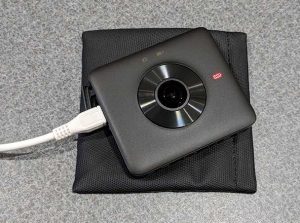
When the camera is charging, a battery status LED will light up in red. When charging is complete, the LED will turn blue.

The Xiaomi Sphere Camera has a nice build and a quality look and feel.

Capturing images manually and with the mobile app

After charging the Xiaomi Sphere Camera and inserting a microSD card, you can immediately start using the camera just by pressing the power button and then using the capture button to capture an image or start recording a video. Of course, the camera doesn’t have a built-in display, so you can’t preview your shots or watch any of the images or video that you’ve captured until you connect the camera to a computer or remove the microSD card and use a card reader to view the files.

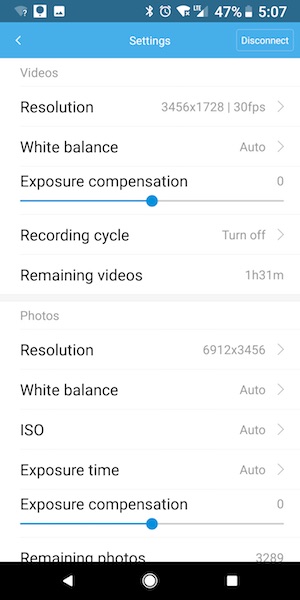
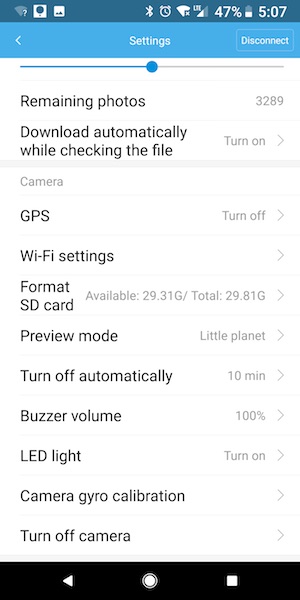
If you want to be able to preview your shots, view captured images and video, and adjust the camera’s settings, you will need to use the Mi Sphere Camera app (compatible with iOS and Android) to connect the camera to your smartphone.


The app’s interface is pretty self-explanatory. There’s a red capture button, a mode button and different types of capture modes like time-lapse and slow motion.


Here are all the camera settings that you can adjust using the Mi Sphere Camera app.


The app does make it easier to set up your shots, but I didn’t use it that often as a way to capture video and images while I was testing the camera. I mainly just used the buttons on the camera itself along with the default settings.

Let’s check out some sample images and video

Unfortunately, WordPress does not natively support embedding 360-degree photos and videos directly into articles. You can install a plugin to display them, but I don’t want to install a plugin just for one review, so I shared some of the images and videos to my Facebook account. They are public, so you can click and enjoy without needing your own Facebook account to view them.

360 of the Indianapolis airport.

Posted by Julie Strietelmeier on Tuesday, June 19, 2018


360-degree pic

Posted by Julie Strietelmeier on Monday, June 18, 2018


360 video in Kings Canyon National Park in California.

Posted by Julie Strietelmeier on Tuesday, June 19, 2018


360 on beach in Carmel CA

Posted by Julie Strietelmeier on Tuesday, June 19, 2018

In the app, you can view the captured images in different styles like pano, flat, crystal ball, and tiny planet style pics (shown below). But as far as I can tell, you can’t share the images in these specific types of view modes though.


There’s a button on the share screen that is supposed to let you choose the view mode, but it is greyed out and nothing happens when you press it, so all of my images are shared as flat 360-degree images that you can pan around in with your mouse like the ones you see above.

What I like

  • Simple to use with basic controls
  • 360-degree image and video capture is unique and fun (for a while)

What needs to be improved

  • No live streaming
  • 75-minute video capture limit
  • No built-in  display to preview shots, requires a WiFi connection to a mobile device

Final thoughts

360-degree images and video are obviously cool and are fun to capture and view. But are images and video like this worth paying $286.99 to capture them? That’s the main question, isn’t it? Other than taking it with you when you go on an epic vacation, I can’t imagine using a camera like this one on a day to day basis. Maybe that’s only because my day to day life isn’t epic enough to justify a camera like this one. So I’m not going to judge if you want a Xiaomi Sphere Camera 360 because it is pretty cool and maybe your life is morning 360-degree worthy than mine is.

Price: $286.99
Where to buy: Amazon
Source: The sample for this review was provided by Xiaomi.

Filed in categories: Reviews

Tagged:

Xiaomi 360 3.5K Sphere camera review originally appeared on The Gadgeteer on June 19, 2018 at 5:05 pm.

Note: If you are subscribed to this feed through FeedBurner, please switch to our native feed URL http://the-gadgeteer.com/feed/ in order to ensure continuous delivery.
Epson Expression Premium XP-6000 All-In-One Printer review

I remember watching the original Star Trek series on TV as a lad. Every time someone wanted to look at some kind of media, it was always presented on a tablet-looking device. We’re not there yet, but until we get there, a good printer, like Epson’s XP-6000 fills the void nicely

What is it?

Epson’s Expression Premium All-In-One XP-6000 printer is a wireless computer printer, with fax, scanning, photo printing, and dual-sided capabilities. Multiple paper trays allow borderless 4” X 6” and 8-1/2” X 11” printing.

Hardware Specs

• Printing Method:  Epson Micro Piezo™ print head

• Nozzle Configuration: 360 Nozzles Black, 180 Nozzles per Color

• Minimum Droplet Size: 1.5 Pl, With Variable-Sized Droplet Technology

• Ink Technology:  Claria™ Premium Ink

• Printing Resolution: 5,760 x 1,440 DPI

• Application: Home, Photo

• All-in-One Functions:  Print, Scan, Copy

• Printing Speed ISO/IEC 24734:  15.8 pages/min Monochrome, 11.3 pages/min Color

• Printing Speed:         32 pages/min Monochrome (plain paper 75 g/m²), 32 pages/min Color (plain paper 75 g/m²),15 Seconds per 10 x 15 cm photo (Epson Premium Glossy Photo Paper)

• Colors: Black, Photo Black, Cyan, Yellow, Magenta

• Scanning Resolution: 1,200 DPI x 4,800 DPI (Horizontal x Vertical)

• Scanner type:  Contact image sensor (CIS)

• Number of paper trays: 2

• Paper Formats: A4, A5, A6, B5, No. 10 (Envelope), Letter, 10 x 15 cm, 13 x 18 cm, 16:9, Legal, 9 x 13 cm, 13 x 20 cm, 20 x 25 cm, DL (Envelope), C6 (Envelope)

• Duplex: Yes (A4, plain paper)

• Print Margin: 0 mm top, 0 mm right, 0 mm bottom, 0 mm left (Wherever margin is defined. Otherwise 3mm top, left, right, bottom.)

• Multifunction: 100 Sheets Standard, 20 Photo Sheets

• Media Handling: Automatic duplex (A4, plain paper), Borderless print, CD/DVD print

• Energy Use: 18 Watt (standalone copying, ISO/IEC 24712 pattern), 0.7 Watt (sleep mode), 6 Watt (ready), 0.2 Watt (Power off), ENERGY STAR® qualified

• Supply Voltage: AC 220 V – 240 V

• Product dimensions: 349‎ x 340 x 142 mm (Width x Depth x Height)

• Product weight: 6.6 kg

• Noise Level: 4.6 B (A) with Epson Premium Glossy Photo Paper / Photo RPM mode – 33 dB (A) with Epson Premium Glossy Photo Paper / Photo RPM mode

• Compatible Operating Systems: Mac OS X 10.6.8 or later, Windows 10, Windows 7, Windows 8, Windows 8.1, Windows Vista, Windows XP SP3, XP Professional x64 Edition SP2

• Included Software: Epson Easy Photo Print, Epson Print CD

• Interfaces: WiFi, USB, Wi-Fi Direct, USB host

• WLAN Security: WEP 64 Bit, WEP 128 Bit, WPA PSK (TKIP), WPA PSK (AES)

• Mobile and Cloud printing services: Apple AirPrint, Google Cloud Print, Epson Connect (iPrint, Email Print, Remote Print Driver, Scan-to-Cloud, Facebook print)

• Housing Color: Black

• LCD screen: Color, Diagonal: 6.1 cm

• Memory Cards: SD, SDHC, SDXC, MicroSD*, MicroSDHC*, MicroSDXC*, MiniSD*, MiniSDHC* (* Adaptor required, not included)

• Features: Red-eye removal, Photo Enhance, Direct print from USB, Wireless PictBridge

• Warranty: 12 months Carry-in

What’s in the Box?

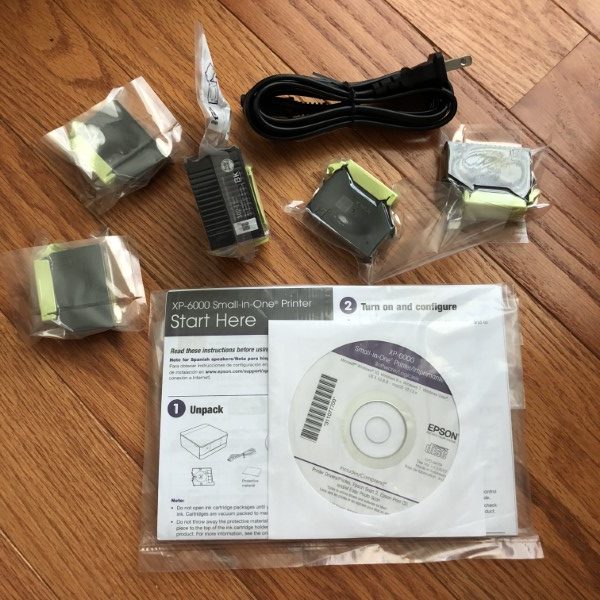
  • Individual Ink Cartridges
  • Printer
  • Power Cable
  • Setup Guide
  • Software CD
  • Warranty Card

Design and features

Epson has been a household name in printing for many years. In fact, my first color printer was an Epson some 20 years ago.

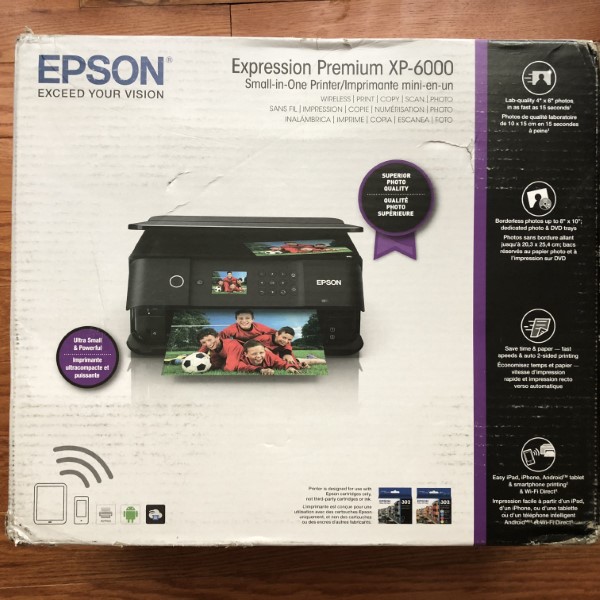
The XP-6000 printer arrived in a full-color, well-padded box with hand grips in the sides –always helpful for the bulky gadgets. Epson was gracious in including several types of paper for this review.

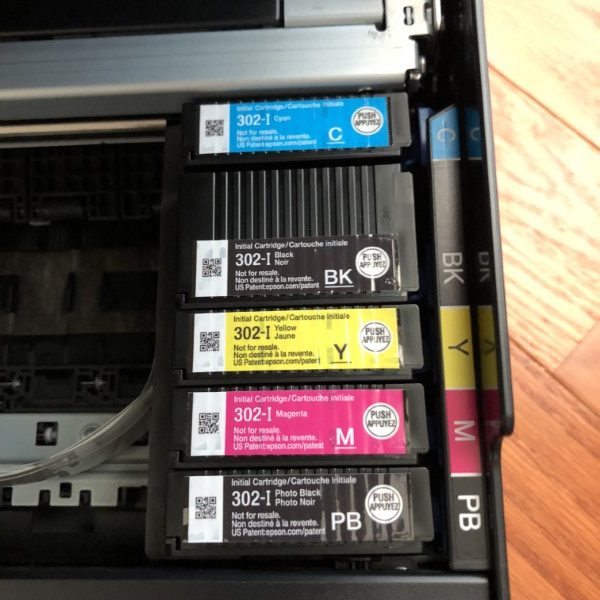
I removed what seemed like dozens of blue tape tabs to secure the printer during transport, unwrapped and installed the ink cartridges and plugged in the printer for its maiden voyage.

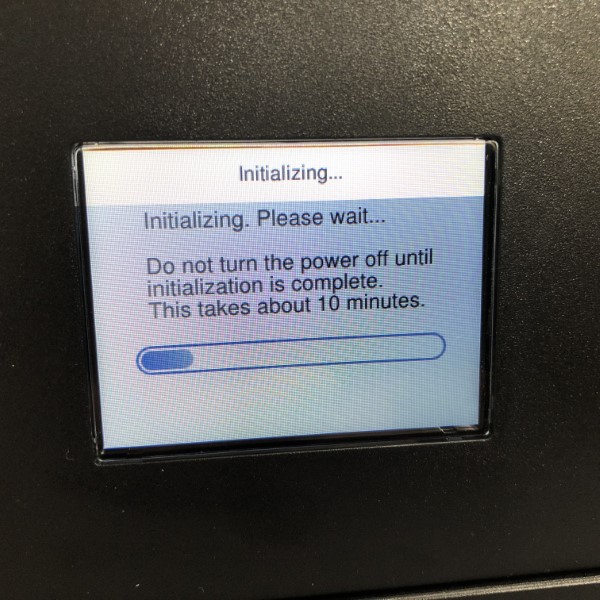
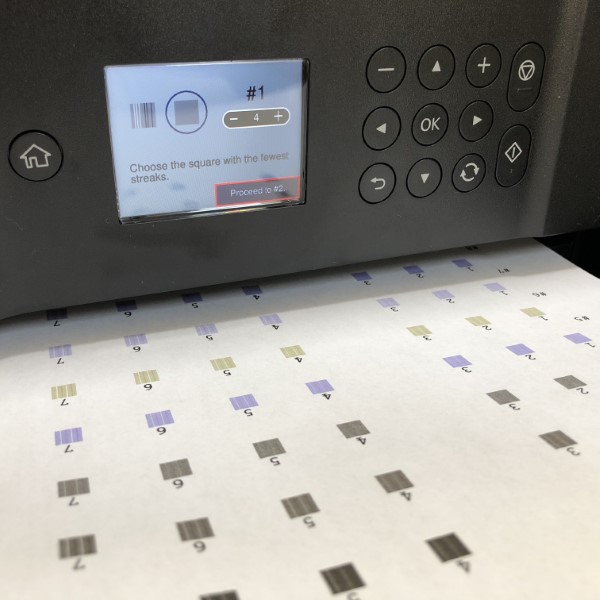
The printer starts with a number of print quality and head alignment tests which took about 10 minutes.

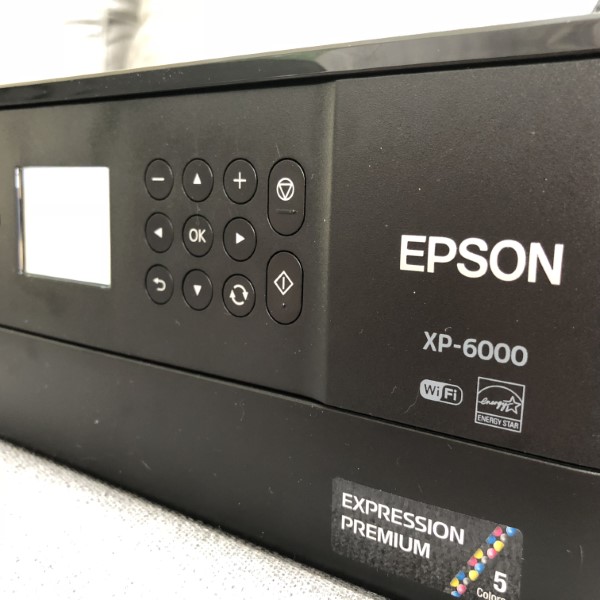
Several pages were printed which asked me to provide answers to my preferred printed squares, blocks, and colors. Connecting the printer to WiFi was a bit cumbersome scrolling through alpha-numeric screens using the keypad cursors and “ok” button.

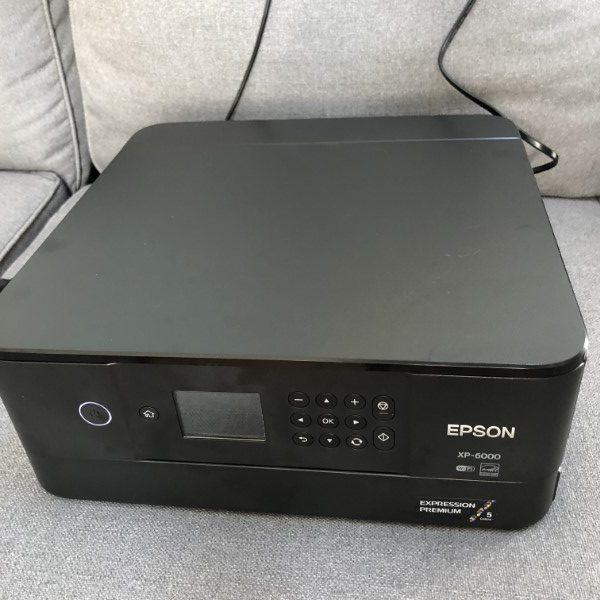
The printer is very “boxy” with not very many protrusions in its resting state. I like this clean unencumbered design.

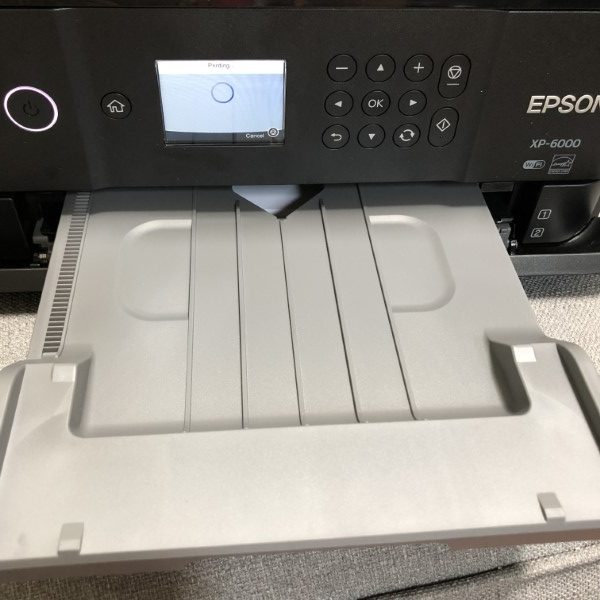
To start printing, the front of the printer must be opened and the collection tray extended. This might pose a problem if someone sent data to the printer, but didn’t make sure the collection tray was not extended. With the tray closed, the printer is very compact and quite sexy (can I use “sexy” to describe a printer?)

I loaded plain paper and 4 X 6 photo paper and selected a few images from my iPhone. The printer isn’t a speed demon, but the output was sharp and clear, I was particularly impressed with the subtlety in the greys in the photo of my daughter’s pet bunny.

A few more printed 4 X 6 and 8 X10 photos were proof enough for me that the printer is very capable. Like all inkjet printers, ink can be expensive and has a limited shelf life. Inks for the XP-6000 are comparably priced with others on the market. It’s worth noting this printer has four colors, black, cyan, magenta, yellow and photo black that can be purchased in multi-packs.

Next, I chose a two-sided color text document on plain paper. Output was quick and quiet, with only short delays between pages.

I installed the included software on my computer to gain access to the scanning and CD printing capabilities and found the software to be intuitive and easy to use. There are separate apps for CD Printing, scanning and a very comprehensive user guide.

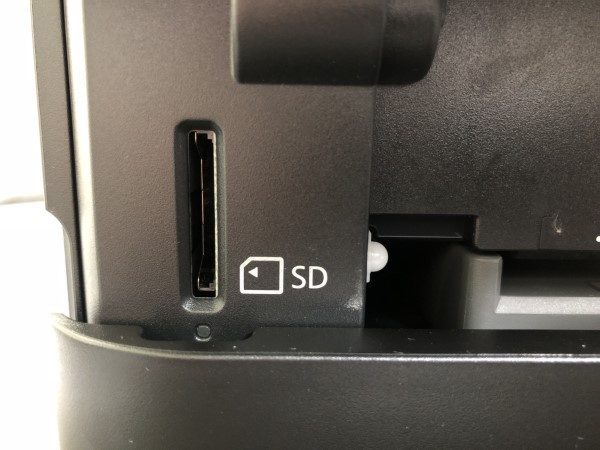
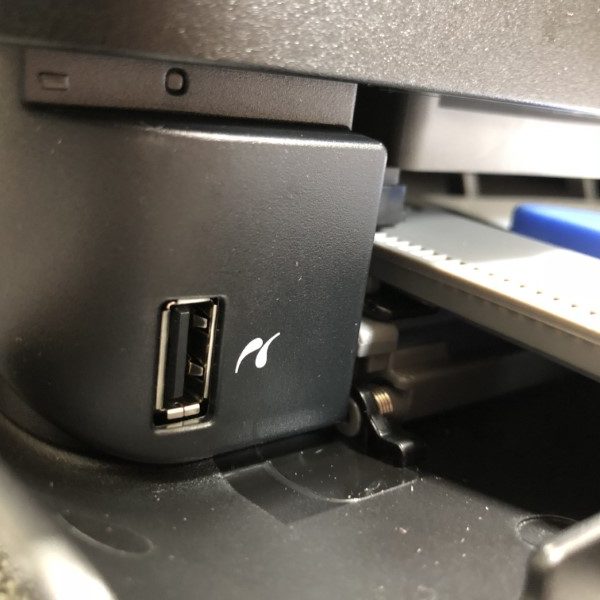
The printer also boasts direct-to-disk printing for CD/DVD/Blu-ray an SD card slot (micro SD cards will need an adapter that isn’t included) and a USB port.

The CD print tray is cleverly housed under the 8-1/2 X 11 tray. The CD printing app works well with lots of options. I’m big on home video so I might have to re-burn all my discs to give them a more polished look.

Computer-free printing is as simple, pop in a USB or SD card, and work through the menus – select the photos, number of prints, finish quality and, poof – done, just don’t forget to extend the output tray.

What I like

  • Attractive styling and compact size
  • Plenty of print options
  • CD printing and tray included
  • Great performance
  • Reasonably priced

What needs to be improved?

  • The ink alignment and head cleaning process can take a while and uses precious ink.

Final thoughts

Epson’s XP-6000 All-In-One printer is solid, offering a great design, CD, two photo sizes and plain paper printing. The apps are well designed and easy to use. Since this printer lacks a document feeder, it’s more geared towards the casual user. The pull-out trays are a bit quirky to get accustomed to, but not onerous. Overall, I really liked the XP-6000 and give it a solid recommendation. It’s not Star Trek yet, but with a snazzy printer like this, I can wait.

Price: $89.99
Where to buy: Amazon
Source: The sample for this review was provided by Epson.

Filed in categories: Reviews

Tagged:

Epson Expression Premium XP-6000 All-In-One Printer review originally appeared on The Gadgeteer on June 19, 2018 at 11:00 am.

Note: If you are subscribed to this feed through FeedBurner, please switch to our native feed URL http://the-gadgeteer.com/feed/ in order to ensure continuous delivery.
Jabra Elite 65e headset review

I am a fan of wireless Bluetooth earbuds, and these types of earbuds have been the focus of my search to find the best fit for me. When I first got the chance to review the Jabra Elite 65e Wireless headset, initially I was not very interested because the design included a wire from earbud to earbud. However, I decided to give them a chance. Here is how things worked out.

What is it?

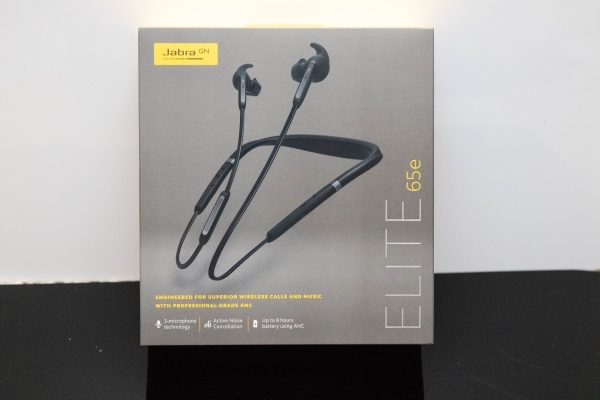
The Jabra Elite 65e headset is a wireless Active Noise Cancelling headset that provides access and functionality for music listening and cell phone functions via Bluetooth.

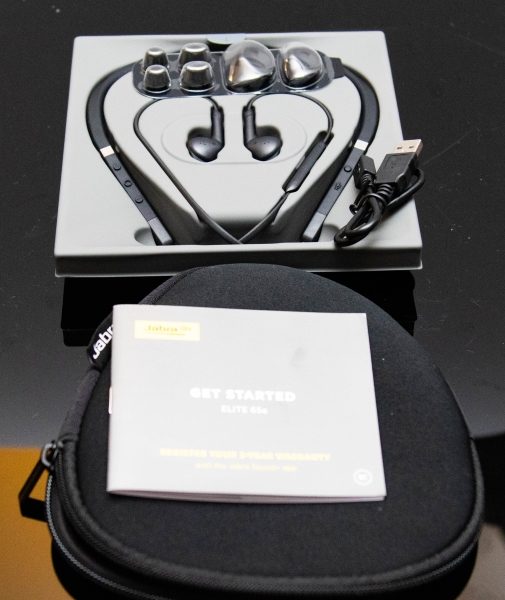
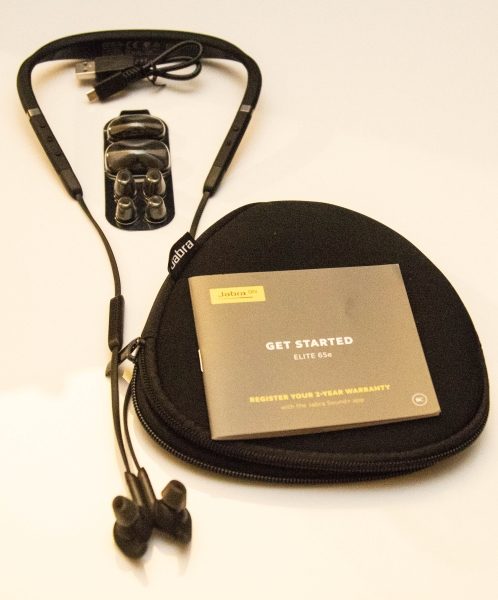
What’s in the box


1 x Jabra Elite 65E Headset
3 x Pairs of EarGels
3 x Pairs of EarWings
1 x Micro USB Charging cable
1 x Storage Pouch
1 x Instruction Booklet

Design and features

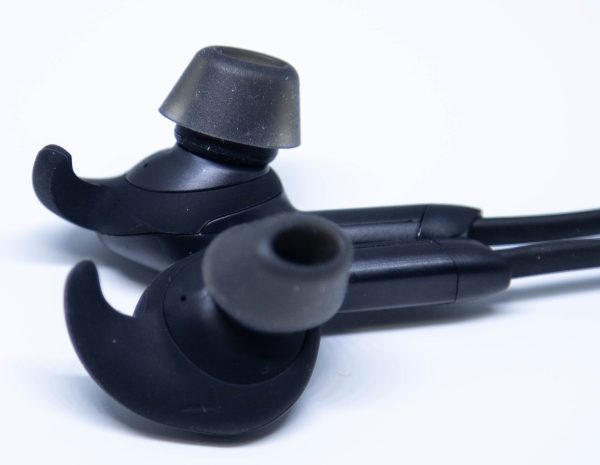
The Jabra Elite 65E headset is designed as 2 earbuds that are connected by a wire that incorporates all of the controls and the charging option. The middle of the wire is built thicker and of a rubber material, and forms the neckband that when worn properly, rests around your neck. The included pairs of EarGels and EarWings come in 3 different sizes and can be easily interchanged for the best fit.

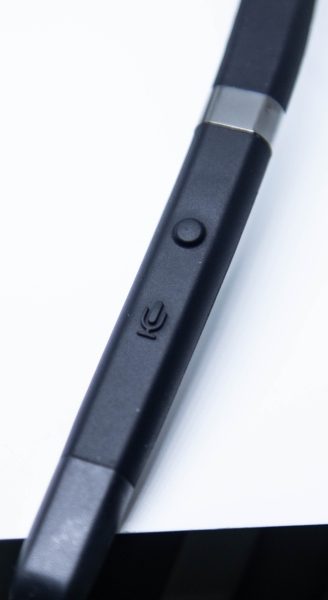
When worn correctly around your neck, the left side of the neckband contains 2 controls and a LED. The top round button pictured below is the Active Noice Cancellation/HearThrough Button. Holding this button down for 2 seconds will toggle this feature on or off.

The microphone symbol button below is used to activate Siri or Google Now, and to mute and unmute the microphone. In addition, when the headset is on, holding down the microphone button for 5 seconds will toggle the voice guidance on or off.

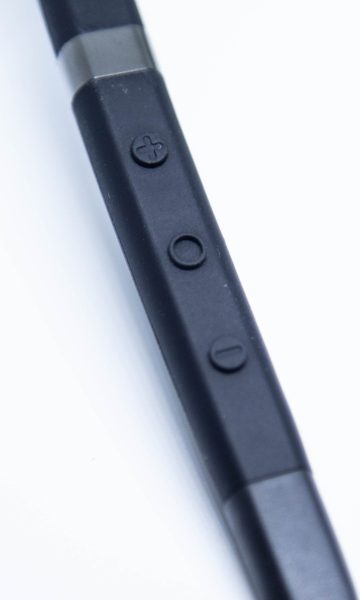
On the right side of the headset neckband, there are 3 buttons as pictured below. The button in the center of the 3 buttons, is the Multi-function button. When you first use the headset, you have to hold this button down for 3 seconds to turn on the headset and to put it in pairing mode. From there, the pairing process is the same as any other Bluetooth device. Once the headset is paired, the Multi-function button handles the following for calls and music:
– Hold down for 1 second to turn on the headphones
– Hold down for 3 seconds to turn off the headphones
– When listening to music, pressing this button will pause or play music
– When using the phone, this button will answer or end the call
– Double pressing this button will reject a call

The Multi-function button also handles multiple calls:
– Press to end a current call and answer an incoming call
– Hold down for 1 second to put the current call on hold and answer an incoming call
– Hold down for 1 second to switch between an active call and a call on hold
– Double-tap to reject an incoming call when you are already on a call

The + and – buttons control the following functions:
– Use the + or – button to adjust the volume when listening to music or on a call
– When using a Smartphone/Tablet and listening to music, press the + or – button for 1 second to skip a track forward or backward.
– When not listening to music or when not on a call, press the + or – button to hear the battery status.

Above the buttons, there is a status LED that indicates battery level for full, medium, low and very low, and pairing mode and resetting.


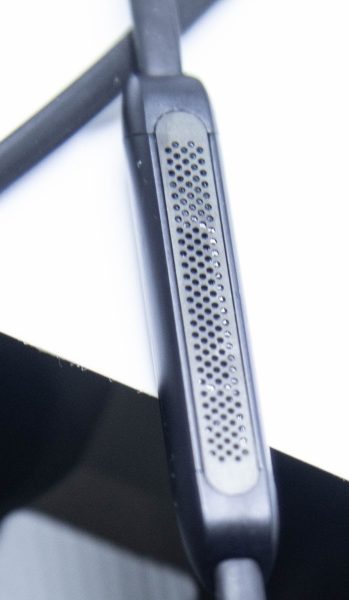
On the right side cable between the neckband and the earbud, there is a microphone in the middle.

As a part of the earbud section of the headset, each earbud has a magnet built-in. The magnets allow you to attach the 2 earbuds together when wearing them for added security, cable management, and power management. If you connect the earbuds together via the magnets while listening to music or on a call, the music will be paused or the call will be ended. If you are receiving a call, separating the earbuds will answer the call.

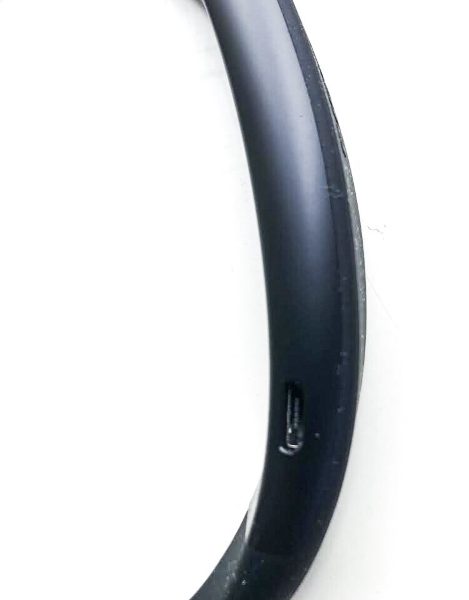
The thick part of the neckband that sits around your neck includes the charging port, and it also vibrates when powered on or off, when the headset connects to your Smartphone or computer, etc., and when there is an incoming call.

Performance

Although I am a big fan of completely wireless earbuds and not a big fan of the neckband, I must say that I LOVE this Jabra headset. It remains charged for quite a long time and recharges quickly. However, those features are just the tip of the iceberg. When placed around my neck, the headset fits so well that I forget that it is there. The fit of the earbuds in my ears is comfortable and secure, and I can wear them for a long time. The buttons function well, and the voice commands are clear and make sense. In terms of the sound, the lows, mids, and highs are well balanced and just sound great, and there is a built-in volume limiter that limits how loud they get. At first, I was a bit annoyed about the limiting, but the volume is more than adequate, and this feature will likely preserve my hearing. Phone calls are clear on both ends, and the Bluetooth connection is very reliable with very few disconnects. The accompanying Jabra Sound+ App is a nice feature, and the ability to equalize your music especially when switching genres is nice. I listen to Contemporary Jazz, R&B, Gospel, Easy Listening, some “borderline” classical music, etc.
Jabra Sound+ App

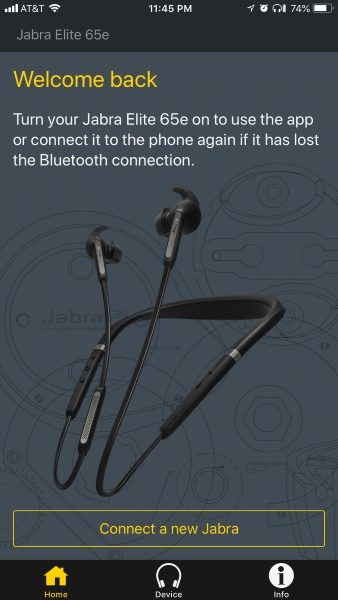
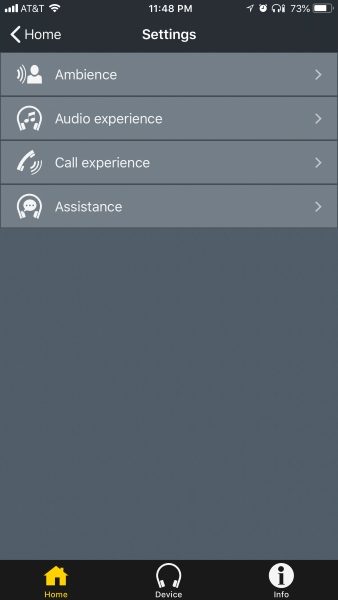
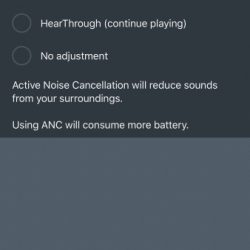
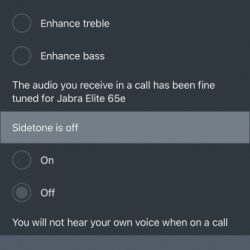
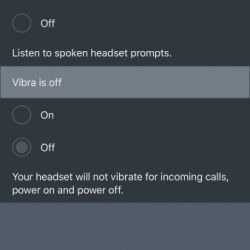
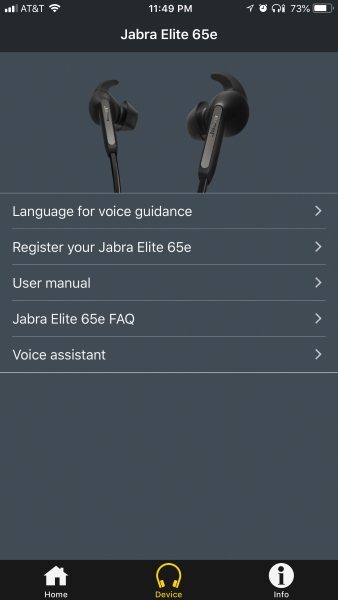
The Jabra Sound+ App allows you to customize your music along with handling other functions. You can manage the Automatic Noise Cancellation/HearThrough, enable or disable vibration, manage voice prompts, equalize your sound, as well as register your headset for the 2-year warranty and get any firmware updates. The pictures below show some of the available screens and choices.


What I Like

I love the quality of the build of this headset, the built-in features and functionality, and the fit and finish. Holding them in my hand just gives the feel of a quality product. The sound reproduction is pretty darn good, and they are really comfortable to wear.

What can be improved

I do think that while this headset is well built, the magnets that hold the earbuds together could be a bit stronger. I am not sure how that would affect performance, but they do constantly separate while I am wearing them, and on a couple of occasions, the headset fell from around my neck after the magnets separated.

Final thoughts

In a market that is saturated with wireless earbuds of every shape and size and gimmick, the Jabra Elite 65e headset stands out as a quality product in just about every way. It is well built, produces well-balanced sound and most of all remain reliable use after use. If anything changes, I will be sure to write an update, but in the meantime and until I find earbuds that can do better, this headset holds on to the #1 position in my growing collection.

Price: $199.99
Where to buy: Jabra and Amazon
Source: The sample for this review was provided by Jabra.

Filed in categories: Reviews

Tagged:

Jabra Elite 65e headset review originally appeared on The Gadgeteer on June 19, 2018 at 9:00 am.

Note: If you are subscribed to this feed through FeedBurner, please switch to our native feed URL http://the-gadgeteer.com/feed/ in order to ensure continuous delivery.