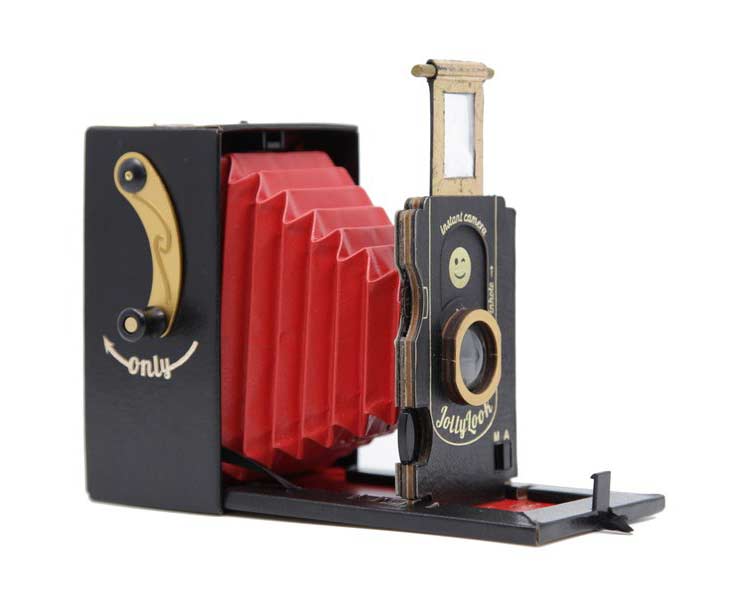
NEWS – Camera and photography buffs will find the Jollylook Mini Camera interesting if only for the way it looks and what it’s made of. It looks like an old-timey box camera from decades gone by, but it’s made of cardboard and it can be used with Fuji Instax mini film.
Just load in the film cassette, open the lid, pull out the bellows, to set the focal length, set the aperture, and snap the pic. Then you use the crank to eject the photo which will “develop” in front of your eyes. Check out this quick video which shows the whole process.
Looks fun right? You can buy one for $69 from jollylook.photo where you can also find accessories for the camera like a strap, filters, tripod attachment plate, and more.
Note: If you are subscribed to this feed through FeedBurner, please switch to our native feed URL http://the-gadgeteer.com/feed/ in order to ensure continuous delivery.
REVIEW – I used to use a GoPro camera for some of my video work a few years ago, but I got rid of it a while ago. I wanted to get back to using an inexpensive action camera, so I figured I would give this Toplex Action Camera T101 a try.
What is it?
The Toplex Action Camera T101 is a 4k capable action camera that includes a 2″ display, Panasonic Sensor, WiFi, a 170-degree lens, and image stabilization. It also has the ability to be controlled via a smartphone app.
Modes: Video, video and snap, photo, loop video (driving mode), time-lapse video, time-lapse photo, slow motion.
Design and features
The Toplex Action Camera T101 has a fairly good feature set. There are multiple video and photo modes.
The video modes include the following:
Standard video recording at 4k/30fps, 2.7k/60fps, 1440p/60fps, 1080p/60fps, 1080p/30fps.
Loop recording in 5, 10, or 25 minute loops
Video + Snap records video and captures photos at intervals of 3 seconds, 5 seconds, 10 seconds, 30 seconds, 1 minute or 5 minutes.
Time Lapse creates a video from frames captured at intervals of .5, 1, 2, 5, 10, 30, or 60 seconds.
Slow motion video recording at 720p/120fps.
The photo modes include the following:
Standard photos at 5, 8, 12, AND 16mp (4608×3456).
Lapse takes photos at intervals of 1, 3, 5, 10 or 30 seconds.
Timer mode captures a photo continuously at a set time interval of .5 seconds, 1 second, 3 seconds, 5 seconds, 10 seconds, 30 seconds, 1 minute or 5 minutes.
Burst mode will take a series of photos at a set time interval. The options include 3 photos in 1 second, 5 photos in 1 second, 10 photos in 1 second, 15 photos in 1 second, 20 photos in 2 seconds, 30 photos in 2 seconds, and 30 photos in 3 seconds.
There are some standard settings like being able to choose the starting mode so that the camera will start in whatever mode you want, like video, loop recording (for use as a dash cam), time lapse, etc.
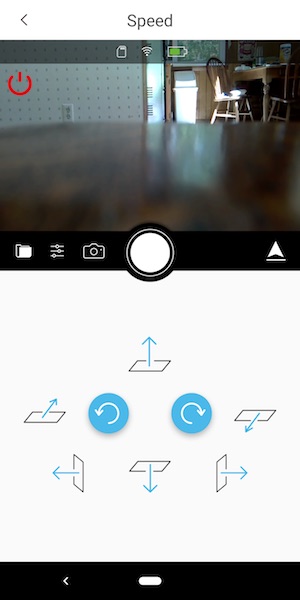
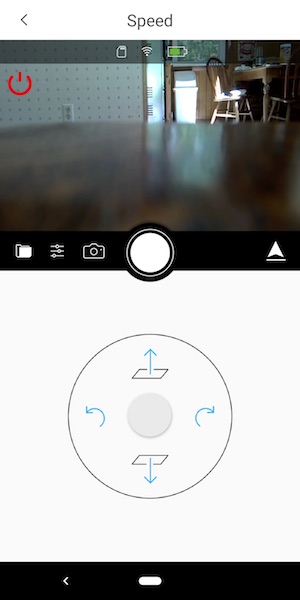
The camera app allows easy preview and settings access to the camera. I found the app easy to use, in fact a little easier to use than the interface on the camera itself.
The camera app did fail to download a video. The first time it stated “Failed”, the second and third time it seemed to complete without error but I could not locate the video anywhere in the iPhone Photos app.
One thing that is really nice is the size:
Here’s the problem
I was extremely disappointed in the video quality with this device. There are obvious artifacts in the video, in multiple formats. I tried multiple settings such as NTSC/PAL, 50htz/60htz, and various size formats, and they all seem to have the same dots and lines. The dots and lines varied in their positions, so I’m guessing it’s a signal processing flaw.
For example, here’s a screen capture from a 1080p time-lapse I took:
A close up of the image artifacts:
Here’s a screen capture from a 1080p video:
Here’s a partial screen from a 4k video:
There’s also a serious magenta color cast to the video.
1080p Video Time-lapse:
4K Video Sample:
What I like
Included two batteries
Included many accessories
Included waterproof case
Included nice semi-hard case
Smartphone app
What needs to be improved
Video quality
Addition of a Touch Screen
App did not download videos to my phone
Final thoughts
The video from this camera is so poor that I would not consider it for anything other than using this camera as a dash cam, or a security/body camera – but even then, not at this price. This is not something you would want for creating YouTube videos, or any video where you want some quality to the video. However, if you output the 4k video at 1080p or smaller, the dots and lines are reduced to an almost unnoticeable level. That might be something I could tolerate with a $40 action cam, but not a $100 one.
Price: $99.99 Where to buy: Amazon Source: The sample of this product was provided by Toplex.
Note: If you are subscribed to this feed through FeedBurner, please switch to our native feed URL http://the-gadgeteer.com/feed/ in order to ensure continuous delivery.
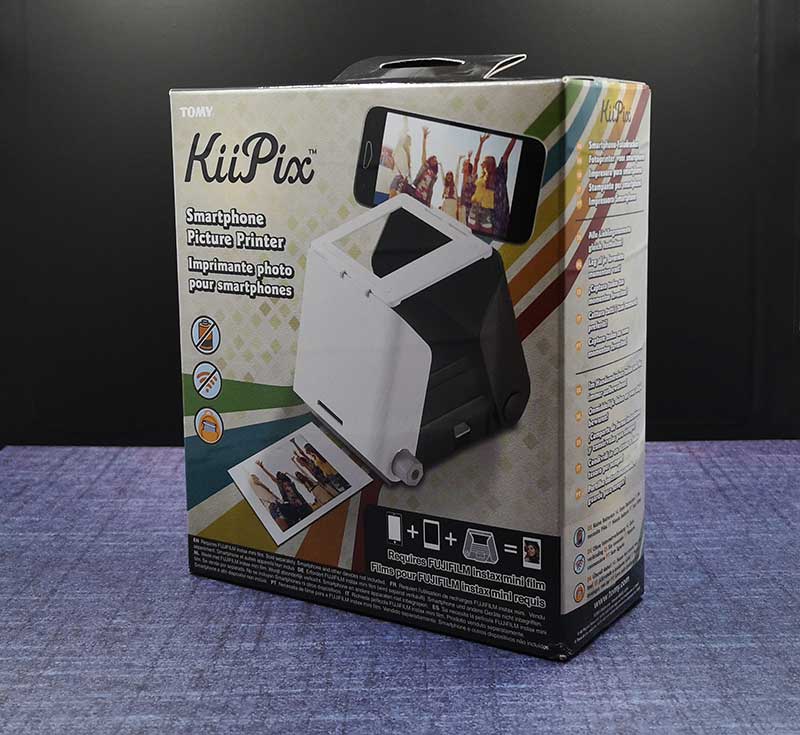
REVIEW – I take a LOT of pictures with my smartphone and I like to print some of them to put in my journal to help me remember things that have happened. Small photo printers are cool, but they require an app and have batteries that have to be charged. Is there an easier way to print your favorite pics? Tomy things so with their KiiPix Smartphone Picture Printer. Let’s check it out.
What is it?
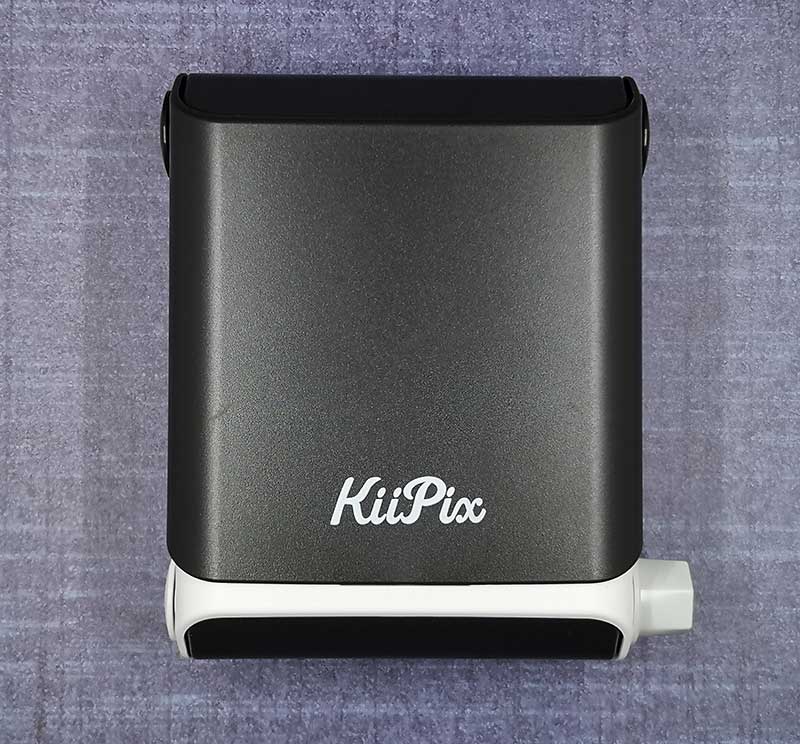
The Tomy KiiPix Smartphone Picture Printer is actually a modern take on the iconic Polaroid cameras of the 70’s and 80’s.
What’s in the box?
KiiPix Smartphone Picture Printer
Instructions
*Fujifilm Instax mini film cartridge is NOT included
Design and features
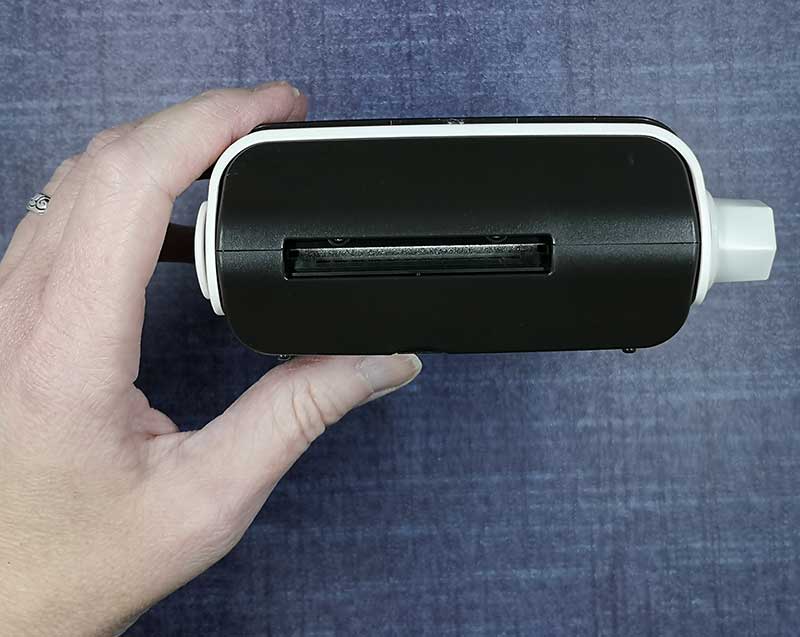
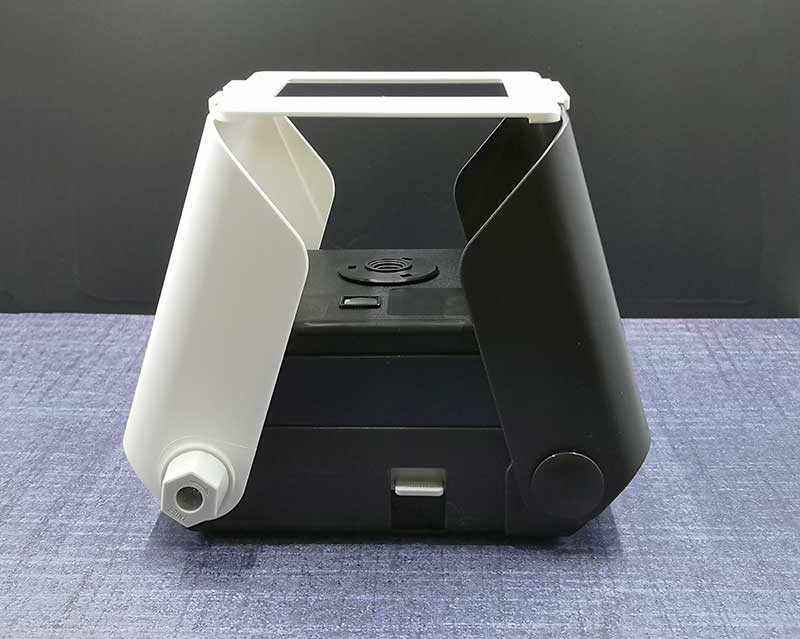
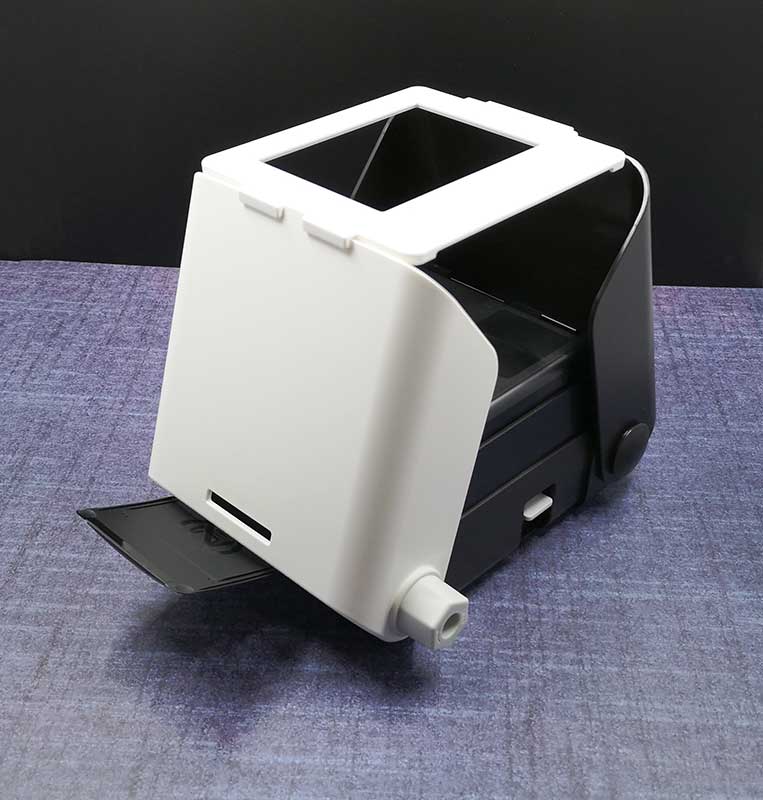
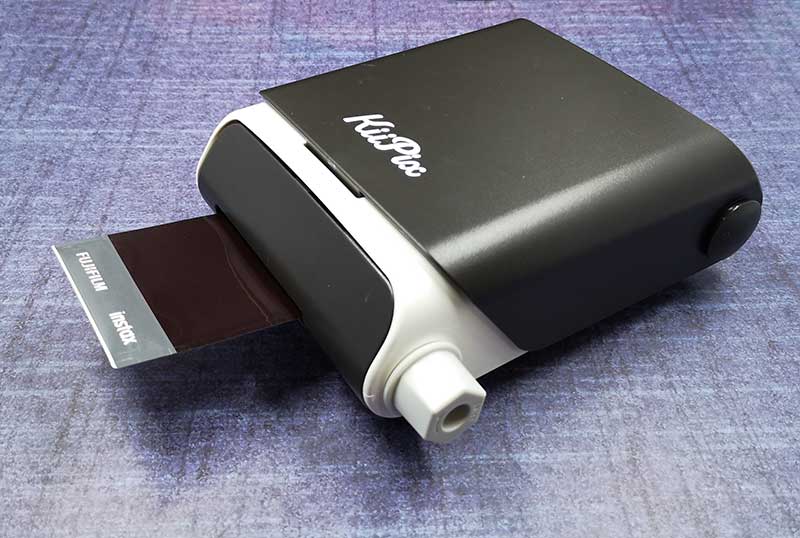
The KiiPix device is made of white and black plastic and features a film ejection dial on one side that is used to advance and eject each print.
The prints eject from the side of the unit.
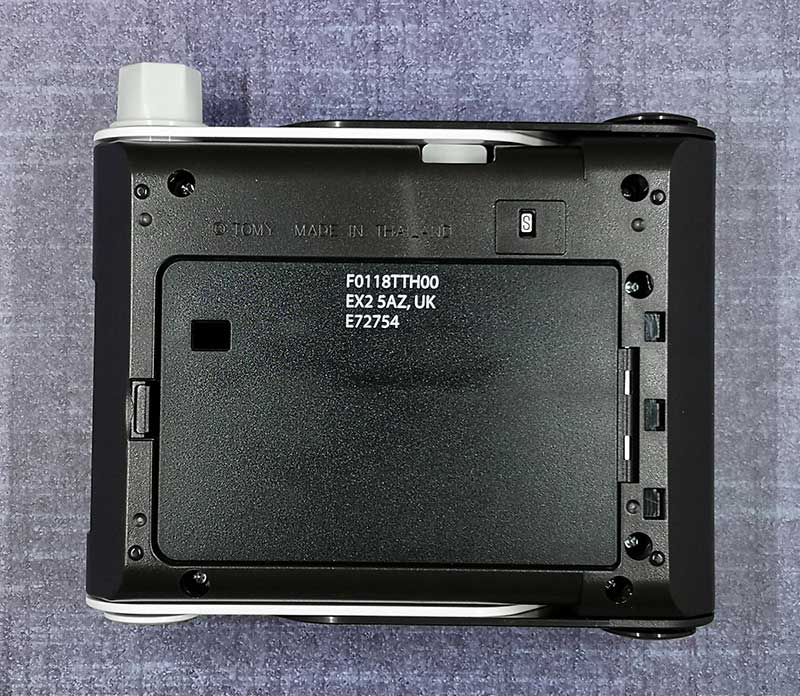
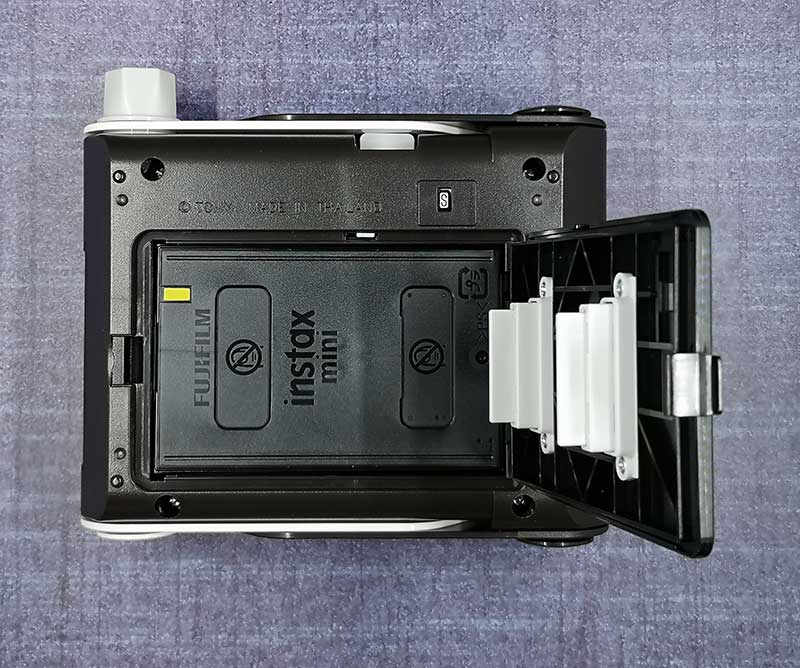
On the bottom of the KiiPix, you’ll find the printer paper compartment and the print count indicator.
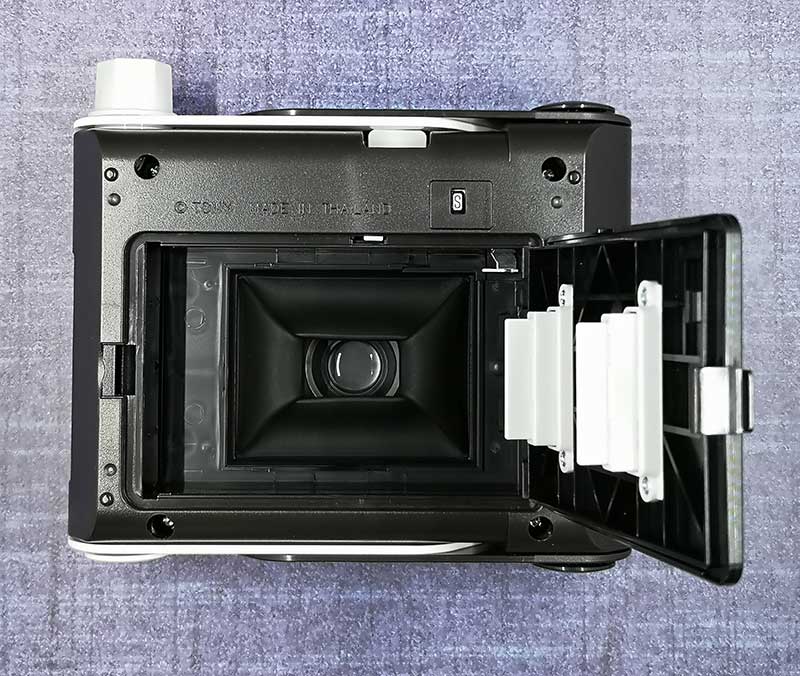
The paper compartment opens to reveal the camera lens. That’s right, this isn’t really a photo printer, it’s actually an instant camera.
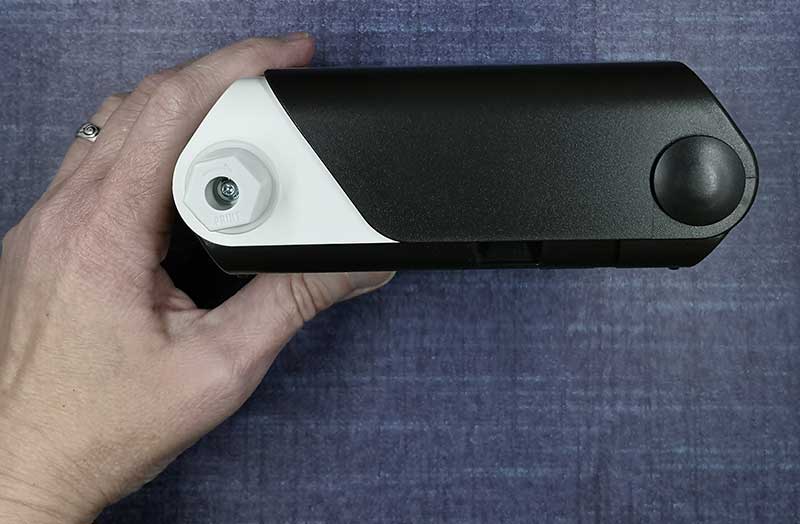
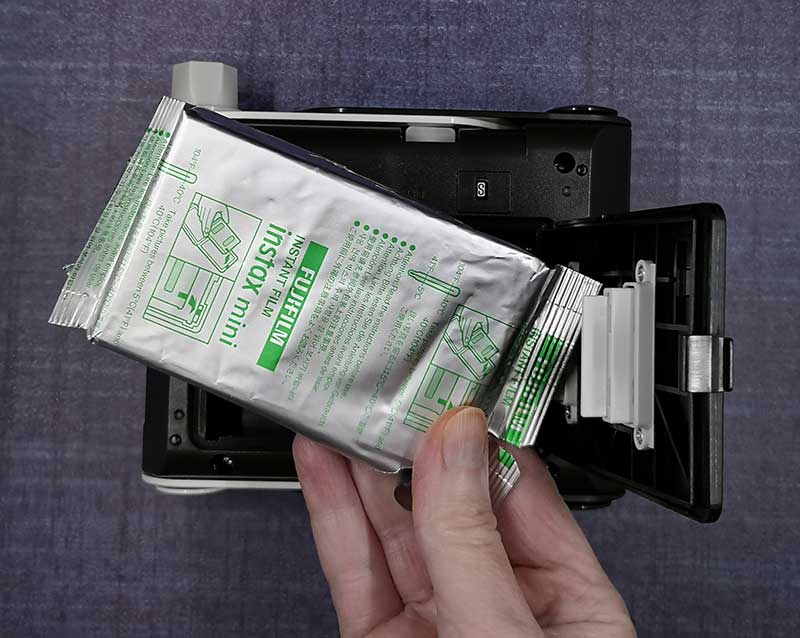
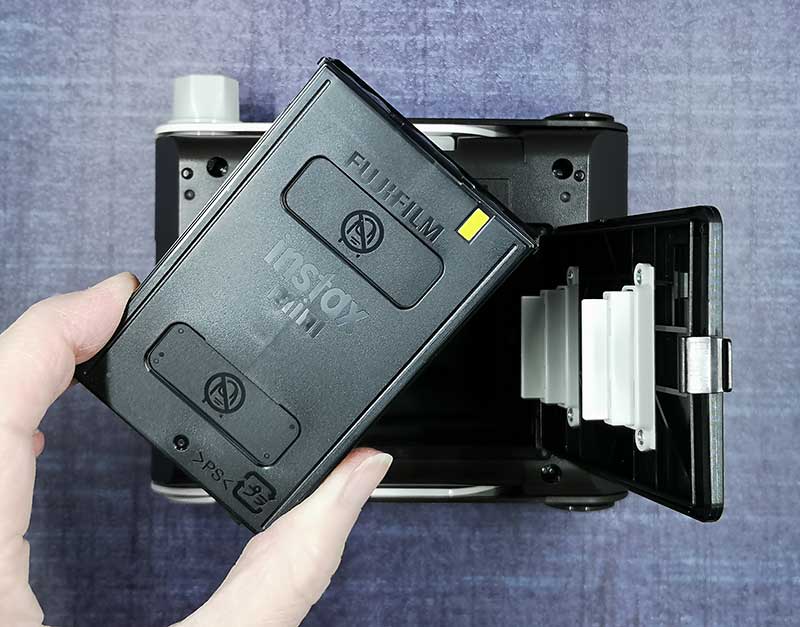
To use it, you’ll have to load a cartridge of Fujifilm Instax mini film into the bottom of the KiiPix.
Each Fujifilm cartridge has 10 films inside.
The film cartridge easily snaps in place and the door secures shut with a click.
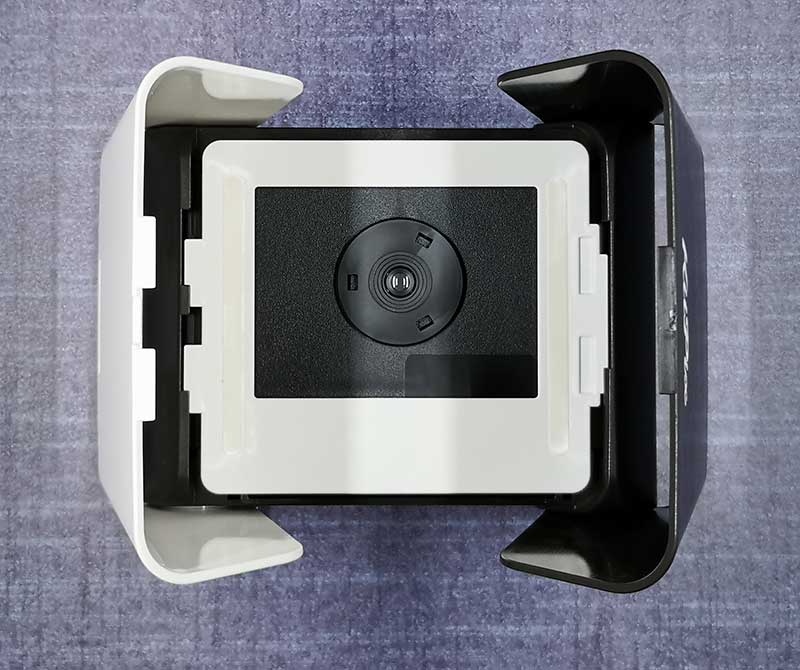
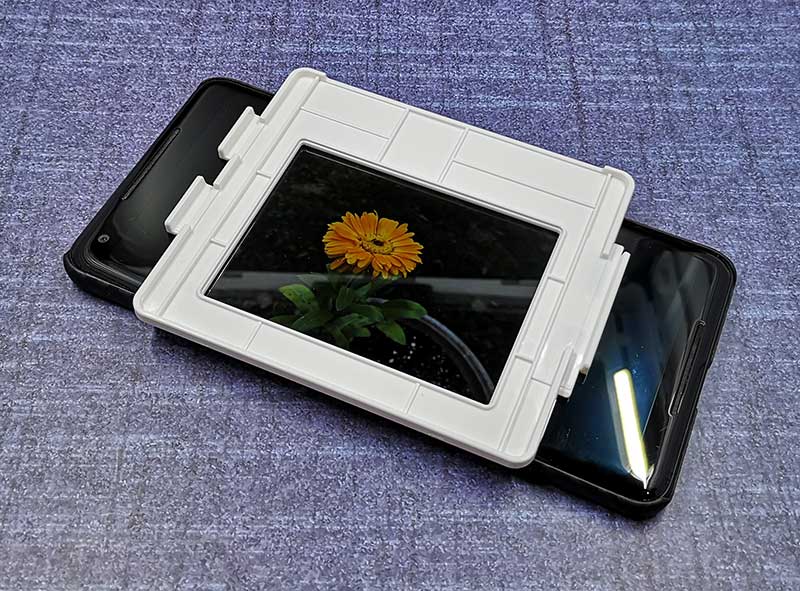
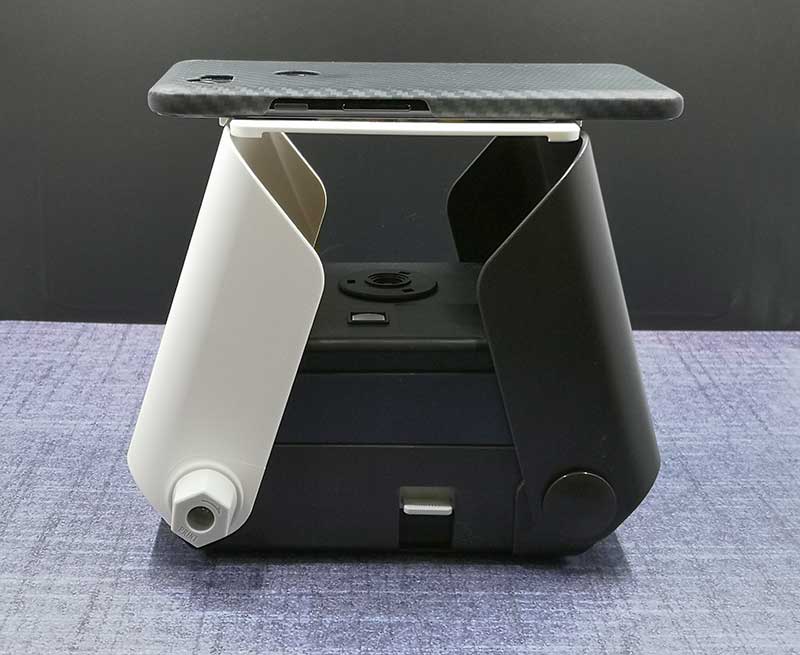
The next step is to unfold/open the KiiPix by lifting the two “wings”. You will then see a white plastic frame.
The frame lifts out of the camera and is placed over the two wings to create a platform.
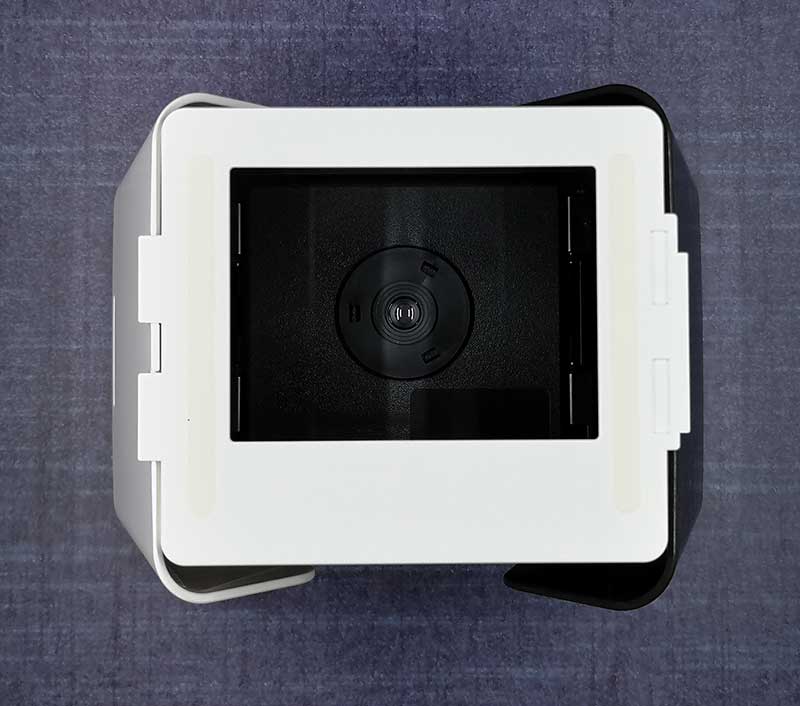
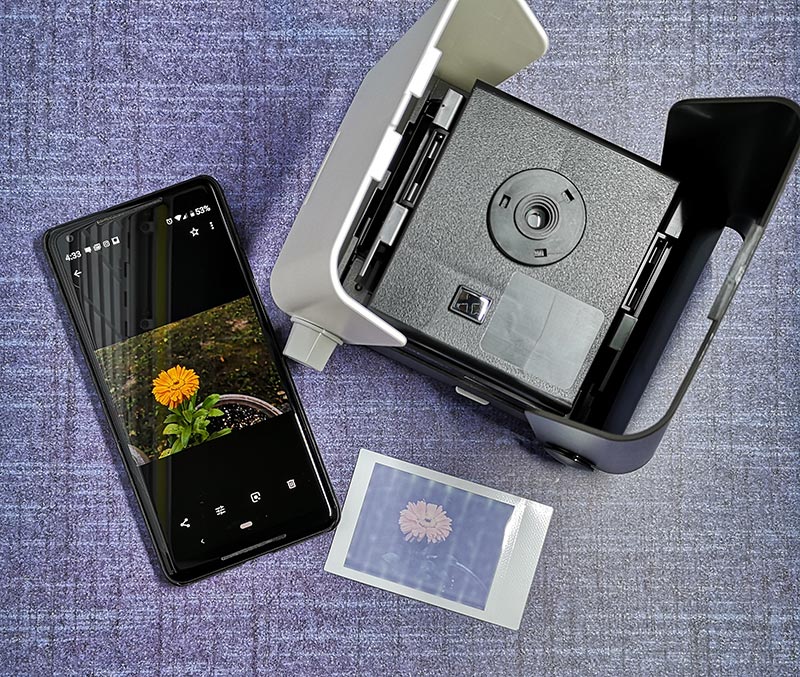
The frame is designed so that your iPhone or Android phone’s display rests over the opening so that the camera below it can take a photo of the phone’s screen.
To line up the photo, you need to have it displayed on the phone and then stick the frame (it has sticky strips on the edges to the display.
There’s also a tiny mirror that you can use to line up the image.
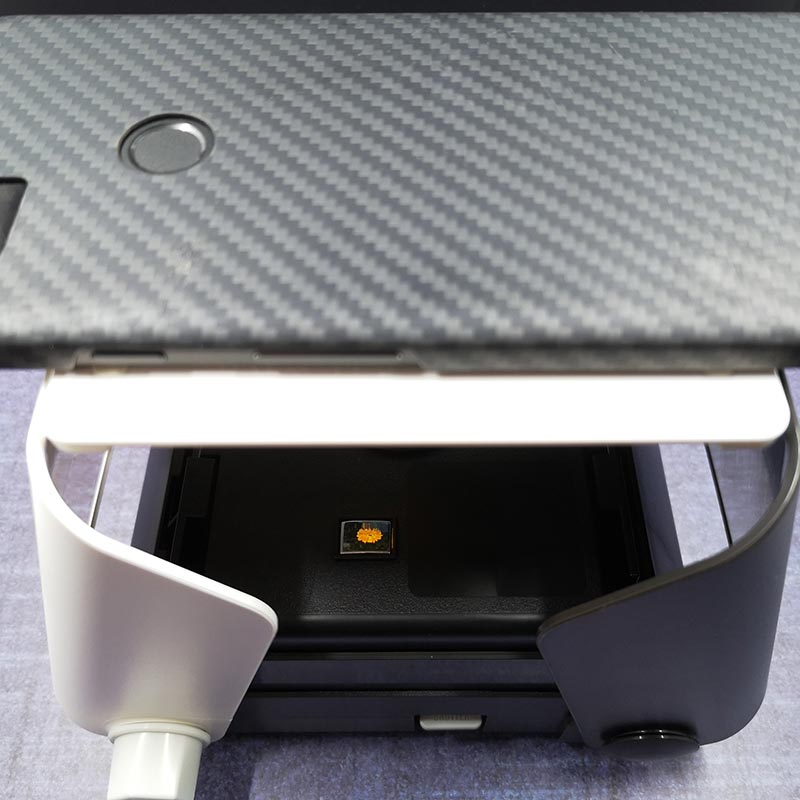
I tested the KiiPix with my Pixel 2 XL. Note that you don’t have to pair the KiiPix with your phone or load a special app. All you have to do is display the image on the phone’s screen that you want to print. The KiiPix will then take a picture of the image on the phone’s display when you press the shutter button on the side of KiiPix.
The first time you use the KiiPix, you have to rotate the film ejection dial until the first sheet is ejected.
Then you can take an actual picture and it will eject from the KiiPix when you turn the dial.
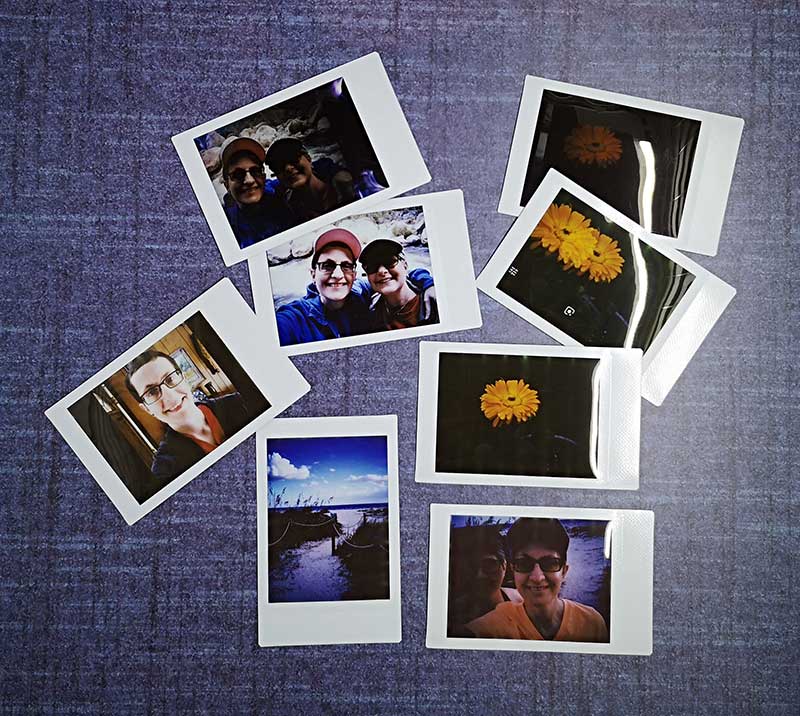
The 3.4 inch x 2.1 inch print comes out black, but the image will become visible within a few seconds.
Within about 90 seconds – 2 minutes, the 2.4 inch x 1.8 inch image will be fully visible. Check out the video below that shows the film developing over time.
The resulting photo quality was a mixed bag. My first image can be seen above and in the video had strange black arcs on the side and the whole print got much darker as time went by. Here are some more prints that I made.
My first two images were really dark, and then I read that you’re supposed to turn the phone’s brightness to the max. But even then, I still felt like the images were darker than I would like. I also ran into issues where I accidentally pressed the shutter button twice. Can you see which image that was? Yes, it’s the one with double flowers. That’s actually a cool “feature” that can allow you to make some creative photos by having double exposures. Then there’s the issue of the screen rotating when you don’t want it too like the selfie at 9 o’clock where you can see black bars on the side. That image is supposed to be oriented the other way…
What I like
No cables, no Bluetooth, no batteries
Doesn’t require an app
What needs to be improved
Doesn’t come with a Fujifilm Instax Mini print pack
Print quality isn’t very impressive
Final thoughts
The KiiPix has a few things going for it when compared to the more expensive small photo printers like my favorite HP Sprocket. First of all, the KiiPix costs about $90 less than the HP Sprocket. The KiiPix also doesn’t need to be charged, paired, or used with an app. But both printers require that you buy film/photo packs. I like the Zink prints from photo printers like the HP Sprocket better than the Fujifilm Instax Mini prints because the Zink prints have peel and stick backs which make it much easier to put the photos in a journal. The Fujifilm prints are also thicker and have a large white frame around them instead of the image being edge to edge like the Zink prints.
But when it comes right down to it. I prefer the smaller HP Sprocket style printer because I don’t have to line up the camera on top of the printer itself and the print results are much better and don’t depend on how bright the screen. In my opinion, the Tomy KiiPix Smartphone Picture Printer is more of a toy than a photo printer. Yes, it prints photos, but the results won’t impress.
Price: $39.99 Where to buy: Amazon Source: The sample for this review was provided by Tomy.
Note: If you are subscribed to this feed through FeedBurner, please switch to our native feed URL http://the-gadgeteer.com/feed/ in order to ensure continuous delivery.
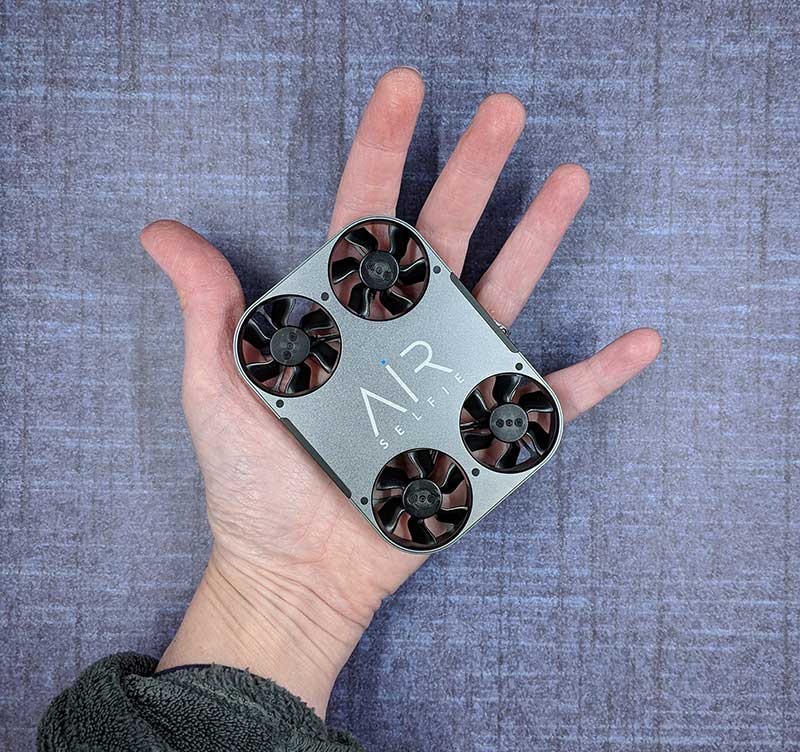
REVIEW – Everyone either has or wants a drone and it’s hard to fault them because drones are both fun and useful. They are fun because you can capture awesome video from locations that you would otherwise never be able to do. And drones are useful because you can use them to see things like your roof, gutters, etc, without climbing a ladder. All this fun and usefulness can also equal an expensive and bulky gadget. Let’s check out the AirSelfie2 pocket-sized flying camera and see if it’s just a toy or a worthy pocket drone.
What is it?
The AirSelfie2 is the 2nd generation AirSelfie flying camera which is a small playing card deck-sized drone that is designed to… you guessed it… take selfies and capture video.
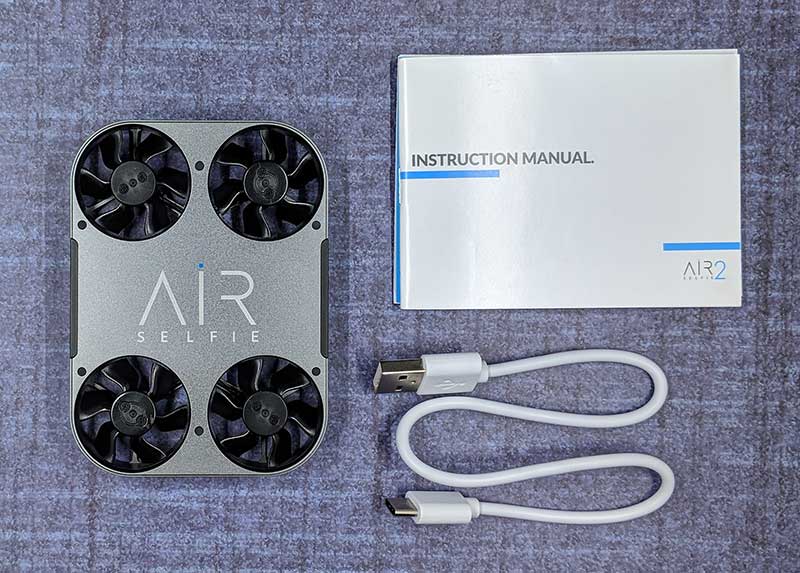
What’s in the box?
AirSelfie2 drone
USB-C charging cable
Storage case (this was missing with my sample)
Instruction manual
Hardware specs
Video:1080p 30fps – Photo:12MP wide-angle (81°)
Wide-angle: ƒ/2.0 aperture
Gyro/Barometer/Geomagnetic sensor
Brushless motor
Built-in Micro SD card 16GB
400mAh 7.4v Built-in Battery
2.4G Wi-Fi
Control distance 65 feet / 20 meters
Size:98.5 x 71.2 x 13.6mm (3.8”x2.8”x0.5”)
Design and features
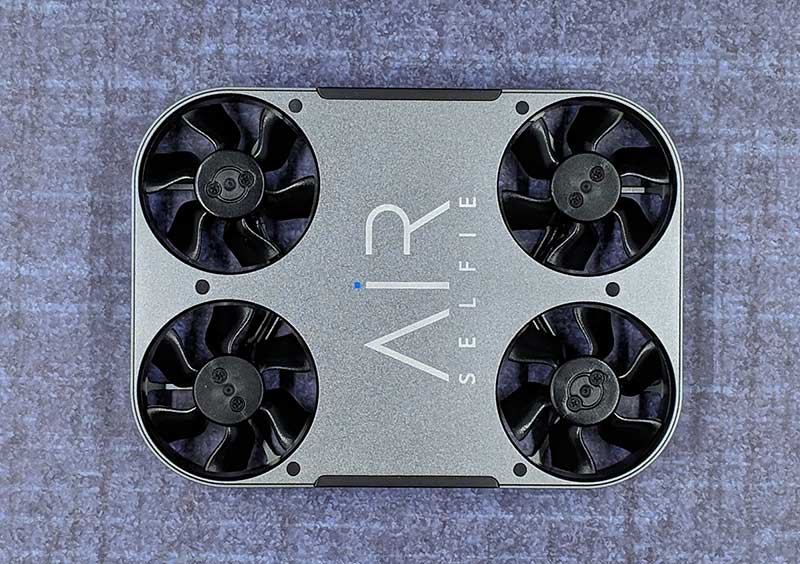
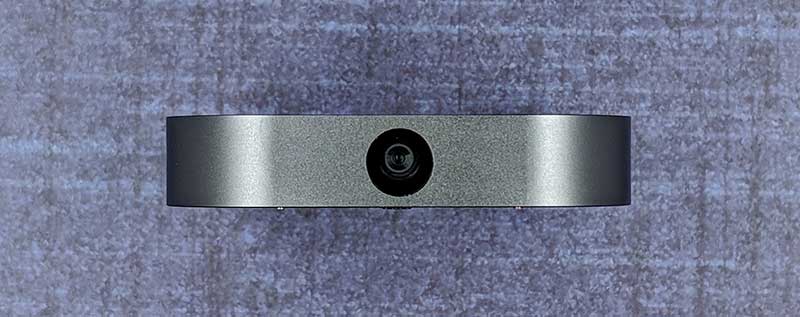
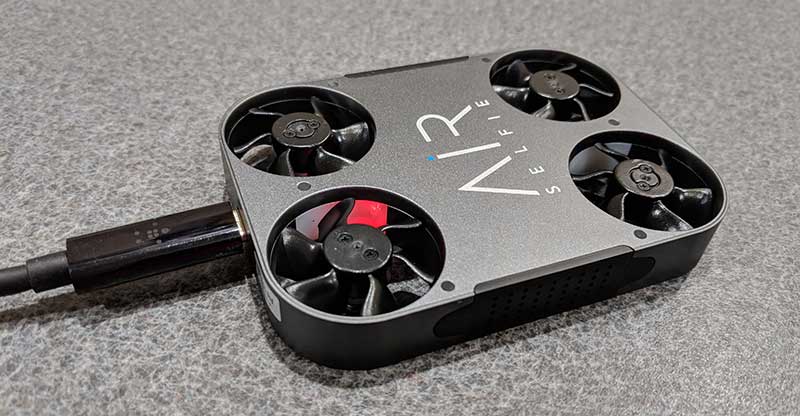
The AirSelfie2 is a sharp looking little drone with a gray metal colored aluminum housing and four propellers.
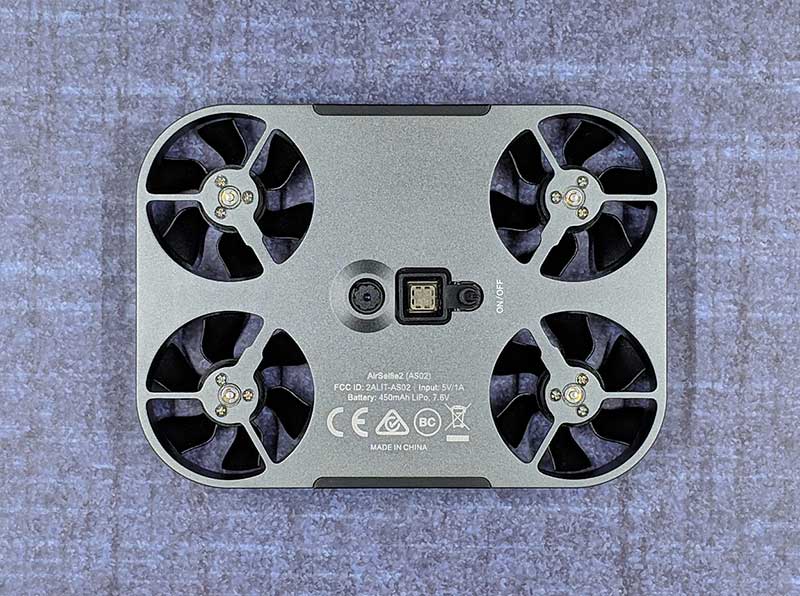
On the bottom side of the drone, you find two sensors and the power switch. The round sensor on the left is the visual sensor and the square sensor next to it is the sonar sensor. The small button on the right is the power switch which you have to hold in for a few seconds to toggle power.
There’s a 12MP camera one end.
And on the opposite end, you’ll find a USB-C charging port.
The AirSelfie2 looks like a gadget that James Bond would use on a mission. Although it’s lightweight, it doesn’t look or feel like a toy. It’s well made and the design looks much more robust than some small plastic drones I’ve tested in the past.
Let’s fly!
Before you can fly the AirSelfie, you have to charge it using the included (or any) USB-C charging cable. It takes about an hour to fully charge the battery from fully empty to full which provides up to 5 minutes of flight time. While charging, an LED in one of the propeller areas glows red. When charging is complete, the LED turns off. This status LED also glows blue when the AirSelfie is powered on.
You will also need to install the iOS or Android Airselfie app on your phone or tablet. I tested the AirSelfie2 with my Pixel 2 XL.
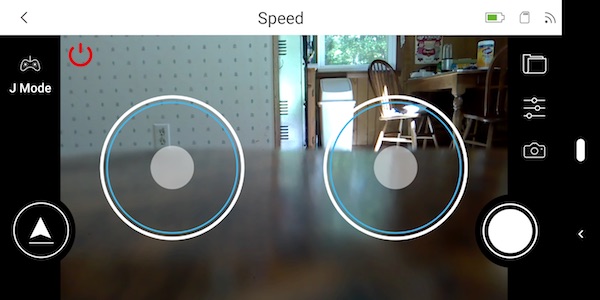
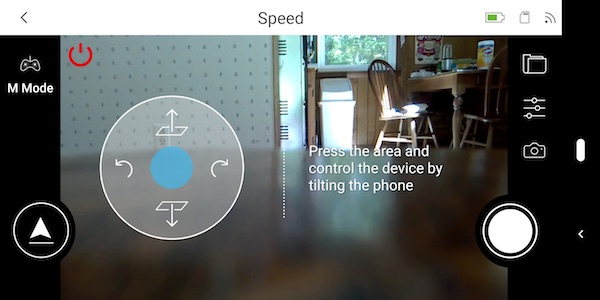
The app doesn’t use Bluetooth to control the drone. It generates its own WiFi connection. Each time you want to fly the AirSelfie, you have to power it on, launch the AirSelfie app, and then go into your WiFi settings to connect to the AirSelfie’s WiFi.
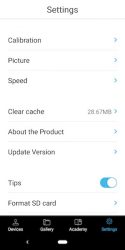
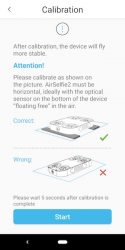
The app is pretty basic, It offers 3 different flight control styles, a way to calibrate the drone, and a few settings that you can customize. The flight control styles include an easy one-handed version shown above on the left and a slightly harder one-handed version on the right which controls the drone by physically tilting the phone in the direction that you want it to fly.
The other two control styles are two-handed joystick style touchscreen controls.
I tried all of the control styles but I kept going back to the easy (first style) because it’s easier. Go figure
I thought the AirSelfie sample that was sent to me was defective because I couldn’t get the propellers to spin up when I would press the arrow button in the app. It took me a while to figure out that you need to press and hold that button for a few seconds to start the propellers. Then you have to place the drone on your flat palm with the camera facing you and toss it gently in the air. It might sound scary, but launching it is easy. Landing it is a bit harder. You’re supposed to bring your hand up under it and grab it. Most of the time when I did this, the propellers would spin fast like the AirSelfie was a captured bug trying to get away. I finally learned that you have to grab it and raise your hand to signal it to turn off.
Pics and video
Since the AirSelfie2 is marketed as a flying camera, I had hopes that it would be a good flying camera and taking pictures and capturing video with the app was easy when it worked. But regularly, I’d see a capture failed message on the screen when I’d tap the shutter button. To fix this issue, I would have to restart the app and/or cycle power on the AirSelfie. I found this to be an annoying problem that seemed to happen right when I could have captured a decent selfie.
Most of the time my selfies were at weird angles or chopped off half of my body. Indoor selfies just look ok although I think they are a little dark and on the flip side, outdoor selfies can be completely blown out if it’s a sunny day. Click the images above to see the full-sized picture.
The AirSelfie2 can also capture video. Video without sound though… which is to be expected because the propeller noise would drown out any other noise. Check out the video below that shows how to fly it and video from the AirSelfie2 itself.
From the short video, you can tell that the AirSelfie2 is NOT a stealth drone. It makes quite a bit of noise and the video capture quality is about the same as the image capture quality – not stellar. It also drifts while hovering, so you end up cutting off half a person when you press the shutter button.
What I like
Tiny pocket size
Good build quality
What needs to be improved
Image and video quality
Drifts while hovering
Short flight time (3-5mins)
Would be nice to have a self-landing feature so you don’t have to grab it out of the air
Final thoughts
I tested the AirSelfie2 on multiple occasions and had the same results each time. The images that this little flying camera capture just arn’t that good for a $200 camera. Yes, the device is cool, but cool only goes so far. My advice is to save your money and buy a drone from a brand name that has 3 initials and a built-in gimbal
Price: $199.95 Where to buy: Amazon Source: The sample for this review was provided by AirSelfie.
Note: If you are subscribed to this feed through FeedBurner, please switch to our native feed URL http://the-gadgeteer.com/feed/ in order to ensure continuous delivery.
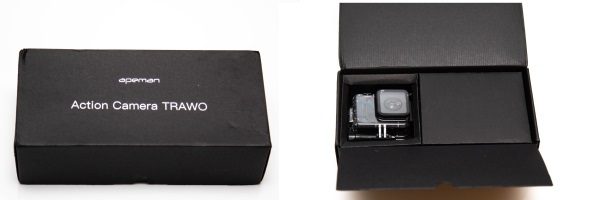
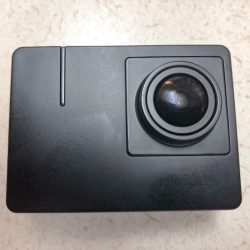
REVIEW – Ever since the famous GoPro Action Camera was launched, many companies have tried to follow that model by creating a similar product with similar features, but for a lower cost. I recently got the opportunity to test and review just such a product. Here are the results:
What is it?
The Apeman Trawo Action Camera is a GoPro style action camera, with 4K capability and a host of similar GoPro features for capturing action and movement footage in all types of environments and scenarios.
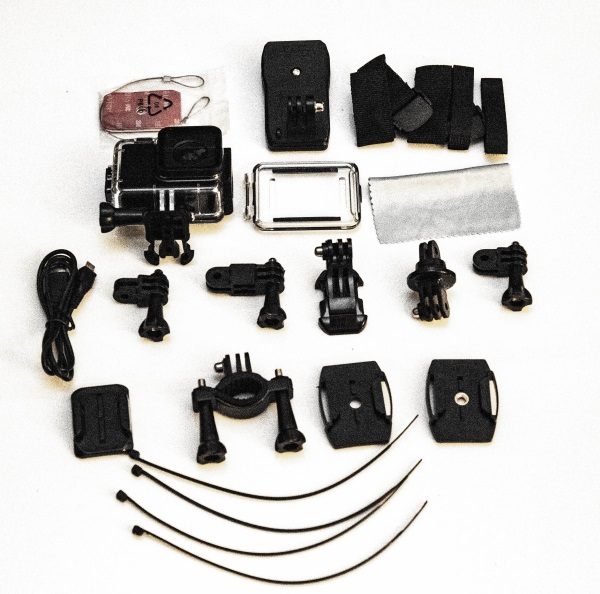
What’s in the box
1 x Apeman Trawo Action Camera
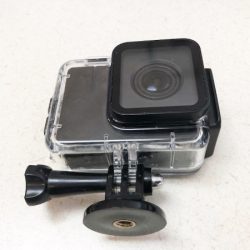
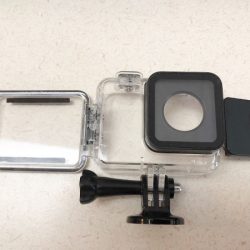
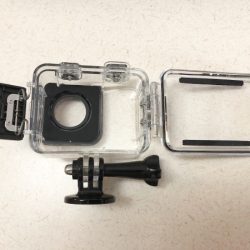
1 x Waterproof Case
1 x Additional Rear case Cover
1 x Micro USB Cable
7 x Various Case Mounts
1 x Micro Fiber Cleaning Cloth
1 x Pack of Velcro Straps (Assorted Sizes)
4 x Plastic Ties
1 x Wire Strap with Double-Sided Tape
3 x Base Mounts (@ with ¼-20mm female mounts)
(I received a pre-release version of this camera, so no instruction booklet was included in the box)
Design and features
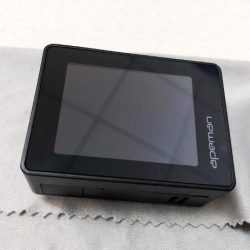
Much like other Action cameras available today, the Apeman Trawo Action Camera is a small compact action camera that without the waterproof case measures approximately 2 1/4″ x 1 3/4″ x 1″. When in the waterproof case, it measures approximately 3″ x 2 1/2″ x 1 1/2″ at the widest and longest sides. The LCD screen is approximately 1 1/2″ x 1 1/4″. It is well built and in my opinion, it does not feel cheap in any way.
The controls for the camera are on the sides. On the top of the camera, there are 2 buttons. With the camera facing forward, the top left button has 2 main functions on the button. The front of the button powers the camera on and off and the back of the button switches the camera mode between video, camera, viewing, settings modes. The button on the top right turns the record function on and off, works as the shutter button for taking pictures and also works as the selection button when in settings mode.
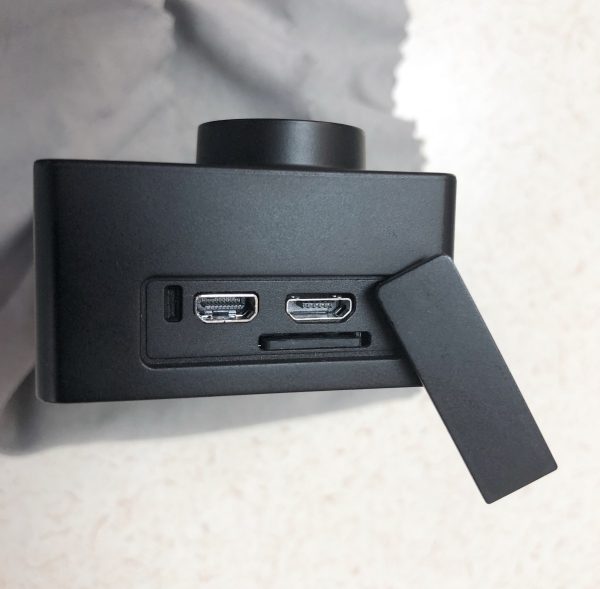
On the left side of the camera, there are 3 ports with a removable cover. These ports are the micro SD card slot, the micro USB port, and the micro HDMI port.
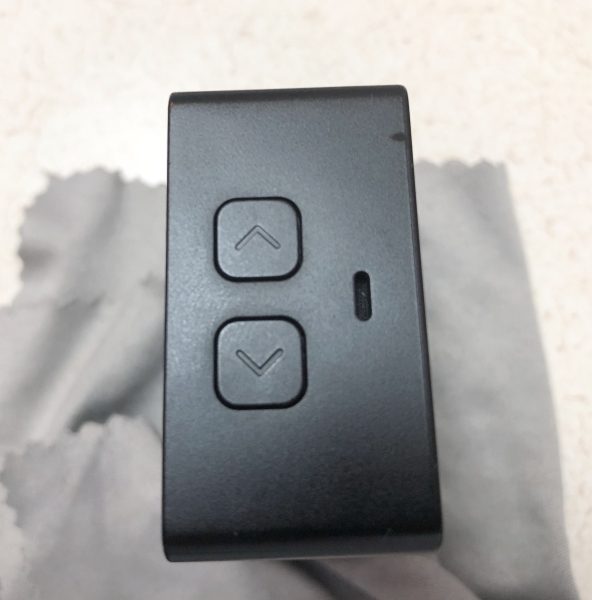
On the right side of the camera, are the up and down buttons for navigating.
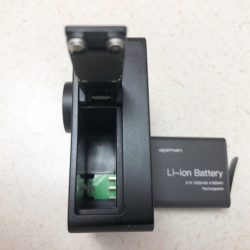
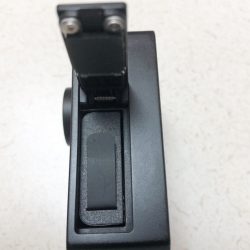
At the bottom of the camera, there is the battery port and cover.
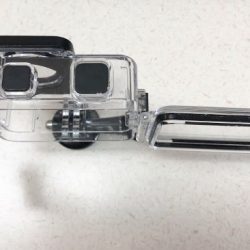
The waterproof case that comes with the camera has water-sealed buttons that mirror the buttons on the camera, but the sides with the ports and battery are sealed.
Settings
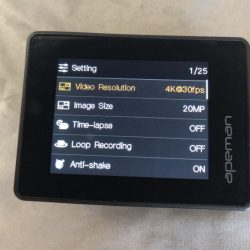
The Apeman Trawo has a large selection of settings that offer great customization. Navigating through the settings is very easy and every choice is very clear. The following is the list of settings located on the “settings” screen. I have provided details on the first 2 since many folks would want that preliminary information:
Video resolution – 720P@60fps 1280* 720 ~ 4K@30fps 3840*2160
Image size from – 3MP 2048*1536 ~ 20MP 5120*3840
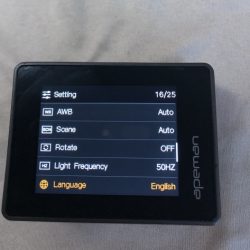
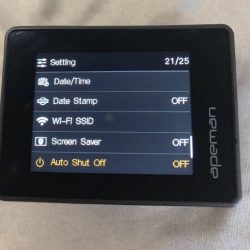
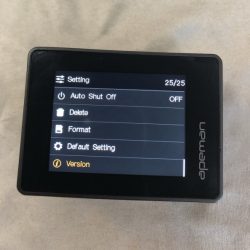
Time-lapse, Loop Recording, Anti-Shake, Lens Angle, Shooting Timer, Burst, Mic, Exposure Compensation, ISO, AWB, Scene, Rotate, Light Frequency, Language, Date/Time, Date Stamp, Wi-Fi SSID, Screen Saver, Auto Shut Off, Delete, Format, Default Setting, Version. (See Settings Screens Below)
Performance
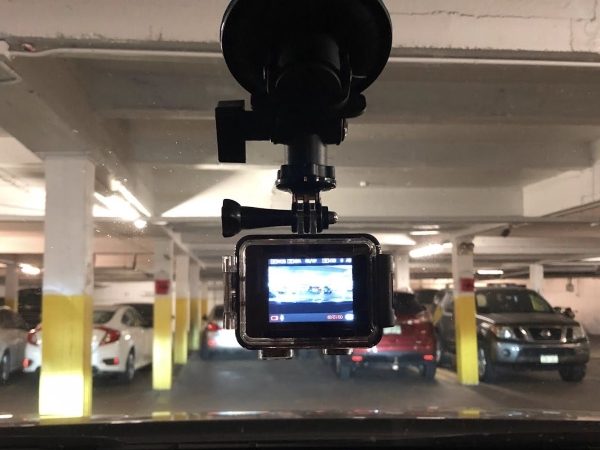
I used the action camera for daily activities to see how it would stand up to things I normally do. For the first test, I bought a windshield mount, and I tried it out as a dashcam.
The footage I got was very good and the stabilization worked well. However, the camera seemed to have some negative effects from the heat of the sun through the windshield. Let me first say that before each test, I charged the battery overnight to ensure that it was fully charged. Each time I used it, it either shut down at around an hour or so of use, or when it didn’t, the battery drained very quickly, or the sensors told the camera that it was drained. Each time the battery indicator was red, and when I removed the camera from the windshield mount and powered it off, waited a bit and powered it back on, the battery showed back in the white, but also on the low side. My conclusion is that there must be some effect from the heat.
Here is some footage from the dashcam: (Notice near the end of the video when I am driving on really rough roads, how well the Anti-shake works).
My next test was to see if the waterproof case was, in fact, waterproof and to see what kind of underwater footage I could get with the water thrashing up against the camera. For this test, I purchased a waterproof monopod with a 1/4″-20mm stud.
I then submerged the camera into the waves of the shoreline of the Atlantic Ocean. I am not a diver so I am not sure what the depth threshold is, but the case is definitely waterproof. Here is some of the footage:
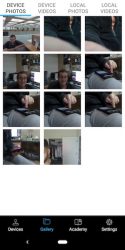
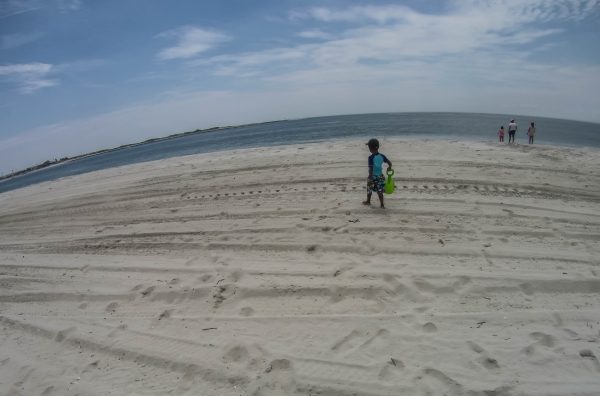
The Action Camera also takes wide and clear pictures. (You can choose the lens angle in the settings)
Hisi 4K CAM
What I like
I like the small form factor of the camera that mirrors that of the GoPro. I like that is records in 4K, and that the waterproof case really is waterproof. The footage is great.
What can be improved
Battery response to heat
Better battery life
Addition of a detailed instruction booklet
Final thoughts
When I first received the Apeman Trawo Action Camera for review, I was expecting a less than capable GoPro knockoff that like many similar products, would not do any one thing very well. I must say that I am quite surprised by the performance and capabilities of this action camera. It performs very well, albeit with a few issues that I am sure can be overcome. It offers great footage and great resolutions, and the stabilization actually works. When comparing the price to other action cameras that offer the same quality and features, in my opinion, this is a great choice.
Price: $139 Where to buy: Amazon Source: The sample for this review was provided by Apeman.
Note: If you are subscribed to this feed through FeedBurner, please switch to our native feed URL http://the-gadgeteer.com/feed/ in order to ensure continuous delivery.