myCharge UNPLUGGED 10K Fast Wireless Powerbank review

REVIEW – Powerbanks, external batteries, portable chargers, no matter what you call them, they are useful accessories to have in your gear bag for those times when you have no access to a wall outlet and your smartphone or other gadget has run out of juice. Powerbanks aren’t the most glamorous gadget and pretty much only do one thing and that’s charge a device. But today I’m going to show the myCharge UNPLUGGED 10K fast wireless powerbank that has an extra feature that increases the convenience of an already convenient product.

What is it?

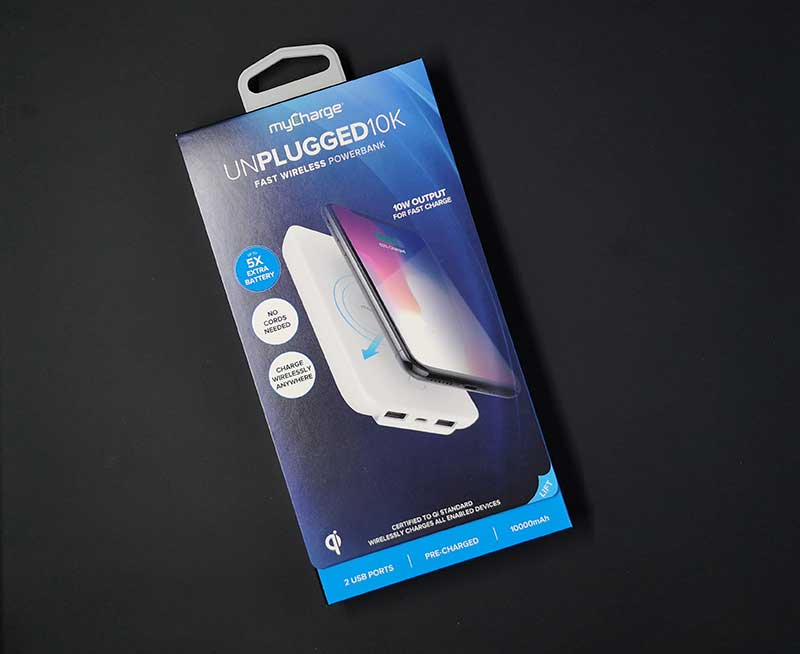
The myCharge UNPLUGGED 10K fast wireless powerbank is a 10,000mAh 10W backup battery that has 2 built-in USB ports and built-in Qi wireless charging so you can charge three devices at once.

What’s in the box?
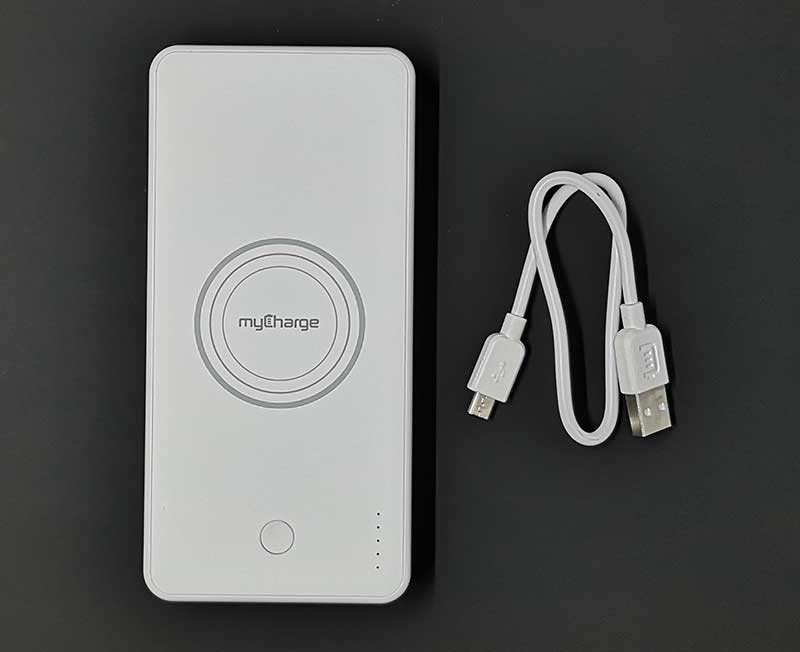
myCharge UNPLUGGED 10K powerbank
micro USB cable

Specs

Battery: 10,000mAh Lithium Ion
Product Dimensions: 2.8 in x 0.8 in x 5.8 in
Product Weight: 0.4 lbs.
Wireless Output: 10 Watts
USB port delivers 2.4A output

Design and features
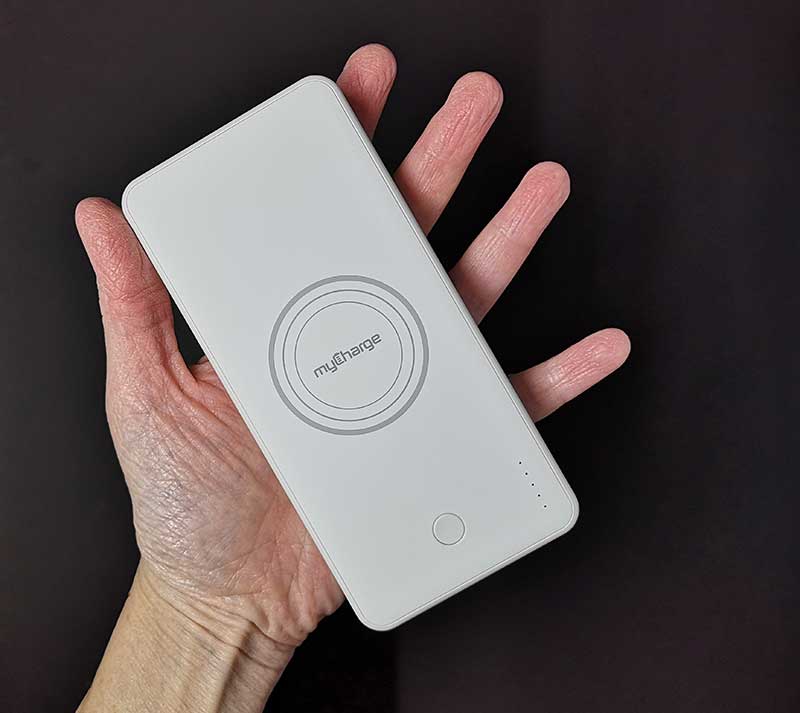
The UNPLUGGED 10K is a powerbank with a soft-touch white shell and a power button that turns on the wireless charger and is used to see the battery capacity by lighting up the row of status LEDs on the top.
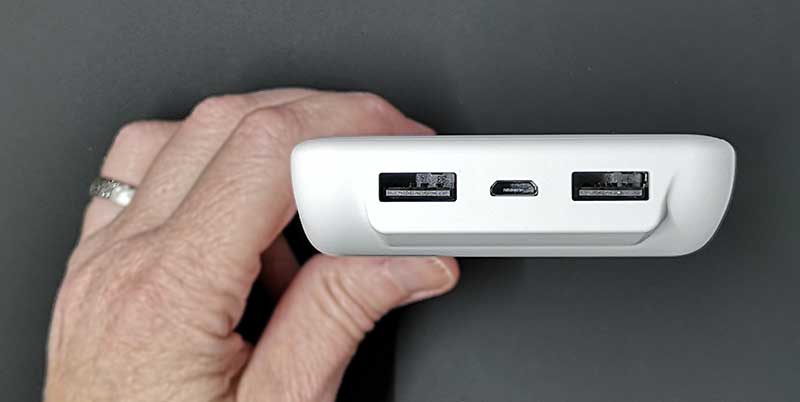
On one end are 2 USB-A 2.4A ports and a micro USB port that is used to recharge the powerbank itself. Note that this powerbank has pass-through charging which means that you can charge the myCharge at the same time the myCharge is charging up to 3 devices.
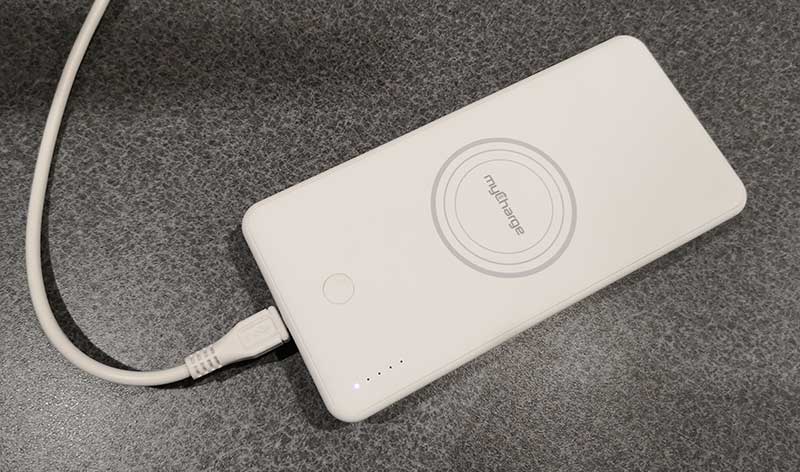
The UNPLUGGED 10K powerbank comes pre-charged and ready to use. But when it needs to be topped off, you just plug in a micro USB cable and let it juice up until the 4 white LEDs light up.
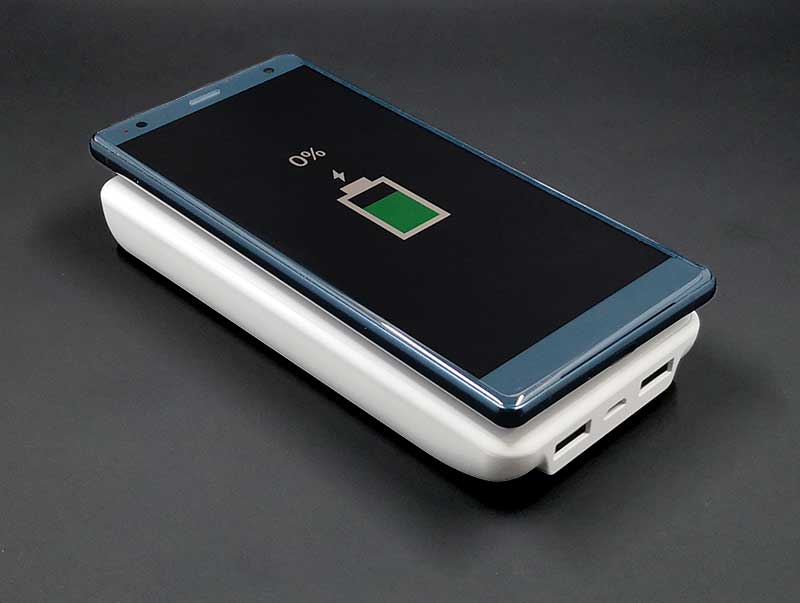
My first test of the myCharge was to see how quick it could re-charge a Sony Xperia XZ2 from flat to full. Here are the results.

Started with battery at 0%
30 mins battery 11% charged
60 mins battery 24% charged
1 hr 30 mins battery 38% charged
2 hrs battery 50% charged
2 hrs 30 mins battery 62% charged
3 hrs battery 71% charged
3 hrs 30 mins battery 81% charged
4hrs battery 92% charged
Test end

In another test, I connected my Pixel 2 XL and my drained Rowkin micro Touch Bluetooth earbuds to the myCharge the next day after my Sony test.

Pixel 2 XL battery at 29%, Rowkin earbuds 0% (or what appears to be 0%)
30 min Pixel 2 XL battery 47% charged, one Rowin earbud fully charged, the other still charging
1 hr 10 mins Pixel 2 XL battery 75% charged, Rowkin earbuds fully charged
2 hrs Pixel 2 XL battery 86% charged
2 hrs 30 mins Pixel 2 XL battery % charged
Test end
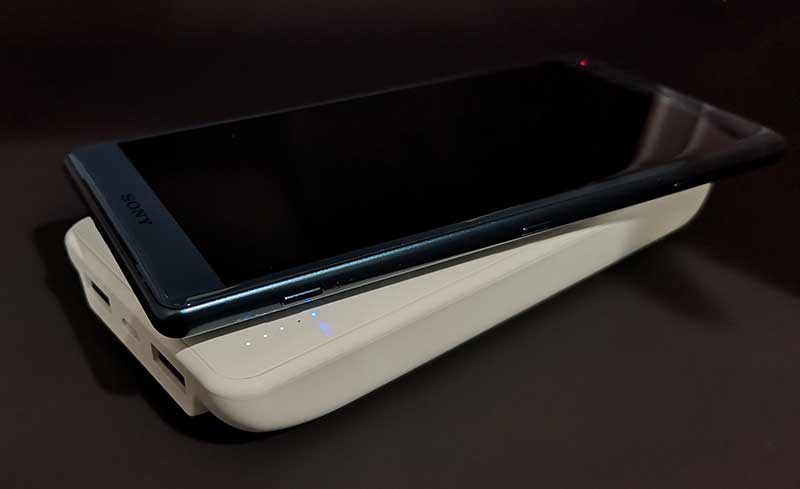
At the end of my 2 tests, the battery level of the myCharge UNPLUGGED 10K was down to just one lit LED.

What I like

  • Can charge 2 USB devices and 1 wireless device at the same time
  • Meets Apple and Samsung fast charge standard
  • Pass through charging – Can charge the myCharge AND charge 3 devices at the same time

What needs to be improved

  • Wireless charging is slow

Final thoughts

If you’re in the market for a powerbank and you have a Qi enabled device like a newer iPhone, Sony Xperia or Samsung Galaxy, the myCharge UNPLUGGED 10K is a nice option because it offers the ability to charge those devices wirelessly and also charge 2 other devices at the same time. Even if wireless charging is slower than plugging in a cable, the fact that this one powerbank can charge more than one device simultaneously gives it an extra check mark for usefulness.

Price: $69.99
Where to buy: myCharge and Amazon
Source: The sample for this review was provided by myCharge.

Filed in categories: Reviews

Tagged: ,

myCharge UNPLUGGED 10K Fast Wireless Powerbank review originally appeared on The Gadgeteer on August 17, 2018 at 12:00 pm.

Note: If you are subscribed to this feed through FeedBurner, please switch to our native feed URL http://the-gadgeteer.com/feed/ in order to ensure continuous delivery.

Aura Frames digital photo frame review


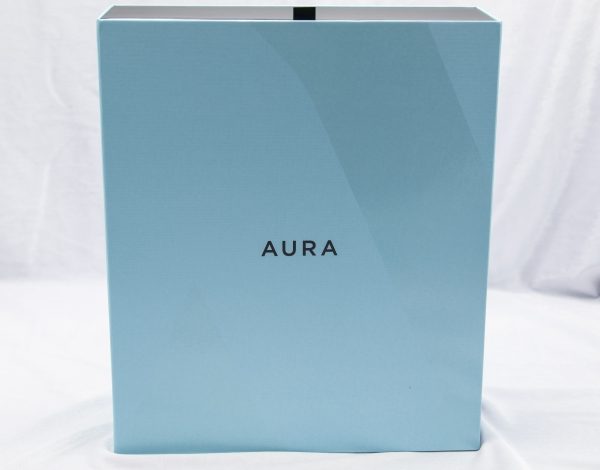
REVIEW – As a photographer, a nice photo displayed in a complimentary frame is considered “a thing of beauty”. However, like many photographers, we simply have too many favorite pictures to frame, and the cost to do so and the space required to display them is simply prohibitive. In these days of advancing technology, Digital Picture Frames have “stormed” the market in an attempt to provide a solution to this issue and to do so while preserving the originality, authenticity, and purity of the original photograph. For this review, I got the opportunity to test and review a digital photo frame from Aura Frames that promises to deliver “cutting edge” technology with attractive bells and whistles.

What is it?

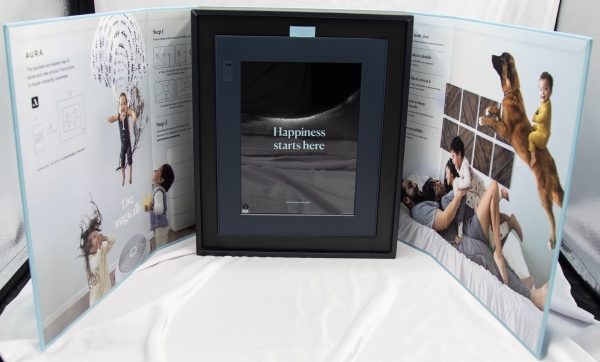
The Aura Frame is a digital photo display frame that allows you to wirelessly upload and display your photos.

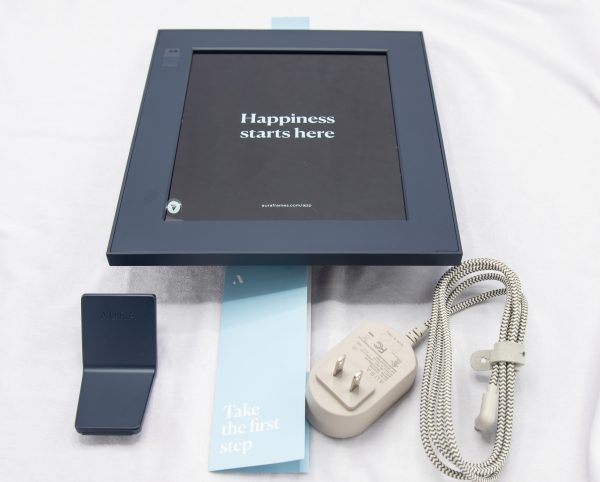
What’s in the box


1 x Aura Digital Picture Frame
1 x Stand
1 x AC Adapter
1 x Instruction Booklet

Design and features

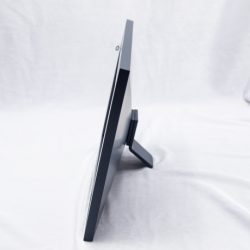
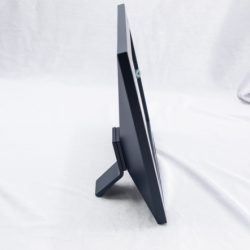
The Aura Digital Picture frame (Modern Version) is 11.75” W x 10” H x 0.75” D in size and is built incredibly well with a sturdy and weighty feel to it. It actually weighs 3.2 pounds. The actual screen size is 9.7”, with a resolution of 2048 x 1536 on a LED-backlit display with a 4:3 aspect ratio. For setup and use, both Bluetooth 4.2 and 802.11b/g/n 2.4GHz wireless connectivity are built in. The frame is controlled by the Aura frame app that is available for ios 9.1 or higher, Android 4.4 KitKat or above. It is available in two colors: Slate and Stardust, and can be displayed in both landscape and portrait mode.


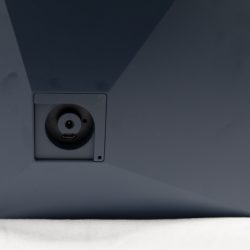
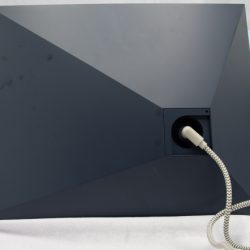
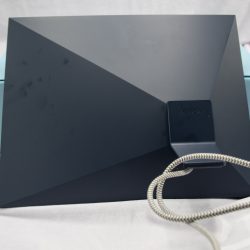
On the back of the frame there is a locking slot for attaching the stand, and within the slot, there is a micro USB power port. Once the cable is plugged in, the stand is attached as a result it locks the power cable in place to prevent it from accidentally coming loose.


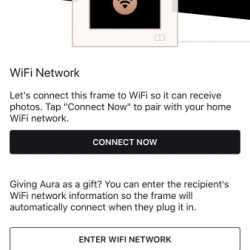
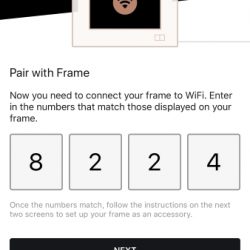
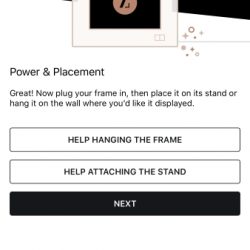
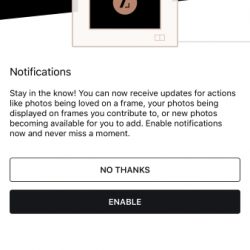
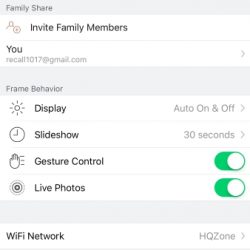
Once you power up the frame and download the app, getting connected, creating an account and loading pictures is a quick and easy process that is all controlled by the app. The following pictures are examples of some of the many screens that guide you through the process.


Performance

Once I loaded the first set of pictures, they appeared on the frame in seconds and the display is absolutely beautiful. The hand gestures that control the changing of pictures if so desired and that control the “wake up” function if the frame is in sleep mode, work flawlessly. The auto-dimming feature also works very well and enables the correct lighting to match the ambient light of any room.

Here are some additional features:

  • Aura creates collections of People and Pets using facial recognition software. You will see collections of the people you take photos most often of in the Aura app. All you need to do is select a person or pet, click “Add All” and any photo of that person – past, present, or future! – will get added to the frame.
  • Aura automatically applies a quality filter and will not display any photos that are blurry, have red eye, are duplicates, are too light or too dark, are poorly cropped, or where people have their eyes closed. Just select an album or a person or pet to add to your frame, and Aura will do the work for you, automatically sorting your photos and skipping over any you wouldn’t want to see on your frame.
  • We also have state of the art nudity filters so no inappropriate photos will ever make their way on to the frame. In addition to nudity, we also have filters to weed out photos of your driver’s license and passport.


The huge “elephant in the room” is that for $299, the use and the lifespan of the ability to display pictures are entirely controlled by the company. There is no built-in ability to use an SD card, or USB drive or network storage. Sine Aura can perform updates via the internet and since the frame has built WiFi, it would be a great value for them to add the option of storage via your own local network.

What I like

• The build quality of the frame
• The finish of the frame
• The ease of setup and the flawless performance
• The features including the hand gestures, the ambient light recognition and ability to enable friends and
family to load pictures to the frame from anywhere in the world.

What can be improved

  • The storage options of pictures so that the frame is not exclusively dependent on the infrastructure of the
    company
  • Additional frame size options

Final thoughts

The Aura Digital Photo frame is a really great display with fantastic resolution and in its current form, limitless storage. I love the build quality and the finish on the frame. The features are really well implemented and just make this frame a joy to have and to use. And the ability to maybe install it at grandma’s house and send current pictures of the grandkids to it is just one way that it can provide joy and value for years. However, the fact that the pictures are stored on the company’s storage and depend on their uptime and existence is a major deal that in this day and age not only raises the issue of privacy but also of ownership and longevity. For the cost of this frame, the local storage option via one’s own network is, in my opinion, a must and a big miss by this company. Otherwise, if you are willing to take the risk, then you will love this frame.

Price: $299
Where to buy: Aura Frames Website
Source: The sample for this display was provided by Aura.

Filed in categories: Reviews

Tagged:

Aura Frames digital photo frame review originally appeared on The Gadgeteer on August 17, 2018 at 9:00 am.

Note: If you are subscribed to this feed through FeedBurner, please switch to our native feed URL http://the-gadgeteer.com/feed/ in order to ensure continuous delivery.
HP Sprocket portable photo printer review

If you’re like me, you probably take a lot of pictures with your phone. Flipping through pics on our phones is fun, but most of us don’t get a chance to enjoy them OUTSIDE of the phone. One way to do that is to print the pictures and one solution that can help you with that task is the HP Sprocket portable photo printer. Let’s check it out.

What is it?

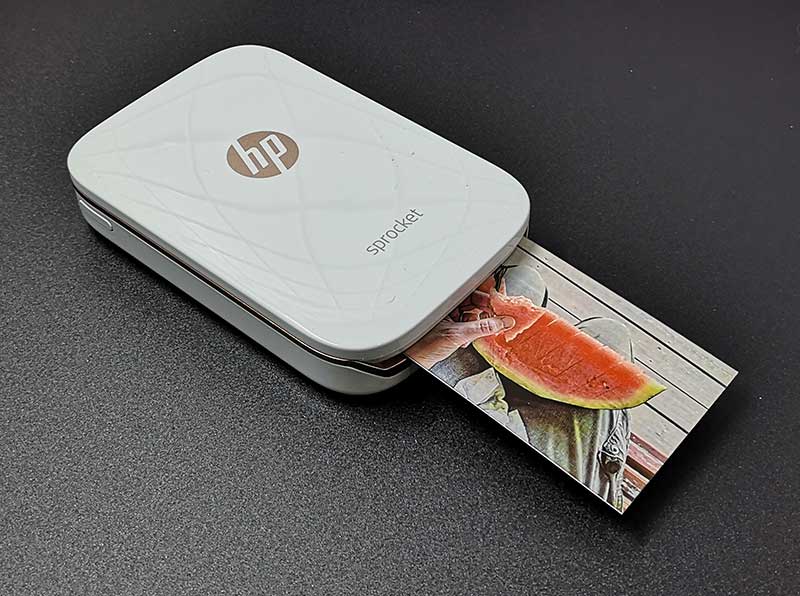
The HP Sprocket portable photo printer is a battery-powered printer that is about the size of a deck of cards and pairs with your phone and the HP Sprocket app to allow you to easily and quickly print your images on 2 x 3-inch sticky-backed paper without using ink.

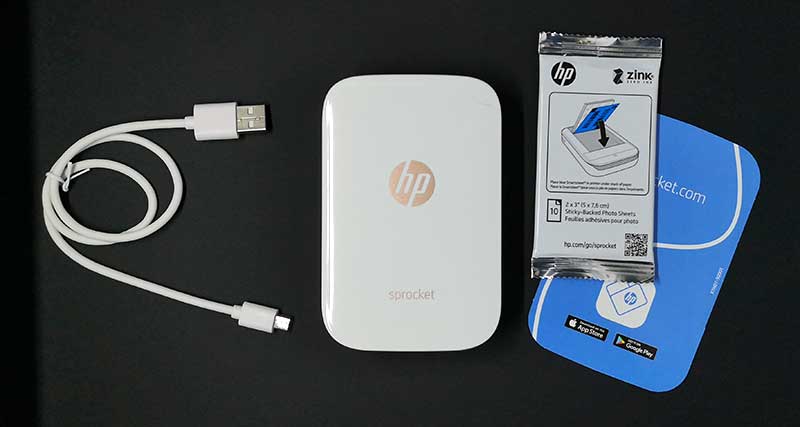
What’s in the box?

HP Sprocket printer
micro USB cable
10 pack of HP ZINK sticky backed photo sheets

Design and features

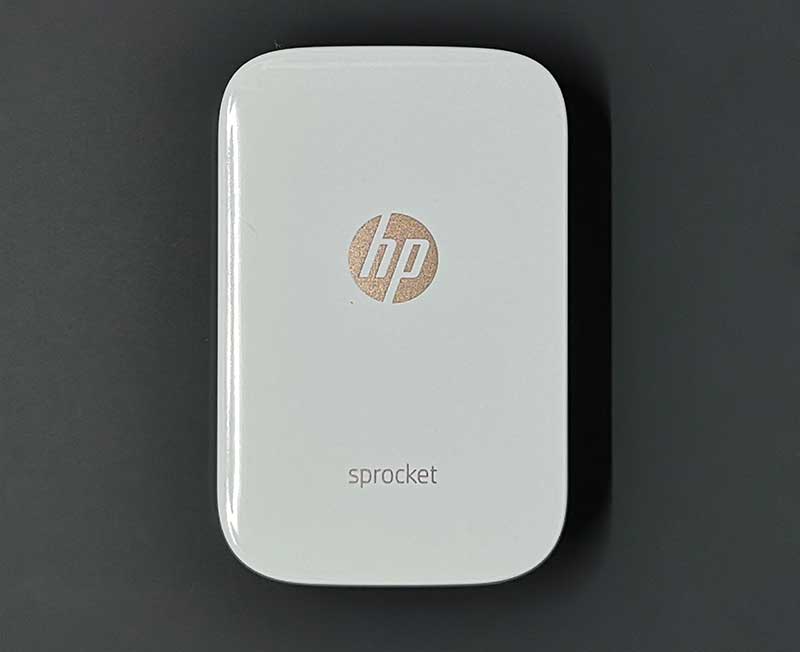
The HP Sprocket printer is available in several colors, but I was sent the white version of the printer which has bronze colored accents.

The small printer has a plastic case with one button on the side which toggles power.

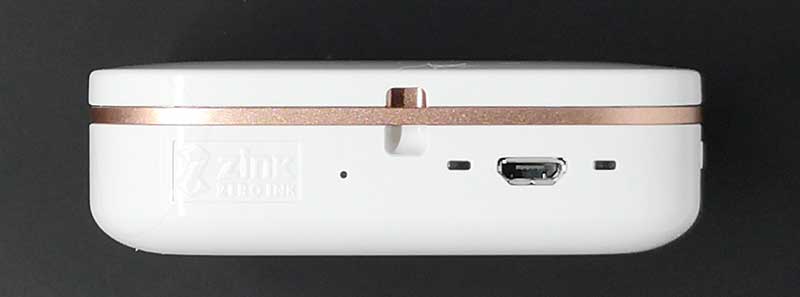
On the back of the printer is what looks like a lanyard attachement point… weird. You’ll also find the micro USB port for charging, two status LEDs, and a reset switch/hole.

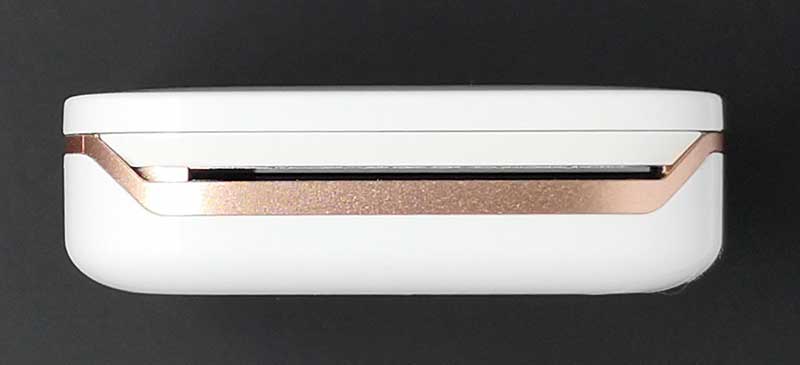
The front edge of the Sprocket is where the printed photo is ejected.

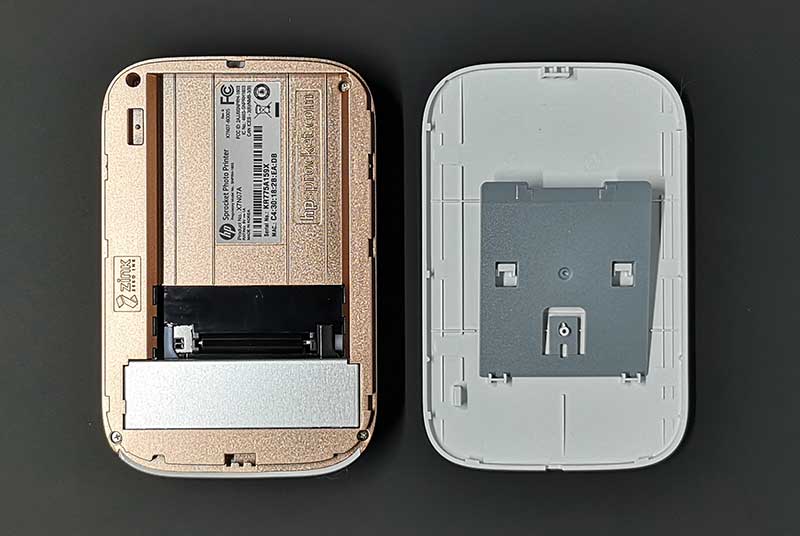
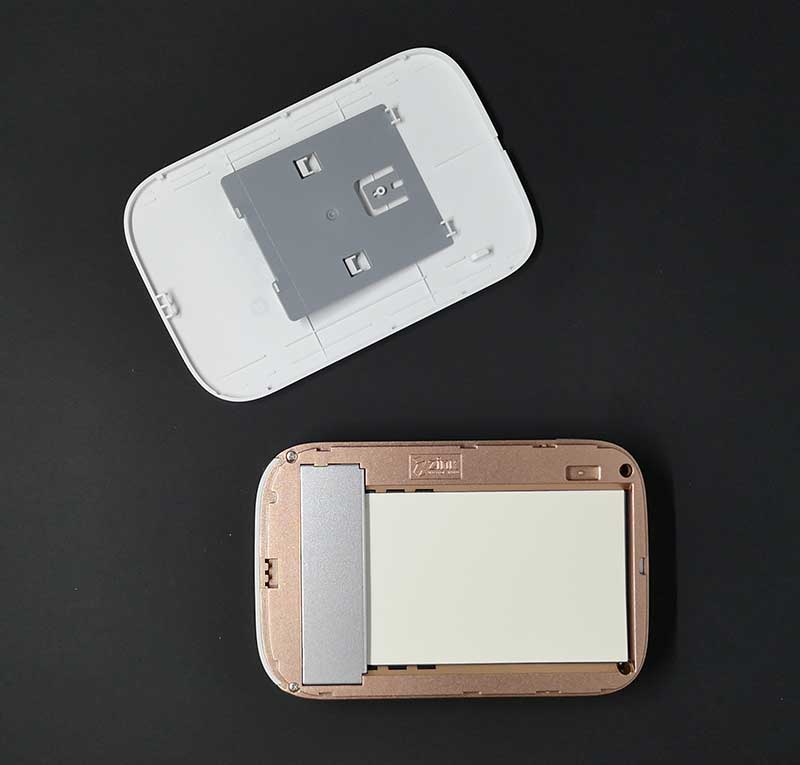
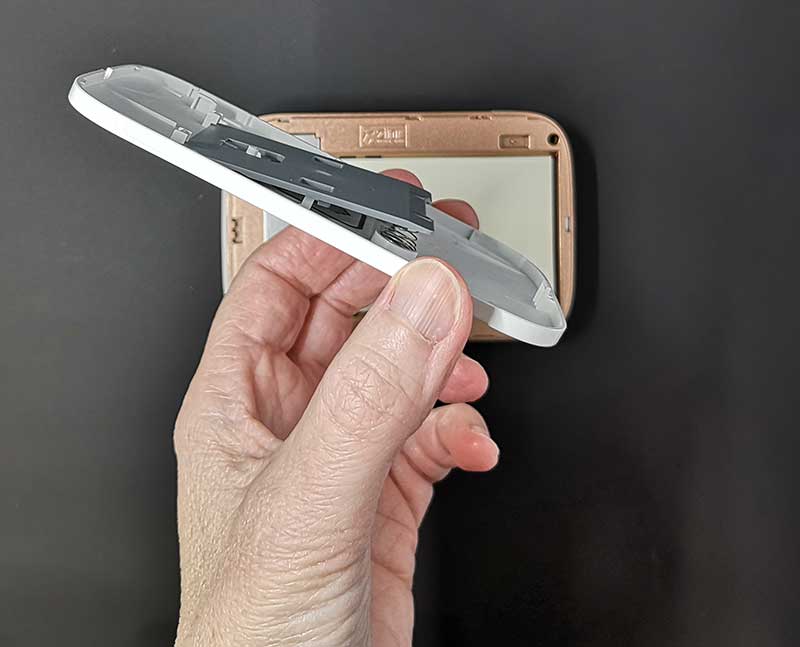
The top of the printer slides off to reveal the compartment where you place the photo paper.

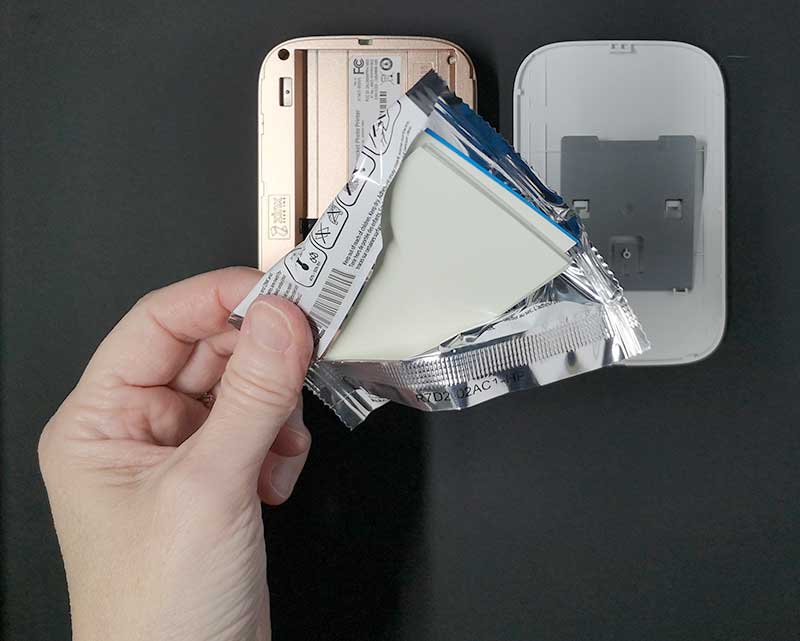
The photo paper is packaged in 10 sheet packs and probably has some sort of coding that won’t allow you to use other types of ZINK paper that are marketed for other brands of printers like the Sprocket.

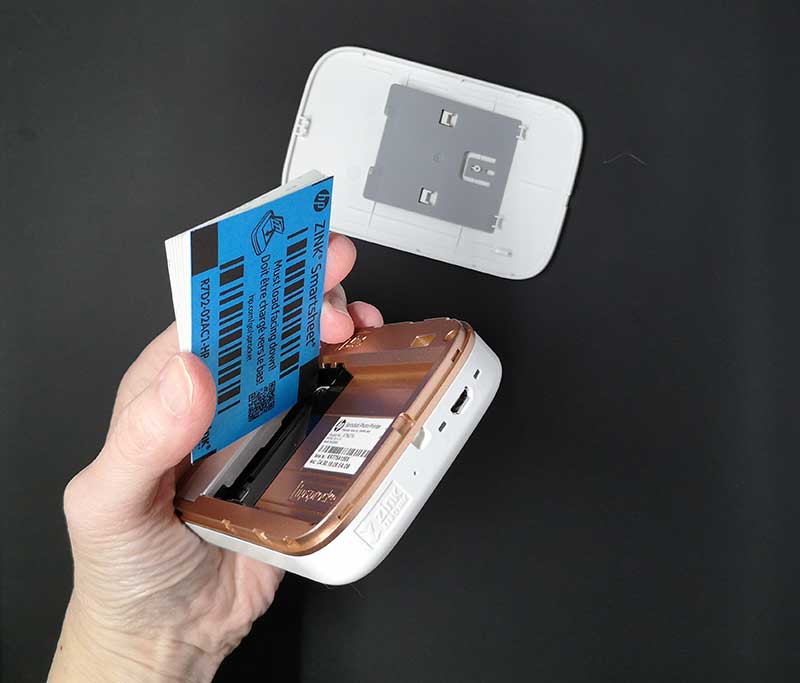
I’ve reviewed a couple other printers that also use this type of paper and they all include a special blue card that has to be left in the stack of paper face down when you install the paper into the printer.

Here we see the stack of 10 sheets of ZINK paper placed in the Sprocket printer.

A spring-loaded pressure lever keeps the paper in place so that it doesn’t jam up inside of the printer during the printing process. I’ve had this problem with another older printer that I reviewed years ago, so I like to see that HP has designed a solution for this potential problem.

HP Sprocket app


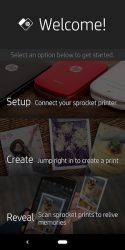
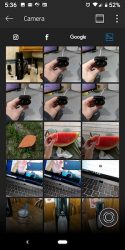
To print your pictures, you need to install the HP Sprocket app on your phone. This app will let you view, edit, and print the images in your phone’s memory, on your Instagram account, Facebook account, and Google Photos account.

The app also lets you do some rudimentary editing like cropping, adjusting levels, adding text, and stickers.

Printing is quick and easy and since the HP Sprocket uses ZINK photo paper, you don’t have to worry about ink drying, smearing your smudging. The prints are ready to use and pass around as soon as the print ejects from the Sprocket.

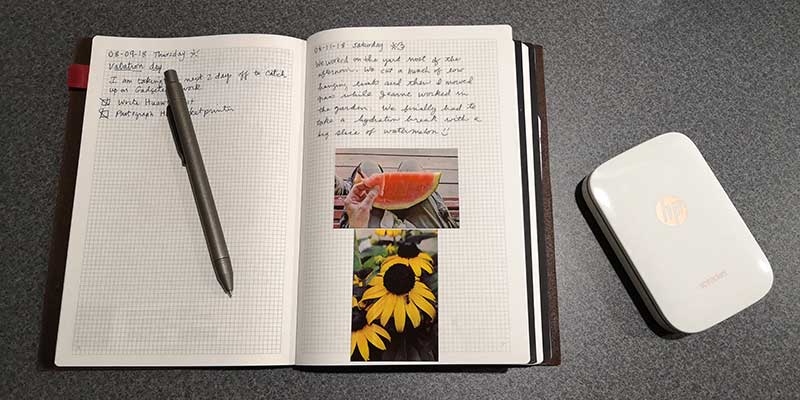
My favorite thing about the prints is that they are peel and stick. I usually have problems peeling the other ZINK photo paper that I’ve used with my other photo printers, but the paper backing on the HP ZINK paper is noticeably easier to separate. I like to use the prints to embellish the entries in my journal.

What I like

  • Easy setup
  • Quick photo prints
  • Crisp and good color

What needs to be improved

  • Only comes with 10 sheets of photo paper

Final thoughts

I’ve reviewed a couple other printers very similar to the HP Sprocket, so I wasn’t expecting the resulting prints to be much if any different than ones I’ve been using for years. But I actually was surprised. The prints from the HP Sprocket look a bit crisper and have more vibrant colors than prints from Polaroid and Panasonic ZINK printers which have always looked a bit washed out to me. The HP Sprocket app is a bit more polished as well compared to the other printer apps. If I was in the market for a pocket-sized photo printer today, my first choice would be the HP Sprocket portable photo printer. It’s a keeper.

Price: $129.99
Where to buy: HP and Amazon
Source: The sample for this review was provided by HP.

Filed in categories: Reviews

Tagged: ,

HP Sprocket portable photo printer review originally appeared on The Gadgeteer on August 16, 2018 at 12:00 pm.

Note: If you are subscribed to this feed through FeedBurner, please switch to our native feed URL http://the-gadgeteer.com/feed/ in order to ensure continuous delivery.
BenQ ScreenBar Plus LED Lamp Review

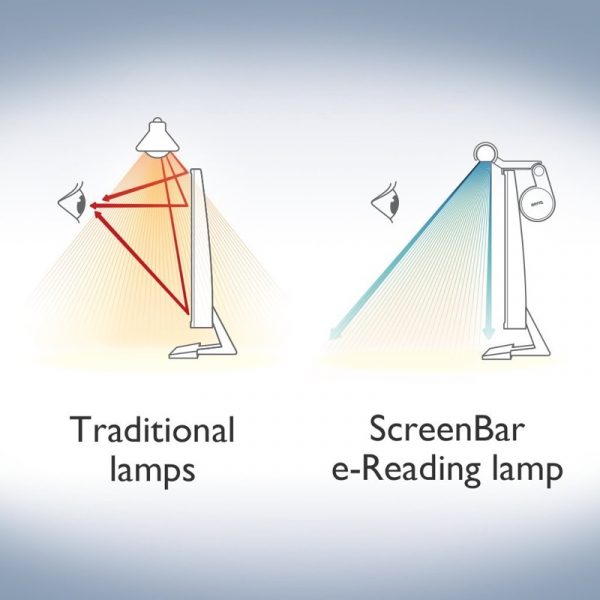
REVIEW – At home, I do most of my “work” at my computer desk paying bills, sorting papers, and staying up late. Lighting up my workspace has always been a little tricky since the computer screens themselves give of light and can get in the way. The BenQ ScreenBar Plus is a lamp that sits atop your monitor in a way that gives off even illumination without getting in your way.

What is it?

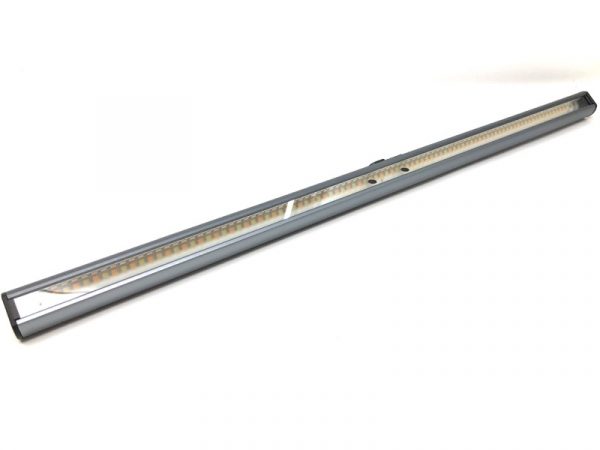
The ScreenBar Plus is an LED lamp that doesn’t add glare to your monitors, yet provides an even pool of light in your work area. It’s dimmable and color temperature adjustable.

Hardware specs

  • USB powered
  • Color temperature adjustable between 2700K and 6500K
  • Auto-dimming
  • Fits on any monitor thickness from 0.4″ to 1.2″

What’s in the box?

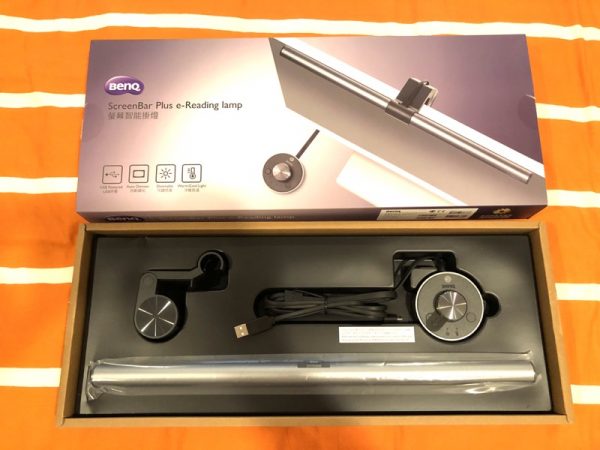
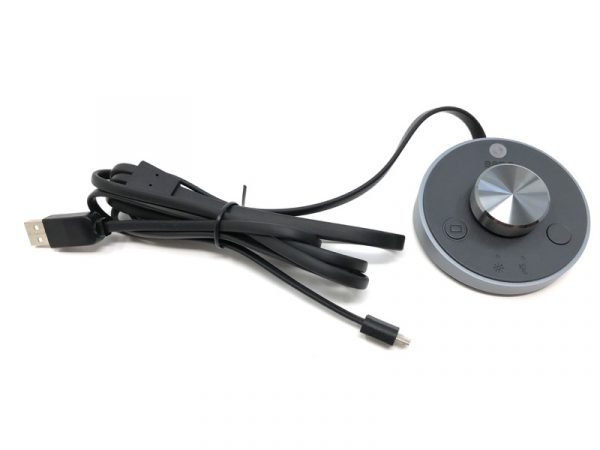
You’ll find the LED tube, the monitor clip, and a round controller with USB cables.

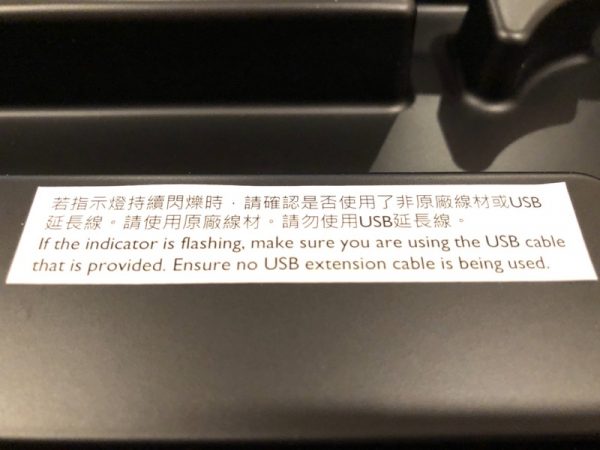
There’s a warning sticker in the box too. I guess they really don’t want you to use a USB extension.

Design and features

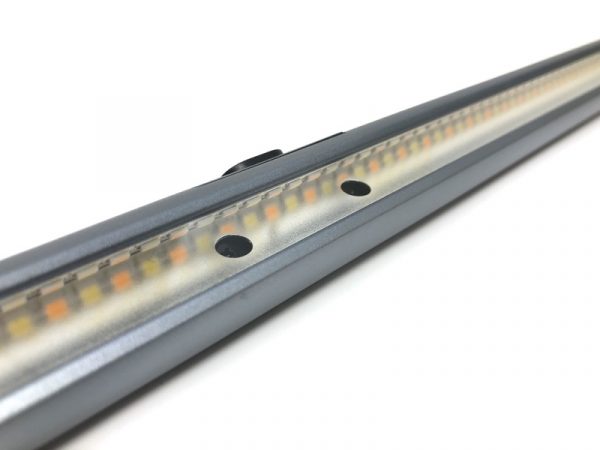
The LED tube itself has tiny, individual LED lights all along the length of the assembly.

Note that there are actually two “colors” of LED lights. The lamp is able to adjust between the two.

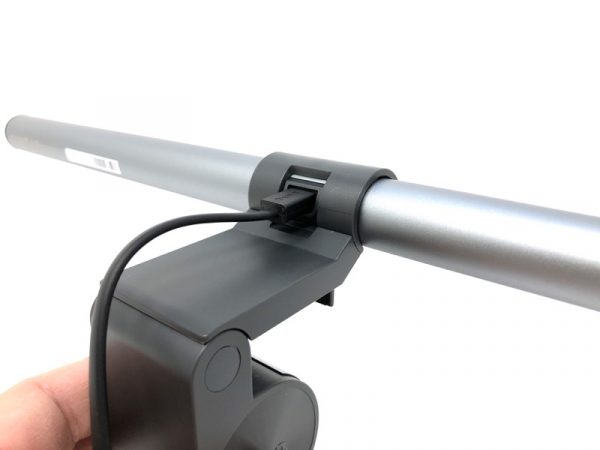
The controller has a cord permanently attached to it. There’s a standard USB-A for power, and a micro USB for the lamp itself.

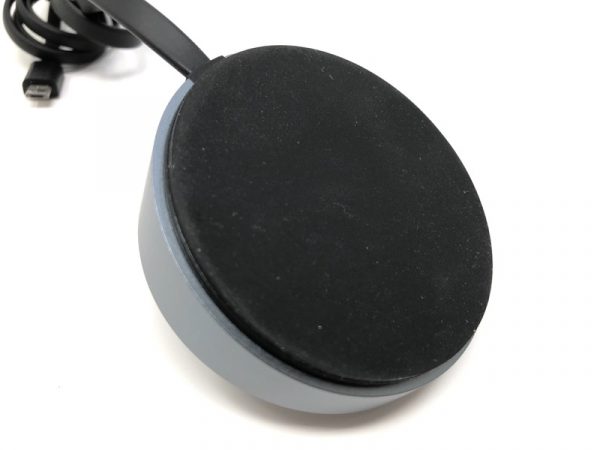
The bottom of the controller has a large, non-skid pad. It feels rubbery.

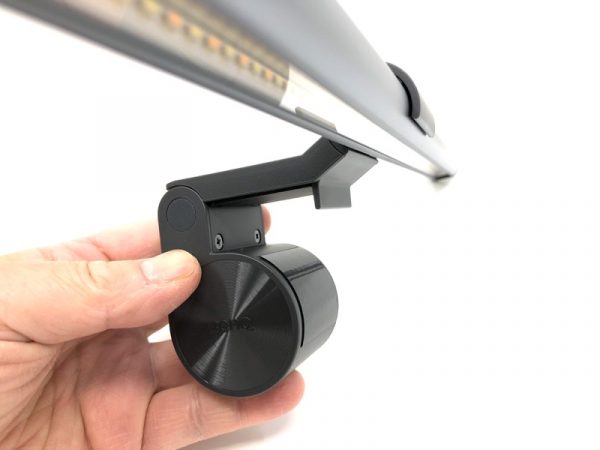
Here’s the monitor clip. The cylinder actually has a bit of weight to it to serve as a counterbalance to the LED bar.

There’s a cutout on the back for the micro USB cable. The cutout is larger than the port itself, which allows the entire LED tube to rotate up to 20 degrees.

Setup

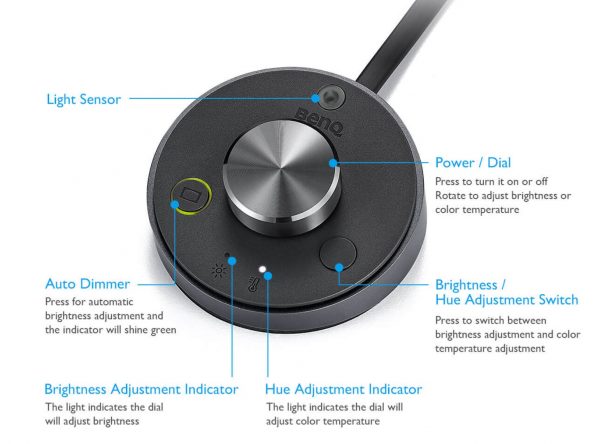
All controls are on the round “puck”. The dial is like an encoder that rotates infinitely in either direction and has detents like a mouse wheel. Depending on what mode you’re in (Brightness or Hue adjust), twisting the dial will raise brightness or change the color temperature.

Pressing the center knob turns the lamp on or off. You can also plug the lamp into a USB port on your computer so it turns on or off with the computer. Either way, the lamp remembers the previous setting.

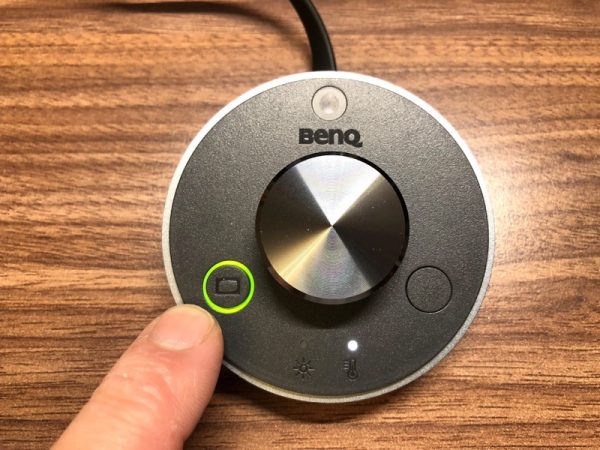
The Auto Dimmer button illuminates with a green ring. When pressed, the light sensor (top position) determines a suitable brightness level, and the color temperature goes right in the middle. I like to choose my own brightness and color temperature, so I don’t use this. Twisting the knob returns control back to manual.

Performance

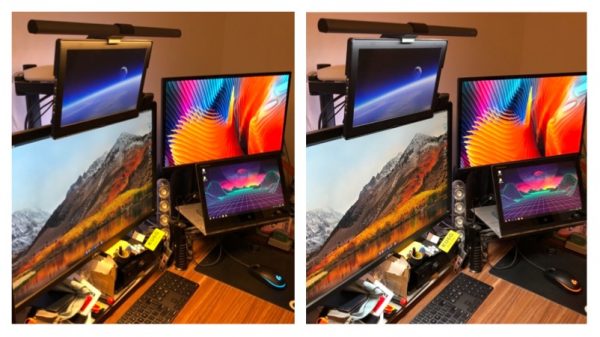
I attached the light to the top of my mess of monitors. Here are some shots of the warmest (L) vs. coolest (R) color temperature settings.

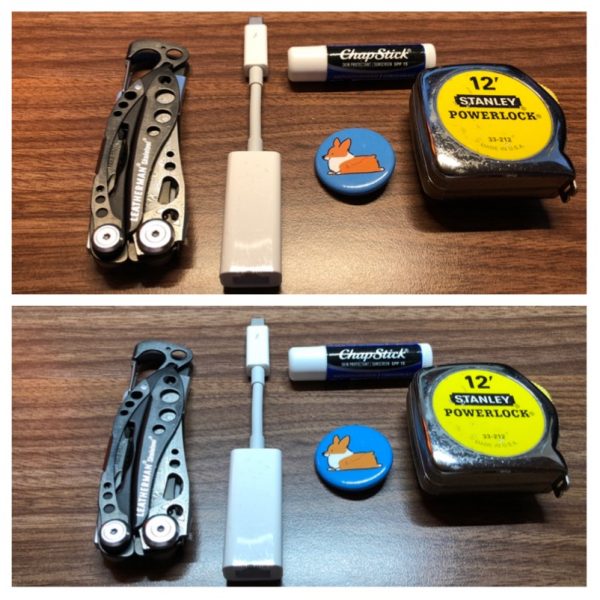
I placed some random objects on my desk and tried again. Warmest (top) and coolest (bottom).

What I like

Fits out of the way on top of your monitor, yet minimal glare on your screens. Adjustable brightness and color temperature is easy with the remote knob.

What needs to be improved

I haven’t seen much use for the auto dimmer.

Final thoughts

I’ve been trying to figure out what kind of lamp works best for my desk. I can stop looking. The BenQ ScreenBar Plus is a bright idea!

Price: $129.00
Where to buy: Amazon
Source: The sample of this product was provided by BenQ.

Filed in categories: Reviews

Tagged:

BenQ ScreenBar Plus LED Lamp Review originally appeared on The Gadgeteer on August 16, 2018 at 9:00 am.

Note: If you are subscribed to this feed through FeedBurner, please switch to our native feed URL http://the-gadgeteer.com/feed/ in order to ensure continuous delivery.
Julie’s favorite gear, Click and Grow garden, Netwon Mail, and more – Review updates

REVIEW – It’s time to check back on a handful of our past reviews and articles that have been updated with new info. This is our way of letting you how well the products that we review stand the test of time weeks, months, and even years after we first brought you our reviews. The updates can be found at the bottom of each review linked below.
Julie’s favorite gear

Click & Grow Smart Garden 9 review by Julie Strietelmeier

iLife A8 robotic vacuum cleaner review by Julie Strietelmeier

Jarvis Farley will give you inspiration to turn your home into a smart one by Julie Strietelmeier

Newton Mail review by Julie Strietelmeier

Master & Dynamic MW60 wireless and MW50 wireless headphones review by Bill Henderson

Filed in categories: Reviews

Tagged:

Julie’s favorite gear, Click and Grow garden, Netwon Mail, and more – Review updates originally appeared on The Gadgeteer on August 15, 2018 at 11:33 am.

Note: If you are subscribed to this feed through FeedBurner, please switch to our native feed URL http://the-gadgeteer.com/feed/ in order to ensure continuous delivery.