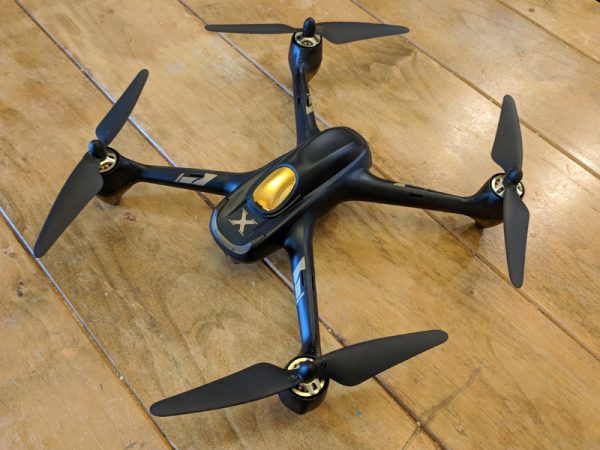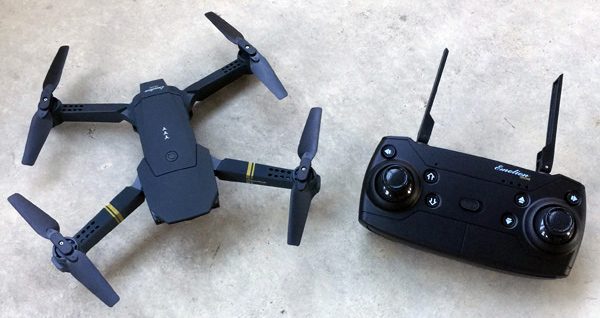
Holy Stone HS220 quadcopter drone review

REVIEW – What’s more fun than a remote-controlled quadcopter? A quadcopter that you can control with your phone or a dedicated controller that also has a built-in camera all packaged in a 2-in-1 folding format. Let’s check it out.

What is it?

The Holy Stone HS220 is a quadcopter drone that can be controlled with a battery-powered remote or an iPhone or Android device.

What’s in the box?

  • Holy Stone drone
  • Handheld remote
  • 2 batteries
  • micro USB charging cable
  • 4 replacement propellers
  • 4 replacement feet
  • Screwdriver
  • Tool
  • User manual

Design and features

The Holy Stone HS220 drone is made of white and black plastic and features a quadcopter design with 4 rotors. On top of the drone, you’ll see the Holy Stone logo which doubles as the touch-enabled power button. You’ll also notice two other icons which are designators for how to position the drone when in folded (as shown here) and unfolded Wing flight mode.

The bottom of the drone has for LED status lights and the battery slot.

A black plastic cage protects the rotors and your fingers from damage. You’ll also notice the four rubber feet that let you land the drone on different types of surfaces without damage.


As mentioned earlier, the Holy Stone HS220 is a folding drone. Each rotor folds out to create a larger X-shaped drone that is almost 2x the original size. Note, that you have to unfold the drone to be able to remove the battery for charging.

You’ll also need to use the drone in wing flight mode if you want to take pictures and video with the built-in camera.


The HS220 comes with a handheld remote control which doubles as the battery charger. It is powered by the same type of battery that the drone uses. The control has a micro USB connector on the front edge that is used to charge the batteries for both the controller and the drone.

The drone can fly for about 7-9 minutes per battery charge, and the remote will work for a much longer time on one charge, so you can swap batteries with the controller when you’re out in the field if the drone’s battery is too weak for flight. The drone’s weak battery will still work in the controller and the controller’s battery will power the drone for a few extra minutes until you need to go inside for a recharge.

Note that it can take up to 150 minutes (2.5 hrs) to recharge each battery which seems like forever when you just want to fly your drone.

The controller also features a fold out phone holder if you want to use the Holy Stone app and the controller to control the drone.

The app

The app is available for iOS and Android. I tested the app on my Pixel 2 XL and the Huawei P20.

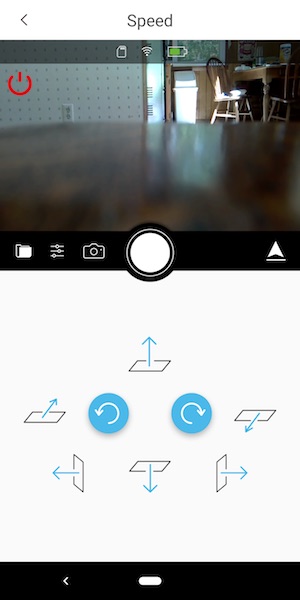
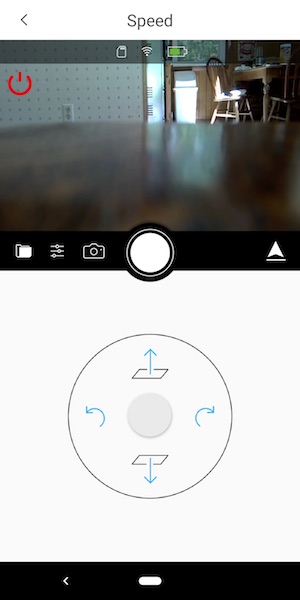
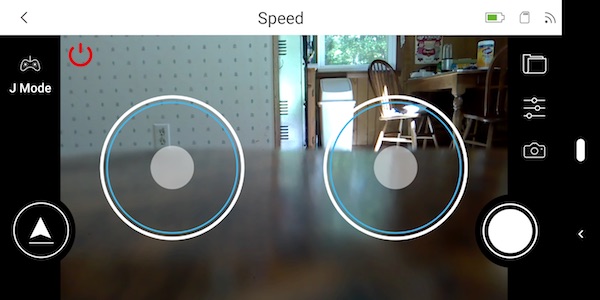
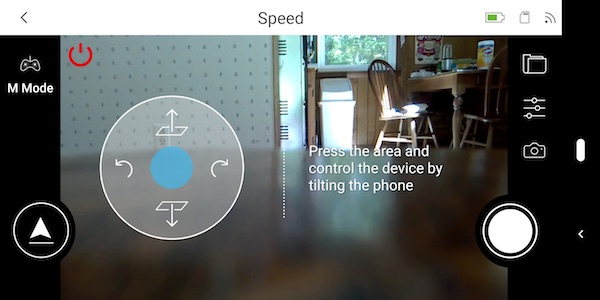
The app’s user interface is relatively basic. And the main part of the screen is used for a live view through the drone’s camera. Note that you have to use the app if you want to record video and / or capture images with the drone. Also note that the image you see above is the ONLY time I was able to see a live view from the drone’s camera. Every subsequent time that I used the app, it the screen would be black. However, if I clicked the picture capture button on the handheld remote control while the app was open and my phone was connected to the drone’s WiFi, the app would make a click/capture noise. But video and images came out with a black screen.

Let’s fly!

To fly the Holy Stone drone, you first have to charge the battery for the handheld controller and the battery for the drone. As mentioned above, both batteries are charged using the controller. After both batteries are charged, you can decide if you want to fly the drone in the folded (smaller) form factor or the wing flight form factor. In my experience, the drone is more stable in the unfolded wing flight form factor. When it’s folded, you can snap pictures or capture video and the flight pattern is a little wonky which you’ll see in the video demo below.

Before you can start flying, you will tap the logo on the drone to turn it on and press the power button on the controller. Then you will want to press the lift joystick up, then down to pair the controller with the drone, then press the one key start/land button. This will cause the drone blades to start spinning and you can use the left joystick to lift the drone.

See it in action (or not)

As you’ve seen in my 1st demo video above, I had a LOT of problems flying this drone. It seemed to have a mind of its own for the first few flights. Even so, it stood up just fine from getting stuck in a tree, to slamming into the side of the house, and other flight stopping maneuvers. I have to hand it to Holy Stone for making a rugged little drone.

I got better at flying it, but the drone does drift in different directions, which require frequent trim operations to resolve that problem and even after performing the trim operations, the drone would not just hover completely still in one place, it would always drift a little bit. Also when using the one-key landing button, it would not just descend straight down and land, it would descend at an angle and then land.

What I like

  • Small foldable design
  • More rugged than other drones I’ve reviewed
  • Can fly it with or without using your smartphone
  • One button launch and land

What needs to be improved

  • Control. Requires frequent trim procedure
  • Takes too long to charge the batteries (150 minutes)
  • Android app bugs. No way to capture pictures or video without using the app

Final thoughts

After some practice, I was able to fly the Holy Stone HS220 drone pretty well, but I was never able to see how well the built-in camera performed as I was not able to get the app to show the live view of the camera or record from the camera.

When it’s all said and done, flying this drone was fun but is overpriced at $100. For that much money, I expect the camera feature to work and I think there should be a way to capture video and images without needing to use an iOS or Android app.

Price: $99.99
Where to buy: Amazon
Source: The sample for this review was provided by Holy Stone.

Filed in categories: Reviews

Tagged:

Holy Stone HS220 quadcopter drone review originally appeared on The Gadgeteer on December 3, 2018 at 11:34 am.

Note: If you are subscribed to this feed through FeedBurner, please switch to our native feed URL http://the-gadgeteer.com/feed/ in order to ensure continuous delivery.

EACHINE E58 RC Pocket Quadcopter Drone review

REVIEW – Drones are all the rage today, and they have become significantly more complex and feature-rich.  While high-end drones like the DJI Mavic Pro are capable of all sorts of aerobatics and videography, not everyone can afford one, so there is a large and growing market for less expensive drones that are still fun to fly and provide many of the features of their higher-end cousins.  One such product is the Eachine E58 RC Pocket Quadcopter Drone.  While it is basically a smaller version of the granddaddy Mavic Pro, it is still loaded with features while being significantly more affordable.  Let’s check it out!  Gadget on!

What is it?

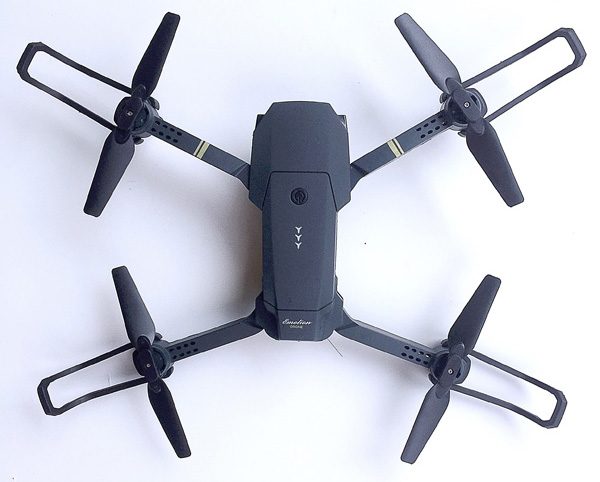
The Eachine E85 Quadcopter Drone is a small, foldable, radio-controlled drone that is styled to be, in appearance and essential functions at least, a miniature version of the larger and much more expensive DJI Mavic Pro drone.  So it is basically a drone clone (see what I did there?).

Hardware specs

  • 2.4 GHz remote control
  • Glass lens FPV (First Person View) camera that can rotate from 0 to 90 degrees downward that includes the following functions:
    • 2MP still images camera
    • 720p HD video camera
  • WiFi control (with app) capable LED lamp with nightlight function
  • Gravity sensor
  • 6-axis gyroscope
  • Headless mode
  • One-key takeoff and landing
  • Trajectory Flight with mobile phone app
  • Three speed modes
  • Quadcopter includes 3.7V 500mAh rechargeable Lithium battery
  • One-key return
  • 360-degree roll
  • Micro SD card slot (card not included)
  • Controller requires (4) AA batteries (not included)
  • Time to full charge = 60-70 minutes
  • Flight time = 7-9 minutes
  • RC range = 80-100 meters
  • Dimensions:
    • 27 x 19.5 x 5cm (arms not folded)
    • 12.5 x 7.5 x 5cm (arms folded)

What’s in the package?
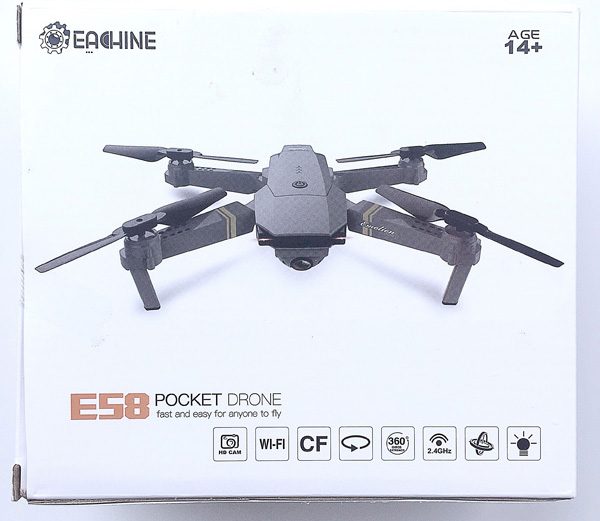
 

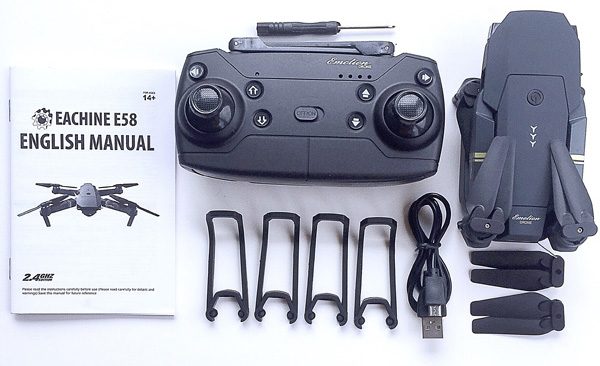
  • 1 x Eachine E58 RC Quadcopter drone
  • 1 x Transmitter
  • 1 x 3.7V 500mAh Lipo Battery
  • 1 x Micro USB Charging Cable
  • 4 x Prop Guards
  • 4 x Spare Blades (2 sets of 2)
  • 1 x Small Screwdriver
  • 1 x User Manual

Design and features

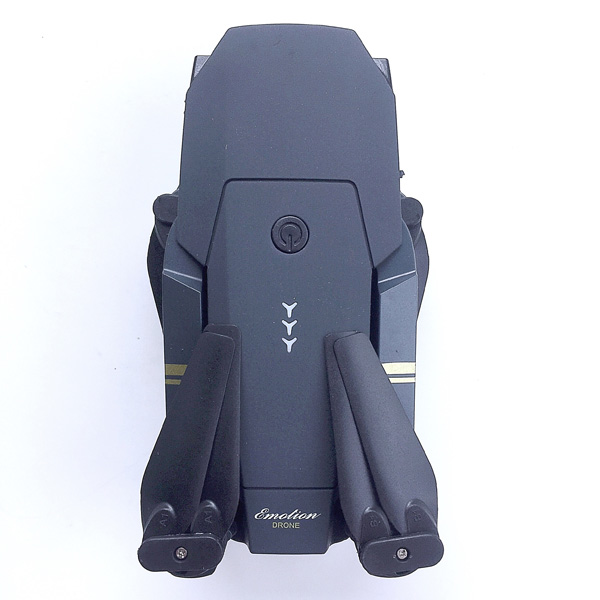
My first impression of the E58 was that is was very small and compact when folded down.  Smaller than I had imagined, actually, and because of this it seemed very portable and easy to take with you.
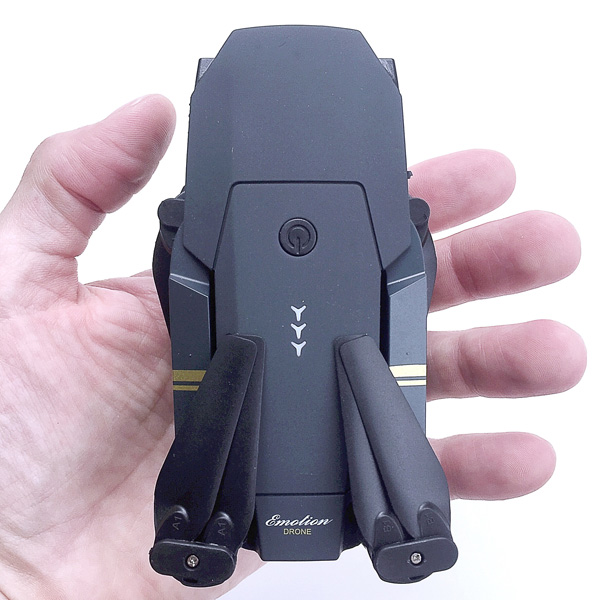
In fact, the E58 is small enough to almost fit in the palm of my hand, and is very lightweight.  However, even when folded down it actually feels fairly solid, like it isn’t going to just fall apart on you if you bump it against something, the way a lot of drones feel to me.  It would be easy enough to place it into a backpack or other bag for transport, but I think it might get banged up quite a bit if it were not put into some type of case first—do a Google search for “E58 drone case” and you may find some good options for this.
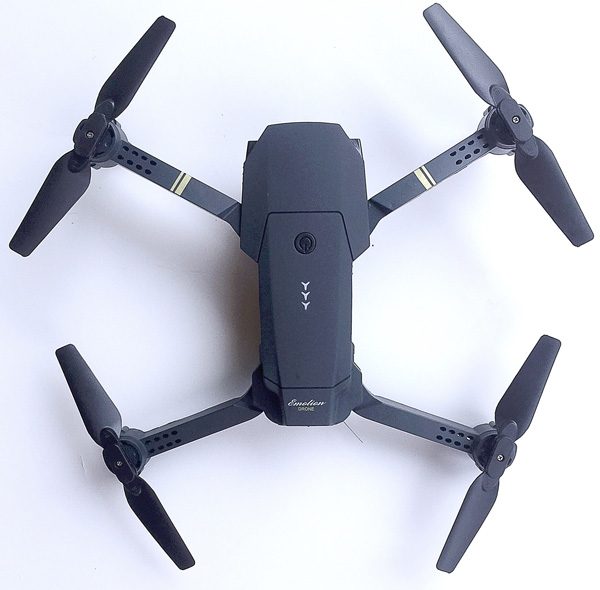
After folding out the E58’s four legs, my very next impression was that, in appearance, it is truly a clone of the DJI Mavic Pro quadcopter drone, which is one of the current granddaddies of high-end drones.  The E58 is basically a nearly exact copy in appearance but in miniature.  I don’t think this is a bad thing at all; I really like the low-profile, futuristic the styling of the Mavic Pro myself, and Eachine did a really solid job of mimicking the Mavic Pro’s Styling for their E58.
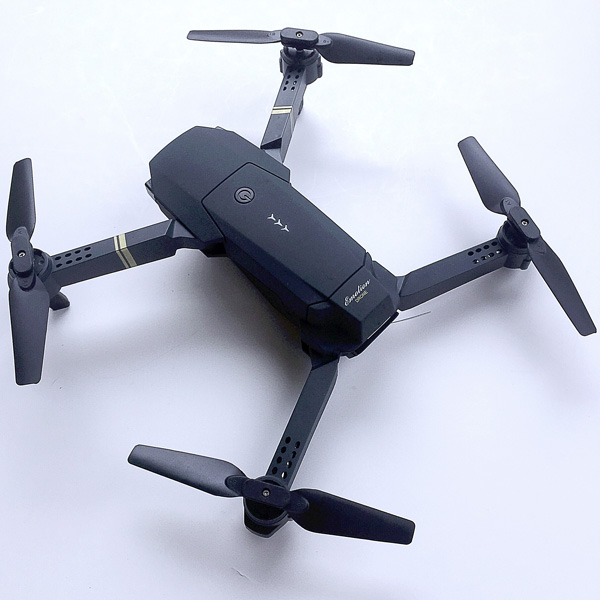
Above, another view of the E58 with its “arms” fully extended.
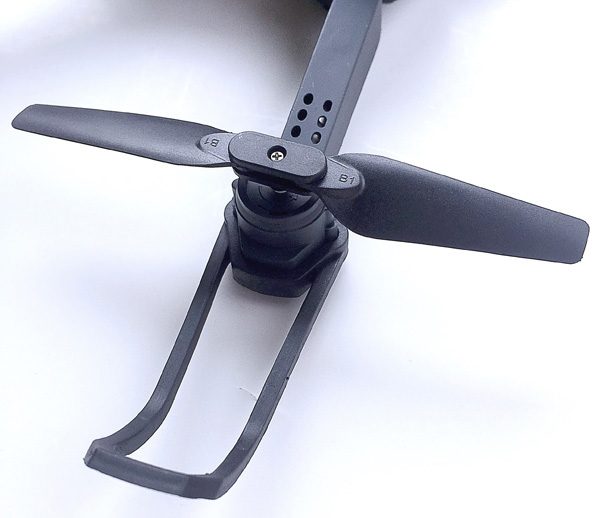
The E58’s four props are each basically hinged twin props. This allows them to be collapsible for transport and storage, but when spinning, centripetal acceleration will cause them to deploy outward, essentially forming a single prop blade at the end of each of the E58’s “arms.”
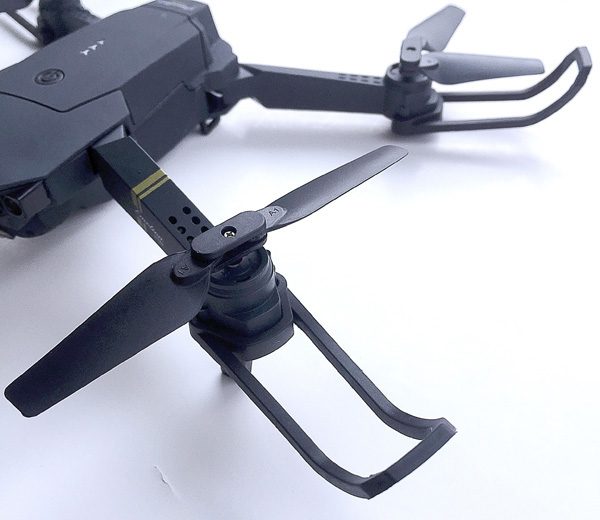
Each of the props is labeled “A” or  “B” and each must be installed on the correct legs of the E58, or the drone will not fly optimally (if at all).  In addition, the E58 includes four “bumpers” that can be attached to each leg to protect the props.  As a fairly new drone pilot, I installed these on the E58 before I took it out for its first test flight, as seen in the above image.  In fact, these bumpers saved the E58 from my flight control learning curve multiple times, as I seemed to repeatedly find items in my yard to collide with.
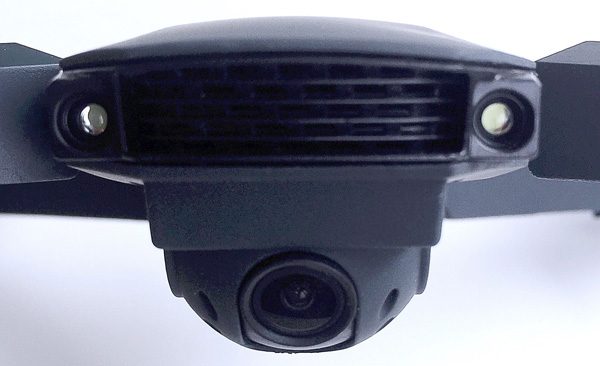
To me, the “front” of the E58 almost appears to be a “face” as seen above.  There are two lights on either side of a grille, with the E58’s camera mounted at the “chin” position.
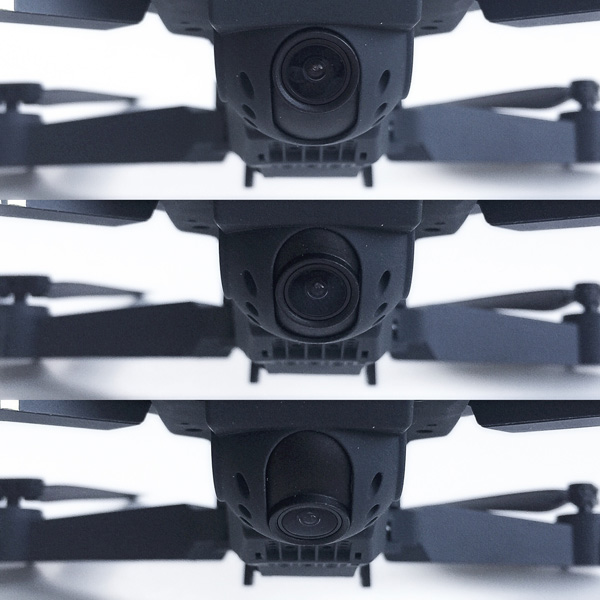
The E58’s camera is mounted on pivot that, although it does not move side-to-side, can be manually positioned from zero degrees (straight forward) to 90 degrees (straight down) prior to flight, as shown above, and it slides smoothly along its track, not in discreet stopping points.  The camera has a glass lens for clarity and friction seems to hold its position in place once set, even during crashes.
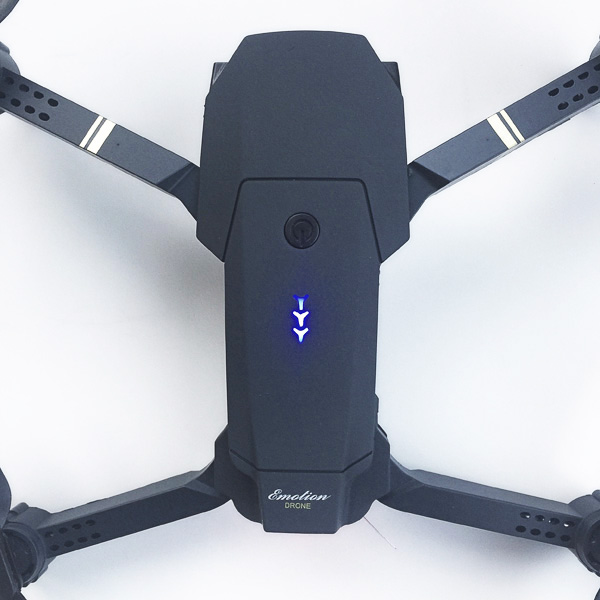
Pressing the power button on the top of the E58 turns it on.  As seen in the image above, there is a column of three blue LED lights on the top of the E58’s fuselage that to me resemble the logo of the popular game “Destiny.”  (Probably a coincidence, but still fun.) In any event, these three LEDs are not battery power level indicators as you might expect; they merely indicate when the E58 is powered on.
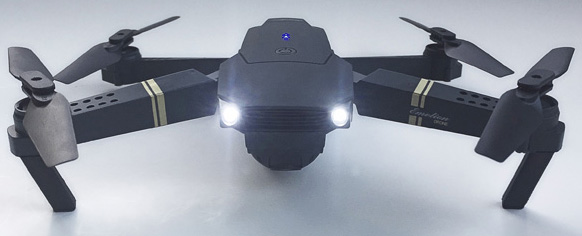
As mentioned above, the E58 has a pair of white lights on the front that, when illuminated, appear to almost be headlights, as seen in the image above.  Having two headlights on the front can help with visually determining orientation of the E58 in lower-light flying conditions.
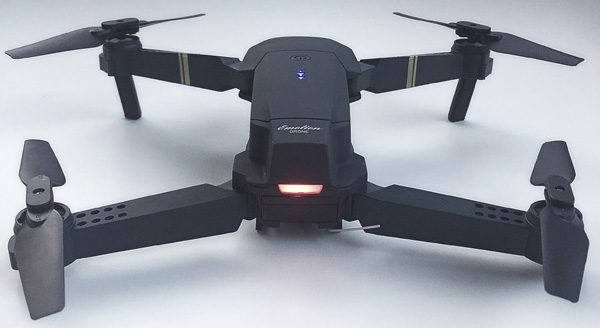
In addition to the “headlights” on the front, the rear of the E58 includes a single red light bar that resembled as car’s tail light, as seen in the image above.  Again, this light on the rear can help in visually determining the flight orientation of the E58.
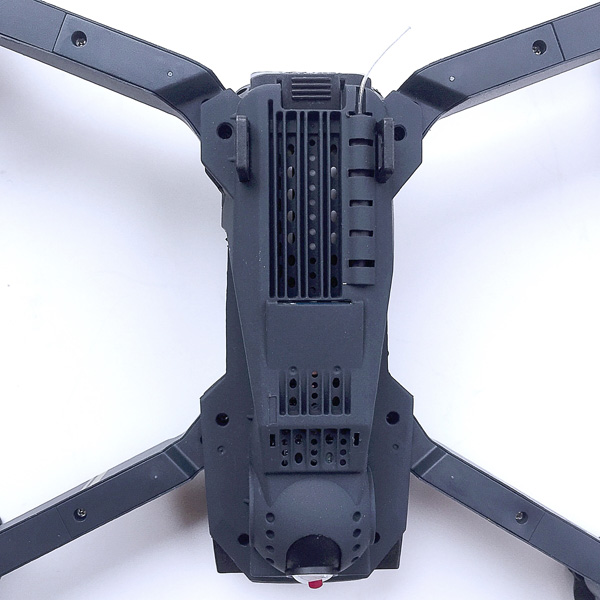
Let’s take a look at the underside of the E58.   As seen in the image above, a small antenna that resembles a short length of fishing line protrudes from the back end of the drone.  Also, you can see some of the electronic innards of the E58, visible through the slats of a grille on its underbelly.  There are several sets of grilles and holes around and on the E58’s underside, presumably to allow heat to escape during flight, since I did notice that the E58 gets quite warm after only a few minutes of operation.
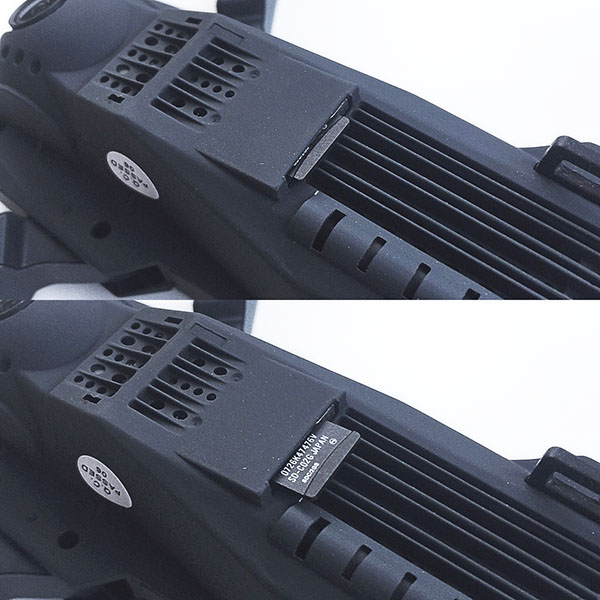
Another feature located on the underside of the E58 is the Micro SD card slot, which is spring-loaded so the card “clicks” in place when pressed in and “clicks” back out when pressed again.  The E58’s video and still camera can record to this Micro SD card during flight.  The drone can record 720p onboard to this card.  Note that a Micro SD card is not included, you must supply your own.
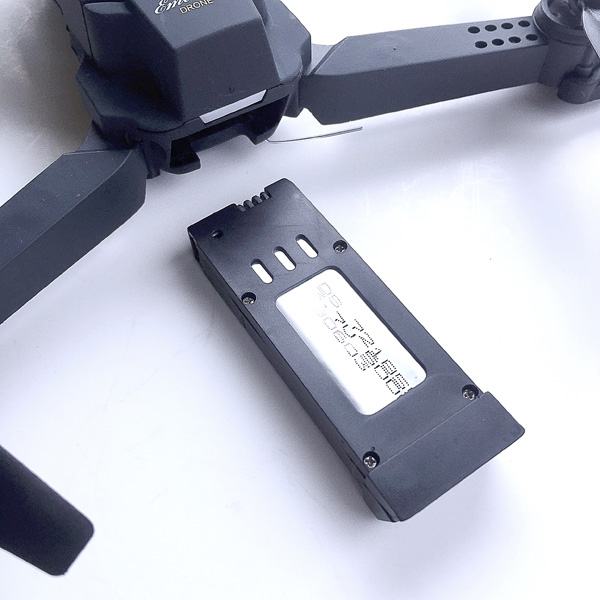
The E58 is powered by a single, rechargeable 3.75V battery that slides into a slot in the back of the drone, as seen in the image above.
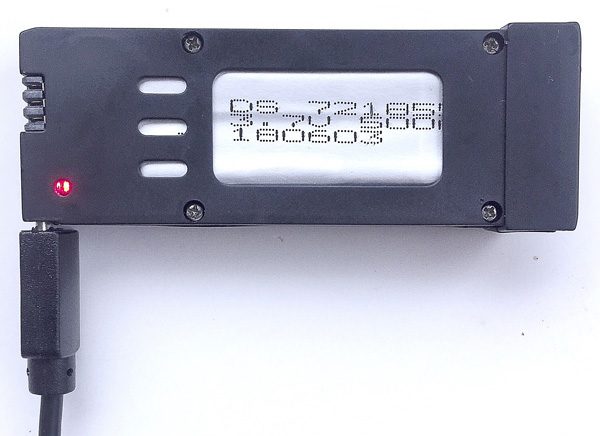
This battery is charged by simply plugging in the included micro USB cable, as seen in the image above.  When charging, a small red LED is illuminated, which turns off when the battery is fully charged, which is typically about an hour if it has been fully drained.
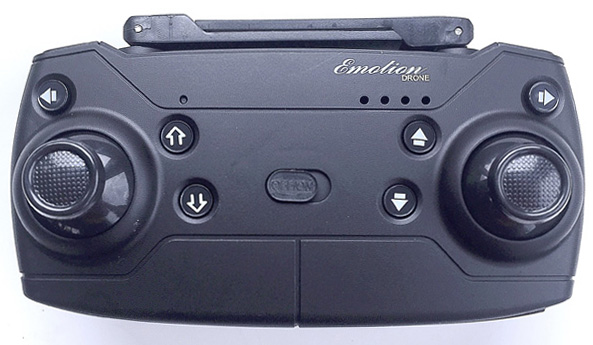
Next, let’s check out the E85’s controller.  As seen in the image above, it has two joysticks and multiple buttons that are all used to control various features of the E58 during flight.  It resembles the styling of the DJI Mavic Pro drone’s controller as well, which I suspect is not a coincidence.
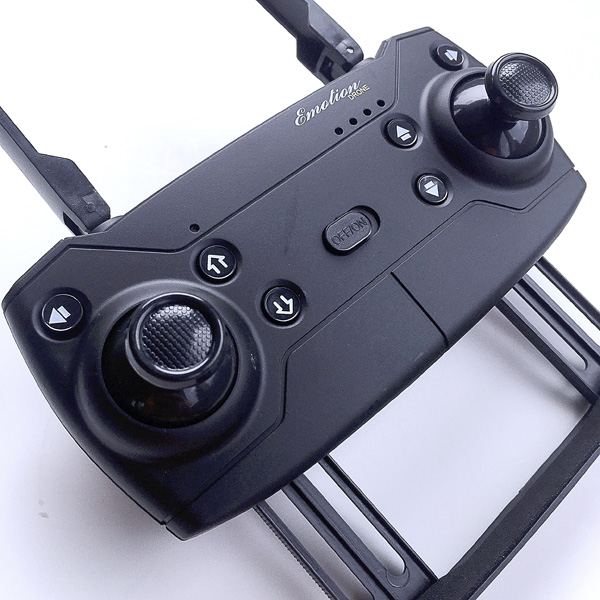
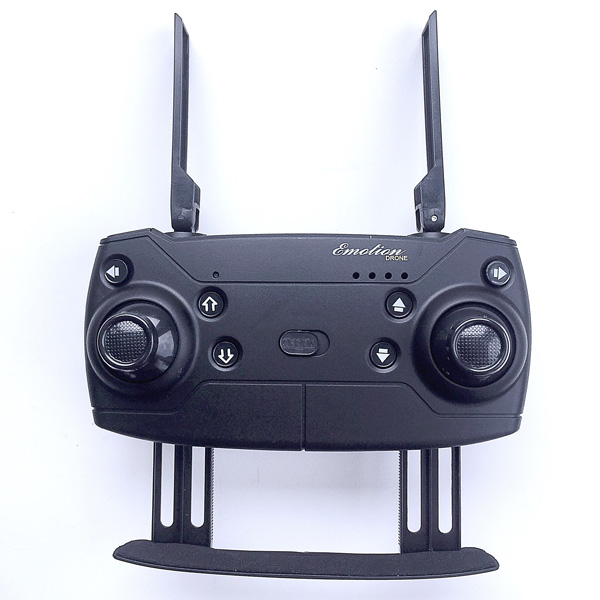
The controller has two collapsible “antennae,” that appear to be for styling purposes only and not for any sort of actual function.  In addition, the controller has a hidden tray that slides out from the bottom and can be used to mount a smartphone (more on this below).
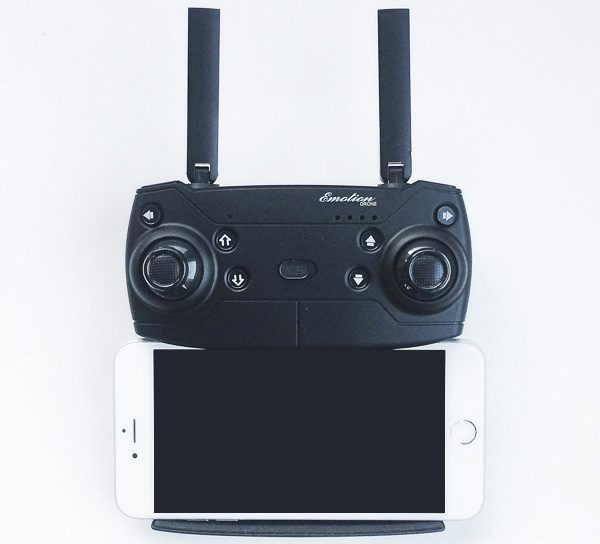
The controller’s smartphone tray held a phone as large as an iPhone 6 Plus, as shown above; however, this seemed to be putting quite a bit of strain on the tray and I wouldn’t recommend placing a phone quite this wide here.
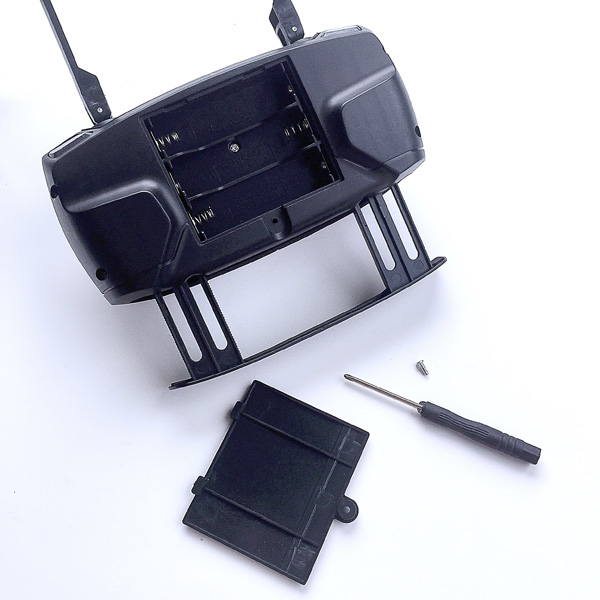
The E58’s controller is powered by three (3) AA batteries, which are not included.  However, a small screwdriver is included, which facilitates removal of the tiny screw that holds the battery cover in place, as seen in the image above.  Just be sure not to lose that screw, or you’ll be screwed (pun intended).
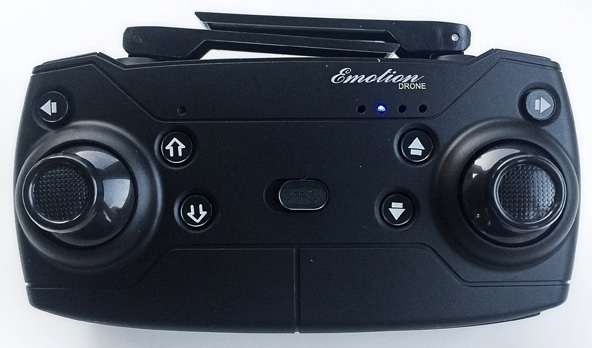
Sliding the On/Off switch in the center of the E58’s controller powers it on, which is indicated by the illumination of a small blue LED, as seen in the image above.  As with the E58 drone itself, this LED appears to be in a bank of four that would seem to indicate the controller battery’s power level, but this does not seem to actually be the case; only the second LED from left is ever illuminated and this did not ever seem to change no matter the controller’s remaining power level.

Let’s take a look at the controls, starting with the front face of the controller.  The left joystick controls the throttle; forward on the stick is increased throttle, backward on the stick is decreased throttle.  Letting go of the stick allows it to center itself.   Pushing the stick right or left will rotate or “yaw” the drone about its vertical center axis in that direction.  Pushing the right joystick up or down controls the forward and reverse motion of the drone, while pushing the right side stick right or left “slides” the drone laterally in that direction.  One other feature of the joysticks is that the E58 can be calibrated by pushing both joysticks down and to the right.

The arrow buttons in the upper left and upper right of the controller are the fine tuning left and right controls.  The hollow up and down arrow buttons to the left of the on/off switch are the one-touch launch and one touch land buttons.  The one-touch launch button starts the motors and immediately launches the drone into the air, while the one-touch land button brings the drone down to the ground fairly gently, then kills the motors.  The solid up and down arrow buttons to the right of the on/off switch are the fine tuning forward and backward controls.
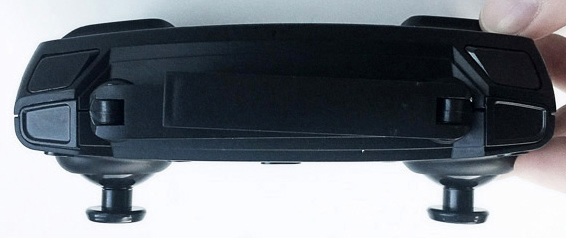
Next let’s look at the four buttons on top of the controller, as seen in the image above.  Starting from the left side, the button in the upper left, farthest from the front of the controller, operates the “Headless Mode” (a short press) and One-Key Return (a longer press).  The Headless Mode essentially make the drone fly as if the controller is its reference point; I found this mode to be difficult to adjust to.  The One-Key Return was a bit dodgy.  Because this is a lower-end drone without the GPS capability of the higher-end drones, this “return” function does not work as well as you might expect.  It basically turns the drone around to a heading that is pointing toward you, but you have to actually fly it back to your location yourself; it does not fly itself to you.  The button in the lower left, closest to the front of the controller, is the Photo/Video button, though this button never did seem to work; I had to control the still and video camera features with the app on an iPhone (see more on this below).  Moving to the right side, the button in the upper right, farthest from the front of the controller, operates the “360 Flip” (a short press) and Emergency Stop (a longer press).  The 360 Flip is fun; you press the button, then press the right joystick left or right to force the ED58 to flip in that direction.  Also, be very careful with the Emergency Stop—it kills all of the motors immediately and the drone drops to the ground like a rock, which could be very damaging if the drone is at high altitude and drops onto a hard surface (fortunately I only tried the E58 on grass).  The button in the lower right, closest to the front of the controller, is the Speed Switch.  This cycles the drone from 30% to 60% to 100% then back to 30% speed level with each press.  As a neophyte drone pilot, I kept the E58 in 30% most of the time while I acclimated to the controls, but I can tell you that the 60% and 100% speed rate settings are quite fast and experienced pilots will really like them.
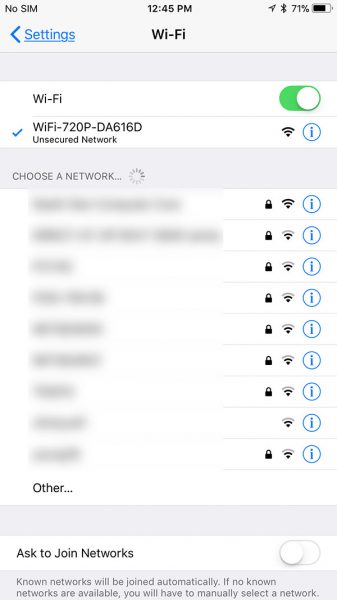
Next, I tried controlling the E58 via app.  Eachine recommends an app called “JY UFO” which I downloaded for free from the iOS App Store.  Since the E85 has WiFi capability and essentially projects a mini Wi-Fi hotspot, I followed the instructions on the app and connected the drone to the iPhone by going to Setting on the iPhone, then Wi-Fi, then selected a signal called “WiFi-720P-DA616D,” seen above.  This essentially connected the iPhone to the E58 just as if it were a WiFi router; however, this is really only a link between the E58 and my iPhone, with no actual internet access and no data roaming, so you don’t need to be in range of an actual WiFi router to make this work.  I then re-launched the JY UFO app and started playing around with the controls.
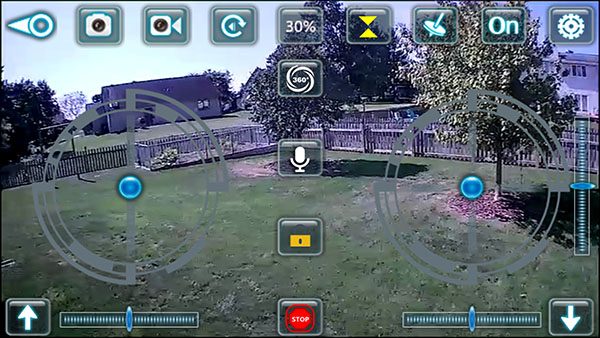
The above image depicts what I saw on the JY UFO app.  The background of the app is what the E58’s camera is “seeing” at any given moment.  The left and right joysticks, as well as other controls, are simulated on the app’s screen.  In addition, the app allows the E58 to be controlled in gyro mode, which bypassed the simulated joysticks on the screen and lets you control the flight attitude of the E58 by tilting and tipping it.  However, I found this to be quite challenging (I probably need a lot more practice on this).   Yet another method of controlling the E58 with the app is “Mission Planner” mode, in which you trace a trajectory on the app’s screen, then the app directs the E58 to fly in that trajectory.  I didn’t find this mode of controlling to be all that accurate or useful.

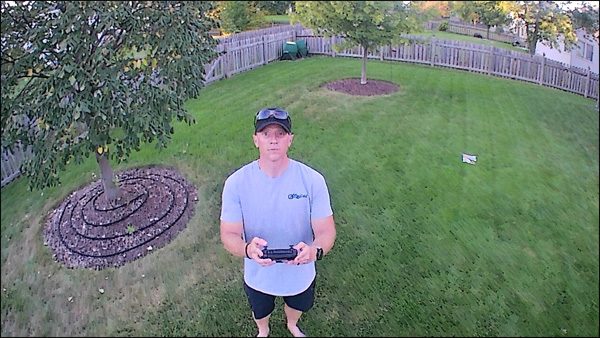
Of particular interest is that, as mentioned above, I could only control the still and video recording features using the app, not the controller.  Using the JY UFO app allowed me to record both images and video in 1280×720 resolution; the still images were stored in my iPhone’s Photos, while the video was stored on the Micro SD card.  The images had a bit of a “fisheye” effect, but the video footage did not.  Although I found the E58’s dedicated controller a but easier to learn, I liked having the flexibility to control it with the app instead; this way, if I wanted to leave the controller behind to save space, I always have my phone with me as a controller.
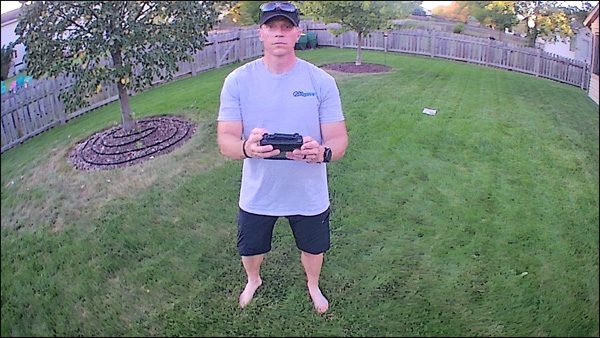
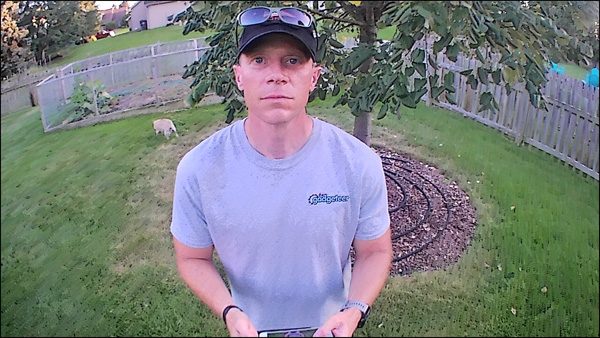
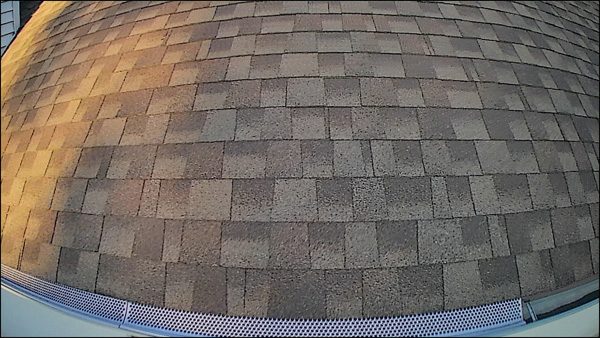
I flew it over my roof a bit.  I could envision using the E58 to check out how clogged my gutters are getting, or even to check for shingle damage after a severe storm; however, the resolution does not lend itself to a great deal of detail.
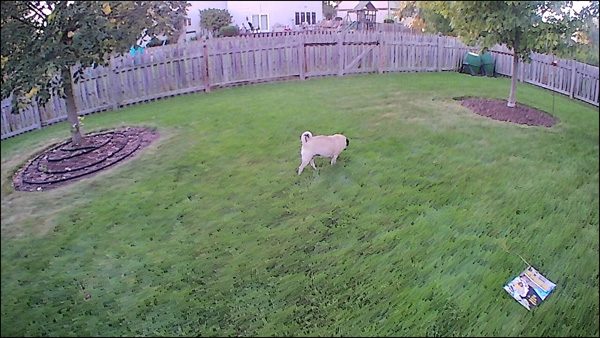
I even followed one of my pugs around the yard with it.  (FYI, she didn’t seem to pay much attention, unless I flew really close to her.)  I didn’t have the opportunity to fly the E58 in elevated wind conditions, but I did have a few breeze gusts here and there, and it stayed surprisingly stable in these conditions.

I was able to get about 8-10 minutes of flight time before the E58’s battery was drained, which it indicated by blinking its lights just before it fully died.  However, you could purchase multiple batteries and swap them out for longer flight sessions.
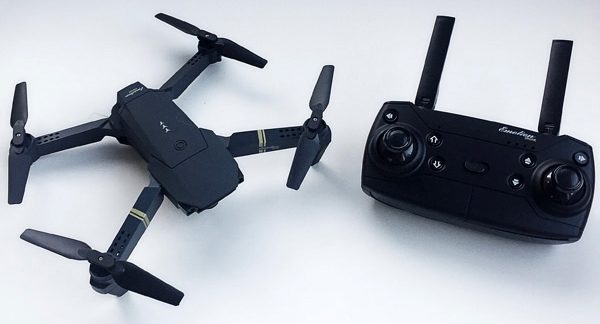
What I like

  • Very portable: small, compact size and lightweight
  • Styled like the DJI Mavic Pro Quadcopter Drone
  • Stable–can basically hover if you can get it set up right, which is great for photos and videos
  • Fairly easy to fly once you get the hang of it (but I still need some practice!)
  • Fairly robust to crashes despite having a fragile look and feel

What needs to be improved

  • Camera/video button on controller appears to be non-functional; these functions can only be controlled when using the smartphone app
  • The instruction book is very difficult to understand due to the broken English translation (presumably from Chinese)

Final thoughts

EACHINE E58 RC Pocket Quadcopter Drone is a small, lightweight, miniature drone that has a lot of features, is fairly easy to learn and quite fun to fly once you get the hang of it.  It can also record some decent photos and videos and has multiple options for controlling it.  Considering what you actually get with this drone and its “fun factor,” I think it is a pretty decent value for its price of $75.99.

Price: currently $64.99
Where to buy: Can be purchased directly from Eachine, from Amazon
Source: The product sample for this review was provided by Eachine.

Filed in categories: Reviews

Tagged:

EACHINE E58 RC Pocket Quadcopter Drone review originally appeared on The Gadgeteer on September 30, 2018 at 1:19 pm.

Note: If you are subscribed to this feed through FeedBurner, please switch to our native feed URL http://the-gadgeteer.com/feed/ in order to ensure continuous delivery.

AirSelfie2 flying camera review

REVIEW – Everyone either has or wants a drone and it’s hard to fault them because drones are both fun and useful. They are fun because you can capture awesome video from locations that you would otherwise never be able to do. And drones are useful because you can use them to see things like your roof, gutters, etc, without climbing a ladder. All this fun and usefulness can also equal an expensive and bulky gadget. Let’s check out the AirSelfie2 pocket-sized flying camera and see if it’s just a toy or a worthy pocket drone.

What is it?

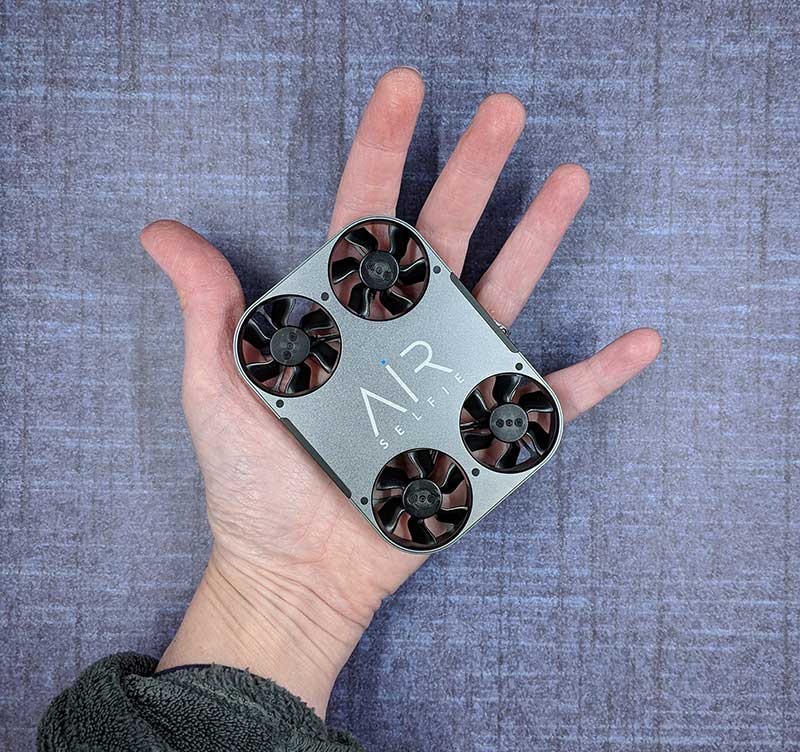
The AirSelfie2 is the 2nd generation AirSelfie flying camera which is a small playing card deck-sized drone that is designed to… you guessed it… take selfies and capture video.

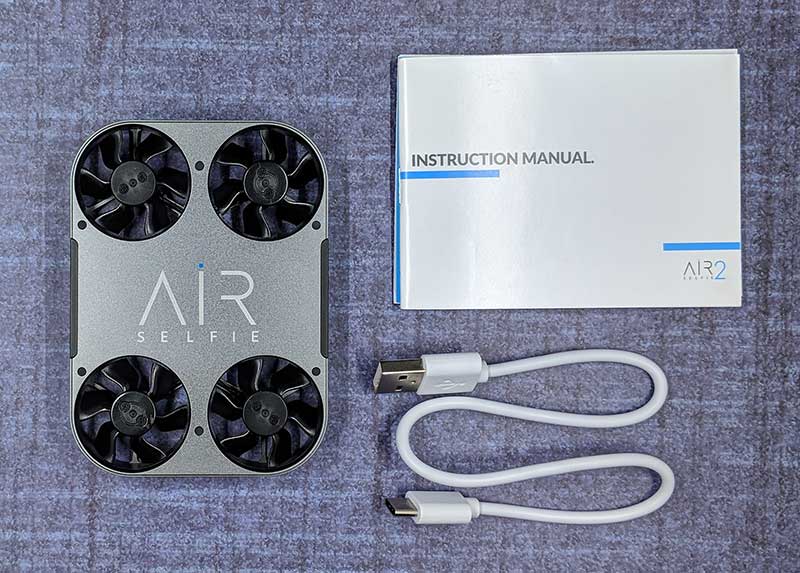
What’s in the box?

  • AirSelfie2 drone
  • USB-C charging cable
  • Storage case (this was missing with my sample)
  • Instruction manual

Hardware specs

Video:1080p 30fps – Photo:12MP wide-angle (81°)
Wide-angle: ƒ/2.0 aperture
Gyro/Barometer/Geomagnetic sensor
Brushless motor
Built-in Micro SD card 16GB
400mAh 7.4v Built-in Battery
2.4G Wi-Fi
Control distance 65 feet / 20 meters
Size:98.5 x 71.2 x 13.6mm (3.8”x2.8”x0.5”)

Design and features

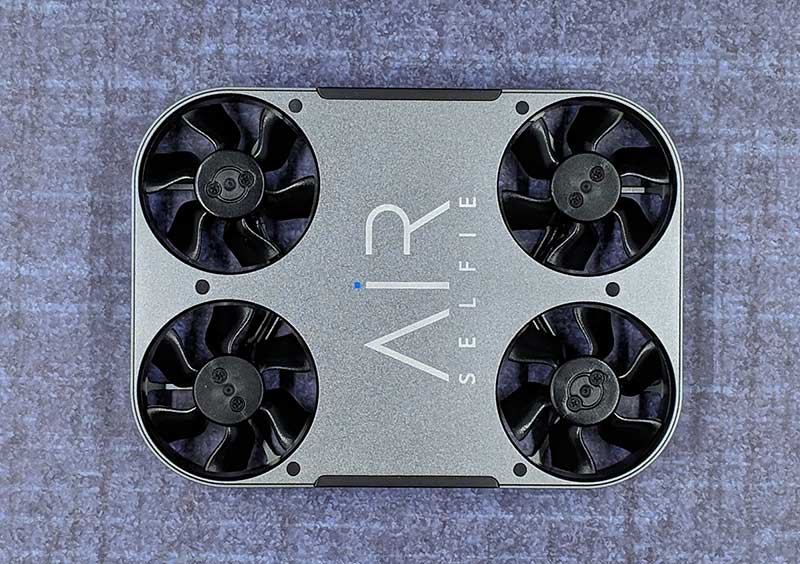
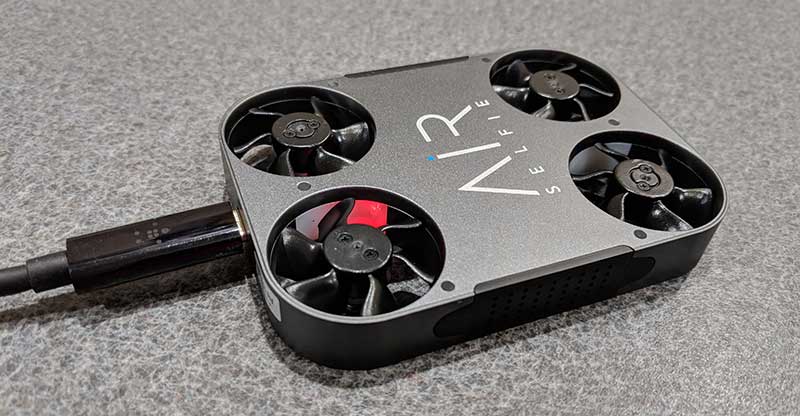
The AirSelfie2 is a sharp looking little drone with a gray metal colored aluminum housing and four propellers.

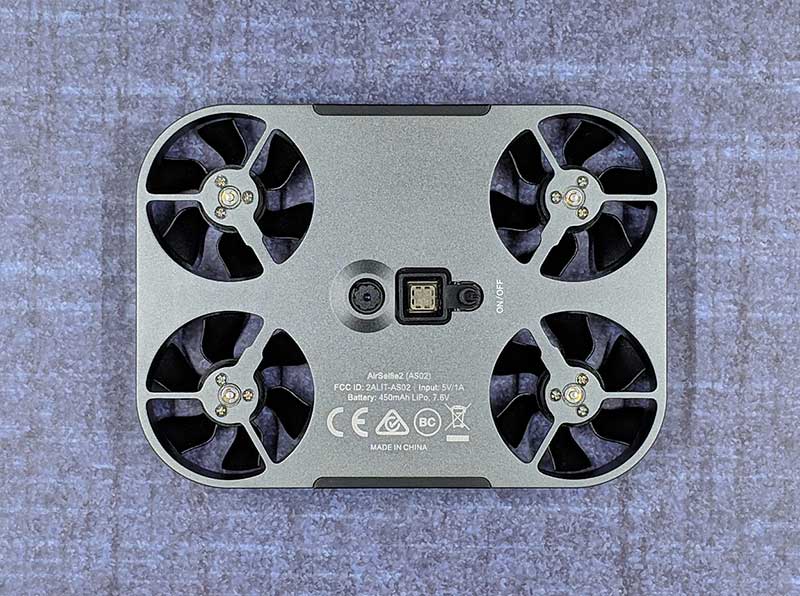
On the bottom side of the drone, you find two sensors and the power switch. The round sensor on the left is the visual sensor and the square sensor next to it is the sonar sensor. The small button on the right is the power switch which you have to hold in for a few seconds to toggle power.

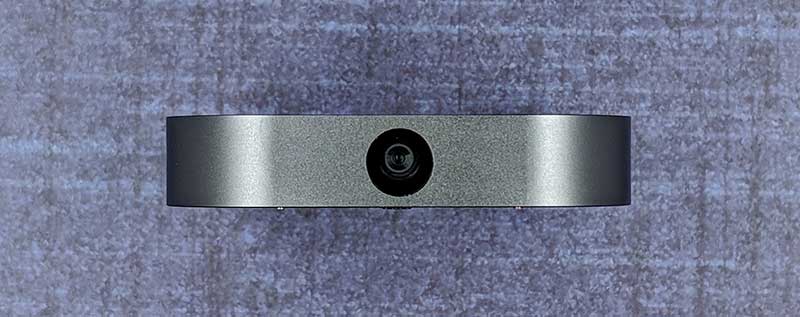
There’s a 12MP camera one end.

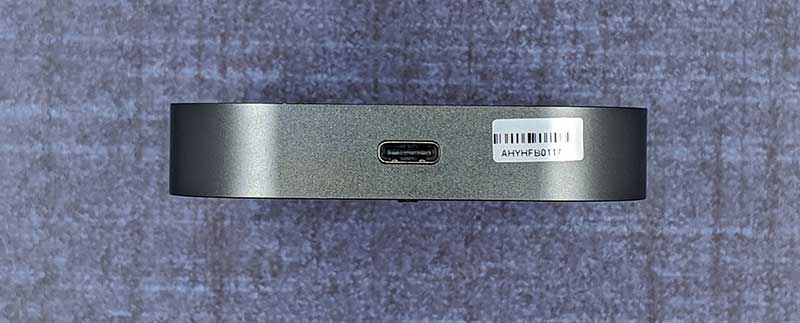
And on the opposite end, you’ll find a USB-C charging port.

The AirSelfie2 looks like a gadget that James Bond would use on a mission. Although it’s lightweight, it doesn’t look or feel like a toy. It’s well made and the design looks much more robust than some small plastic drones I’ve tested in the past.

Let’s fly!

Before you can fly the AirSelfie, you have to charge it using the included (or any) USB-C charging cable. It takes about an hour to fully charge the battery from fully empty to full which provides up to 5 minutes of flight time. While charging, an LED in one of the propeller areas glows red. When charging is complete, the LED turns off. This status LED also glows blue when the AirSelfie is powered on.

You will also need to install the iOS or Android Airselfie app on your phone or tablet. I tested the AirSelfie2 with my Pixel 2 XL.


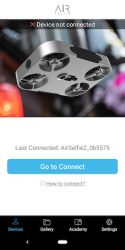
The app doesn’t use Bluetooth to control the drone. It generates its own WiFi connection. Each time you want to fly the AirSelfie, you have to power it on, launch the AirSelfie app, and then go into your WiFi settings to connect to the AirSelfie’s WiFi.


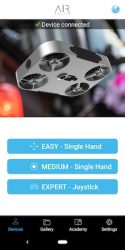
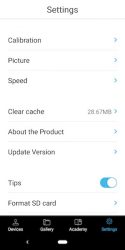
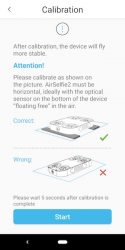
The app is pretty basic, It offers 3 different flight control styles, a way to calibrate the drone, and a few settings that you can customize. The flight control styles include an easy one-handed version shown above on the left and a slightly harder one-handed version on the right which controls the drone by physically tilting the phone in the direction that you want it to fly.

The other two control styles are two-handed joystick style touchscreen controls.

I tried all of the control styles but I kept going back to the easy (first style) because it’s easier. Go figure 🙂

I thought the AirSelfie sample that was sent to me was defective because I couldn’t get the propellers to spin up when I would press the arrow button in the app. It took me a while to figure out that you need to press and hold that button for a few seconds to start the propellers. Then you have to place the drone on your flat palm with the camera facing you and toss it gently in the air. It might sound scary, but launching it is easy. Landing it is a bit harder. You’re supposed to bring your hand up under it and grab it. Most of the time when I did this, the propellers would spin fast like the AirSelfie was a captured bug trying to get away. I finally learned that you have to grab it and raise your hand to signal it to turn off.

Pics and video


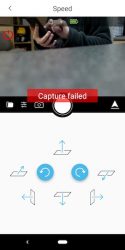
Since the AirSelfie2 is marketed as a flying camera, I had hopes that it would be a good flying camera and taking pictures and capturing video with the app was easy when it worked. But regularly, I’d see a capture failed message on the screen when I’d tap the shutter button. To fix this issue, I would have to restart the app and/or cycle power on the AirSelfie. I found this to be an annoying problem that seemed to happen right when I could have captured a decent selfie.


Most of the time my selfies were at weird angles or chopped off half of my body. Indoor selfies just look ok although I think they are a little dark and on the flip side, outdoor selfies can be completely blown out if it’s a sunny day. Click the images above to see the full-sized picture.

The AirSelfie2 can also capture video. Video without sound though… which is to be expected because the propeller noise would drown out any other noise. Check out the video below that shows how to fly it and video from the AirSelfie2 itself.


From the short video, you can tell that the AirSelfie2 is NOT a stealth drone. It makes quite a bit of noise and the video capture quality is about the same as the image capture quality – not stellar. It also drifts while hovering, so you end up cutting off half a person when you press the shutter button.

What I like

  • Tiny pocket size
  • Good build quality

What needs to be improved

  • Image and video quality
  • Drifts while hovering
  • Short flight time (3-5mins)
  • Would be nice to have a self-landing feature so you don’t have to grab it out of the air

Final thoughts

I tested the AirSelfie2 on multiple occasions and had the same results each time. The images that this little flying camera capture just arn’t that good for a $200 camera. Yes, the device is cool, but cool only goes so far. My advice is to save your money and buy a drone from a brand name that has 3 initials and a built-in gimbal 🙂

Price: $199.95
Where to buy: Amazon
Source: The sample for this review was provided by AirSelfie.

Filed in categories: Reviews

Tagged: ,

AirSelfie2 flying camera review originally appeared on The Gadgeteer on September 14, 2018 at 9:00 am.

Note: If you are subscribed to this feed through FeedBurner, please switch to our native feed URL http://the-gadgeteer.com/feed/ in order to ensure continuous delivery.

Potensic T25 Drone with 1080P HD Camera review

REVIEWS – Potensic’s new T25 drone has a lot of features, almost too many to grasp. Want to know more? Read on.

What is it?

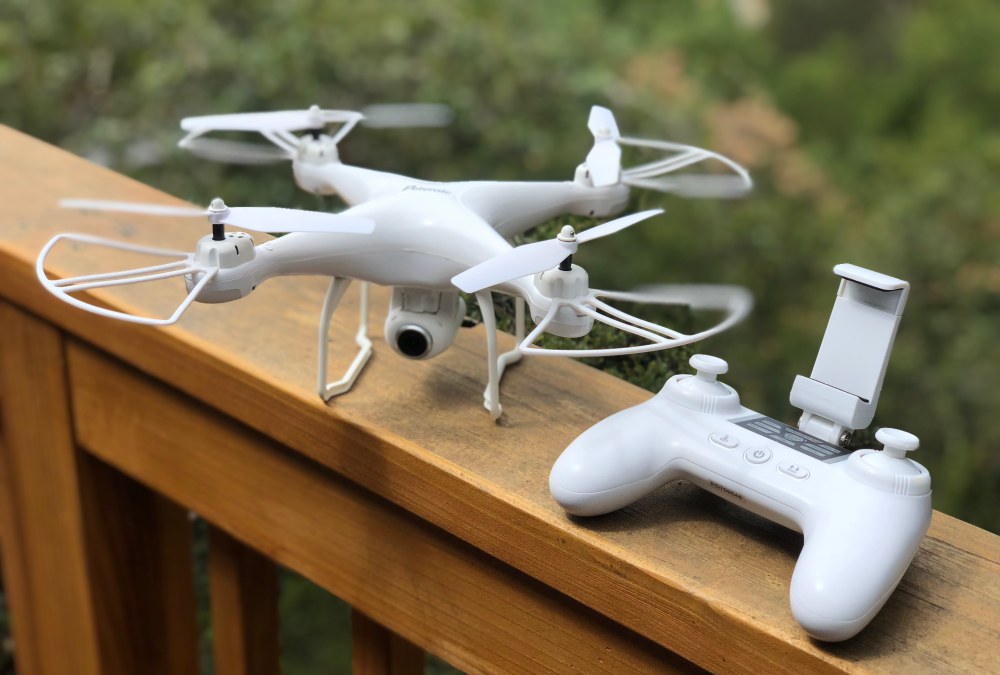
The T25 is a small to mid-size drone with a full suite of capabilities including takeoff and landing assist, return to home, full 1080P recording and much more. Are you looking for your first drone or an upgrade from a low-cost mini-drone? Let’s take a look at the T25 and see if their feature set and performance are right for you.

Hardware specs

Drone GPS and specs
– Follow Me, GPS return home, GPS positioning and hold, Geo-Fencing, and Low Battery Return
Drone inflight features
– Headless mode, Auto Takeoff / Landing / Hover, 9-Axis gyroscope, Color-coded dual LED lights, 2.4G technology
– Range: Up to 300m (Image range up to 100-150m)
– Max Height: Up to 120m, Max Speed: Up to 25km/h
Camera
– HD Wifi Camera with 75º articulating 120º wide-angle lens
– Optional SD card (sold separately)
Battery
– 3.7v 1000mAh lithium ion
– Micro-USB port allows for charging in or outside drone
– LED lights for battery level indication
Controller
– Internal lithium polymer battery
– Micro-USB port for charging

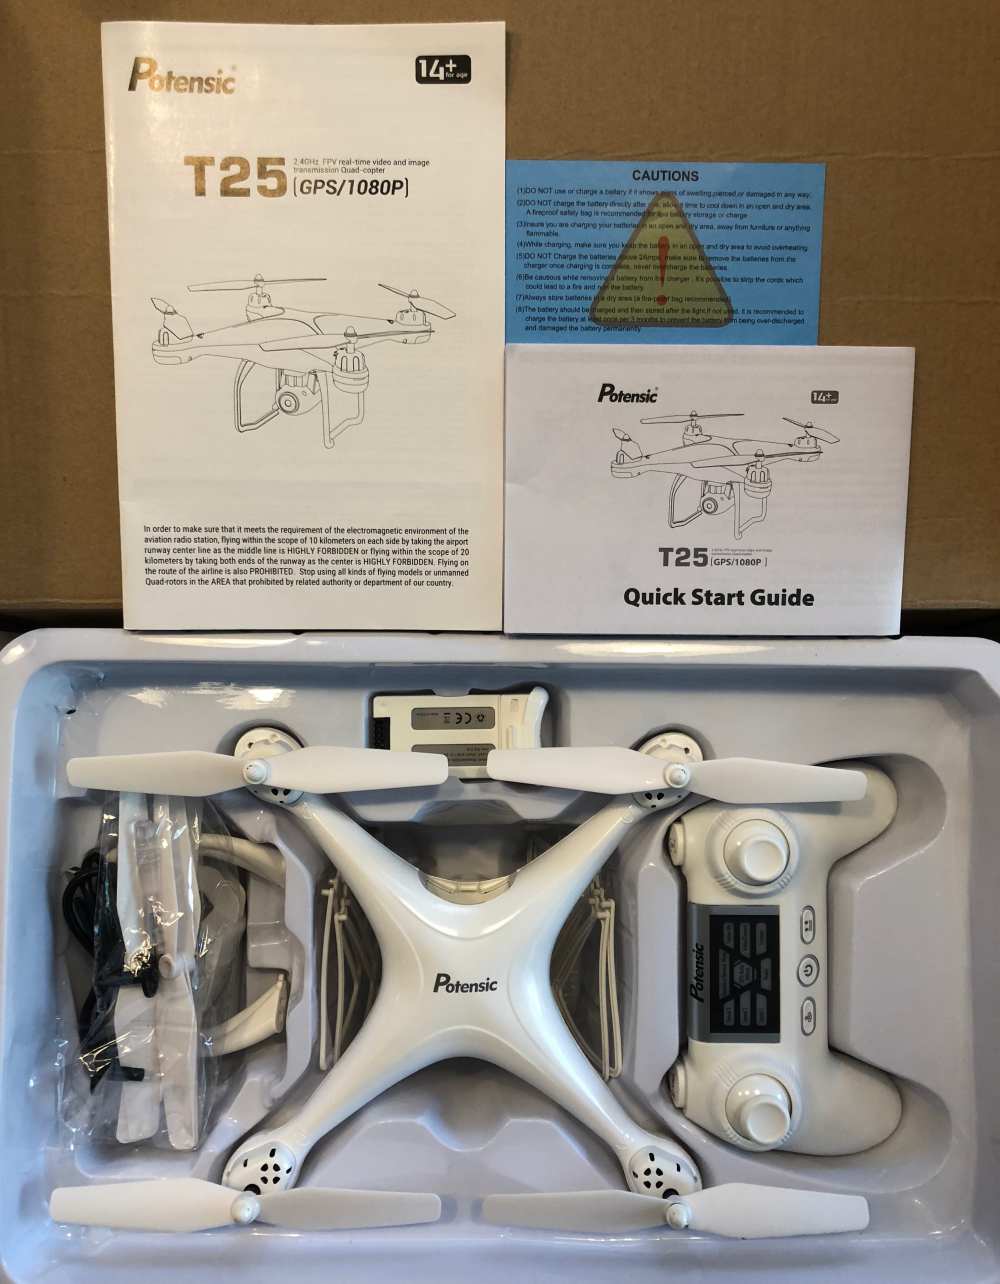
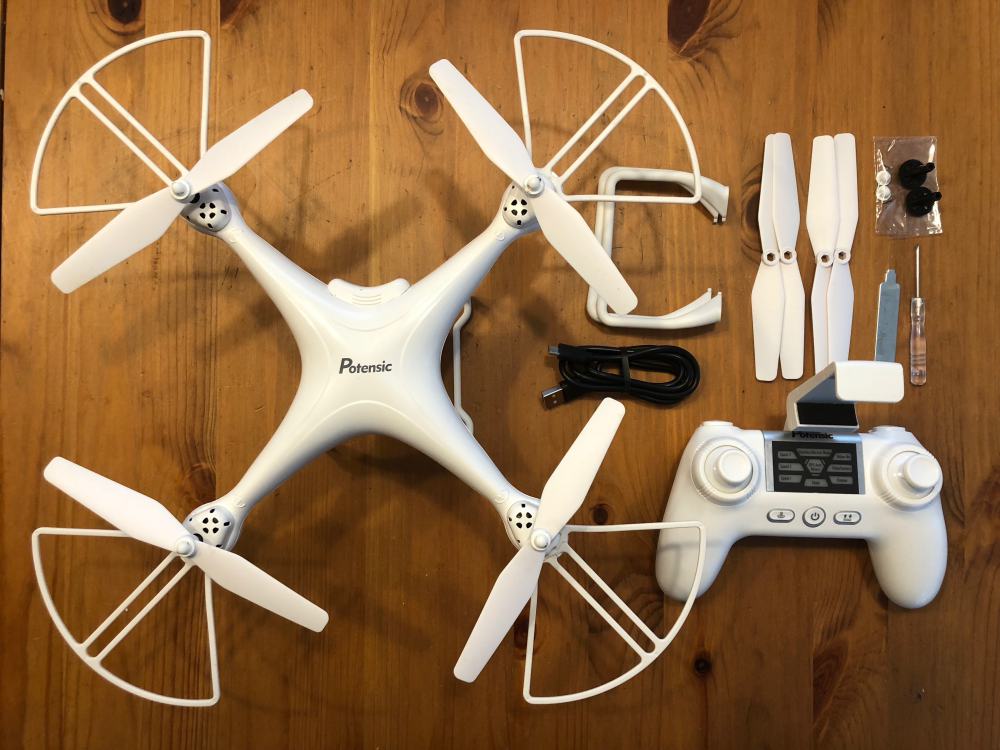
What’s in the box?

  • (1) T25 Drone
  • (1) 1080P HD camera module
  • (1) Transmitter w/ mobile phone cradle
  • (1)  3.7V 1000mAH Battery
  • (1) User Manual & Quickstart Guides
  • (1) USB Battery Charger
  • (1) Screwdriver, (1) Wrench
  • (4) Propeller Protection Guards
  • Spare Parts
  • (2) Landing Leg pairs
  • (4) Propeller Blades (2 each rotational direction)
  • (2) Propeller gears, (2) Propeller caps, (4) Propeller screws

Here’s a better look at those parts removed from the packaging.

Design and features

Functionally, the design of the T25 is well done. The landing legs are replaceable as are the propellers and the propeller guards. The will hold most (if not all) smartphones and the app works well during use. From an aesthetic standpoint, there is little here that stands out as being unique to this drone so I would forgive almost anyone for mistaking it for a drone from the market leader. Maybe that’s the point, but in the end, while you are watching the drone as you fly, you quickly start to go heads down and watch your phone where the camera feeds a live view. As bland as the exterior may be, you’ll want to avoid putting stickers on or painting it as even adding the 4 propeller guards changes flight characteristics and a medium gust of wind definitely does. Let’s move on to set up and performance.

Setup

If you’ve had a drone before, none of the following is likely to surprise you. If not, let’s just say that setup isn’t hard, it’s just not fast nor straightforward if you’re expecting something similar to an RC car. The T25 is relatively assembled in the box, but as you saw in the photos above, there are so many additional small parts, both required and spares that it still feels like a kit instead of a finished product. That’s actually part of the charm in some respects.

If we boil it down, the setup process is as follows…

  1. Charge the batteries
  2. Install a microSD card (not included) into the camera
  3. Press the propeller guards into place
  4. Install batteries in the controller
  5. Install the phone cradle into the controller
  6. Download and launch the Potensic-G App

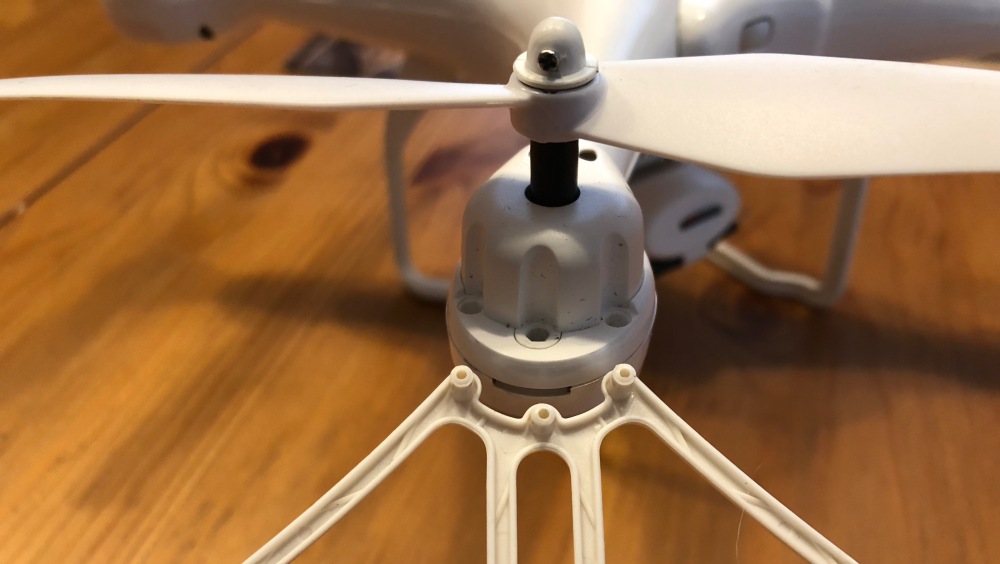
Here’s a shot of the propeller guard posts and the press-in receivers on the drone. It literally is a press-fit.

Right about here is where you think you’re ready to fly, and you kind of are. As a drone novice, I underestimated the amount of time the next steps would take including getting comfortable piloting the drone. While awaiting the review sample to arrive I did happen to notice that the battery provides about 8 minutes of flight time, so I ordered a spare battery from Amazon so that I’d have double the flight time between charging sessions. All that out of the way, here’s the next set of setup instructions. (Feel free to skip this if you’re familiar with drone calibrations)…

  1. Turn on the drone and set it down on a level surface, and all lights should be blinking red (This is an important step as the drone will use this as its perception of flat – You should also be in a wide open space, and the lights can be hard to see in strong sunlight)
  2. Turn on the controller (Here’s where it gets all secret game code-like)
    1. Press UP then DOWN on the left joystick
    2. Front lights will flash WHITE, rear BLUE
    3. On your phone hop into settings and connect to WiFi broadcast by the drone (Potensic-xxx) then jump back to the app
    4. Calibrate the gyro by pressing each joystick to the forward and outward corners (left @ 11, right @ 1) – lights should blink rapidly
    5. Calibrate the compass by pressing each joystick to the forward and inward corners (left @ 1, right @ 11) – lights should now add a red between the flashes (white/red in front, blue/red in rear)
    6. Pick up the drone and in one smooth motion turn your body in a circle keeping the drone level in front of you – rear lights should go solid blue
    7. Now tip the drone face down (propellers forward) and do the same thing keeping the drone in this position – front lights should go solid white
    8. The app should confirm calibration okay and you will set the drone back on the level surface where the lights will return to respective white/blue flashing while the drone is ‘Waiting for GPS signal’.  [NOTE: If you happen to be somewhere where you cannot get a GPS lock (large indoor area?), you can press and hold the right joystick for 2 seconds to disable GPS. Keep in mind that will also disable any of the features reliant on GPS like return home and follow me.]
    9. When the lights return to all solid you’re ready to fly and the app should say so.
    10. Last thing that was not mentioned anywhere that I could find is that in the app, you need to click on ‘CONTROLS’ to get to the flying screen.

Performance

There are a lot of controls on the controller (which makes sense), but it makes for a learning curve that’s as steep as your familiarity with this kind of setup. If you play any kind of modern gaming system you’ll already be more likely to jump in. Let’s take a look at all those controls quickly…

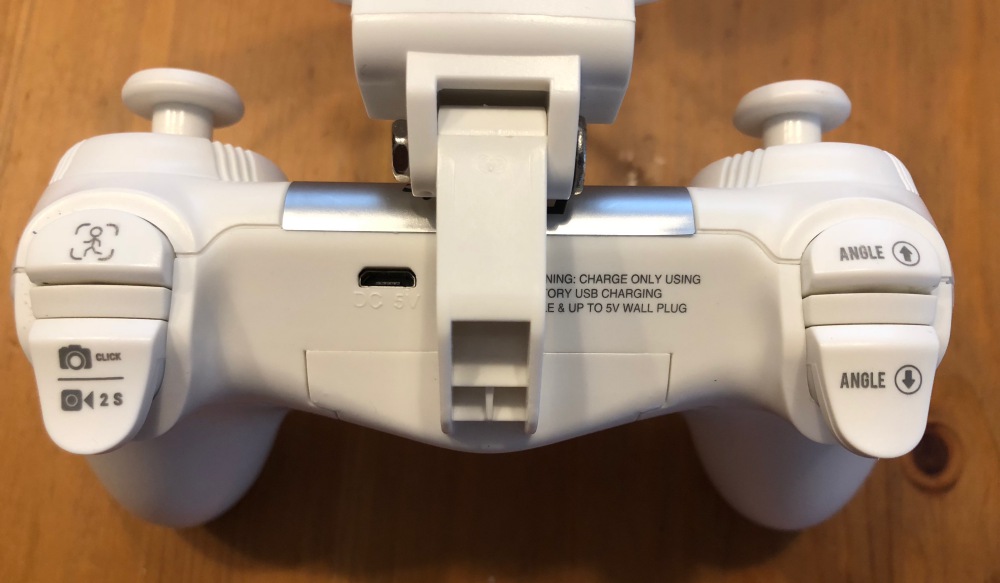
Above you see the trigger controls for [follow me], [camera/video] and on the left hand [angle up] and [angle down] adjustments

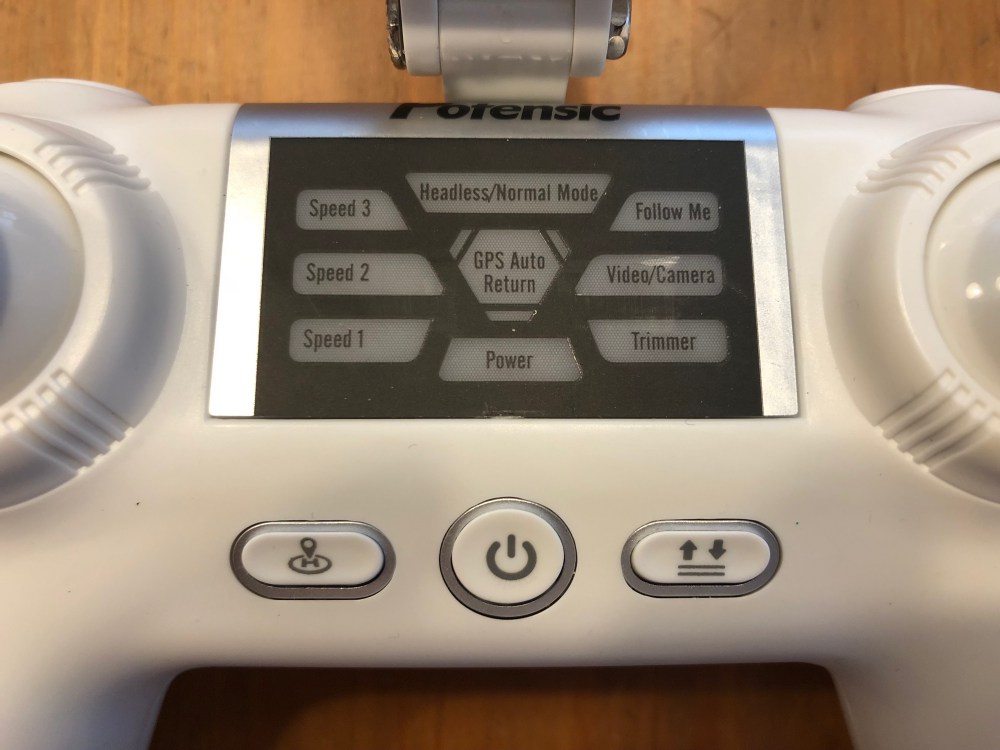
Here are the [return to home] , [power] and [takeoff/landing] buttons along with a whole lot of indicators above which help to communicate which settings the drone has active. These are lit well during use and hard to confuse.

When it comes to actually flying the drone, Potensic has done a few things that aid a new pilot significantly. The first is a one button take off which literally works as advertised. Press that button and the propellers whirr to life lifting the drone to about 5 feet off the ground at which point it just unnaturally maintains its position. Auto land is another that just takes a huge headache away by just landing for you.

A unique feature is “headless” mode which basically translates to the controls never switching orientation. This means that forward is always forward based on the starting position of your controller and left is always left of that forward motion. This is super useful if you’re thinking grid style, but if you turn around because you flew the drone behind you, you’ll need to mentally remap the controls to have the drone do what you want it to do.

Follow me is a feature that got me really excited and in my first attempts also concerned me the most. I don’t trust the GPS on my phone to be accurate to within 10 feet. When experimenting, the drone does what it’s supposed to do and if you back up, it advances. The problem is that with some GPS drift, sometimes it would get a little closer than I expected which resulted in me stepping back and it continuing to advance. Comical right? Also scary.

So as a new pilot, the reality is that it learning to fly is a bit stressful and just when you think you’ve got it, something changes and your gut reaction ends up causing a problem. It’s also a bit frustrating to see all these beautiful drone-shot videos on youtube and other media outlets, only to realize that it’s not quite that easy to get that beautiful shot without a lot of practice. So here are a couple of reference comments for you to consider.

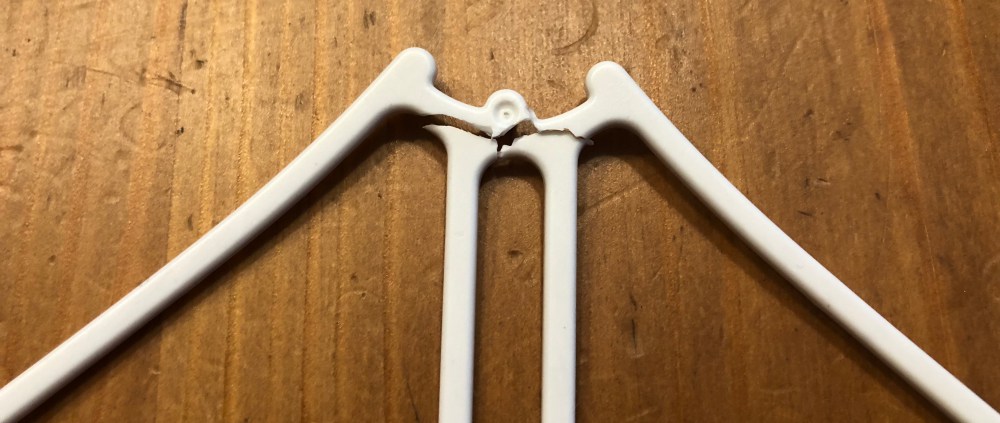
I only had one real ‘crash’. It was before I discovered headless mode and I ended up sending the drone into the side of our car. The propeller guards did what they were supposed to do and kept both the car and the drone uninjured, but one propeller guard snapped. It would be nice to have some spares in the box as it seems like these are more likely to be needed than spare landing gear, but then again who’s really to say.

The on-board video camera is why I think drones intrigue most of us, and the T25 boasts 1080P. Note that both the below videos are posted here at 720. On a recent family vacation, we were filming a sequel to an ongoing saga of movies with our kids as action heroes. There was a scene with my older kids running towards the beach and it seemed like the perfect opportunity for a drone shot. In the video below you’ll see that while it worked, I didn’t account for the amount of wind and controlling the drone was quite difficult. I will say that it was impressive to see the T25 tilted at almost a 25º angle and just holding its position which was right at the beginning of this video.

Here’s another video of one of the earlier flights just getting the hang of the controls and even just comfort level of having it head back towards me. The camera does a pretty good job, but it can be a bit jumpy and the clarity isn’t quite as good as I was hoping.

A couple of things to note about the way the camera works. You see exactly what you’re shooting on your controller display (iPhone in my case). Any photos or videos are recorded directly to your phone as well as an SD card if you have it installed. Videos record in .avi format on the SD card while .mov on the iPhone. That’s helpful as macs don’t read .avi natively so you’ll need to grab VLC or some other player/editor. I did not see resolution differences between the SD card recordings or the iPhone recordings.

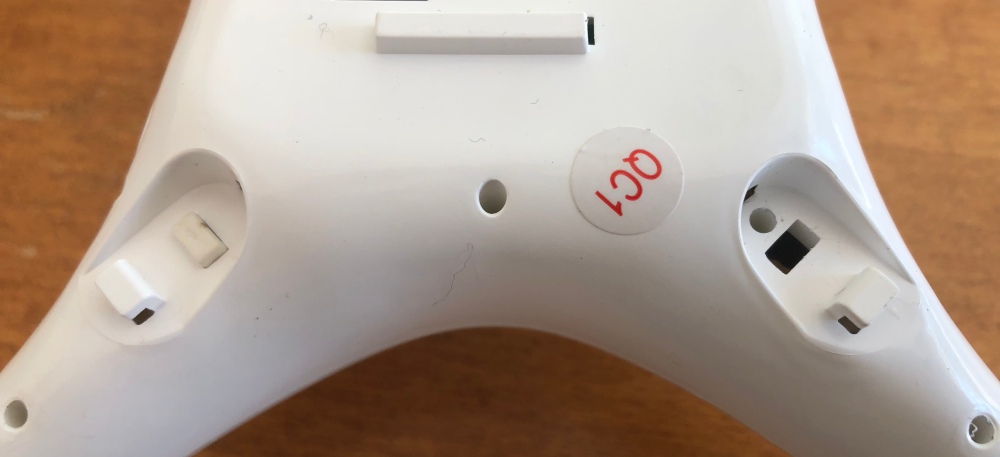
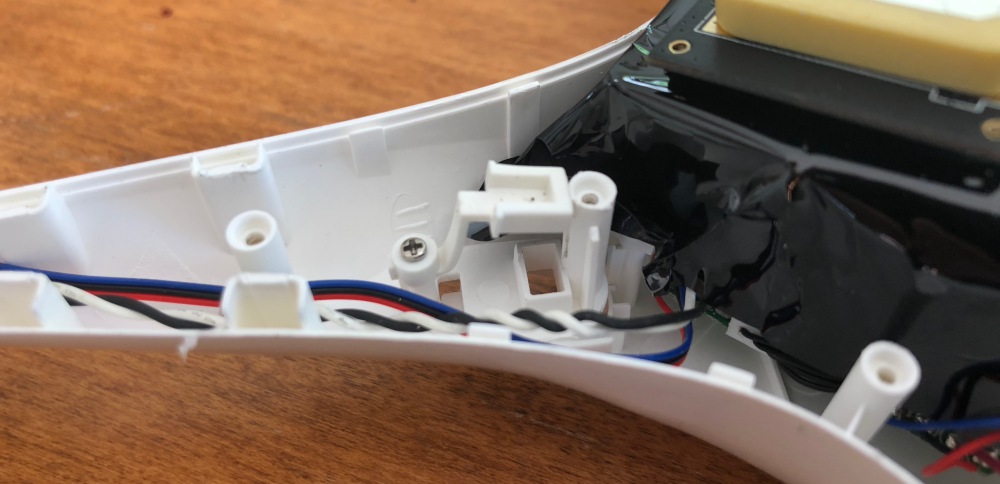
When initially setting the drone up and looking over all the parts I took off the legs and inadvertently pushed one of the release buttons too far where it pushed inside the drone and the spring was rattling around. In retrospect, this is why their wrench has a small extended section with physical stops. Regardless, it resulted in taking the drone apart to rescue the button and I got to look at some of the inner workings. You can see in the second shot where the button arm is keeping it trapped against the assembly post. Overall an easy fix, albeit with a lot of screws.

What I like

  • Small and compact without being diminutive
  • Learning aids are great for new pilots
  • Spare parts included for some key items

What needs to be improved

  • Battery life/flying time – and/or – 2nd battery in the box would help
  • Propeller guards are more fragile than they should be
  • Add a learning mode where certain features can only be unlocked if you’ve passed ‘flight school’ levels
  • Battery swap requires redoing all the calibration steps

Final thoughts

I’ve flown a couple of drones before, but it was quick flights with the drone’s owner right there. When it’s your own and you’re doing all the setup, the “am I doing this right?” weighs on you quite a bit and I can only imagine that ratcheting up a lot if you’ve dropped your own dollars to purchase it. The more time you can spend flying, the more efficient you’ll be and the better results you’ll get out of video and photos. The main complaint from any user will be flight time. I’d recommend a minimum of one extra battery and likely two as if you’re headed out to fly, you’ll want a good 30 minutes and 3 won’t quite get you there. Also once the controller battery is depleted you’re done as it takes an hour to charge even if you brought a power bank. Overall the T25 is a good value, not too light, not too heavy and sits in a pretty good spot as far as not being too expensive while having an impressive feature set.

Price: $189.99
Where to buy: Amazon
Source: The sample of this product was provided by Potensic.

Filed in categories: Reviews

Tagged:

Potensic T25 Drone with 1080P HD Camera review originally appeared on The Gadgeteer on September 1, 2018 at 9:00 am.

Note: If you are subscribed to this feed through FeedBurner, please switch to our native feed URL http://the-gadgeteer.com/feed/ in order to ensure continuous delivery.

Hubsan H501A X4 Air Pro Advanced Drone review

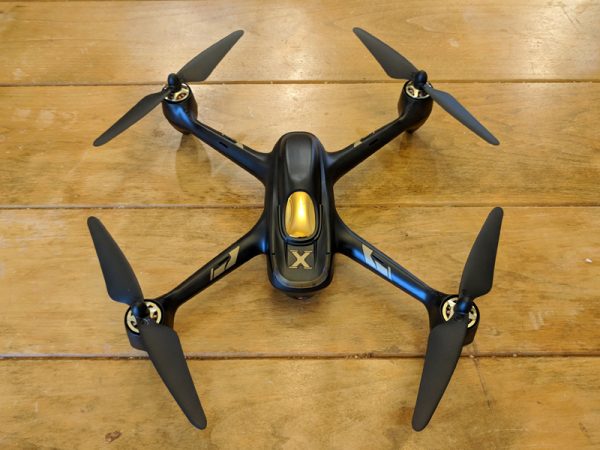
Drone technology has exploded in the last few years as cameras have gotten smaller, batteries have gotten bigger and cool new features have been developed. The Hubsan H501A X4 Air Pro Advanced Drone has a lot of the latest tech packaged in a sleek, powerful little frame. It’s fun to fly, if you have the patience to get through the ridiculously frustrating setup and can handle the anxiety of knowing that your drone can (and will) stop responding to your commands at random times. The amount of features you get packed into this drone for around $200 make it a great buy on paper, but in reality the low-end tech never really delivers on its promises.
What is it?

The Hubsan H501A X4 Air Pro Advanced Drone is marketed as a GPS waypoint-enabled, FPV (first person view) quadcopter. The manufacturer, Hubsan, is known for making affordable, fun, and reliable, albeit somewhat disposable, drones. With products like the H501A X4, Hubsan is now venturing into the high-end drone space to compete with heavyweights like DJI and Yuneec.
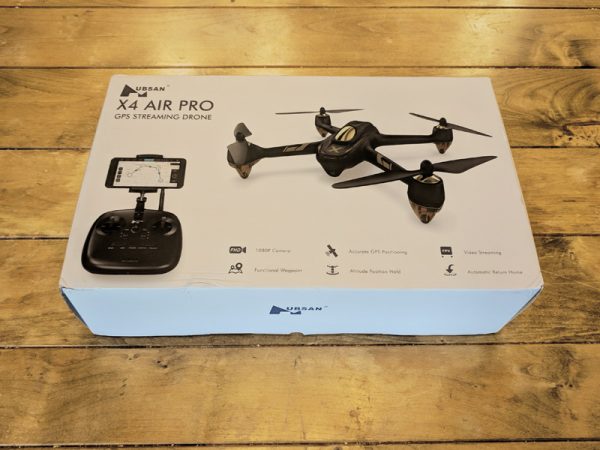
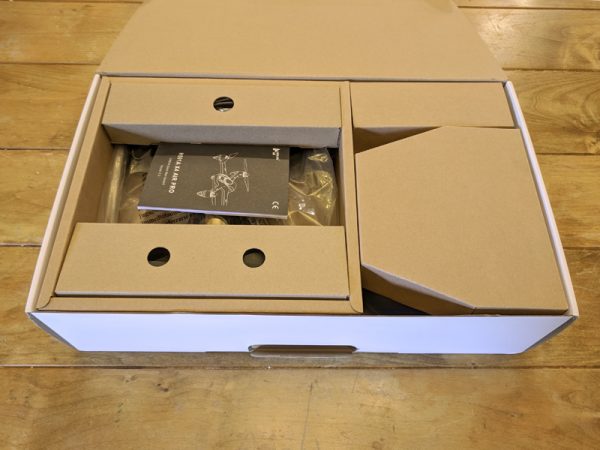
The H501A X4 Air Pro arrives packaged in a nice box featuring photos of the drone and included controller as well as a quick list of the drone’s advanced features.

Everything comes pre-assembled, aside from the rotors, and fits perfectly back into the box after use. The box has a handle as well, so it functions great as a basic carrying case.

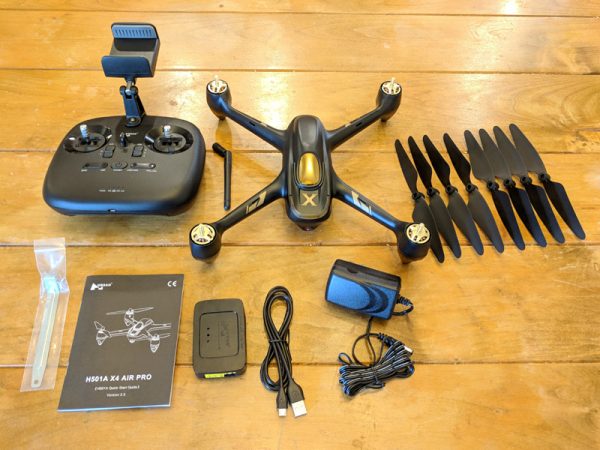
What’s in the box?

  • 1 x H501A Aircraft Body
  • 1x HT011A Remote Control
  • 1 x 7.4V 2700mAh LiPo Battery
  • 4 x Propeller A
  • 4 x Propeller B
  • 1 x USB Charging Cable
  • 1 x AC Adapter
  • 1 x Balance Charger
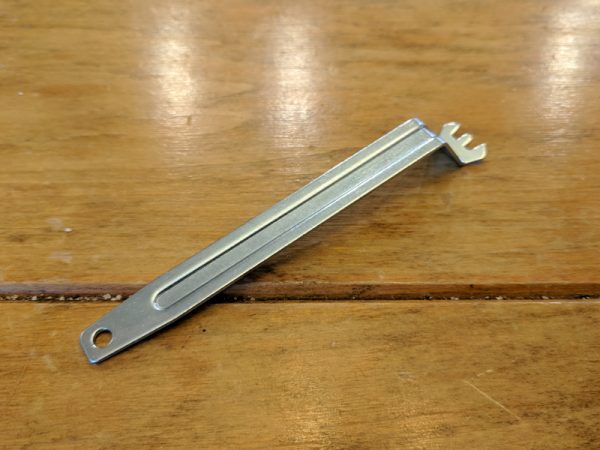
  • 1 x Prop Wrench
  • 1 x Instruction manual

Hardware specs

  • Size: 8.6″ x 8.6″
  • Flying Weight: 450g
  • Battery: 7.4V 2700mAh Li-Po
  • Charging Time: 210 minutes
  • Flight Time: 20 minutes
  • Max Flight Distance: 400 meters
  • Motors: 4 x Brushless KV1650 PM1806
  • Camera Resolution: 1920 x 1080
  • Main Rotor Diameter: 7.3″
  • Frequency: 2.4G
  • Supported SD Card Types: Micro SD max 16-32 GB. Class 10 or UHS-1 rating required

Design and Features

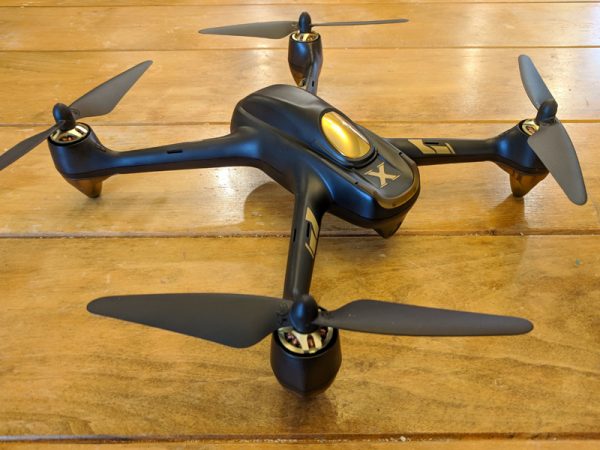
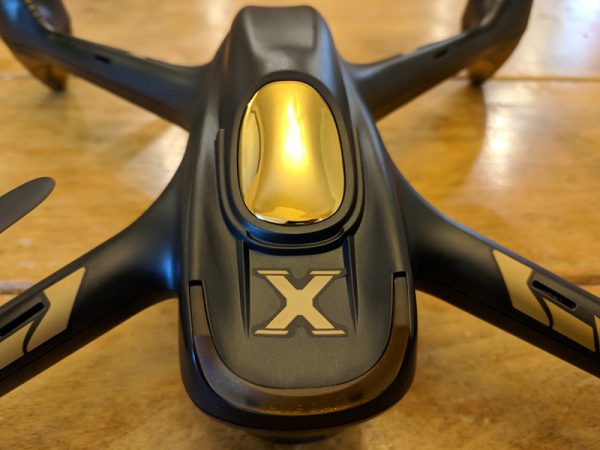
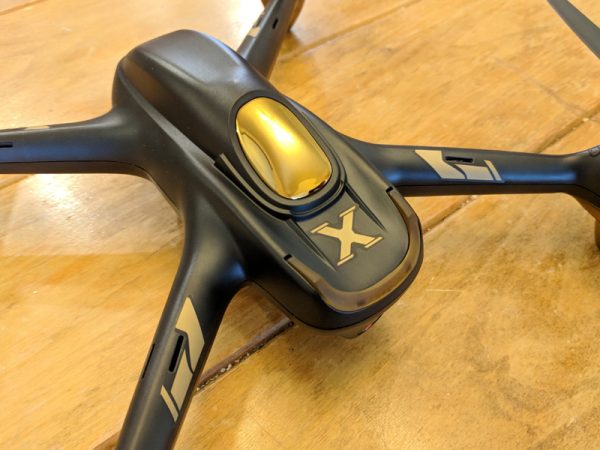
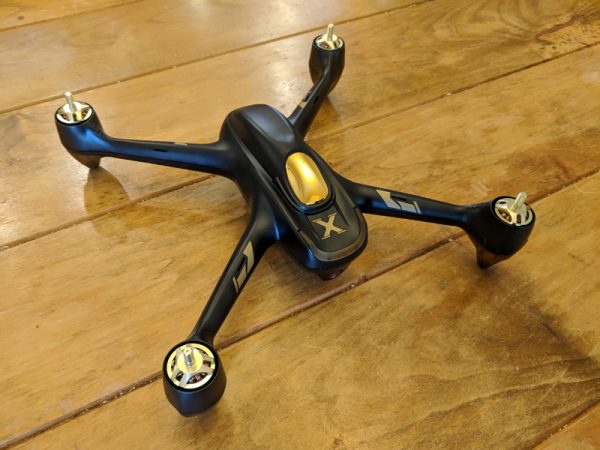
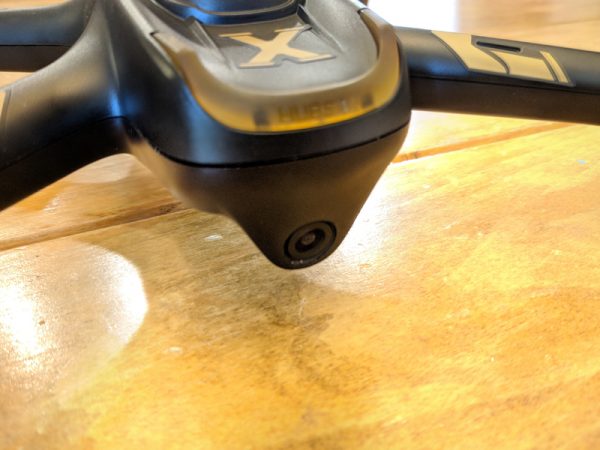
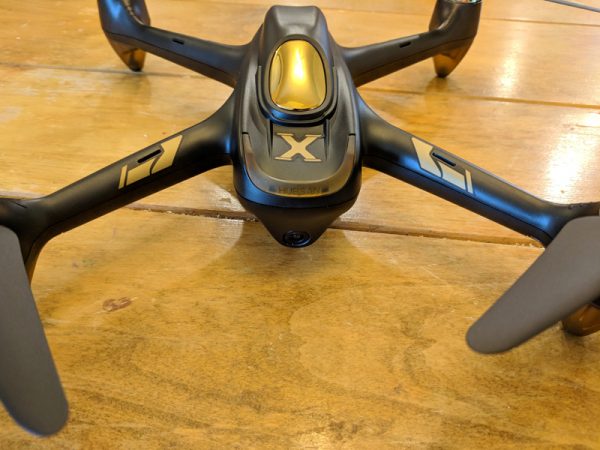
The Hubsan H501A X4 Air Pro Advanced Drone is a sleekly designed FPV drone with a bunch of GPS based features like Follow Me, Automatic Take-Off, Orbiting, Return-to-Home and Waypoints. In my testing, I couldn’t get a majority of those features to function properly, but even without them, the drone itself is expertly designed for standard recreational flying.

Setup

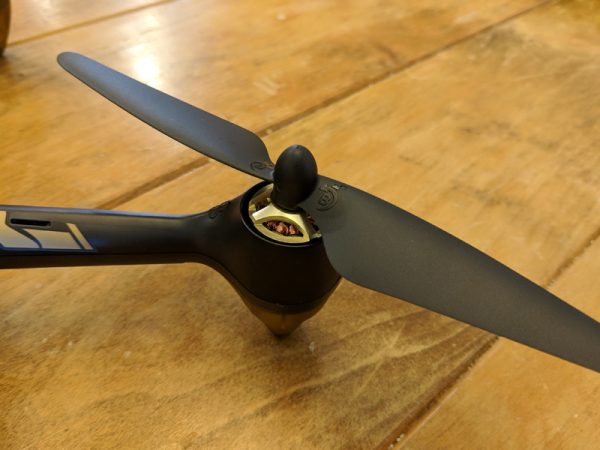
Since the H501A X4 arrives preassembled, all that remains for full functionality is to attach the propeller blades to the motors before flight.

Luckily, the H501A X4 comes with a prop wrench for safely attaching and removing the propellers. There are four propellers and the drone comes with four replacement propellers as well.

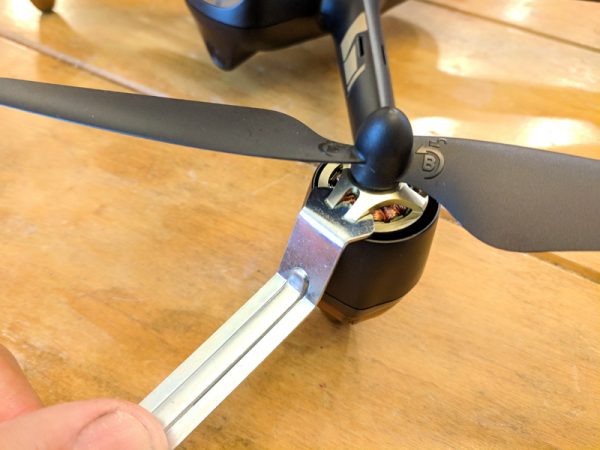
The prop wrench fits perfectly into grooves on each motor and holds the motor in place so that the propeller can be rotated on.

Each motor and propeller is labeled A and B. It’s vitally important that only the A propellers are attached to the A motors and likewise for B. The propellers screw on in opposite directions for A as opposed to B. It’s also important that the propellers are not tightened too much, otherwise they can be damaged.

Once the propellers are attached properly it’s time to set up your controller.

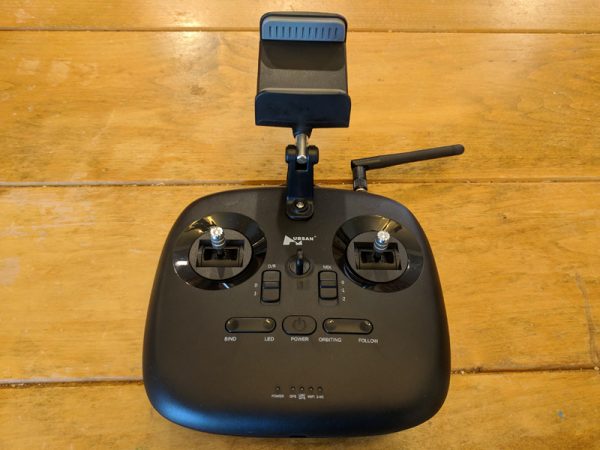
This version of the H501A X4 comes with the Hubsan HT011A controller. The HT011A can control your drone via WiFi or 2.4G. You can run the drone with the controller alone, but for full functionality, you’ll need a smart device running Hubsan’s X-Hubsan app, which is available for Apple or Android devices.

The directions in the manual are pretty useless for the controller setup, but if you’re lucky, you can stumble through the process of linking the controller to the drone via the X-Hubsan app. Basically, this involves powering up the drone and controller, allowing the app to connect to the drone via WiFi and then connecting to the controller’s WiFi signal which should bind the two together. In my testing it took about four attempts to get this to work properly.

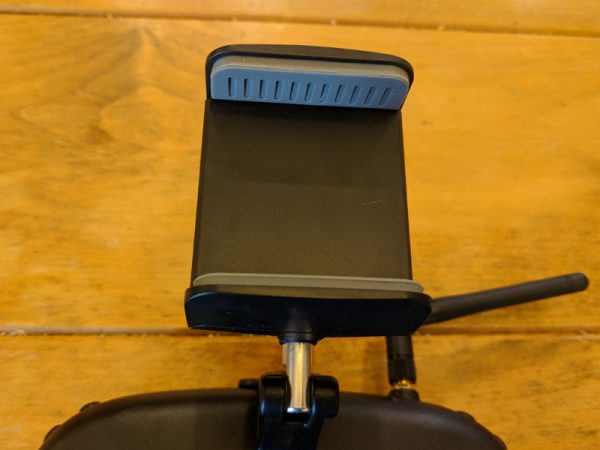
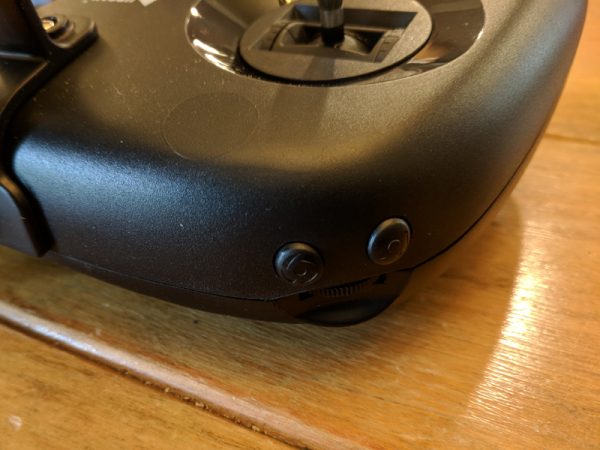
The HT011A holds your smart device in place with a spring-loaded clamp mounted to the top of the controller. While the documentation says that you can use a tablet, the clamp opens just barely enough to snugly hold a smartphone. Also, the design of the clamp is such that if your smart device has volume keys on its side, they will be continually activated by the clamp’s pressure.

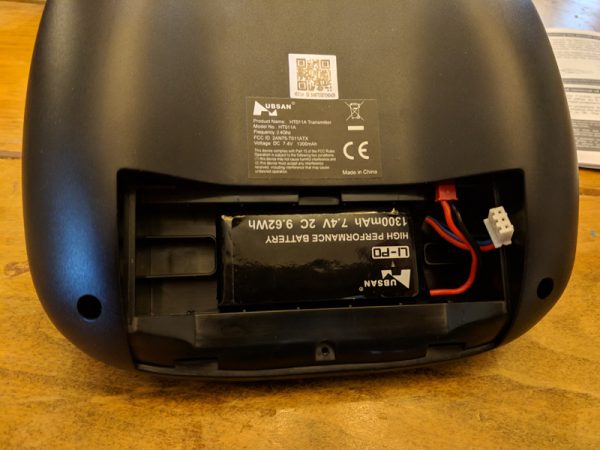
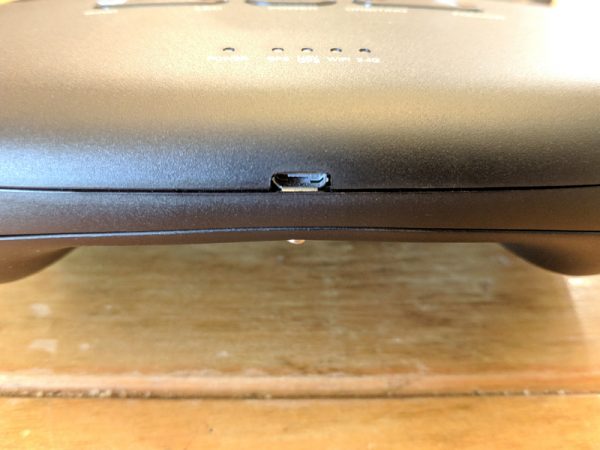
The controller is powered by a 1300mAh Li-Po battery similar to the one that powers the drone. There’s a micro-USB port on the bottom of the controller, and you’d think this is how you charge the battery, but no, this port has no functionality. What’s so frustrating is that you’d have to scour the poorly written, small font directions to find that information. And, the drone only comes with one Li-Po charger, so you can’t charge your drone and controller concurrently.

Since it takes over three hours to fully charge the drone, having to then charge the controller is a real bummer. Also, unless you buy extra drone batteries, three hours is a long time to wait between the short 15-20 minute flights the battery powers.

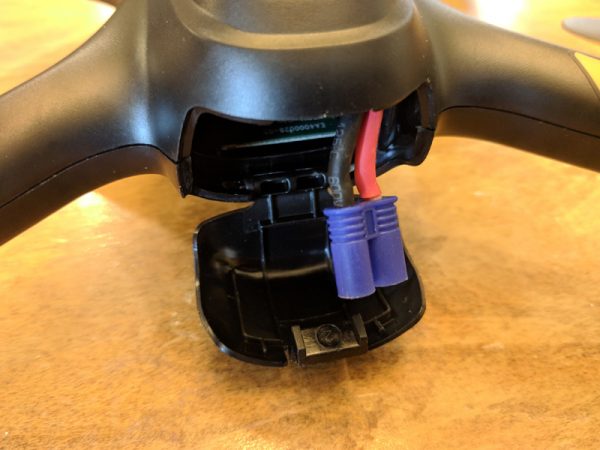
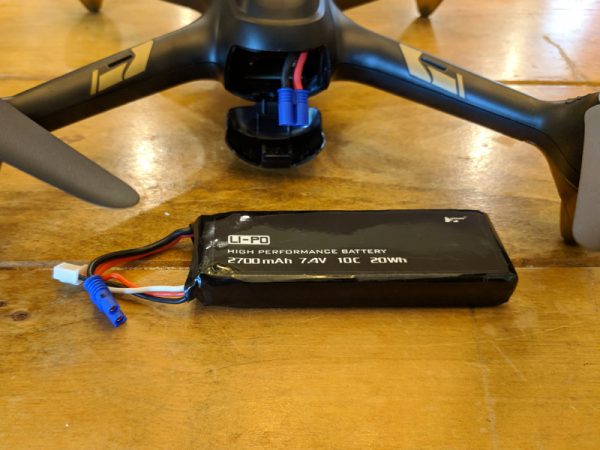
The drone’s battery sits inside a rear compartment accessed by a latch. The LiPo battery connector hangs out just enough to snugly fit the battery inside.

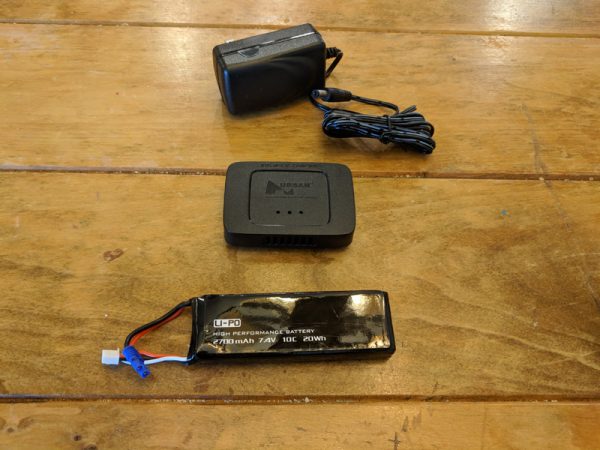
While most newer drones arrive with some type of USB charging solution, the Hubsan uses a standard LiPo brick and charger.

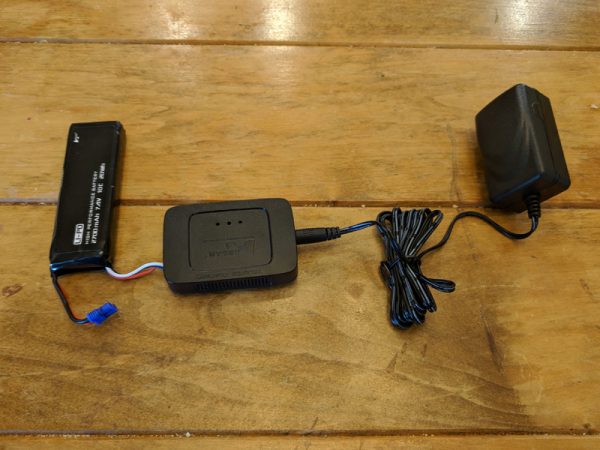
There are two wires on the LiPo battery, one for connecting to the drone and a smaller white plug that connects to the charger.

The setup makes for an ungainly solution, but it does works.

Performance

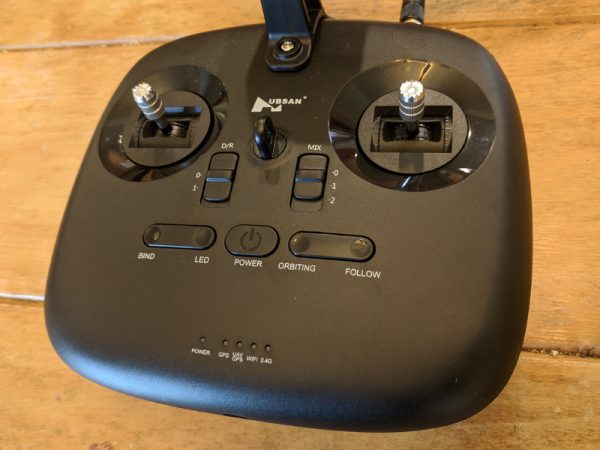
The HT011A controller does feel great in your hands and the controls are very crisp and responsive. Buttons on the controller mimic some of the control options from the app. You can toggle the drone’s lights, change the control scheme, or activate the some of the GPS functions like Orbit and Follow (even though in my testing I never got any of these functions to work properly).  A string of LEDs on the bottom of the controller let you know if the GPS, WiFi, or 2.4G options are active.

There are additional buttons on the shoulders of the controller to activate the drone’s camera. you can switch between photo and video as well as start and stop recordings.

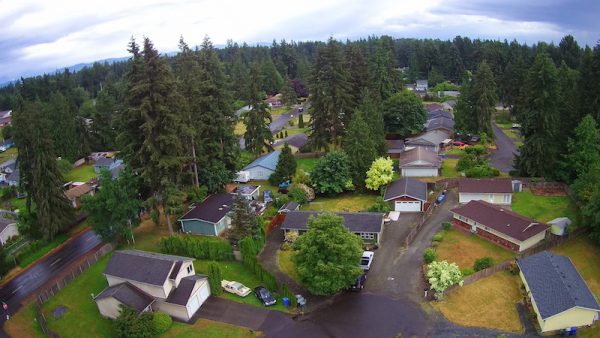
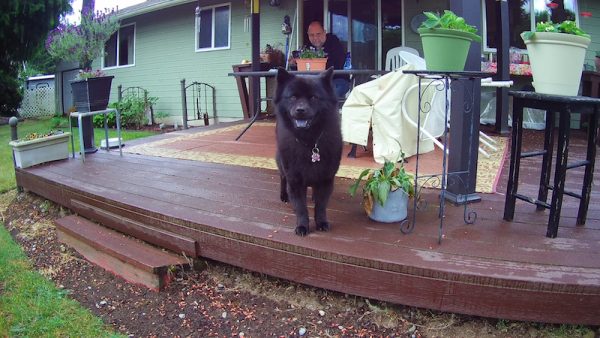
The H501A X4 has a great 1080p front-facing camera. The photos and videos it records are bright with vibrant color and clarity.

The auto white balance on the camera blows out in some areas of sunlight, but overall the camera produces some stunning pictures.

There’s a slight cyan cast over the raw images and a clear distortion from the fisheye lens, but for a tiny drone camera, this is expected.

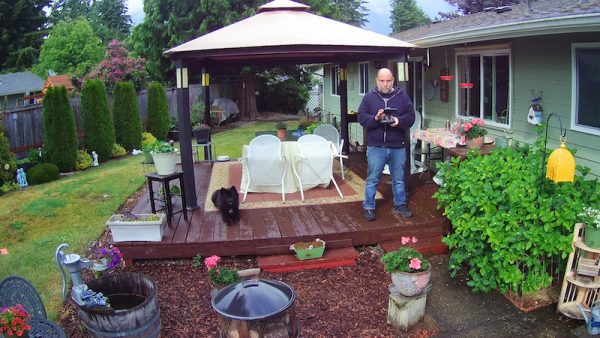
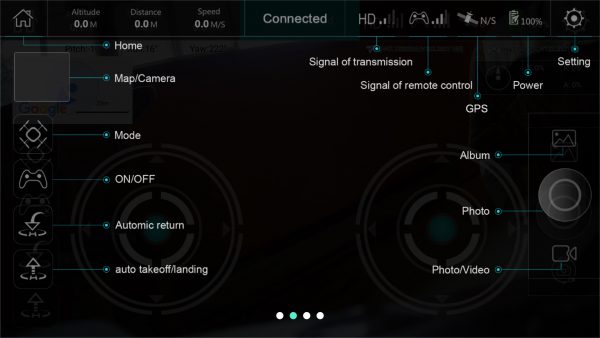
Once you take flight with your drone, the main screen of the app conveys all the info you need to safely fly. You can see your signal levels, the drone’s distance, speed and altitude.

Flying the drone is a lot of fun. The H501A X4 is quick and powerful enough to shoot up to altitude pretty quickly. The problem is that, occasionally, especially at altitude, the drone just stops responding. There’s no indication on the app that control has been lost, which is why it’s always important, when flying ANY drone, to always have a visual line-of-sight to your drone.

Luckily, I didn’t experience any fly-offs with the H501A X4, but other reviewers have reported them. When I lost control, the drone simply stayed exactly where it was. It was still pretty scary and frustrating, especially when the drone was at a higher altitude. This happened a number of times and each time, after about a minute or two of switching the app and controller off and on, I was able to regain control of the drone and land it safely.

In all my attempts to test the GPS functions, the drone and app failed to respond. A few times when I tried the Return-to-Home function the drone stuttered in place, like it was trying to initiate the function, but it never succeeded.

The other functions like Waypoints and Orbit just never gave an indication that they were activated, whether they were initiated from the app of the controller.

What I like

  • Fun to fly
  • Sturdy construction
  • Great camera quality

What needs to be improved

  • Difficult set up
  • Frequent loss of control
  • Poor instructions
  • Single charger for remote and drone

Final thoughts

The Hubsan H501A X4 Air Pro Advanced Drone is fun to fly and it has a great camera, good for recording all types of exciting photos and videos during your flights. Unfortunately, the setup is pretty frustrating and there’s a good chance the drone will lose its connection frequently during your flights. The H501A is reasonably priced though, so if you can put up with the drawbacks, it might be worth checking out.

Price: $219.99
Where to buy: Hubsan and Amazon
Source: The sample of this product was provided by Hubsan.

The post Hubsan H501A X4 Air Pro Advanced Drone review appeared first on The Gadgeteer.

Filed in categories: Reviews

Tagged:

Hubsan H501A X4 Air Pro Advanced Drone review originally appeared on The Gadgeteer on June 28, 2018 at 11:00 am.

Note: If you are subscribed to this feed through FeedBurner, please switch to our native feed URL http://the-gadgeteer.com/feed/ in order to ensure continuous delivery.