REVIEW – Drones are all the rage today, and they have become significantly more complex and feature-rich. While high-end drones like the DJI Mavic Pro are capable of all sorts of aerobatics and videography, not everyone can afford one, so there is a large and growing market for less expensive drones that are still fun to fly and provide many of the features of their higher-end cousins. One such product is the Eachine E58 RC Pocket Quadcopter Drone. While it is basically a smaller version of the granddaddy Mavic Pro, it is still loaded with features while being significantly more affordable. Let’s check it out! Gadget on!
What is it?
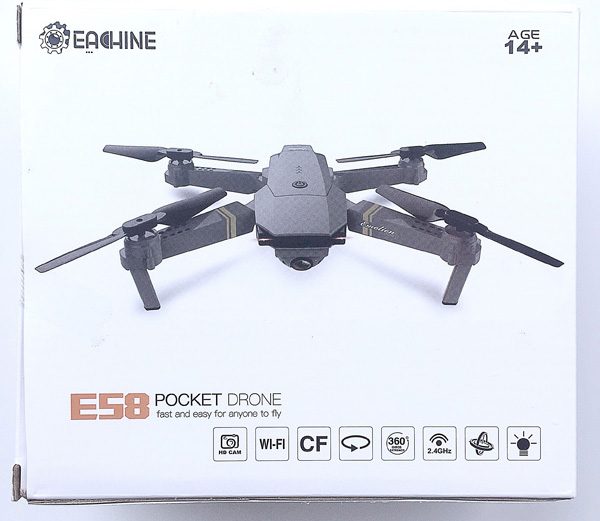
The Eachine E85 Quadcopter Drone is a small, foldable, radio-controlled drone that is styled to be, in appearance and essential functions at least, a miniature version of the larger and much more expensive DJI Mavic Pro drone. So it is basically a drone clone (see what I did there?).
Hardware specs
- 2.4 GHz remote control
- Glass lens FPV (First Person View) camera that can rotate from 0 to 90 degrees downward that includes the following functions:
- 2MP still images camera
- 720p HD video camera
- WiFi control (with app) capable LED lamp with nightlight function
- Gravity sensor
- 6-axis gyroscope
- Headless mode
- One-key takeoff and landing
- Trajectory Flight with mobile phone app
- Three speed modes
- Quadcopter includes 3.7V 500mAh rechargeable Lithium battery
- One-key return
- 360-degree roll
- Micro SD card slot (card not included)
- Controller requires (4) AA batteries (not included)
- Time to full charge = 60-70 minutes
- Flight time = 7-9 minutes
- RC range = 80-100 meters
- Dimensions:
- 27 x 19.5 x 5cm (arms not folded)
- 12.5 x 7.5 x 5cm (arms folded)
What’s in the package?
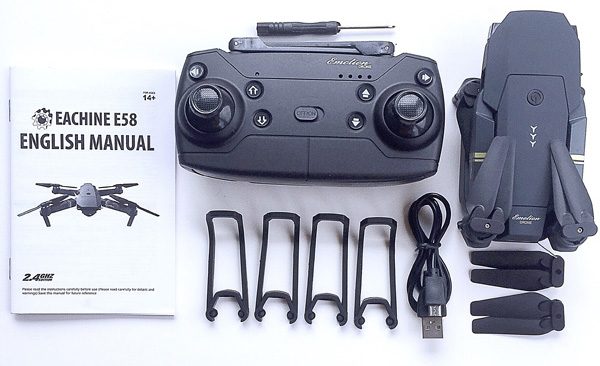
- 1 x Eachine E58 RC Quadcopter drone
- 1 x Transmitter
- 1 x 3.7V 500mAh Lipo Battery
- 1 x Micro USB Charging Cable
- 4 x Prop Guards
- 4 x Spare Blades (2 sets of 2)
- 1 x Small Screwdriver
- 1 x User Manual
Design and features
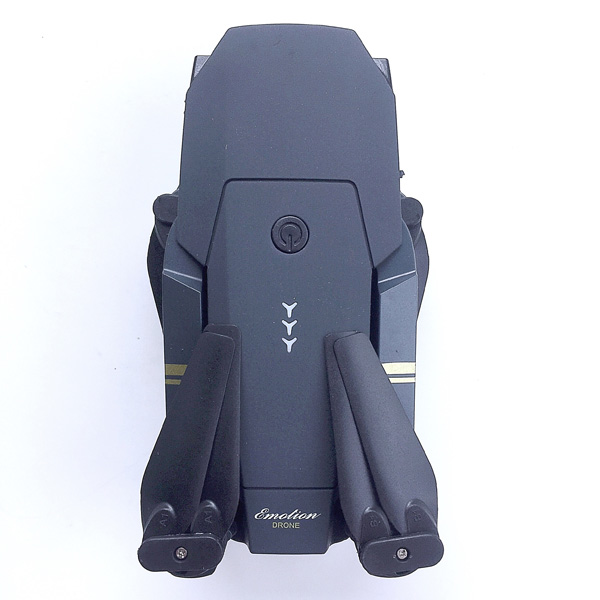 My first impression of the E58 was that is was very small and compact when folded down. Smaller than I had imagined, actually, and because of this it seemed very portable and easy to take with you.
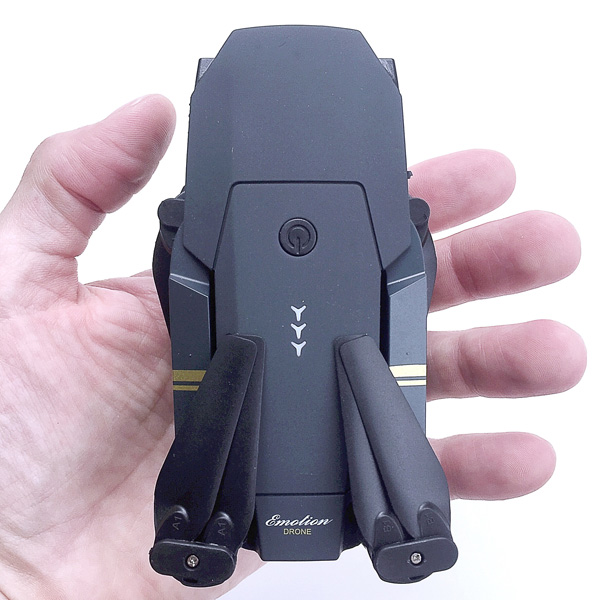
In fact, the E58 is small enough to almost fit in the palm of my hand, and is very lightweight. However, even when folded down it actually feels fairly solid, like it isn’t going to just fall apart on you if you bump it against something, the way a lot of drones feel to me. It would be easy enough to place it into a backpack or other bag for transport, but I think it might get banged up quite a bit if it were not put into some type of case first—do a Google search for “E58 drone case” and you may find some good options for this.
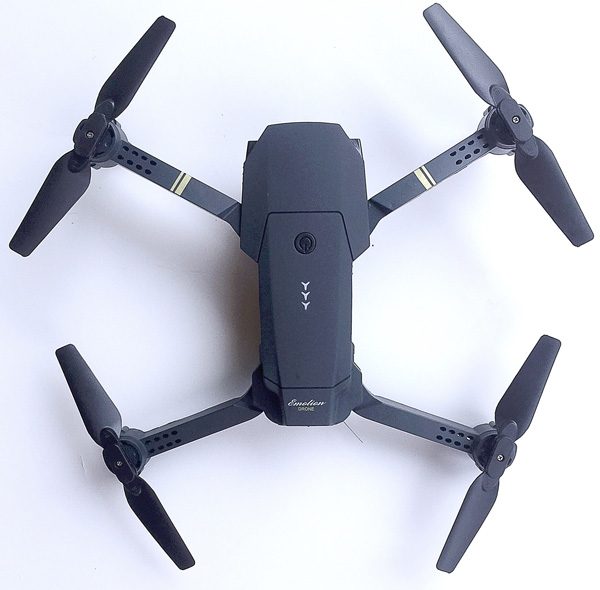
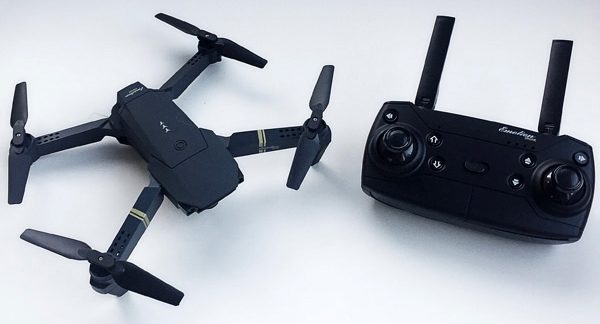
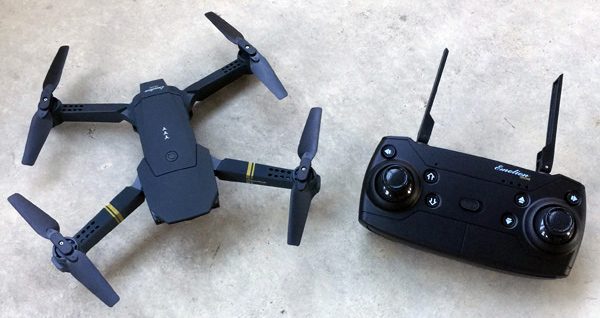
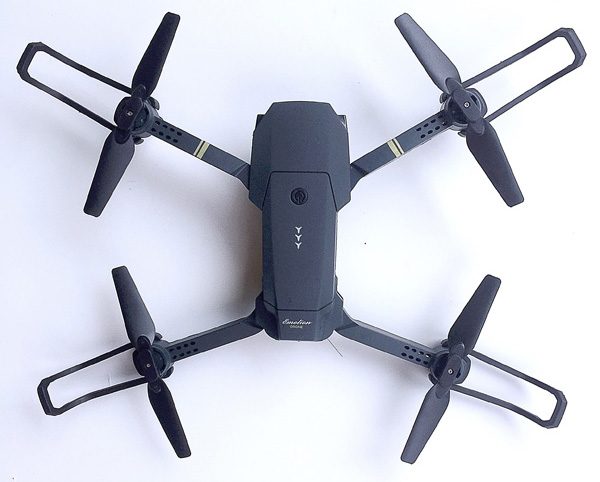
After folding out the E58’s four legs, my very next impression was that, in appearance, it is truly a clone of the DJI Mavic Pro quadcopter drone, which is one of the current granddaddies of high-end drones. The E58 is basically a nearly exact copy in appearance but in miniature. I don’t think this is a bad thing at all; I really like the low-profile, futuristic the styling of the Mavic Pro myself, and Eachine did a really solid job of mimicking the Mavic Pro’s Styling for their E58.
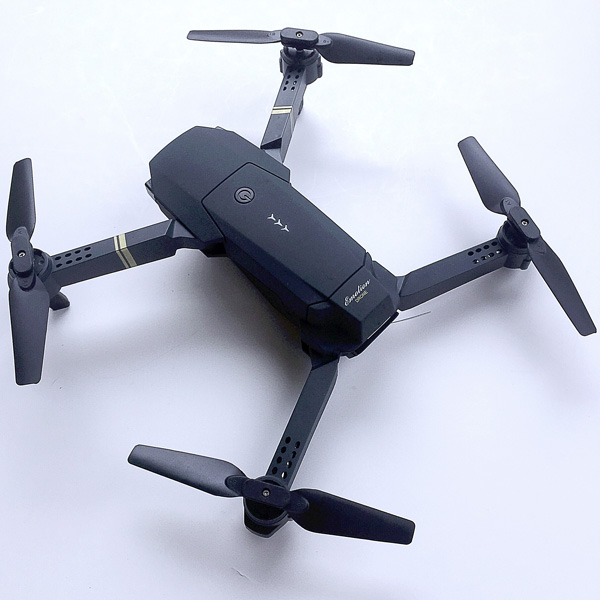
Above, another view of the E58 with its “arms” fully extended.
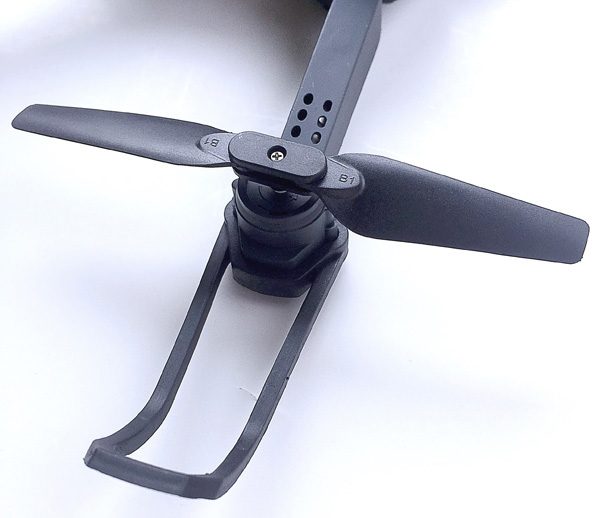
The E58’s four props are each basically hinged twin props. This allows them to be collapsible for transport and storage, but when spinning, centripetal acceleration will cause them to deploy outward, essentially forming a single prop blade at the end of each of the E58’s “arms.”
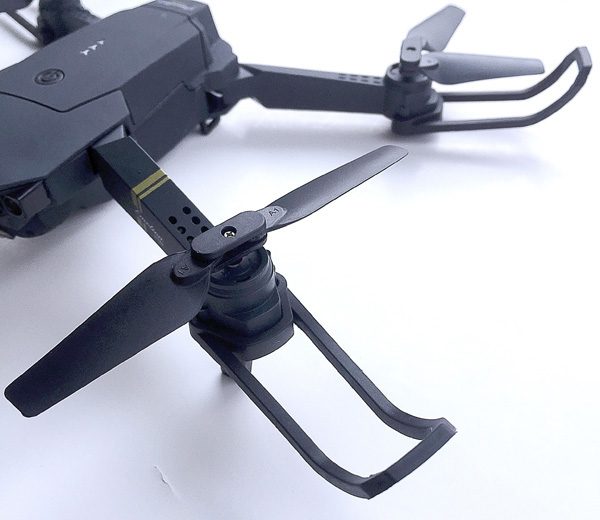
Each of the props is labeled “A” or “B” and each must be installed on the correct legs of the E58, or the drone will not fly optimally (if at all). In addition, the E58 includes four “bumpers” that can be attached to each leg to protect the props. As a fairly new drone pilot, I installed these on the E58 before I took it out for its first test flight, as seen in the above image. In fact, these bumpers saved the E58 from my flight control learning curve multiple times, as I seemed to repeatedly find items in my yard to collide with.
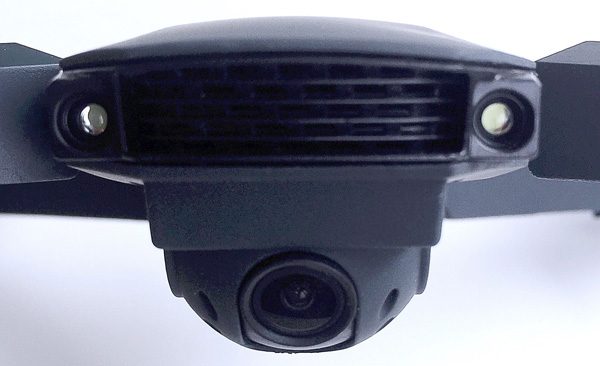
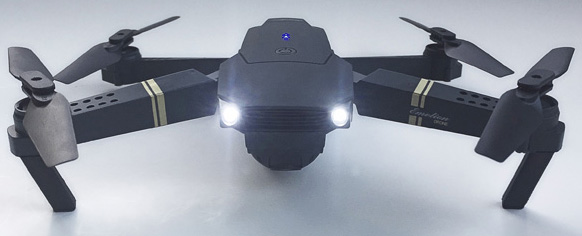
To me, the “front” of the E58 almost appears to be a “face” as seen above. There are two lights on either side of a grille, with the E58’s camera mounted at the “chin” position.
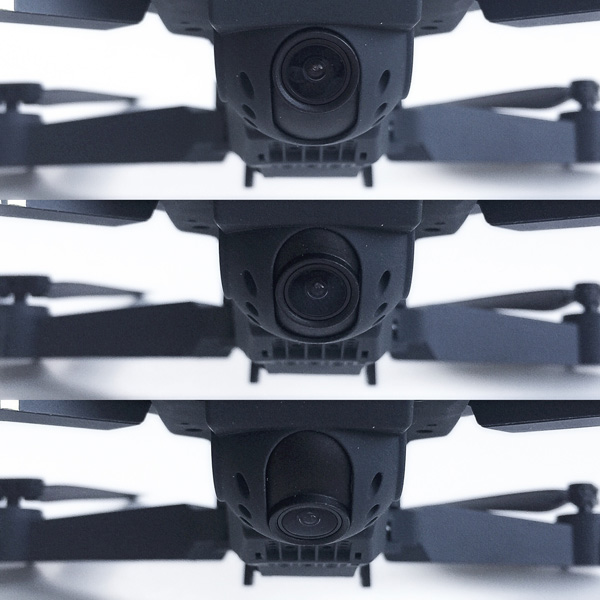 The E58’s camera is mounted on pivot that, although it does not move side-to-side, can be manually positioned from zero degrees (straight forward) to 90 degrees (straight down) prior to flight, as shown above, and it slides smoothly along its track, not in discreet stopping points. The camera has a glass lens for clarity and friction seems to hold its position in place once set, even during crashes.
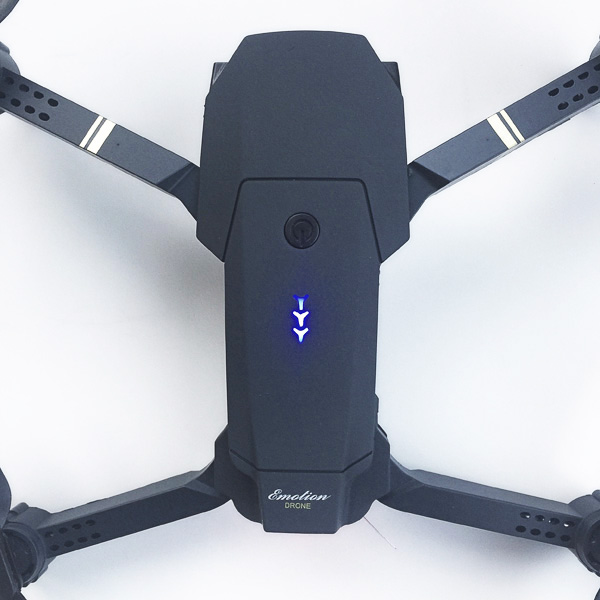
Pressing the power button on the top of the E58 turns it on. As seen in the image above, there is a column of three blue LED lights on the top of the E58’s fuselage that to me resemble the logo of the popular game “Destiny.” (Probably a coincidence, but still fun.) In any event, these three LEDs are not battery power level indicators as you might expect; they merely indicate when the E58 is powered on.
As mentioned above, the E58 has a pair of white lights on the front that, when illuminated, appear to almost be headlights, as seen in the image above. Having two headlights on the front can help with visually determining orientation of the E58 in lower-light flying conditions.
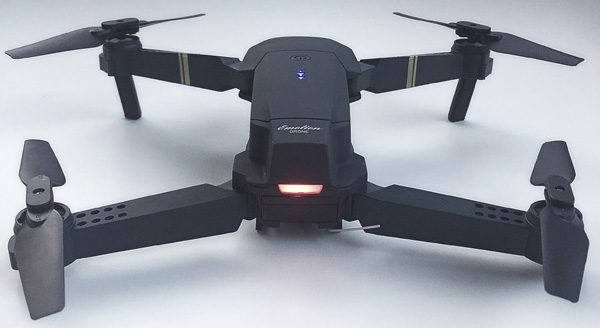
In addition to the “headlights” on the front, the rear of the E58 includes a single red light bar that resembled as car’s tail light, as seen in the image above. Again, this light on the rear can help in visually determining the flight orientation of the E58.
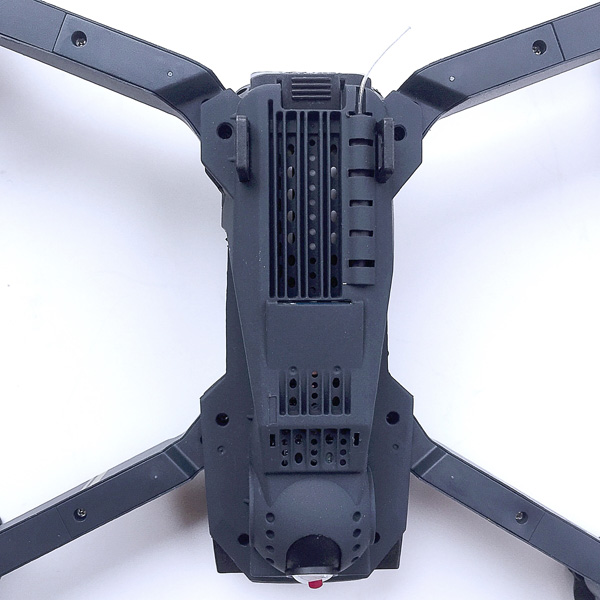
Let’s take a look at the underside of the E58. As seen in the image above, a small antenna that resembles a short length of fishing line protrudes from the back end of the drone. Also, you can see some of the electronic innards of the E58, visible through the slats of a grille on its underbelly. There are several sets of grilles and holes around and on the E58’s underside, presumably to allow heat to escape during flight, since I did notice that the E58 gets quite warm after only a few minutes of operation.
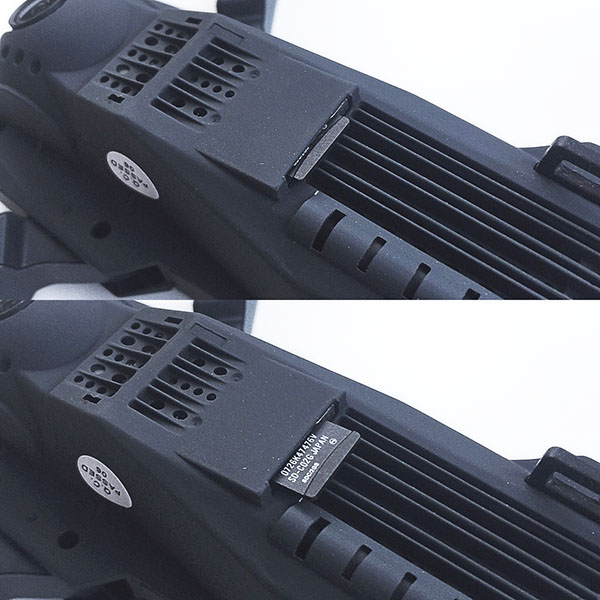
Another feature located on the underside of the E58 is the Micro SD card slot, which is spring-loaded so the card “clicks” in place when pressed in and “clicks” back out when pressed again. The E58’s video and still camera can record to this Micro SD card during flight. The drone can record 720p onboard to this card. Note that a Micro SD card is not included, you must supply your own.
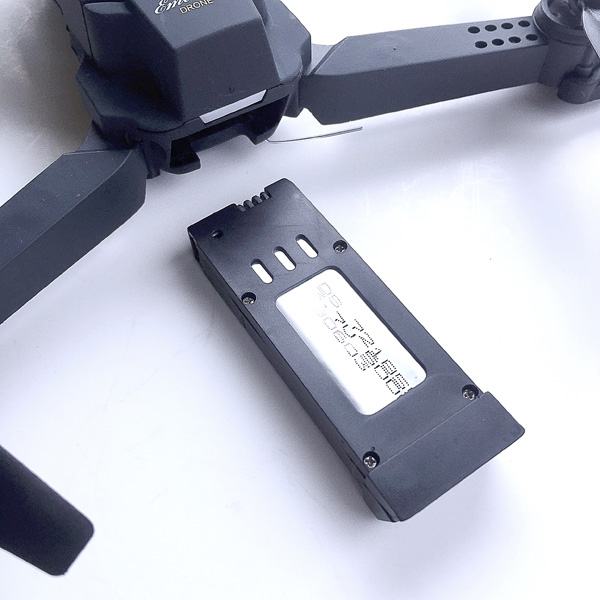
The E58 is powered by a single, rechargeable 3.75V battery that slides into a slot in the back of the drone, as seen in the image above.
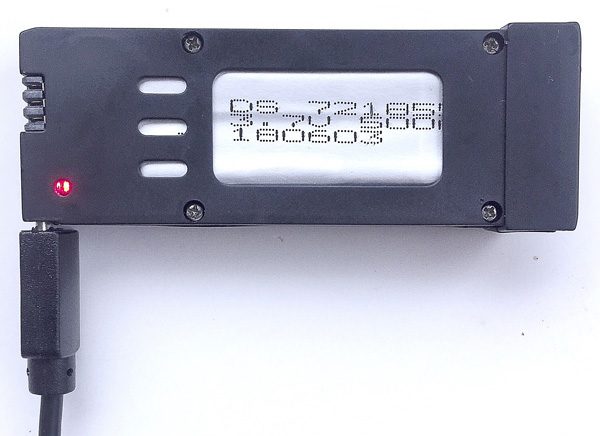
This battery is charged by simply plugging in the included micro USB cable, as seen in the image above. When charging, a small red LED is illuminated, which turns off when the battery is fully charged, which is typically about an hour if it has been fully drained.
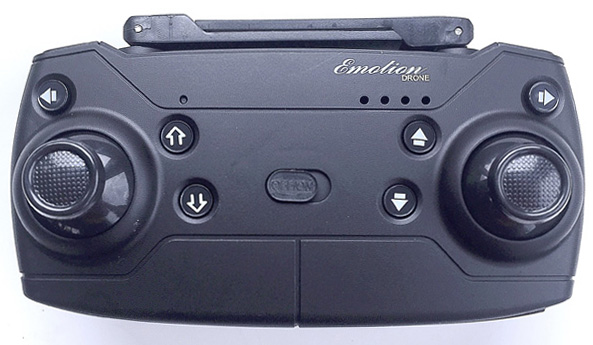
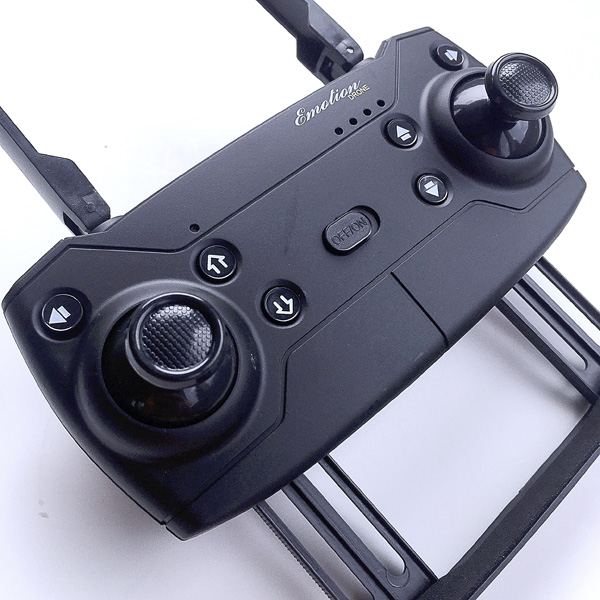
Next, let’s check out the E85’s controller. As seen in the image above, it has two joysticks and multiple buttons that are all used to control various features of the E58 during flight. It resembles the styling of the DJI Mavic Pro drone’s controller as well, which I suspect is not a coincidence.
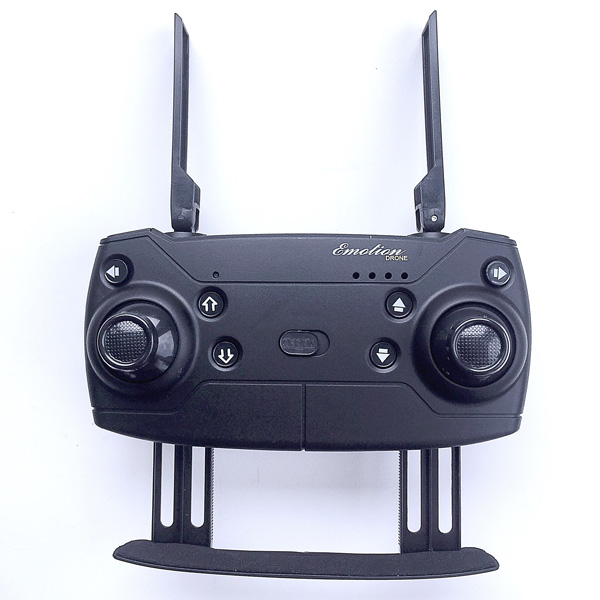
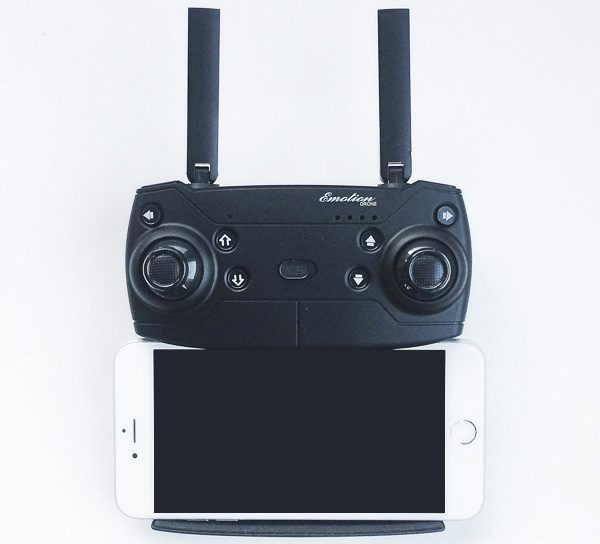
The controller has two collapsible “antennae,” that appear to be for styling purposes only and not for any sort of actual function. In addition, the controller has a hidden tray that slides out from the bottom and can be used to mount a smartphone (more on this below).
The controller’s smartphone tray held a phone as large as an iPhone 6 Plus, as shown above; however, this seemed to be putting quite a bit of strain on the tray and I wouldn’t recommend placing a phone quite this wide here.
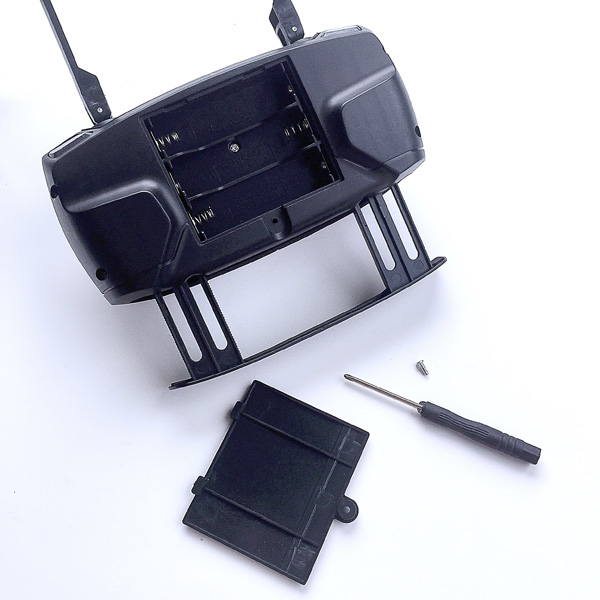
The E58’s controller is powered by three (3) AA batteries, which are not included. However, a small screwdriver is included, which facilitates removal of the tiny screw that holds the battery cover in place, as seen in the image above. Just be sure not to lose that screw, or you’ll be screwed (pun intended).
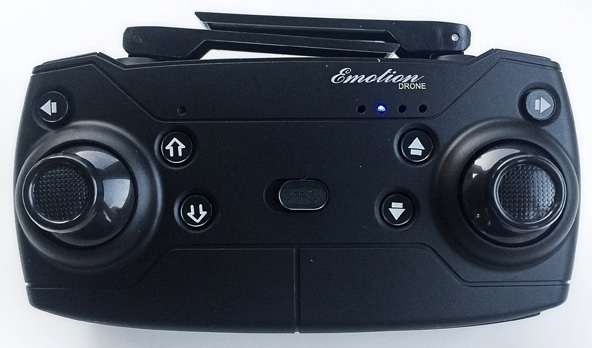
Sliding the On/Off switch in the center of the E58’s controller powers it on, which is indicated by the illumination of a small blue LED, as seen in the image above. As with the E58 drone itself, this LED appears to be in a bank of four that would seem to indicate the controller battery’s power level, but this does not seem to actually be the case; only the second LED from left is ever illuminated and this did not ever seem to change no matter the controller’s remaining power level.
Let’s take a look at the controls, starting with the front face of the controller. The left joystick controls the throttle; forward on the stick is increased throttle, backward on the stick is decreased throttle. Letting go of the stick allows it to center itself. Pushing the stick right or left will rotate or “yaw” the drone about its vertical center axis in that direction. Pushing the right joystick up or down controls the forward and reverse motion of the drone, while pushing the right side stick right or left “slides” the drone laterally in that direction. One other feature of the joysticks is that the E58 can be calibrated by pushing both joysticks down and to the right.
The arrow buttons in the upper left and upper right of the controller are the fine tuning left and right controls. The hollow up and down arrow buttons to the left of the on/off switch are the one-touch launch and one touch land buttons. The one-touch launch button starts the motors and immediately launches the drone into the air, while the one-touch land button brings the drone down to the ground fairly gently, then kills the motors. The solid up and down arrow buttons to the right of the on/off switch are the fine tuning forward and backward controls.
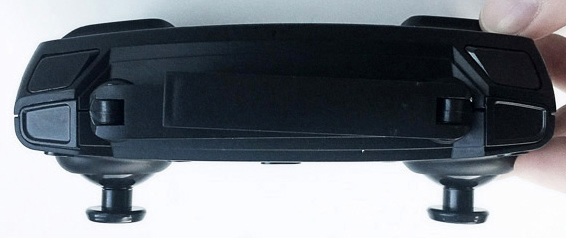
Next let’s look at the four buttons on top of the controller, as seen in the image above. Starting from the left side, the button in the upper left, farthest from the front of the controller, operates the “Headless Mode” (a short press) and One-Key Return (a longer press). The Headless Mode essentially make the drone fly as if the controller is its reference point; I found this mode to be difficult to adjust to. The One-Key Return was a bit dodgy. Because this is a lower-end drone without the GPS capability of the higher-end drones, this “return” function does not work as well as you might expect. It basically turns the drone around to a heading that is pointing toward you, but you have to actually fly it back to your location yourself; it does not fly itself to you. The button in the lower left, closest to the front of the controller, is the Photo/Video button, though this button never did seem to work; I had to control the still and video camera features with the app on an iPhone (see more on this below). Moving to the right side, the button in the upper right, farthest from the front of the controller, operates the “360 Flip” (a short press) and Emergency Stop (a longer press). The 360 Flip is fun; you press the button, then press the right joystick left or right to force the ED58 to flip in that direction. Also, be very careful with the Emergency Stop—it kills all of the motors immediately and the drone drops to the ground like a rock, which could be very damaging if the drone is at high altitude and drops onto a hard surface (fortunately I only tried the E58 on grass). The button in the lower right, closest to the front of the controller, is the Speed Switch. This cycles the drone from 30% to 60% to 100% then back to 30% speed level with each press. As a neophyte drone pilot, I kept the E58 in 30% most of the time while I acclimated to the controls, but I can tell you that the 60% and 100% speed rate settings are quite fast and experienced pilots will really like them.
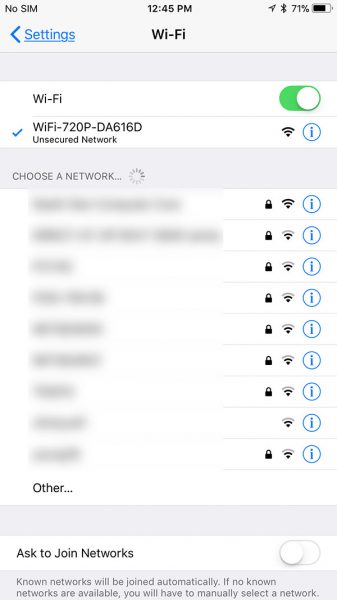
Next, I tried controlling the E58 via app. Eachine recommends an app called “JY UFO” which I downloaded for free from the iOS App Store. Since the E85 has WiFi capability and essentially projects a mini Wi-Fi hotspot, I followed the instructions on the app and connected the drone to the iPhone by going to Setting on the iPhone, then Wi-Fi, then selected a signal called “WiFi-720P-DA616D,” seen above. This essentially connected the iPhone to the E58 just as if it were a WiFi router; however, this is really only a link between the E58 and my iPhone, with no actual internet access and no data roaming, so you don’t need to be in range of an actual WiFi router to make this work. I then re-launched the JY UFO app and started playing around with the controls.
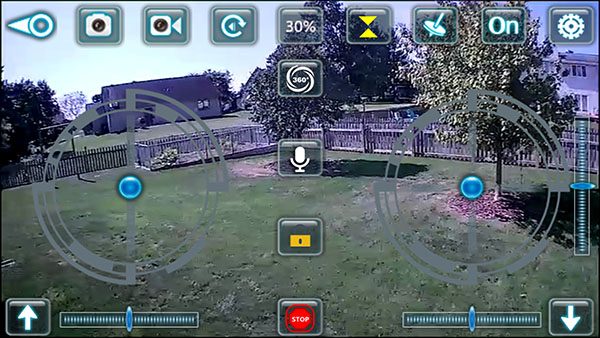
The above image depicts what I saw on the JY UFO app. The background of the app is what the E58’s camera is “seeing” at any given moment. The left and right joysticks, as well as other controls, are simulated on the app’s screen. In addition, the app allows the E58 to be controlled in gyro mode, which bypassed the simulated joysticks on the screen and lets you control the flight attitude of the E58 by tilting and tipping it. However, I found this to be quite challenging (I probably need a lot more practice on this). Yet another method of controlling the E58 with the app is “Mission Planner” mode, in which you trace a trajectory on the app’s screen, then the app directs the E58 to fly in that trajectory. I didn’t find this mode of controlling to be all that accurate or useful.
Of particular interest is that, as mentioned above, I could only control the still and video recording features using the app, not the controller. Using the JY UFO app allowed me to record both images and video in 1280×720 resolution; the still images were stored in my iPhone’s Photos, while the video was stored on the Micro SD card. The images had a bit of a “fisheye” effect, but the video footage did not. Although I found the E58’s dedicated controller a but easier to learn, I liked having the flexibility to control it with the app instead; this way, if I wanted to leave the controller behind to save space, I always have my phone with me as a controller.
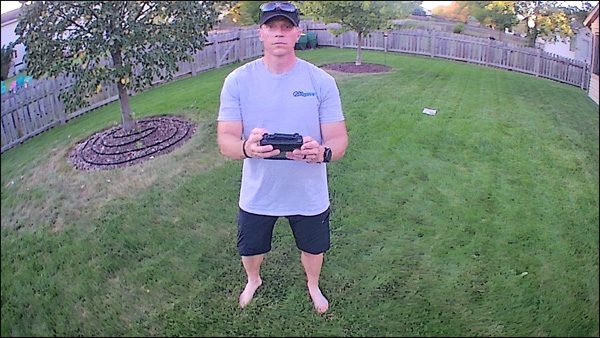
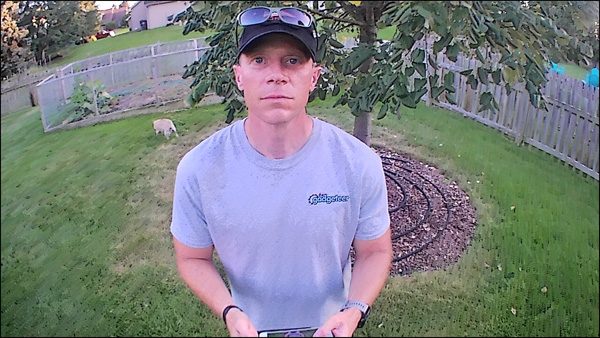
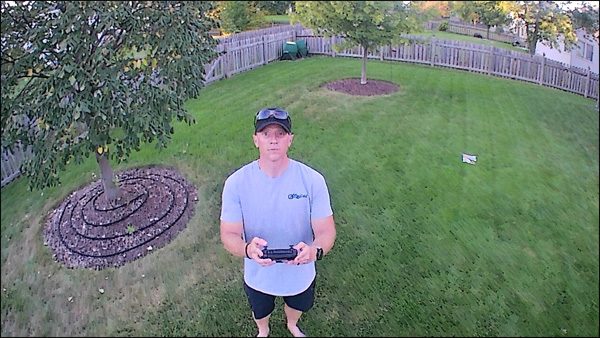
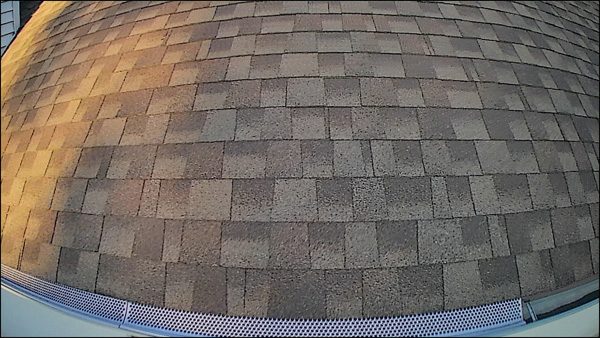
I flew it over my roof a bit. I could envision using the E58 to check out how clogged my gutters are getting, or even to check for shingle damage after a severe storm; however, the resolution does not lend itself to a great deal of detail.
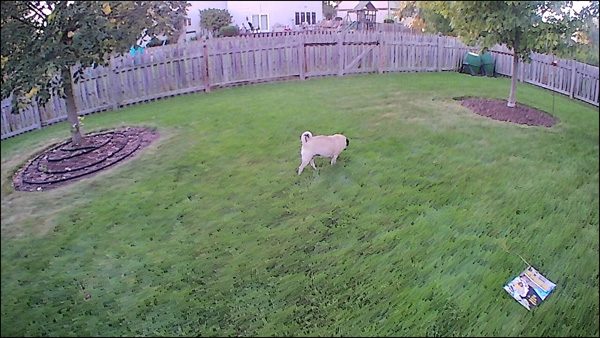
I even followed one of my pugs around the yard with it. (FYI, she didn’t seem to pay much attention, unless I flew really close to her.) I didn’t have the opportunity to fly the E58 in elevated wind conditions, but I did have a few breeze gusts here and there, and it stayed surprisingly stable in these conditions.
I was able to get about 8-10 minutes of flight time before the E58’s battery was drained, which it indicated by blinking its lights just before it fully died. However, you could purchase multiple batteries and swap them out for longer flight sessions.
What I like
- Very portable: small, compact size and lightweight
- Styled like the DJI Mavic Pro Quadcopter Drone
- Stable–can basically hover if you can get it set up right, which is great for photos and videos
- Fairly easy to fly once you get the hang of it (but I still need some practice!)
- Fairly robust to crashes despite having a fragile look and feel
What needs to be improved
- Camera/video button on controller appears to be non-functional; these functions can only be controlled when using the smartphone app
- The instruction book is very difficult to understand due to the broken English translation (presumably from Chinese)
Final thoughts
EACHINE E58 RC Pocket Quadcopter Drone is a small, lightweight, miniature drone that has a lot of features, is fairly easy to learn and quite fun to fly once you get the hang of it. It can also record some decent photos and videos and has multiple options for controlling it. Considering what you actually get with this drone and its “fun factor,” I think it is a pretty decent value for its price of $75.99.
Price: currently $64.99
Where to buy: Can be purchased directly from Eachine, from Amazon
Source: The product sample for this review was provided by Eachine.
Filed in categories: Reviews
Tagged: Drone
EACHINE E58 RC Pocket Quadcopter Drone review originally appeared on The Gadgeteer on September 30, 2018 at 1:19 pm.
Note: If you are subscribed to this feed through FeedBurner, please switch to our native feed URL http://the-gadgeteer.com/feed/ in order to ensure continuous delivery.

