Eliminate carrying multiple cables with the Anker PowerLine II 3-in-1 cable

NEWS – Anker has a created the PowerLine II 3-in-1 charging cable (3 feet long) to help us eliminate the need to carry multiple cables around. It is a micro-USB cable that contains Lightning (MFI certified) and USB Type-C adapters. It is made to be universally compatible for “laptops, phones, game systems, and more…” In addition, the PowerLine II cables all come with lifetime warranties because of their “bulletproof fiber reinforcement for long-lasting performance”. The Anker PowerLine II 3-in-1 3 foot cable is available from Amazon for $14.99. Use the code ANKER846 to get $3.75 off that price (get it while it’s good) – thanks Kinja Deals!

Filed in categories: News

Tagged:

Eliminate carrying multiple cables with the Anker PowerLine II 3-in-1 cable originally appeared on The Gadgeteer on September 27, 2018 at 8:00 am.

Note: If you are subscribed to this feed through FeedBurner, please switch to our native feed URL http://the-gadgeteer.com/feed/ in order to ensure continuous delivery.

Music with catitude!

NEWS – Want a pair of Bluetooth headphones, but you’re looking for a little extra fun and – dare I say, catitude?  These Wireless Cat Ear Headphones with Removable Ears certainly fit both those criteria.  The cat ears can be removed when you want to attract a little less attention while you listen to music, and the color-changing lights can be turned on or left off.  With the flip of a switch, you can go from private listening through the ear cups to pumping out the music through the cat ears to share your music with your friends.

Headphone Audio

  • 20Hz-–20KHz frequency response
  • 32 Ohm impedance
  • 40mm drivers

Cat Ear Speaker Audio

  • 200Hz-–18KHz frequency response
  • 28mm drivers

The Wireless Cat Ear Headphones with Removable Ears are normally $129.99, but they are $89.99 at the time of writing.  They are available at Brookstone.

Filed in categories: News

Tagged:

Music with catitude! originally appeared on The Gadgeteer on September 26, 2018 at 12:14 pm.

Note: If you are subscribed to this feed through FeedBurner, please switch to our native feed URL http://the-gadgeteer.com/feed/ in order to ensure continuous delivery.

Cascade Wallet review


REVIEW – If you like gadgets and mechanisms (and you likely do since you’re here), the Cascade Wallet might be something to take a closer look at. Being a daily-carry item, a good wallet is a necessity. Mani Wonders has a very technical take on what makes a good wallet. It definitely caught my attention. Let’s jump to the test drive.

What is it?

The Cascade Wallet is a minimalistic credit card case with a sliding mechanism for accessing the cards along with a hidden money clip for cash and other thin items like business cards. A snap-on cover (available separately) lets you expand the storage capabilities.

Hardware specs

Wallet

  • Aircraft aluminum construction
  • RFID protection
  • Credit card lifting mechanism
  • Holds 5-6 cards
  • Hidden money clip
  • Dimensions 66.9 x 10.2 x 100.9mm

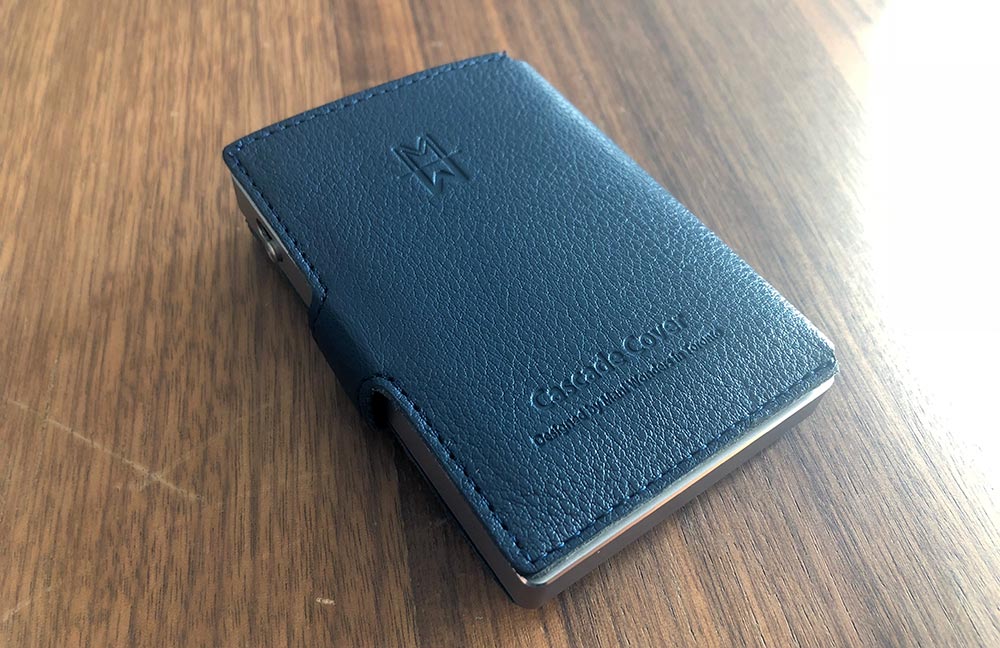
Cover (Sold separately)

  • Leather construction
  • Metal snap pins
  • Velcro closure
  • 4 card slots
  • Cash area

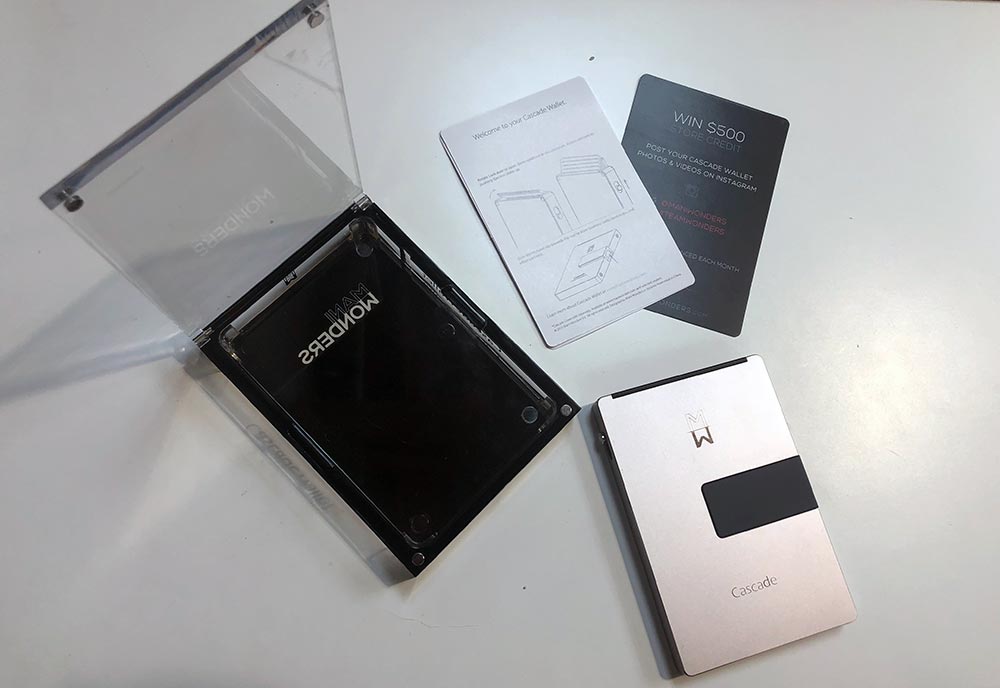
What’s in the boxes?
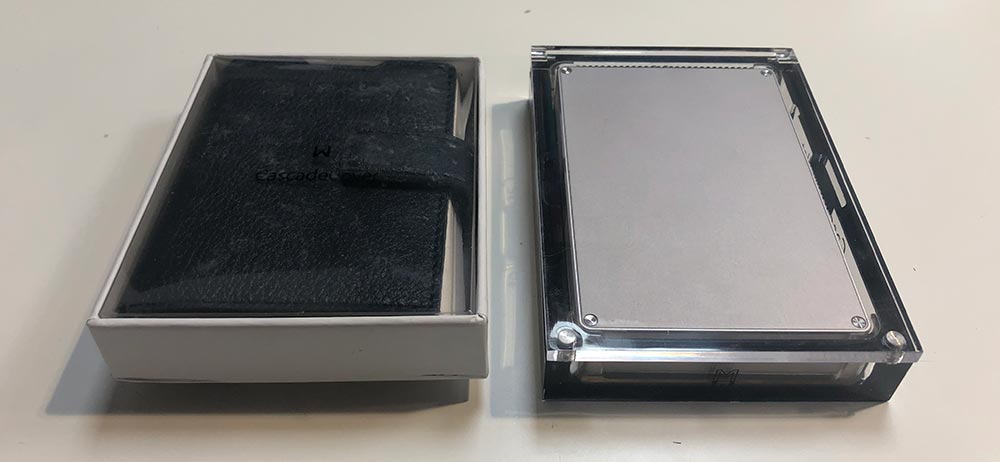
  • Cascade Wallet
  • Instruction card
  • Cascade Wallet Cover

Design and features

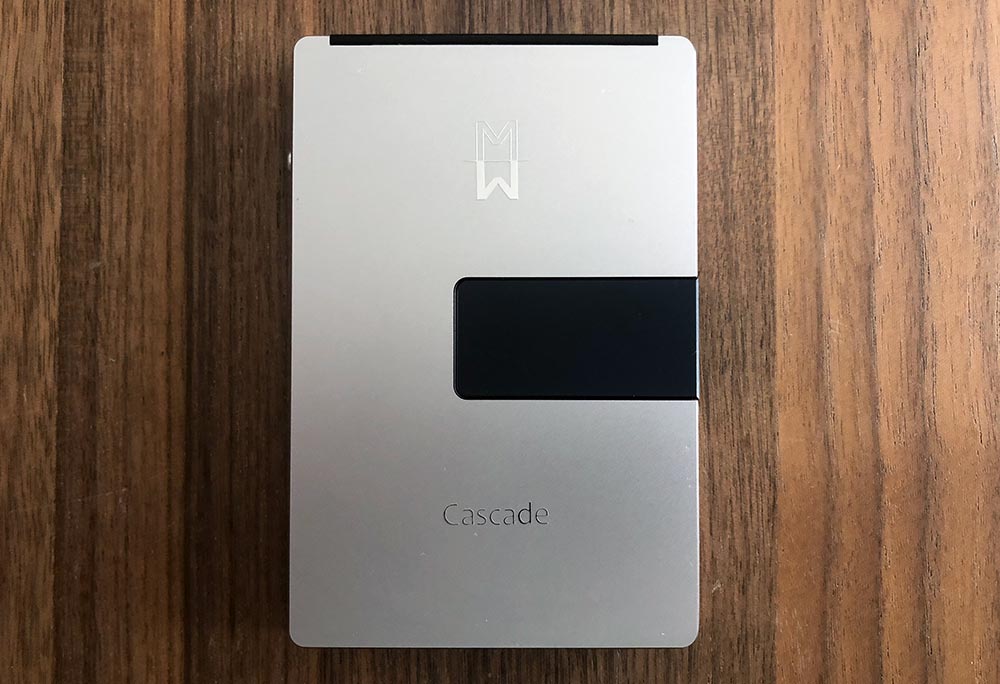
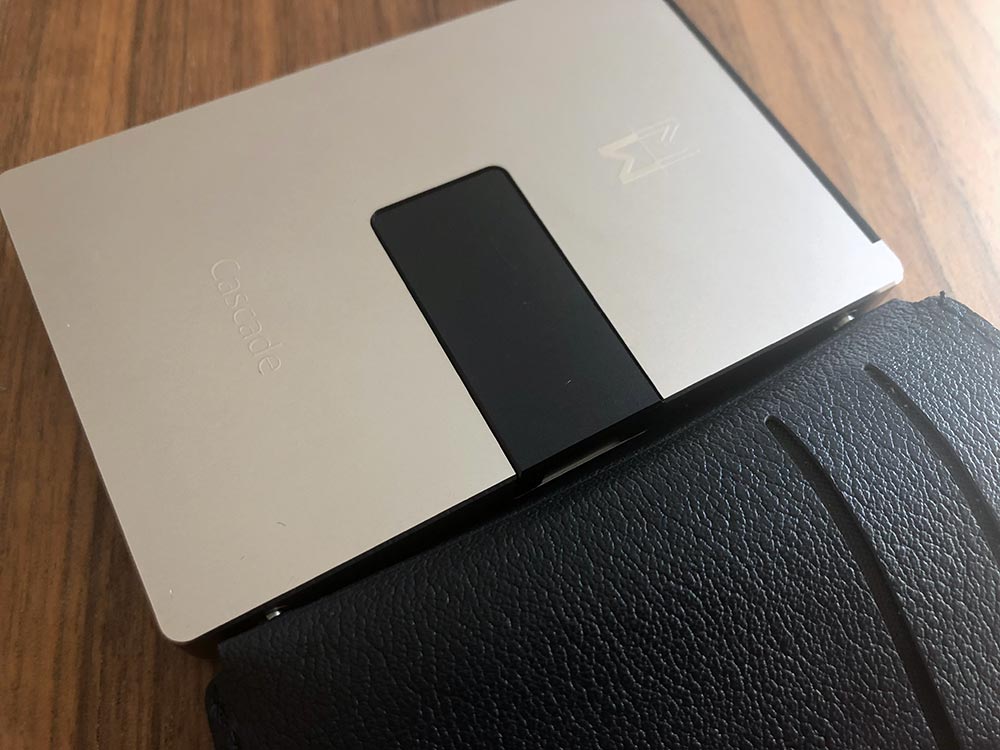
The Cascade Wallet is extremely well made. It’s primarily a two part, aluminum construction. The front half, sides and bottom are all a single part with mounting areas for the credit card door, slider switch and the money clip. The back plate hides the internals.

The right side of the case houses the money clip lever and has two flush receiving rivets for attaching the cover.

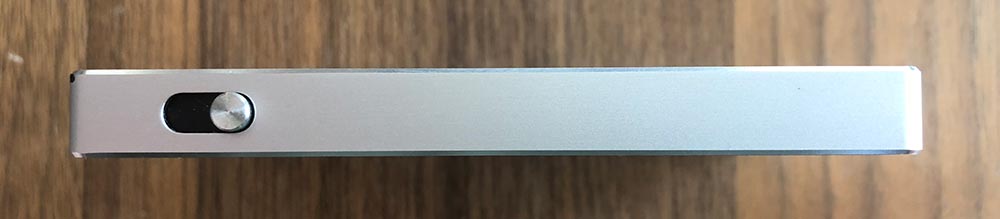
The slider switch lives on the left side of the case which is used to raise credit cards out of the wallet.

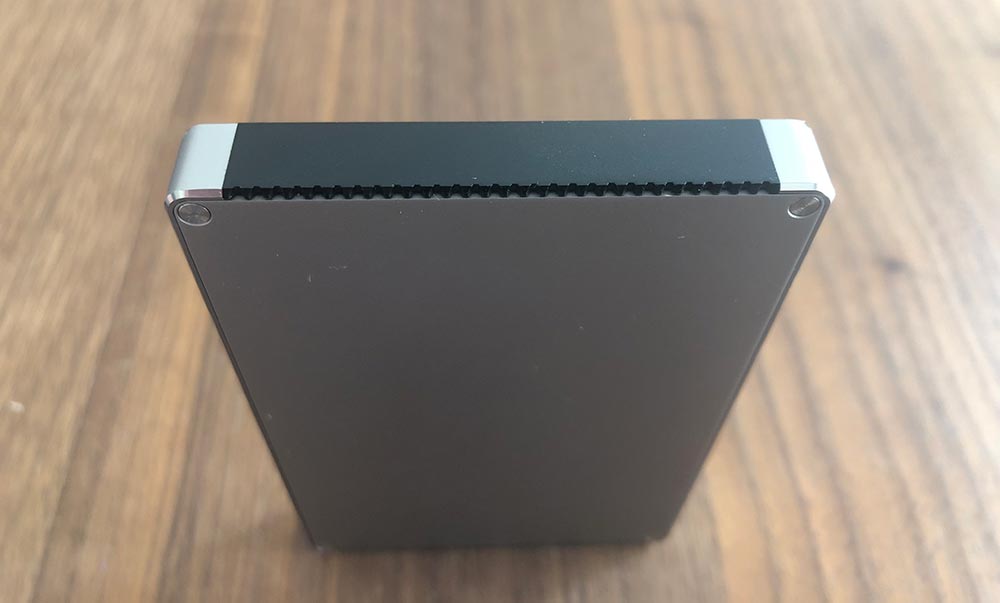
The credit card door is on the top and has a serrated edge used for opening the constant resistance hinge.

Setup

Part of starting to use any new wallet is figuring out which cards to put where. Using the Cascade Wallet (without a cover) makes this pretty simple as there is room for 5-6 cards. More and more credit cards have moved away from having raised numbers on the card’s face. If you’re running more of the flush, you should be able to get 6 in there.

The money clip will hold a few bills and a card.

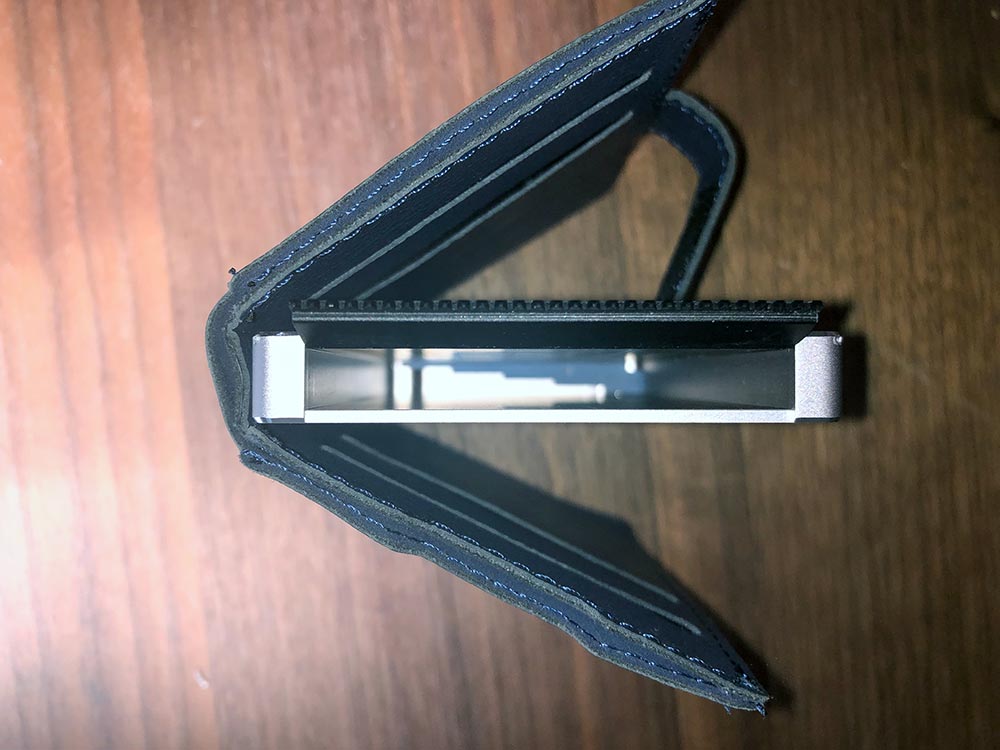
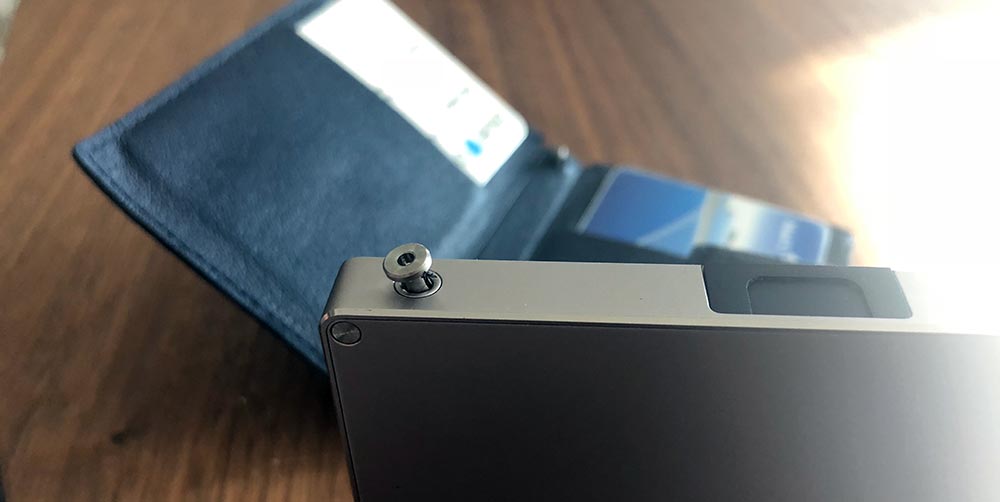
If you choose to purchase the cover, you’ll have some additional storage options. Installation isn’t hard, but it’s a bit tricky. Inside the cover on the spine are two small metal posts. You’ll want to align these with the two holes on the wallet and then press down on the wallet as shown below.

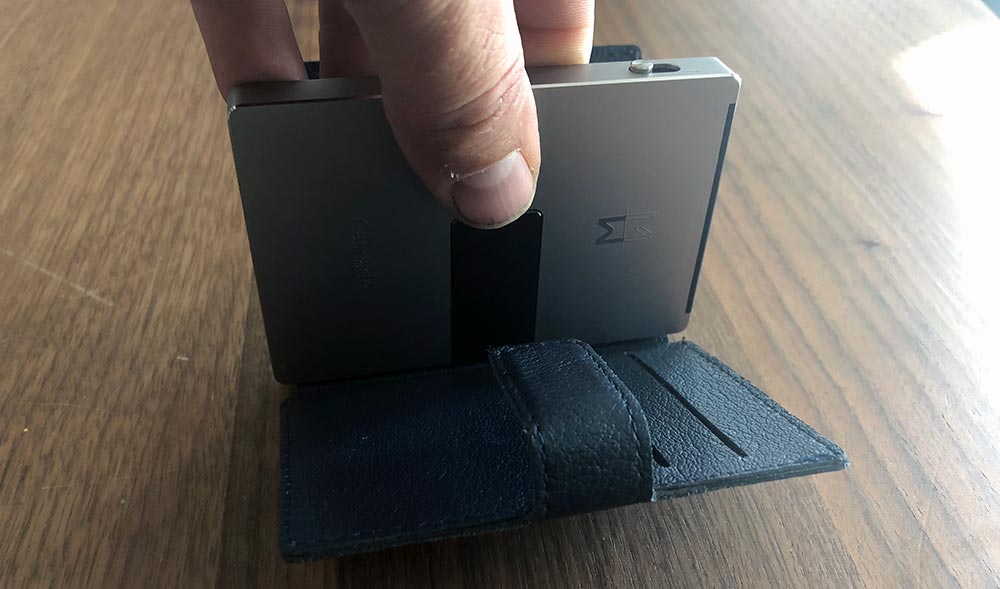
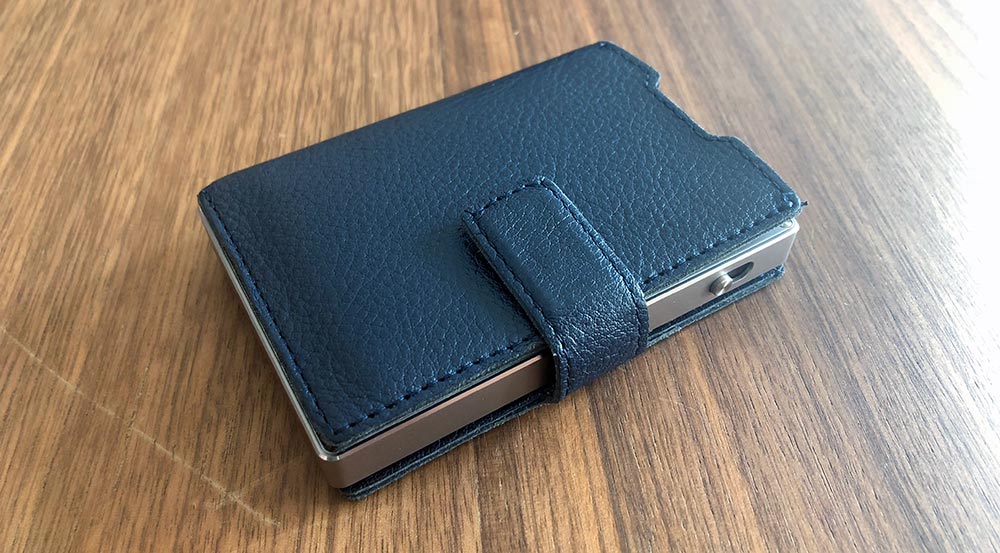
Once installed, the velcro holds the cover closed around the wallet.

Performance

It’s really a shame that the wallet is as beautiful as it is as I really wanted to like it, and there are plenty of things to like. They’re just overshadowed by functional issues that for me, resulted in returning to my previous wallet.

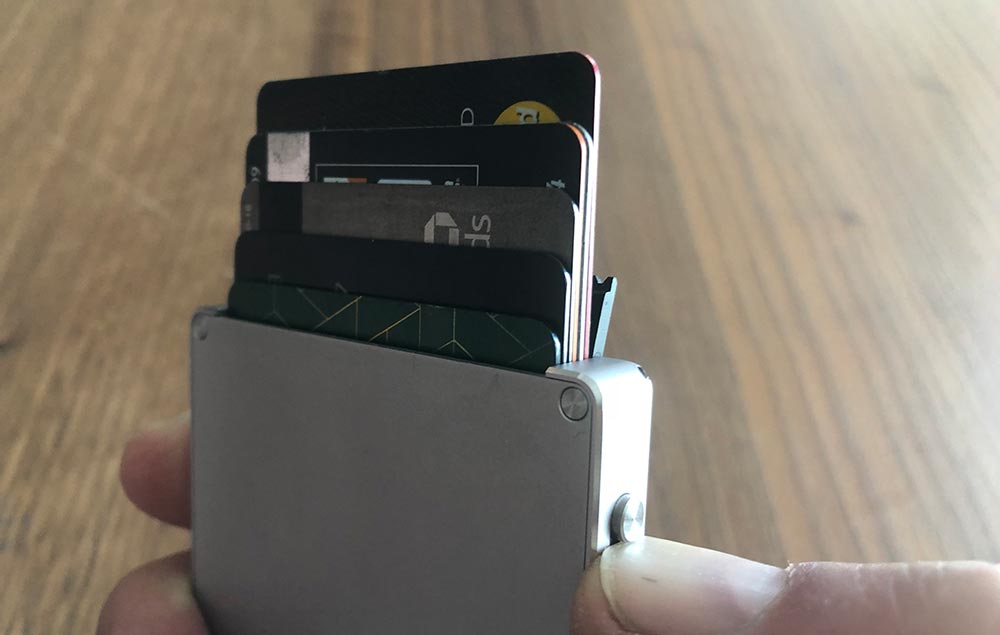
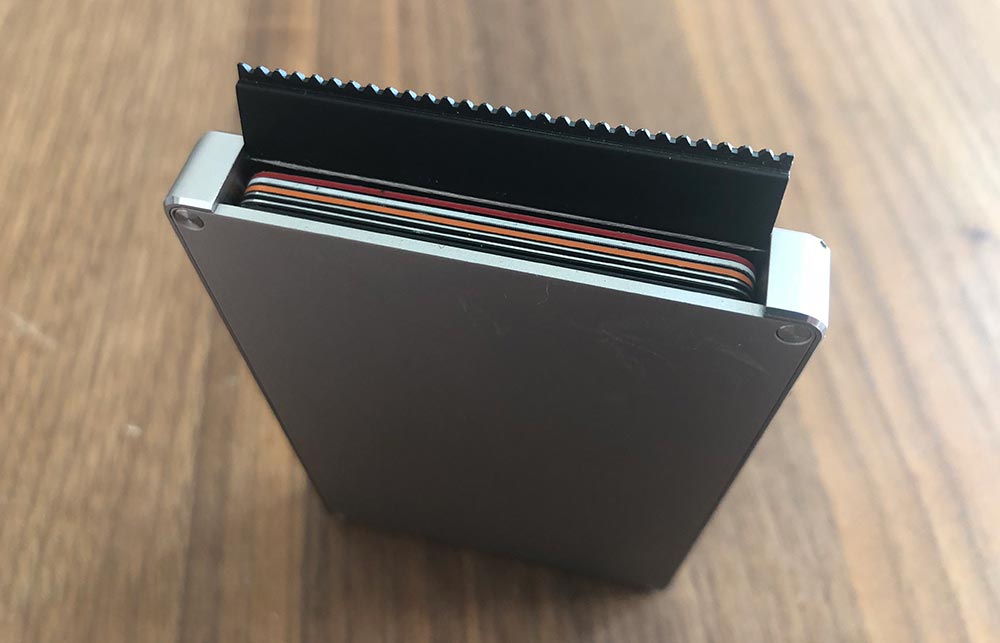
The key feature is the switch that slides the cards up. When it works, it’s magical. It fans the cards semi-evenly depending on the thickness and stack order of your cards.

So first things first. You can’t use the switch unless you have already pivoted open the door. This door is tight enough that initially, you think you are doing something wrong. On the plus side, this is never going to accidentally swing open.

The switch itself protrudes slightly and if you try and slide it single-handed with your thumb, the inward pressure of your thumb jams the mechanism. If I use the top of my thumbnail, it works much better, but it’s less of a natural motion. Using my other thumb (which is already close by from opening the door) doesn’t offer any advantages.

In this photo, you can see the stepped lifter at the bottom of the inside. As that rotates it lifts each of the cards to different heights.

Next up. You may have noticed I didn’t say 1-6 cards. If you have a single card in the wallet, it rattles around, but depending on which way you’re holding the wallet it will rest on a different lifter when you use the switch. It might be barely up, fully up or somewhere in the middle. The same thing happens with 3-4 cards, or even with 6 if you happen to have closed your wallet while you’re using the one you took out, making it a bit tricky to figure out where to put the one back.

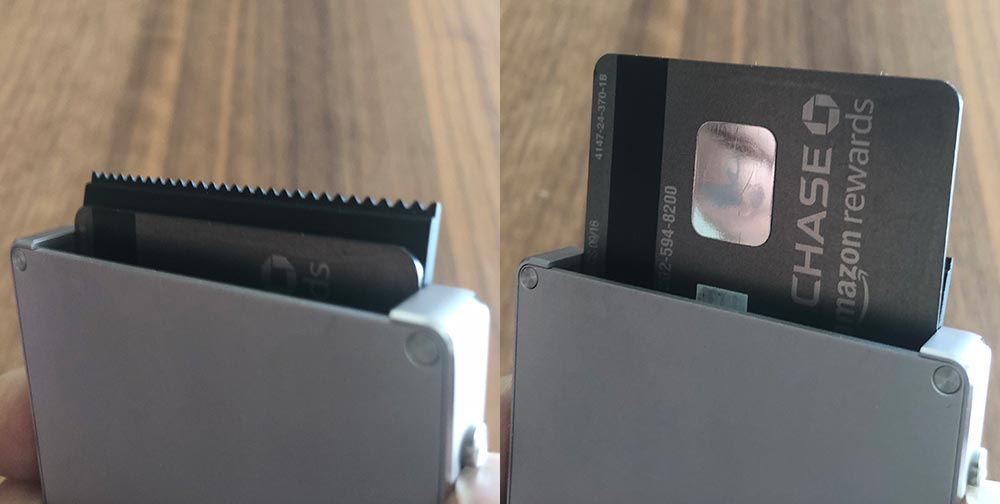
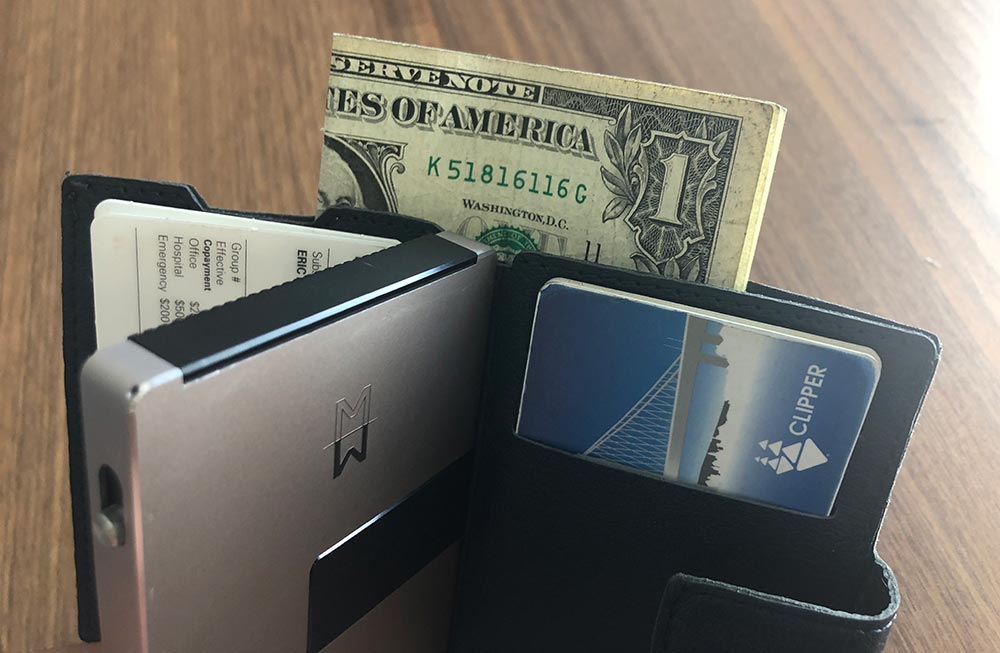
Even if you do have the full 6 cards in there, extracting the one you want is more challenging than you would think. The front and back cards are pretty easy, but ones in the middle are tricky, especially if they’re paired up like the two in the photo above. If you tip the wallet to help out, there’s zero retention and all six go sliding out (usually at speed).

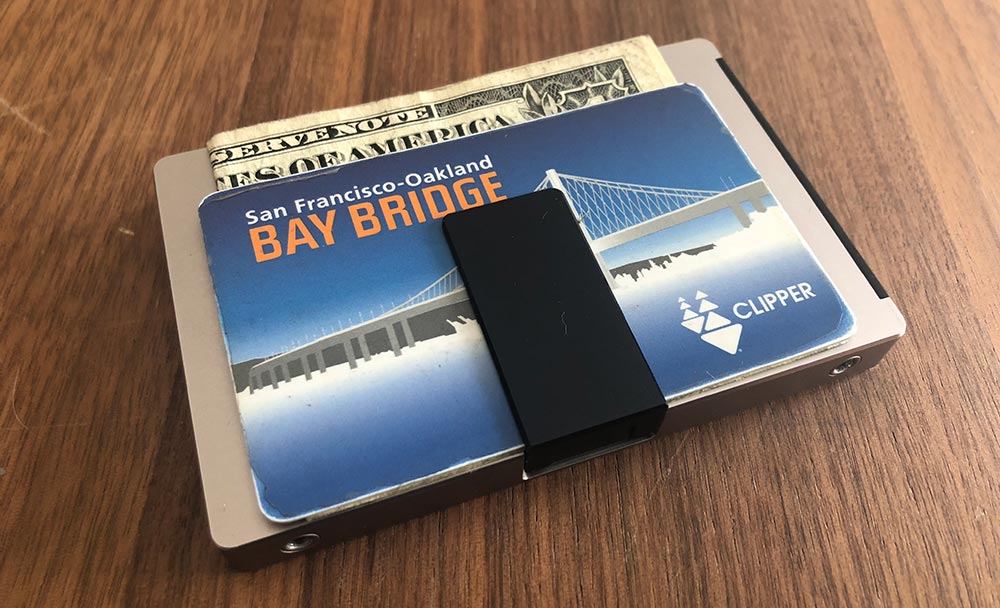
Let’s move onto the money clip. It’s really cool that they were able to design a mechanism that sits this flush when not in use. To open the money clip, you need to slide the clip towards the front of the wallet with your thumb. This motion, while opening the clip, tilts the front edge of the clip enough where it’s hiding again.

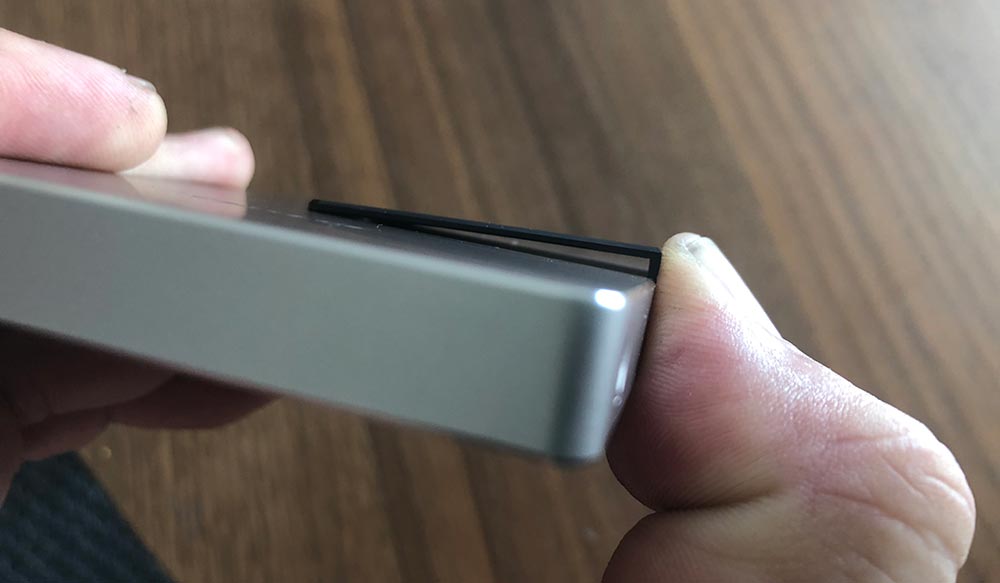
As a result, you end up trying to wedge your bill or card underneath the edge closest to your thumb and then navigating your cash into place. After numerous tries, I figured out that you can push it up and then rock your thumb backward to kinda level out the clip. Not ideal. It also opens just far enough to tackle a bill or two. If you paid with a 20 and got back 8 in bills, you’ll be fighting it a bit.

At this point, I opted to try out the cover. The RFID function of the main wallet is a great safety feature, but also means that my transit card won’t work at readers, so I already knew I’d end up using the cover for regular use. With the cover on, I was able to put 6 cards inside the wallet, health/insurance cards in the left side of the cover and my Clipper and driver’s license on the right side.

The cover’s length is about 15mm short of being able to put bills in without folding, so you’ll have to decide your preferred folding, lump stack up. All closed up the wallet doubles in thickness to about 20mm loaded this way. Still pretty thin, but just an FYI.

It’s also worth noting that once you have the cover on, it further renders the money clip useless as the lever is now trapped inside the spine of the cover.

When it came time to take some photos for this review I needed to take the cover back off. There are no instructions on how to do this in the card that came with the wallet and none on their site. I would imagine that the pins relax a bit over time, and maybe Mani Wonders didn’t think someone would take the cover back off this quickly, but it was not trivial. In fact, both of the pins pulled through the cover and sat proudly from the side of the wallet. At that point, they were much easier to remove.

What I like

  • The slim aesthetic and overall size
  • The intent of the design
  • The materials

What needs to be improved

  • Functionality
  • Cost

Final thoughts

There’s so much potential here, but so many misses when it comes to the core functionality of a wallet. I need to be able to quickly get to the card I need, use it and return it without challenge. With the Cascade Wallet, it felt like I had passed some kind of a test if it all went as it should. The materials and attention to detail are amazing, but it’s really hard to ignore functionality problems this big, especially at this price. Here’s hoping they can figure out how to make V2 better.

Price: $159 ($39 extra for cover)
Where to buy: Mani Wonders
Source: The sample of this product was provided by Mani Wonders.

Filed in categories: Reviews

Tagged:

Cascade Wallet review originally appeared on The Gadgeteer on September 26, 2018 at 11:00 am.

Note: If you are subscribed to this feed through FeedBurner, please switch to our native feed URL http://the-gadgeteer.com/feed/ in order to ensure continuous delivery.

The Neck Hammock provides ultimate relaxation and pain relief

NEWS – If you work at a desk all day or like most people spend hours looking down at a computer or phone screen you probably experience some degree of neck pain. I know I do and it seems like nothing helps to relieve that nagging discomfort. The Neck Hammock is a cervical traction device created by a physical therapist that helps you gently stretch out the muscles in your neck. Providing a dose of relief from aches, kinks, and pain in as little as 10 minutes a day.

It’s basically a sling that cradles your head and neck that’s easily adjustable to hang at the right height from a doorknob or railing. How high you hang it and how long you use it is entirely up to you. And even if you don’t suffer from any kind of pain, it’s a perfect way to just relax and zen out for a few minutes after a long day.

Neck Hammock is hand washable, portable, and lightweight. Making it great for in-home use or stretching out post-travel stiffness.

It even comes complete with a travel pouch, eye cover, a “do not open” door sign, a guided meditation audio file, and instructions.

The Neck Hammock is available on The Grommet for $49.95.

Filed in categories: News

Tagged:

The Neck Hammock provides ultimate relaxation and pain relief originally appeared on The Gadgeteer on September 26, 2018 at 10:00 am.

Note: If you are subscribed to this feed through FeedBurner, please switch to our native feed URL http://the-gadgeteer.com/feed/ in order to ensure continuous delivery.

Vantrue N1 Pro Mini Dash Cam review


REVIEW – For many years, I really disliked dash cameras. I felt like they were in the way of my vision, and always had some sort of shortcoming, whether it was the quality of the footage or connectivity that made me say away from them. Most recently I have been able to test and review a few of them, and I have begun to like them more as the overall quality has increased. This dashcam really caught my interest because of its really tiny size and yet indications of nice built-in features.

What is it?

The Vantrue Dash Cam is a “tiny” dash cam with a 1.5″ LCD and a 160-degree wide angle lens that produces full 1080P HD footage and includes features like Parking Mode and collision detection.

What’s in the box


1 x Vantrue N1 Pro Dash Cam
1 x Suction cup mount
1 x 3’ Micro USB data cable
1 x Car charger/power adapter with connected 10’ mini USB cable
1 x User Guide
1 x Quick Start Guide
1 x Warranty card

Design and features

This dash cam has a tiny and compact design and measures 1″ x  2 1/2″ x 1 1/2″.

Specifications:

Display: 1.5 inch TFT LCD (4:3)
Lens: 160-degree wide viewing angle and a full 6 layer glass lens with a wide aperture of F/2.0
Languages: English/Japanese/Germany/简体中文
Video Format: .MOV; H.264 compressed format
Video Resolution: 1920x1080P30, 1280x720P30
Image Resolution: 12M Pixels
Image Format: JPEG
Motion Detection: ON/OFF
Parking Monitor: ON/OFF
Audio Recording: ON/OFF
Memory Card: Micro SD Card up to 64GB (Class 10; in FAT32 format)
MIC/Speaker: Built-In
Backlight: Off ON/OFF
USB Port: USB 2.0, mini
Battery Capacity: 130mAh
PC Operation System: Windows XP/Vista/Windows 7/Windows 8/Window 10/Mac

On the front of the camera, there is the logo and to the right of it the camera lens. On the back on the top right-hand corner, there are 2 LED indicators that show when the camera is charging and when it is recording. In the column of the 4 buttons, the top button is on/off power button, the second is the upward selection button that also serves as the fast forward playback button and as the microphone on/off switch. Next, there is the OK button that starts and stops video recording and performs the “confirmed” function, and last, there is the downward selection button that also serves as the slow forward playback button and to turn the screen on or off.

On one side of the camera, there is a micro USB port on top for charging or data transfers, and a micro SD card slot below.


At the top of the dash cam to the left, there is the emergency mode button that you press to capture a photo while the camera is recording, and a long press, while the camera is recording, will put it in Parking Mode. To the right of the emergency mode button, is the connection that receives power for the camera once it is connected to the mount and the mount is plugged in. At the bottom of the camera as shown below is the HDMI port and the factory reset button.


The 3 pictures below are of the windshield mount and they show how it is positioned when connected to the dash cam, the mini USB power jack and how the power adapter is connected to the mount.


Performance

This dashcam really performs well. The settings are easy to navigate and the choices are very straightforward. The image stabilization works well and the video and images are clear even in overcast and/or rainy conditions. Its “tiny” size, it has no noticeable effect on your view when driving.


It includes features like 1080P/30 fps HD video with Supper Night Vision, seamless loop recording on micro SD cards up to 256GB, and a G-sensor that automatically detects a sudden shake/collision and locks the footage to prevent the video from being overwritten even in loop recording. The 24-hour Parking Monitor motion activated parking mode allows the camera to automatically record when it detects motion in front of your car. To take advantage of this feature, the power adapter should be plugged into an “always on” outlet or hard-wired to the battery. This way, if the dash cam is off and it detects a crash to the front of the vehicle, it will turn on and end recording after 20 seconds, and the recorded videos are saved and locked.

If you enable the time-lapse feature, the Vantrue N1 will keep taking photos at the set time interval and then auto edit them together to a video clip. This reduces the size of the video file. The dash cam also provides excellent audio quality. I also like that the power adapter has a nice blue LED on the end that plugs into your vehicle. Not only does it indicate power on/off, but it is a nice interior light.

Videos


What I like

  • I love the size
  • The video quality
  • The features and ease of use

What can be improved

  • The connector to the dash/windshield mount

Final thoughts

Out of all of the dash cams that I have owned and/or tested, I like this one the best. It is so small that it does not present any type of bothersome obstruction of your view and yet it functions much like the bigger and more expensive dash cams. While it is not 4K, its footage is perfect for its function and quite “crisp and clean”. It is simple and effective, and gets an exuberant thumbs up from me!!

Price: $79.99
Where to buy: Amazon
Source: The sample for this review was provided by Vantrue.

Filed in categories: Reviews

Tagged: ,

Vantrue N1 Pro Mini Dash Cam review originally appeared on The Gadgeteer on September 26, 2018 at 9:00 am.

Note: If you are subscribed to this feed through FeedBurner, please switch to our native feed URL http://the-gadgeteer.com/feed/ in order to ensure continuous delivery.