
REVIEW – Whenever I write a review, I always assume a position of impartiality. Having said that, many of the readers that follow my reviews know that I love BenQ equipment and especially BenQ monitors. When I heard about the BenQ SW270C Photographer Monitor, I was beyond excited about the opportunity to test and review it. Let’s see if I am still excited after taking it for a spin!!
What is it?
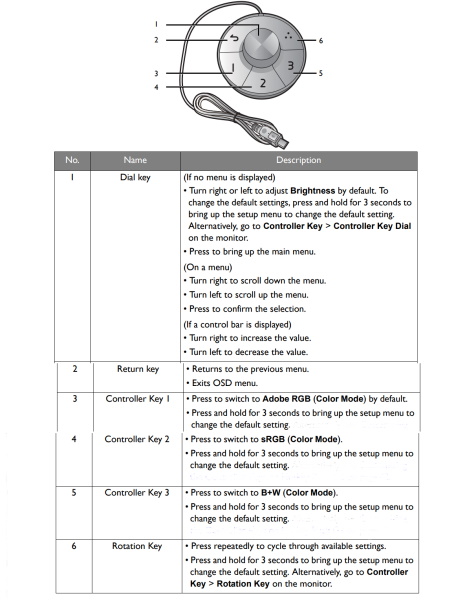
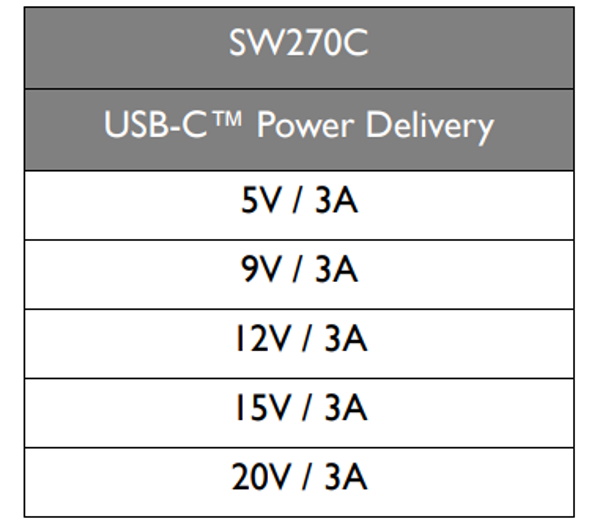
The BenQ SW270C Monitor is a 27-inch Photographer Monitor with, 2K Adobe RGB, Uniformity Technology for Screen-Wide Color Accuracy, 99% Adobe RGB Color Space with IPS Technology and multiple built-in ports including USB-C Connectivity with Power Delivery. BenQ has also included a Hotkey Puck that simplifies switching between modes. The Hotkey Puck is programmable so that it can be used to quickly adjust the displays settings.
What’s in the box
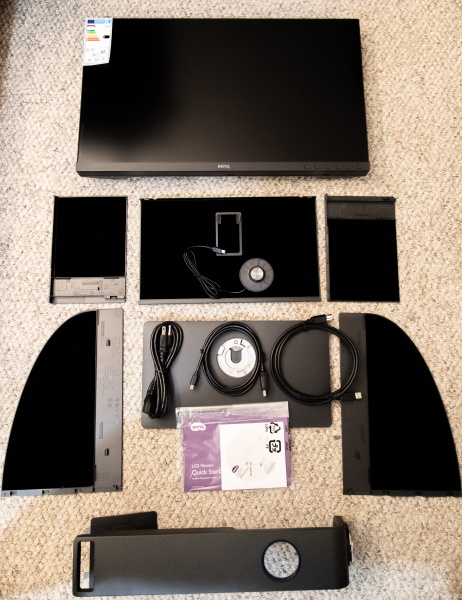
1 x BenQ SW270C LCD Monitor
1 x Monitor Stand
1 x Monitor Base
1 x Shading hood for landscape orientation
1 x Hotkey Puck G2
1 x Video Cable: DP to mini DP
1 x USB Cable
1 x Power Cord
1 x Quick Start Guide
1 x CD-ROM
Design and features
Specifications
Screen Size: 27″
Panel Type: IPS
Backlight Technology: LED backlight
Resolution (max.): 2560×1440
Brightness: 300
Native Contrast(typ.): 1000:1
Viewing Angle: (L/R;U/D) (CR>=10), 178/178
Response Time: 5 ms (GtG)
Refresh Rate: 60Hz
Aspect Ratio: 16:9
Display Colors: 1.07 billion colors
Color Gamut: 99% Adobe RGB, 97% P3, 100% sRGB
Display Area(mm): 596.7×335.6
Pixel Pitch (mm): 0.2331
PPI: 109
DCR (Dynamic Contrast Ratio) (typ.): 20M:1
Color Bit: 10bits
Headphone Jack: Yes
Segment: Photographer
Product Color: Gray
Color Mode: Adobe RGB / sRGB / B&W / Rec. 709 / DCI-P3 / Display P3 / M-book / HDR / DICOM/Calibration 1 / Calibration 2 / Calibration 3 / Custom 1 / Custom 2
HDR: HDR10
Display Mode: Full, Aspect Ratio, 1:1
Color Temperature: 5000°K / 6500°K/ 9300°K / User Mode
Gamma: 1.6 – 2.6, sRGB
K Locker: Yes
OSD Language: 18 Languages (English / Francais / Deutsch / Italiano / Espanol / Polish / Czech / Hungarian / Romanian / Netherlands / Russian / Swedish / Portuguese / Japanese / Chinese / S-Chinese / Arabic/Korean)
PIP/PBP: Yes
HDCP: 2.2
VESA Wall Mount: 100x100mm
AMA: Yes
Display Screen Coating: Anti-Glare
3D-LUT: 16bits
Delta E: <= 2 (avg)
Uniformity Technology: Yes
Hardware Calibration: Yes
Video Format Support: Yes
Gamut Duo: Yes
Black & White mode: Yes
Black Level: Yes
Hotkey Puck G2: Yes
Factory Calibration Report: Yes
HDMI: HDMI (v2.0)x2
DisplayPort: DisplayPort (v1.4)
USB 3.1 Hub: USB Downstream x 2, Mini USB x 1
USB 3.1 Hub: USB Upstream x 1
USB Type-C: Yes (PD60W, DP Alt mode, Data)
Card Reader: SD/MMC type
Support Format: SD/SDHC/SDXC/MMC
Voltage Rating: 100~240V
Power Supply: Built-in
Power Consumption (based on Energy Star): 36.1W
Power Consumption (stand by mode): 0.5W
Power Consumption (sleep mode): 0.5W
Dimensions (HxWxD mm) (w/o Base) (with shading hood): 372.2 x 626 x 238.04
Dimensions (HxWxD mm) (without shading hood): Landscape: 504.5-611 x 613.8 x 213.4; Portrait: 733.4 x 380.7 x 223.2
Dimensions (HxWxD mm) (w/o Base): 368.9 x 613.8 x 62.65
Dimensions (HxWxD mm): Landscape: 504.5-614.3 x 626 x 334.8; Portrait: 744.6 x 381.1 x 334.6
Software: Palette Master Element
Support Calibrator: X-Rite i1 Display Pro / i1 Pro /i1 Pro 2 /i1 Studio , Datacolor Spyder 4/5
Hor. Frequency (kHz): 27~140Khz
Ver. Frequency (Hz): 24~76Hz
Video Bandwidth (MHZ): 600M Hz
Compatibility: Mac Compatible, Windows® Compatible, Windows®10, Windows®8.1, Windows®8, Windows®7
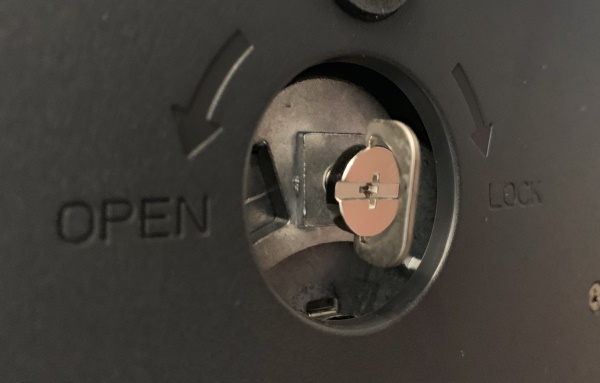
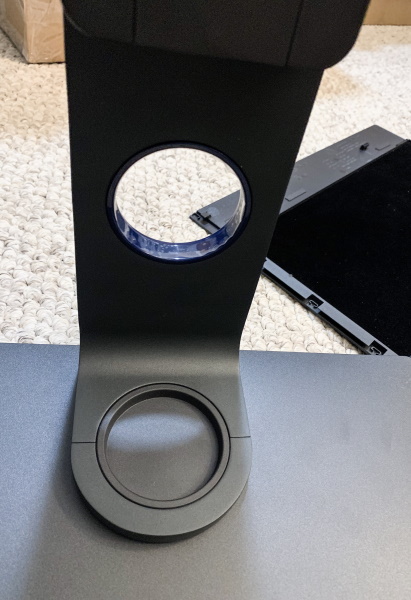
The monitor base is a relatively large and weighty base that provides a firm platform for the monitor. In the middle towards the rear, there is a circular cutout that is the receiver for the monitor stand. Underneath there is a wing screw that screws into the monitor stand to lock the two together.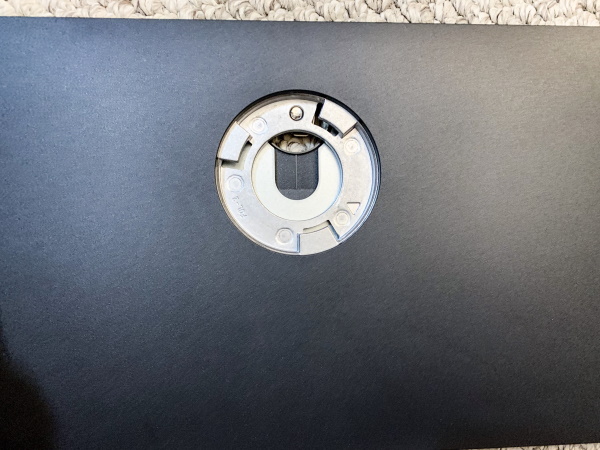
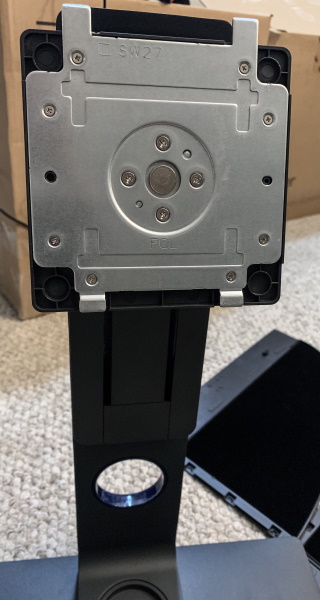
The picture below shows the monitor stand with the locking plate at the top the connects into the VESA receptacle on the back of the monitor to connect the two. Right below the VESA plate, you can see 2 tracks that are the sliding tracks that allow for height adjustment, and below that there is a pass-through hole for cable management. Underneath the stand, there is the plate that connects to the monitor base. There is also a circular slot to accommodate the Hotkey Puck.

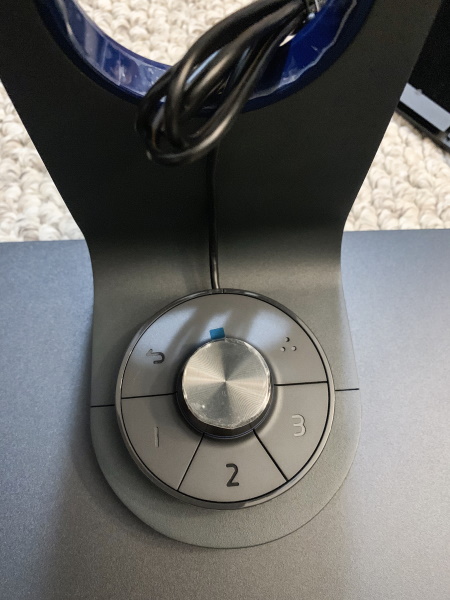
The next picture shows the Hotkey Puck in the monitor stand.
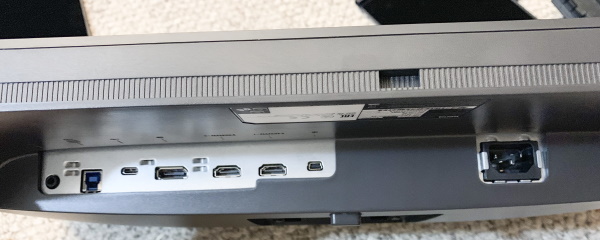
Underneath the monitor, there are the connectivity ports. As shown below from left to right they are the headphone jack, USB port (upstream; connecting to the PC), USB-C port, DisplayPort socket, 2 x HDMI socket, Hotkey Puck / Hotkey Puck G2
socket, and the AC power input jack.
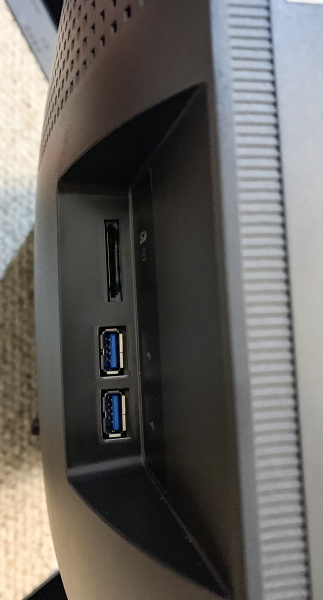
When facing the front of the monitor there are 3 ports on the left side. As shown below, they are from top to bottom, an SD card slot and 2 USB ports.
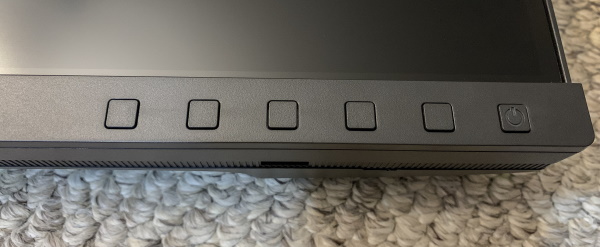
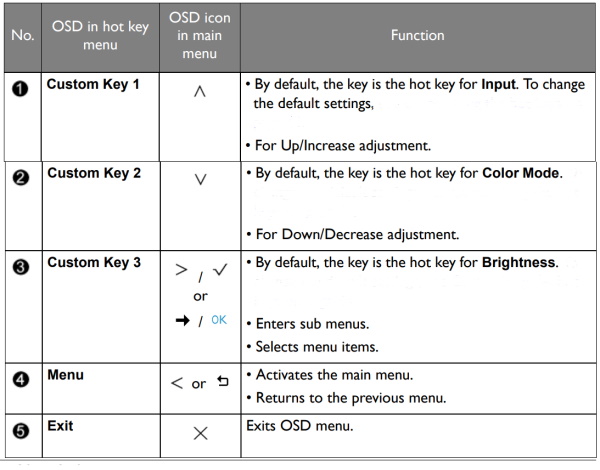
On the bottom right of the front of the monitor, there are the control buttons. From left to right they are 5 control buttons and the on/off power button.
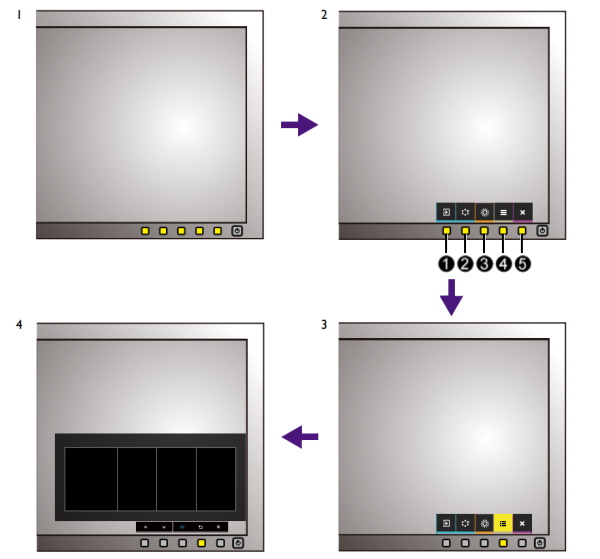
1. Press any of the control keys.
2. The hotkey menu is displayed. The left three controls are custom keys and are designated
for specific functions.
3. Select (Menu) to access the main menu.
4. In the main menu, follow the icons next to the control keys to make adjustments or for
selections.
Performance
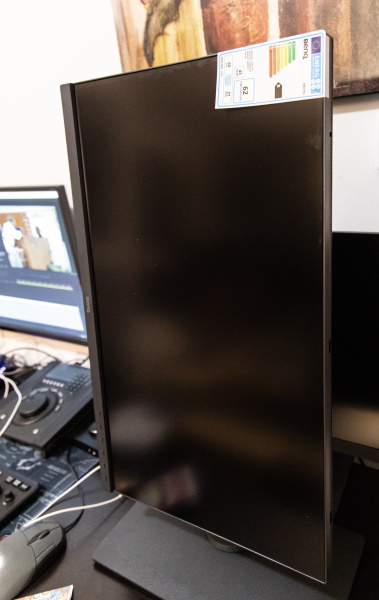
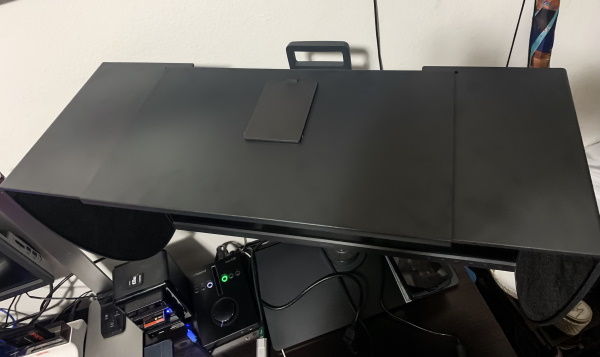
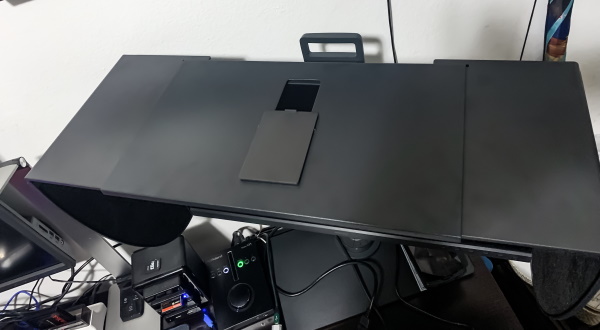
The monitor arrived well packaged and padded. Out of the box, the components are easy to assemble and putting the monitor together only took a few minutes. Adding the hood took a bit longer but was easy once I figured out how the pieces connect to form the hood and how they attach to the monitor. Youtube videos helped me to better understand the process. Before I added the hood, I took the time to play around with the monitor rotation. Since the hood attachments that come with this model only work for use in landscape mode, I took a picture without the hood to show the rotation capability. (This monitor rotates 90 degrees to be used in either portrait or landscape mode.)
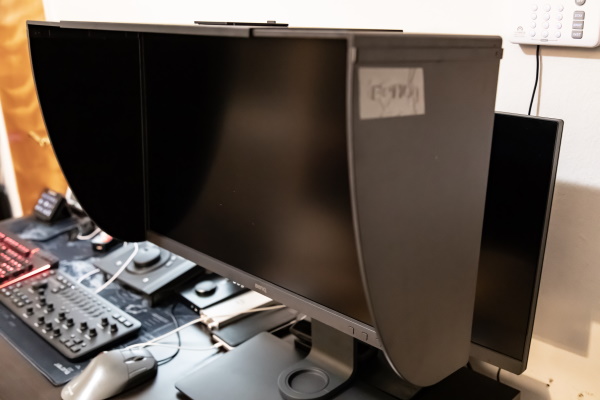
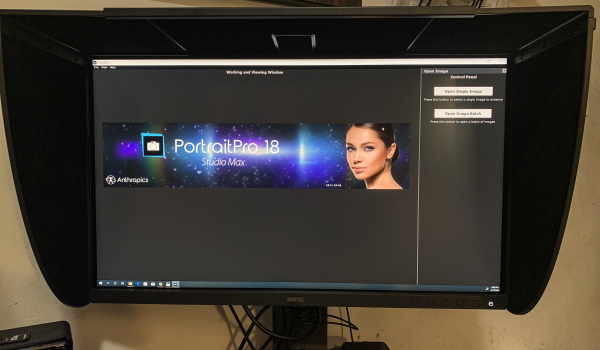
Once I set up the monitor with the hood attached, I took the following pictures from both the left and right perspectives to show how it looks installed.
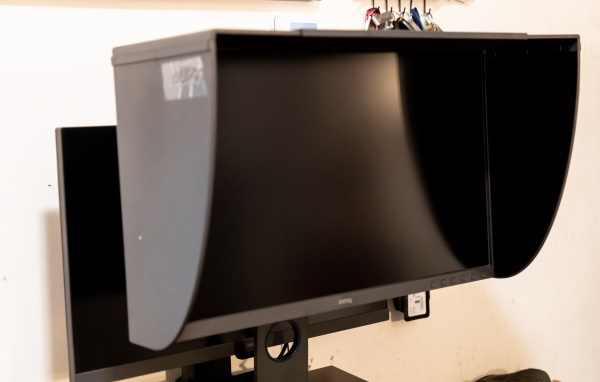
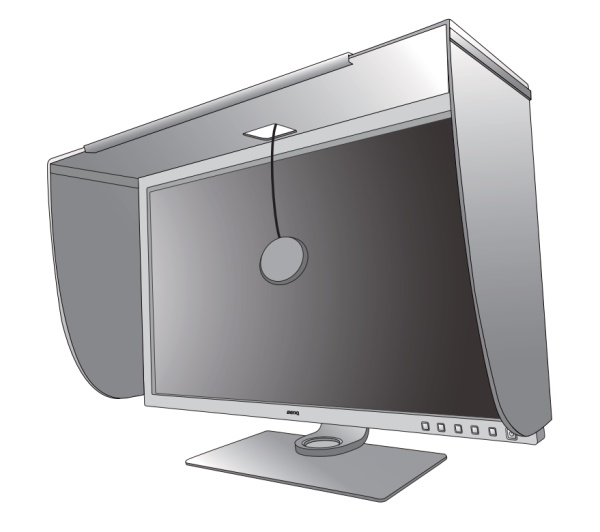
On the top of the hood, there is the sliding door that provides access to the screen for using a calibration device without having to remove the hood.
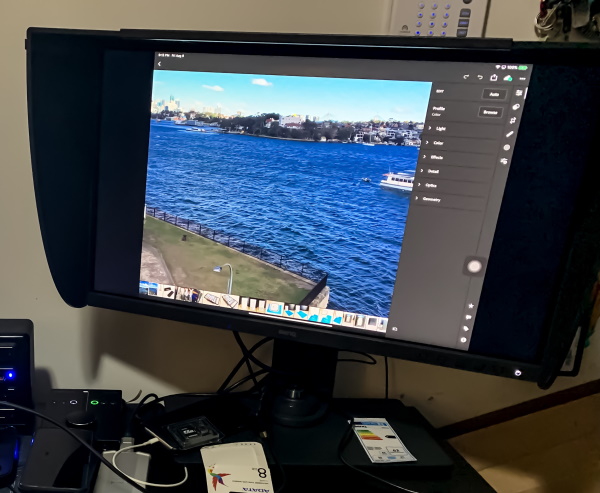
I connected my iPad Pro 12.9″ to the monitor and edited some pictures using Adobe Lightroom on my iPad with the BenQ connected via USB-C as an extended monitor. Having the larger real estate along with accurate colors is great especially as my eyes get older.
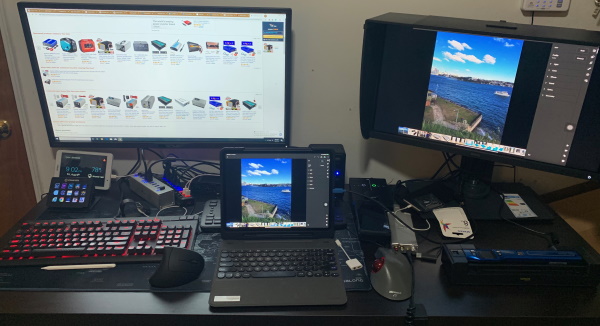
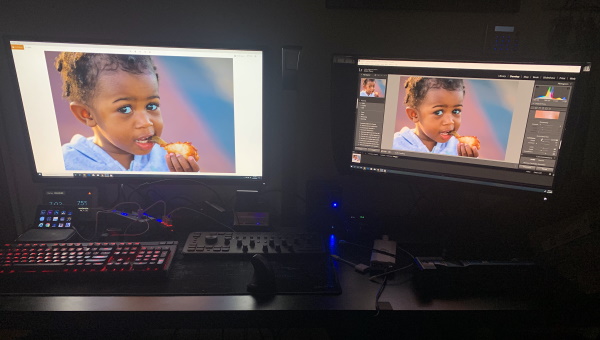
To try to illustrate some of the visual benefits of the monitor including the color representation and the hood effect, the picture below shows the same picture twice. On the left, it is opened via Photo Viewer on my BenQ PD3200U, and on the right is it opened in Adobe Lightroom on this BenQ SW270C monitor.
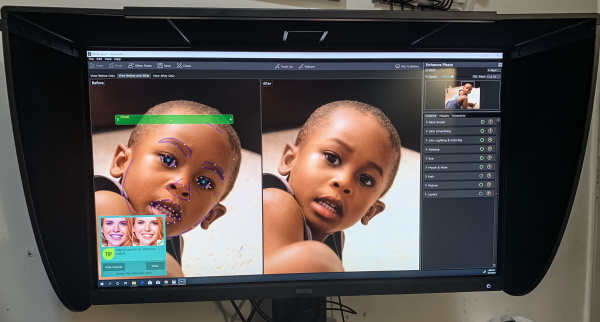
I also edit photos in PortraitPro, and the experience with this monitor including the amazing colors is also great.
What I like
- The build quality
- The connectivity options
- The stability
- The features
- The color accuracy
- The detachable hood
- The overall functionality
What I’d change
- Include the extra hood sections needed to use the hood in Portrait Mode as well
- (Personal wish) – A 32-inch or 35-inch version would be greatly appreciated!!

Final thoughts
I am a huge fan of BenQ monitors, and the BenQ SW270C Photographer Monitor does not disappoint. As a photographer, I spend a lot of time editing photographs on my iPad and my studio PC. This monitor allows me to connect my iPad to it via USB-C and also to use it as an extended monitor on my desktop PC. When connected to my iPad, the Power delivery feature ensures that my iPad remains charged. Whichever way I decide to use the monitor, the colors are precise and brilliant and it is just a joy to use even more so when I have hundreds of photos to edit and in some cases color-correct. I am currently using it with its stand on my desk but I plan to mount it on the wall with an arm that allows for even more movement. The included hood is perfect for viewing true color representation, and for increasing accuracy, especially since ambient lighting or stray lighting becomes less of a factor. The sliding opening in the hood is perfect if there is a need to use a color correcting tool. I have such a tool, but I have had no issue with the colors right out of the box. The Hotkey Puck is also a nice convenient tool albeit that I do not use it very often. I give the BenQ SW270C Photographer Monitor a very well done, and two thumbs way up!!!
Price: $799.99
Where to buy: Amazon
Source: The sample for this review was provided by BenQ
Filed in categories: Reviews
Tagged: monitor
BenQ SW270C Photographer Monitor review originally appeared on The Gadgeteer on August 26, 2019 at 8:00 am.
Note: If you are subscribed to this feed through FeedBurner, please switch to our native feed URL http://the-gadgeteer.com/feed/ in order to ensure continuous delivery.