Homever Slow Masticating Juicer review


REVIEW – In today’s world, eating and drinking healthy are popular efforts that have become a sought after lifestyle. In response to this demand, thousands of appliances have flooded the market, all offering to take your healthy ingredients and turn them into even healthier dishes or juices. I love fruit, but I can never seem to get into the rhythm of eating all of the fruit I purchase. However, since I do drink a lot of liquids, the idea of turning the fruit and vegetables into tasty and healthy juices is very appealing to me. There are tons of Juicers that promise to do the job of producing the most juice, in an easy way, and with minimal cleanup. Let’s see how the Homever Slow Masticating Juicer handles the task.

What is it?

The Homever Slow Masticating Juicer is a slow masticating juicer for fruits and vegetables, with a quiet motor and reverse function. It has also been designed to be easy to clean and it is BPA-Free

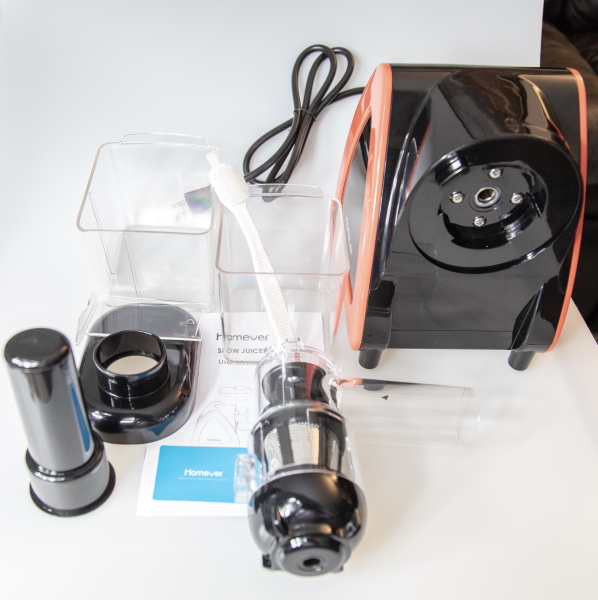
What’s in the box


1 x Homever Slow Masticating Juicer
1 x Juice Container
1 x Residue Container
1 x Propelling Rod
1 x Tray
1 x Extractor
1 x Juice Filter
1 x Extractor Cover
1 x Cleaning Brush
1 x User Guide

Design and features

Features:

  • 80 Rpm Slow Masticating & Grinding: Homever masticating juicer works in slow speed 80 rpm /minute, producing less foaming or clogging.
  • 7 Segment Spiral System: The 7 segment spiral masticating extraction can fully squeeze the fruits and vegetables.
  • 60 Low Decibel Moter Running: The Homever juice machine produces less than 60db of noise when working, and it is easy to assemble, operate and clean.

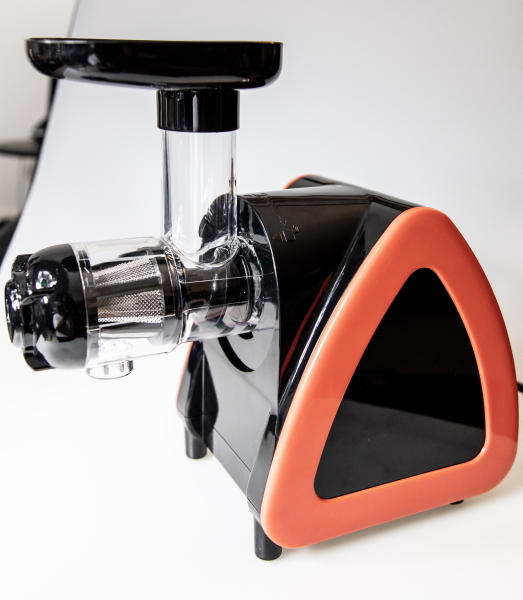
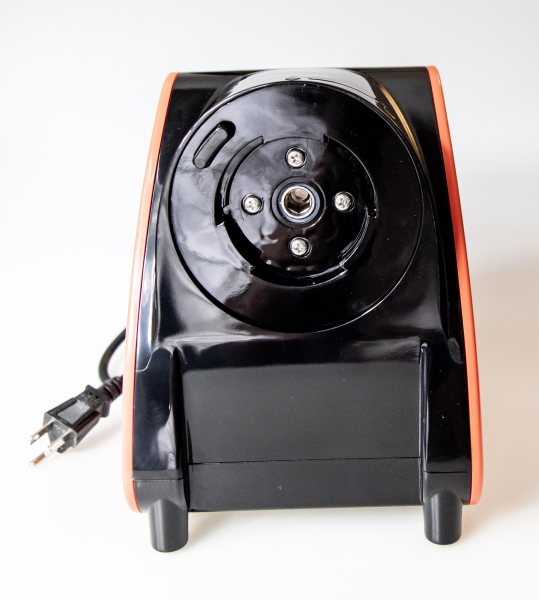
On the front side of the base, there is the receptacle that the juicing extractor mechanism connects to.
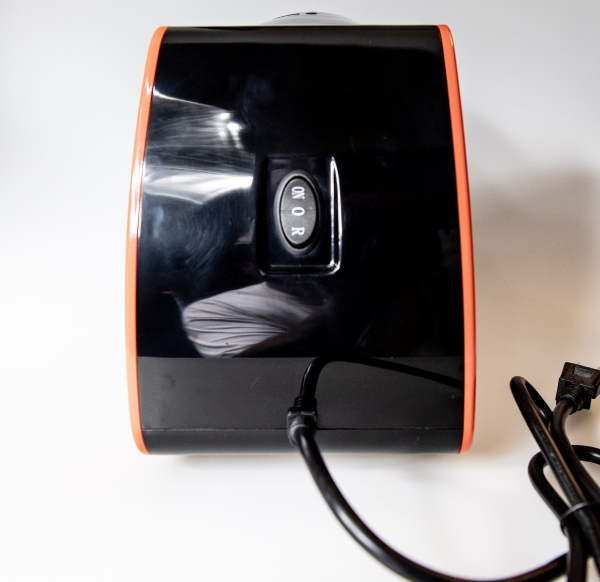
On the opposite side of the base is the power switch. It includes the on, off and the reverse functions. Below the power switch at the bottom is the built-in power cord.

The juicing extractor mechanism that includes the filter, propelling rod and extractor connects to the base.

Performance

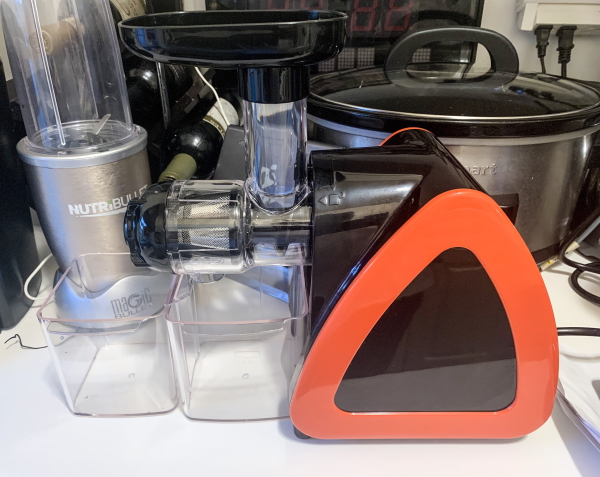
The Juicer is very easy to assemble, and I was able to put the few parts together in seconds. Then, I set it up on my crowded testing counter in the kitchen and I was ready to go., The only challenge I faced was where and how to place the container baffle, but I think I figured it out correctly.

For this test, I decided to use an apple, three clementines, a peach and a bunch of red seedless grapes. The ingredients are shown below.

I started putting the fruit in the feeding tube and very lightly pressed down on the propelling rod.

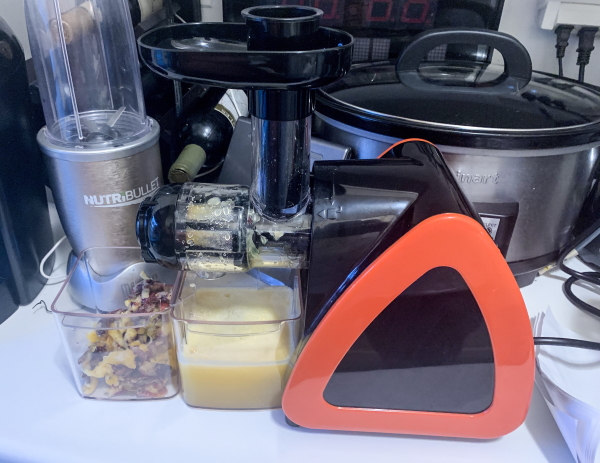
When I was done with feeding the fruit through the extractor, I had one container with all of the pulp and about 2 glasses of great tasting juice. Maybe I did not place the Container Baffle correctly because I did have some foam in the glass, but I have no problem with the foam. Not sure why some folks do, but for me, it was just great.
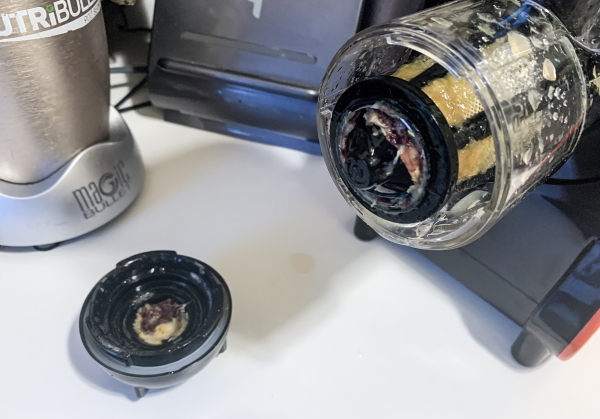
The picture below shows the resulting pulp. Everything processed easily so I did not have to use the reverse function. However, I did test it and it works by reversing the direction of the spiraling system.

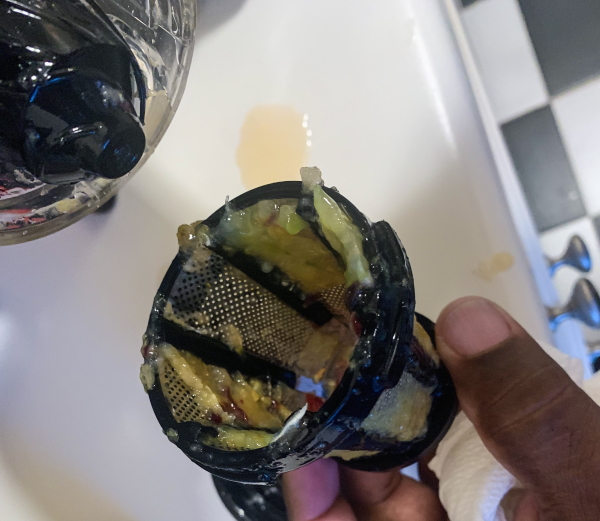
As shown below, taking the juicer apart is simple and that makes it easy to clean. I did not even have to use the Cleaning Brush. I just ran the filter and other parts under hot tap water and everything cleaned up great.

What I like

  • Simple and effective operation
  • It works with very little effort
  • Produces really nice pure juice
  • It is easy to clean
  • The build quality is good and it is lightweight

What I’d change

  • A more detailed User Guide that is also easier to read. (Larger print and diagrams)

Final thoughts

I have tried several juicers prior to this one. The ones I previously tried were ok, but they always seemed to produce less juice than I expected, required quite a bit of effort to “push” the ingredients through the blades, and were not that easy to clean up afterward. While some of them seemed a bit more robust, this juicer not only really gets the juice out of the ingredients, but it also does so producing pure juice with no reside, and the clean up is quick and easy. So far, I give it 2 thumbs up!!

Price: $102.99 plus 12% coupon = $96.79 (Amazon), $98.99 (Homever)
Where to buy: Amazon and Homever website
Source: The sample for this review was provided by Homever

Filed in categories: Reviews

Tagged: , ,

Homever Slow Masticating Juicer review originally appeared on The Gadgeteer on July 29, 2019 at 10:00 am.

Note: If you are subscribed to this feed through FeedBurner, please switch to our native feed URL http://the-gadgeteer.com/feed/ in order to ensure continuous delivery.

Tineco PURE ONE S12 Smart Vacuum Cleaner review

REVIEW – I would hazard a guess that the eternal battle between a clean house and the time to clean isn’t something unique to my family. Add two dogs to the mix and it becomes an exponential problem. Add a roofing project on top of that and now it’s just insult to injury. As luck would have it the Tineco Pure One S12 Smart Vacuum Cleaner showed up for review. Can changing the vacuum we use be the answer we need? Let’s find out.

What is it?

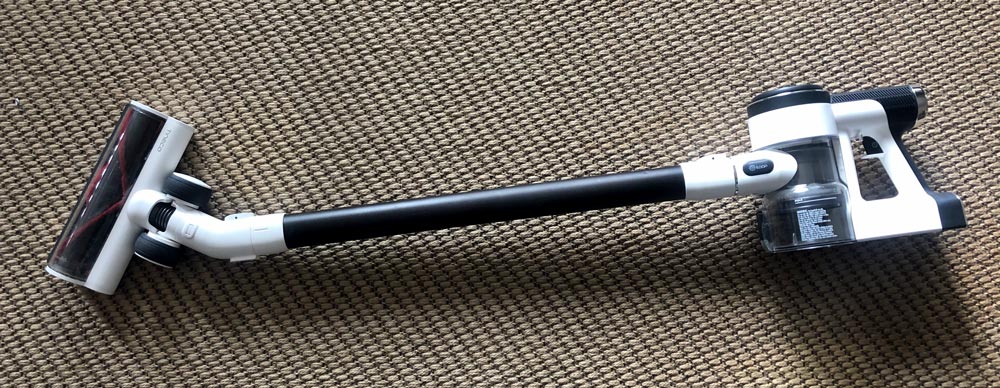
The Pure One S12 is slender stick-type vacuum with a suite of smart features to help in your daily cleaning routine.

What’s in the box?

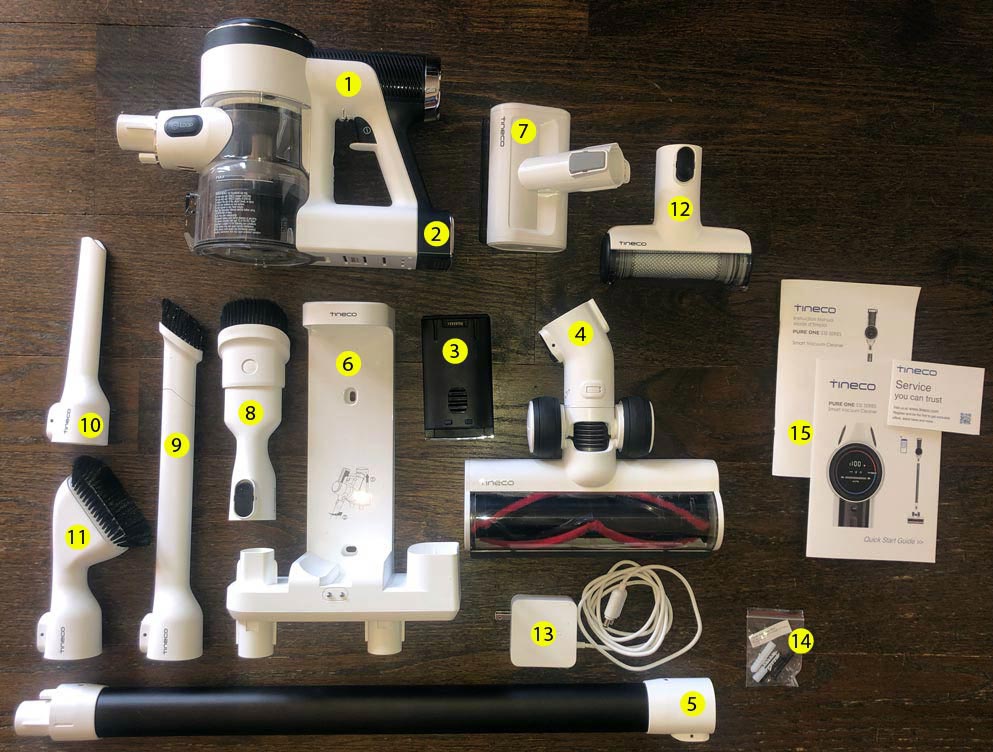
  1. Tineco Pure One S12 Vaccum
  2. 2500mAh Battery
  3. Spare 2500mAh Battery
  4. Multi-tasker power brush (direct-drive LED)
  5. Main extension tube
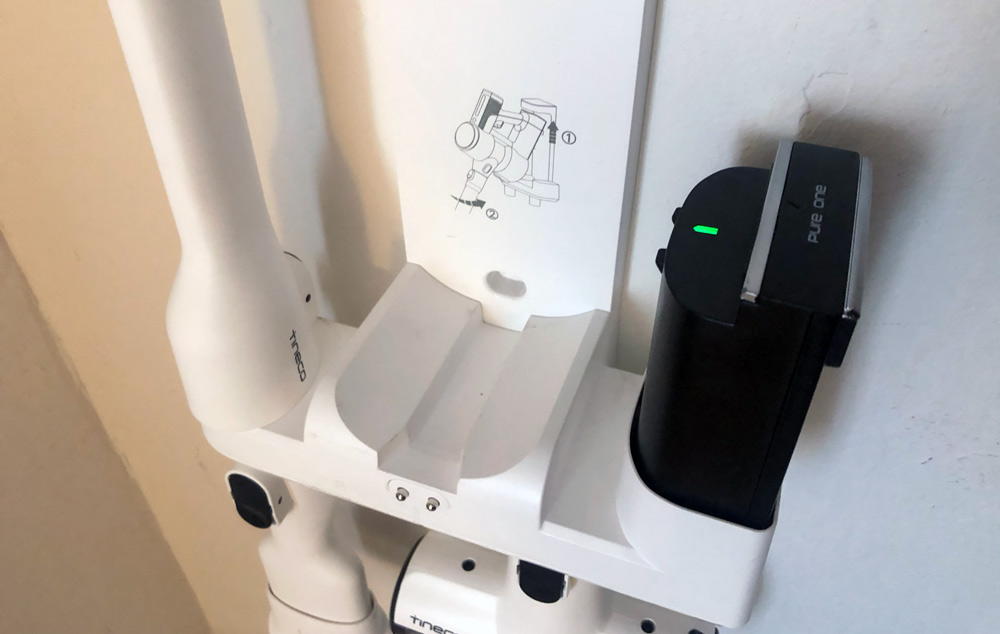
  6. Charging station (wall mount)
  7. Mini power brush
  8. 2-in1 dusting brush
  9. Flexible long crevice tool
  10. Crevice tool
  11. Soft dusting brush
  12. Automatic pre-filter cleaning tool
  13. Wall adapter
  14. Mounting hardware for charging station
  15. Manuals

Hardware specs

Batteries – 2500mAh
Rating Power/Max Suction – 500w/150w
Runtime – ≤ 100 minutes with non-motorized tool attachments

Design and features

The overall build and aesthetic immediately feels more current tech and IOT than it does vacuum. Lots of white and black throughout peppered with a good deal of chrome and plenty of LEDs and a touch panel.

Most of the touted features fall into their Smart nomenclature. Smart Suction which automatically adjusts depending on the activity or blockage. Smart battery management which lets you keep an eye on power levels. Smart noise optimization which keeps operational noise to a minimum. And finally, Smart filter self cleaning which lets you use the vacuum to clean its own filters.

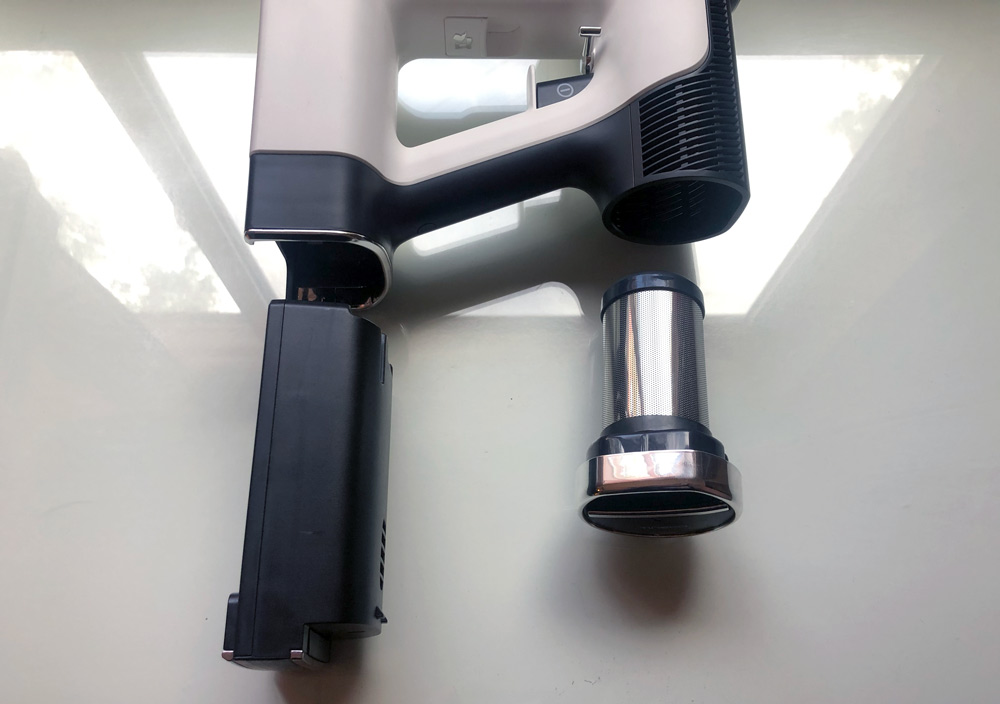
The display itself is a central point of information and controls serving up info on battery level, error indicators, suction level, dust monitoring and wifi connection confirmation. At the rear of the vacuum there are two button releases. One is on the bottom and that’s the battery location with the release switch being on the battery itself (shown here in left of photo).

The second is the main Hepa filter which releases the same way (shown on right above). This should need to be cleaned or replaced much less frequently than the pre-filter which is in direct contact with the vacuum’s intake.

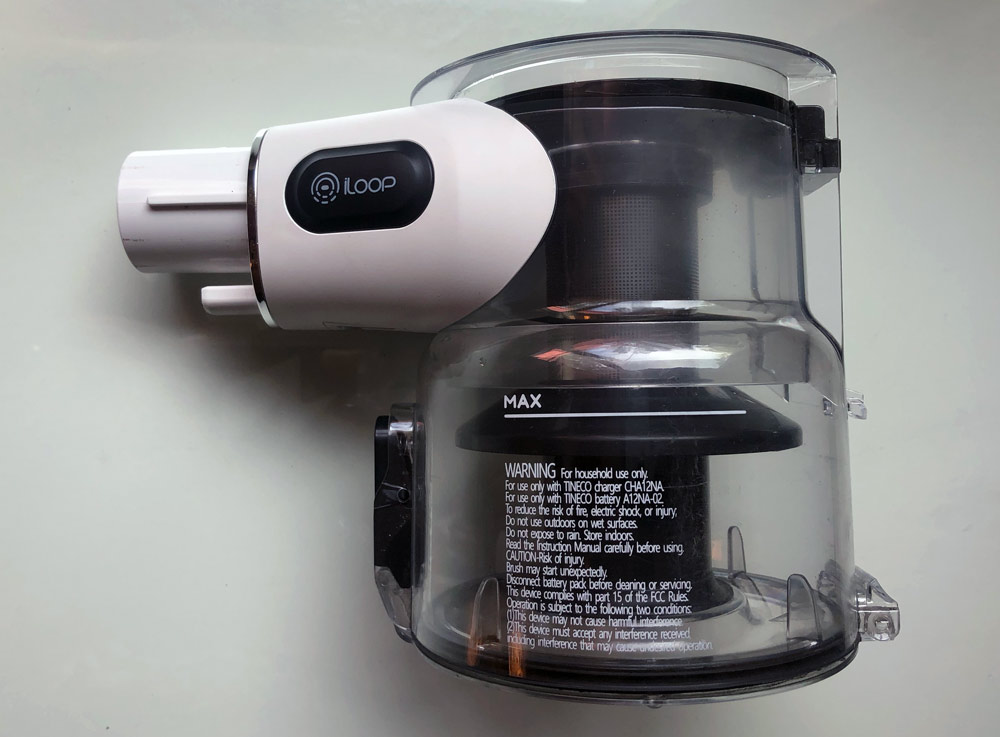
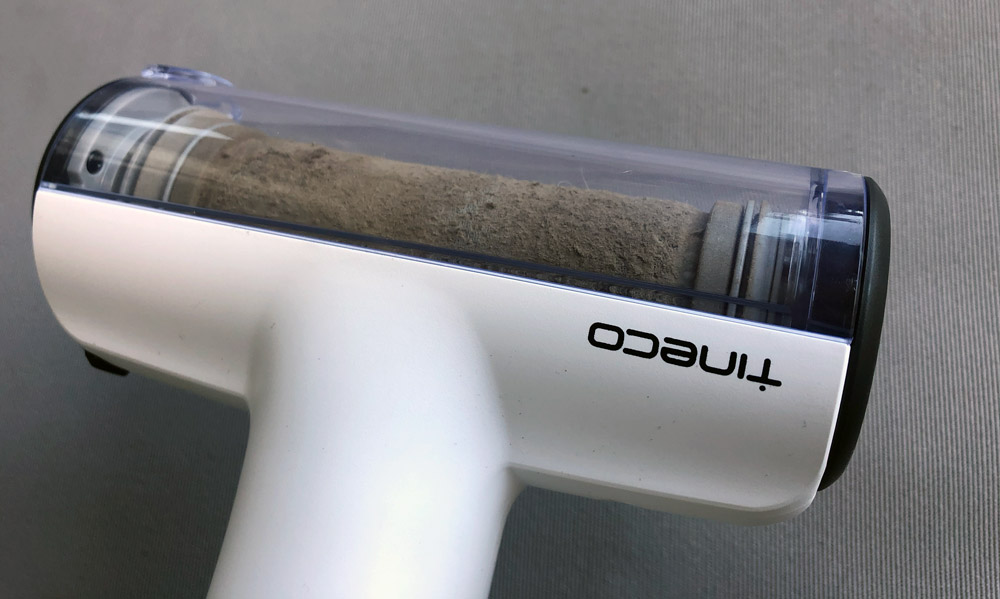
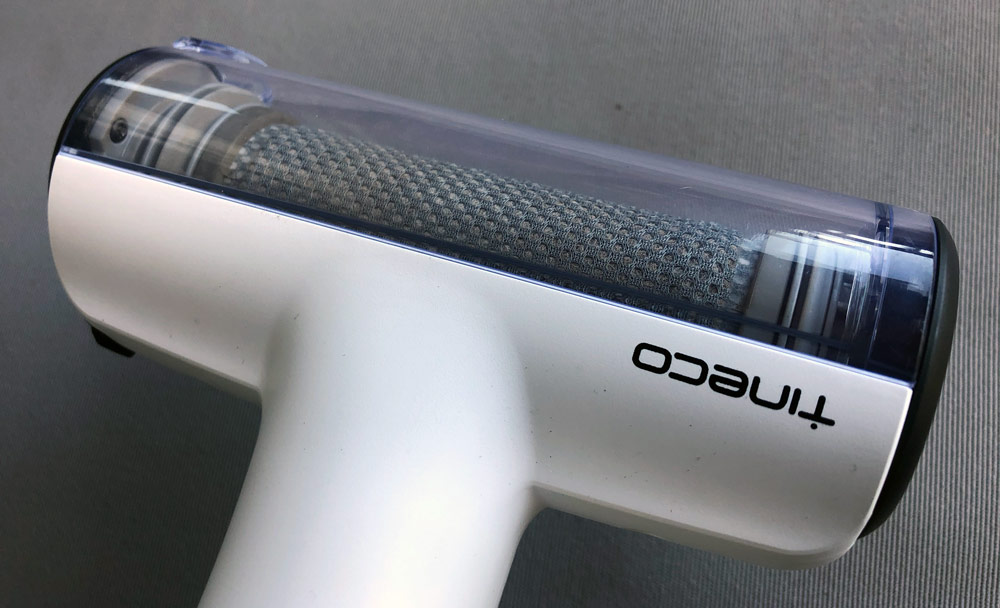
The dustbin is released via a lever in front of your middle fingers. Once released it pivots out from the top front. The dustbin opens from the front and has a center cartridge that houses the pre-filter. Disassembling to clean/wide down is pretty easy.

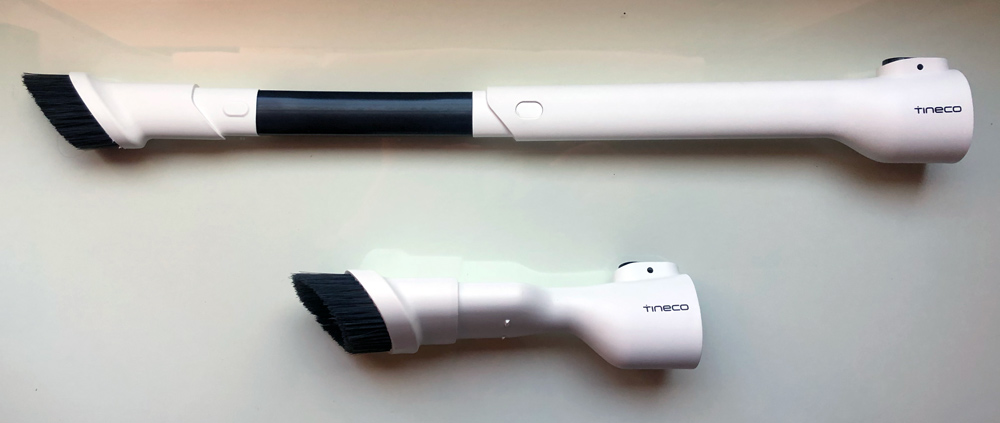
All of the attachments mount to the front of the vacuum with a keyed fitting and nice quick release button that makes swapping accessories very easy. A few of the accessories have built in extension or deployable bristles.

Setup

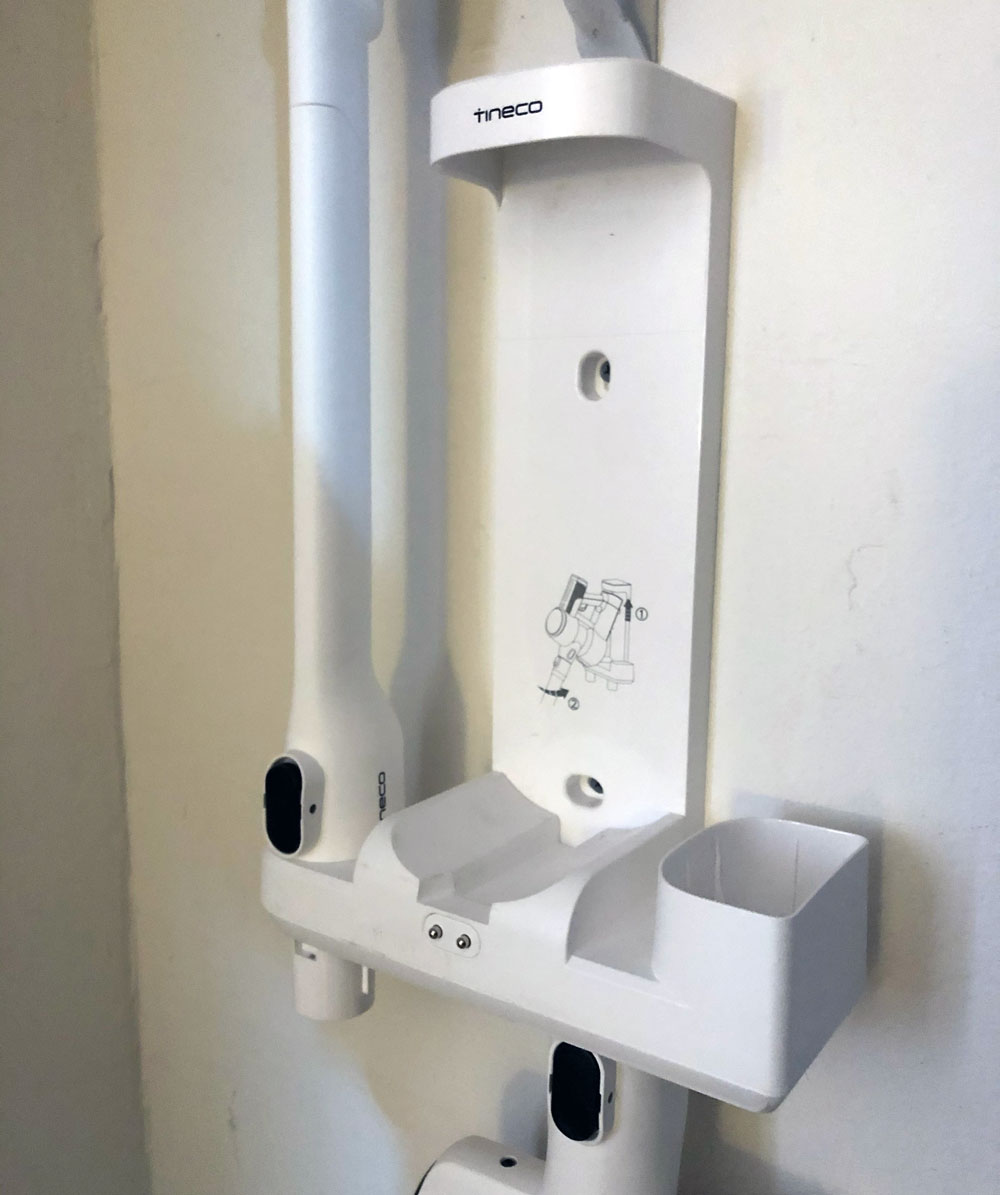
To get started you want to find a good location to mount the wall hanger. One piece of key information that’s missing prior to purchase is that the wall mount is required for charging. There’s no good way to work around it other than laying it all flat on the floor which isn’t the best for space optimization. Hopefully you have a wall outlet nearby as it’s required. I was able to find a spot in a guest room closed and had to run an extension cord, but the good news is it’s up, charged and running.

Tineco has included some mounting hardware and drywall anchors, but use something appropriate for your situation. Make sure to hang the caddy so that the two charging contacts at the front are at least x” from the floor or it’s possible that the floor attachment could keep the vacuum from docking correctly.

Once your system is mounted, go ahead and hang the vacuum by inserting the top at an angle and then resting it into the cavity so the electrical contacts meet. A sticker on the mount shows you how to do it. You’ll know it’s properly docked because the LED panel on the vacuum will spring to life and show the charging status. You can then insert the 2nd battery into the charging dock on the right side of the wall mount. The LED on the battery will show it’s connected.

Once everything is charged, you’re ready to connect the app (yep, there’s an app). Download from Google Play or the App Store, launch and register for an account to get started.

In the App, click on add a device, then on the vacuum, pull the trigger for 2 seconds to activate it, then remove the dustbin and press the wifi reset button.

It’s possible that you’ll then be able to use your phone to scan barcode on the underside of the vacuum, but on my iPhone I had to jump out to the settings app and connect to the Tineco_xxxx network and then back to the app to enter my network information. If you’re having trouble, check Tineco’s website for troubleshooting (and make sure you’re not on pre-release OS software as it could be the culprit).

Performance

So it’s a vacuum. What makes this one different besides being cordless?

As you go to use it, the first thing you notice is the ergonomics.

The weight is up at the handle which makes it easier to carry from room to room. It also has implications to actual vacuuming, but more on that in a bit. The main extension tube is the right height for standard vacuum lengths and works well for our 5’7″ to 6’3″ family. It uses the same connector at the bottom end which means you can connect the big accessories directly to the vacuum if you want to use it directly on a sofa or a mattress. Very cool.

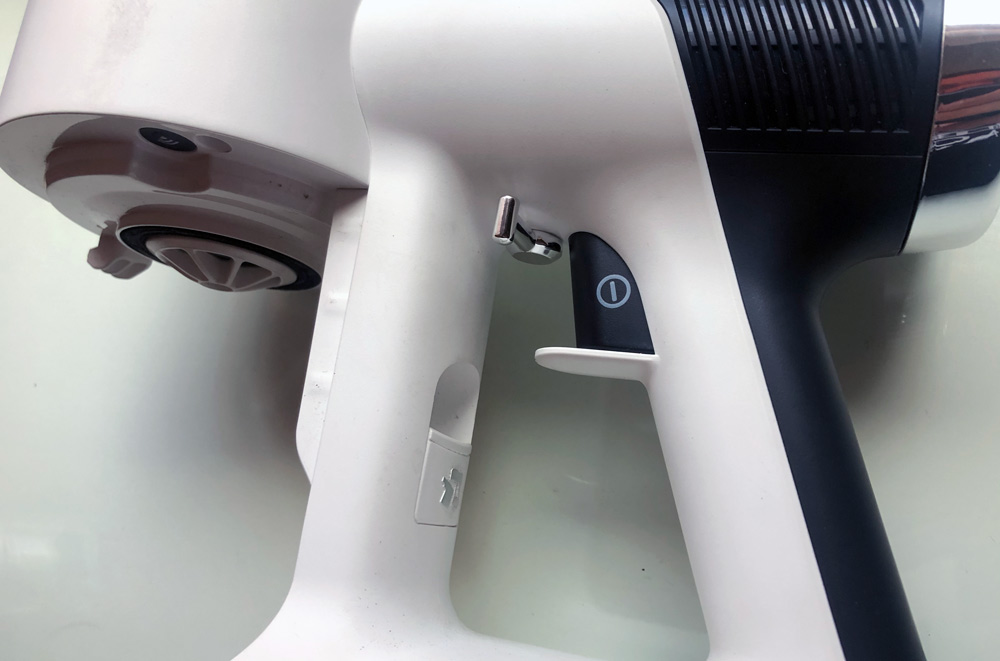
As you grab the drill-driver type handle and trigger, it’s really easy to squeeze, pull and start it up. You’ll actually find that it’s possibly too easy, but ends up being nice that there isn’t a ton of resistance on your finger.

That’s when you notice the second big thing, or lack thereof; the volume. Most vacuums are loud and in my experience they also have high pitched whines. Maybe it’s been my brand choices in the past, but I’ve had models from Hoover, Electrolux and our current Dyson and they’re all loud enough that I almost want earplugs. Even the iLife robot-vac we have is annoyingly loud and takes forever. By comparison, the S12 is very tolerable and completely without the high-pitch whine that would usually drive me crazy. For me this is a massive benefit that results in me using the vacuum more.

Our main floor is mostly dark hardwood with two area rugs, one sisal and one softer but equally low pile. Our stairs are the same hardwood with independent sisal treads and the bedrooms are all medium pile carpets. Our two dogs definitely create the lions share of our vacuuming needs as they both shed. One is a beagle and the other a white Pyrenees/Lab mix whose hair doesn’t exactly hide on the dark woods.

The S12 kicks on in Auto mode by default and actively adjusts suction depending on what the main power brush detects. As I move from hardwood to carpet that change is audible and it’s nice not to have to flick a switch or step on a button to make the change. Speaking of switches, right next to the trigger is a right-handed thumb switch with keeps the vacuum on without continually pressing the trigger.

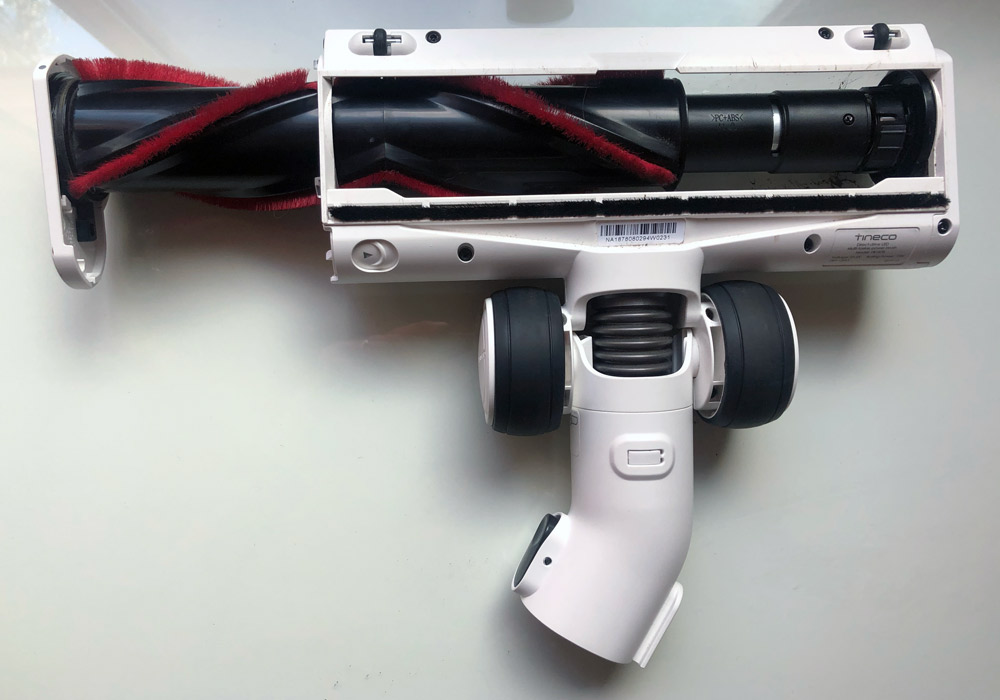
The multi-tasker power brush is the primary attachment we’ve been using. The wheels have an inline-skate quality to them, rolling well without the usual plastic sound that makes me wonder if a vacuum’s wheels are damaging the floors. It also disassembles easily to be able to get to any wrapped hair or threads that may start to affect performance which the big display should notify you of.

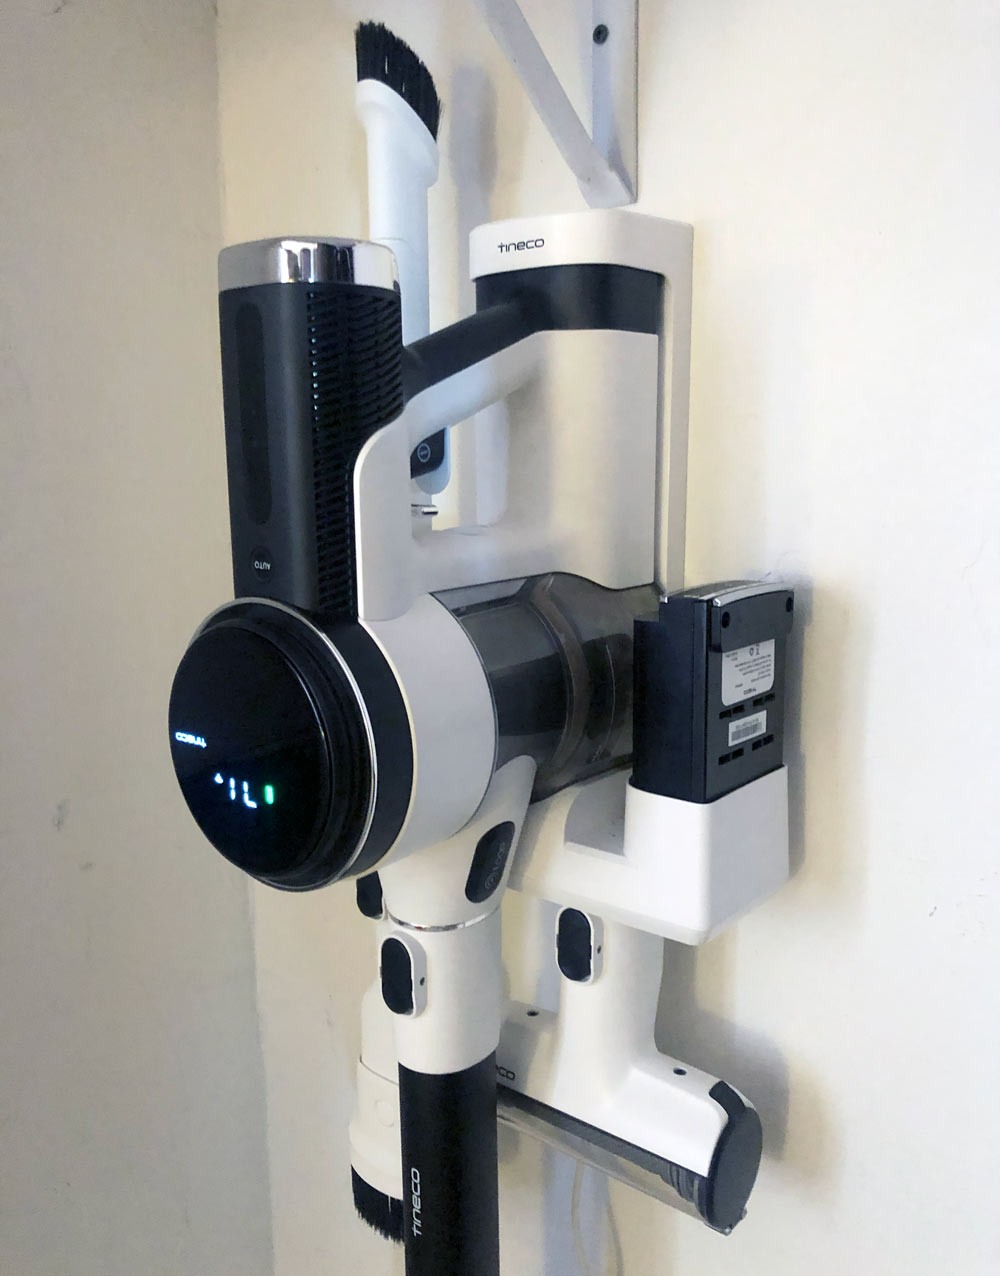
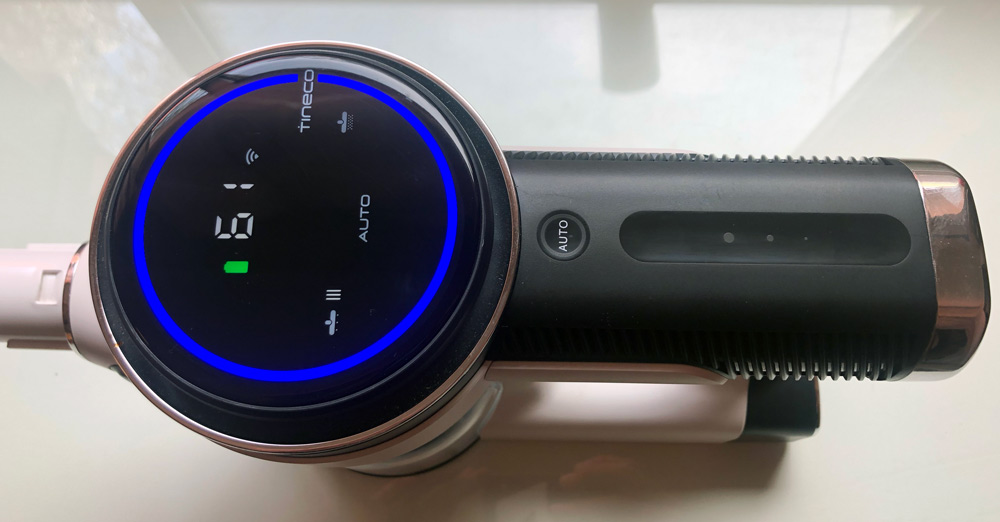
So let’s discuss this display. It’s a big 4″ round display that lights up any time you press the button or dock it to charge. It’s oriented for you as you’re vacuuming and doesn’t invert when docked to charge which I find funny, but hey that’s something they can hopefully fix with a firmware update. As for info, it displays a battery icon, battery percentage and wifi logo just above the center line.

Just below the centerline is the suction power level indicator shown in a segmented line from left to right (showing a very low power level of 4 in this photo). Just below that is the Auto indicator confirming you’re in that mode. Circling the entire face is the dust monitoring loop which turns from blue to red according to the dust levels.

Should they occur, the centerline to the left of the Tineco logo will present brush roller tangled, air channel blocked, and dust sensor defective icons to let you know there’s something that needs your attention.

Just behind the circular display is a round Auto button and a finger width scalloped recess. This is actually a touch sensor for manual mode.

Slide your finger or thumb in the groove towards the display for more power and away for less. The Auto button is used to return to auto from manual mode. In general Auto mode worked great. The only time we switched out of it was when cleaning the stairs around the stair treads with a crevice tool. Auto mode set it to low and we needed max to get to the dog hair in the corners.

The wall mount works well, and having a second battery hanging out fully charged is super handy for any extended cleaning sessions. The main thing I’ll fault it for is that it only has room for 3 of the 6 attachments included with the kit. Tineco does sell an accessory bag, but there’s not a hanging spot on this mount for it either.

Emptying the dustbin is always a messy affair and while the S12 does have a pretty convenient button to release the bottom and dump it out, you’ll definitely want to be over your trashcan at a minimum and ideally inside it. Here’s how that dustbin opens up.

Tineco did something very cool when it comes to filters. First they provided a additional pre-filter, and second they’ve included an attachment that lets the S12 clean the dirty pre-filter. Here’s a dirty filter installed in the cleaning tool.

Here’s that same filter about 60 seconds later.

The rest of the vacuum disassembles easily when you need to clean or unblock anything.

Let’s return to battle of clean house versus cleaning house. The S12 just bested all the vacuums I’ve had including our Dyson Animal. It’s easy to maneuver, has a very reasonable volume level and has quick change attachments that work. It works great on hardwood and equally well on carpets. It has sped up my clean time and is helping us win the battle.

It is top-heavy and that’s something my wife mentions every time she uses it. The main complaint there is you can’t stand it up and walk away and even leaning it is likely to have it crashing to the floor as the bottom swivel joint is nice and twisty. Let’s wrap this up.

What I like

  • Quiet and without a high pitch whine
  • Easy to steer and navigate under and around obstacles
  • Filter cleaning attachment is great
  • Auto mode works well and the manual adjust is there when needed

What I’d change

  • It’s a bit top-heavy
  • Dustbin is small and needs to emptied frequently
  • Wall station does not have places for all the included attachments
  • A stand-alone battery charger for users without hanging space

Final thoughts

The Tineco PURE ONE S12 vacuum is great. Any quibbles above would not keep me from purchasing this as our main vacuum. The key takeaways is that you should be prepared to empty the bin frequently both because it’s small and because you may find yourself vacuuming more often. Probably not a bad thing.

Price: $599
Where to buy: Amazon
Source: The sample of this product was provided by Tineco.

Filed in categories: Reviews

Tagged: ,

Tineco PURE ONE S12 Smart Vacuum Cleaner review originally appeared on The Gadgeteer on July 29, 2019 at 8:00 am.

Note: If you are subscribed to this feed through FeedBurner, please switch to our native feed URL http://the-gadgeteer.com/feed/ in order to ensure continuous delivery.

Cosori Premium 5.8-Quart Air Fryer review

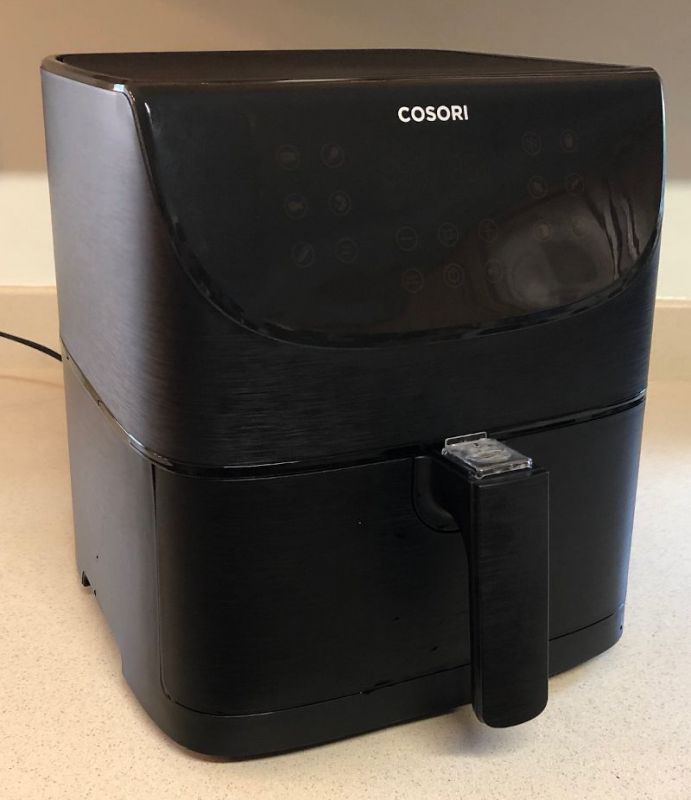
REVIEW – Fried okra?  Yes, please!  Chicken-fried steak?  Of course!  Fried chicken?  You betcha!  When it comes to home cooking, it seems that I’m a bit of Southern boy.  But while I love fried foods, I don’t like cleaning up the mess that frying makes, and I really shouldn’t be consuming all that oil.  What I need is a way to fry foods without frying them in oil, and so I’m hoping that Cosori’s air fryer is just the gadget to make this happen.

What is it?

Cosori’s Air Fryer (model number CP158-AF) is a kitchen appliance that “fries” by rapidly circulating hot air around food.  This air fryer is not actually a fryer, at least not in the traditional sense of the word; rather, it’s a smaller version of a convection oven.  Convection technology is what allows it to cook food faster than a conventional oven while using a lot less heat, and though it sometimes uses oil, it uses far less than a deep-fryer.  According to Cosori’s manual, their air fryer “uses rapid 360° air circulation technology to cook with little to no oil for quick, crispy, delicious food with 75% few calories than deep fryers.”

What’s in the box?

  • The air fryer
  • A user manual with 18 pages of instructions in English
  • A recipe book with over 100 recipes for the air fryer, including breakfast, entrees, appetizers, sides, and desserts
  • A reference guide with handy shortcuts
  • A thank you card that includes contact information for Cosori’s Support Team

Hardware specs

  • Temp Range: 170-400°F (77-205°C)
  • Time Range: 1–60 minutes
  • Power: 1700W
  • Capacity: 5.8 qt
  • Dimensions:  13 in tall, 11 in wide, 11 in deep (+3 in for the handle)

Design and features

The Cosori Air Fryer is a fairly typical size for a kitchen appliance; it’s about the same as our Instant Pot and our Gourmia ice cream maker.  It’s made of black plastic—white and red colors are also available—except for the baskets, which are metal.  It’s surprisingly light weight, yet it doesn’t seem cheap or flimsy.

Installation and setup

To set up the fryer, I removed the warning stickers from the outside and the various packing materials from the inside.  As I skimmed through the manual, I noted even more warnings, so I decided to read the entire manual slowly and carefully.  It is very well written, and the instructions are quite clear.  One thing that stood out to me is the plethora of warnings about getting burned or starting fires.  Here are a few examples:

  • Do not touch hot surfaces.
  • Do not block any ventilation openings.  Hot steam is released through air outlets.
  • Do not place your air fryer near gas burners.
  • Never fill the baskets with oil or fat.
  • Do not place cardboard into your air fryer.
  • Keep your air fryer away from flammable materials.

While some of these are mildly humorous, they are a good reminder that this gadget gets very hot, and if I’m not careful, I could get burned or cause a fire.  If you have little kids at home, you’re going to want to spend extra time training them to leave this appliance alone and put it a location where they can’t touch it or pull on the power cord.  We put ours on a counter facing away from the wall and placed a large, ceramic hot pad in front of it.
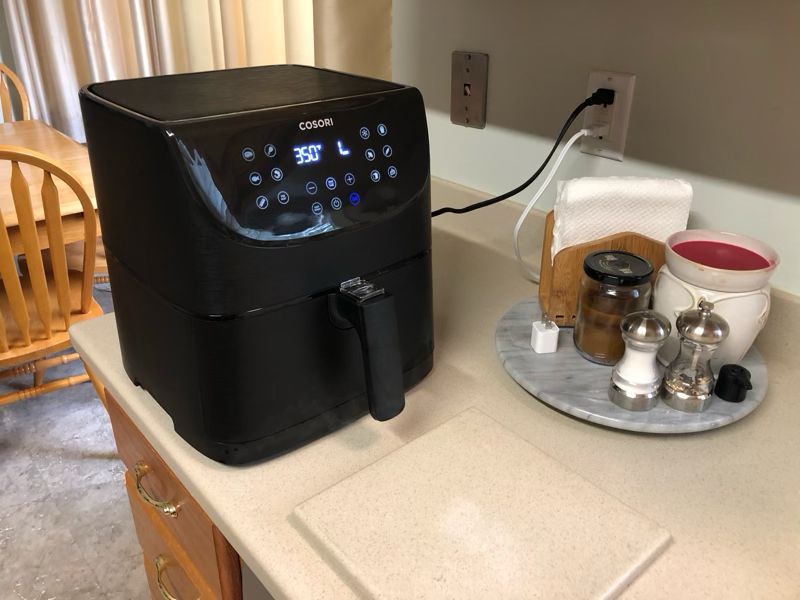
Many of the instructions were about the unique basket-in-a-basket system that is used to hold the foods while frying.  The inner basket is where the food goes, and it has a lot of holes, like a colander.  It sits in and just above the outer basket, which is used to catch any oil or grease that drops from the food.  This is nice, as it prevents the food from cooking in and soaking up extra oil or grease.
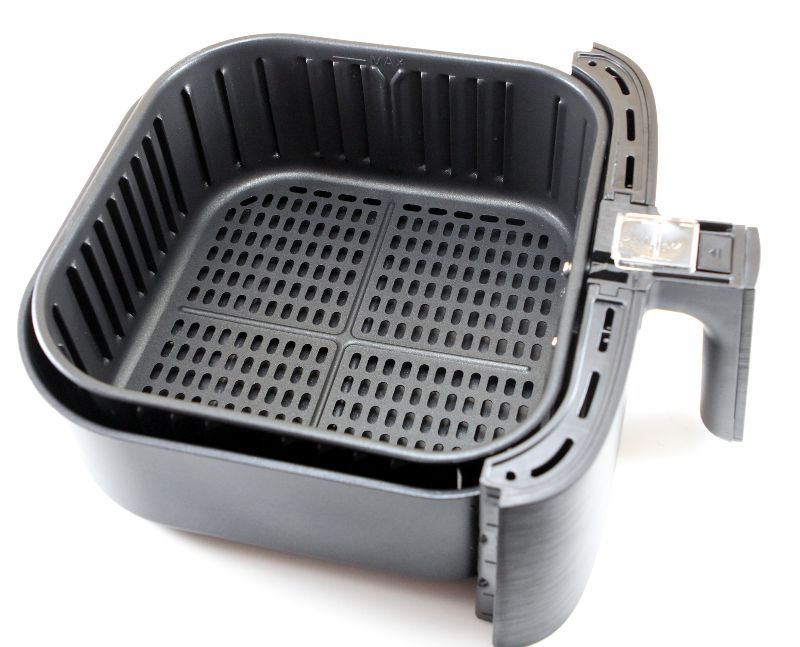
These baskets are connected, and when you pull the handle, they both come out of the fryer together.  When you slide the button guard, you can then press a button that detaches the inner basket from the outer.
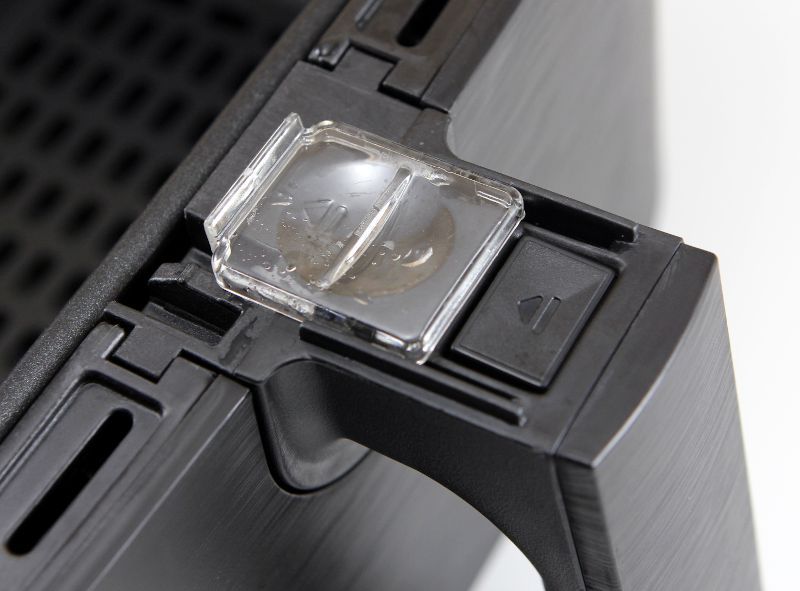
When you do this, you need to make sure the outer basket is resting safely upon a heat-resistant surface, hence our ceramic hot pad, else you risk dropping it and splattering hot oil, which could be dangerous.  Once inner basket pops free from the outer basket, you can dump the food into a serving bowl or use a spatula to serve it onto a plate.
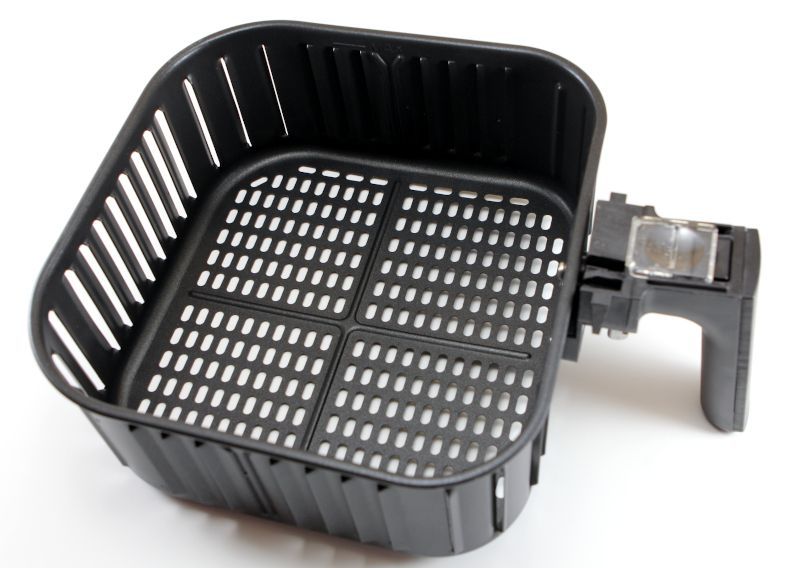
Once the basket was removed, I looked inside to see how the food was heated.  There was a heating coil, reminiscent of the coils on old stoves, and a fan, pretty much what is expected of a convection oven.

Chicken Nuggets

In order to test the fryer, we decided to start simple, so my wife bought a package of frozen chicken nuggets, Kirkwood’s “Fully Cooked Waffle Flavored Chicken Bites.”  First, we used the default Preheat setting to preheat the fryer.  The default value is 400°F for 5 minutes, but both the time and temperature are adjustable if desired.  Second, we put the nuggets, still frozen, into the basket and inserted it into the fryer.  Third, we selected the Frozen preset.  This setting is 350°F for 10 minutes, and half way through it gave a reminder to remove the basket and shake the contents up, which allows the food to heat more evenly.  Many if not most of the foods that we fried needed to be shaken at the half way point to ensure even cooking. The result was a wonderful bowl of chicken nuggets.  They were crispy and lightly-browned on the outside and heated all the way through on the inside.  After seeing how convenient this is, I’m thinking that anyone with a toddler at home should probably be putting this air fryer on their Christmas list.

Tater Tots

Our second test was also a simple test.  For breakfast, we decided to test the fryer on some Season’s Choice Potato Puffs, more commonly known as tater tots.  We preheated the fryer and chose the Frozen preset, but as these values are also adjustable, my wife lowered the time to cook from 10 minutes to 8 minutes, just to see what would happen.  The results were much the same as the nuggets, although we agreed that they probably should have been fried the entire 10 minutes, as some were still a wee bit undercooked.

Grilled-Cheese Sandwiches

For our third test, we slightly increased the difficulty.  Looking through the recipe book, we found a recipe for grilled-cheese sandwiches.  It was simply bread buttered on both sides with cheese in the middle.  We used the Bread preset, which is 320°F for 8 minutes.  The results were mixed.  On the one hand, the bread was toasted and the cheese was melted, making for a delicious sandwich; on the other hand, the bread was a bit too toasted for our preferences, and one side was quite a bit crispier than the other.  I think we can fix these issues by reducing the cook time to 6 minutes and by rotating the bread half way through.  My wife observed that rotating the bread was a bit harder in the fryer basket than in the omelet pan we normally use for this recipe, simply because the sides of the basket are much taller.  We agreed that while the fryer did a good job, this is a recipe that would probably be easier to do in an omelet pan or a cast iron skillet.

Quick Doughnuts

For our fourth test, my wife found an online recipe for quick air-fried doughnuts.  We started with a roll of Grand’s refrigerated biscuits, cut them into doughnut shapes, and then basted them with butter.  We dipped them in a cinnamon-and-sugar mixture and put them in the air fryer.  We tried the recommended settings from the recipe (350°F for 5 minutes), but the first batch of doughnuts were overdone.  Next, we tried it with the Bread preset (320°F for 5 minutes), and they turned out perfectly.  We also made a sugar glaze and drizzled it on top after frying.  The doughnuts were a crispy brown on the outside and light and flakey on the inside; they were so good!

Fried Chicken

For the next test, we used another online recipe, this time for fried chicken.  My wife made breading from flour, salt, and Old Bay and then dipped chicken legs and breasts in the breading, in eggs, and then in the breading again.  She put the legs in the basket and used the Chicken preset (380°F for 25 minutes).  After 10 minutes, she turned the legs over and added the breasts.  The result was crispy, golden brown chicken on the outside that was tender and juicy on the inside.  It tasted delicious.  If you look in the picture below, you can see that some of the flour from the breading wasn’t cooked all the way, something that doesn’t normally happen with traditional frying.  We’re not sure if we added too much flour and failed to shake the excess off, or if there’s something about the air fryer that didn’t quite fry everything evenly.  In any case, it certainly didn’t stop us from enjoying some very yummy fried chicken.

Pork Tenderloin with Peppers and Onions

For our final test, my wife found a recipe for an entrée.  I thinly sliced peppers and onions, seasoned them, and put them in the middle of a small, round baker.  I cut a pork tenderloin into slices, rubbed them with powdered mustard, salt, and pepper, and then put them over the vegetables.  I put the baker into the basket, and cooked the whole thing for 15 minutes on 350°F, pausing halfway through to mix them up.  The result was super yummy, though very different from the other tests.  The meat was tender and juicy, and the peppers and onions were soft yet slightly crunchy.  The big difference between this and the other tests was the baker, which trapped the juices and reduced the crispiness of the tenderloin slices.  This recipe really shows the flexibility of the air fryer:  It can cook foods that are typically fried, like chicken and French fries, yet it can also cook like a traditional oven (in half the time).  If you were concerned that an air fryer can only fry less-than-healthy foods, then rest assured that you can cook a whole variety of meats, vegetables, and other foods and eat as healthy as you want.

We also made a variety of other dishes that I haven’t cataloged here, including smores, bacon and eggs, cinnamon rolls, and potato chips.

Cleanup

Cleanup is pretty simple.  The two baskets have to be washed, either by putting them in the dishwater—they do take up a lot of space—or by washing them by hand.  If you do the later, don’t use anything abrasive, like steel wool, as this could damage the non-stick surface of the baskets.  Using a washcloth that is damp with hot water, wipe down the inside of the fryer, just in case any oil splashed around.  That’s it.

Safety Features

The air fryer has several safety features that are designed to make sure accidents don’t happen.  I appreciate Cosori’s attention to detail when it comes to safety.

  • There’s a button guard over the button that releases the inner basket.
  • When the baskets are withdrawn from the fryer, it automatically stops frying.
  • If the fryer is inactive for 3 minutes, it will automatically shut down.
  • If the fryer overheats, it will automatically shut down.

Other Features

The baskets on this fryer are 5.8 quarts in size, which is pretty big.  It’s easily big enough to serve a dish for 2 people, and for most things it’s probably big enough to serve 4.  If you don’t need such a large fryer, Cosori also makes one that is only 3.7 quarts.  For our family, we are super happy with the larger size.

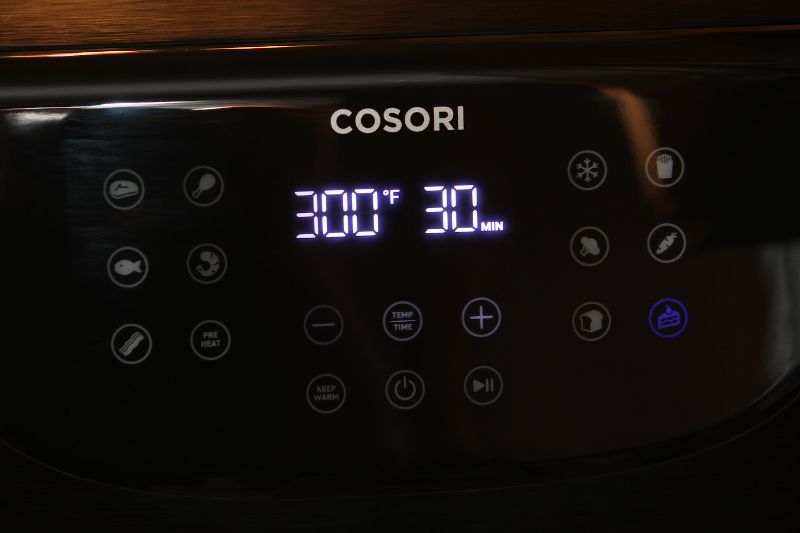
The interface is a digital display along with a set of touch controls.  The display is primarily used to show the temperature and the time remaining.  Most of the controls are the presets, and each has an icon that makes it easy to remember what it’s for.  The remaining controls turn the fryer on, change the temperature and the time, pause it, and so on.  Cosori has done a nice job with this interface, as it’s really easy to use.
As mentioned previously, the air fryer works by blowing air.  There’s a sizable fan inside, and I can definitely tell when it’s on.  It’s nowhere near as loud as a handheld vacuum cleaner, though louder than our ice cream maker.  Probably it’s just softer than our microwave oven.

What I like

  • It cooks fast and uses less heat than the stove or oven, which is especially nice during summer.
  • It fries food without using lots of oil.
  • It’s easy to use, easy to cleanup, and machine washable.
  • Lots of recipes to try that use an air fryer, both in the included cookbook and online.
  • Everything we tried was delicious!

What I’d change

  • I can’t think of anything.

Final thoughts

Our family is very glad that we got this chance to test out Cosori’s Air Fryer.  It’s quick to cook, easy to use, and easy to clean.  If you enjoy fried foods as much as we do, or you’re looking for a simple way to cook without heating up your kitchen with the stove, you should consider purchasing Cosori’s fryer.  Our family plans on enjoying this one for years to come!

Price: $119.99
Where to buy:  Cosori’s Online Store and Amazon
Source: The sample for this review was provided by Cosori.

Filed in categories: Reviews

Tagged: , ,

Cosori Premium 5.8-Quart Air Fryer review originally appeared on The Gadgeteer on July 21, 2019 at 11:00 am.

Note: If you are subscribed to this feed through FeedBurner, please switch to our native feed URL http://the-gadgeteer.com/feed/ in order to ensure continuous delivery.
Deenkee 10 in 1 Pressure Instant Pot review

REVIEW – I can remember a time not too long ago when I would spend hours in the kitchen preparing that special meal for my wife, or for guests on occasion when I was in the mood to do the cooking. Some of the Caribbean dishes I would cook involve processes of preparing several individual ingredients prior to creating the main dish. On many occasions, just the thought of the long process and work would make me suggest eating out and saving myself the experience. These days, appliances have been invented that do the work of many processes in a simple and easy way. The Deenkee 10 in 1 Pressure Instant Pot is a good example of such an appliance.

What is it?

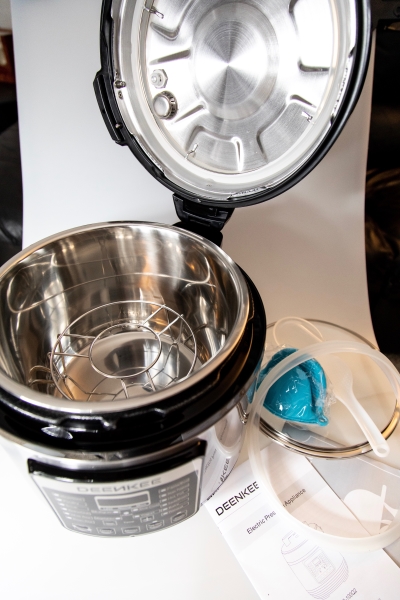
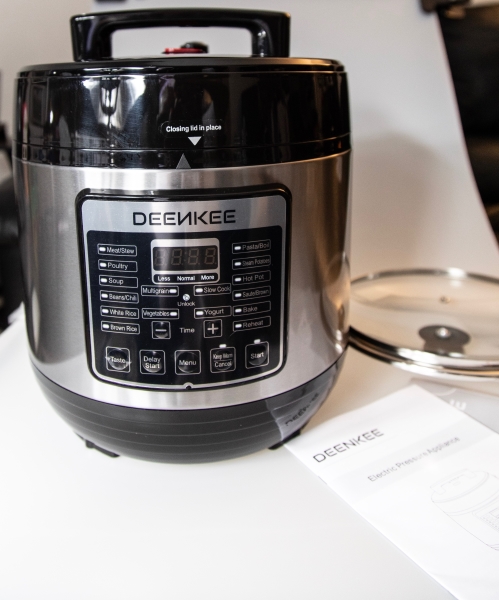
This DEENKEE 6Qt. Pressure Cooker is a programmable kitchen appliance that incorporates features like a large LED display and an easy to use interface to easily adjust cooking settings and pressure levels or to stop/cancel the cooking process at any time. It replaces 10 common kitchen appliances and cooks food up to 70% faster than traditional cooking methods. It also features a one-button pressure release, a detachable carrying handle and a glass lid for the inner pot. It is ETL, FCC, & FDA certified.

What’s in the box


1 x Deenkee 10 in 1 Pressure Instant Pot
1 x Spoon
1 x Ladle
1 x Measuring Cup
1 x Glass lid
1 x Sealing Ring
1 x User Manual
1 x Steam Rack
1 x Recipe Book

Design and features

Specifications:
Voltage: AC 220V / 50Hz
Rated Power: 1000W
Capacity: 6 qt (6 Liters)

Features:

  • 10-1 Muti-Function: Deenkee gives you the flexibility to manually input cooking times when required and you also have the pre-programmed smart programs already set for many dishes such as Oatmeal, Broth/Soup, Poultry, Yogurt, Egg, Beans/Chilli, Rice, Pressure Cook (Manual Setting), Meat/Stew, Cake. Slow Cook, Steam, Saute, Canning & Multi-Grain so all of your favorite dishes are as easy as pressing a button
  • Healthy and Built to last: Ceramic non-stick interior coating, plastic PTFE and PFOA free for even heat distribution, fully sealed environment seals in the flavors, nutrients and aromas within the food to Healthy, stainless steel (18/10) inner cooking pot made from food grade 304 ss, no chemical coating, 3-ply bottom for even heat distribution, fully sealed environment traps the flavors, nutrients and aromas within the food
  • Safety: Safety locking lid, Automatic pressure control, Electrical Current & Temperature fuse, Pressure regulation system, Smart locking sensors, Anti-Block shield, Automatic temperature control, Pressure protection system, Heat resistant cooking mitts, Temperature monitor.
  • Accessory Kit: Included is a tempered glass lid (perfect for slow cooking and sautéing) 2 egg racks/steaming trivets, ladle, rice paddle, cooking mitts, extra silicone sealing ring, stainless steel steaming basket, stainless steel inner cooking pot, and a measuring cup
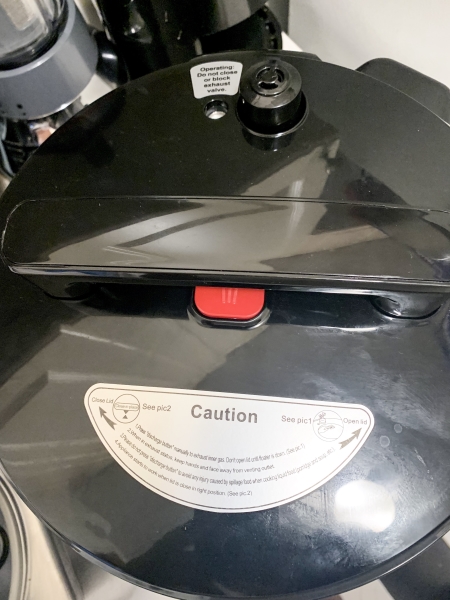
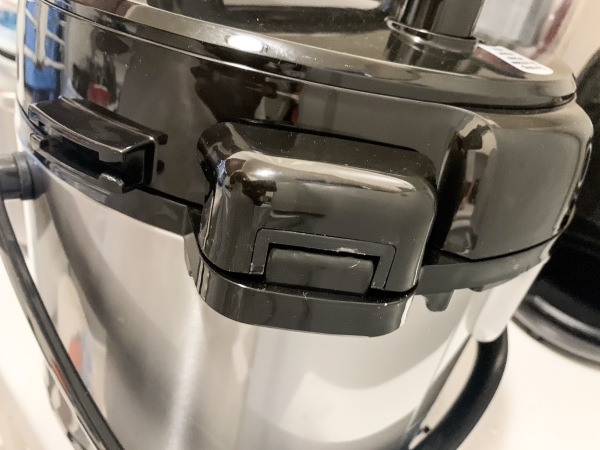
    On the top of the Instant Pot, there is the lid handle with the red pressure release button partially underneath it, and the pressure release valve off to the side.

    On the back of the lid, there is the hinge.

Performance

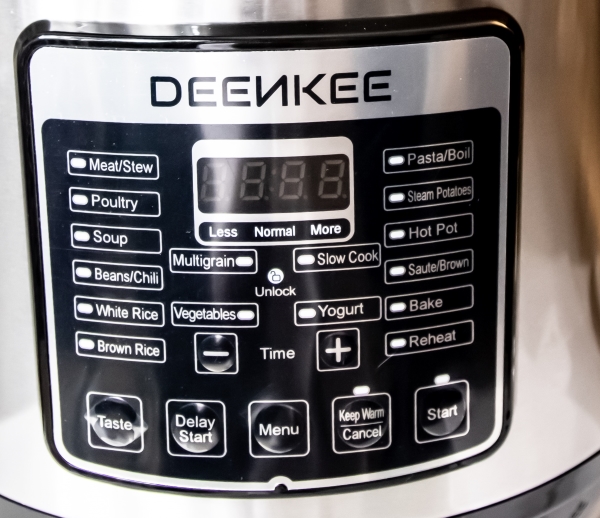
This Instant Pot is well built with stainless steel around the middle and a heavy-duty plastic lid and base. The control panel on the front is easy to read and navigate.

Since it comes fully assembled, I will not get into describing some of the smaller parts under the lid, but that information is available in the manual.

The Instant Pot has a stainless steel removable inner pot where you place the ingredients to be cooked. The control panel has preset buttons that provide preset cooking times for specific dishes and ingredients. I am initially from the Caribbean, and most of the dishes we cook in my home have their own Caribbean twist and flair. So, when we first tried the Instant Pot we used the preset settings and once we determined how the dish turned out, we adjusted the cooking time to suit what we wanted.

Below are some before and after photos of one of our dishes. It is a version of baked chicken with BBQ sauce.


Below are the ingredients for a traditional Caribbean dish called Cook-Up.

Below you see the served dish of the meal prepared above.

What I like

  • The build quality
  • The versatility/cooking options
  • The end results

What I’d change

    • It does what it is designed to do

Final thoughts

The Deenkee 10 in 1 Pressure Instant Pot is a really great appliance that incorporates so much functionality that with practice you can prepare a large variety of meals. The reason I say practice, is that once you get the process down, you have to figure out the cooking times and which setting works best for the dish you are preparing. In my opinion, the preset times serve as a general reference time. This can only be perfected with frequent use and trial and error. The build quality is great and I am sure that barring any unforeseen issue, that this appliance will be in my kitchen for years. I give it a well done and two thumbs up!!

Price: $95.99
Where to buy: Amazon
Sample: The sample for this review was provided by Deenkee.

Filed in categories: Reviews

Tagged: , ,

Deenkee 10 in 1 Pressure Instant Pot review originally appeared on The Gadgeteer on July 19, 2019 at 10:00 am.

Note: If you are subscribed to this feed through FeedBurner, please switch to our native feed URL http://the-gadgeteer.com/feed/ in order to ensure continuous delivery.
AMAREY A900 Robot Vac review

REVIEW – After spending a month with the AMAREY A900 Robot Vac, I find myself wondering what I did without one. This brilliant little guy does a wonderful job of keeping the floors clean… and it’s smart enough to keep from getting itself into real trouble. To the review!

What is it?

It’s a smart vacuum that happily cleans away, with smart mapping technology to optimize the work for future chores.

What’s in the box?

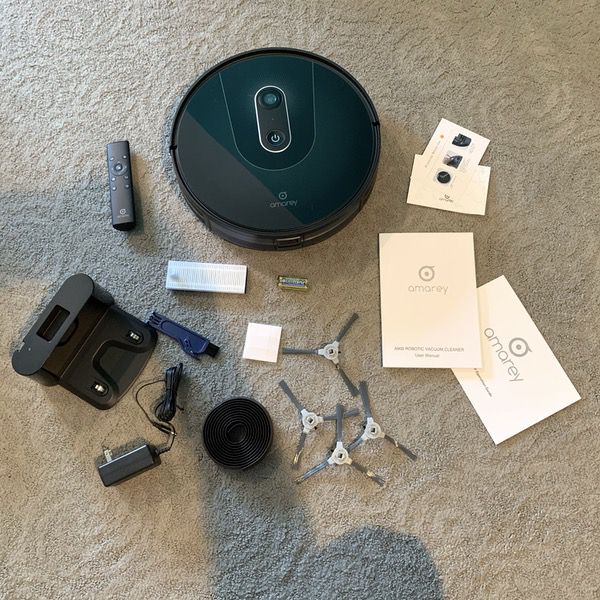
You get the unit, a docking station, 4 brush heads (2 replacements), two sets of filters (1 replacement), a cleaning tool, and rechargeable batteries. There’s also a remote that you can use if you prefer that over the app.

Hardware specs

  • Cleaning unit: 12.7″ by 12.7″ by 2.9″, 5.7 pounds.
  • Lithium ion rechargeable batteries (included).
  • 100 minutes of operation between charges.
  • 145 degree navigation sensor and VSLAM technology for site mapping.
  • Auto-adjustable suction for different surfaces.
  • Compatible with Alexa and Google Assistant.

Design and features

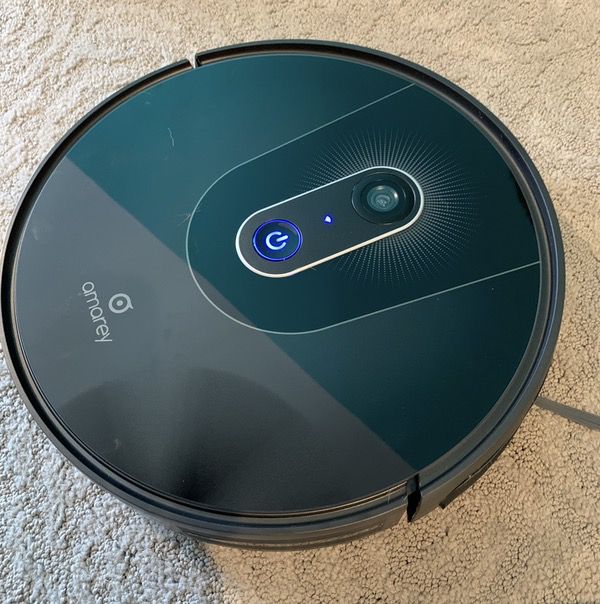
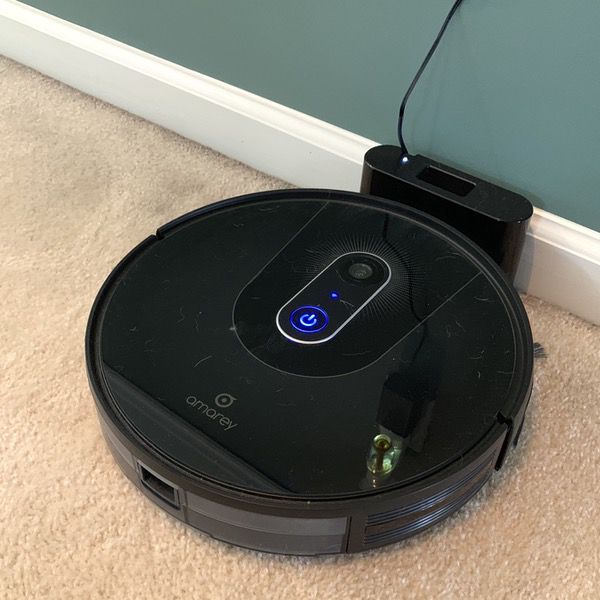
The AMAREY A900 Robot Vac is a bluetooth enabled smart vacuum that takes care of your cleaning duties. It’s got a nice slick profile with a single power/function button on the top face.

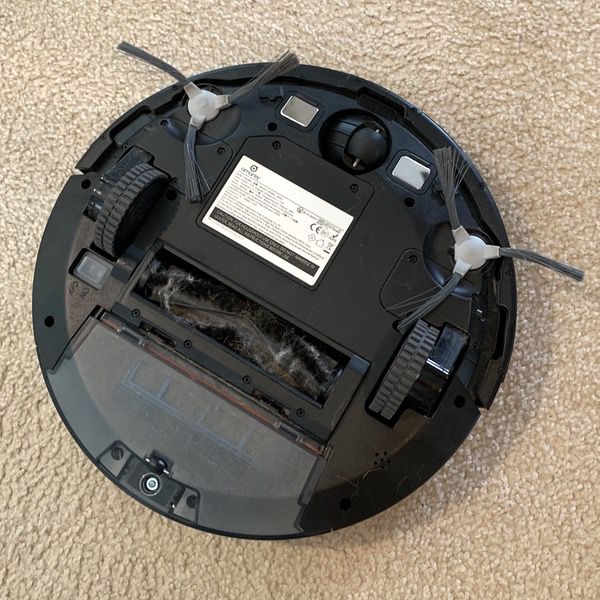
Looking underneath (pardon the mess, it’s been working!) you’ll see a bit more of the mechanics powering the beastie. The vacuum roller sits to the rear of the unit with a pair of edging brushes on the front face to gather the dirty bits. A 360 degree pivot wheel sits in the nose, with a pair of spring-loaded wheels on the sides that adjust to floor height. A bumper on the front face detects hard objects, redirecting the unit’s course of travel.

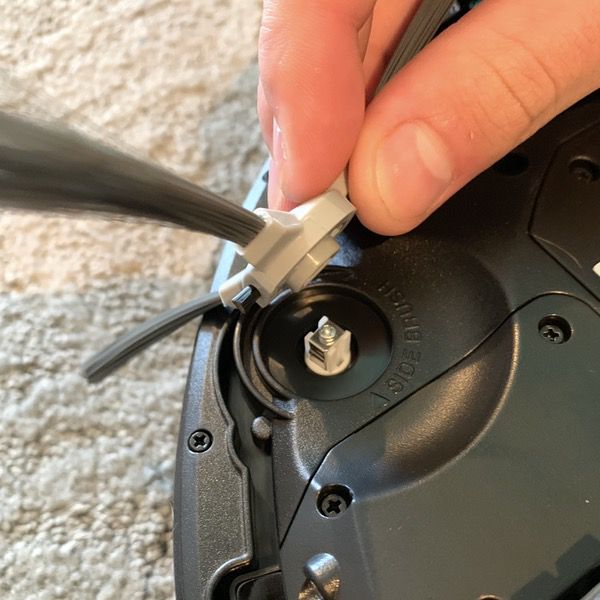
Assembly is simple. You snap the edge brushes into place and insert the batteries, and you’re ready to charge.

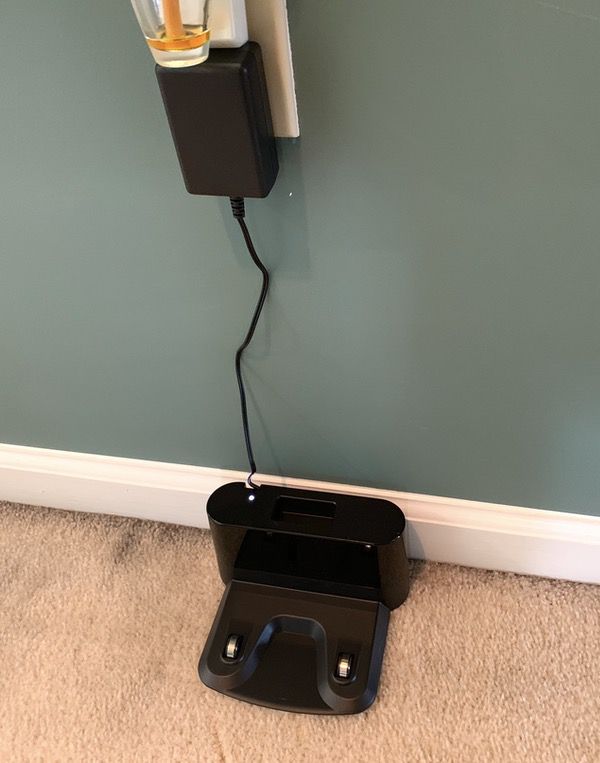
The docking station plugs into a standard outlet. We have our vacuum patrolling the second floor of the house, so we plugged it into a wall socket in the hall.

Those metal tabs on the docking station align with tabs on the base unit for charging. The light turns blue in normal function, and purple when power is running low.

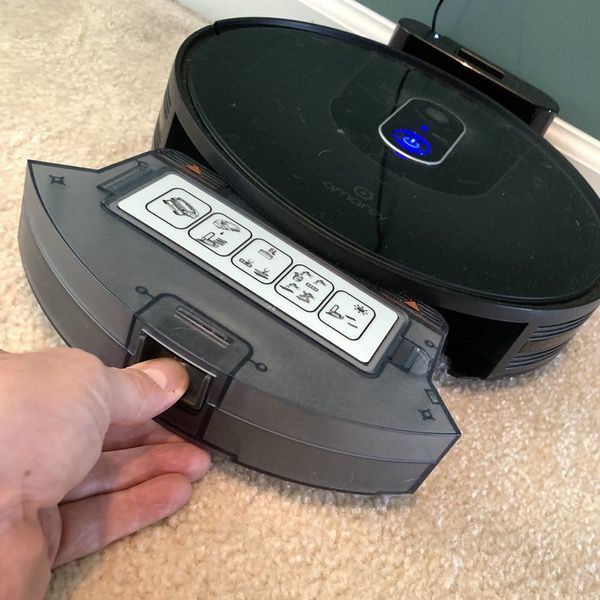
The receptacle for the dirt and grunge pops out of the back of the unit by pushing down on a thumb lock.

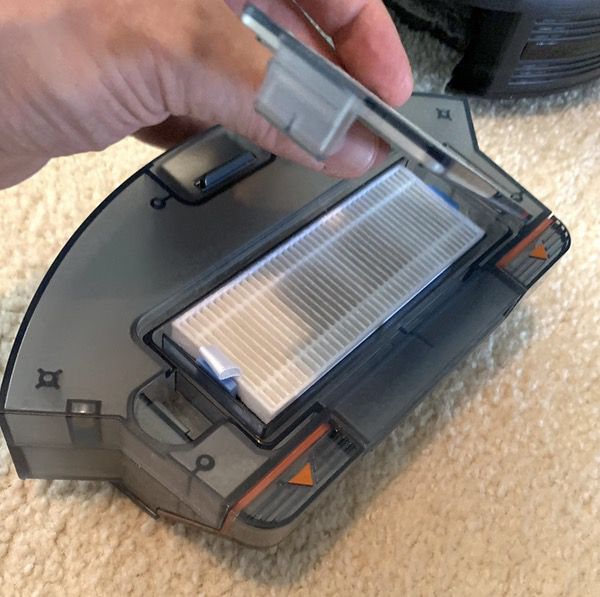
You’ll find a pre-filter and sponge filter here that can be removed and cleaned.

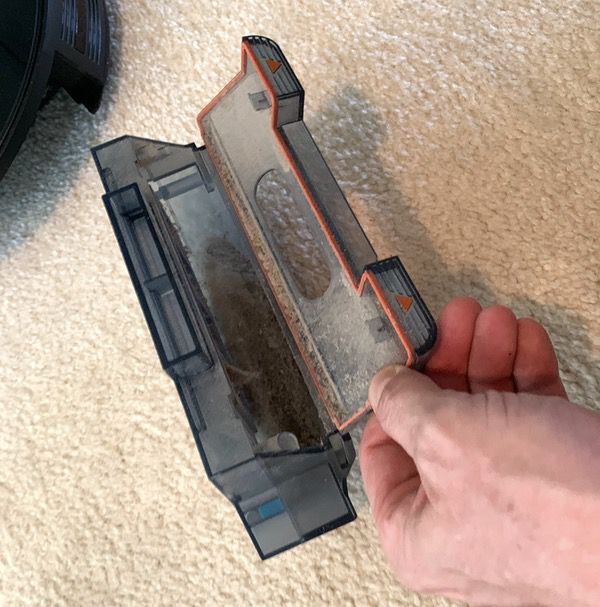
Pop loose the drawer to empty the nasties between cleanings.
Nothing feels cheap in any components of the construction. At a total weight of about 6 pounds, it’s a solid unit that’s also pretty nimble as we’ll see in the tests. The vacuum also has a pleasant female speaking voice that notifies you when it starts, runs, or gets stuck. We’ve taken to calling her “Amy,” which seems appropriate.

Once you’ve charged the unit you can get started on that cleaning. It does include a remote control, but where’s the fun in that when you can control it from an app? Scan the QR code in the manual to download the app, pair it up, and you’re ready to get to work. Simple and efficient.

Performance

So here’s where the fun begins. Open up the app and you’ll find all of your options in an easy-to-use interface. You can control the movements via the remote if you want to play with it, but we went right to the app. Just hit that “Auto” button to get started.

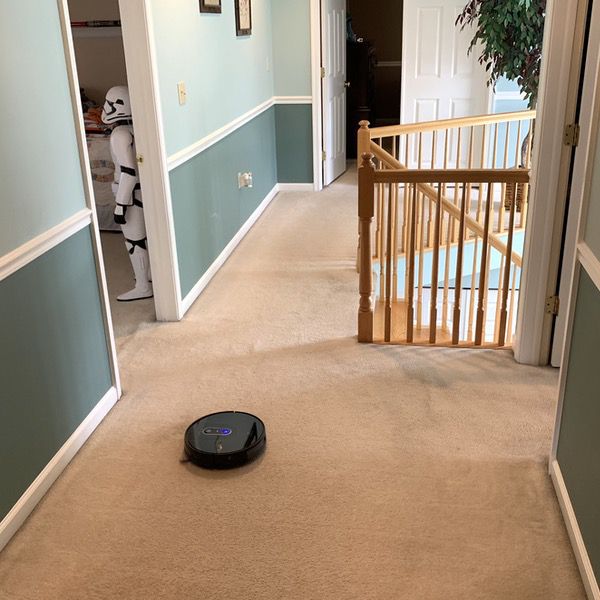
The vacuum then begins its journey. The first time out it wanders around a bit, mapping out the space. As the unit maps out the space, it remembers the map and learns how to do it in a more efficient pattern for future runs. If it encounters trouble like a table leg, it simply backs up ad readjusts until it has mapped a track around the item.

The low profile makes it easy to get under bedframes and the like. Here it is running under my son’s bed, making short work of all the dog hair and who knows what else collects under a teenager’s bed. Ick.

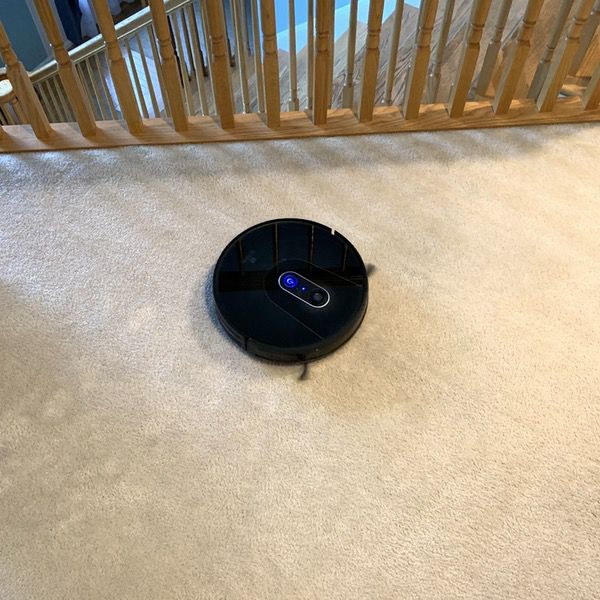
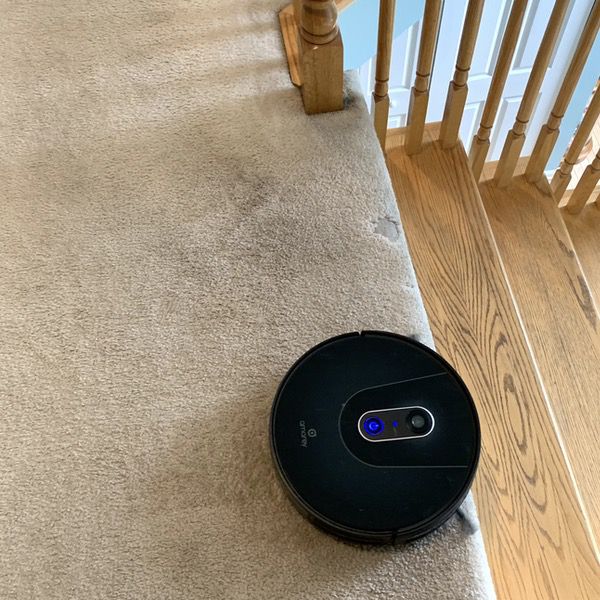
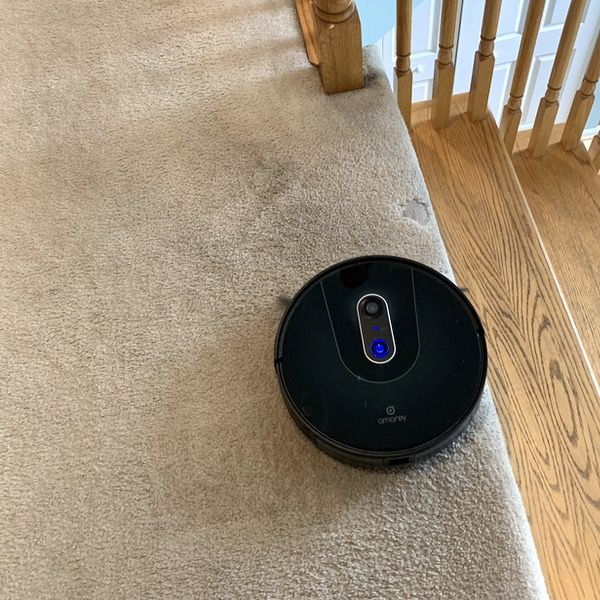
It’s also pretty smart about not getting itself into trouble. It does come with a strip of rubberized material that you can put down for “no-go” areas, and we thought we would need to use that to keep it from taking a nosedive down the stairs. But it has sensors for that! When the unit notices a sudden drop it stops, backs up and corrects its path.

Here it found the edge of the step, made a left, and continued on its way. It remembers this for the next time, too.

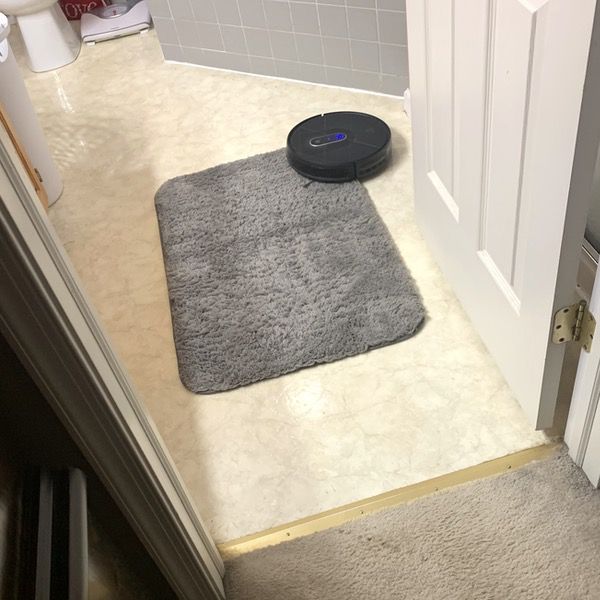
It’s really good at managing other transitions. Here the little fella has wandered into our bathroom. Note that it navigated the transition from carpet to linoleum, and the transition from linoleum to our shaggy carpet rug. It will also adjust the suction power based on the surface, which is nice. You can manually set the suction power in the app, but we haven’t seen a need for that yet.

As the unit does work it updates a map you can review on the app. You can see here how it has run through the entire second floor of our house. And if it starts to run out of juice, it will drag itself back to the docking station for a recharge… and then come back to finish the job.

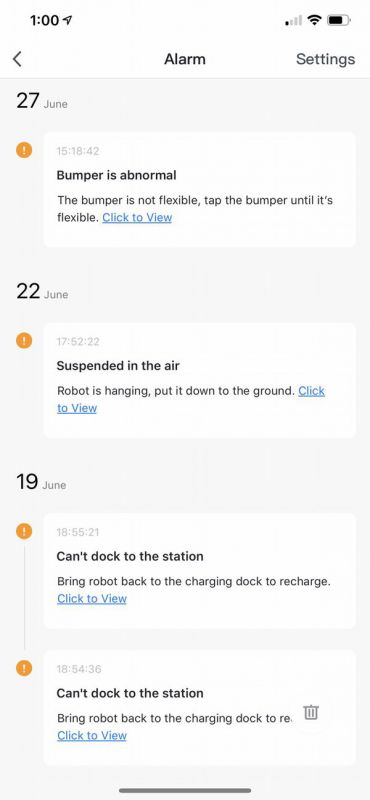
As it wanders along, it will speak to you if it runs into trouble. It also sends an alert to the app, as seen below. What I really like is that it doesn’t push the limits. When in doubt, it just shuts down and waits for human assistance. Note the second alert below… we picked it up mid-flight, and it let us know.

If you want to fully automate the cleaning, you can create a repeating cleaning schedule. You can also adjust the suction level if you like for more or less powerful operation. The device will get about 100 minutes of cleaning time before requiring a recharge.

A month of regular service and the AMAREY A900 Robot Vac is performing like a champ. It survived my dog’s shedding season with nary a whimper. The dirt chamber does require regular emptying given the smaller size, but more frequent cleaning compensates for that.

What I like

  • Simple, brainless and painless operation
  • Sophisticated sensor system keeps it out of trouble
  • Easy to empty the dirt tray and clean the filters

What I’d change

  • Catch chamber for dirt and stuff requires regular emptying, but does seem generous for the size of the unit

Final thoughts

Smart vacuums are not an inexpensive investment, and the AMAREY A900 Robot Vac will set you back around $400. But at that price you’re getting a pretty sophisticated piece of technology that handles roadblocks, multiple cleaning surfaces, and other hazards with ease. I am a huge fan of the plug-and-play nature of this unit. No manual mapping of the areas or other “training” required; it does all the work for you and gets smarter as it learns. If only my teenager was as easy to manage…

Price: $389.99
Where to buy: Buy it now on Amazon.
Source: The sample of this product was provided by Amarey.

Filed in categories: Reviews

Tagged: ,

AMAREY A900 Robot Vac review originally appeared on The Gadgeteer on July 17, 2019 at 9:00 am.

Note: If you are subscribed to this feed through FeedBurner, please switch to our native feed URL http://the-gadgeteer.com/feed/ in order to ensure continuous delivery.