
REVIEW – I would hazard a guess that the eternal battle between a clean house and the time to clean isn’t something unique to my family. Add two dogs to the mix and it becomes an exponential problem. Add a roofing project on top of that and now it’s just insult to injury. As luck would have it the Tineco Pure One S12 Smart Vacuum Cleaner showed up for review. Can changing the vacuum we use be the answer we need? Let’s find out.
What is it?
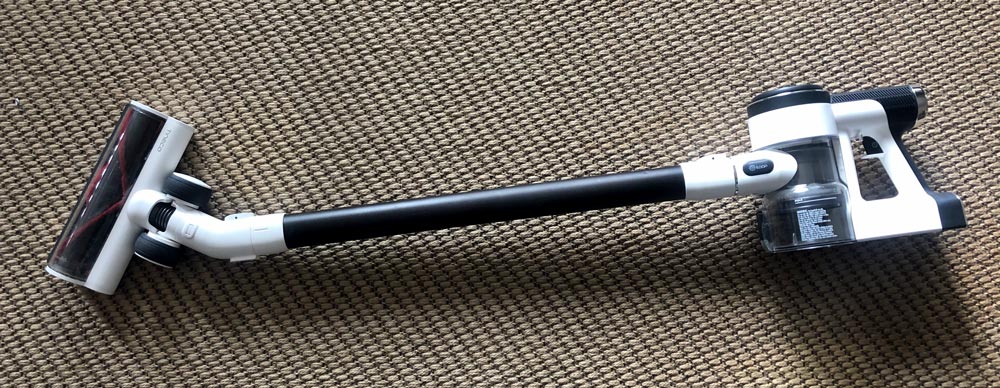
The Pure One S12 is slender stick-type vacuum with a suite of smart features to help in your daily cleaning routine.
What’s in the box?
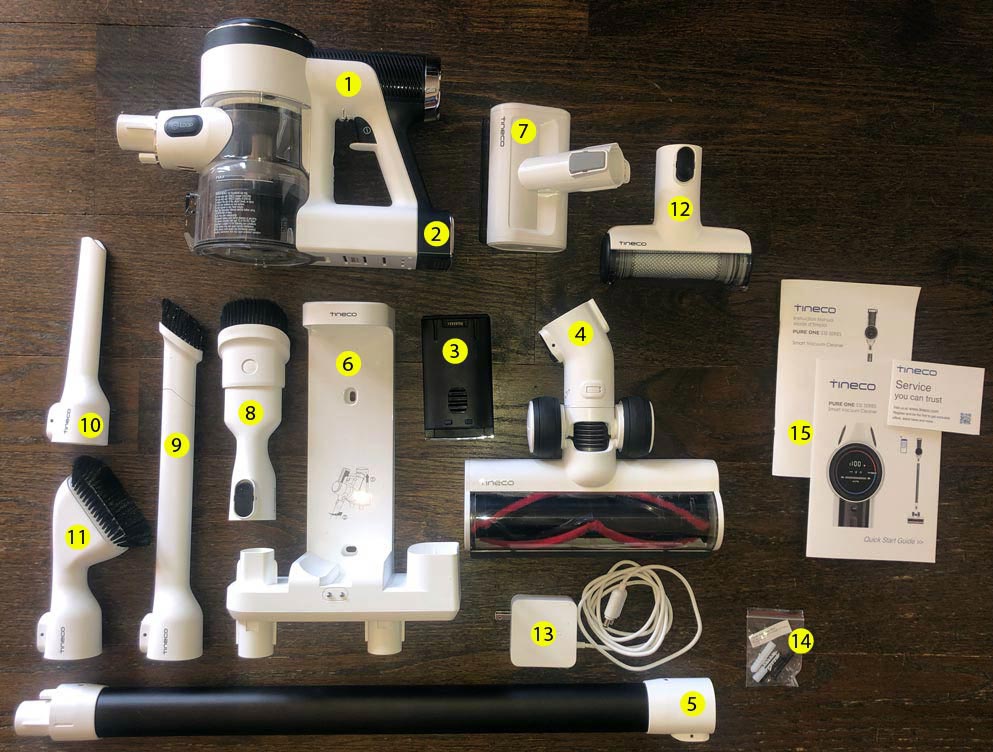
- Tineco Pure One S12 Vaccum
- 2500mAh Battery
- Spare 2500mAh Battery
- Multi-tasker power brush (direct-drive LED)
- Main extension tube
- Charging station (wall mount)
- Mini power brush
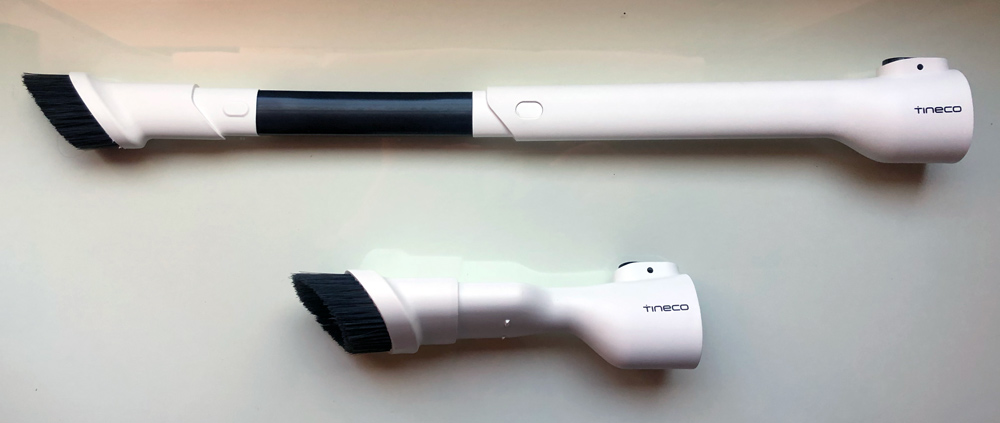
- 2-in1 dusting brush
- Flexible long crevice tool
- Crevice tool
- Soft dusting brush
- Automatic pre-filter cleaning tool
- Wall adapter
- Mounting hardware for charging station
- Manuals
Hardware specs
Batteries – 2500mAh
Rating Power/Max Suction – 500w/150w
Runtime – ≤ 100 minutes with non-motorized tool attachments
Design and features
The overall build and aesthetic immediately feels more current tech and IOT than it does vacuum. Lots of white and black throughout peppered with a good deal of chrome and plenty of LEDs and a touch panel.
Most of the touted features fall into their Smart nomenclature. Smart Suction which automatically adjusts depending on the activity or blockage. Smart battery management which lets you keep an eye on power levels. Smart noise optimization which keeps operational noise to a minimum. And finally, Smart filter self cleaning which lets you use the vacuum to clean its own filters.
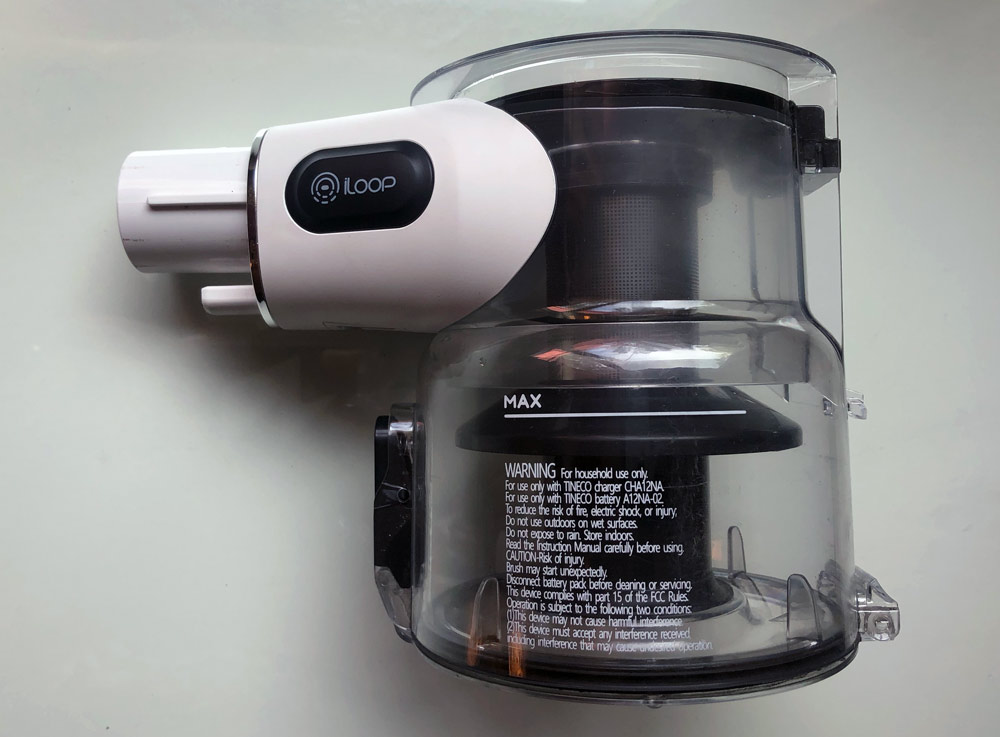
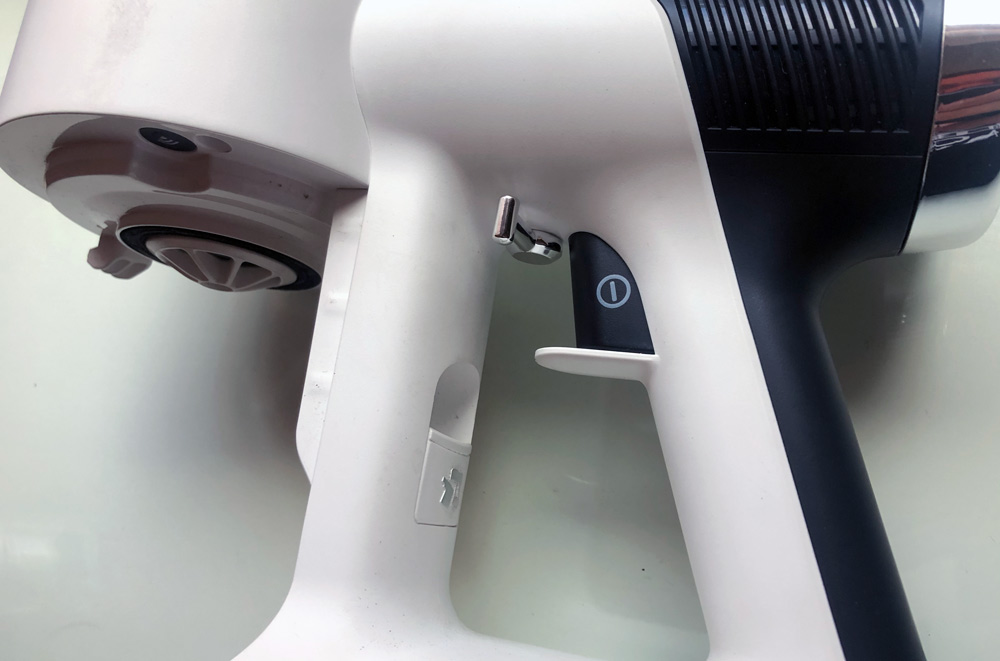
The display itself is a central point of information and controls serving up info on battery level, error indicators, suction level, dust monitoring and wifi connection confirmation. At the rear of the vacuum there are two button releases. One is on the bottom and that’s the battery location with the release switch being on the battery itself (shown here in left of photo).
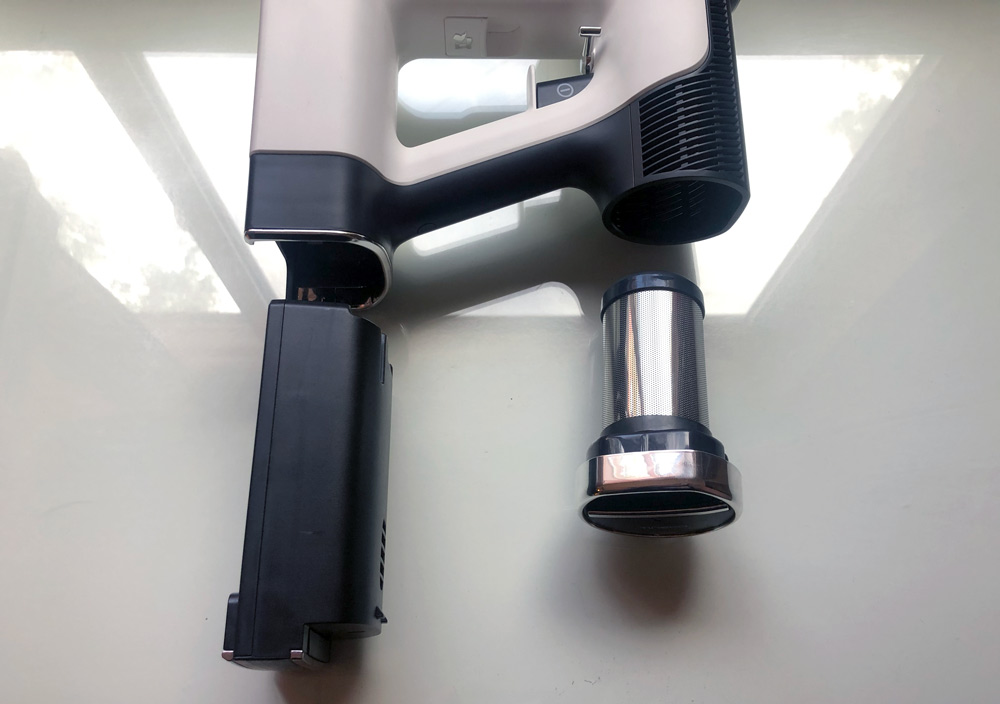
The second is the main Hepa filter which releases the same way (shown on right above). This should need to be cleaned or replaced much less frequently than the pre-filter which is in direct contact with the vacuum’s intake.
The dustbin is released via a lever in front of your middle fingers. Once released it pivots out from the top front. The dustbin opens from the front and has a center cartridge that houses the pre-filter. Disassembling to clean/wide down is pretty easy.
All of the attachments mount to the front of the vacuum with a keyed fitting and nice quick release button that makes swapping accessories very easy. A few of the accessories have built in extension or deployable bristles.
Setup
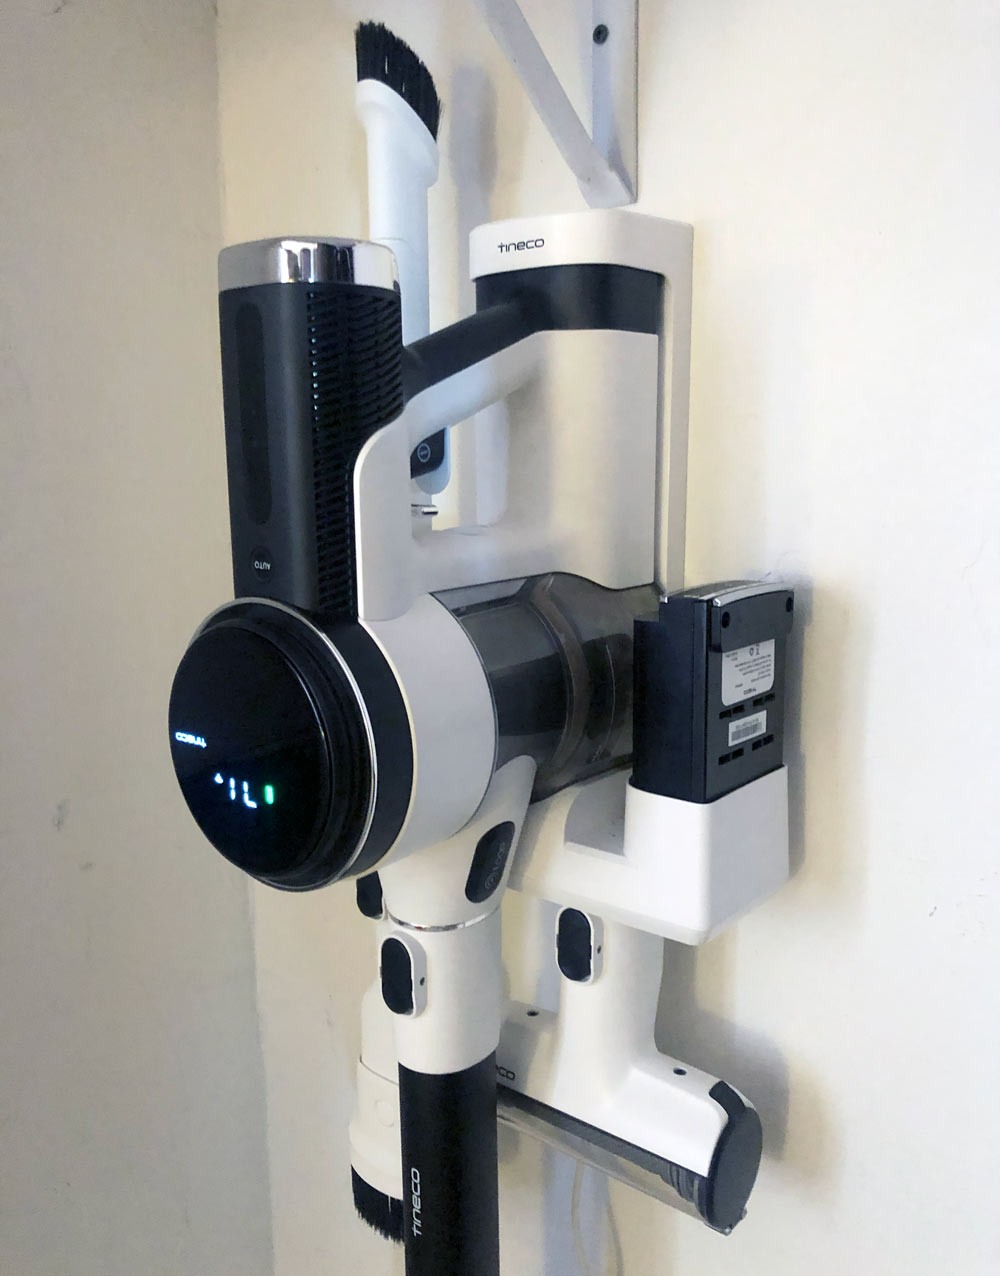
To get started you want to find a good location to mount the wall hanger. One piece of key information that’s missing prior to purchase is that the wall mount is required for charging. There’s no good way to work around it other than laying it all flat on the floor which isn’t the best for space optimization. Hopefully you have a wall outlet nearby as it’s required. I was able to find a spot in a guest room closed and had to run an extension cord, but the good news is it’s up, charged and running.
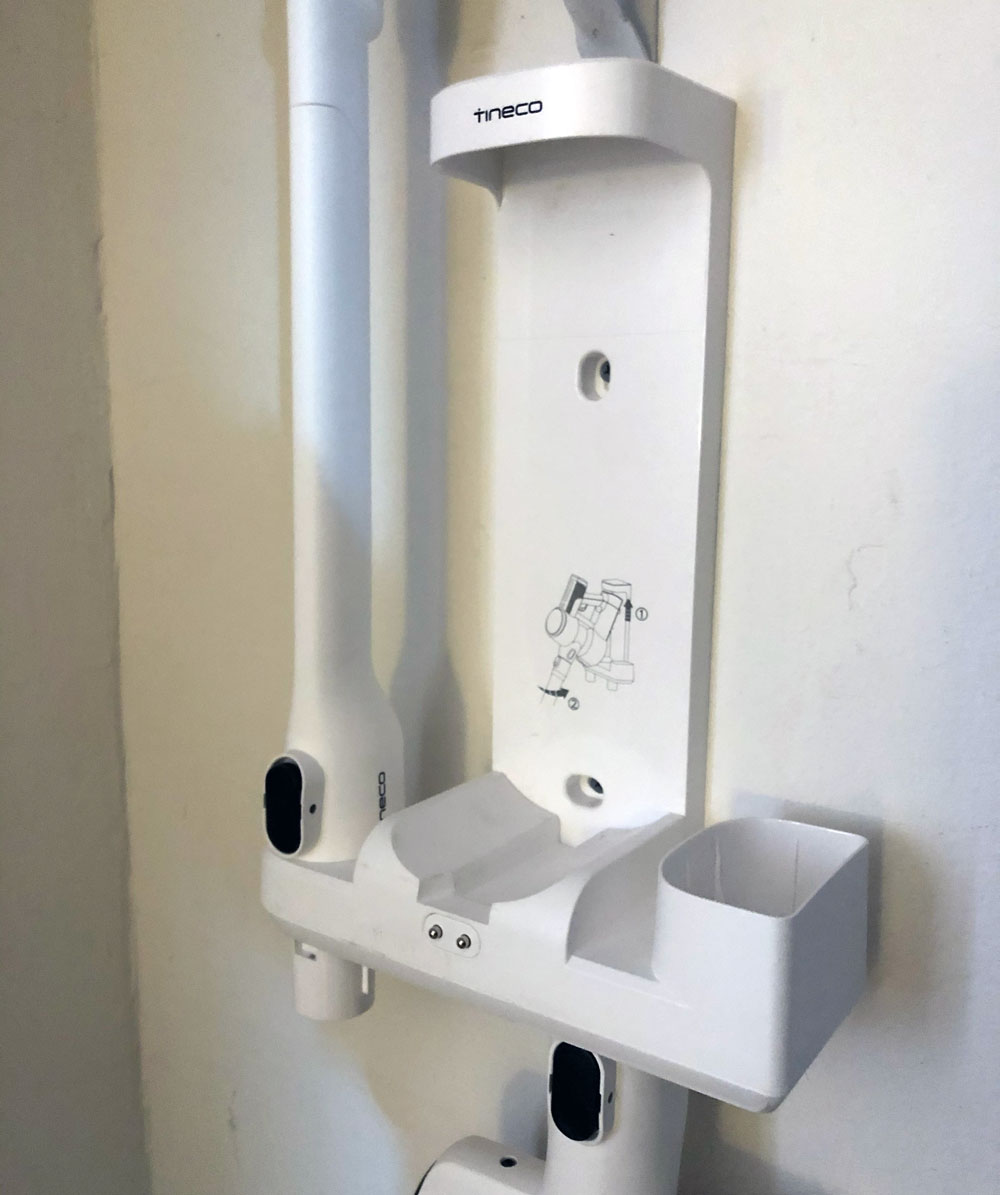
Tineco has included some mounting hardware and drywall anchors, but use something appropriate for your situation. Make sure to hang the caddy so that the two charging contacts at the front are at least x” from the floor or it’s possible that the floor attachment could keep the vacuum from docking correctly.
Once your system is mounted, go ahead and hang the vacuum by inserting the top at an angle and then resting it into the cavity so the electrical contacts meet. A sticker on the mount shows you how to do it. You’ll know it’s properly docked because the LED panel on the vacuum will spring to life and show the charging status. You can then insert the 2nd battery into the charging dock on the right side of the wall mount. The LED on the battery will show it’s connected.

Once everything is charged, you’re ready to connect the app (yep, there’s an app). Download from Google Play or the App Store, launch and register for an account to get started.
In the App, click on add a device, then on the vacuum, pull the trigger for 2 seconds to activate it, then remove the dustbin and press the wifi reset button.
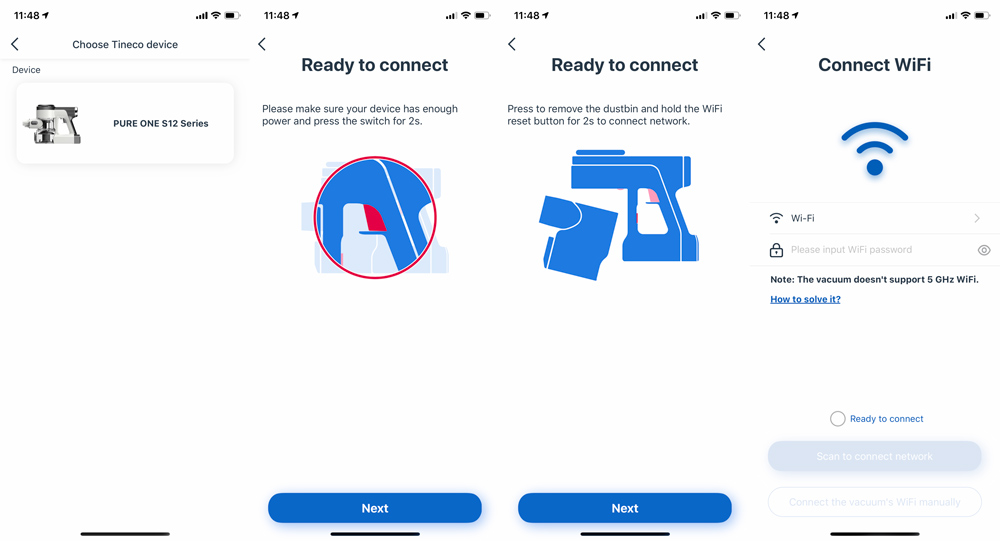
It’s possible that you’ll then be able to use your phone to scan barcode on the underside of the vacuum, but on my iPhone I had to jump out to the settings app and connect to the Tineco_xxxx network and then back to the app to enter my network information. If you’re having trouble, check Tineco’s website for troubleshooting (and make sure you’re not on pre-release OS software as it could be the culprit).
Performance
So it’s a vacuum. What makes this one different besides being cordless?
As you go to use it, the first thing you notice is the ergonomics.
The weight is up at the handle which makes it easier to carry from room to room. It also has implications to actual vacuuming, but more on that in a bit. The main extension tube is the right height for standard vacuum lengths and works well for our 5’7″ to 6’3″ family. It uses the same connector at the bottom end which means you can connect the big accessories directly to the vacuum if you want to use it directly on a sofa or a mattress. Very cool.
As you grab the drill-driver type handle and trigger, it’s really easy to squeeze, pull and start it up. You’ll actually find that it’s possibly too easy, but ends up being nice that there isn’t a ton of resistance on your finger.
That’s when you notice the second big thing, or lack thereof; the volume. Most vacuums are loud and in my experience they also have high pitched whines. Maybe it’s been my brand choices in the past, but I’ve had models from Hoover, Electrolux and our current Dyson and they’re all loud enough that I almost want earplugs. Even the iLife robot-vac we have is annoyingly loud and takes forever. By comparison, the S12 is very tolerable and completely without the high-pitch whine that would usually drive me crazy. For me this is a massive benefit that results in me using the vacuum more.
Our main floor is mostly dark hardwood with two area rugs, one sisal and one softer but equally low pile. Our stairs are the same hardwood with independent sisal treads and the bedrooms are all medium pile carpets. Our two dogs definitely create the lions share of our vacuuming needs as they both shed. One is a beagle and the other a white Pyrenees/Lab mix whose hair doesn’t exactly hide on the dark woods.
The S12 kicks on in Auto mode by default and actively adjusts suction depending on what the main power brush detects. As I move from hardwood to carpet that change is audible and it’s nice not to have to flick a switch or step on a button to make the change. Speaking of switches, right next to the trigger is a right-handed thumb switch with keeps the vacuum on without continually pressing the trigger.
The multi-tasker power brush is the primary attachment we’ve been using. The wheels have an inline-skate quality to them, rolling well without the usual plastic sound that makes me wonder if a vacuum’s wheels are damaging the floors. It also disassembles easily to be able to get to any wrapped hair or threads that may start to affect performance which the big display should notify you of.

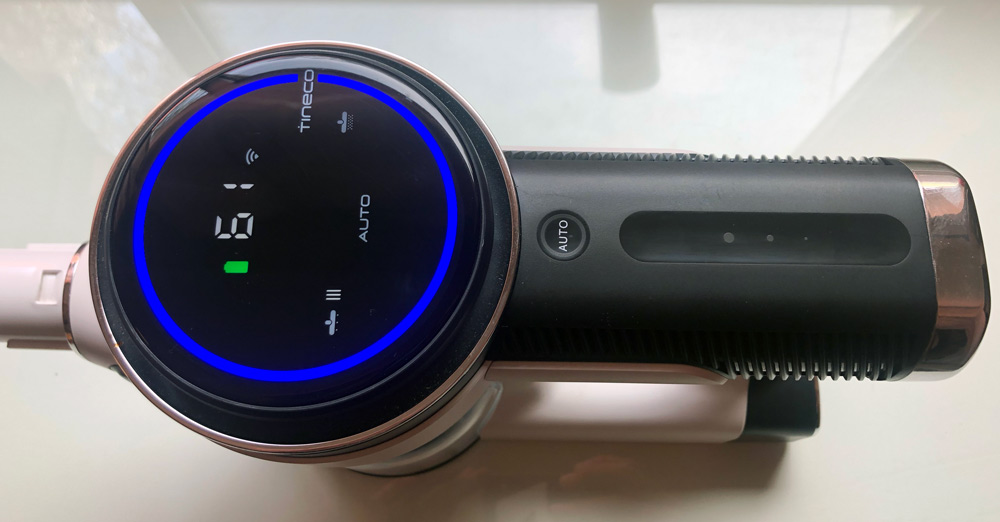
So let’s discuss this display. It’s a big 4″ round display that lights up any time you press the button or dock it to charge. It’s oriented for you as you’re vacuuming and doesn’t invert when docked to charge which I find funny, but hey that’s something they can hopefully fix with a firmware update. As for info, it displays a battery icon, battery percentage and wifi logo just above the center line.
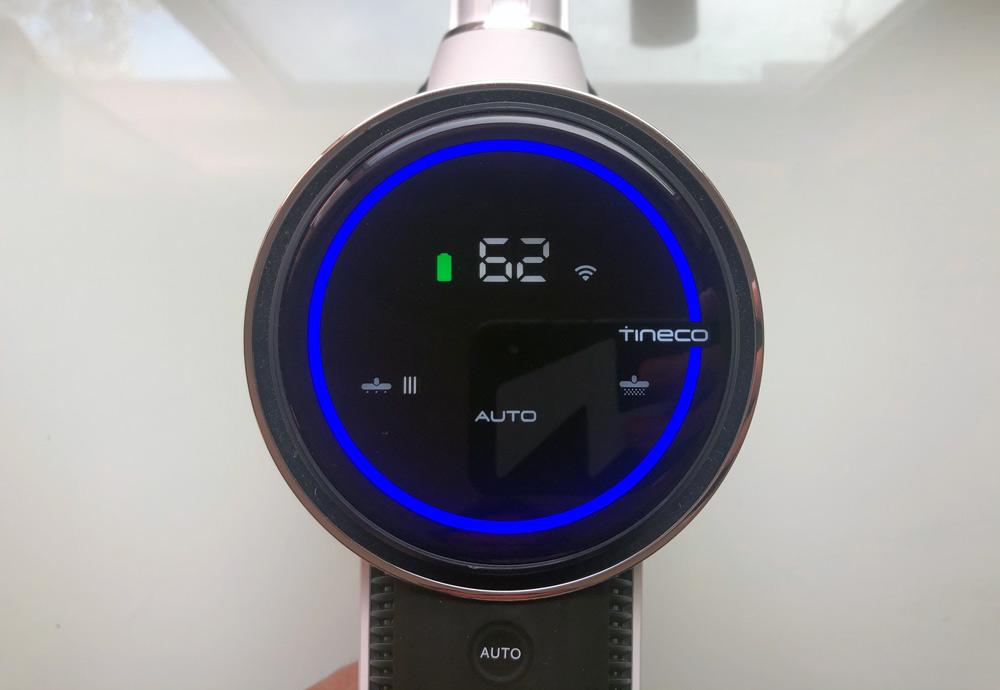
Just below the centerline is the suction power level indicator shown in a segmented line from left to right (showing a very low power level of 4 in this photo). Just below that is the Auto indicator confirming you’re in that mode. Circling the entire face is the dust monitoring loop which turns from blue to red according to the dust levels.
Should they occur, the centerline to the left of the Tineco logo will present brush roller tangled, air channel blocked, and dust sensor defective icons to let you know there’s something that needs your attention.
Just behind the circular display is a round Auto button and a finger width scalloped recess. This is actually a touch sensor for manual mode.
Slide your finger or thumb in the groove towards the display for more power and away for less. The Auto button is used to return to auto from manual mode. In general Auto mode worked great. The only time we switched out of it was when cleaning the stairs around the stair treads with a crevice tool. Auto mode set it to low and we needed max to get to the dog hair in the corners.
The wall mount works well, and having a second battery hanging out fully charged is super handy for any extended cleaning sessions. The main thing I’ll fault it for is that it only has room for 3 of the 6 attachments included with the kit. Tineco does sell an accessory bag, but there’s not a hanging spot on this mount for it either.
Emptying the dustbin is always a messy affair and while the S12 does have a pretty convenient button to release the bottom and dump it out, you’ll definitely want to be over your trashcan at a minimum and ideally inside it. Here’s how that dustbin opens up.
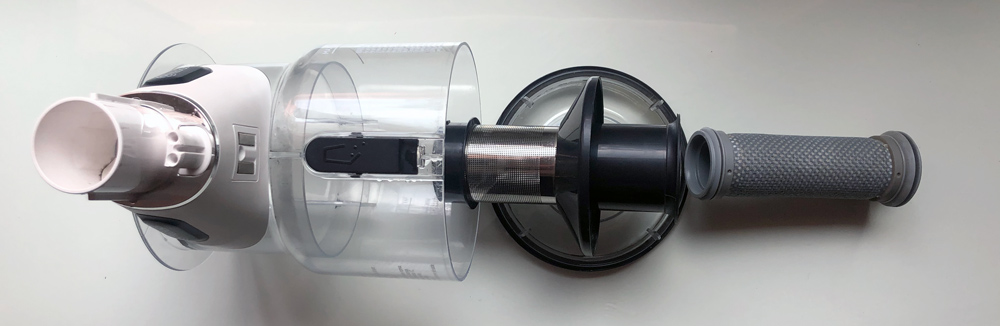
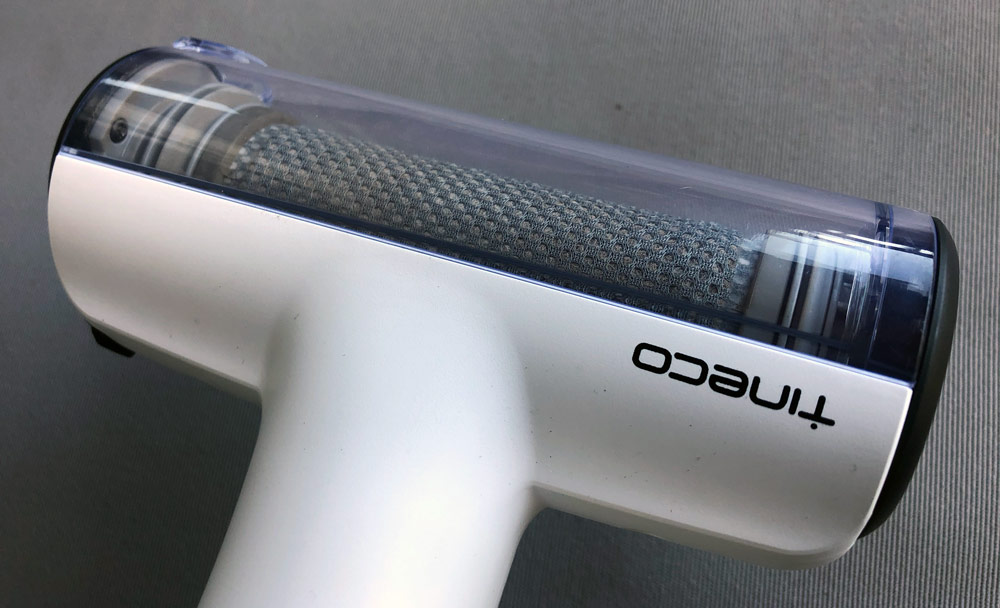
Tineco did something very cool when it comes to filters. First they provided a additional pre-filter, and second they’ve included an attachment that lets the S12 clean the dirty pre-filter. Here’s a dirty filter installed in the cleaning tool.
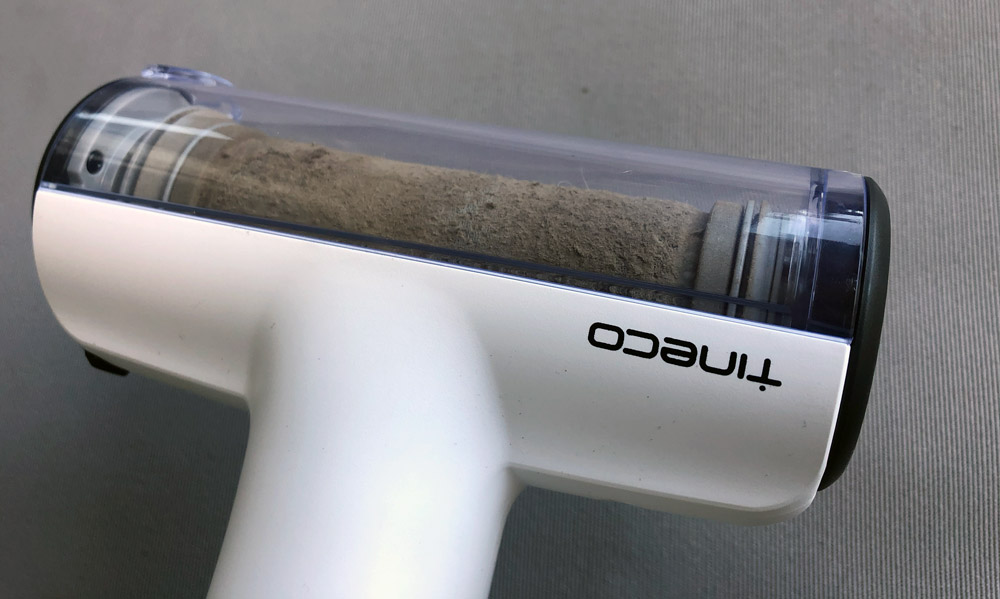
Here’s that same filter about 60 seconds later.
The rest of the vacuum disassembles easily when you need to clean or unblock anything.
Let’s return to battle of clean house versus cleaning house. The S12 just bested all the vacuums I’ve had including our Dyson Animal. It’s easy to maneuver, has a very reasonable volume level and has quick change attachments that work. It works great on hardwood and equally well on carpets. It has sped up my clean time and is helping us win the battle.
It is top-heavy and that’s something my wife mentions every time she uses it. The main complaint there is you can’t stand it up and walk away and even leaning it is likely to have it crashing to the floor as the bottom swivel joint is nice and twisty. Let’s wrap this up.
What I like
- Quiet and without a high pitch whine
- Easy to steer and navigate under and around obstacles
- Filter cleaning attachment is great
- Auto mode works well and the manual adjust is there when needed
What I’d change
- It’s a bit top-heavy
- Dustbin is small and needs to emptied frequently
- Wall station does not have places for all the included attachments
- A stand-alone battery charger for users without hanging space
Final thoughts
The Tineco PURE ONE S12 vacuum is great. Any quibbles above would not keep me from purchasing this as our main vacuum. The key takeaways is that you should be prepared to empty the bin frequently both because it’s small and because you may find yourself vacuuming more often. Probably not a bad thing.
Price: $599
Where to buy: Amazon
Source: The sample of this product was provided by Tineco.
Filed in categories: Reviews
Tagged: Home and Kitchen, Vacuum
Tineco PURE ONE S12 Smart Vacuum Cleaner review originally appeared on The Gadgeteer on July 29, 2019 at 8:00 am.
Note: If you are subscribed to this feed through FeedBurner, please switch to our native feed URL http://the-gadgeteer.com/feed/ in order to ensure continuous delivery.