Akaso Trace 1 dash cam review


REVIEW – I have tested several dash cams lately. Most have been OK, but cameras in general are improving at quite a clip. Witness the current dash cam under review, the Akaso Trace 1.

What is it?

A small box with both a front- and rear-facing camera that takes high-quality videos, with time stamping, and fantastic low-light resolution.

What’s in the box?

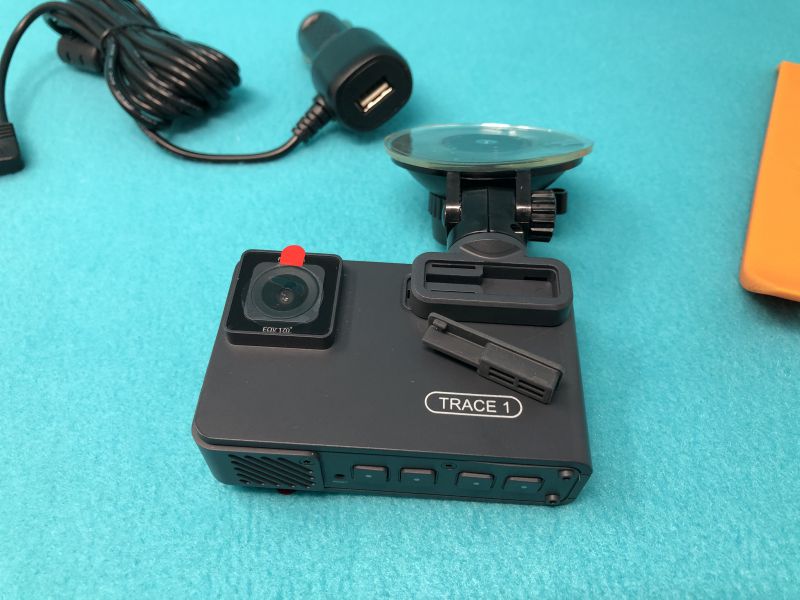
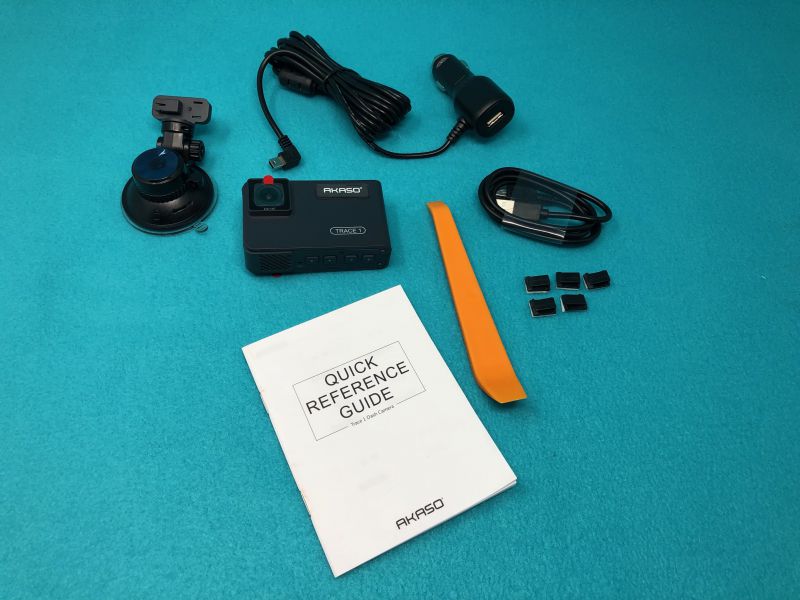
  • Camera unit
  • Suction mount
  • Power plug with captive miniUSB plug and pass-thru jack
  • Mounting clips and tool
  • Quick start guide

Hardware specs

(From company website)

  • FRONT AND INSIDE RECORDING: Trace1 dual dash cam is equipped with dual lenses to capture exterior and interior of the car simultaneously at 1080p30 (340-degree field of view combined). When inside recording is not needed and turned off, the front lens records 1080p60 for crisper and smoother image.
  • UNPARALLELED NIGHT VISION: Thanks to the state-of-art Sony STARVIS at both lenses, which extends the sensitivity of sensor beyond visible light to near-infrared range, and WDR technology, Trace 1 dash cam excels capturing every detail of your surroundings regardless of lighting conditions.
  • G-SENSOR & PARKING MONITOR: Loop recording comes standard, and built-in G-sensor locks the recording clip to ensure data integrity when collision gets sensed. Parking monitor protects your vehicle even when parked – it enables the car dash cam to turn on if any impact is detected, record for 30 seconds and turn off again.
  • OTHER FEATURES: Trace 1 dash camera supports up to 128GB of mircoSD storage (class 10 or above and at least 16GB recommended, memory card NOT included); efficient heat dissipation design; internal microphone with on/off option; auto LCD off to save power.
  • PERFECT DASHCAM FOR EVERYONE: With so many tech and safety features packed into an affordable package, this dash cam front and rear is a perfect option to everyone – beginners and seasoned taxi and rideshare (Uber, Lyft) drivers alike. All AKASO car camera – dash cam comes with 30-day hassle free return and 1-year limited warranty.

Design and features

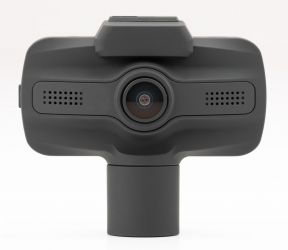
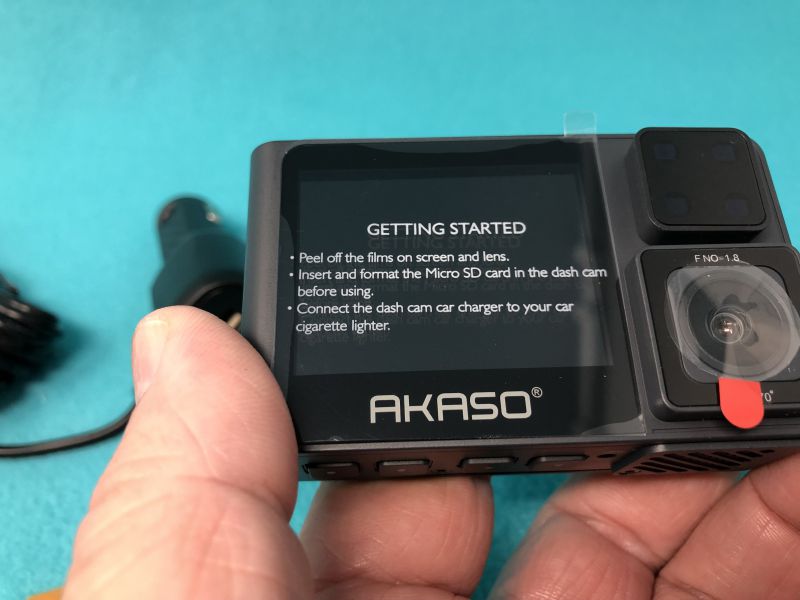
The Trace 1 is small, even by today’s miniaturized standards. At 3” x 1.75” x 1”, it’s barely as large as an action camera. There’s a 2” (diagonal) screen on the rear side, and an f1.8 camera with a .5” diameter lens pointing out both sides. On the rear, there’s a 4-element IR light that allows for great night-time video of the car interior, as well as your blind spots to either side. Both cameras sport a 170º field of view.
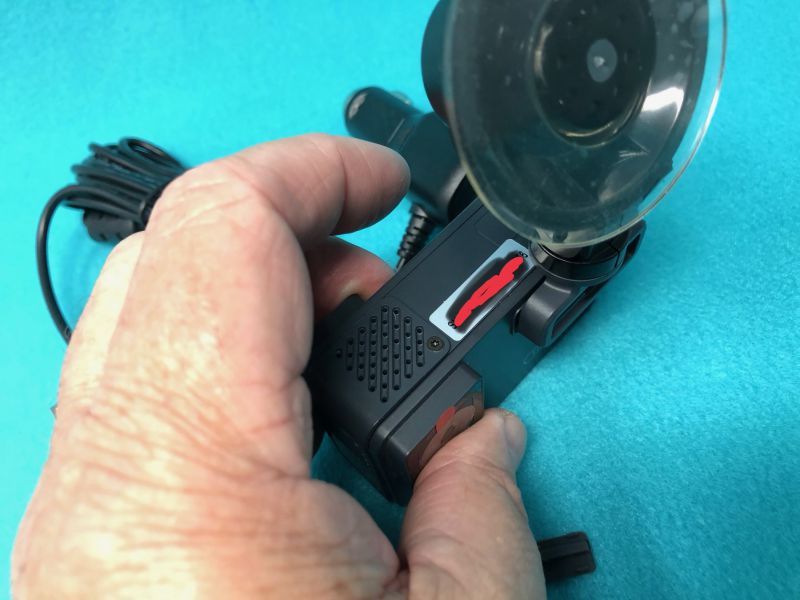

The suction mount has a sticky silicone gripper 2.25” in diameter, with a quarter-turn locking mechanism. I only had it fall off once, after sitting out in the sun all weekend. When I brought it in for this review, however, I noticed that I had left the protective film on the silicone! It wouldn’t have slipped at all if I’d removed that film and actually stuck the bare gripper to the glass.
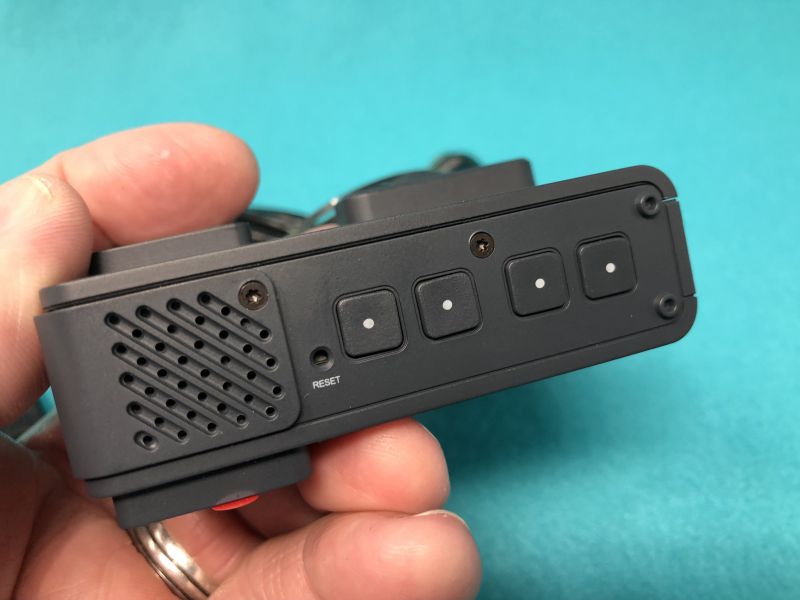

There are four function buttons across the bottom, as well as an on-off button above the card slot on one end. The miniUSB power port is on the top, and there’s a pin-hole mic between the card slot and the power button.
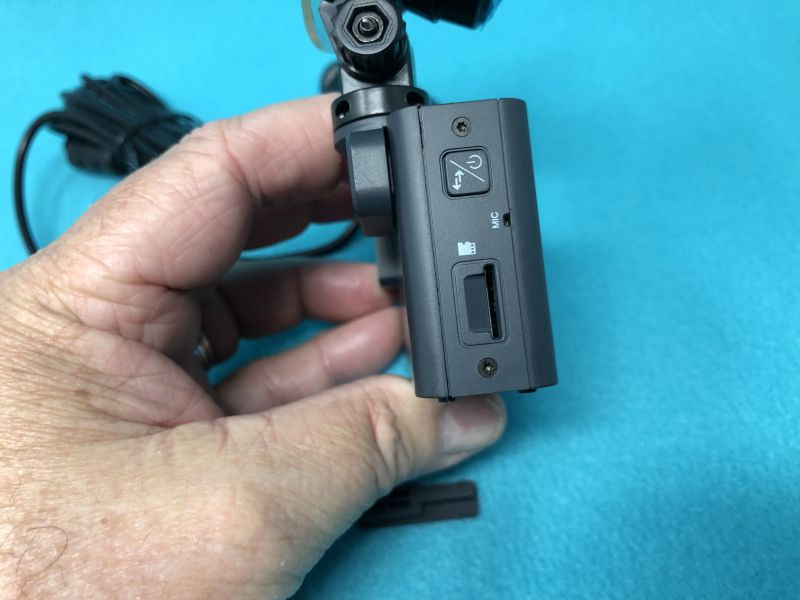

There are various protected grills/vents on several sides, at least some of which is for sound. For a tiny little unit, it’s easy for me to review my last drive home, with a podcast playing, over the noise of lawnmowers and kids that I’m hearing on my back deck writing spot.
The default setting for the firmware is for English, with no parking mode, incident mode (where the clip being recorded will be locked if a jolt or collision is detected based on the motion sensor), with a time-stamp on the videos. This is pretty standard. The four buttons across the bottom of the unit change function when you press them. They are used to replay captured video, format the data card, change the date, turn off the beeping sound, etc.

Setup

Setup of the Trace 1 was minimal. Other than installing a TF storage card (not included), affixing the suction cup mount to the windshield and routing the wire and attaching it to a power plug, there’s really nothing to it. (I didn’t set the time/date at this point, which shows in the video clips.) By default, it’s set to turn on when it has power and stay in “park” mode as long as the battery lasts. Park mode can be set to three levels of sensitivity (as can the normal “incident” mode). This will start recording video and audio if there is a jolt or crash to the vehicle. You can select the length of videos, and in Park mode, the camera will record video until there is no more motion, and then finish the clip. This will allow you to view what happened in case of a parking lot crash where someone hits your car, then drives off.

Here’s a short clip from my exciting commute into work. Note the car passing me on the left at about 7 seconds, which shows in the front camera after the view transitions from rear to front view.

Performance

What I like

  • Single unit takes front and rear-facing video
  • 170º coverage on both front- and rear-facing cameras totals 340º of coverage
  • Both cameras capture high-def video
  • Light and small
  • Runs on battery power for a good while.

What needs to be improved

  • I can’t think of anything.

Final thoughts

As noted in previous dash cam reviews, I have a very short commute and most drivers obey the rules of the road and tend to not try to make me hit them for insurance fraud like in some countries. But, given the nature of changes in our society, there seem to be increasingly many incidents that could be helped by having a video camera on and running all the time. If you’re feeling that vibe, this is a pretty nice little unit to consider.

Price: $99.99
Where to buy: Amazon
Source: The sample of this product was provided by Akaso.

Filed in categories: Reviews

Tagged: ,

Akaso Trace 1 dash cam review originally appeared on The Gadgeteer on May 30, 2019 at 9:00 am.

Note: If you are subscribed to this feed through FeedBurner, please switch to our native feed URL http://the-gadgeteer.com/feed/ in order to ensure continuous delivery.

Soon, your car will update just like your apps and other hardware

NEWS – Cars today run on software.  Programs control everything from climate control to transmission shifting to air/gas mixture in the engine. Car manufacturers release software updates, just like other hardware manufacturers.  I get firmware updates for my Sonos speakers and my Kevo door locks.  They are delivered and installed pretty easily.

But…for cars, it always involved a trip to the dealer and some quality time in the customer lounge.  But why?  Most cars today have access to internet-based connectivity.  But still, updates have to be done at the dealership.  The sole exception to this is Tesla.  They figured out early on that customers hate going to the car dealer.  They changed the model for purchasing and for over-the-air (OTA) software updates.

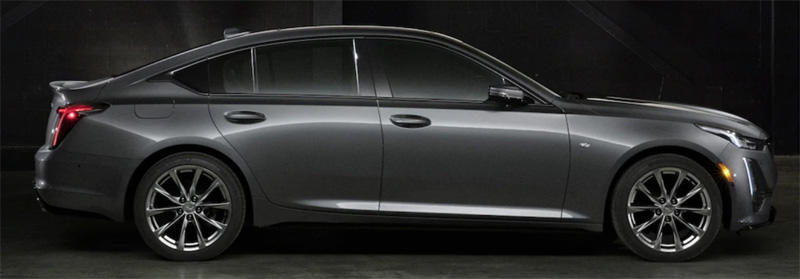
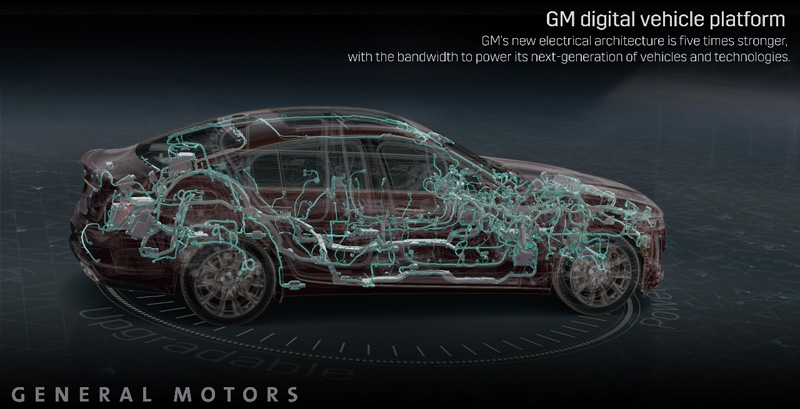
General Motors (GM) is looking to continue the shift in that paradigm with its upcoming digital vehicle platform, being rolled out with the upcoming 2020 Cadillac CT5 sedan.

Most of GM’s vehicles will feature this underlying technology ecosystem by 2023. The new electronics systems will have the capability of managing up to 4.5 terabytes of data processing per hour, enabling systems like GM’s Super Cruise autonomous driving system. This represents an improvement in processing power of up to five times beyond today’s cars.

By adding new OTA updates, GM is positioning its fleet to be able to add new functionality over the lifespan of the vehicles without an annoying dealership visit. This sets the stage for better performing electric and autonomous vehicles as well as improved features on traditional cars.

Of course, hacking is a concern – nobody wants anyone taking control of their car as it hurtles down the highway. GM has included new security measures in the system’s DNA to ensure overall system security.

Tesla set the stage and now GM, and other automakers are jumping into the party, bringing a needed change to the auto industry and I hope, an increase in the propagation of new and exciting features to new vehicles. It is a fun time for the auto industry.

Filed in categories: News

Tagged:

Soon, your car will update just like your apps and other hardware originally appeared on The Gadgeteer on May 22, 2019 at 7:59 am.

Note: If you are subscribed to this feed through FeedBurner, please switch to our native feed URL http://the-gadgeteer.com/feed/ in order to ensure continuous delivery.
Wilson’s new weBoost Drive Reach means no more cellular dead zones on your next road trip

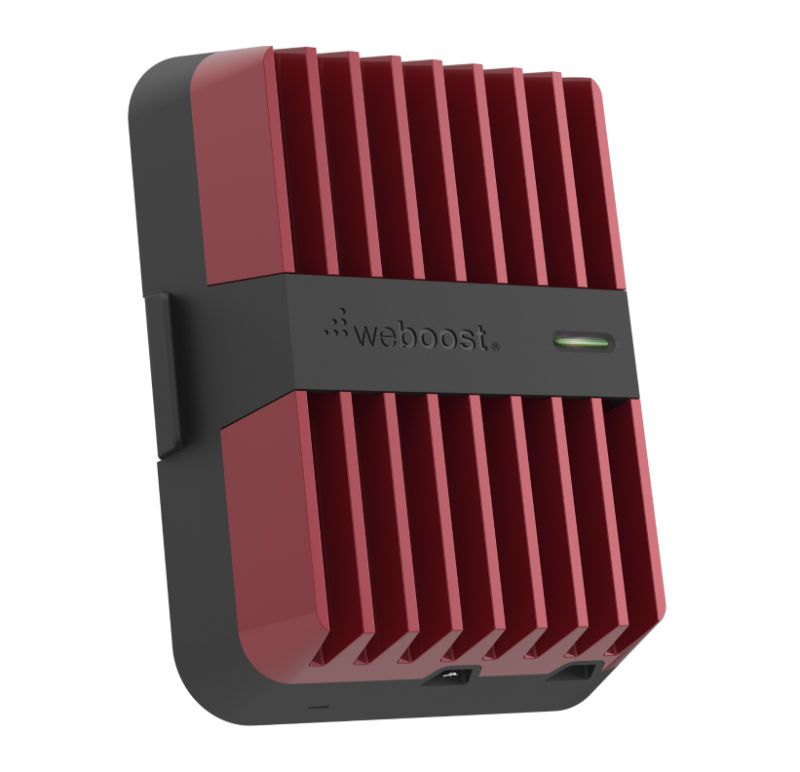
NEWS – Today Wilson Electronics has launched a powerful new in-vehicle signal booster device that has been designed to improve weak cellular signals in cars, trucks, and RVs to provide better connectivity while on the road. The weBoost Drive Reach device is compatible with all mobile phones and wireless carriers in North America and allows drivers to enjoy strong call quality, fewer dead zones and faster data upload/download speeds while traveling.

The weBoost Drive Reach in-vehicle cellular signal booster features uplink output power capabilities of 29.5 dBm and 50 dB gain which is the maximum allowable gain under FCC standards. The device uses an exterior mag-mount 4G antenna that connects to the booster/signal amplifier inside the car to boost weak signals up to 32x. Of course, if the area you’re traveling through has absolutely no signal at all, this product or any other signal boosting device will not work. You just have at least some signal in order to boost it.

Priced at $499.99 and certified by the FCC, the weBoost Drive Reach is available for purchase now at weBoost.com

Filed in categories: News

Tagged:

Wilson’s new weBoost Drive Reach means no more cellular dead zones on your next road trip originally appeared on The Gadgeteer on May 21, 2019 at 1:00 pm.

Note: If you are subscribed to this feed through FeedBurner, please switch to our native feed URL http://the-gadgeteer.com/feed/ in order to ensure continuous delivery.
myGEKOgear OwlScout dual dash cam review

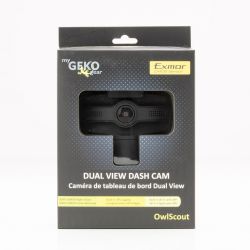
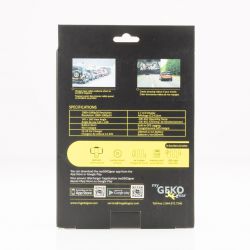
REVIEW – I’ve reviewed a few dash cams in the past, but this time I tried out the myGEKOgear OwlScout dual dash cam. I’ve reviewed a few dash cams from this company, but none with dual built-in cameras. Let’s see how this one performs.

What is it?

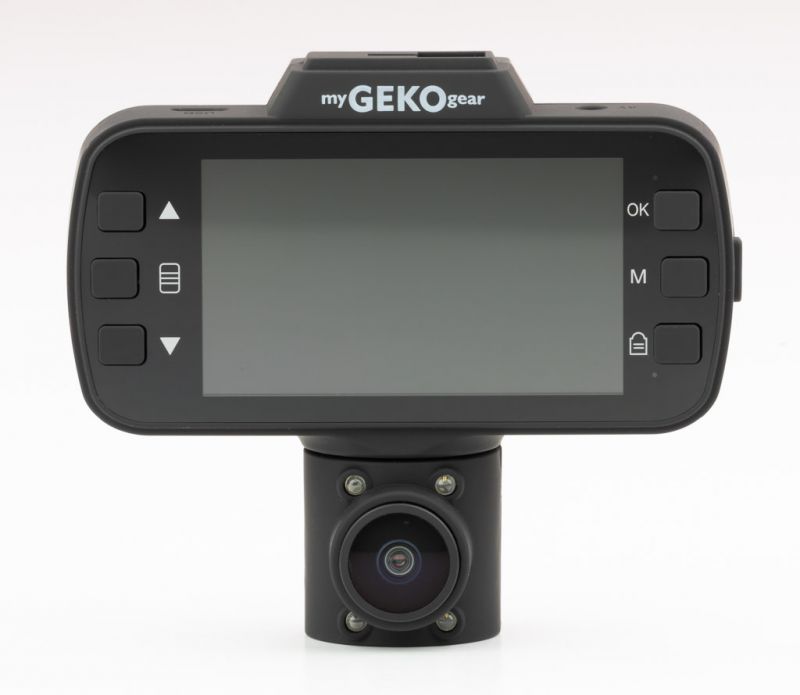
The myGEKOgear OwlScout dual dash cam is a dual camera dash cam designed to record video of both the inside and outside of your vehicle simultaneously.

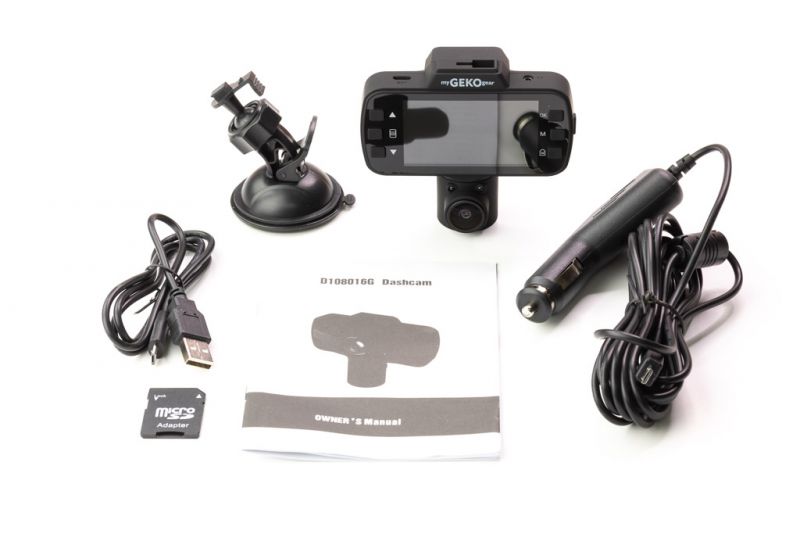
What’s in the box?

  • OwlScount Camera
  • Suction cup mount
  • Car charger plug and cord
  • Micro-USB Cable
  • 16GB Micro-SD card
  • Quick Start Manual


Hardware specs

Recording Resolution: 1080P + 1080P 30FPS
Imaging Sensor: Sony Exmor, Infrared Night Vision
Display Size: 2.7″ LCD
View Angle (F.O.V.): 145°+145° (F+V)
Max. Capacity of microSD card: 16GB microSD included
Batteries Included: 170mAh Li-ion battery embedded
Automatic Incident Detection (G-Sensor): Yes
Loop-Cycle Recording: Yes
Built-in Wi-Fi: Yes
Integrated Microphone: Yes
File Format: .mp4
Dimensions: (H x W x D) 3” x 3.7” x 1.3”

Design and features

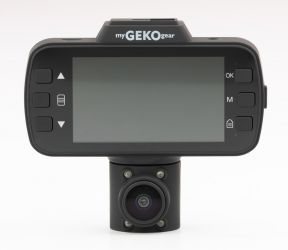
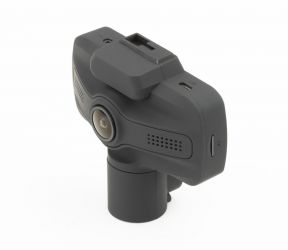
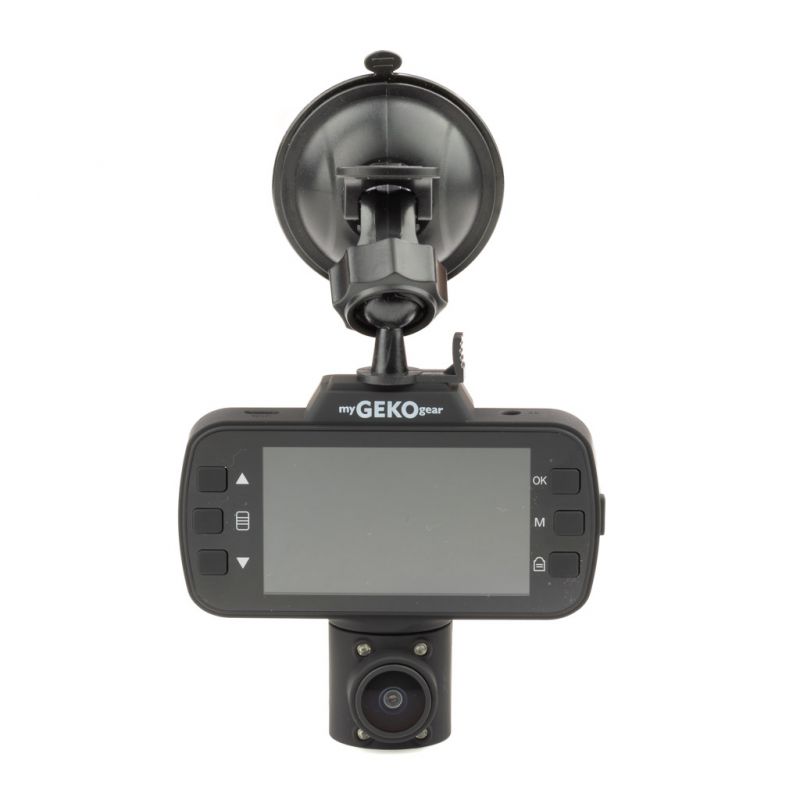
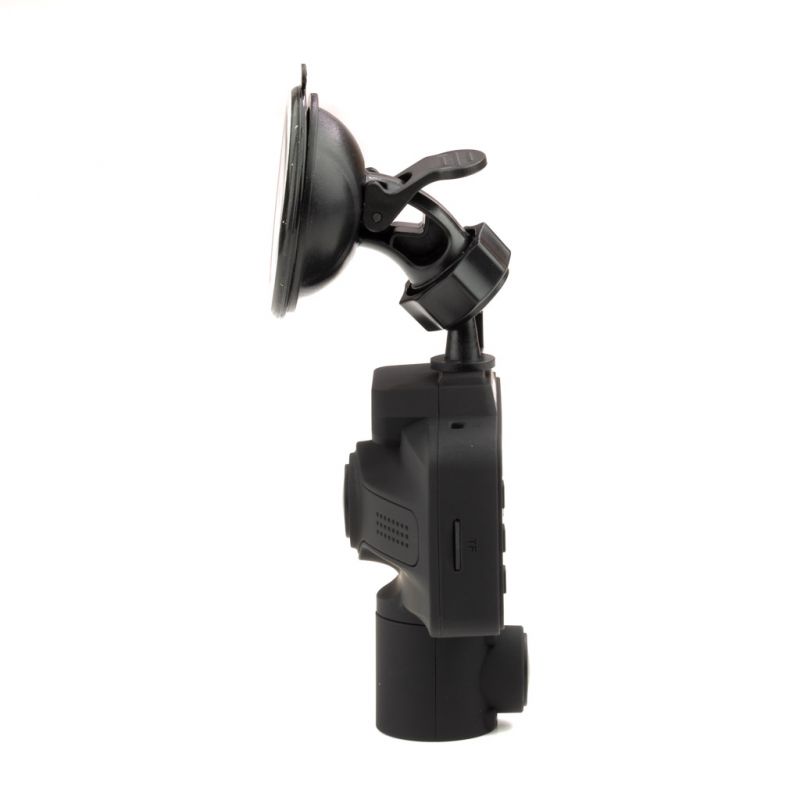
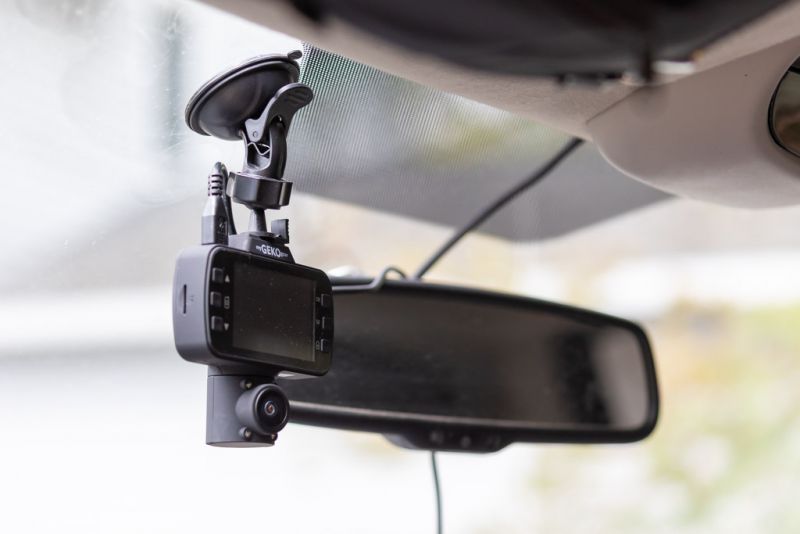
The myGEKOgear OwlScout dual dash cam is a suction cup mounted dash cam that features a large 2.7″ LCD screen and both front facing and rear facing cameras. At the heart of each camera is a Sony Exmor imaging sensor that provides great video in both day and night conditions. The rear facing camera features infrared illumination. Both cameras feature a 145 degree field of view. Each camera’s video is saved to separate files on the memory card.


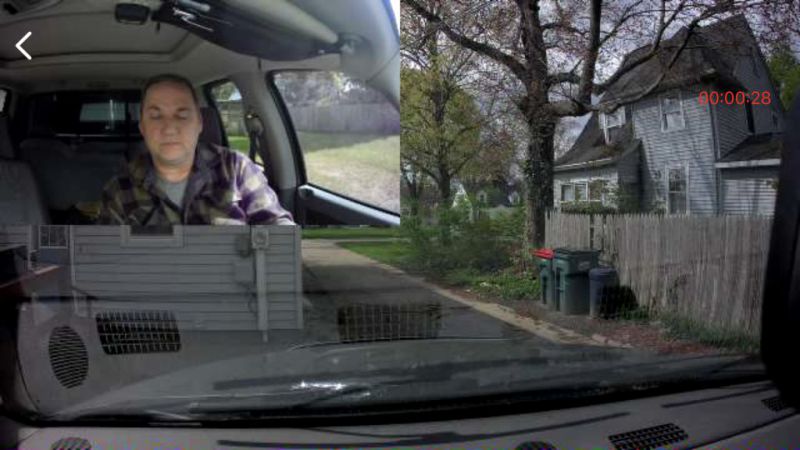
When recording video the rear facing video is displayed in the upper left quarter of the screen, allowing for easy positioning of the camera without having to press any buttons.

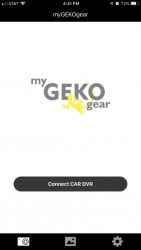
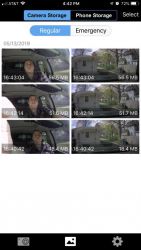
Screen capture from smartphone app

The micro-USB power cord is a welcome feature that allows you to use the provided car charger plug, or your own cable as you desire. A 170mAh embedded battery provides enough power to save video files when the camera is powered off via the ignition, or during a power loss in the event of a crash. In the event of a crash, the G-Sensor will detect the impact and automatically save the video so that it is not overwritten.

The OwlScout comes with a 16GB micro-sd card and features the ability to loop-record. Loop recording will save the video in 3, 5, or 10-minute clips, overwriting the oldest clips when the card is full.


I found the integrated microphone to be surprisingly good. The audio in my sample footage (below) is directly from the camera. I think the microphone should work great for capturing all conversations in the vehicle.

The camera has three modes: Video (dash cam), Photo, and Album. Photo mode takes up to 12MP images, and the Album mode is to view and playback photos and videos.

The OwlScout also has built-in Wi-Fi for connecting to the camera via an iPhone or Android smartphone. I found the app to be a bit limited, but sufficient to view and transfer videos or view live video. I did find though that the settings in the app would not correspond to settings that were already set in the camera, and the camera would revert some settings after the app was used. For example, I had the recording loop set for 3 minutes, and after going into the app and then disconnecting, the camera then showed a 10-minute loop interval.

There is a parking monitor feature that can be turned on which will start recording when an impact on the vehicle is detected.

I do like how the videos that are either automatically saved by the G-Sensor or by manually pressing the lock button are saved to a separate folder on the SD card, as well as accessible from the “Emergency” tab of the album view in the app.


The GPS logging feature mentioned on the website feature list was nowhere to be found in the camera or the app despite there being a GPS icon on the screen.

I did find that the playback operation was a bit confusing as to which button did what, such as play, fast forward, etc. I also found that after switching from video to photo to the album (playback) and then back to video, the dash cam video did not automatically start recording until I clicked the OK button. I lost quite a bit of video because of that. I think it should always revert to recording after a certain period of time when you are in video mode.

Here’s some sample video from the OwlScout camera, along with a few comments as I was driving. The video is unprocessed except that I overlayed one video on the other and spliced the 3-minute clips together. Other than that no video or audio editing was done.

What I like

  • Simple to use menus
  • Easy to see buttons
  • Great microphone
  • Wi-Fi connection with a smartphone
  • Dual Cameras
  • Range of motion for mount
  • Micro USB connection
  • Well named file names in the following format: yyyy_mmdd_hhmmss_001A

What needs to be improved

  • Price – a little high for the feature set
  • Confusing playback controls
  • GPS logging feature missing from app

Final thoughts

Overall the I really liked the video display and its size, and the video quality from this camera was pretty good. The audio captured was fantastic. I think the price might be a little high for the feature set, as some cameras have more features, but may not have video as good as this one.

Price: $199.99
Where to buy: myGEKOgear
Source: The sample of this product was provided by myGEKOgear.

Filed in categories: Reviews

Tagged: ,

myGEKOgear OwlScout dual dash cam review originally appeared on The Gadgeteer on May 20, 2019 at 11:00 am.

Note: If you are subscribed to this feed through FeedBurner, please switch to our native feed URL http://the-gadgeteer.com/feed/ in order to ensure continuous delivery.
OBDLink MX+ review

REVIEW – You know how a dealer will tell you what needs to be fixed on your car, and you find yourself scratching your head wondering if any or all of it was really necessary? This little gizmo claims to be able to help you know what’s wrong with your car before you get to the dealer or shop. Sounds like a good thing right? I agree and had the chance to test one out.

What is it?

The MX+ is a bluetooth adapter for the OBD port on your car that in combination with your phone and a free app creates a  powerful diagnostic tool and real-time performance monitor.

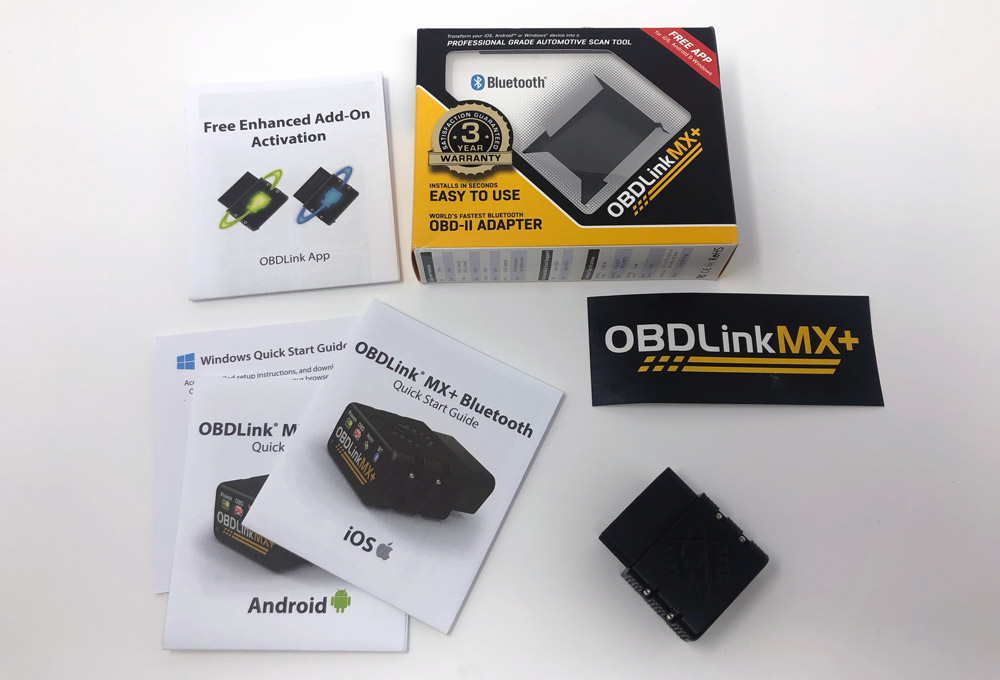
What’s in the box?

  • OBDLink MX+ adapter
  • Quick start guide
  • Item

Hardware specs

Bluetooth: Secure 128-bit data encryption, Class 2 BT v3.0 transmission (262′ max range)
Dimensions/Weight: 50 x 45 x 23mm / 85g
Supports: All OBDII protocols, Single wire CAN (GMLAN), Ford medium speed CAN (MS-CAN)
Power: 8-18v DC, 62mA operating current, 2mA battery saver mode
Thresholds: -4º to 131ºF operating temperature, 10-85% humidity (non-condensing)
Max Parameter ID: ~100 PIDs/sec for PC and Android
Certifications: International: Rohs, REACH | N. America: FCC Part 15B, IC ICES-003, ETSI EN 301 489-1 V1.9.2 & -3 V1.6.1

Design and features

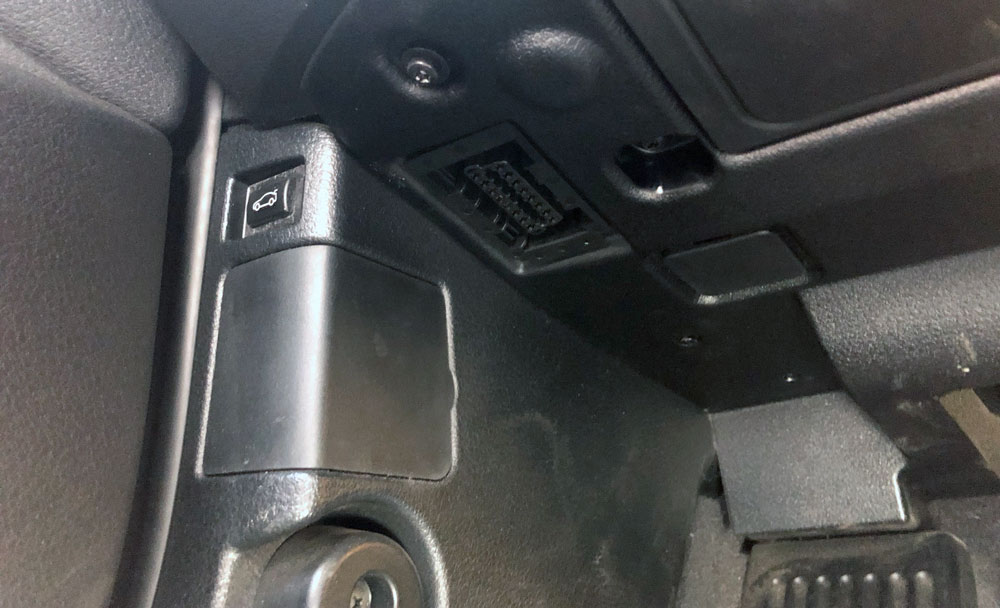
The OBD port is usually found below the steering wheel in an accessible location, either immediately accessible or behind an easy to open panel. It’s been included on all US cars since 1996 and is primarily used for diagnostics by dealers and repair shops.

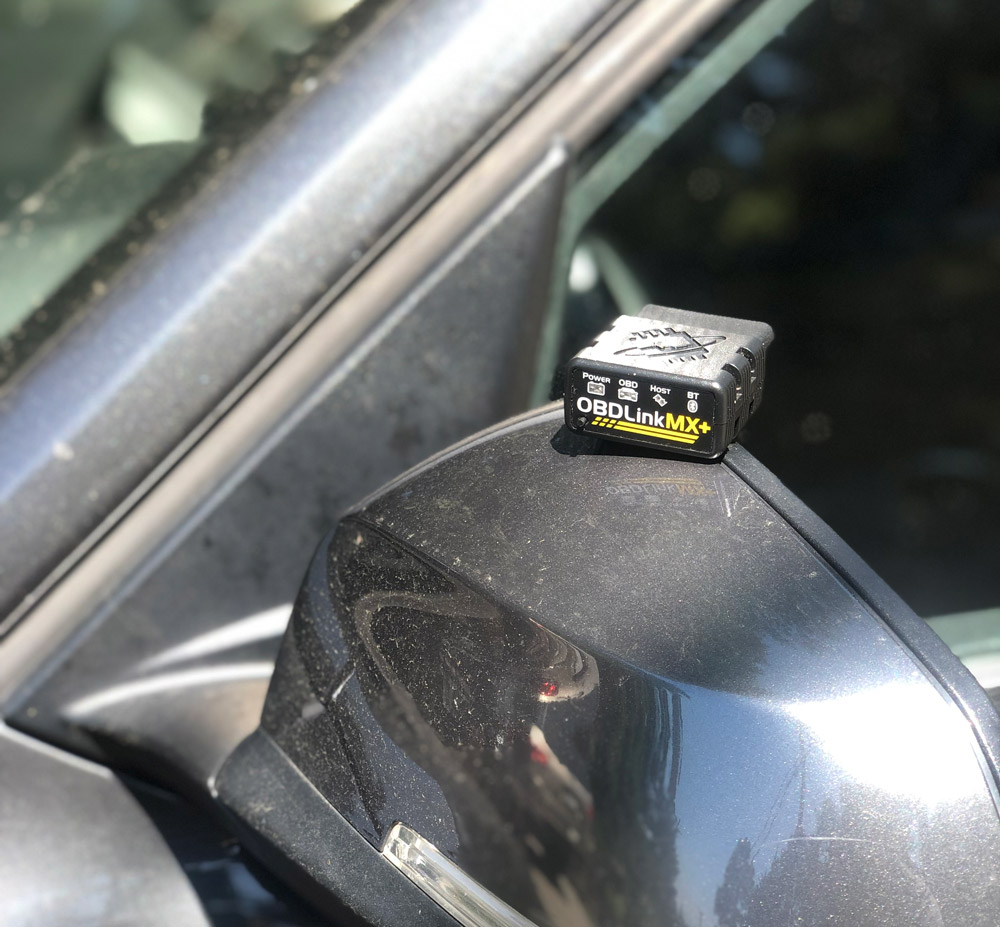
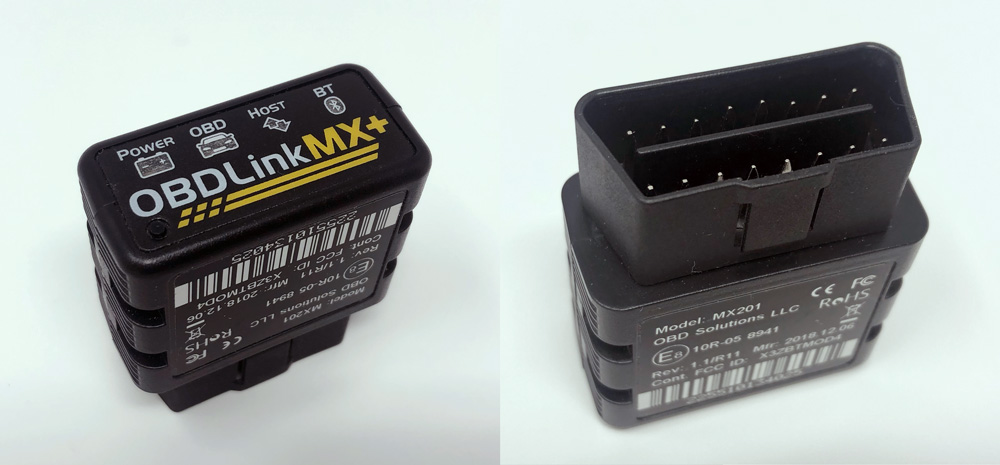
OBDLink designed the MX+ into a small form factor so that it can be inserted and left in that port for continual information flow over bluetooth. Part of that design choice was enabling a low power mode with auto-wake so you don’t need to do anything different when getting in and starting your car. LEDs sit behind the 4 logos on the front of the device; Power, OBD, Host and BT. There’s a small raised button under the O in OBDLink that you’ll need to press for pairing.

Setup

The hardest part about getting started is locating the port in your car, and more specifically determining the orientation. The camera on your phone can be handy here to avoid getting on your back in the driver’s footwell. Here’s the process for iOS.

In our car, the port is directly above the left footrest and is visible without opening or removing any kind of panel. Once you’ve made the determination for your car, go ahead and plug it in.

Next step is to put your car in the ON position without starting the car. You may need to press the ‘start’ button without your foot on the pedal if you have and electronic ignition and don’t have a standard key.

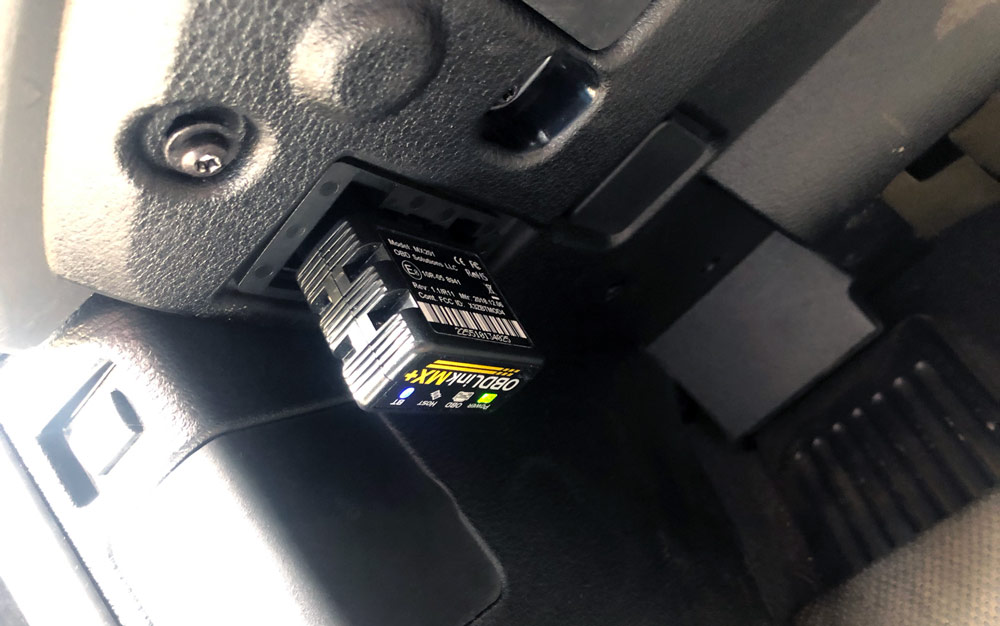
The above photo shows the MX+ installed and connected to my phone, indicated by the green Power and solid blue BT LEDS. The only tricky part here is that you may not be in a position to see those lights.

On your iPhone make sure bluetooth is on, then press the raised button on the MX+. Select OBDLink MX+ when it appears in the bluetooth menu on your iPhone.

Now you can launch the OBDLink app. In settings/preferences/communications choose Bluetooth, then go back to the main menu of the app and click connect at the bottom.

The app will auto-detect your car’s OBD protocol and then connect. The BT light on the MX+ will turn solid when complete.

Performance

I was able to install and connect the MX+ pretty quickly. I have an electric ignition, so I did have to turn the car back off and turn on again without my foot on the pedal to get to the ‘on with engine off’ scenario.

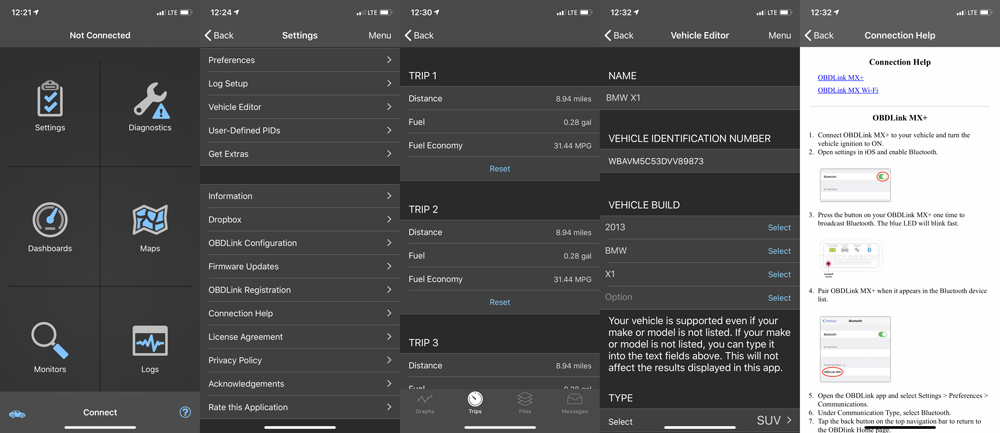
There’s a lot to digest when first opening the app. The first screen is pretty straightforward with 6 buttons; Settings, Diagnostics, Dashboards, Maps, Monitors and Logs. The blue Car and (?) icons in the bottom left and right are also buttons, but the ‘Connect’ in the bottom center is too. I get that it’s an action word, but it’s not very intuitive.

The Settings button takes you to the 2nd screen above. Each of those selections takes you to another myriad of selections which I’m not showing here. The app does an okay job of letting you know if you’re jumping into settings that you shouldn’t be messing around with.

Diagnostics and Maps are what they sound like. I’m not quite sure why you’d use maps here over a real map program. Maybe just to stay within the app?

Logs takes you to graphs, files, messages and trips (shown above middle) for your vehicle.

The Car icon takes you to a settings page specific to your car which you can also access through settings (4th screen above)

(?) will help you with connection issues (far right) which we’ll talk about at the end.

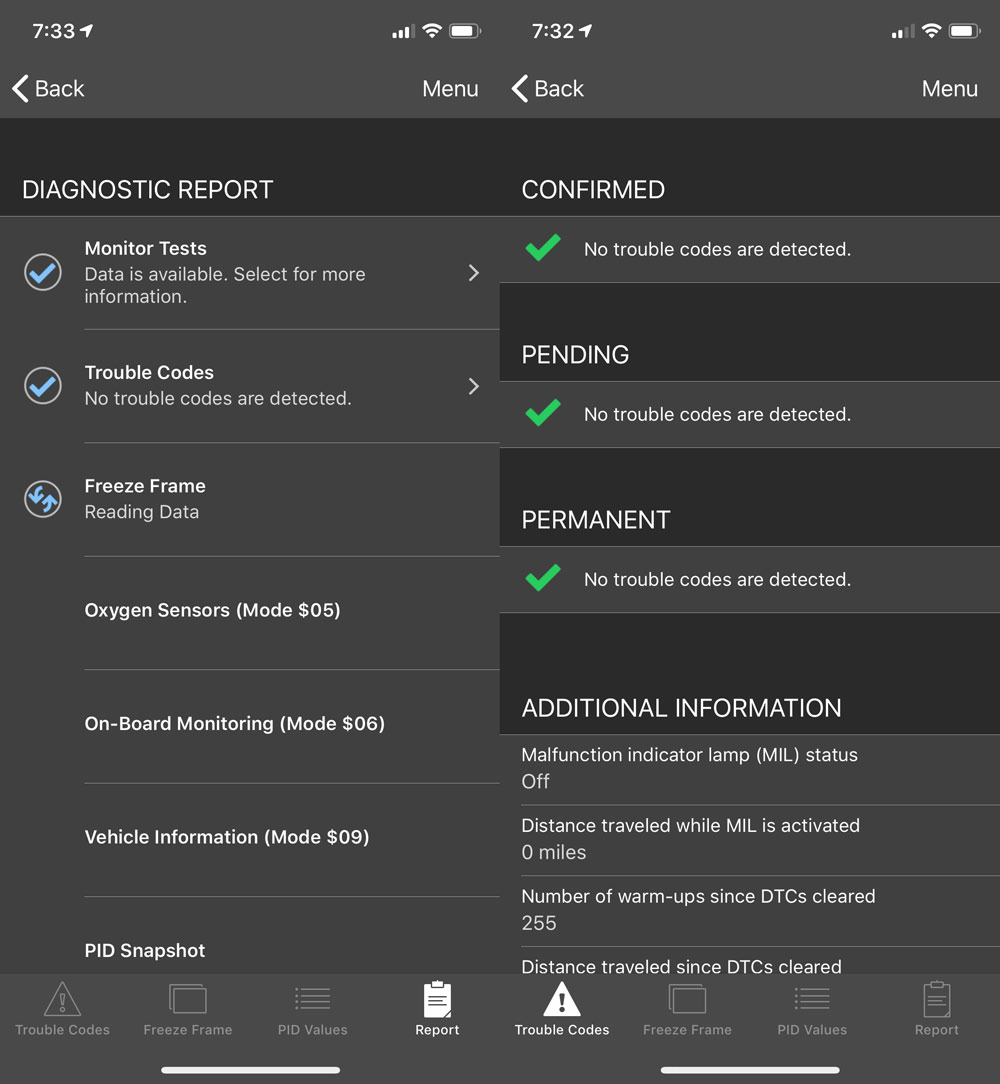
Let’s talk about diagnosing. Our car was overdue for service and had error messages on the instrument panel. We had a chronically low right rear tire and I knew that our coolant was low. I figured great, I’ll connect the MX+ and it’s guaranteed to show me some errors that I can dig into, so I connected and ran the diagnosis.

On the left is the in-process screenshot as the MX+ was gathering data. On the right was the outcome. No trouble codes. Hmm.

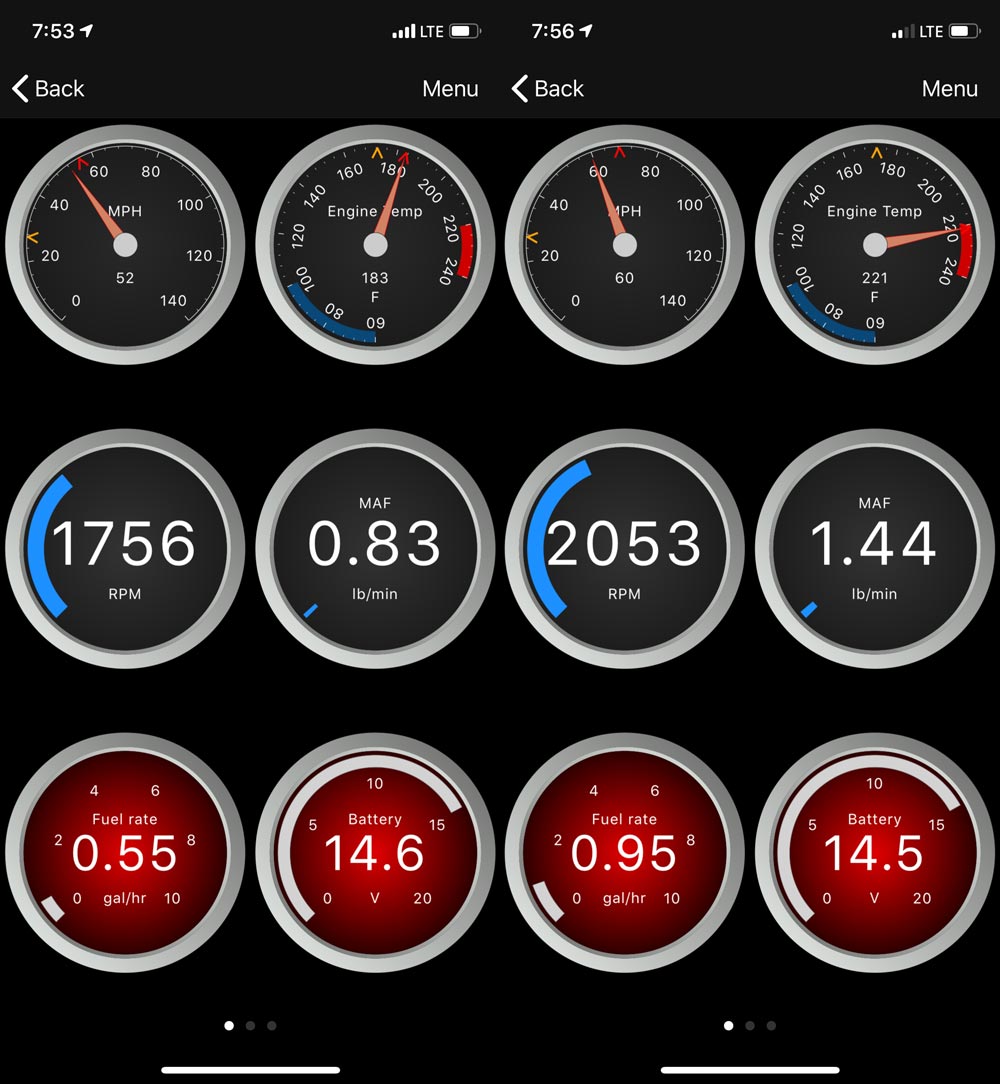
As this was the morning of my appointment, I put my iPhone in the dash mount, launched the app and drove to the dealer with the Dashboards screen up. This is probably the coolest and definitely most active screen in the app.

It’s about a 15 minute drive so I took a screenshot pretty quick (about 3 minutes in) and the second about 10 minutes later. All the gauges (except battery) jump a bit, the most interesting of which is the temperature gauge moving into the red. This completely makes sense as again, I knew I was low on coolant.

The dealer found a nail in the rear tire, both rear tires were in need of replacement and that I was a 1/4 low on coolant, but no leaks after a pressure test. Sounded about right, but not something that the MX+ helped me to diagnose or decide on.

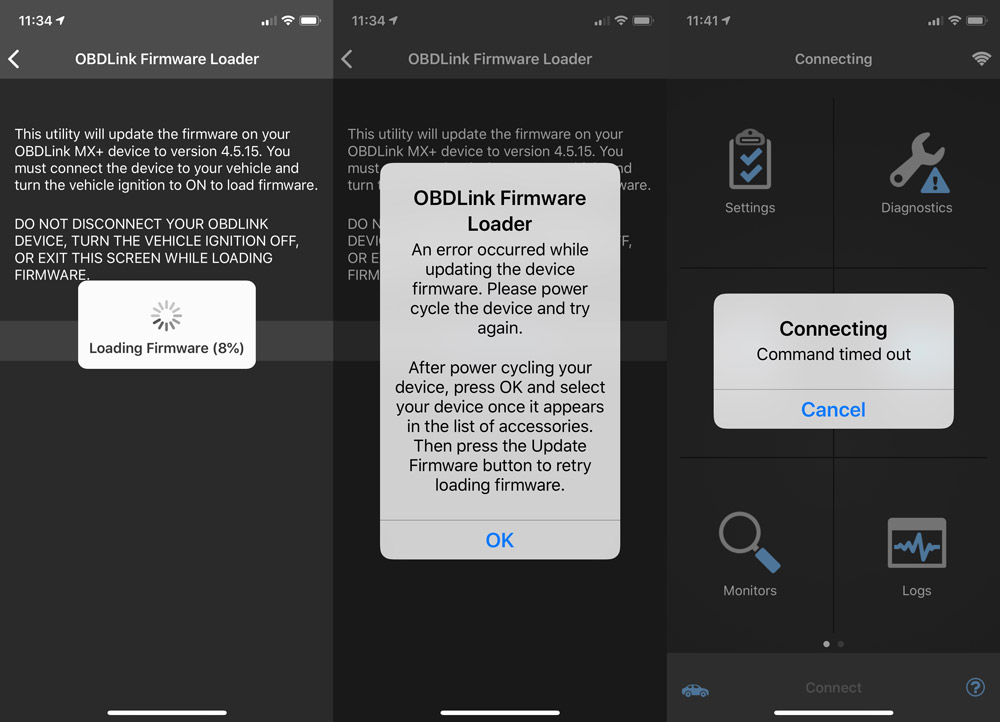
Jumping forward to today, I thought I would look into diagnostics again and re-run them. I noticed that there was a firmware update when I was in the settings panel. With the car in the on (not running) not running position. I followed the prompts to get the update started, but it then threw a firmware loader error. I followed those instructions and then continually hit a command time out error.

A quick visit to the support page showed 413 views on a ‘firmware update failure’ subject that isn’t taking comments. One troubleshooting tip says “Do not hit the OBDLink app CONNECT button at any time during this procedure” which I find ironic considering that it’s the first thing you’ll do if the app tells you it timed out. Needless to say I hit a wall here and have opted to take a break for now and finish up this review for the time being.

What I like

  • Price. It potentially pays for itself if it can avoid even one shop visit
  • Easy to use compact tool that you can connect and forget
  • Broad vehicle compatibility

What needs to be improved

  • May not be able to read all error codes for your vehicle
  • Better process instructions for how to use each screen
  • Better firmware update process, like a test that confirms connection is stable

Final thoughts

I really want to like this product. The dashboard feature is great and the diagnostic function is a feature many car types have a need for. I get that it’s hard to build any product for universality and that each car make and model creates scenarios that complicate issues. The Amazon reviews are positive overall so I’m clearly having issues that aren’t completely normal, but the fact that I know I had errors and the MX+ scan said no error codes bothers me. If you’ve used this and had good luck, let me know in the comments. I’ll give it another crack on an upcoming free weekend to see if I can turn this around.

Price: $79.95
Where to buy: Amazon.com
Source: The sample of this product was provided by OBDLink.

Filed in categories: Reviews

Tagged:

OBDLink MX+ review originally appeared on The Gadgeteer on May 18, 2019 at 9:30 am.

Note: If you are subscribed to this feed through FeedBurner, please switch to our native feed URL http://the-gadgeteer.com/feed/ in order to ensure continuous delivery.