Nonda ZUS Smart Dash Cam review

REVIEW – I’ve reviewed quite a few different dash cams in the past. When the Nonda Smart Dash Cam review came along I saw that it was quite a bit different in form factor and jumped at the opportunity to review something a little different – and different it was!

What is it?

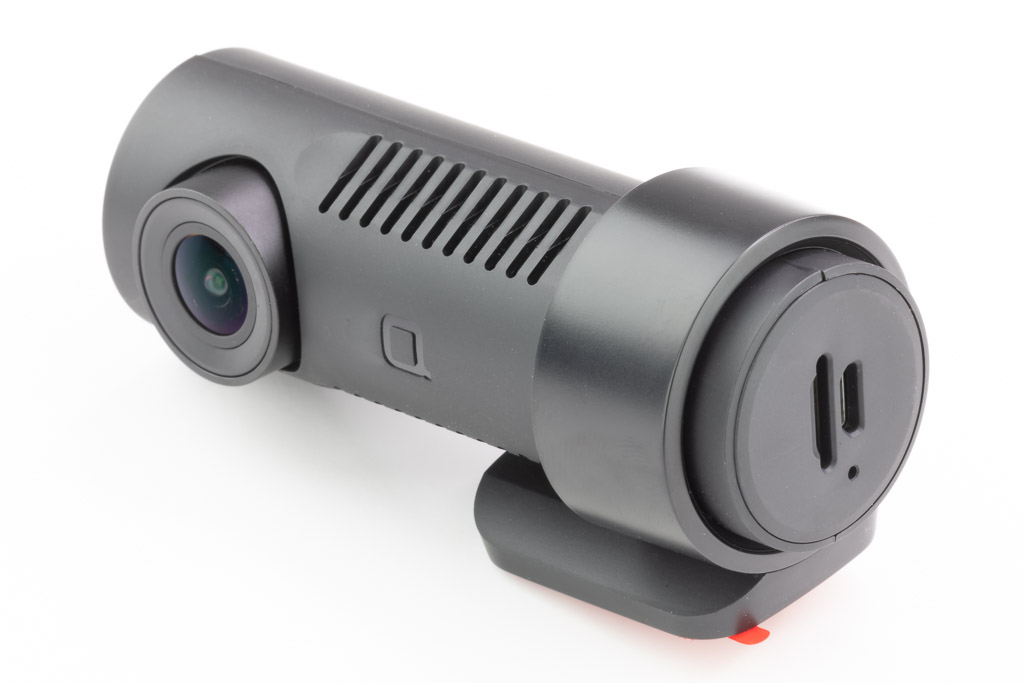
The Nonda Smart Dash Cam is a screenless dash cam. It records on its own, but you use your smartphone to configure its settings and, if desired, view the video.

What’s in the box?

List contents – you can remove this heading and section if it doesn’t apply to your review.
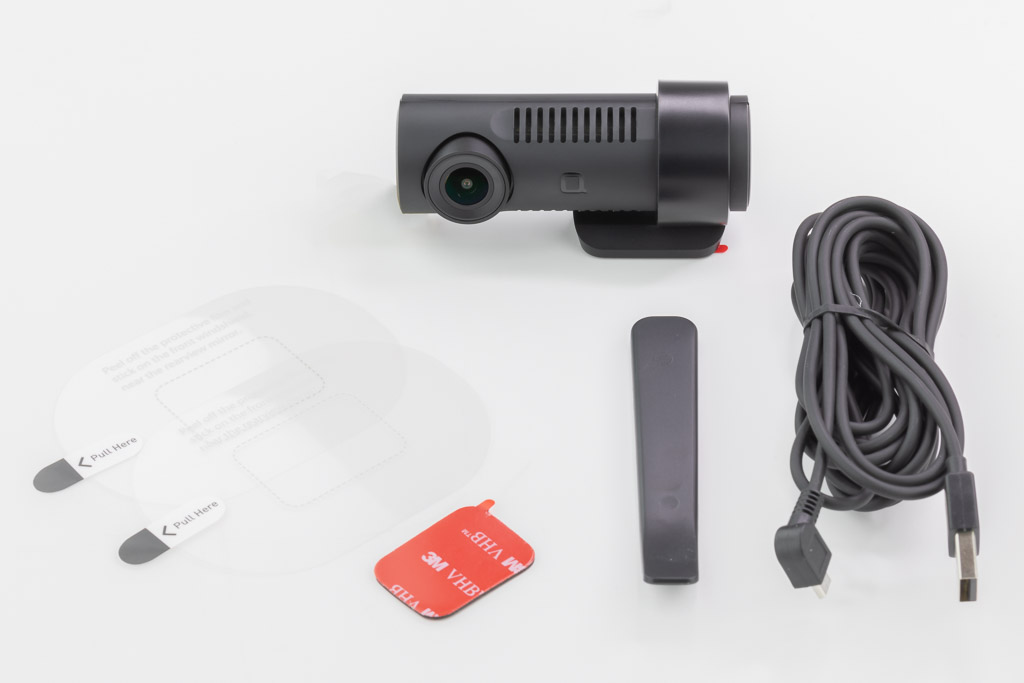
  • Dash cam
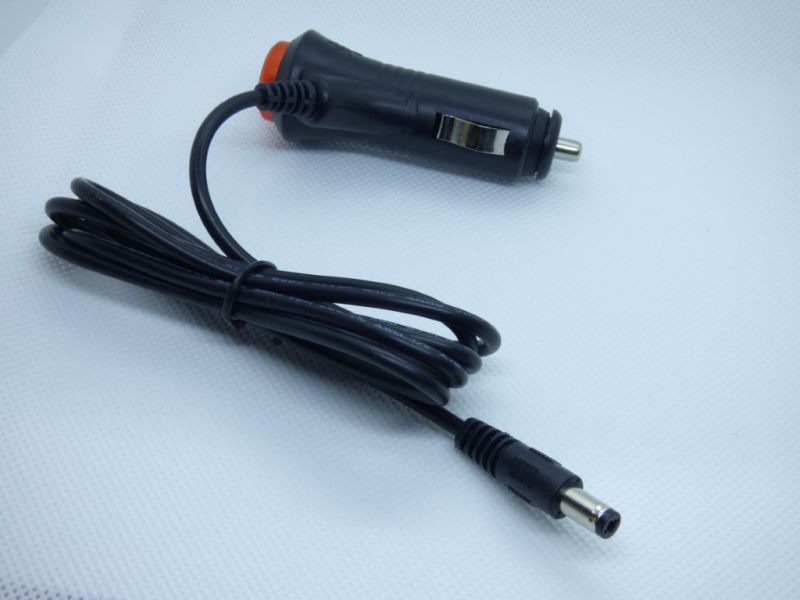
  • Micro-USB power cord, but no power adapter
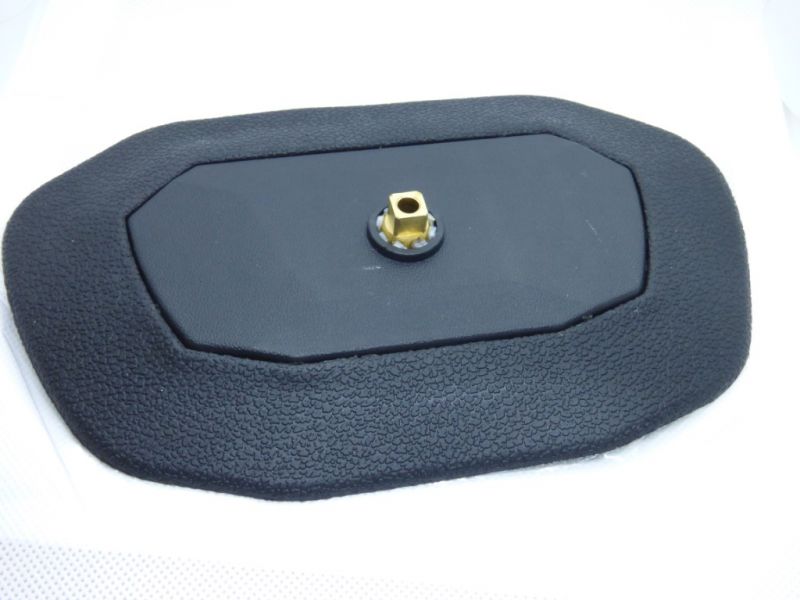
  • Window mount film (2)
  • Extra mounting tape
  • Removal tool


Setup

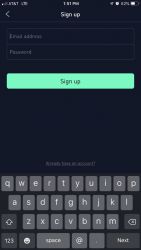
First, you install and start the ZUS app. After six intro screens that advertise features, you’re brought to a screen that prompts you to sign in. You must either sign in with Facebook or create an account with an e-mail address.


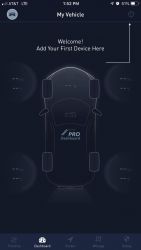
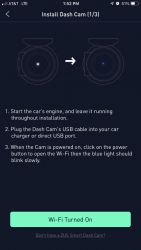
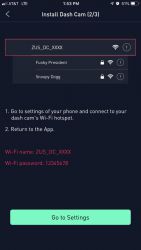
Next, you have to add the camera to the app. After signing in you have to press the button on the camera once to turn on Wi-Fi mode. Then in your phone settings connect your phone Wi-Fi to the camera. Once connected you can add a device.


Design and features

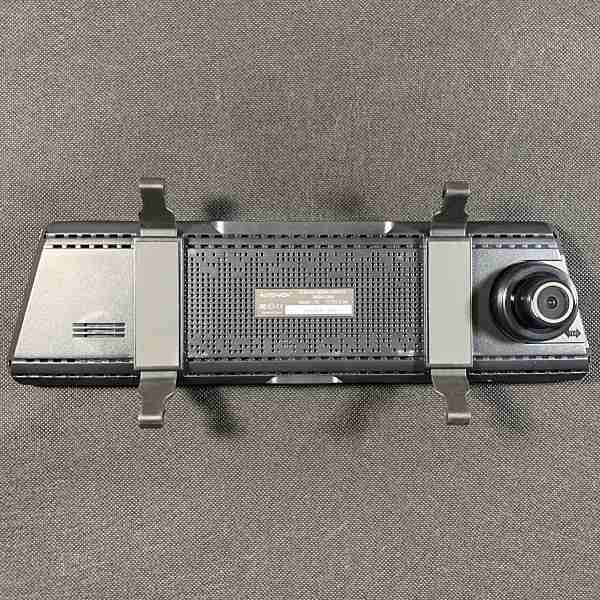
The Nonda Smart Dash Cam has a design that is unlike most other dash cams in several ways. This unusual design has both benefits and drawbacks.

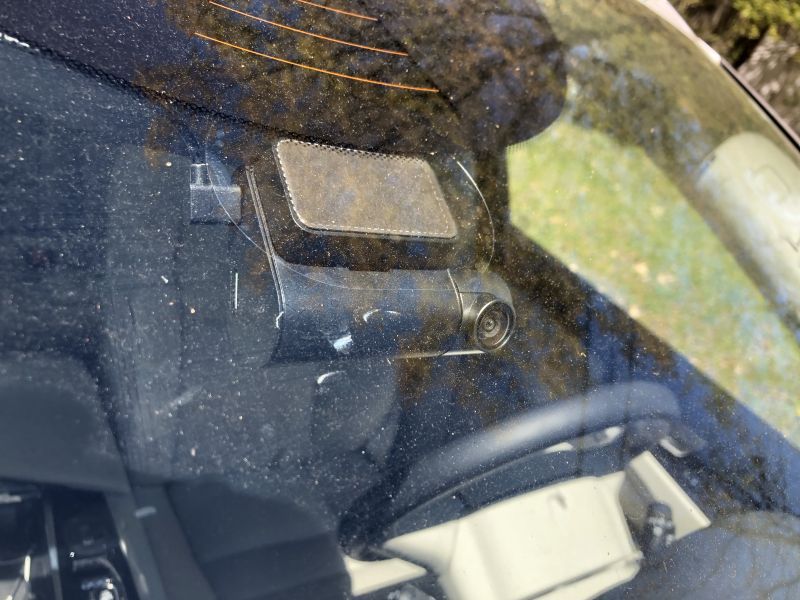
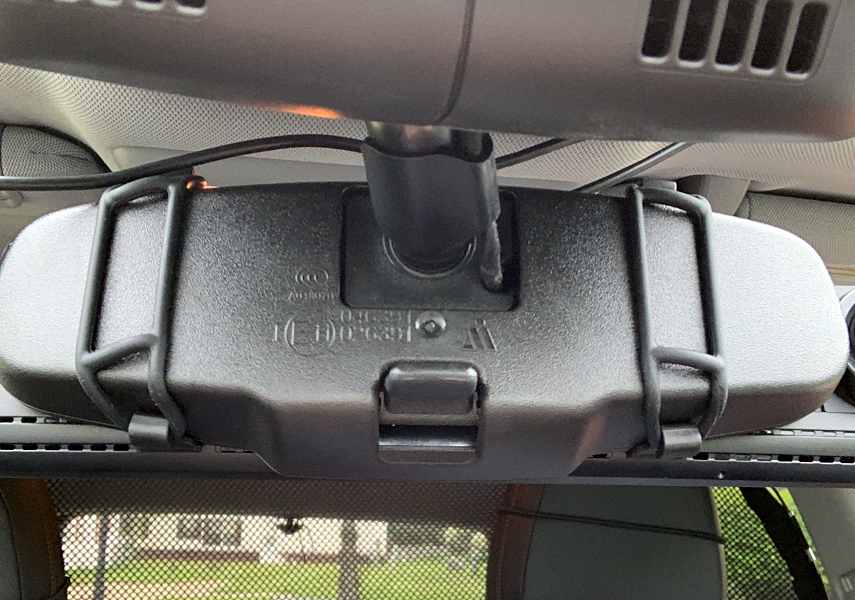
First, its mounting method is different in that instead of a suction cup and ball swivel mount, it uses a small window cling and a tape mount. The cylindrical body can rotate allowing vertical view adjustment, but there is no horizontal adjustment.

This mounting method provides a very sturdy mount but lacks the adjustability that some people may like. It also limits the mounting location to the area in the center of the window, near the rear-view mirror in order for the camera to point directly forward. The sturdy mount most likely won’t move during an impact like many of the ball type mounts can.

Secondly, the screenless design means that to make any changes to the settings you must first start the Wi-Fi mode, connect your phone’s Wi-Fi to the camera, then start the Nonda app. Once the app is connected, you tap “Dashboard” then select the camera which will show you the recorded clips. Once on that screen, you can access the camera settings.

There are a couple of benefits to this design that I could think of. 1) If you have teen drivers, they don’t have access to erase videos. 2) There’s no screen to distract you or others.

As for buttons and lights, there’s one button with an LED light in it. Pressing the button once turns on Wi-Fi mode, which is indicated by the LED blinking. It’s worthy to note that while in Wi-Fi mode that camera does not record, so you can’t just use your phone as a screen for that camera while driving. I did find the LED status light a but hard to see in the daytime, I would prefer it to be a little brighter.

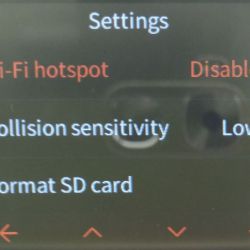
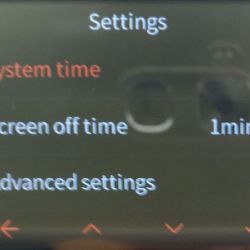
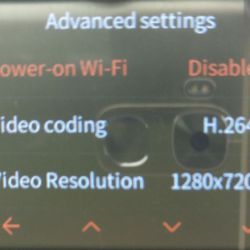
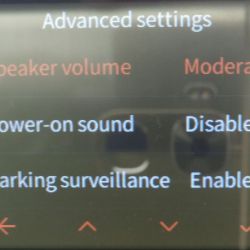
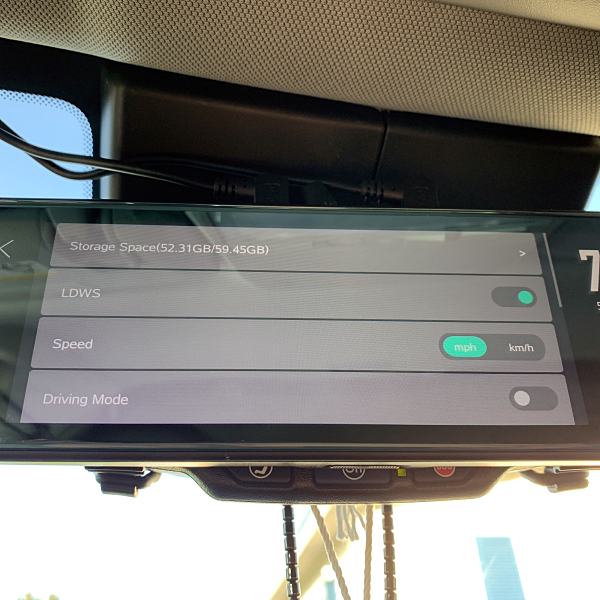
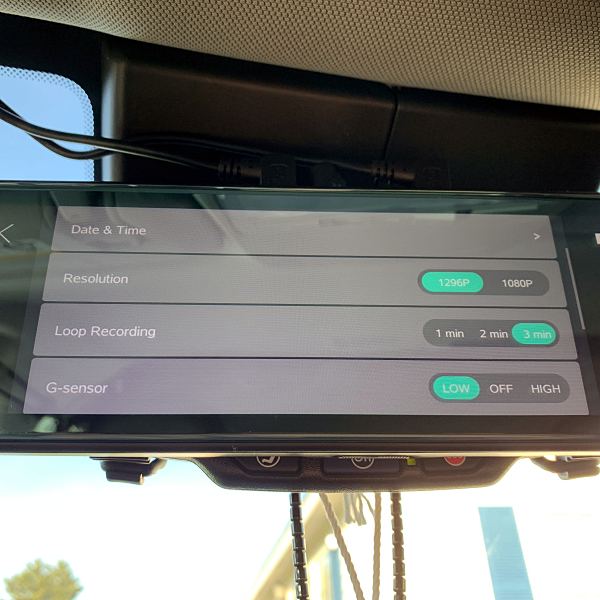
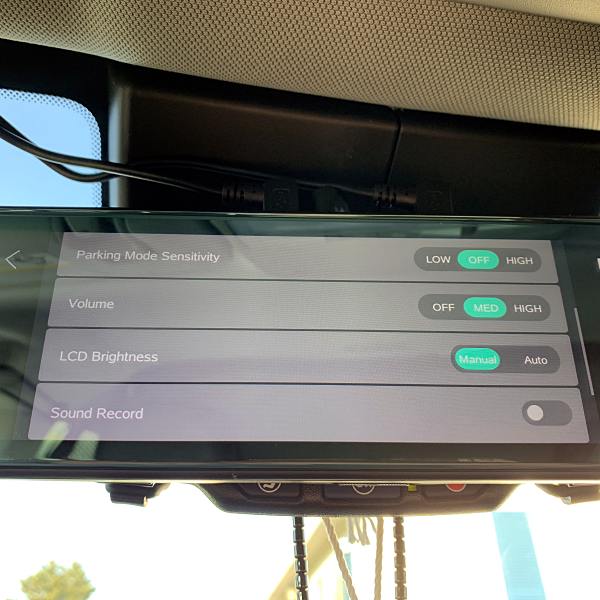
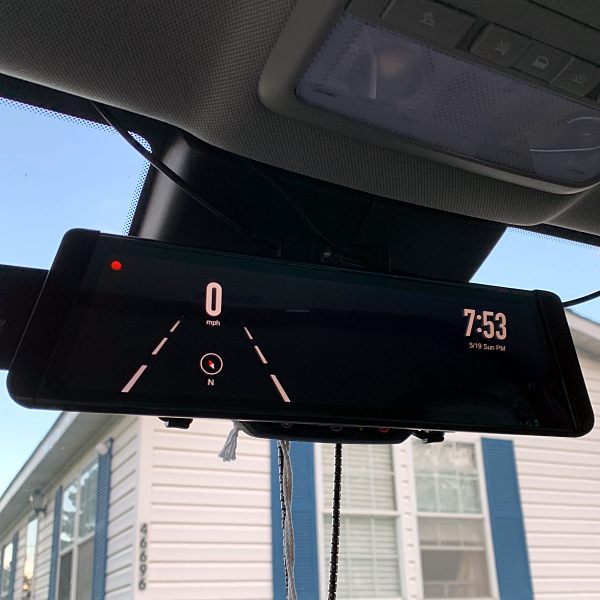
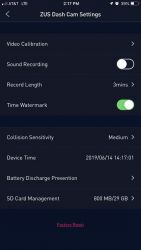
The camera itself has a 140-degree view and records in 1080p. It has auto collision detection to automatically save files in the event of an impact. An SD card is not included. The camera settings include the ability to turn on and off sound recording (default is off), record length, time watermark, collision sensitivity, device date/time, battery discharge prevention, and SD card management.

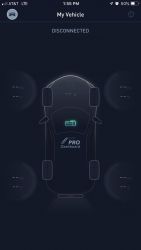
The app for the Nonda Smart Dash Cam is called “ZUS Smart Driving Assistant” that connects to the camera and other optional Nonda smart devices for your car such as a backup camera, tire pressure monitors, vehicle health monitor, and more. The app is designed to work with those other devices, so the dash cam is not the primary focus of the app, making the viewing of video or getting to the camera settings a multi-step process. Without the other devices, you’ll tap something only to be presented with information about buying or connecting the other device.

The app opens to a “Timeline” view, which is basically a blog for Nonda’s website and ads for their stuff. This is quite annoying as I would rather have it open to the “Dashboard view” where it shows all of your devices. Once there you can tap on the dashcam to access the video and settings.

The app has a “Finder” feature that is supposed to locate your car, but when tapped it only prompts me to “Add a ZUS smart Device” – which I thought the dash cam was, but when I tap “Add a ZUS smart Device” it just takes me to the vehicle settings, which lists the devices, including the camera, but does not allow you to select one. The “Mileage” and “Safety” features work the same way, but the Safety feature is understandable because it requires a separate device. I contacted Nonda Customer Care via their in-app contact feature. Not only did they respond on a Sunday, but they also did so in about 20 minutes. Their response was: “The Finder feature will only work with the ZUS charger or ZUS smart vehicle monitor… The Smart Dash Cam is only a camera and does not have any other functions on the ZUS App.” – Well, so much for it being a “Smart Dash Cam”.


The app also notified me of a firmware update for the camera. The process to upgrade the camera firmware through the app was easy and had great instructions during the process.

There are a bunch of settings in the app for your vehicle information, however, these aren’t used for anything unless you install one of the other smart devices such as the Smart Vehicle Health Monitor.
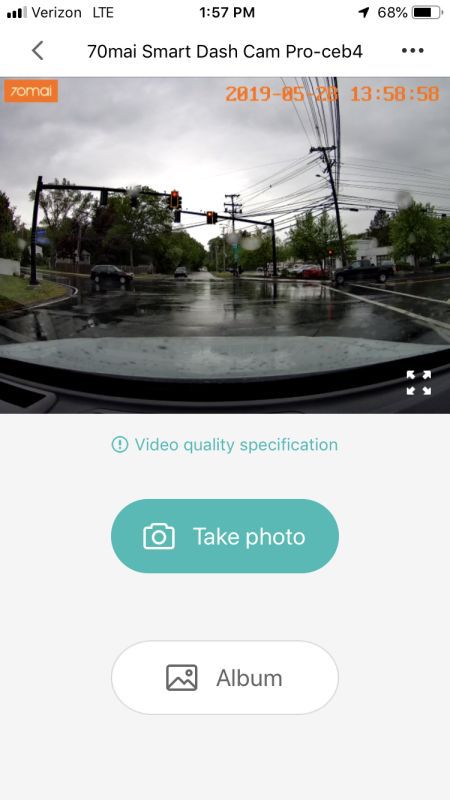
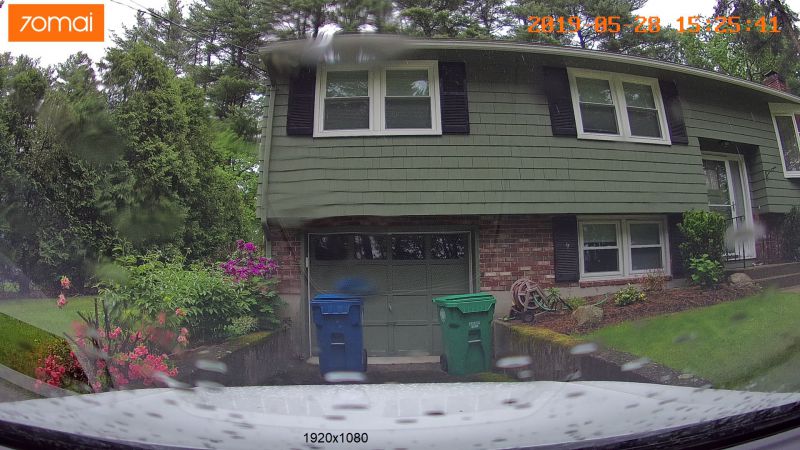
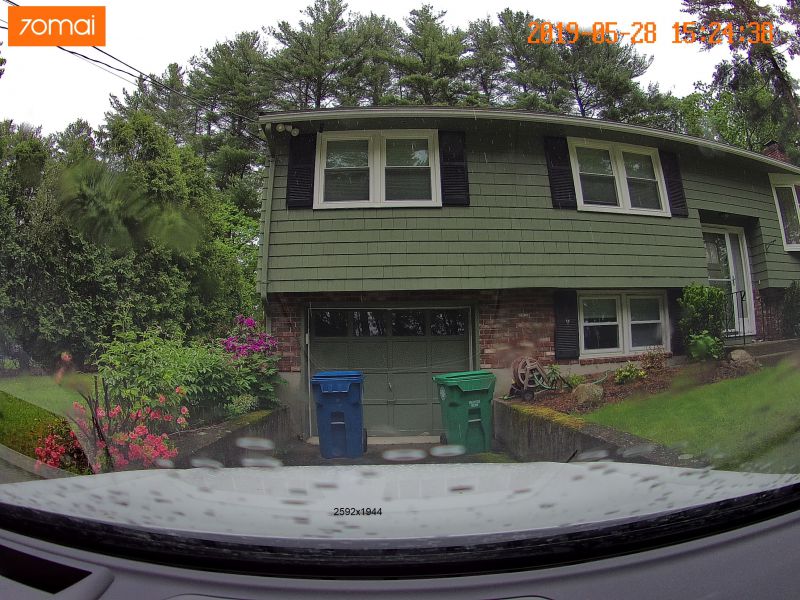
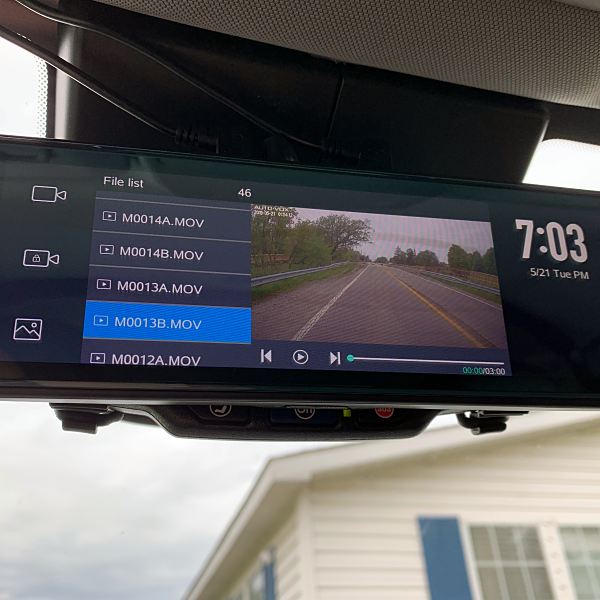
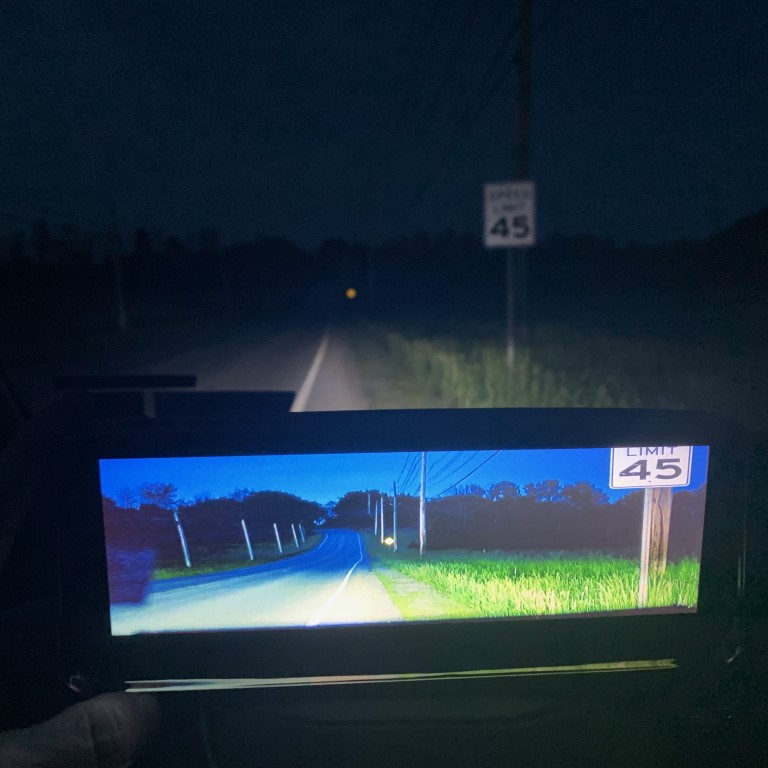
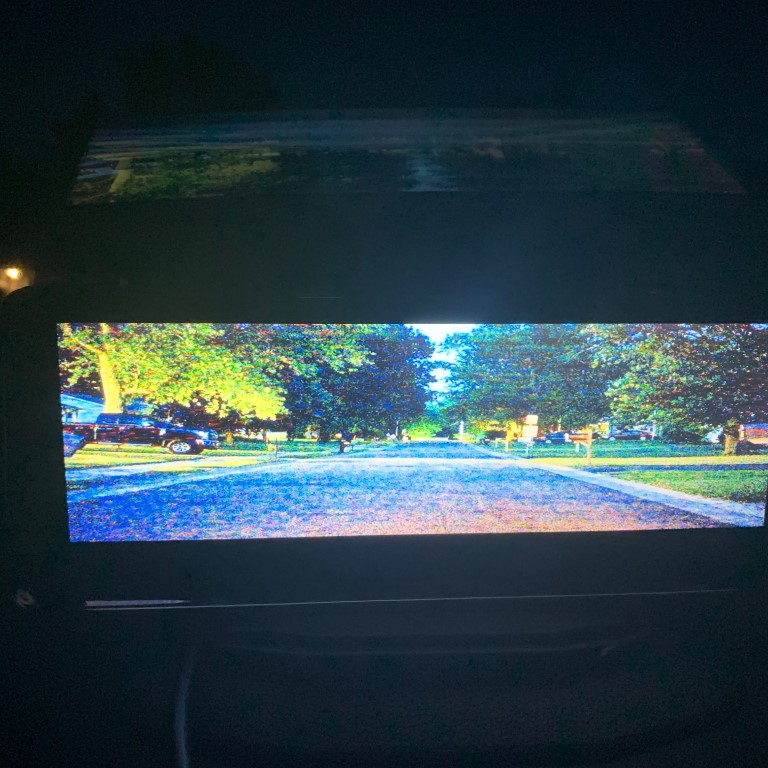
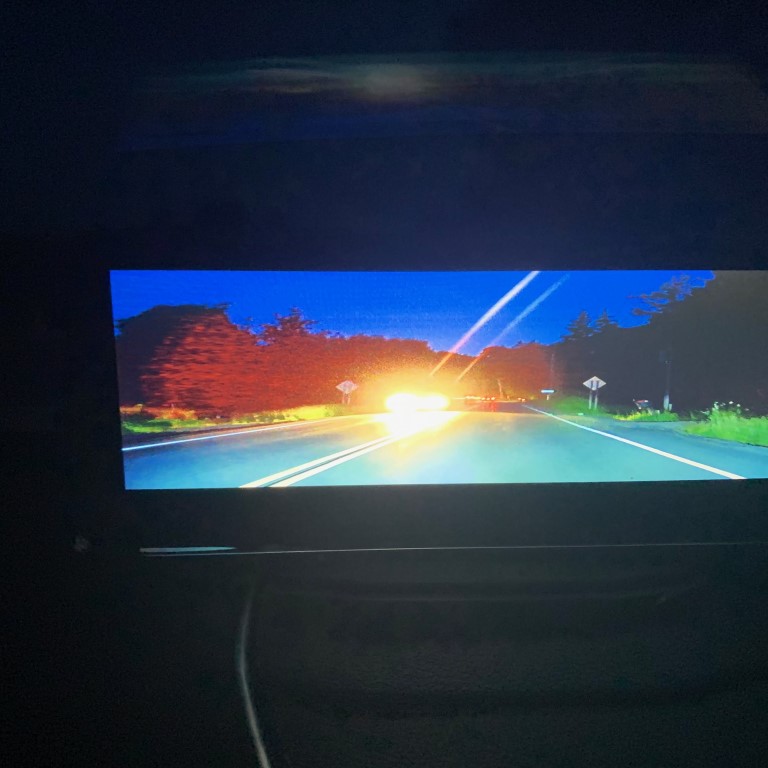
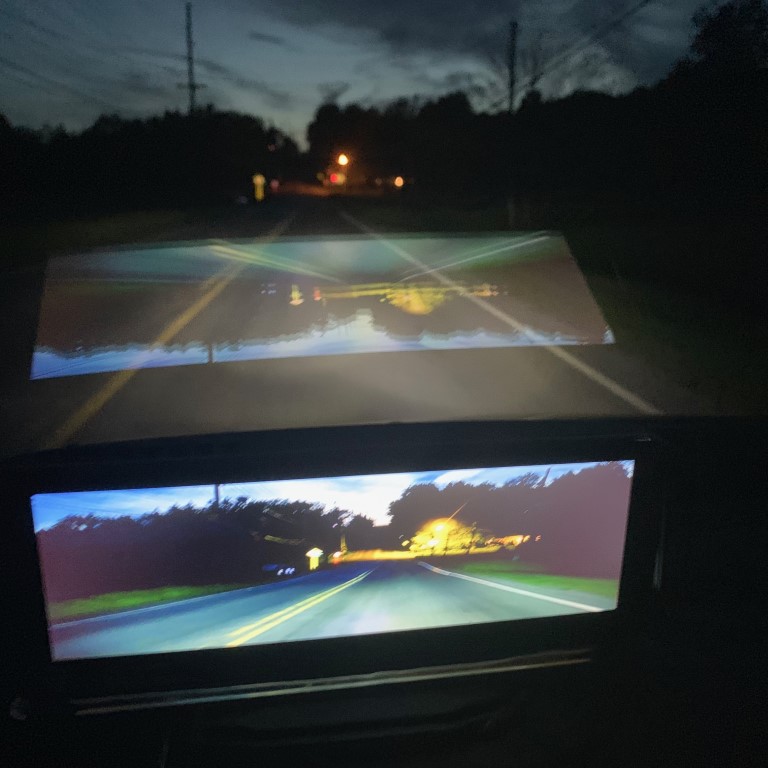
Sample Video

The video from the Nonda Smart Dash Cam is as expected, a high-quality 1920×1080 video. The camera also saves a 640×360 version of the video, presumably to make smartphone playback quicker and/or easier to share.

What I like

  • Sturdy design
  • Large lens
  • Hides well behind the rear-view mirror

What I’d change

  • You shouldn’t have to create an account to use a dash cam
  • The app leaves you feeling like they’re just trying to sell you more stuff
  • There’s no way to manually save a recording from being overwritten
  • Better LED status light

Final thoughts

Although I could see this camera appealing to certain persons, I personally prefer a camera with a screen. It does not have the features of many other dashcams such as photo taking ability, or the ability to do a time-lapse video or monitor while the vehicle is parked. I also prefer the adjustability of the suction cup mounts. I think if you added the smart charger the app would feel much more useful with its parking monitoring and mileage log.

Price: $99.00
Where to buy: Nonda and Amazon
Source: The sample of this product was provided by Nonda.

Filed in categories: Reviews

Tagged: ,

Nonda ZUS Smart Dash Cam review originally appeared on The Gadgeteer on June 24, 2019 at 8:00 am.

Note: If you are subscribed to this feed through FeedBurner, please switch to our native feed URL http://the-gadgeteer.com/feed/ in order to ensure continuous delivery.

Lanmodo Car Night Vision Camera review


REVIEW – I live in the frozen tundra of Upstate New York among all manner of wildlife and long winter nights. I personally have had many close encounters of the furry kind, some of which resulted in coughing up my insurance deductible. I was eager to give Lanmodo’s Night Vision Safe Driving Assistant a try to see if it could improve my road safety.

What is it?

The Lanmodo Night Vision Safe Driving Assistant is a self-contained high-sensitivity night vision camera and monitor for your car that provides an enhanced visibility view of the oncoming road.

What’s in the box?

  • Camera and display unit
  • Weighted base
  • Suction base
  • Screwdriver
  • Lighter plug power cord
  • OBD2 port power cord
  • Instruction manual
  • Optional rear-view camera

Hardware specs

  • Original SONY MCCD photosensitive chip
  • 28MM 7G full glass HD optical lens
  • Minimum illumination 0.0001 Lux
  • Full-color HWDR processing technology
  • Near-infrared night vision imaging
  • LVDS digital HD decoding
  • IPS 8.2 inch  display’ 1920P*1080P’ 30 FPS
  • DC12-24V 1500MA
  • -20°C ~ 80°C operating temperature

Design and Features

Setup:

The equipment arrives in a very “iPhone-ish” box nested in comfy foam. The fit of the box was so tight it was a challenge to open. If the rest of the tolerances are as tight, this was going to be an interesting review.

Setup is relatively simple – choose the mounting base and attach the holding screw, fasten the base to the dashboard or windshield, plug in the power and wait for dark.

The kits arrived with the options for powering from the OBD2 car diagnostic port or cigarette lighter socket. Should your cigarette lighter be powered even when the car is off, Lanmodo integrated a pushbutton switch into the lighter plug, a welcome addition.

Performance

The first thing I noticed was the mounting bases. The non-slip mat might work on smoother surfaces, but I could not get it to stay in one position on my textured dash. I tried the suction cup glass mount, but could not find a location that would give me access to the controls, but not cause the display to obstruct too much of my view of the road. For testing, I used the non-slip mat and put the camera on the dash in front of the driver’s seat.

Now the fun part…In the dark…Ooooooh!

I found the display too bright for my tastes, but easily remedied with a few tweaks. I then aimed the camera for the best view of the road and began driving. Care should be taken when positioning the camera because the housing is quite large. It should be positioned where it will not inhibit the driver’s view of the road.

Image amplification from this camera is spectacular! I even turned off my headlights (while safely parked) and could clearly see the road for at least a few hundred yards ahead. Very impressive!

It’s worth mentioning that the image is somewhat magnified and it’s compressed from top to bottom, making everything look squished, but I can understand the need getting a more complete view of the road. Very dark images appear grainy while still pleasant to view.

Oncoming headlights or even taillights caused substantial screen glare. This didn’t bother me much as it’s not the intention of this product. If you can see a vehicle in front of you and your headlights are working, you know should where the road is.

I ran into a few issues, not with the camera’s performance, but with mounting. The connection between the non-slip base and the main unit is a bit wobbly. With the magnified image, any movement of the display while the car is moving is amplified dramatically resulting in an annoying, distracting shaking of the screen. I will look for alternate mounting methods to increase image stability.

Next, depending on the angle of your windshield, there can be a considerable reflection which I found to be very distracting. I plan on experimenting with alternative mounting locations to see if I can reduce this.

Taking my car out for a drive during the day also gave me a few unexpected surprises – the main display and chrome accents are very reflective and I had a few occasions where I was momentarily blinded by sun glare. Again, I think that relocating the camera to the top of my windshield next to my rear-view mirror will alleviate this issue. Fortunately, Lanmodo incorporates the ability to rotate and flip the display into the software for just this reason.

Interestingly, one of the features I would expect to be on this device wasn’t there – a dash cam. This is a dedicated night-vision device, but the incorporation of a dash cam would seem a logical addition.

What I like

  • Fantastic night vision!
  • Easy set-up

What I’d change

  • Mounting hardware stability should be improved.
  • The suction cup mount needs to be more versatile. Another articulation elbow would be welcomed to help with placement
  • Subdue the chrome and implement a less reflective screen to prevent sun reflections from distracting the driver.
  • Integrate a dash cam and video recording.

Final thoughts

The Lanmodo Night Vision Safe Driving Assistant is a top-notch system that’s ideal for those with vision issues (although it should not be used exclusively to pilot your car). It’s a solid performer with outstanding low-light capabilities, but care should be taken to securely mount the hardware.

Price: $499.00
Where to buy: Amazon
Source: The sample of this product was provided by Lanmodo.

Filed in categories: Reviews

Tagged:

Lanmodo Car Night Vision Camera review originally appeared on The Gadgeteer on June 22, 2019 at 9:30 am.

Note: If you are subscribed to this feed through FeedBurner, please switch to our native feed URL http://the-gadgeteer.com/feed/ in order to ensure continuous delivery.

Flats are a thing of the past with GM and Michelin’s Uptis program

NEWS – Auto manufacturer General Motors and tire manufacturer Michelin have teamed up to push forward with Uptis (Unique Puncture-proof Tire System).

This tire uses a unique flexible structure to replace the air-filled chamber in traditional pneumatic tires.  This eliminates the possibility of a flat while providing similar rolling dynamics and impact resilience.

General Motors will test the Uptis tires on a fleet of electric Chevrolet Bolts with a target of 2024 to roll the tires out on passenger vehicles.

One of the main causes of tire wear is improper inflation, Uptis eliminates that and should last considerably longer, reducing waste. In addition, vehicles equipped with Uptis will not require a spare tire, reducing overall vehicle weight.

For more information, visit Michelin’s Uptis press release.

Filed in categories: News

Tagged:

Flats are a thing of the past with GM and Michelin’s Uptis program originally appeared on The Gadgeteer on June 8, 2019 at 12:00 pm.

Note: If you are subscribed to this feed through FeedBurner, please switch to our native feed URL http://the-gadgeteer.com/feed/ in order to ensure continuous delivery.

70Mai Dash Cam Pro review

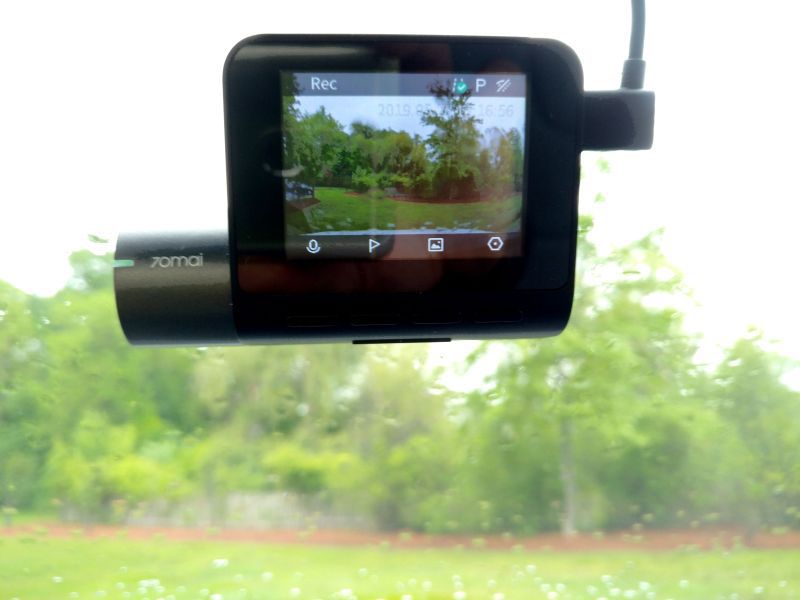
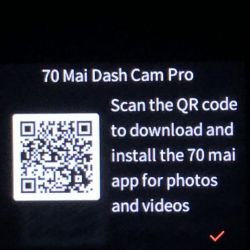
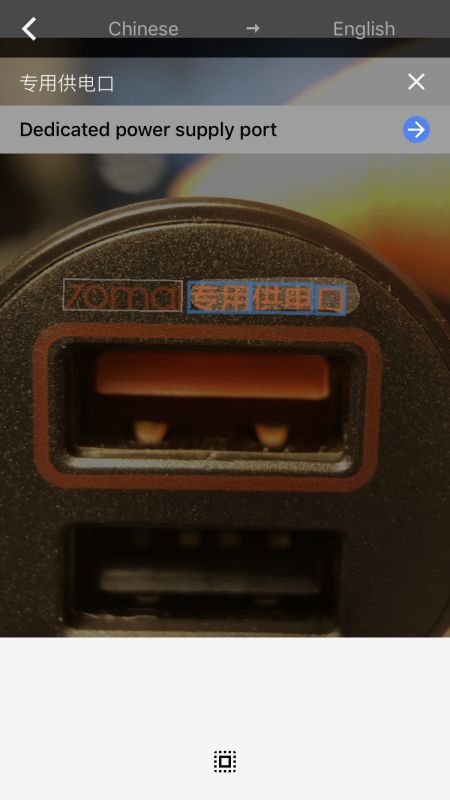
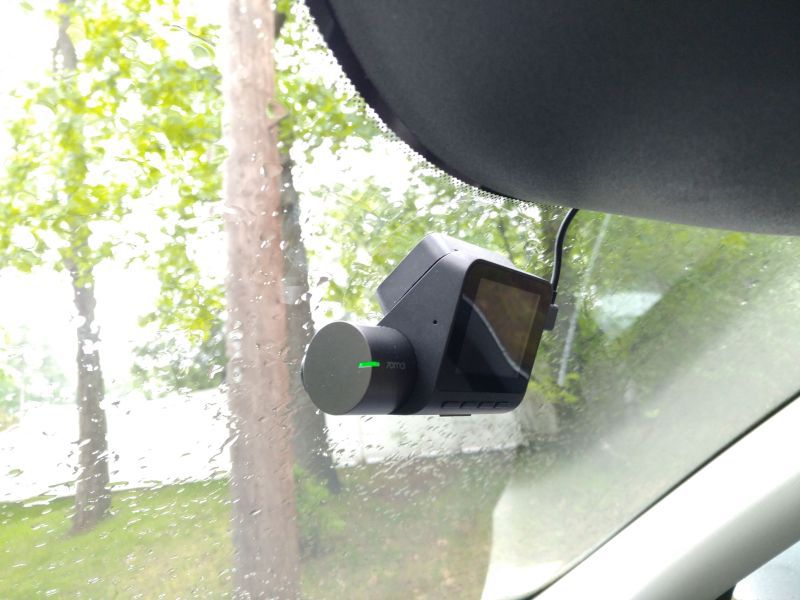
REVIEW – Dashcams are used to record outrageous occurrences on the road or provide evidence of collision, vandalism, or corruption. However, only Tesla has a built-in dashcam; in other cars, the dashcam is purchased separately. The 70Mai Dash Cam Pro is one of the newest models to hit the market. Read on to see what I think!

What is it?

A dashcam is a small digital video camera that mounts to the dashboard and records the point of view of the driver. Each country and jurisdiction within the country has rules about the use of dashcams and the distribution of the videos that they record, so users must ensure their legal right to operate the camera.  These legal restrictions are one of the reasons that automakers generally do not incorporate them. The benefit to these restrictions is that dashcam manufacturers can rapidly develop features outside of the snail’s pace of evolution that automakers are restricted to.  As a result, consumers and manufacturers are no longer satisfied with a dashcam as merely a windshield mounted HD wide-angle camera that can store video to a microSD card. As part of this trend, the 70Mai Dash Cam Pro has some very innovative design and features and is an example of the rapid evolution of the dashcam.

What’s in the box?

  • 70mai Smart Dash Cam Pro
  • Car Charger
  • USB Cable
  • Two Electrostatic stickers
  • Wiring tool
  • mounting bracket with heat resistant adhesive
  • manual

Hardware specs

  • Model: Midrive D02
  • Image sensor: SONY IMX335
  • Resolution: 2592 x 1944
  • Camera: FOV 140° , F1.8, 6 glass
  • Wireless connection: Wi-Fi IEEE 802.11 b/g/n/ 2.4GHz
  • G-sensor: Acceleration sensor
  • Expandable memory: MicroSD card with a capacity of 16-64GB and read/write speed of Class10 and above
  • Supported OS: Android4.4/iOS8.0 and above
  • Power supply: car cigarette lighter
  • Battery type: li-polymer battery
  • Battery capacity: 500mAh
  • Input: 5V 2A
  • Operating temperature:-10C 60C
  • Dimensions: 82 x 58.2 x 40.5mm

Design and features

first thoughts

The physical design of the dash cam is very sleek and unobtrusive. This is the first camera that I have seen that supports mounting using an electrostatic film. This is similar to that film that is applied to glass phone screen protectors. Once the film has bonded to the windshield it is held securely in place but may be removed by peeling back one edge without leaving any residue. or film. This design allows the film to be freely repositioned without leaving traces of adhesive. This also permits the camera to be used on rented or other short term vehicle and then returned to the main vehicle. You can see the oval film in the photo below.

The camera mounts to the windshield so that the LCD display and buttons for the user interface are mounted in a fixed position against the windshield. This is a great option for a vast majority of vehicles but may be difficult to access for some vans or cars that have large windshields mounted at a low angle.

Setup

The camera is on the left-hand side and the USB cord is on the right-hand side. I would expect that since more cars are left side drive that the camera would be on the right-hand side so that the camera could be mounted center with the screen and buttons closer to the driver. The camera mount has an indicator light designed to alert the driver so a left side drive was definitely the target platform when the camera was designed. The camera is mounted on a rotating bezel so that the most use of the field of view can be obtained. The camera does not have any left to right adjustment, so the unit must be mounted in the center of the windshield to obtain the best results.

The review sample of the dashcam was provided with an accessory GPS mount holder that has an adhesive on it and is used to mount the camera to the electrostatic sticker. If the GPS mount is not purchased then a standard mount is provided. The mount allows quick connection and disconnection from the windshield without removing the electrostatic sticker. It also has small rubber feet so that it acts as a shock absorber for recording. The camera doesn’t have any built-in image stabilization so a little help from these rubber feet goes a long way.

Once the camera is mounted it looks very sharp and more like a built-in piece of the car versus an accessory stuck on the windshield. The USB power cable is very long, about 10.5 feet, and should allow inconspicuous mounting of the camera cable in a variety of cars. Owners should be careful to not block the operation of airbags. If you are able to remove the A-pillar faring and tie the wire to the other cables running in this area then that is best.

Operation

The instruction booklet is in the English language and gives a brief overview of the use. In addition, the camera and electrostatic mounts each come with screen protectors printed with instructive text. The camera screen protector indicates the function buttons and that the unit may be reset by holding the power button for 15 seconds. The electrostatic film protector describes the instructions for mounting the film and camera. The camera also provides some information upon the first use, but there is no way to revisit this information from a help submenu. The gallery below shows what it is like.


The website at the beginning of the book,  https://help.70mai.asia/278.html, is quite helpful and provides much more information than the booklet shipped with the camera.  Specifically, the website describes the voice control capabilities, the P vs N setting (PAL vs NTSC), the limited number of photos (100), and other items not mentioned in the booklet. (I suddenly long for the hundreds of pages that Microsoft Ofice included in the early ’90s.) One thing I couldn’t find any info on was what the 12V adapter said. The text is very hard to read amber on black and it is in Chinese. Good thing Google translate knows that this says “Dedicated power supply port.”

You will need to supply your own microSD card for the camera. The manual recommends a card that is 16 to 64 GB but I used a 128 GB card without issue and it was able to access the whole capacity. The camera records video in one-minute intervals and will delete the oldest video when the capacity of the memory card is nearly exhausted. The card capacity relates to how many minutes of driving record you wish to keep.  The card must be formatted in the camera and will have four directories of video storage: Normal video which is the looped record of the drive, Emergency video which is triggered by a hard acceleration during driving, Parking video which is triggered by the movement of the accelerometer after power is cut off, and photo storage. I was surprised to read that the emergency video is also looped. I would think that these videos should be persistent until the storage of the card is full.  The recordings are constant bit rate and each video has an audio track even when the audio is not recorded. The audio on silent clips is 1 minute of constant bit rate mono 44kHz 24bit sample.

The camera is able to record video in 4 different resolutions. The higher resolutions are recorded in H.265, which may not be supported natively on all devices and the lower resolutions are recorded in H.264. Each video segment also has a preview video in 640×360 that is downloaded to the mobile app for preview. The total capacity for each video is identified in the table below.

resolution (pixels) codec Frame rate (1/sec) file size (KB)
2592×1944 H.265 30 163840
2560×1440 H.265 30 163840
1920×1080 H.265 30 122880
1920×1080 H.264 30 122880
1280×720 H.264 30 122880
640×360 H.264 30 20480

Photos are taken at the resolution that the camera is operating at. Each photo was stored in a 5 MB file. Even the highest resolution photo shouldn’t be more than 2 MB.

It seems based on this table that the incremental difference in the capacity required for higher resolutions is small based on the compression used and the way that video is stored on the card.  Apparently, the 128GB card I used was formatted with a 5120 MB cluster size.  I also tried a 32 GB card and it was formatted in the same way. The card is readable by a PC or Mac using an adapter.

The operation of the camera is menu driven. I think that some menu items are in the wrong place, but here is the layout.


The camera app allows you to manage all of the 70mai gadgets. The app has a local album of videos and photos that you download to the app. The app also has the same info presented on the web page above. The app settings allow you to clear the app cache and provide feedback to 70mai. The main screen of the app is a preview window of the camera feed and allows the user to take a photo using a button on the app. The app pairs with the camera using a WI-FI access point.

Once the power is cut to the camera the camera will remain on standby. if there is any movement detected by the camera in this state it will record a video. The camera also records a video while the car is moving if there is sudden acceleration.

A de-fog algorithm sharpens video taken in snow, smoke or haze but without a way to turn it off, I was unsure how well it works.

There is an optional GPS module that replaces the camera’s mount. The GPS mount enables a feature called Advanced Driver Assistance System, which gives real-time alerts when your car is leaving its lane or rapidly approaching a vehicle ahead. This feature didn’t work as well as my car’s built-in system. What I find frustrating is that the GPS isn’t used to EXIF tag the photos, label the files of the video or set the camera’s time. These should be minor programming changes that could have a profound benefit to understanding what happened on the road and when. One other item is that the operation is restricted to between 14 and 140 degF. Car’s interiors often reach conditions outside of this range and I’m not sure that the parking monitor will work in these extreme conditions.

Performance

I’ve included a few videos of the performance at the links below. Overall the videos are clear. I think that the enhancement that the advertisement shows is more like CSI than reality, but license plates are visible and readable.

This is the manufacturer’s video:

This is my video taken during the day at the highest resolution. The sun is setting to the left of the video but the glare doesn’t wash out the rest of the scene. I bet the couple who got in a collision had one of these cameras.

Here is another video that I captured taken at night. It is impressive how the sensor compensates when the headlights are turned off. It is actually brighter on the video display than it is through the windshield.

The images of my garage below show the different resolutions available. I added the resolution text but everything else is standard and not configurable.


What I like

  • Design
  • User interface (both verbal and button based)
  • App

What needs to be improved

  • ADAS implementation
  • GPS integration
  • Extreme weather operation
  • It is a bit difficult to get the microSD card in and out

Final thoughts

Ideally, the dashcam is the gadget that you won’t know you have until you really need it. This unit’s small size, easy function, and affordable price mean it won’t take up room in your car or burn a hole in your wallet.

Price: $75.97
Where to buy: Amazon
Source: The sample of this product was provided by 70mai.

Filed in categories: Reviews

Tagged: ,

70Mai Dash Cam Pro review originally appeared on The Gadgeteer on June 5, 2019 at 9:00 am.

Note: If you are subscribed to this feed through FeedBurner, please switch to our native feed URL http://the-gadgeteer.com/feed/ in order to ensure continuous delivery.

Auto-Vox X2 Streaming Media Mirror Dash Cam review

REVIEW – I’ve never reviewed a dash cam before. But with the terrible roads here in Michigan, and the increased number of distracted drivers on those roads, I thought it was time I did. Today I’ll be taking a look at the Auto-Vox X2 Streaming Media Mirror Dash Cam.

What is it?

The Auto-Vox X2 is a touch-screen streaming media mirror with a built-in dash cam and rear backup camera.

What’s in the box?

  • Auto-Vox X2 streaming media mirror
  • 2 sets of elastic attachment bands
  • Car charger
  • GPS antenna
  • Backup camera
  • Video cable
  • Lens cloth
  • Instruction manual

Hardware specs

Mirror:

  • Screen Size – 9.88-inches
  • Supply Voltage – DC 5-5.5V
  • Resolution – 1080P,1296P
  • Video – H.264 1296P@30fps+720P@25fps
  • Battery – Polymer lithium ion battery
  • TF Card – 64GB-128GB,Class 10(not included)

Front view camera:

  • Viewing angle – 140 degrees
  • Aperture Size – F2.2
  • Len Focus Type – Adjustable
  • Processor – High-definition HD image processor

Backup camera:

  • Viewing Angle – 140 degrees
  • Water-Proof – IP68 waterproof
  • Resolution – 720P

Design and features

The X2 is designed to fit overtop your cars existing rearview mirror. The front of the unit contains a 9.88” LCD touch sensitive screen.

On the back, there are attachment clips along with the front view dash camera.

The USB power port, TF card slot, AV port for the backup cam, and the GPS port are all located along the top of the monitor.

The power button is located in the center on the bottom.

The unit requires a MicroSD card (not included). It supports 64GB to 128GB. Note: make sure that you use a class 10 card which is meant for recording and playing back Full HD video.

Installation

The X2 attaches over the top of your cars rearview mirror using to elastic bands. It only took me a couple of minutes to strap it onto the mirror.

The most challenging part was running the various cables. However, after a bit of planning and some trial and error, I was able to run all 3 cables without much problem. And if I do say so myself, did a great job of hiding them too. 

I have a 2019 Chevy Trax which already has a backup camera. My reason for installing the X2’s rear camera was to use it in lieu of the rearview mirror. So I just mounted it inside the car using the 3M adhesive on the base of the camera.

Overall installation from start to finish was under 2 hours.

Display

The X2’s display has a 9.88” LCD touch-sensitive screen. The unit automatically powers on when you start your car and powers down when your car is turned off. To manually power the unit off, press and hold the power button for 3-seconds.

Time and date are shown in the upper right-hand corner of the display. In the lower left corner, a small compass icon indicates your driving direction.

A tap anywhere the screen brings up the Touch Screen Interface. This brings up six different icons. The Settings Menu, DVR video playback, Start/Stop video, Camera switching front/back, Screenshot, and Emergency Lock – Lock the Video as SOS file (will not be covered by Loop-recording).

The Settings Menu allows you to select and customize all of the X2 features. (Note: You need to pause recording before entering into the menu.)

X2 can be used in two different ways while driving. In Driving Mode the camera display is turned off, and it functions as a standard analog mirror that displays speed and direction information. 

If you choose you, can have the screen display the image from the rear cam. I really like this feature, and I use it almost exclusively. Using the rear camera, you get a full 140º wide angle real-time image. It almost totally eliminates the cars blind spots. And you feel like you can see everything behind you. Much better than my cars rear view mirror.

You can also toggle between the two modes. When in Drive Mode tapping the screen will bring up the rear cam view. You can go back to DM by pressing the power button.

The Lane Departure Warning System(LDWS) will sound an alarm when your car is veering into another lane. You can enable this feature in Settings.

I found the LDWS to be hit or miss. Sometimes I got a warning others times I didn’t. So I just turned the feature off.

Overall the display is very nice. The image is clear and bright, and the touch-screen is very responsive. My only complaint, it picks up a lot of glare, especially on sunny days. However, I was able to alleviate some of the glare by tilting the mirror.

Cameras

The front camera is mounted on the front of the unit. The camera has two resolutions, 1080P, which is the default resolution & 1296P. I set it at 1296P, and the image is very good. It’s bright and crystal clear so you can see details like license plate numbers. It also gives you a nice wide 140º viewing angle.

The rear camera has the same 140º wide viewing angle. Unfortunately, it has a disappointing 720P resolution. The image quality is still good, but not anywhere near as clear as the front camera. The rear camera is also IP68 waterproof. You can see both cams in action in the videos below (Front cam top/Rear cam bottom).

Both cameras do a good job of recording at night. The only issue, there’s blooming around the headlights of approaching vehicles. See the video below (Front cam top/Rear cam bottom).

You can also tilt both cameras up or down by sliding your finger up or down on the screen.

Video recording features

Video recording automatically starts the moment the unit is powered on. The unit uses Loop recording, which can be set at 1,2 or 3 minutes. With Loop recording enabled, you never have to worry about buying additional SD cards when capacity is full.

Parking Mode protects your car when it’s parked. When the DVR detects any collision, it will start recording for a short period of time. I tested it by slamming my cars door. When I turned the unit back on and went to the DVR, there were 2 short videos saved in the Emergency Video section. One for each camera.

Auto-Vox does recommend to hardwire the unit if you want to use Parking Mode. Unfortunately, they don’t provide you with the Hardwire kit. They can be purchased on Amazon for $19.

If you get into a collision, the units G-sensor will automatically lock the video, which means the video can’t be overwritten. It’s saved as an Emergency Video on the SD card and the units DVR.

The DVR function allows you to view all recorded videos directly from the display. You can view regular, emergency videos and screenshots. My complaint with the DVR is the video files are not displayed by date or time, which makes it difficult if you’re looking for a specific clip.

You can also playback videos from the SD card on your computer. I was able to view them on my MacBook Pro. Unlike the built-in DVR, the files are listed with date and time. Note: If you want access to the videos GPS info you must be using a PC.

What I like

  • Touch Screen is easy to use / very responsive
  • Both cameras have a good picture
  • Being able to use the rear camera as the rearview mirror
  • Great wide angle view from the rear camera

What needs to be improved

  • LDWS doesn’t work properly
  • Blooming from headlights at night
  • Can’t access video GPS info on my MacBook Pro
  • SD card slot placement makes it hard to remove the SD card

Final thoughts

On the surface, the Auto-Vox X2 may seem a bit pricey. But you not only get a dash cam, but you also get a backup/rearview camera and a nearly 10″ touch-screen monitor. I feel safer just having it installed in my car.

Price: $259.99
Where to buy: Amazon
Source: The sample for this review was provided by Auto-Vox.

Filed in categories: Reviews

Tagged: ,

Auto-Vox X2 Streaming Media Mirror Dash Cam review originally appeared on The Gadgeteer on June 2, 2019 at 9:00 am.

Note: If you are subscribed to this feed through FeedBurner, please switch to our native feed URL http://the-gadgeteer.com/feed/ in order to ensure continuous delivery.