Kodak Pixpro Orbit360 4K VR Camera review

The Kodak Pixpro Orbit360 4K VR Camera is a consumer level camera that has been designed to let you get your feet wet in the world of VR/360 cameras in an easy and fun way. They sent me their Pixpro Orbit360 Satellite Pack that includes a collection of accessories. Let’s take a look.

What is it?

The Kodak Pixpro Orbit360 VR Camera is a 3 in 1 camera that can shoot 4K video like GoPro action camera,  4K 360-degree video, and 4K 180-degree video. Although it sports the Kodak brand, this isn’t actually a Kodak camera. It’s made by JK Imaging who is a licensee of the Kodak camera brand.

Hardware specs

Image Sensor A
Effective Image Sensor Pixels: 20.68 Megapixels
Focal Length: 1.633 mm
F number: F2.4
Lens Construction: 7 groups 8 elements
Focus: Fix Focus
Field of View: Max. 197 Degree [For Front Mode (16:9)]
Max. 155 Degree [For VR Mode (2:1)]
Focusing Range: 30 cm — ∞

Image Sensor B
Effective Image Sensor Pixels: 20.68 Megapixels
Focal Length: 1.257 mm
F number: F2.4
Lens Construction: 7 groups 8 elements
Focus: Fix Focus
Field of View: Max. 235 Degree [For Front Mode (16:9)]
Focusing Range: 30 cm — ∞

Electronic Image Stabilization (EIS)

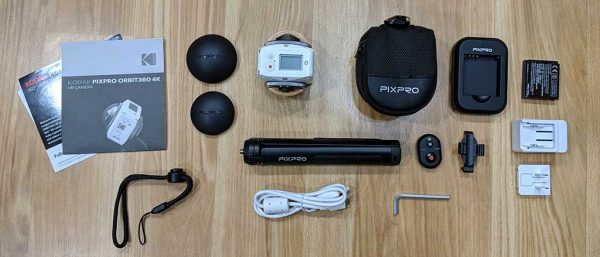
What’s in the box?


  • Kodak Pixpro Orbit360 4K VR Camera
  • Lens Covers
  • Protective Covers
  • Li-ion Battery + Charger
  • USB Cable + AC Adapter
  • Camera Carrying Case
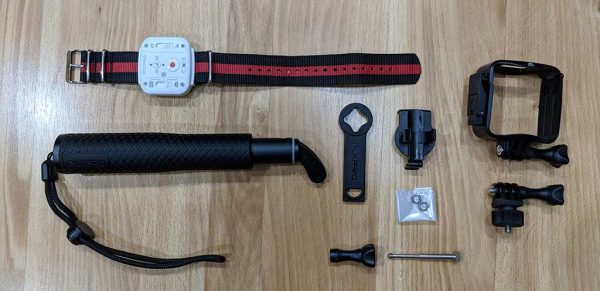
  • Wearable Remote Control, Mini BT Remote Control
  • Remote Control Mounts
  • Standard Housing
  • Selfie Stick, small tripod
  • Accessory Tool & Thumbscrew Adapter
  • Screw Mount
  • Cleaning Cloth
  • Quick Start Guide, Service Card, Online Company Store Card, Warranty Card, Team 360 Sticker

Design and features
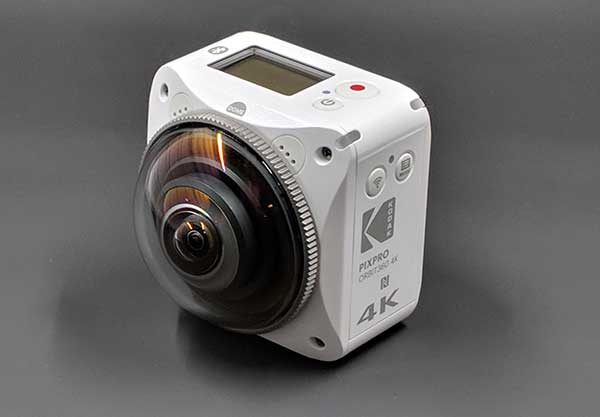
At first glance, the Pixpro looks like an action camera. But that’s just at first glance. It doesn’t take long to realize that the Pixpro is not an ordinary action camera. One give away is the dome-shaped lens cover that protects the 20.68MP lens.
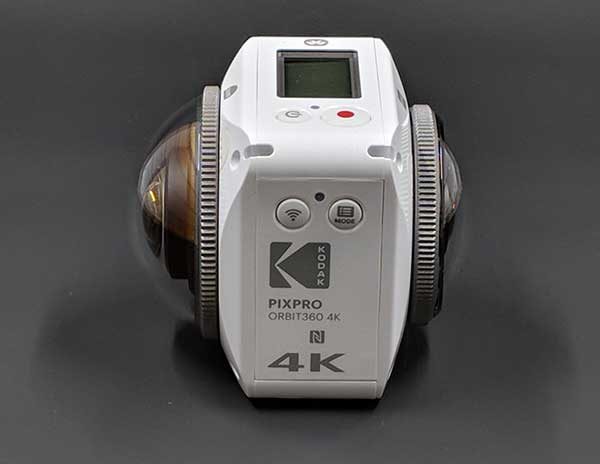
But the Pixpro doesn’t have just one lens, it has 2! The larger dome-shaped lens (B) is the 235-degree lens and the smaller lens (A) on the opposite side is a 197-degree lens.
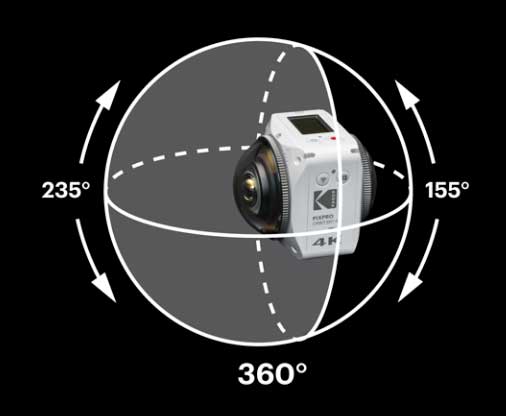
To get a 360-degree image, both lenses are used and the images/video are stitched together.
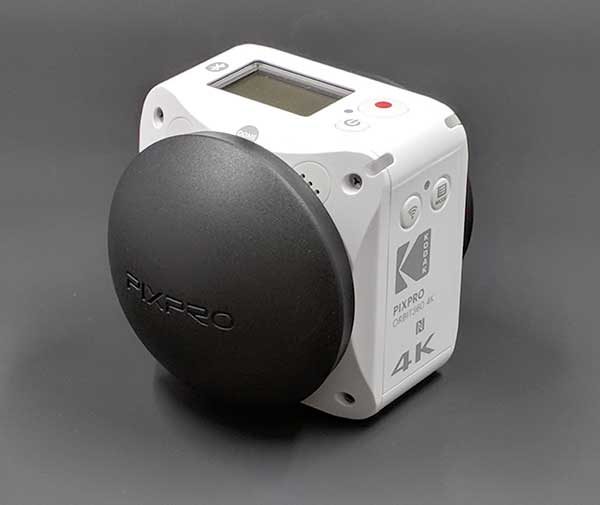
Included with the Pixpro are 2 lens covers that protect the lenses when the camera isn’t being used. The covers do not have a way to attach them to the camera itself or anything else, so it seems like it would be easy to accidentally misplace them.

You would think that a 360-degree camera with two lenses would have all sorts of buttons, switches, dials, and displays, but the Pixpro has a relatively simple design.

On one side of the camera, you will find the WiFi toggle button and a menu button.
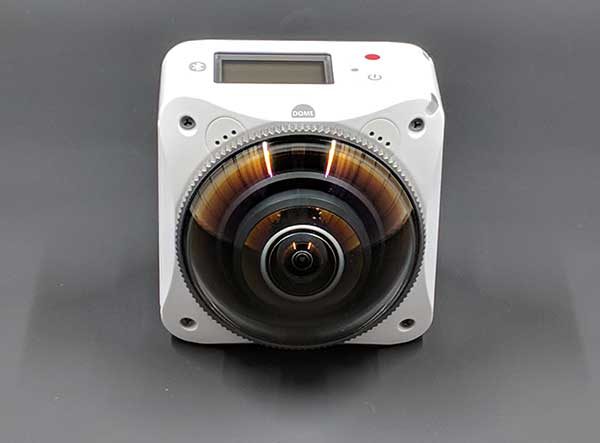
At 10 and 2 o’clock above each lens are built-in microphones and on each upper right corner is a status LED for each lens so that you will know which lens is recording video.
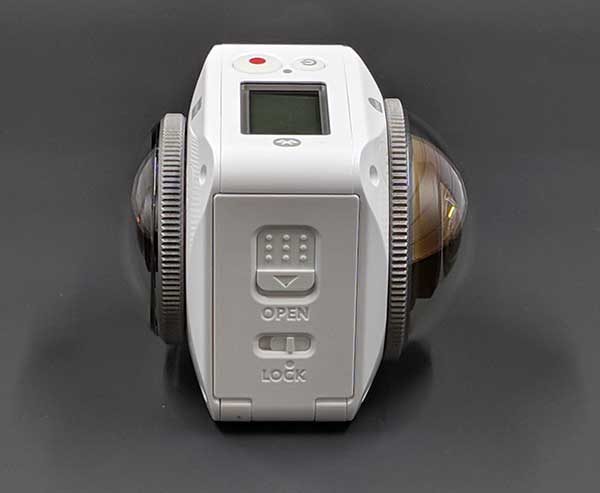
The other side of the Pixpro has the battery compartment.
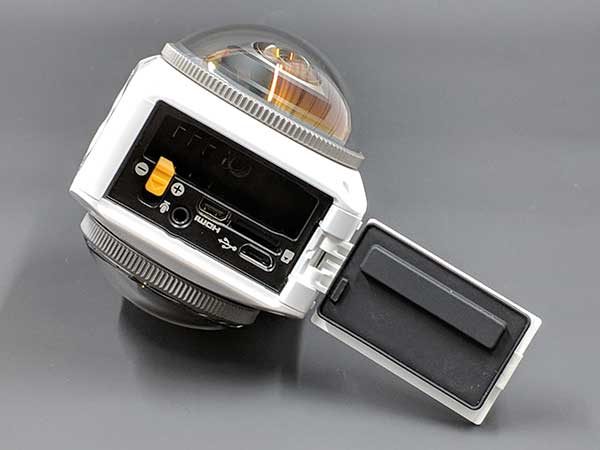
Opening the latch reveals a removable battery, a micro USB port, a micro HDMI port (cable not included), a microphone jack (cable sold separately),  and a micro SD card slot (also not included). You’ll want to use a Class 10 or higher 8GB – 256GB micro SD card with this camera.
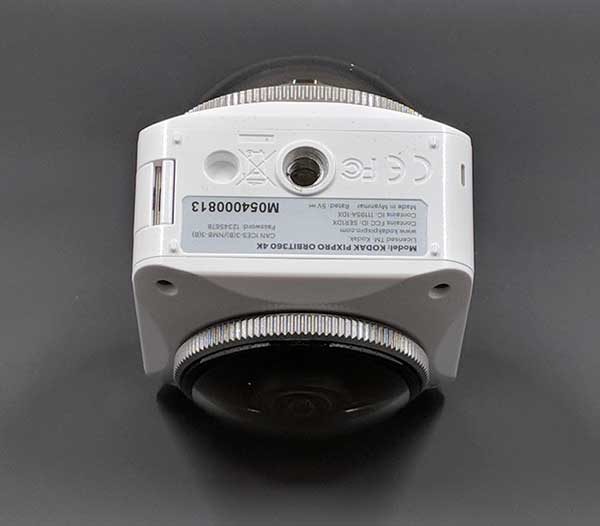
The bottom of the Pixpro Orbit360 camera is a standard sized threaded tripod socket.
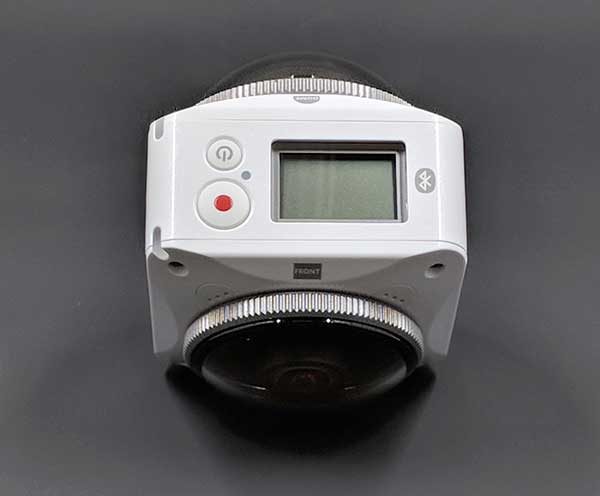
And the top of the camera has a small LCD, power button, and shutter/record button.
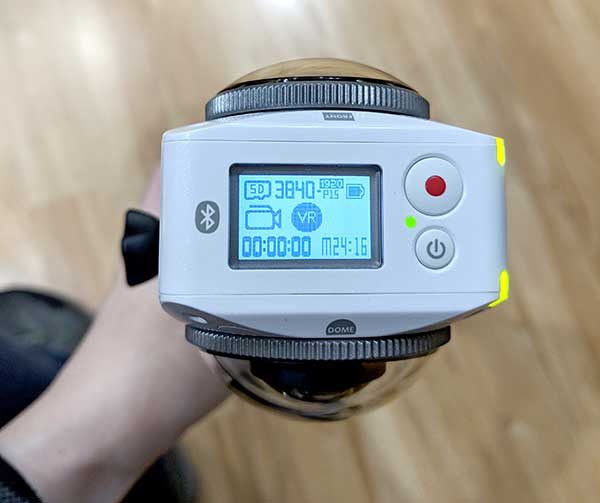
Unlike a lot of midrange action cameras on the market, the Pixpro’s display is very basic with no touch features. You have to use the menu button and WiFi button to navigate through the menus.
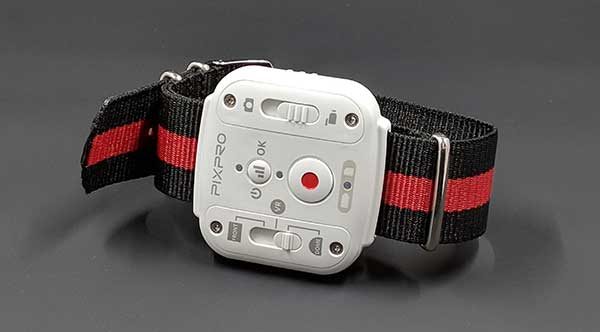
Luckily, the Pixpro Satellite Pack comes with a wearable remote control that lets you easily switch modes from camera to video and VR modes without wandering around in the menus.
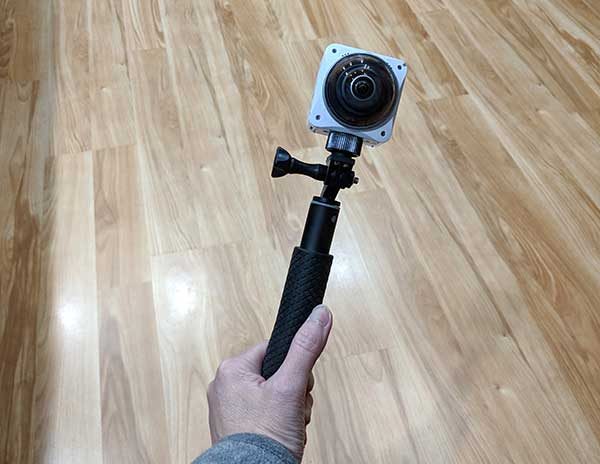
Before you can begin using the Kodak Pixpro Orbit360 4K VR Camera, you’ll need to charge the battery using the included battery charger or by connecting a micro USB cable to the camera and a computer or a USB AC adapter.

Once the Pixpro’s battery is charged and you’ve inserted a micro SD card, you can begin capturing images and video.

Desktop software

After you capture some images and video, you can install software on your PC, Mac, or smartphone that will provide a live view of the camera and help you process certain types of images and video.
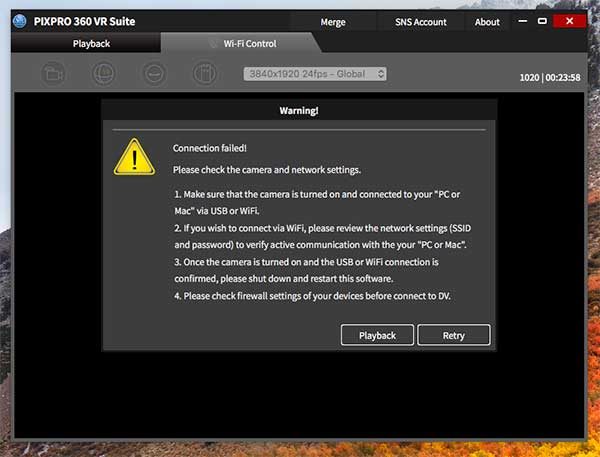
I downloaded and installed the free Kodak PIXPRO 360 VR Suite software on my 12-inch MacBook and had a lot of difficulties getting the camera to connect to my Mac and/or stay connected for any length of time.
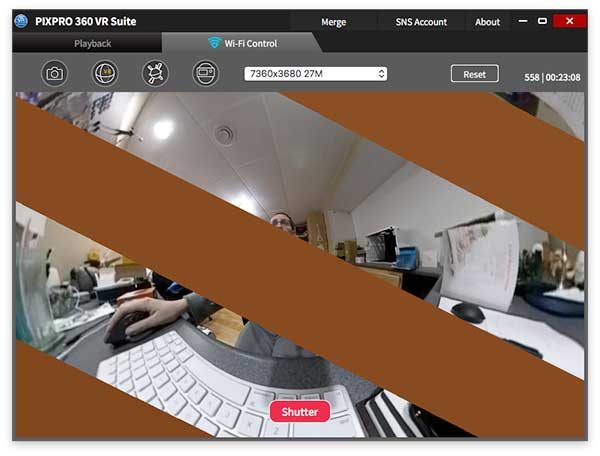
I also experienced odd graphical issues which I was told was due to my computer not being able to handle the streaming video connection to the camera.
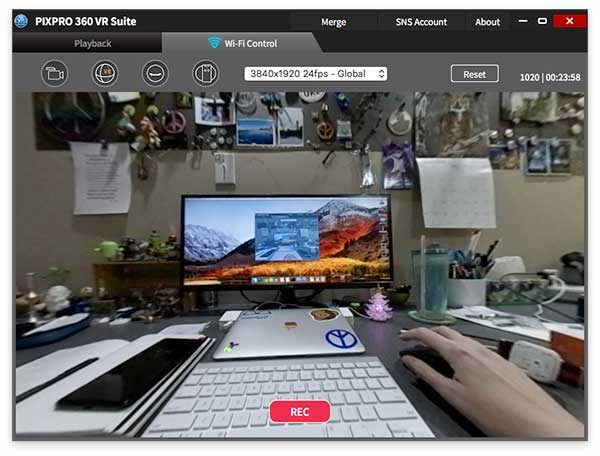
Overall, I found the desktop VR Studio software to be buggy and frustrating to use.
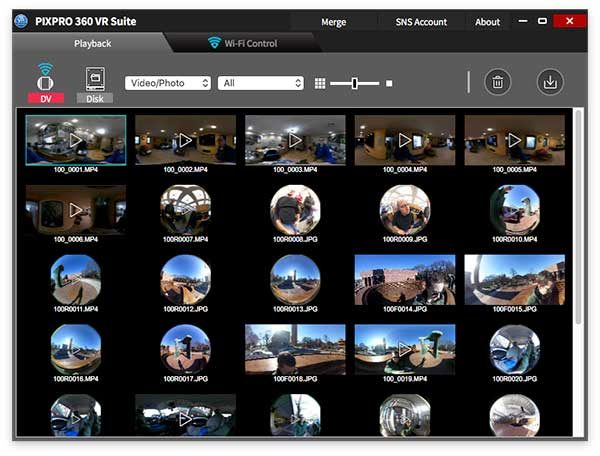
Loading thumbnails of the images and video stored on the micro SD card in the camera was painfully slow and anytime you would leave the file view to go to another part of the app, the list would have to load again when you came back to the list view.
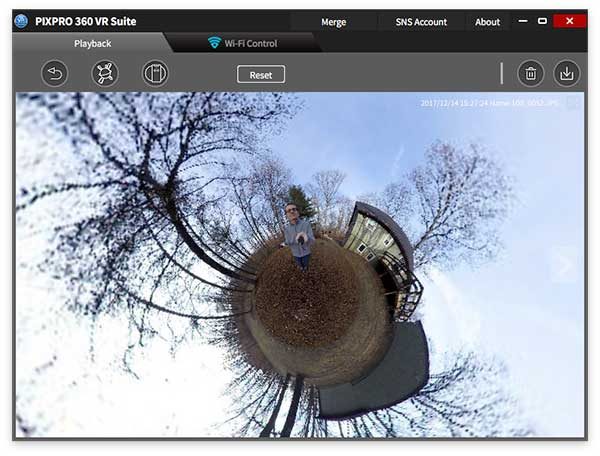
The only reason I even wanted to use the VR Studio software was to be able to create Tiny Planet pictures like the one you see above. I was finally able to create such a picture on my MacBook using the VR Studio macOS software but then found out that you CAN NOT export the Tiny Planet pictures from the desktop software to a new file on your computer. The only way to export it is to use the smartphone version of the software. What the heck?!

Smartphone software
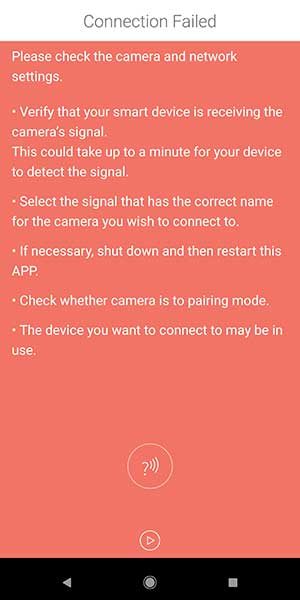
I had no luck at all connecting the Pixpro to my Pixel 2 XL using the Android app, but I was able to get it working on my Samsung Galaxy Tab S3.

Using the app isn’t difficult, but there’s way to live stream to Facebook or Youtube because the camera has to be paired with the mobile device in order to control and view the saved images and videos. While your mobile device or desktop computer is connected to the camera, it uses it’s own WiFi connection so you aren’t connected to the internet. The app will allow you to save video and images to the mobile device but it can take awhile to process a 360-degree video.

Image and video samples

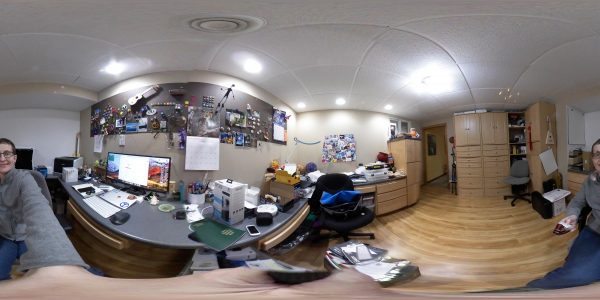
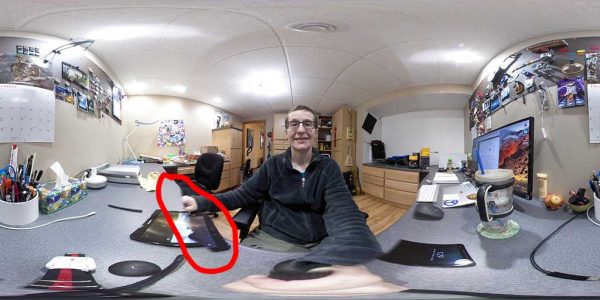
Here are a couple images taken directly from the micro SD card.

You can click the image to see the original size but you won’t be able to pan around to see the 360-degree view when you’re viewing the JPG on your computer.

The problem with the images are the stitch lines. You don’t notice them that much in the image above…

But in this image, the stitch lines are pretty obvious.

I’m sure you’re wondering why you can’t pan around in these images since the Pixpro is a 360-degree camera. For a 360-degree view of static JPG images, you can view them through the VR Studio desktop or mobile app or you can upload the JPGs to social media sites like Facebook. Here’s a sample. Click to view.

Testing the Kodak Pixpro Orbit360 4K VR Camera

Posted by Julie Strietelmeier on Thursday, December 28, 2017

Another Kodak Pixpro Orbit360 4K VR Camera test.

Posted by Julie Strietelmeier on Thursday, December 28, 2017

Pixpro video is the same way, if you view the MP4 files on the micro SD card on your computer, they will have a weird ultra-wide angle look to them but no panning features. But your video will automatically have the panning feature when you upload them to Youtube (other social media sites like Facebook have this feature too, but I only tested video uploads on Youtube). Here are a couple 360-degree video samples:

You can pause and drag your mouse around in the video to see different views.

The Pixpro image and video quality were ok when captured in a bright setting, but low light video and images left a lot to be desired.

Positives

  • 3-in-1 camera
  • Easy to use
  • Removable battery
  • Nice build quality
  • Wearable remote makes camera control easy
  • Dustproof, freezeproof, splashproof and shockproof

Negatives

  • Expensive
  • Can’t live stream
  • Image quality isn’t impressive; visible video stitching seams
  • Desktop and smartphone software is slow and buggy
  • No way to attach protective lens caps or a safety tether to the camera
  • A waterproof housing is currently not available

Final thoughts

The Kodak Pixpro Orbit360 4K VR Camera was my first experience using a 360-degree camera. I wanted to love this camera and although I did have fun using it, I was disappointed in the video quality and quickly became frustrated when I wanted to view the images and video using the apps. Using the desktop and mobile app was annoying because you have to use a live connection to the camera instead of just loading the video files on your computer from the micro SD card. The app wouldn’t work at all on my Pixel 2 XL, felt slow on my MacBook, and was just ok with my Samsung Galaxy Tab S3. Considering the price, I feel this camera is overpriced for what it can do.

Price: $499.99
Where to buy: Amazon
Source: The sample for this review was provided by Kodak.

FrontRow camera review

If you feel compelled to take your phone out of your pocket to snap pictures and record videos throughout your day, a device like the FrontRow camera might save you a lot of time because this camera automatically records your adventures so you can leave your phone in your pocket. 

What is it?

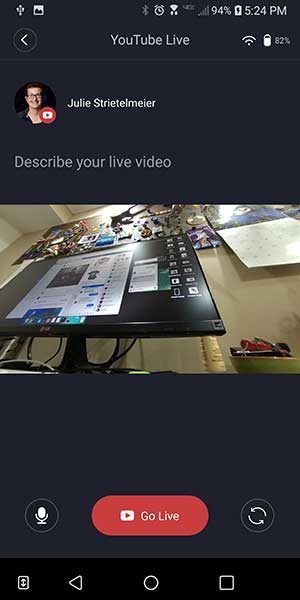
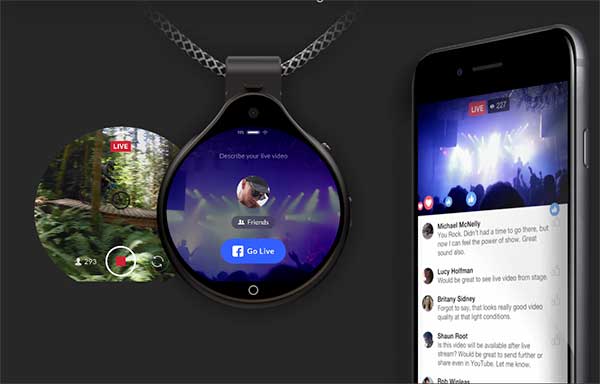
FrontRow is a camera that you wear around your neck that can capture snapshots and video either manually or automatically throughout your day to create condensed time-lapse videos called stories. The camera can also be used to live stream to Facebook, Twitter, and Youtube.

Hardware specs

Main camera: 8MP, f2.2, 1080P, 30fps, optical image stabilization
Back camera: 5MP, f2.0, 1080P, 30fps, optical image stabilization
Display: color touch screen, 640 x 572 resolution
Memory: RAM 2GB, Storage 32GB
Battery: Standby 50hrs, live streaming 1hr 45min – 1hr 55min, recording 1hr 50min – 2hr, fast charging via USB TYPE-C
Connectivity: Bluetooth and Wifi

What’s in the box?

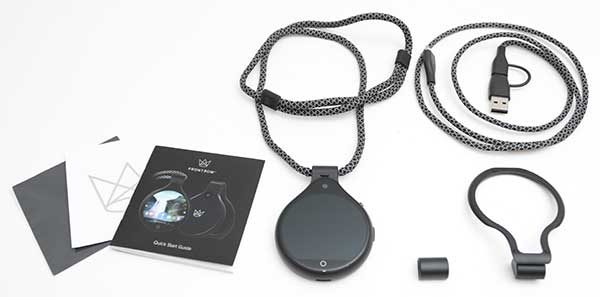
FrontRow camera
Magnetic clip
USB cable with adapter
Adjustable lanyard
Microfiber cloth
Quick start guide
FrontRow logo sticker

Design and features

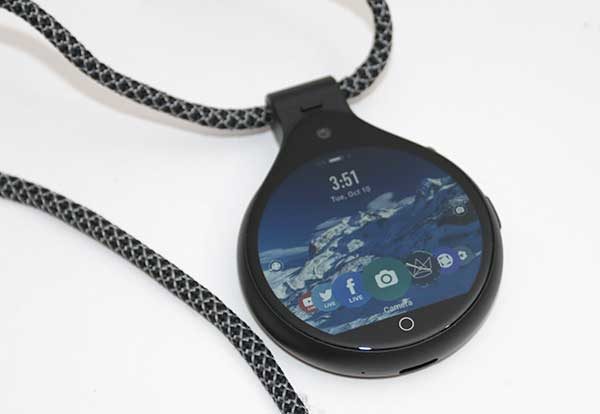
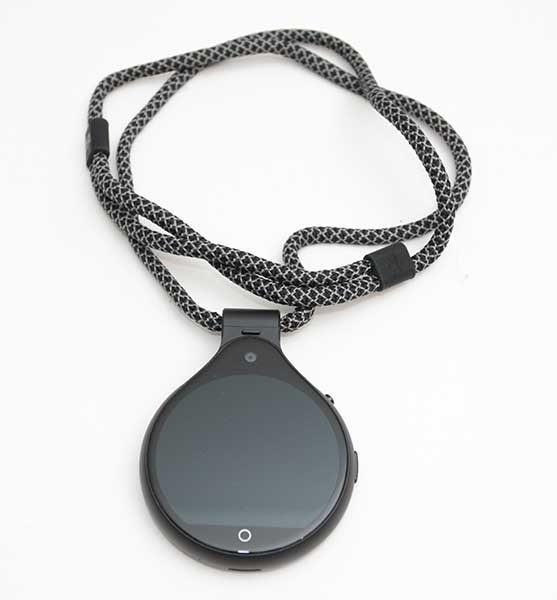
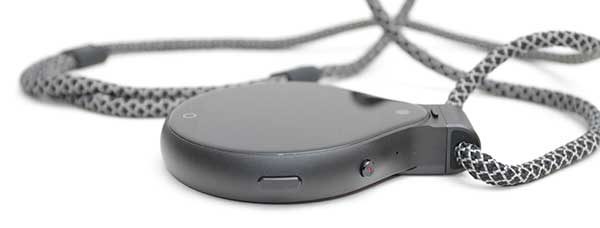
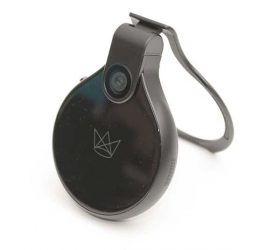
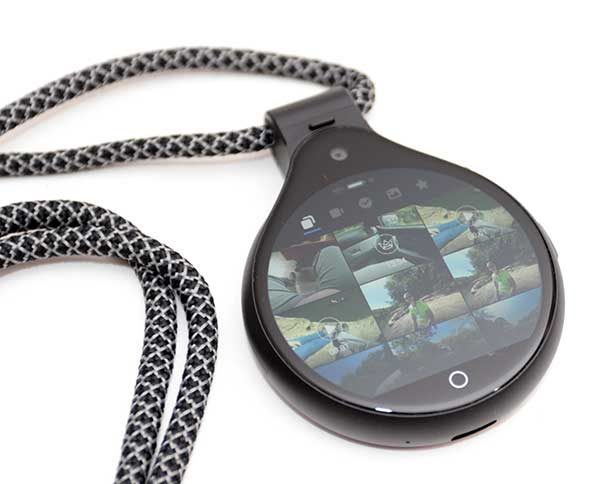
The FrontRow camera looks like a stopwatch that a coach might wear around their neck.

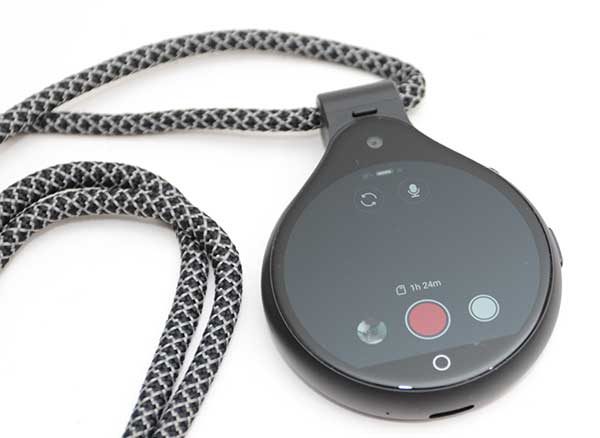
It comes in black and will also soon be available in white with rose gold. The camera has a premium look and feel due to the metal casing and a glass touchscreen display. The display faces against your body when it’s being worn. Above the display is a 5MP reverse camera which has an 85-degree viewing angle and below the display is the home button.

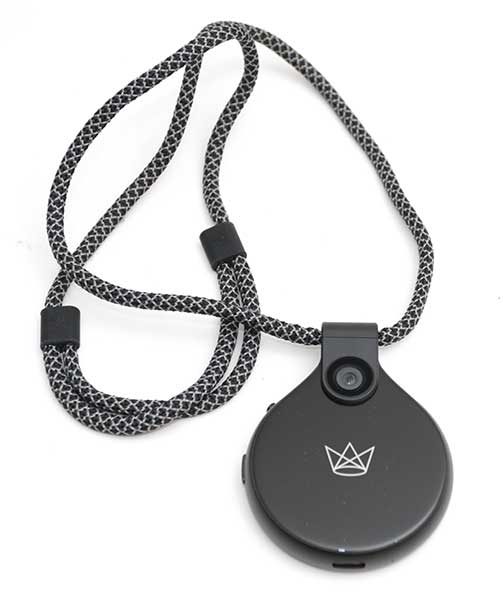
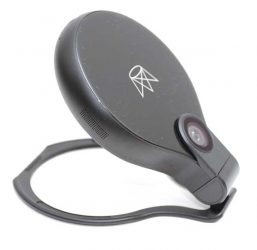
The front of the FrontRow camera has the FrontRow logo and the main 8MP camera which has a 147.5-degree wide-angle lens.

On one side of the camera is a small media button and a longer power button. On the opposite side (not shown), is a speaker and a tiny status LED that blinks in blue while charging, is solid blue when fully charged, and blinks red while video is being recorded.

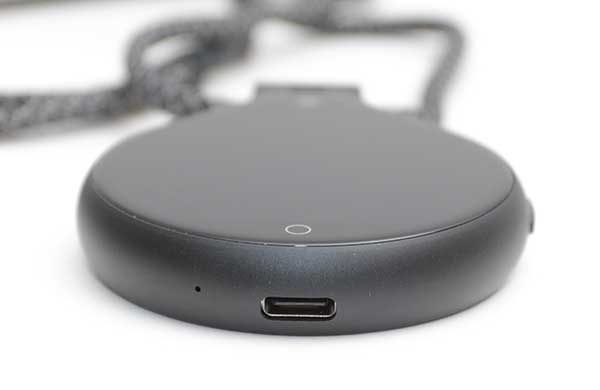
On the bottom edge of the FrontRow camera is a USB Type-C port and to the left of the charging port is a microphone.

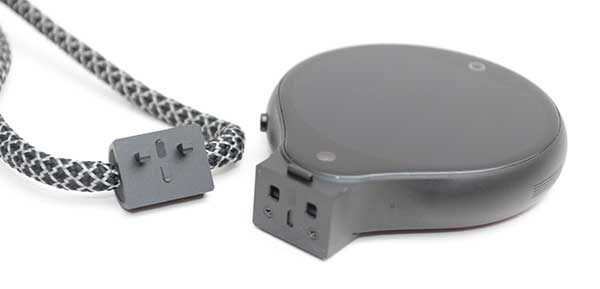
The top of the FrontRow is designed with a detachable clip. The camera comes with a lanyard clip and a magnetic stand clip.

The clips are made of metal with hooks that latch securely into the top of the FrontRow camera.


The magnetic clip can be used to attach the FrontRow to a metal surface. Be aware that the magnet isn’t very strong, so I would be wary of using it to hold the camera high above the ground.

Other mounting options in the future may include a car mount so you can use the FrontRow camera as a dash cam.

Setting up the FrontRow

The first thing you will need to do before you can start using the FrontRow camera is to charge it using the included USB Type-C cable. While the camera is charging, you can install the iOS or Android FrontRow app on your mobile device.


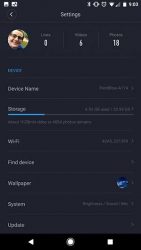
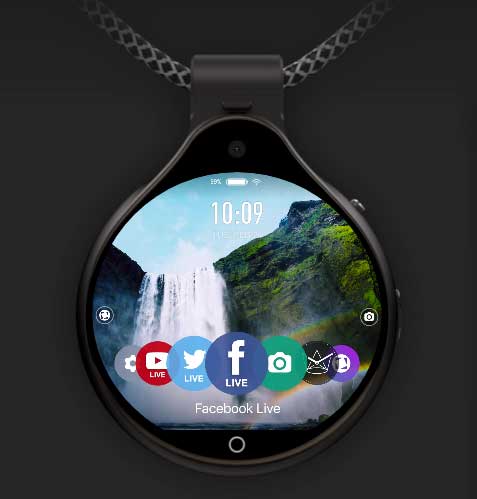
The app and the camera itself have an easy to use interface that provides access to images, video, and stories that have been captured with the camera as well as an interface to change settings and initiate recordings and live streaming events.

Almost everything that you can do through the app, you can also do right from the camera. This includes manually capturing video from either the main or reverse cameras.

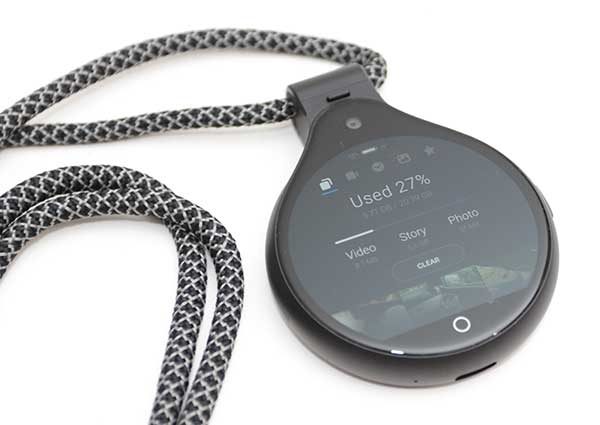
You can also view images and watch videos right on the FrontRow’s color touchscreen display which by the way is crisp, clear, and vibrant. It’s also surprisingly fingerprint resistant.

In addition to taking snapshots with the FrontRow camera, capturing video, making time-lapse videos, and live streaming to social sites like Facebook, the FrontRow camera has a few other interesting features like a stopwatch, language translator, and a Spotify player.

Using the FrontRow as a camera

To take a snapshot with the FrontRow, you just click the media button once. If the FrontRow’s display is on and the camera is not in story mode, you’ll hear a shutter sound to let you know that an image was just captured.

If the screen is off and the camera is not in story mode, you’ll feel three vibrations with the last vibration signifying that the image was just captured.

If the FrontRow camera is in story mode, you can still snap images by pressing the media button and you will feel one vibration to let you know that the image was just captured.


Click the example images above to see the image quality. You’ll notice that the first three images are a little blurred and that part of my jacket was in the way of the lens for one of the shots. Only the selfie was sharp and clear. I noticed the blurring issue with most of the images that I manually captured. Due to the problem with blurring, I wouldn’t want to use the FrontRow as my only camera. As a live streaming camera, video camera, and time-lapse camera, it does a good job, but as a stand-alone snapshot camera, I prefer my phone.

Using the FrontRow camera to capture video and create live streaming sessions

The FrontRow camera has both optical (OIS) and electrical (EIS) image stabilization which is supposed to keep your action videos looking smooth instead of choppy. But these stabilization features won’t help if you’re wearing the camera around your neck and are walking or running around while you’re trying to capture video. Here’s a quick example of me wearing the camera around my neck while walking normally around my house.

Not very smooth is it? It’s not the fault of the FrontRow though. I don’t think any amount of OIS or EIS can help smooth out video when the camera is swinging from your neck as it’s recording. FYI: The video sample was saved in SD (720p) quality and the weird audio is due to it being a really breezy day.

Live streaming video quality works very well as long as you have a WiFi or good connection to the net through your phone. The first time I tried to do a live stream was in my car and it would not work. It kept asking me to connect to WiFi. When I asked FrontRow about this issue, they responded with:

The Facebook livestream API requires speeds greater than 50kbps. If speeds do not meet this requirement Facebook will end the stream (or not allow a stream to begin until speeds meet the required level). FrontRow suggesting to connect to a wi-fi networks is a result of needing to satisfy these speed requirements.

Here’s an example of a live stream to Facebook while my phone was connected to my home WiFi.

https://www.facebook.com/julie.strietelmeier/videos/10154856065261437/

Note that copies of your live-streamed videos are NOT saved on the FrontRow camera or on your phone.

Using the FrontRow to capture time-lapse “stories”

Live streaming is cool, but my favorite feature of the FrontRow camera is the story feature. Stories are a group of clips that are condensed and turned into time-lapse video recordings of your day or special events. By default, stories don’t include audio, but you can add background music using the FrontRow app.

Stories are a fun way to relive your day without having to manually record a video yourself. Just put the FrontRow around your neck turn on story mode and it will do the rest.

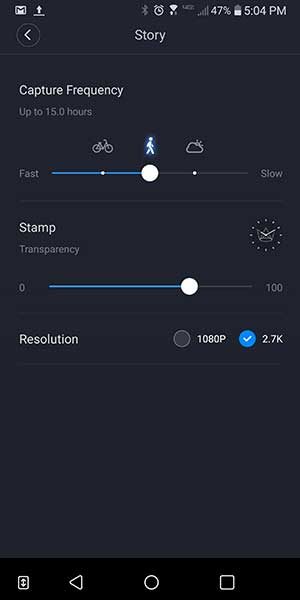
You can customise the video clip capture length from fast to slow. The exreme left side of the slider = 3sec/clip, bicycle symbol = 5sec/clip, walking symbol = 8sec/clip, cloud symbol = 10sec/clip, extreme right side of the slider = 20sec/clip.

I decided that using the FrontRow to capture a day at Turkey Run State Park would be a worthy test. I set the camera to the walking symbol, put it around my neck, started the story mode, and we went about our day at the park. You can check out the 14-minute video below.

As you can see from the video, sometimes the clips are a bit blurry. The idea isn’t to have a perfect video of your whole day but to be able to relive the memories of the day and I think FrontRow does that quite nicely.

It’s also important to keep in mind that the FrontRow is automatically capturing video snippets all the time and that after a short while, you’ll forget that you’re wearing it. That means that the camera might capture scenes that you might not want to see or have others see like when you’re in the restroom. 🙂 That’s why you can pause the story anytime you like by double clicking the media button. When you’re ready to start capturing the story again, you just double-click the button again.
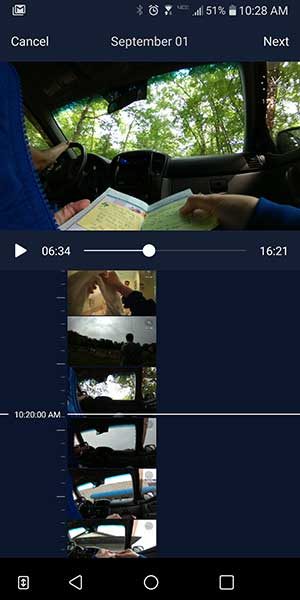
Your stories will also probably include a lot of boring parts that you can cut out using the editing features in the FrontRow app. You can also add background music to your stories using the included instrumental tracks from the app.

Stories use a LOT of storage. The 14-minute video above used more than 2.5GB of space on the camera which does not have expandable storage.

Battery life

The camera has good battery life but the recording time will depend on the resolution and the speed that you choose. The video sample I included above was set to the middle speed and was able to capture a time-lapse from 9:30 am – 5 pm which is pretty impressive.

The camera also has a fast charging feature, so you can semi-quickly charge it up for your next adventure and you can live stream while charging.

Final thoughts

The FrontRow camera is the type of product that most people won’t use every day and that makes the $400 price a bit steep. That said, it is a fun gadget to have for vacations, trips, and special events because you can wear it around your neck, start the story mode and enjoy the day or event without feeling like you have to take out your phone every few minutes to snap a picture or record a video.

Source: The sample for this review was provided by FrontRow. Please visit their site for more info and Amazon to order.


Product Information

Price: $399.00
Manufacturer: FrontRow
Retailer: Amazon
Pros:
  • Multi-use camera
  • Quality hardware
  • Auto timelapse "stories"
  • Makes live streaming easy
Cons:
  • Expensive
  • Live streaming requires a WiFi connection if phone connection to the internet is slow

Filed in categories: Reviews

Tagged:

FrontRow camera review originally appeared on The Gadgeteer on October 16, 2017 at 11:00 am.

Note: If you are subscribed to this feed through FeedBurner, please switch to our native feed URL http://the-gadgeteer.com/feed/ in order to ensure continuous delivery.

Frontrow is a wearable camera/watch that captures first person timelapse videos

I’ve reviewed a couple wearable cameras like the Narrative Clip that are designed to automatically capture images so you can relive your daily adventures. Love the idea, but so far none of the cameras I’ve tried has really been that impressive. If looks count for anything, the Frontrow wearable hands-free live stream camera and watch has me drooling.

The Frontrow camera can be worn around your neck or clipped to a shirt, belt, etc. It features a touchscreen display on the front that can show the current time.

The device also both a front and rear camera. The front camera is an 8MP and the rear camera is 5MP. It also has a built-in microphone and speaker.

It has 16hrs of battery life per charge and refuels quickly via USB Type-C.

Want to know more about the Frontrow camera? Head over to www.frontrow.com or Amazon where you can buy one now for $399.99.

[Via The Awesomer]

Filed in categories: News

Tagged: ,

Frontrow is a wearable camera/watch that captures first person timelapse videos originally appeared on The Gadgeteer on August 19, 2017 at 3:31 pm.

Note: If you are subscribed to this feed through FeedBurner, please switch to our native feed URL http://the-gadgeteer.com/feed/ in order to ensure continuous delivery.

Bitplay SNAP! 7 camera case and lenses for iPhone 7 Plus review


There is no question that I, and probably many of you readers, take a lot of photographs on a cell phone. It is always on you, and the cameras on them are getting better and better. I purchased the iPhone 7 Plus because of the camera, and I was intrigued to find out that there are cases and lenses to try to make that camera better. One of them is the Bitplay Snap! 7 and their differing lenses, and I was given an opportunity to try a few out.


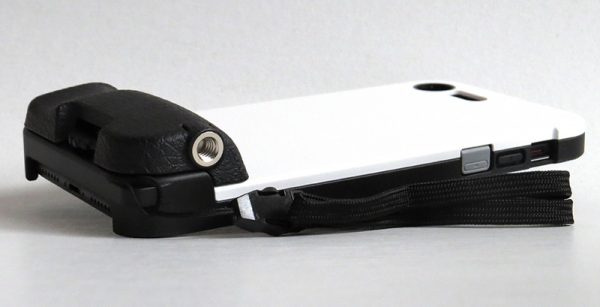
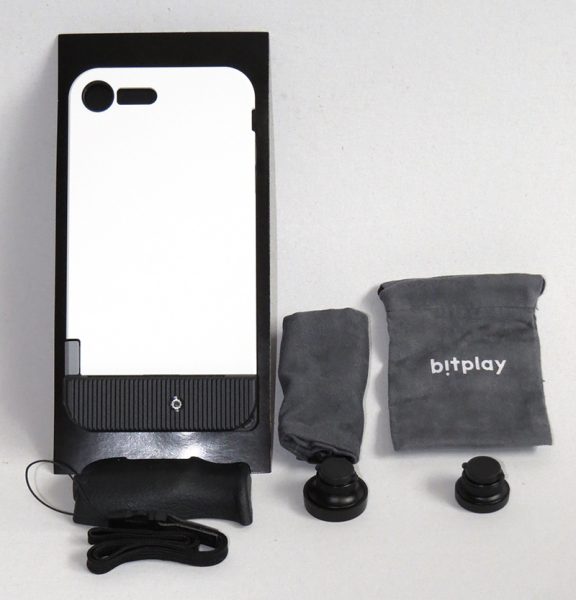
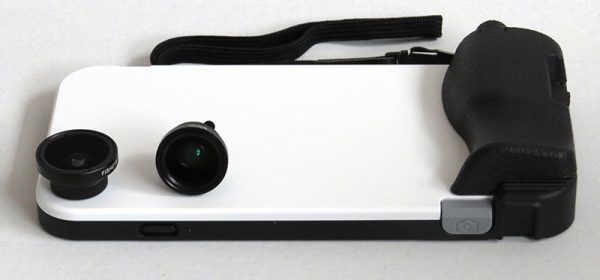
I was sent the Bitplay Snap! 7 case which includes the case, a hand grip, thumb rest, wrist strap, and user manual. Along with the case, I was sent two different lens sets to try out. Each lens had a macro lens included, as well as a cinch top bag to store them in. I ended up using one bag to store the accessories in the case and the other to store the lenses.


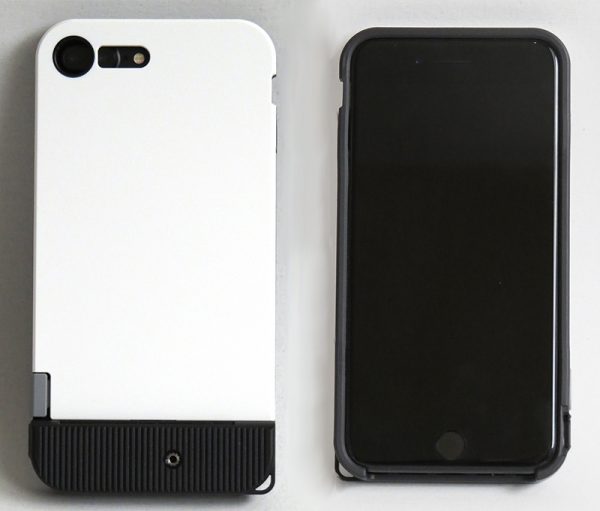
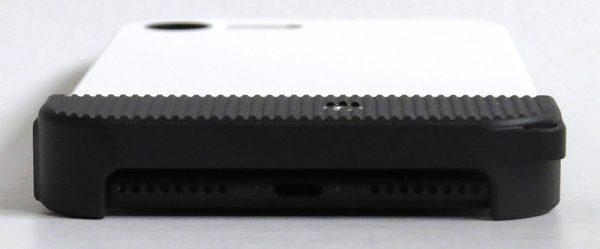
The case slips on like most standard cases, and it fit snugly on my phone. There is a lip on the front of the case to protect your screen, which is a must in my opinion, and the case itself is sturdy and I felt comfortable that it would protect my phone if dropped. The cutout for the camera does not interfere at all with taking pictures.


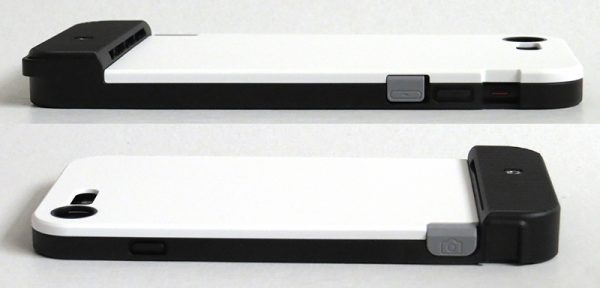
One of the things that make this a camera case is the extra button on the bottom right side to be used as a shutter button. Basically, it is a volume down switch moved to a new position. I used this when taking pictures, but after a few weeks of use, I still hit it accidentally when I am holding my phone and turn the volume down. It did work very well for taking pictures, however.


The bottom is left open, and I was able to plug in different sizes of Lightning cables without any problem at all. I prefer it this way, since my previous case only allowed for the official Apple cable to fit.


With the cutouts and holes for the camera accessories, the case itself is not the most aesthetically pleasing, but it performs its function well. It also is a little bulky, and I had a hard time fitting the already big phone into a few of my jacket pockets with the case on. Due to this, I don’t think I would use this daily, but instead, have it for vacations where I am going to use the camera features frequently.


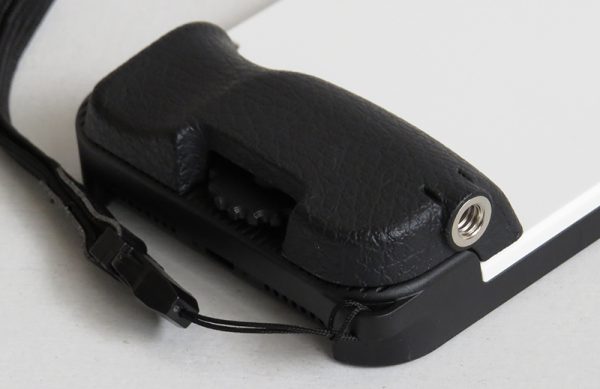
Now let’s move on to the included accessories. A thumb rest and hand grip are included with the case, and they are definitely not for daily use. However, taking pictures using both of these with the case was very comfortable. The hand grip can easily be screwed and unscrewed with a built-in dial. Not once did it unscrew on its own, which was one thing I worried about.

I was sent two lens kits; a wide angle with a 1.5x macro lens, and a fisheye with a 5x macro lens. Both included a carry bag. These lenses are sold separately, and there are also other variations of lenses available on their website.


The macro lenses were similar, so I will lump them in together. Both took good pictures, but it was very hard to keep the phone in focus when taking such close-up photos. Also, you had to be VERY close to the object to get a good picture, which meant I could only photograph tiny flowers, rather than a tulip or daisy. I can’t see myself using the macro lenses terribly often.


It was both fun and interesting to use the fisheye lens. When testing it out, my cat took a closer look at the lens and I shot a perfect picture of her nose. I would include it here, but it is just barely out of focus, so I took another of a flower bush to better show off the fisheye effect. Keep reading if you want to take a look at the fisheye picture of my cat. The iPhone camera adapted very well to the lens, focusing like it wasn’t there and also providing clear pictures. The lens quality seems pretty good. It’s not cheapo plastic feeling, and the included covers protected both sides of the lens to keep scratches from appearing on the glass.


The lens that I would use most out of all that I tried, however, is the wide-angle lens. I was floored when I saw the difference between a wide-angle and regular iPhone picture, so much that I did my best to take a picture at the same place with and without the lens to show it off. The above picture is just a regular iPhone picture, no lens attached. The below picture is the field of view when I added the lens on. I was able to see the entire bush, and not only that, there isn’t much in the way of distortion around the edges of the picture. I would have loved to have this in Yellowstone, to get an even greater view of the grand prismatic spring. The quality is just as good as I mentioned with the fisheye lens as well. If you picked up one lens for this case, this would be the one I would recommend.


Fisheye, macro, wide-angle, they all have their uses depending on their situation. If you are someone who loves an extreme fisheye look like my cat above, then the fisheye may work for you. They also have another style of fisheye on their website that doesn’t seem so extreme as well. I’d have loved to get a look at that one, but the standard fisheye was fun to use nonetheless.


Overall, I really liked the case and wide-angle lens, and will definitely include them on my next trip. For daily use, I reverted back to my previous case, since it is just too bulky to use all the time. The case and lenses may be a little pricey if you are used to cheap cases, but the quality is definitely there. If you are looking for a daily use case, I would probably not even look at a camera case, but if you are looking specifically for a case and lenses, take a look at the Bitplay Snap! 7.

Source: The sample for this review was provided by Bitplay. Please visit their site for more information and visit Amazon to order.


Product Information

Price: $49.99 (Case) – $34.99 (Fisheye + 5X macro lenses) – $24.99 (Wide angle + 1.5X macro lenses)
Manufacturer: Bitplay
Retailer: Amazon
Pros:
  • – Good photo quality with the lenses
  • – Easy to put on and take off
  • – Comfortable to take pictures with
Cons:
  • – Adds some bulk to the phone
  • – Have to remember to keep the lenses with you

Filed in categories: Reviews

Tagged: ,

Bitplay SNAP! 7 camera case and lenses for iPhone 7 Plus review originally appeared on on May 19, 2017 at 7:30 am.

Note: If you are subscribed to this feed through FeedBurner, please switch to our native feed URL http://the-gadgeteer.com/feed/ in order to ensure continuous delivery.

Facebook unveils two new Surround 360 cameras at F8


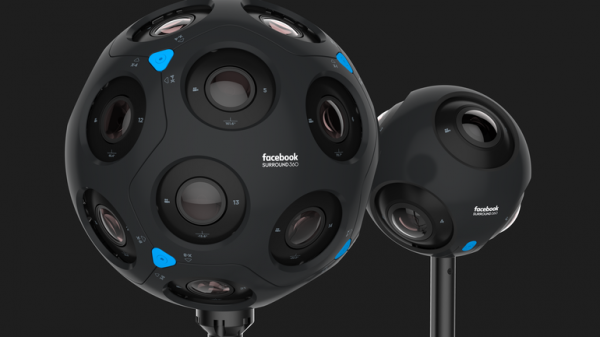
During the second day of Facebook’s annual F8 developer conference, where Facebook usually makes its biggest announcements of the year, CTO Mike Schroepfer unveiled two new Surround 360 cameras with some amazing capabilities.

Since purchasing Oculus in July of 2014, Facebook has invested majorly in Virtual Reality. Aside from creating a channel built right into your Facebook feed for 360° videos, Facebook has also done a lot of research and development into creating high-end 360° cameras.

The first iteration of the Surround 360, now dubbed the Surround 360 Open Edition, was a 17 camera behemoth that was open-sourced on GitHub. You couldn’t buy one, but you could download the plans to build one with off the shelf components. These two new cameras, currently called the x24 and the x6 for the number of lenses on each, will be licensed by Facebook to manufacturing partners with the hopes of getting them to market later in 2017.

The most impressive feature of these cameras, aside from their futuristic spherical design, is the ability to shoot 360° video with six degrees of freedom, also known as 6DoF. Shooting in 6DoF allows the creator to provide a more immersive experience for the viewer who will now be able move along six different axes during playback. The range of motion will be limited though and the video will need to be viewed on a powerful VR device such as the Oculus Rift or HTC Vive which can provide positional tracking.

No pricing or branding was mentioned during the presentation, but expect the x24 to rival or surpass the cost of the comparable $40,000 Nokia Ozo. Hopefully, there will be more updates on these cameras as deals are struck with manufacturers.


Filed in categories: News

Tagged:

Facebook unveils two new Surround 360 cameras at F8 originally appeared on on April 20, 2017 at 7:00 am.

Note: If you are subscribed to this feed through FeedBurner, please switch to our native feed URL http://the-gadgeteer.com/feed/ in order to ensure continuous delivery.