AirSelfie2 flying camera review

REVIEW – Everyone either has or wants a drone and it’s hard to fault them because drones are both fun and useful. They are fun because you can capture awesome video from locations that you would otherwise never be able to do. And drones are useful because you can use them to see things like your roof, gutters, etc, without climbing a ladder. All this fun and usefulness can also equal an expensive and bulky gadget. Let’s check out the AirSelfie2 pocket-sized flying camera and see if it’s just a toy or a worthy pocket drone.

What is it?

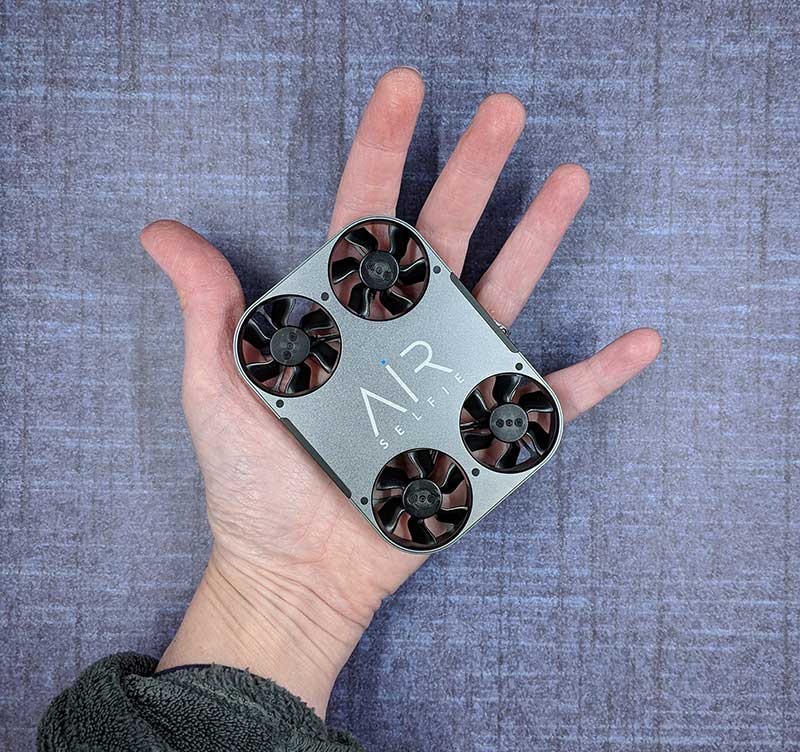
The AirSelfie2 is the 2nd generation AirSelfie flying camera which is a small playing card deck-sized drone that is designed to… you guessed it… take selfies and capture video.

What’s in the box?
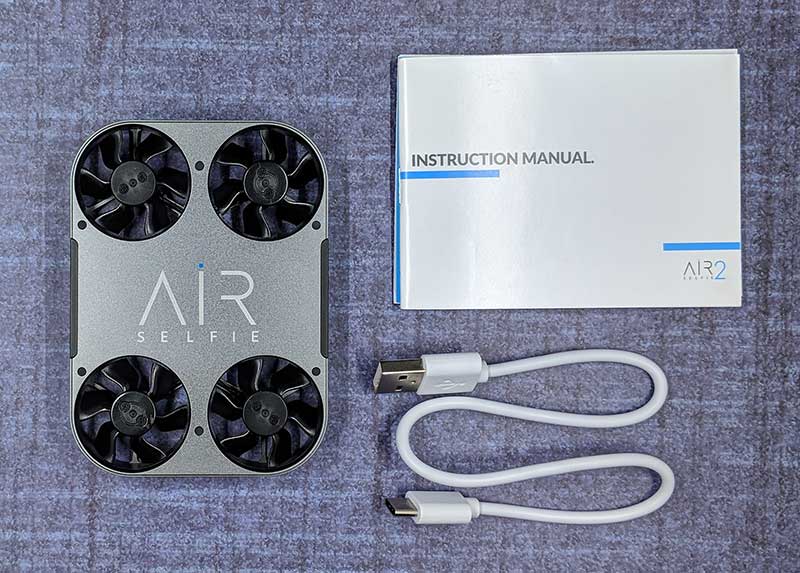
  • AirSelfie2 drone
  • USB-C charging cable
  • Storage case (this was missing with my sample)
  • Instruction manual

Hardware specs

Video:1080p 30fps – Photo:12MP wide-angle (81°)
Wide-angle: ƒ/2.0 aperture
Gyro/Barometer/Geomagnetic sensor
Brushless motor
Built-in Micro SD card 16GB
400mAh 7.4v Built-in Battery
2.4G Wi-Fi
Control distance 65 feet / 20 meters
Size:98.5 x 71.2 x 13.6mm (3.8”x2.8”x0.5”)

Design and features
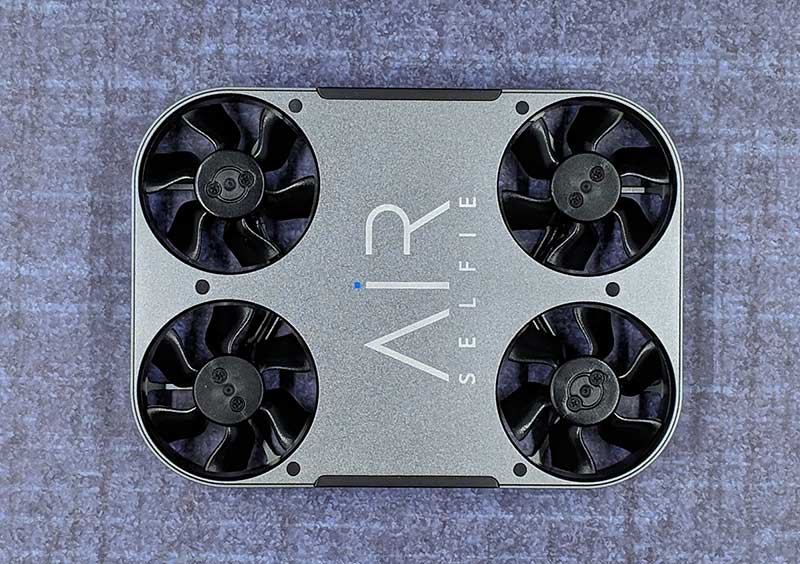
The AirSelfie2 is a sharp looking little drone with a gray metal colored aluminum housing and four propellers.
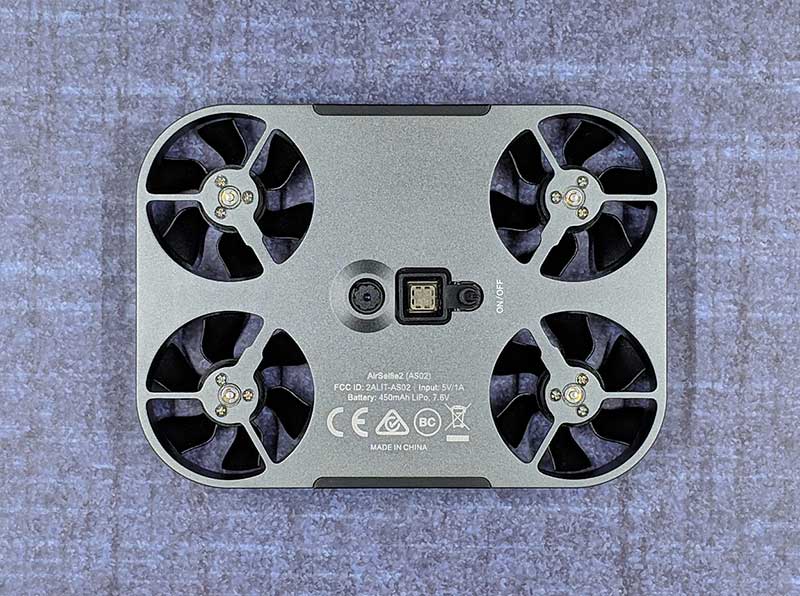
On the bottom side of the drone, you find two sensors and the power switch. The round sensor on the left is the visual sensor and the square sensor next to it is the sonar sensor. The small button on the right is the power switch which you have to hold in for a few seconds to toggle power.
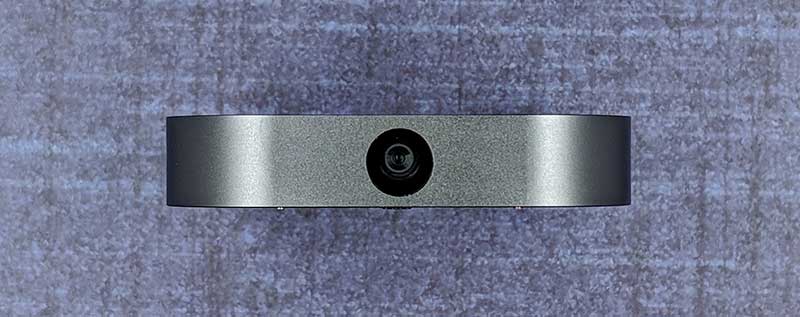
There’s a 12MP camera one end.
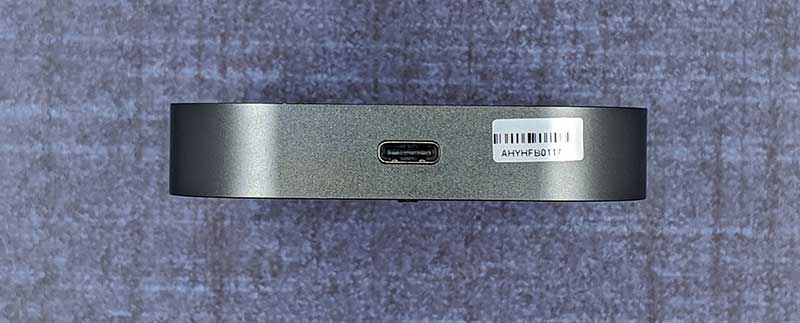
And on the opposite end, you’ll find a USB-C charging port.

The AirSelfie2 looks like a gadget that James Bond would use on a mission. Although it’s lightweight, it doesn’t look or feel like a toy. It’s well made and the design looks much more robust than some small plastic drones I’ve tested in the past.

Let’s fly!
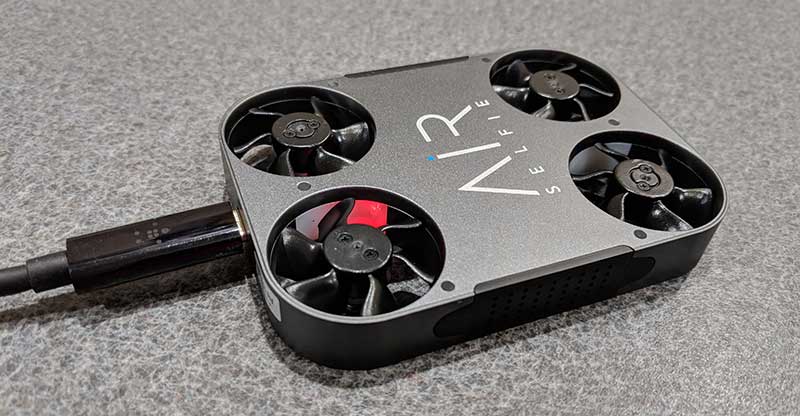
Before you can fly the AirSelfie, you have to charge it using the included (or any) USB-C charging cable. It takes about an hour to fully charge the battery from fully empty to full which provides up to 5 minutes of flight time. While charging, an LED in one of the propeller areas glows red. When charging is complete, the LED turns off. This status LED also glows blue when the AirSelfie is powered on.

You will also need to install the iOS or Android Airselfie app on your phone or tablet. I tested the AirSelfie2 with my Pixel 2 XL.


The app doesn’t use Bluetooth to control the drone. It generates its own WiFi connection. Each time you want to fly the AirSelfie, you have to power it on, launch the AirSelfie app, and then go into your WiFi settings to connect to the AirSelfie’s WiFi.


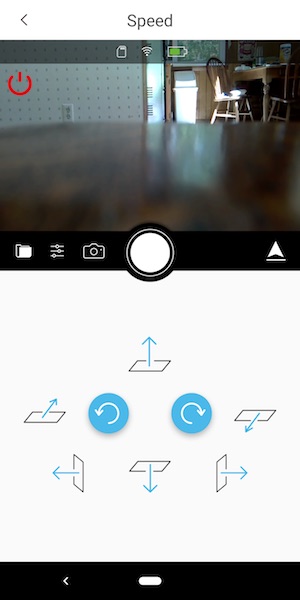
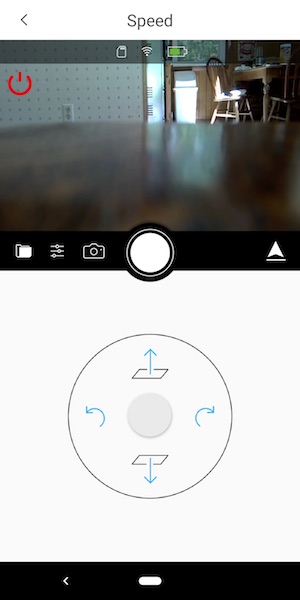
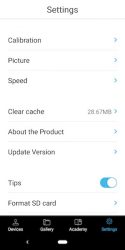
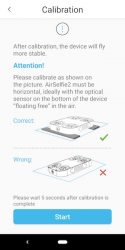
The app is pretty basic, It offers 3 different flight control styles, a way to calibrate the drone, and a few settings that you can customize. The flight control styles include an easy one-handed version shown above on the left and a slightly harder one-handed version on the right which controls the drone by physically tilting the phone in the direction that you want it to fly.
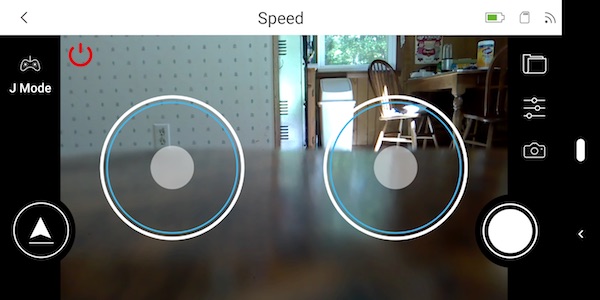
The other two control styles are two-handed joystick style touchscreen controls.
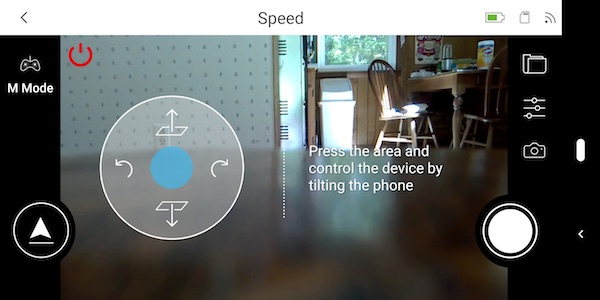
I tried all of the control styles but I kept going back to the easy (first style) because it’s easier. Go figure 🙂

I thought the AirSelfie sample that was sent to me was defective because I couldn’t get the propellers to spin up when I would press the arrow button in the app. It took me a while to figure out that you need to press and hold that button for a few seconds to start the propellers. Then you have to place the drone on your flat palm with the camera facing you and toss it gently in the air. It might sound scary, but launching it is easy. Landing it is a bit harder. You’re supposed to bring your hand up under it and grab it. Most of the time when I did this, the propellers would spin fast like the AirSelfie was a captured bug trying to get away. I finally learned that you have to grab it and raise your hand to signal it to turn off.

Pics and video


Since the AirSelfie2 is marketed as a flying camera, I had hopes that it would be a good flying camera and taking pictures and capturing video with the app was easy when it worked. But regularly, I’d see a capture failed message on the screen when I’d tap the shutter button. To fix this issue, I would have to restart the app and/or cycle power on the AirSelfie. I found this to be an annoying problem that seemed to happen right when I could have captured a decent selfie.


Most of the time my selfies were at weird angles or chopped off half of my body. Indoor selfies just look ok although I think they are a little dark and on the flip side, outdoor selfies can be completely blown out if it’s a sunny day. Click the images above to see the full-sized picture.

The AirSelfie2 can also capture video. Video without sound though… which is to be expected because the propeller noise would drown out any other noise. Check out the video below that shows how to fly it and video from the AirSelfie2 itself.


From the short video, you can tell that the AirSelfie2 is NOT a stealth drone. It makes quite a bit of noise and the video capture quality is about the same as the image capture quality – not stellar. It also drifts while hovering, so you end up cutting off half a person when you press the shutter button.

What I like

  • Tiny pocket size
  • Good build quality

What needs to be improved

  • Image and video quality
  • Drifts while hovering
  • Short flight time (3-5mins)
  • Would be nice to have a self-landing feature so you don’t have to grab it out of the air

Final thoughts

I tested the AirSelfie2 on multiple occasions and had the same results each time. The images that this little flying camera capture just arn’t that good for a $200 camera. Yes, the device is cool, but cool only goes so far. My advice is to save your money and buy a drone from a brand name that has 3 initials and a built-in gimbal 🙂

Price: $199.95
Where to buy: Amazon
Source: The sample for this review was provided by AirSelfie.

Filed in categories: Reviews

Tagged: ,

AirSelfie2 flying camera review originally appeared on The Gadgeteer on September 14, 2018 at 9:00 am.

Note: If you are subscribed to this feed through FeedBurner, please switch to our native feed URL http://the-gadgeteer.com/feed/ in order to ensure continuous delivery.

Apeman Trawo action camera review


REVIEW – Ever since the famous GoPro Action Camera was launched, many companies have tried to follow that model by creating a similar product with similar features, but for a lower cost. I recently got the opportunity to test and review just such a product. Here are the results:

What is it?

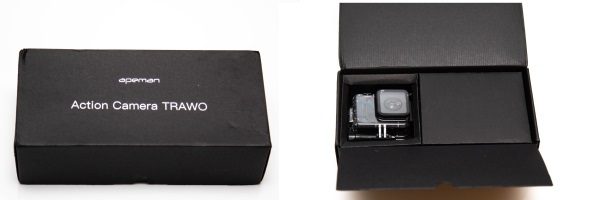
The Apeman Trawo Action Camera is a GoPro style action camera, with 4K capability and a host of similar GoPro features for capturing action and movement footage in all types of environments and scenarios.

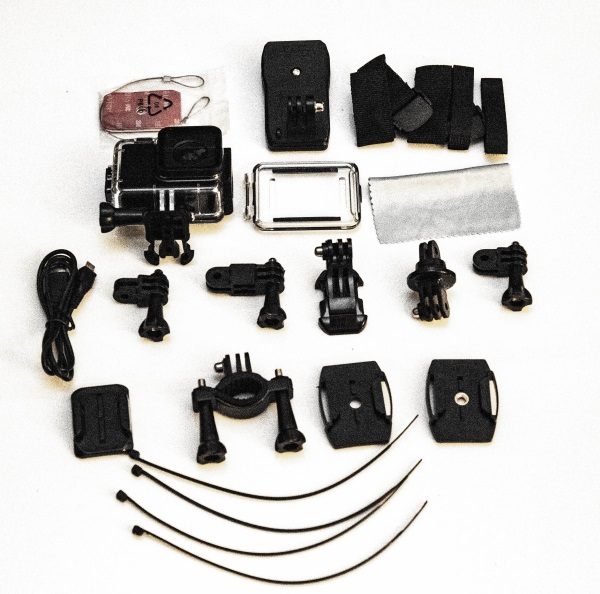
What’s in the box

1 x Apeman Trawo Action Camera
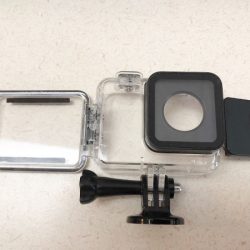
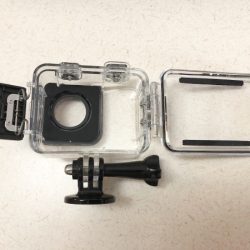
1 x Waterproof Case
1 x Additional Rear case Cover
1 x Micro USB Cable
7 x Various Case Mounts
1 x Micro Fiber Cleaning Cloth
1 x Pack of Velcro Straps (Assorted Sizes)
4 x Plastic Ties
1 x Wire Strap with Double-Sided Tape
3 x Base Mounts (@ with ¼-20mm female mounts)

(I received a pre-release version of this camera, so no instruction booklet was included in the box)

Design and features

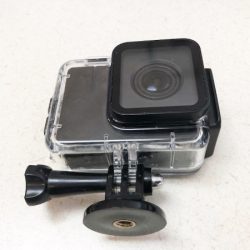
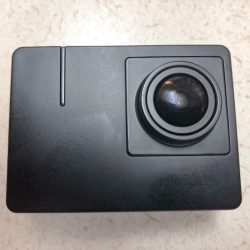
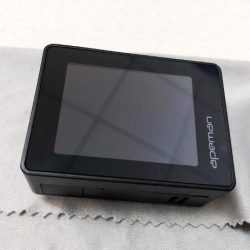
Much like other Action cameras available today, the Apeman Trawo Action Camera is a small compact action camera that without the waterproof case measures approximately 2 1/4″ x 1 3/4″ x 1″. When in the waterproof case, it measures approximately 3″ x 2 1/2″ x 1 1/2″ at the widest and longest sides. The LCD screen is approximately 1 1/2″ x 1 1/4″. It is well built and in my opinion, it does not feel cheap in any way.


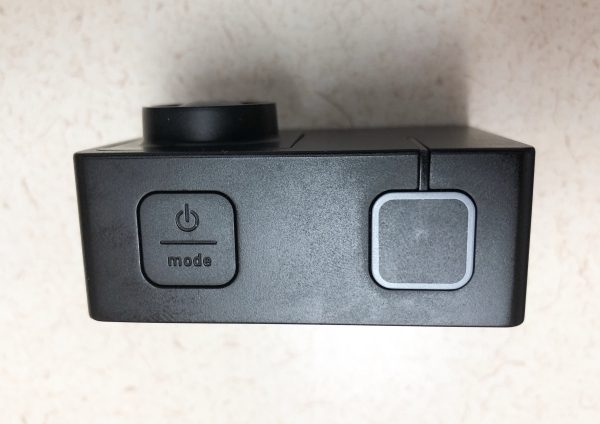
The controls for the camera are on the sides. On the top of the camera, there are 2 buttons. With the camera facing forward, the top left button has 2 main functions on the button. The front of the button powers the camera on and off and the back of the button switches the camera mode between video, camera, viewing, settings modes. The button on the top right turns the record function on and off, works as the shutter button for taking pictures and also works as the selection button when in settings mode.


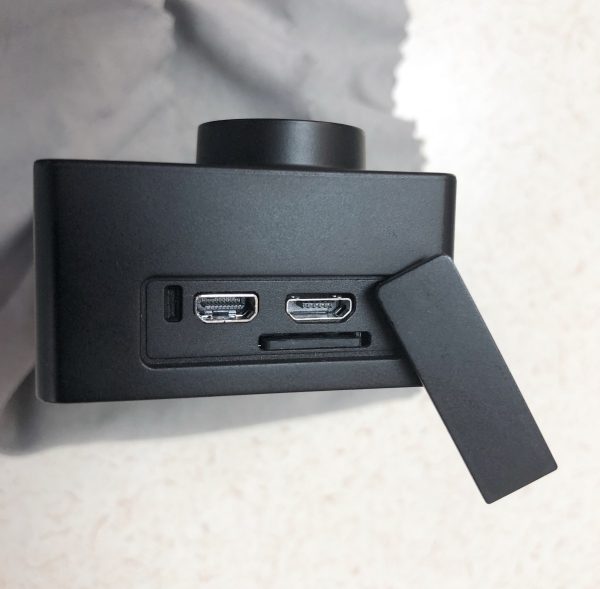
On the left side of the camera, there are 3 ports with a removable cover. These ports are the micro SD card slot, the micro USB port, and the micro HDMI port.


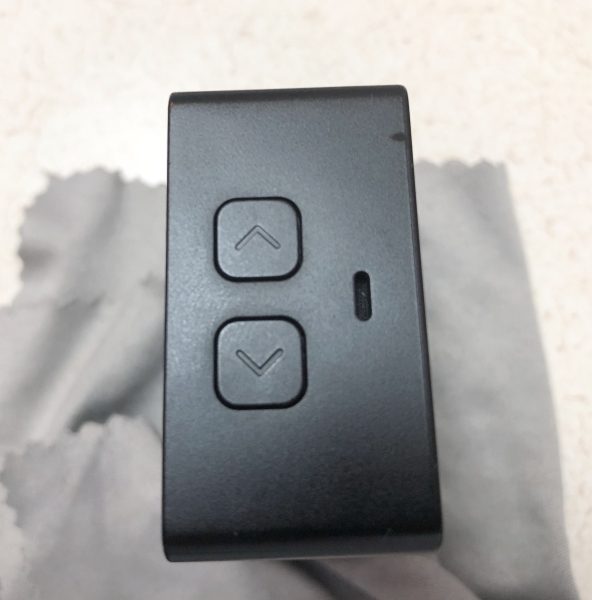
On the right side of the camera, are the up and down buttons for navigating.


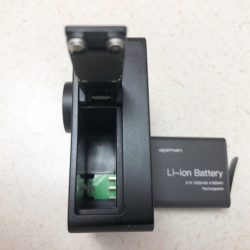
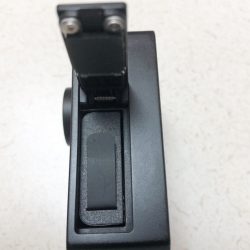
At the bottom of the camera, there is the battery port and cover.


The waterproof case that comes with the camera has water-sealed buttons that mirror the buttons on the camera, but the sides with the ports and battery are sealed.


Settings

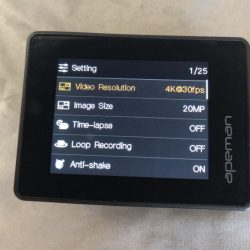
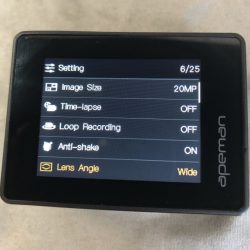
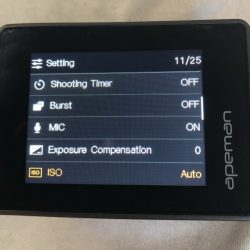
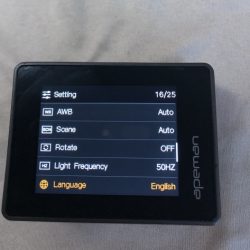
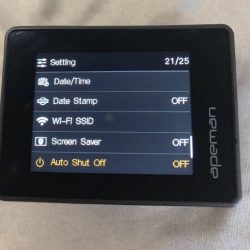
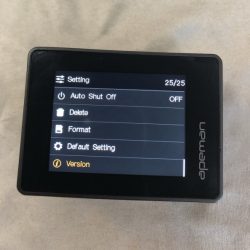
The Apeman Trawo has a large selection of settings that offer great customization. Navigating through the settings is very easy and every choice is very clear. The following is the list of settings located on the “settings” screen. I have provided details on the first 2 since many folks would want that preliminary information:
Video resolution – 720P@60fps 1280* 720 ~ 4K@30fps 3840*2160
Image size from – 3MP 2048*1536 ~ 20MP 5120*3840
Time-lapse, Loop Recording, Anti-Shake, Lens Angle, Shooting Timer, Burst, Mic, Exposure Compensation, ISO, AWB, Scene, Rotate, Light Frequency, Language, Date/Time, Date Stamp, Wi-Fi SSID, Screen Saver, Auto Shut Off, Delete, Format, Default Setting, Version.
(See Settings Screens Below)


Performance

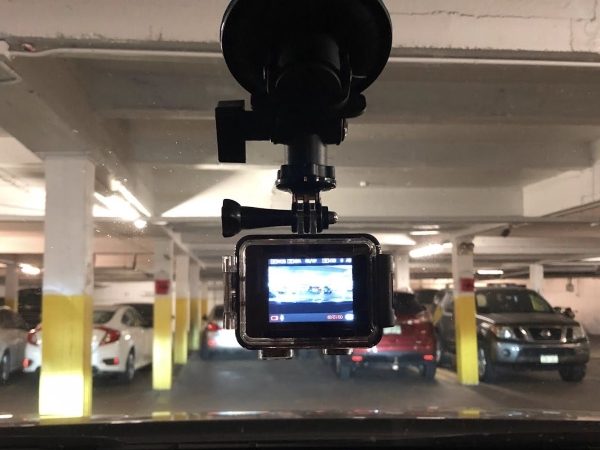
I used the action camera for daily activities to see how it would stand up to things I normally do. For the first test, I bought a windshield mount, and I tried it out as a dashcam.


The footage I got was very good and the stabilization worked well. However, the camera seemed to have some negative effects from the heat of the sun through the windshield. Let me first say that before each test, I charged the battery overnight to ensure that it was fully charged. Each time I used it, it either shut down at around an hour or so of use, or when it didn’t, the battery drained very quickly, or the sensors told the camera that it was drained. Each time the battery indicator was red, and when I removed the camera from the windshield mount and powered it off, waited a bit and powered it back on, the battery showed back in the white, but also on the low side. My conclusion is that there must be some effect from the heat.

Here is some footage from the dashcam: (Notice near the end of the video when I am driving on really rough roads, how well the Anti-shake works).

My next test was to see if the waterproof case was, in fact, waterproof and to see what kind of underwater footage I could get with the water thrashing up against the camera. For this test, I purchased a waterproof monopod with a 1/4″-20mm stud.

I then submerged the camera into the waves of the shoreline of the Atlantic Ocean. I am not a diver so I am not sure what the depth threshold is, but the case is definitely waterproof. Here is some of the footage:

The Action Camera also takes wide and clear pictures. (You can choose the lens angle in the settings)

Hisi 4K CAM

What I like

I like the small form factor of the camera that mirrors that of the GoPro. I like that is records in 4K, and that the waterproof case really is waterproof. The footage is great.

What can be improved

  • Battery response to heat
  • Better battery life
  • Addition of a detailed instruction booklet

Final thoughts

When I first received the Apeman Trawo Action Camera for review, I was expecting a less than capable GoPro knockoff that like many similar products, would not do any one thing very well. I must say that I am quite surprised by the performance and capabilities of this action camera. It performs very well, albeit with a few issues that I am sure can be overcome. It offers great footage and great resolutions, and the stabilization actually works. When comparing the price to other action cameras that offer the same quality and features, in my opinion, this is a great choice.

Price: $139
Where to buy: Amazon
Source: The sample for this review was provided by Apeman.

Filed in categories: Reviews

Tagged: ,

Apeman Trawo action camera review originally appeared on The Gadgeteer on July 18, 2018 at 9:00 am.

Note: If you are subscribed to this feed through FeedBurner, please switch to our native feed URL http://the-gadgeteer.com/feed/ in order to ensure continuous delivery.

Xiaomi 360 3.5K Sphere camera review

What features do a stand-alone camera need to make it compelling enough that you would want to buy one when the cameras in our phones are already so good? How about the ability to capture 360-degree images and videos? Let’s take a look at the Xiaomi 360 3.5K Sphere camera to see if it should earn a spot in your gear bag.

What is it?

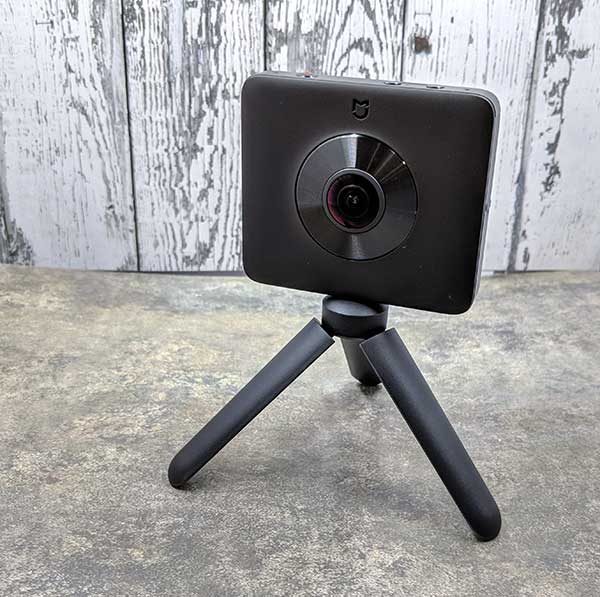
The Xiaomi (pronounced as: show me) 360 3.5K Sphere camera is a small stand-alone dual-lens camera that can capture 3.5K 360 degree images and video.

What’s in the box?

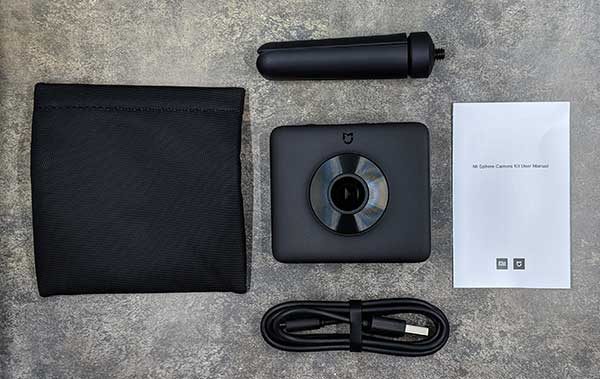
Xiaomi 360 3.5K Sphere camera
Pouch
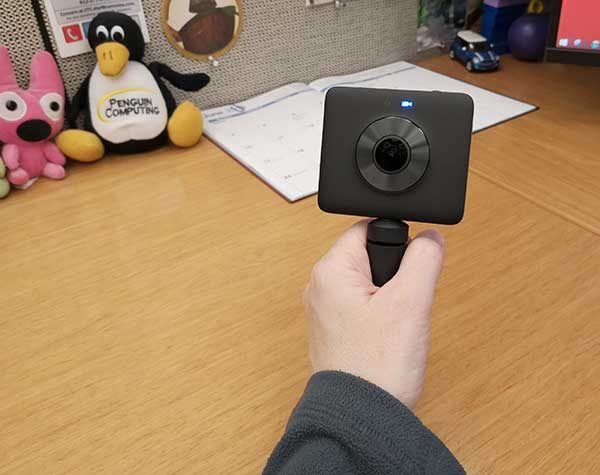
Tripod/selfie stick
micro USB charging cable
User manual

Hardware specs

23.88 MP
Dual 1/2.3″ Sony image sensors that support up to 3456×1728/30fps or 2304×1152/60fps
6-axis electronic image stabilization
microSD card slot – requires U3 cards
Built-in microphone
1600mAh lion battery for up to 200 photos or up to 90 minutes video recording
Operating temperature is 14℉ to 113℉ (-10 degree Celsius to 45 degree Celsius)
IP67 water/dust rating
WiFi connection to mobile device
1/4″ threaded socket

Design and features

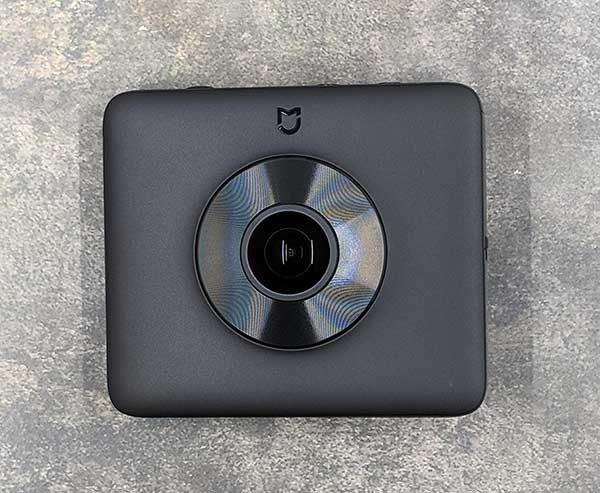
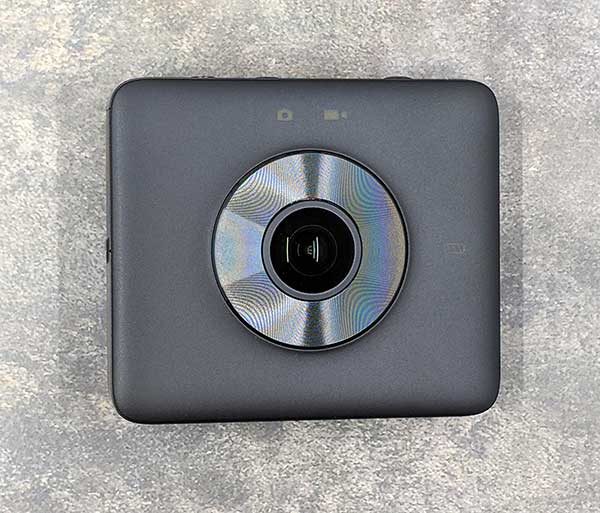
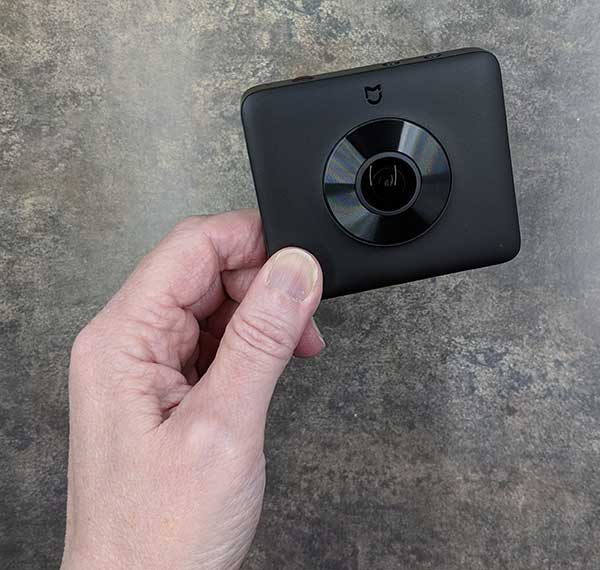
The Xiaomi Sphere Camera has a unique form factor compared to other standalone action cameras. It’s about 3.0 x 0.5 x 2.7 inches. Both sides of the camera have a bulging 190-degree wide-angle fisheye lens that helps to eliminate blind spots that other 360-degree cameras can suffer from.

One side of the camera surrounding the lens is made of a matte black plastic with a logo at the top and nothing else.

The other side of the camera is also matte black plastic and has the other lens and two status icons that light up in blue to show the current camera mode, which is either image capture mode, or video capture mode. Either icon will light up in blue when that mode is active. The camera will remember the last setting and will power up in the last mode that you used.

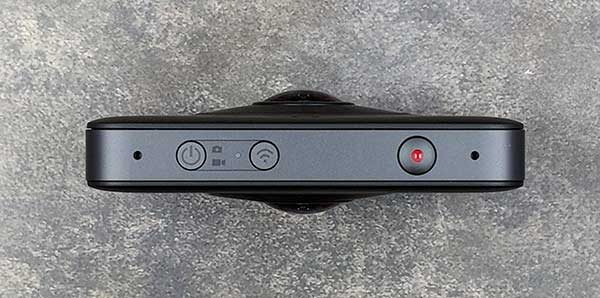
The frame of the Xiaomi Sphere Camera is made of aluminum and the top edge of the camera has a microphone, a power button which doubles as the mode selector, a WiFi button, a capture button, and another microphone.

The buttons have some tactile feedback when you press them, but they aren’t very “clicky”. It’s also pretty easy to accidentally toggle power on the camera without realizing it and/or switch modes since the power button is used for both actions. One good thing is that as long as you’re not in a noisy environment, you’ll know when the camera powers on, powers off, and the mode is changed because the camera plays a 4 note tone when powering on and off and a 1 note tone when changing modes. Note that it is possible to adjust the volume of these audible notifications and even turn them off.

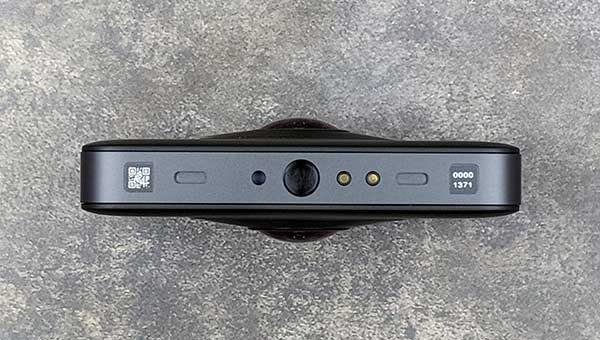
On the bottom edge of the camera is a standard sized threaded tripod socket and some electrical contacts for an optional charger or another accessory which does not ship with the camera.

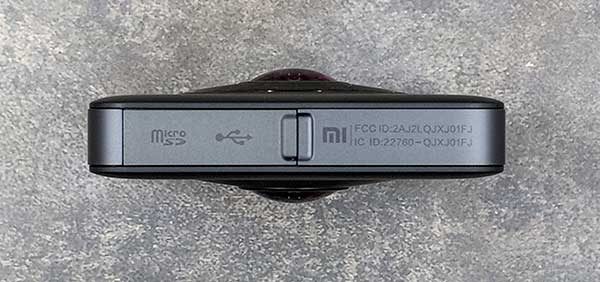
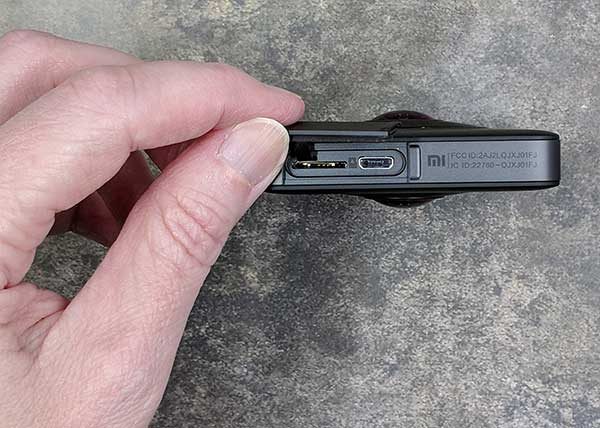
One side of the camera has a cover that protects the charging connector and built-in memory card slot.

The Xiaomi Sphere Camera charges with a micro USB cable and it uses microSD cards to store the captured images and video. Note that the camera does NOT come with a microSD card. It’s up to you to provide your own memory card.


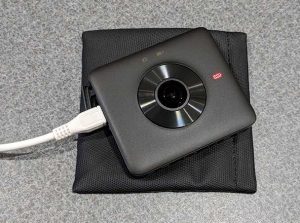
When the camera is charging, a battery status LED will light up in red. When charging is complete, the LED will turn blue.

The Xiaomi Sphere Camera has a nice build and a quality look and feel.

Capturing images manually and with the mobile app

After charging the Xiaomi Sphere Camera and inserting a microSD card, you can immediately start using the camera just by pressing the power button and then using the capture button to capture an image or start recording a video. Of course, the camera doesn’t have a built-in display, so you can’t preview your shots or watch any of the images or video that you’ve captured until you connect the camera to a computer or remove the microSD card and use a card reader to view the files.

If you want to be able to preview your shots, view captured images and video, and adjust the camera’s settings, you will need to use the Mi Sphere Camera app (compatible with iOS and Android) to connect the camera to your smartphone.


The app’s interface is pretty self-explanatory. There’s a red capture button, a mode button and different types of capture modes like time-lapse and slow motion.


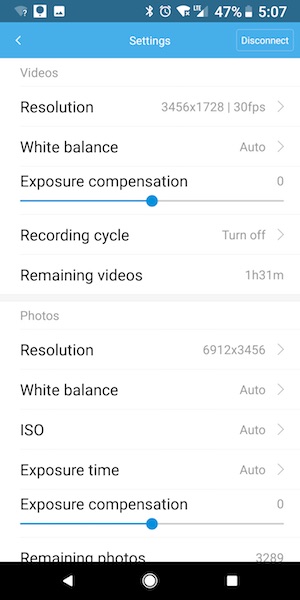
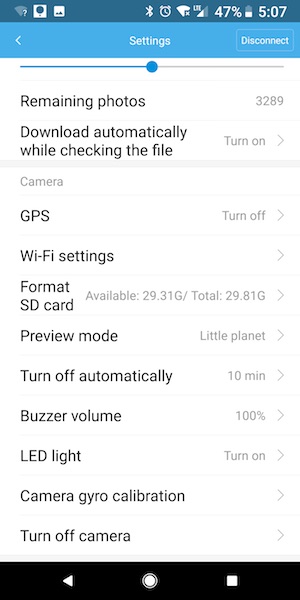
Here are all the camera settings that you can adjust using the Mi Sphere Camera app.


The app does make it easier to set up your shots, but I didn’t use it that often as a way to capture video and images while I was testing the camera. I mainly just used the buttons on the camera itself along with the default settings.

Let’s check out some sample images and video

Unfortunately, WordPress does not natively support embedding 360-degree photos and videos directly into articles. You can install a plugin to display them, but I don’t want to install a plugin just for one review, so I shared some of the images and videos to my Facebook account. They are public, so you can click and enjoy without needing your own Facebook account to view them.

360 of the Indianapolis airport.

Posted by Julie Strietelmeier on Tuesday, June 19, 2018


360-degree pic

Posted by Julie Strietelmeier on Monday, June 18, 2018


360 video in Kings Canyon National Park in California.

Posted by Julie Strietelmeier on Tuesday, June 19, 2018


360 on beach in Carmel CA

Posted by Julie Strietelmeier on Tuesday, June 19, 2018

In the app, you can view the captured images in different styles like pano, flat, crystal ball, and tiny planet style pics (shown below). But as far as I can tell, you can’t share the images in these specific types of view modes though.


There’s a button on the share screen that is supposed to let you choose the view mode, but it is greyed out and nothing happens when you press it, so all of my images are shared as flat 360-degree images that you can pan around in with your mouse like the ones you see above.

What I like

  • Simple to use with basic controls
  • 360-degree image and video capture is unique and fun (for a while)

What needs to be improved

  • No live streaming
  • 75-minute video capture limit
  • No built-in  display to preview shots, requires a WiFi connection to a mobile device

Final thoughts

360-degree images and video are obviously cool and are fun to capture and view. But are images and video like this worth paying $286.99 to capture them? That’s the main question, isn’t it? Other than taking it with you when you go on an epic vacation, I can’t imagine using a camera like this one on a day to day basis. Maybe that’s only because my day to day life isn’t epic enough to justify a camera like this one. So I’m not going to judge if you want a Xiaomi Sphere Camera 360 because it is pretty cool and maybe your life is morning 360-degree worthy than mine is.

Price: $286.99
Where to buy: Amazon
Source: The sample for this review was provided by Xiaomi.

Filed in categories: Reviews

Tagged:

Xiaomi 360 3.5K Sphere camera review originally appeared on The Gadgeteer on June 19, 2018 at 5:05 pm.

Note: If you are subscribed to this feed through FeedBurner, please switch to our native feed URL http://the-gadgeteer.com/feed/ in order to ensure continuous delivery.
FridgeCam lets you see inside your fridge even when you’re at the grocery store

Do you ever find yourself at the grocery store wondering if you should buy a new bottle of salad dressing, or a head of lettuce only to get home and find that you bought a second of head of lettuce when you didn’t need one. Now you’ll end up wasting the food. Is there a solution to this problem? The Smarter FridgeCam claims to be the solution you need to save money and waste.

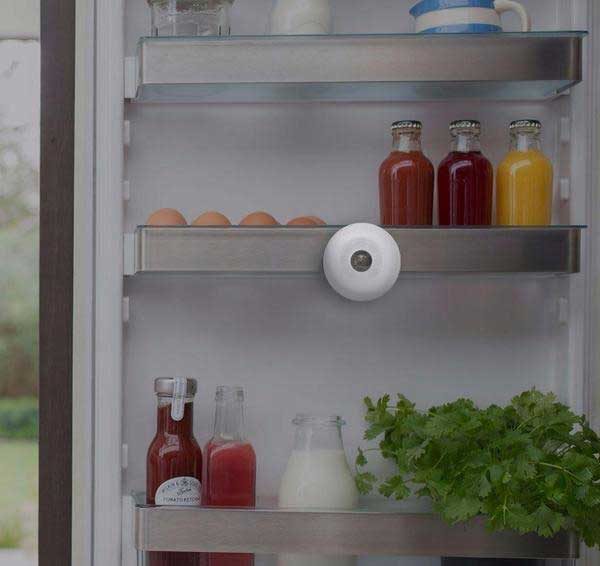
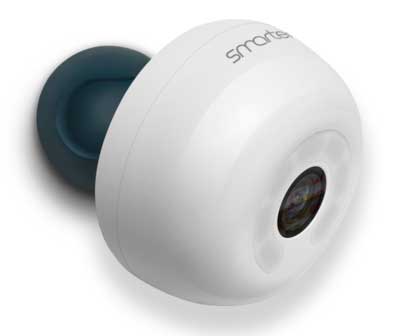
The FridgeCam is a wireless camera that you can place INSIDE your refrigerator and it will snap a picture each time the door is closed to keep a record of the current contents. You can then access that picture or a live view of the camera from where ever you are – even at the grocery store.

There’s also a companion app that helps you keep track of expiration dates for foods and aids you in creating your shopping list.

The concept for this camera sounds interesting, but I’m not convinced how well it would work based on how much of a mess my fridge usually is. It tends to be crammed full of things so I’d only be able to see the front most items.

With a price tag of £149.99 which is about $202 US, the FridgeCam is pretty spendy. What do you think? Could a camera like this be useful? If you think so, you can order one from store.smarter.am

The post FridgeCam lets you see inside your fridge even when you’re at the grocery store appeared first on The Gadgeteer.

Filed in categories: News

Tagged: ,

FridgeCam lets you see inside your fridge even when you’re at the grocery store originally appeared on The Gadgeteer on May 14, 2018 at 12:00 pm.

Note: If you are subscribed to this feed through FeedBurner, please switch to our native feed URL http://the-gadgeteer.com/feed/ in order to ensure continuous delivery.
The Blackmagic Design Pocket Cinema Camera 4K is the next generation


For many years, Blackmagic Design has been a major player in the film industry, supplying all types of great equipment for videographers and filmmakers, including equipment for the beginner all the way to high-end equipment for professional studios. Blackmagic Design cameras are well-liked and offer many industry leading features.

One of their newest releases is the Blackmagic Design Pocket Cinema Camera 4K. This camera is being touted as “the next generation handheld 4K digital film camera”.

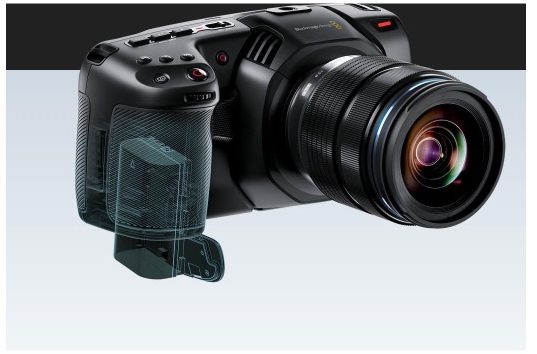
The camera has a four-thirds size sensor, 13 stops of dynamic range, and dual native ISO up to 25.600. Additional features include a very bright 5-inch touchscreen, both SD and CFast card slots, 4 built-in microphones, a mini XLR input with phantom power, a 3.5mm stereo audio jack, a USB-C Expansion Port, a full-sized HDMI port and Bluetooth. CFast 2.0 cards can record in RAW format, and ProRes at up to 120 frames per second. If there is a need for a long high-resolution recording, you can also record directly to an external SSD or flash disk via the built-in USB-C Expansion Port. The built-in audio recorders have high-quality preamps and eliminate the need to use a separate audio recorder.

The new handheld design makes the camera easier to grip, and its features make it a capable digital cinema camera for many types of events ranging from fashion shows and weddings to independent films and documentaries.

Despite its powerful features, the compact size of this camera makes it very portable. It uses standard removable LP-E6 type batteries, and if installed, they can be charged while using the AC adapter to power the camera. The batteries can also be charged using portable battery packs plugged into the USB-C Expansion Port since that port also accepts power.

If you would like to order the Blackmagic Design Pocket Cinema Camera 4K, you can head over to Adorama and pre-order one starting at $1295 for the body only.
The post The Blackmagic Design Pocket Cinema Camera 4K is the next generation appeared first on The Gadgeteer.
Filed in categories: News

Tagged:

The Blackmagic Design Pocket Cinema Camera 4K is the next generation originally appeared on The Gadgeteer on April 13, 2018 at 12:00 pm.

Note: If you are subscribed to this feed through FeedBurner, please switch to our native feed URL http://the-gadgeteer.com/feed/ in order to ensure continuous delivery.