Wyze Sense review

REVIEW – Let me get this out of the way right from the start… I love Wyze products. I reviewed the Wyze Cam and have gone on to buy additional cameras and help my neighbor purchase and set up more cameras for his home. I think they are an awesome bang for your buck when it comes to small home security cameras and now Wyze has added two new sensors that work with the Wyze Cam to create an affordable basic home security system. Let’s check it out.

What is it?

Wyze Sense are small contact and motion sensors that work with Wyze cameras to create a basic home security system.
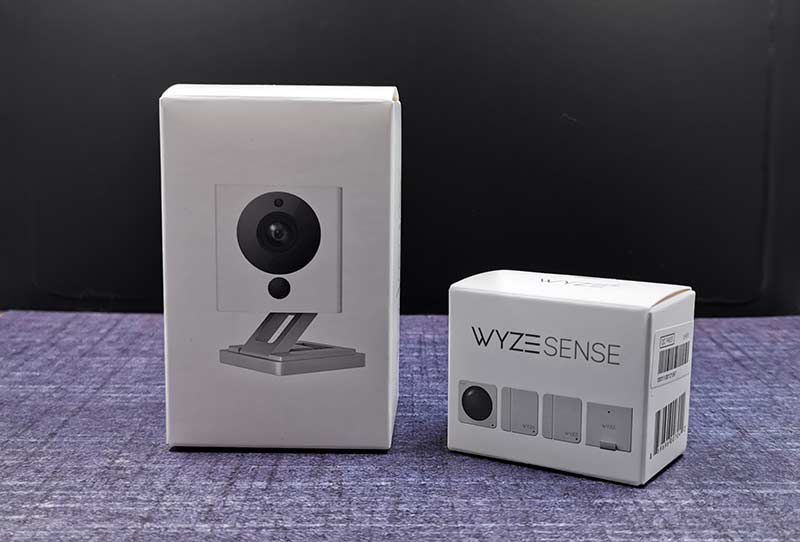
What’s in the box?

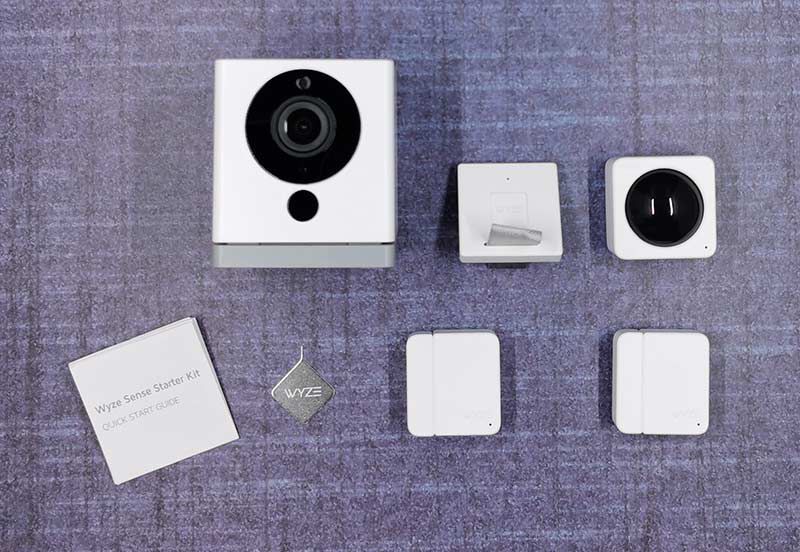
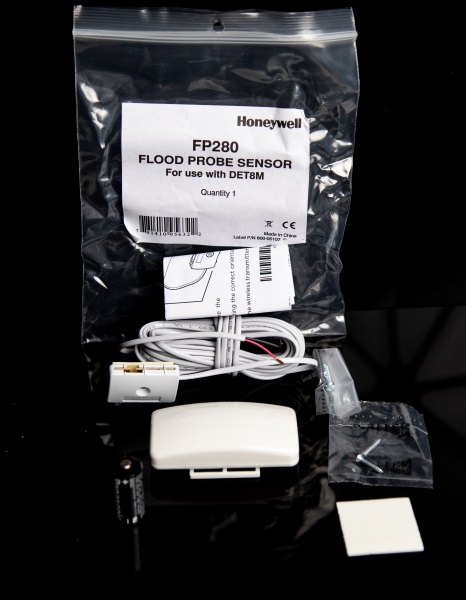
Starter kit comes with:

  • 2 Contact sensors
  • 1 Motion sensor
  • 1 Sensor bridge
  • Reset tool
  • Instructions

A Wyze Camera is NOT included in the starter kit, but one camera is required for the setup.

Design and features

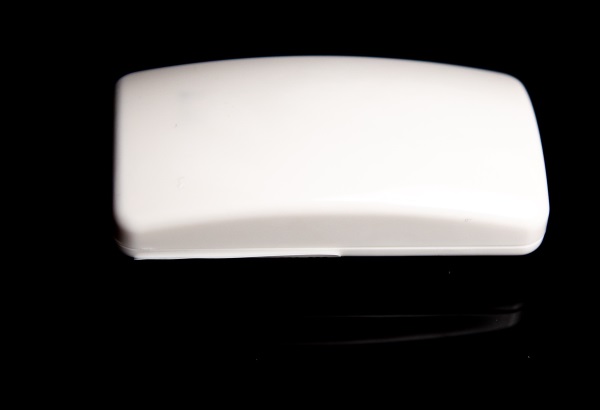
The starter kit comes with 2 sensors.

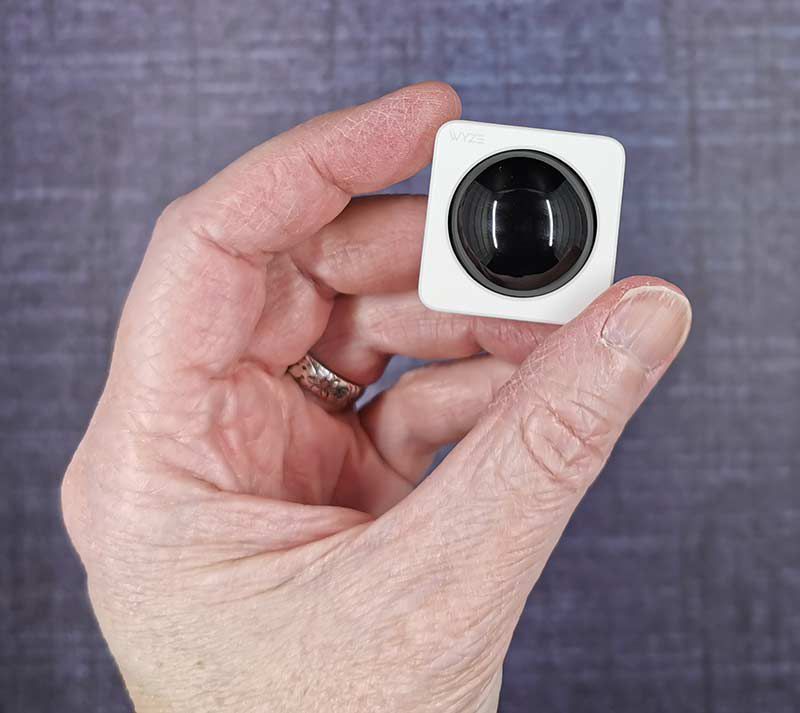
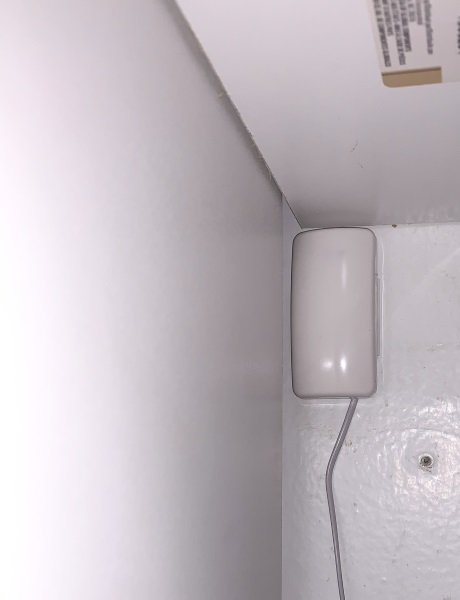
There’s the small motion sensor shown above which can detect motion 120° up to 26′ away. Just place the sensor about 6 ft up on a shelf and it is good to go.

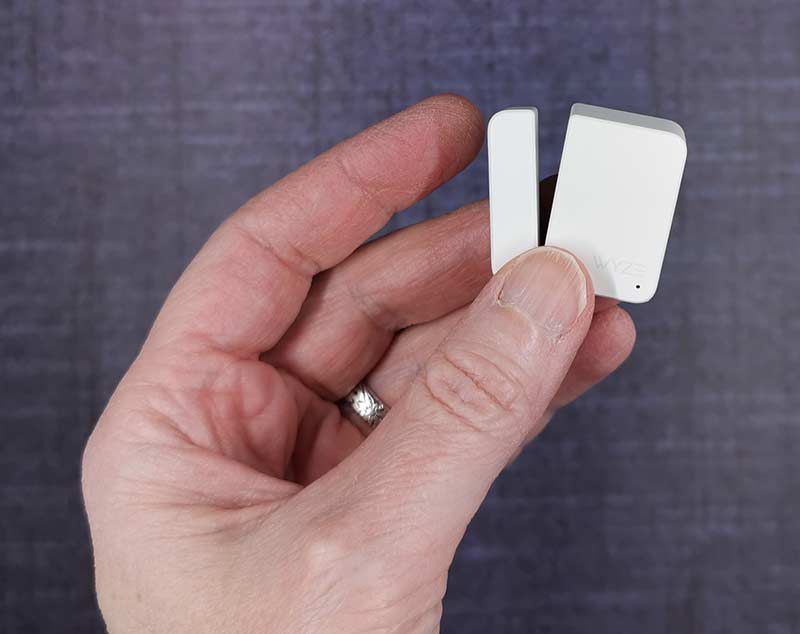
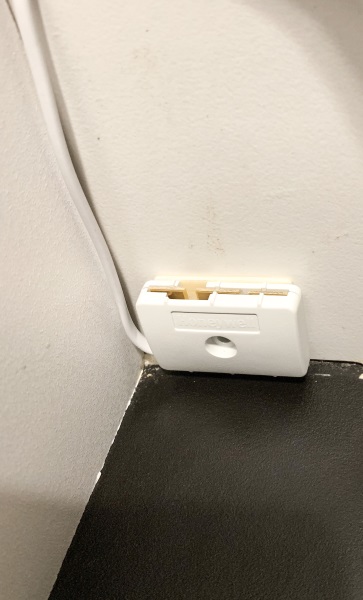
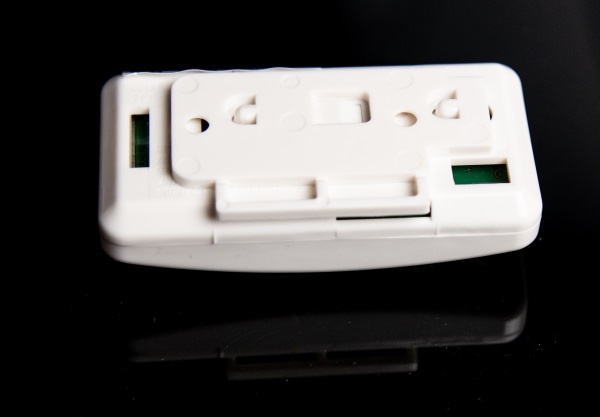
The contact sensor has two pieces that use a magnet to know when the contact between the pieces has been opened or closed.

Installation

Wyze knows how to design a system that anyone can install. The Wyze Sense installation isn’t any different. It takes only a couple of minutes to get up and running and most of that time is just figuring out where to place the sensors.

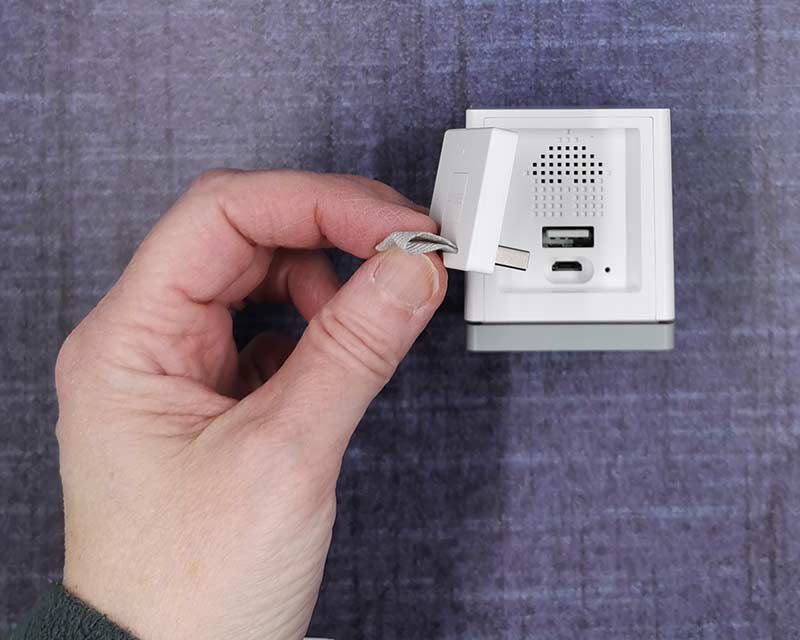
You will need a Wyze camera though. The camera is needed for the Sensor Bridge which plugs into the USB port on the back of the camera.

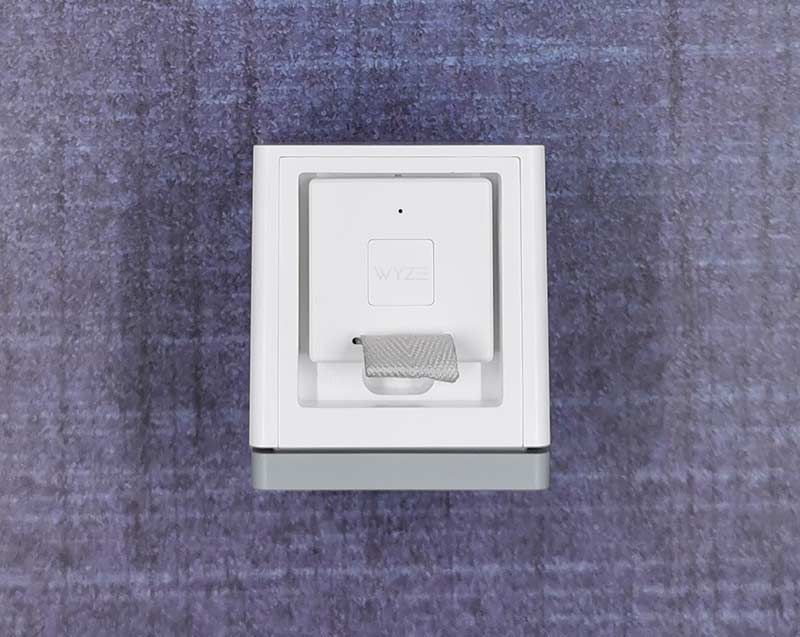
The Bridge is the module that the sensors will talk to.

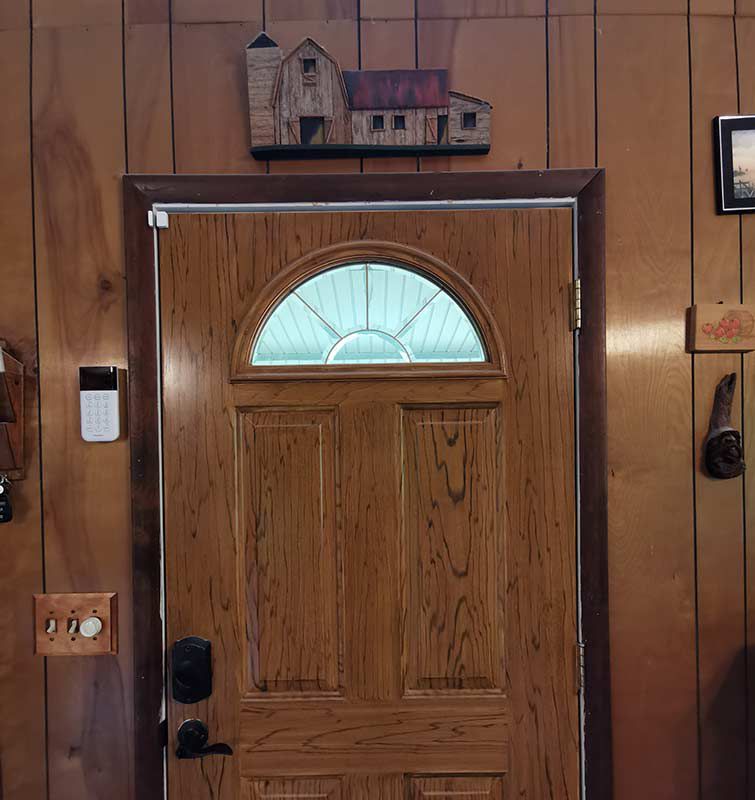
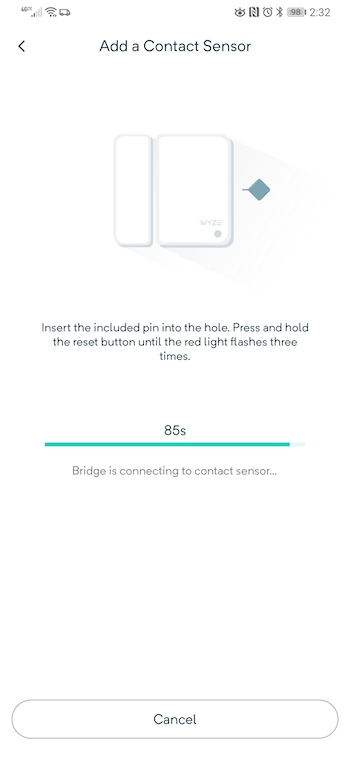
To install the contact sensor, you remove the adhesive on each piece and then stick them on something that will open, like a door, a window, a cabinet, etc.

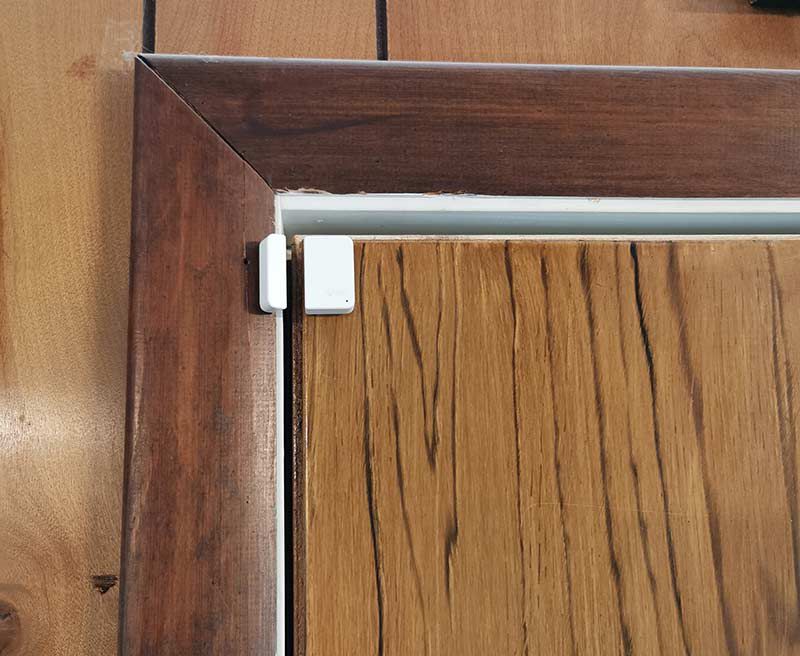
I placed mine on the front door so that when the door opens, the contact between the two pieces is open and when the door shuts, the contacts close.

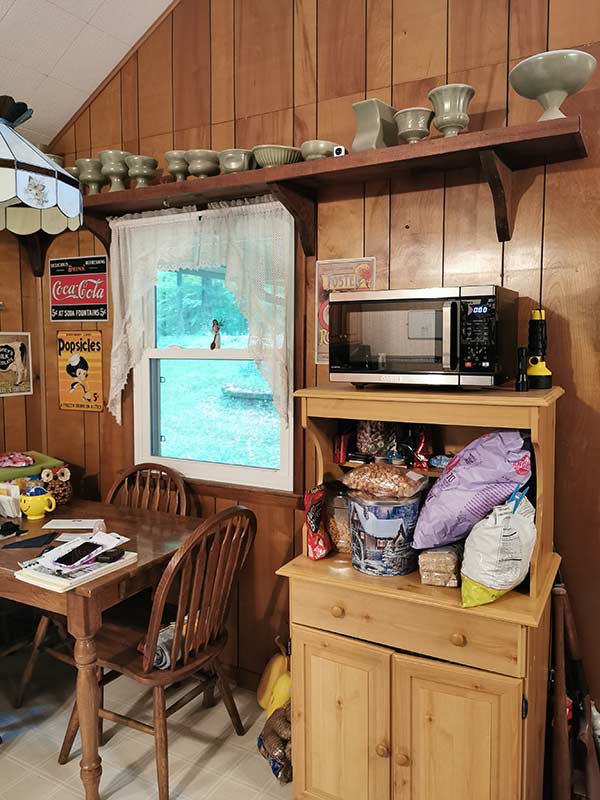
For the motion sensor, I placed it on a high shelf. Can you find it in the image above?

The only criticism about the sensors that I can think of is that they are bright and stick out since they are made of white plastic. It would be great if Wyze offered them in black too.


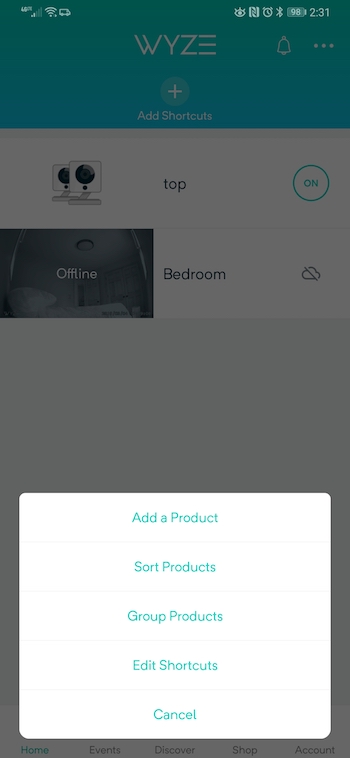
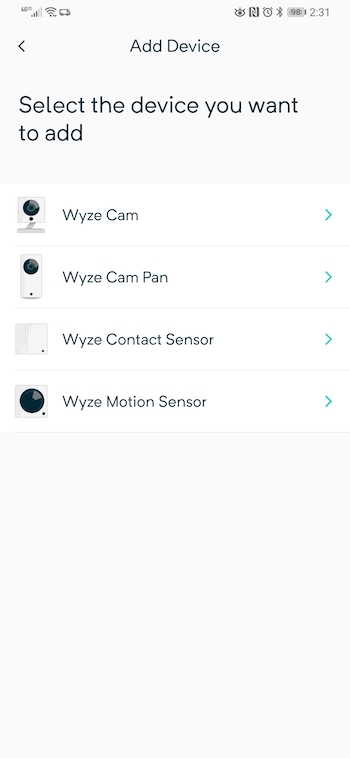
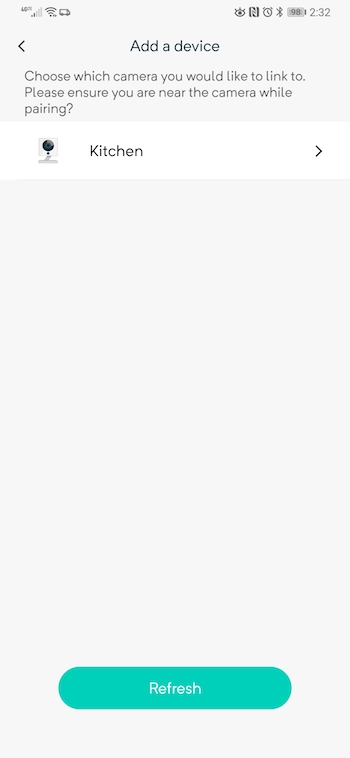
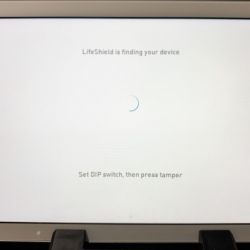
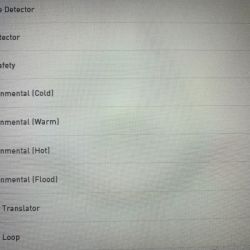
The next step in setting up the sensors requires you to launch the Wyze app on your mobile device and add the new products. The app leads you step by step through the process which only takes a couple of minutes. As you can see, you have to link the sensors with one of the Wyze cameras so that any triggered events will capture a video clip.


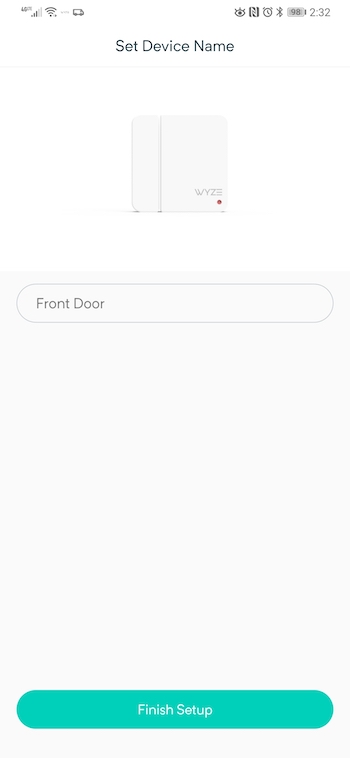
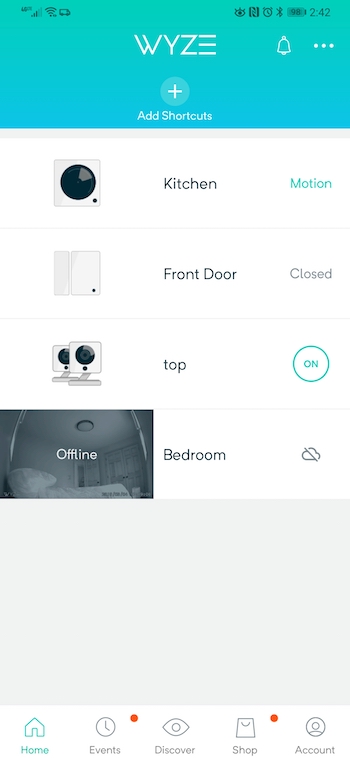
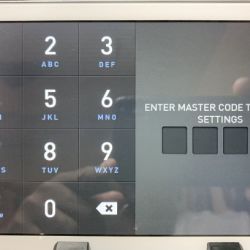
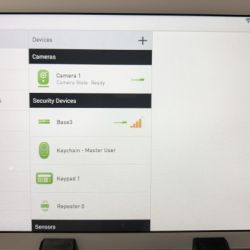
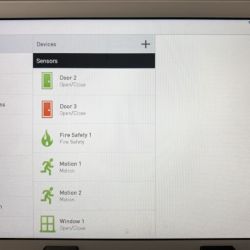
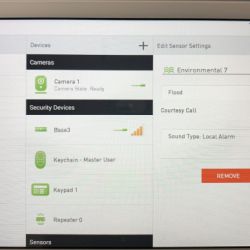
When the setup is complete, the sensors will show up in the Wyze app dashboard where you can quickly see their status.


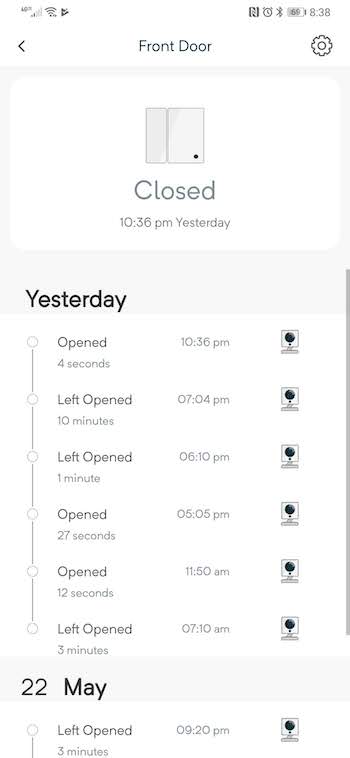
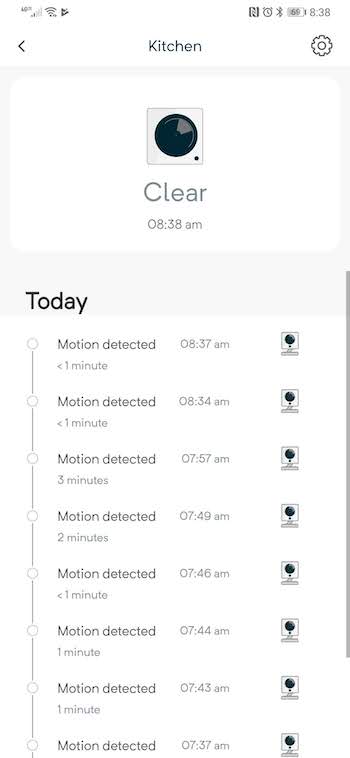
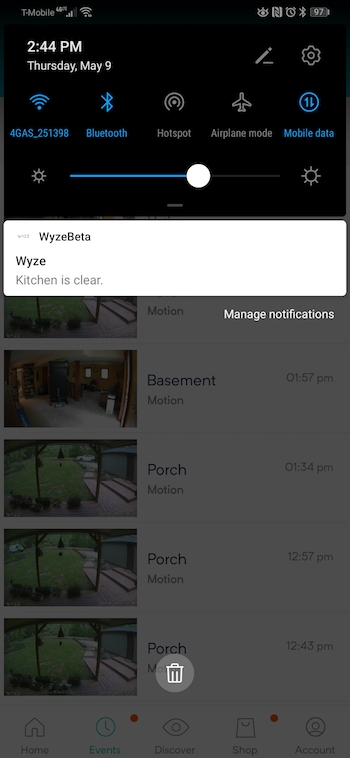
Going into each sensor from the dashboard will allow you to see more info including times when the sensors detected an event. The sensors also send alerts just like camera motion events do.

I’ve been testing these sensors for the past few weeks and have had zero false positives on the contact sensor and the motion sensor has been rock solid too. Just know that it will detect your pets which may or may not be an issue for you.

What I like

  • Inexpensive
  • Simple to install
  • Reliable

What needs to be improved

  • More sensors please! 🙂

Final thoughts

Wyze has done it again. Not only do they offer the absolute most affordable and best experience in security cameras, now they are branching into sensors to create a basic home security system. If I sound gushy that’s just because I have loved using Wyze products in the past and am truly excited about what they will come up with next. FYI, I already know what’s next. It’s a smart light bulb and of course, I’ll have one to review soon.

Price: $19.99
Where to buy: Wyze
Source: The sample for this review was provided by Wyze.

Filed in categories: Reviews

Tagged: , ,

Wyze Sense review originally appeared on The Gadgeteer on May 24, 2019 at 9:00 am.

Note: If you are subscribed to this feed through FeedBurner, please switch to our native feed URL http://the-gadgeteer.com/feed/ in order to ensure continuous delivery.

LifeShield Wireless Flood Sensor review


REVIEW – Last year, I reviewed the LifeShield Security System, that included full automation via a touchscreen tablet, base station, wireless keypad, wireless camera, and a number of security accessories and sensors. The system has performed flawlessly, and now I have the opportunity to reviews LifeShield’s Wireless Flood Sensor. I am quite confident that this add-on will be another good experience, but I won’t count my chickens before they hatch. Let’s see if I am right.

What is it?

The LifeShield Wireless Flood Sensor connects to the LifeShield Security System and will sound the alarm if water reaches or rises above the level at which it is placed. Since it is wireless, the transmitter is powered by a battery.

What’s in the box


1 x Wireless Transmitter
1 x Flood Sensor
1 x Battery
2 x Set of Mounting Screws
1 x Adhesive Pad
1 x Instruction Leaflet

Design and features

The flood sensor consists of a transmitter and a sensor and the 2 are connected via a wire. The transmitter is battery powered and should be mounted somewhere above the sensor and above any anticipated and possible water level. The transmitter can be used with any one of 4 different types of sensors.

Shown below is the sensor and with the wire that is permanently connected.

Installation

The first illustration below is the one-page instruction sheet that is provided with the sensor. It includes directions on how to open the transmitter, how to set the DIP switches to select the type of sensor that you are connecting, and how to connect the 2 wires from the sensor.

The next picture below shows the inside of the transmitter including the battery holder, tamper switch and DIP switches.
Using the provided double-sided, I attached the sensor on the side of the wall right above the floor and within the recommended height above floor level.

This next picture slows my placement of the transmitter again using the provided double-sided tape. I placed it about 5′ above the transmitter. (By choice).

After installing the hardware, there is a simple process that you follow in the settings screen of the LifeShield control panel to add the sensor. The following are screenshots of the process.


What I like

  • Function
  • Easy connectivity with LifeShield Security system

What can be improved

  • Larger print for the provided instructions

Final thoughts

Since I am already a fan of the LifeShield security system, I was very interested when I got the opportunity to try their flood sensor. (They sent 2). Just as I expected, the installation was easy and incident free. Since my 2 young kids are fans of water, and since they have flooded my bathroom more than once before, I readily embraced this device. Just like several other sensors and devices that pair with the LifeShield system, I am happy to give them two thumbs up for this add-on accessory.

Price: $29.99
Where to buy: The LifeShield website
Sample: The samples(2) for this review were provided by LifeShield.

Filed in categories: Reviews

Tagged: ,

LifeShield Wireless Flood Sensor review originally appeared on The Gadgeteer on April 13, 2019 at 10:00 am.

Note: If you are subscribed to this feed through FeedBurner, please switch to our native feed URL http://the-gadgeteer.com/feed/ in order to ensure continuous delivery.

Stop the wet bandits with the D-Link Wi-Fi battery powered water sensor

NEWS – It isn’t just the wet bandits that can ruin your house.  Plain old water leaks from overflowing sump crocks, leaky washer hoses, bad sink fittings, toilets, water heater – basically anywhere water flows – can trash your home very quickly. According to Home Advisor, the average water repair bill is over $2,000. D-Link aims to help alert you when that happens (or when the wet bandits show up) with the new DCH-S161 Wi-Fi battery powered water sensor.

The sensor is powered by two AA batteries that should provide power for up to a year.  It’s 5.9 foot sensor cable has a water sensing tip that is placed on the ground where water may gather.  The cable can be extended with an available adapter. The water sensor connects to your Wi-Fi network directly without the need for a separate hub.  The mydlink app, available for IOS and Android, gives you a glimpse of the current status and provides remote alerts. Its built-in 90 dB siren should get everyone’s attention. D-Link support IFTTT integration for further alert methods.

The D-Link battery-powered Wi-Fi water sensor is available on Amazon for $49.99. The wet bandits are out there.  Be ready!

Filed in categories: News

Tagged: ,

Stop the wet bandits with the D-Link Wi-Fi battery powered water sensor originally appeared on The Gadgeteer on March 5, 2019 at 8:00 am.

Note: If you are subscribed to this feed through FeedBurner, please switch to our native feed URL http://the-gadgeteer.com/feed/ in order to ensure continuous delivery.

Airthings Wave Plus indoor air quality monitor with radon detection review

REVIEW – I’m sure that you keep your house clean by sweeping the floors, dusting the furniture, and picking up clutter. But did you know that there could be serious threats to your health silently lurking in the air you breath while you’re relaxing in what you think is a safe environment? I’m talking about dangerous Radon gas, and TVOCs (total volatile organic compounds). The Airthings Wave Plus detector will let you know if there is an issue in your home so that you can keep you and your family protected. Let’s take a look.

What is it?

Airthings Wave Plus is a battery-powered sensor that detects Radon, CO2, TVOCs, humidity, temperature, and air pressure. Radon gas is the leading cause of lung cancer in non-smokers, so it’s very important to know if there are high levels of this invisible, odorless gas in your home. TVOCs are emitted gases from things like paint, cooking, cosmetics, and more. TVOCs can cause headaches, eye, and throat irritations, to serious respiratory and even liver problems. High CO2 levels can also cause headaches, brain fog, drowsiness, and more.

What’s in the box?

  • Airthings Wave Plus smart indoor air quality monitor with radon detection
  • 2 AA batteries
  • Mounting screw
  • Info sheet

Design and features

I reviewed the Airthings Wave last year and the newer Wave Plus looks very similar to that device, like a traditional smoke detector.

The bottom of the unit has a magnetic lid that has a hole in the center so you can mount it to a wall or ceiling using the screw that is included in the package.

Removing the lid will give you access to the battery compartments. The Airthings Wave Plus is powered by 2 AA batteries which are included with the unit and should last for up to 16 months before they need to be replaced.

As mentioned, you can mount the Airthings on a wall or ceiling, or you can set it on a shelf. The advantage of putting in on a shelf is that you can walk by it and just wave your hand over the unit to see a visual indication of the air quality status.

There’s a built-in LED on top that will glow green if all the levels are safe, yellow when there is a problem, and red when you should run screaming from your house. Just kidding, but not really. If you see red, the sensor is telling you that the levels for Radon or TVOCs are not safe. But how do you get more details? You can use the Airthings mobile app or web client.

Airthings mobile app


The app’s data syncs automatically when your mobile device is within range as it uses Bluetooth to communicate with the monitor. The app’s dashboard shows the current levels for radon, TVOCs, CO2, Humidity, Temperature, and Pressure. If you want more info on each reading, you can scroll for a 48 hr, week, month and yearly graph.


The provides easy to interpret data for current sensor levels, but to get more info, you can use the Airthings web client.

I do want to mention that I’ve had issues with the app losing data when adding a 2nd device and once when I hadn’t synced in over a week due to being away on vacation. Since the unit uses Bluetooth instead of WiFi to sync, this could be an ongoing problem, but I’ve not taken another extended vacation yet to find out.

Airthings web client

The web client provides a better interface for viewing the graphs for each sensor’s data. Like the mobile app, the web client has a dashboard view, but clicking on one of the sensors takes you into graph page that makes it easy to spot trends.

You can see graphs for the past 12 hours, 48 hours, week, month, and even the past year.

I’m still trying to figure out what is triggering the high TVOC readings that you can see in the graph.

Changing to an expanded view helps provide more details and hovering over any part of the graph will show the date, time and level for each sensor.

You have the data, now what?

I became a fan of Airthings when the original unit that I reviewed last spring started reporting high radon readings this past fall. Everytime I’d walk by the unit and wave my hand over it, it would show red so I kept an eye on the readings and they were high. I’m talking through the roof high readings of 11 pCi/L. I read the following info on Airthings site:

It is important to do a long-term measure in places where you normally spend a lot of hours like bedrooms or your office. Overall, if concentrations are:
0 – 49 Bq/m (0 – 1.3 pCi/L):  No action necessary.
49 – 99 Bq/m3 (1.4 – 2.6 pCi/L): Experiment with ventilation and sealing cracks to reduce levels.
100 Bq/m3 – 299 Bq/m3 (2.7 – 8 pCi/L): Keep measuring. If levels are maintained for more than 3 months, contact a professional radon mitigator.
300 Bq/m(8.1 pCi/L) and up: Keep measuring. If levels are maintained for more than 1 month, contact a professional radon mitigator.

After a month my radon levels were still too high, so I ended up having a mitigation system installed and within 6hrs the levels were down to 0.5 pCi/L and have remained that low. Whew! Crisis averted!

The high powered fan on the outside of my house isn’t the most attractive thing in the world but it sure helps relieve the anxiety of worrying that I (or Jeanne) might develop lung cancer from the radon gas. I’ve already had cancer once, and don’t want it again thank you very much. FYI, the smoke in the image above isn’t from the radon fan unit, it’s from the dryer vent and the fact that it was only 30 degrees outside when I took the pic.

What I like

  • Easy to use
  • Helps detect dangerous radon levels quickly
  • Battery powered

What needs to be improved

  • The app is buggy especially when used multiple Airthings devices
  • Needs a carbon monoxide sensor too

Final thoughts

Airthings sensors are just as important to me and my home as our smoke detectors, carbon monoxide detectors, and security system. I will admit that I mainly pay attention to the radon levels and haven’t really cared that much about the TVOC levels unless they remain in the yellow or red (haven’t seen red yet) level for any length of time. So far the TVOC levels have only spiked a couple times into the yellow levels, so I’m not too concerned (yet).

The Airthings Wave Plus indoor air quality monitor with radon detection is pricy at $269 and I do wish it included a carbon monoxide sensor, but when you consider that this monitor can help protect your health, it’s priceless. If there are known issues with radon gas in your area you should consider a sensor like the Wave Plus or the lower priced Wave.

Price: $269.00
Where to buy: Amazon
Source: The sample for this review was provided by Airthings.

Filed in categories: Reviews

Tagged: ,

Airthings Wave Plus indoor air quality monitor with radon detection review originally appeared on The Gadgeteer on February 18, 2019 at 11:05 am.

Note: If you are subscribed to this feed through FeedBurner, please switch to our native feed URL http://the-gadgeteer.com/feed/ in order to ensure continuous delivery.

Minger Govee Wireless Thermo-Hygrometer with WiFi Gateway Review

REVIEW – I have always been a weather nerd.  From my earliest memories, I remember watching the sky hoping and praying for a good thunderstorm to roll across the area.  I had even originally planned to be a meteorologist until I found out how many calculus classes were required for the degree!  That being said, the lack of a degree in meteorology never kept me from being fascinated by the weather and capturing the data associated with it. Hey, my real job is a data analyst so go figure!  When the Gadgeteer offered up the opportunity to review the Govee Wireless Thermo-Hygrometer with WiFi Gateway I jumped at the review.  Read on to see how well it worked out for me.

What is it?

The Govee Wireless Thermo-Hygrometer with WiFi Gateway is exactly what it says it is.  It comes with a wireless hub you plug into the wall and connect to your home’s WiFi.  Then you can attach multiple of their Thermo-Hygrometer units to the gateway and monitor the temperature and humidity in various places around your home.  You just need to be sure you place the sensors where a WiFi signal is available.  You can then install the Govee Home app on your IOS or Android device and see the values those sensors are returning anywhere your phone gets a cellular signal.

They mention monitoring a baby’s room or maybe a wine cellar for those who are lucky enough to have one.  Another good place to put one if there is enough room is a cigar humidor.  Basically put them anywhere you want to monitor the temperature and humidity.   I placed one on my back deck on a side rail (it did not blow off in 45 mph wind gusts the other day so I put it in a good spot) that was out of any direct sunlight but had good airflow.  The other I placed in my living room.

I have owned what I call a professional weather station and have learned a lot about where you should place temperature sensors outside.  Ideally, they should be 6 feet off the ground in a well ventilated spot not in direct sunlight.  Way back when I first got my original weather station I had the temperature sensor mounted under an eve on the side of my house.  Yes, it was in shade, but all the heat rose and was trapped under that eve so my temperature readings were a good 10 degrees or more than they should have been!

What is in the box?

The box was very plain and simple, but it may have been because I received this device for review and it was not the true public packaging.  That being said, there were only four things in the box.

  1. Two wireless temperature and humidity sensors.  They both had a pair of triple A batteries inside and I simply removed the cover and pulled a tab to make the batteries touch the contacts.
  2. One user manual
  3. One gateway hub that plugs into a standard US socket.  It only works with 2.4 GHz WiFi not 5 G.

Setup and Use

Setup for this set of sensors is pretty painless.  The first thing you do is to install the Govee Home app on your phone.  It is available for both Android and IOS.  The next series of screens will take you through the setup starting with the 4 screenshots above. When you first open the app you are presented with this screen.  I clicked on the top left blue badge titled ‘Become a Savvy User’.  It took me to the next screen explaining the benefits of becoming a Savvy User.  I like discounts and I like voicing my opinion (go figure!) so I joined.  The next page is the signup page where you enter in your email and pick a password.  The fourth screen shows me logged in and now a Savvy User.

The next four screens now show the steps I went through to set up the gateway and temp-humidity sensors.  I clicked on the home screen icon at the bottom of the page.  From the home screen, I then clicked on the plus sign on the top right hand of the screen to add a device.

The first screen above shows the plethora of devices they offer.  This particular screenshot is on the second page of products and I picked the Wi-Fi Smart Gateway.  The user product manual that came with it specified that I was to add the gateway first so that is why I picked it instead of the Wireless Thermo-Hygrometer.

Once I picked the gateway, I was presented with the second screen.  I followed the instructions after plugging in the device into an outlet that was in the same room as my router.  The third screen popped up quickly and I switched over to my phone’s WiFi connections and connected to the Govee Gateway.  I then went back to the app and saw the 4th screen above.  What you don’t see is the next screen where I had to enter in my WiFi password and connect the gateway to my router.  Now the gateway is on my WiFi network.

Immediately after I was connected to the network I was presented with the top left screen above.  I was happily surprised to see the Gateway found my two sensors and immediately connected to them.  The top one is the one outside and the bottom one is the one in my living room.  Note that I have since changed the name of both devices to something meaningful through the settings screen offered on each device.  You can see the main screen gives a nice overview of the current temp and humidity of each device.  If you click on any one of the devices you are presented with the second screen which is the hourly screen.

The detail screens (these are the ones you get when you click on a device from the main screen) all default to display the hourly screen.  From there you can pick day, week, month or year.  You can also see the settings icon on the top right of the page.  The second screenshot above shows the hourly screen.  The third and fourth screens show you the popup that happens when you touch one of the points on the screen.  I like how it pops up the detail to show the temp and time/date it happened.  This works for both temp and humidity.

The next screenshot above is the weekly screenshot.  We had a front come through early Sunday morning and you can see the drop in temperature and humidity.  The next two screenshots are the monthly displays.  The third one is how it pops up very compressed.  The app lets you use two fingers and expand the data points which is really cool.

The second screenshot is the month expanded.   Something else that is really cool for a data nerd like me is the export data button you can see on the bottom of the third screen.  If you click on that you get the fourth screen.  You can specify intervals down to the minute and then pick start and end times.  When you click the little paper airplane up top the app will send you a CSV file in the mail with all of the detail.  Very cool!!

This last screenshot shows you the devices settings page.  I have scrolled down a bit, but at the very top is where you can give the device a meaningful name. The rest of the screen is dedicated to alarm notifications.  You can set the min and max temp and humidity and if the device exceeds either one you will get a notification from the app.  This works exactly as it should.  I set the min temp for outside to 57 degrees and I started getting notifications the moment it dropped below that.  There are also calibration options which I also think is a nice feature.  If you have another thermometer that you trust implicitly, you could use it to calibrate the ones from Govee.

What I like

I love how easy the device is to use.  The app is very flexible allowing you to see temp and humidity values across any number of time periods.  I also find the ability to export the data into a CSV file a big plus.  Being able to set alarm notifications would also be a big plus for anyone putting these sensors in sensitive areas like a baby’s room, greenhouse or cigar humidor.  They also offer a fast return service.  If you ever experience a problem with the device, the app lets you put in your Amazon order number and they will send you a replacement right away with no need for you to send the old one back.  They have a two-year replacement warranty.  I personally never tried that feature, but it seems to be a cool option to have.

What needs to be improved

I cannot find anything that needs to be improved.  What can I say, I love this device.

Price: $79.99
Where to buy: Amazon
Source: The sample for this review was provided by Minger.

Filed in categories: Reviews

Tagged: , ,

Minger Govee Wireless Thermo-Hygrometer with WiFi Gateway Review originally appeared on The Gadgeteer on January 26, 2019 at 9:00 am.

Note: If you are subscribed to this feed through FeedBurner, please switch to our native feed URL http://the-gadgeteer.com/feed/ in order to ensure continuous delivery.