AUKEY Bluetooth 5.0 Transmitter Receiver review


REVIEW – Bluetooth connectivity has been around long enough now that I have been spoiled by it and simply refuse to consider portable audio devices that do not include this feature and I even look for it as an included feature in some non-portable components. None of the televisions in my home have built-in Bluetooth, but I figure that it would be great to use my Bluetooth headphones and watch TV in the living room while being able to ignore the kids as they engage in activities that I am now convinced are designed to blow my eardrums and make my head spin!! LOL!! The Aukey Bluetooth 5.0 Transmitter Receiver seems like it could be the answer for me and finally an opportunity to score one win in the dad vs kids duel.

What is it?

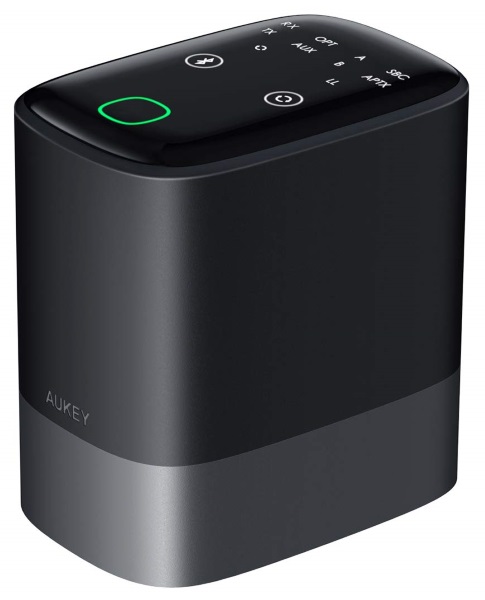
The AUKEY Bluetooth 5.0 Transmitter Receiver provides dual-mode connectivity for devices lacking built-in Bluetooth. It offers a connectivity range of up to 50m/164’, and it features the aptX Low Latency codec to ensure high-quality wireless sound and synchronized audio and video for gaming and watching movies. It also features a touch control display to control functions and to display the connection status and audio codec used. There are also two slide switches on one side to select the operational mode and function.

What’s in the box


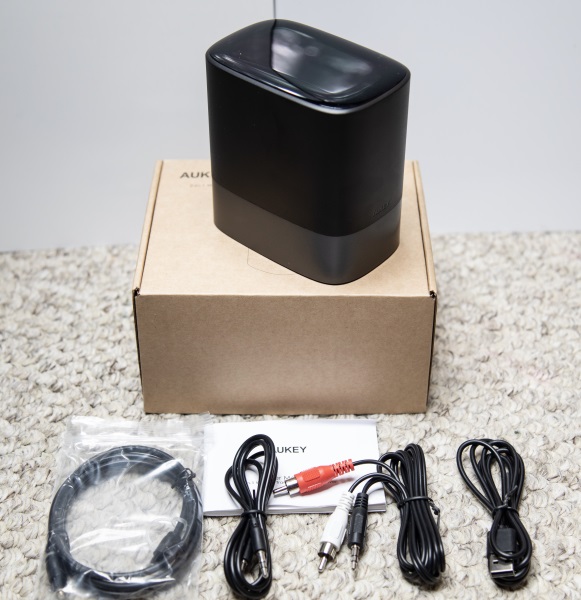
1 x AUKEY BR-O8 2-in-1 Wireless Transmitter and Receiver
1 x Micro-USB Cable
1 x 3.5mm Audio Cable
1 x 3.5mm to RCA Audio Cable
1 x Toslink Optical Cable
1 x User Manual

Design and features

Specifications

Model Number: BR-O8
Technology: BT 5, aptX, aptX-LL
Frequency Range: 2.402GHz – 2.480GHz
Input: DC 5V
Operating Range: Up to 50m / 164ft
Dimensions: 113 x 110 x 73mm / 4.45” x 4.33” x 2.87”
Weight: 300g / 10.58oz

Features

Bluetooth 5 Technology:
The latest Bluetooth 5 greatly increases the connection range (up to 50m/164ft). Higher bandwidth enables faster pairing and better audio quality for compatible devices.
Low Latency Audio:
aptX Low Latency codec avoids sound sync issues when watching movies or playing games.
Dual-Device Connection:
Simultaneously connect two pairs of Bluetooth headphones. Share your favorite TV series or play a game with a friend or a family member.
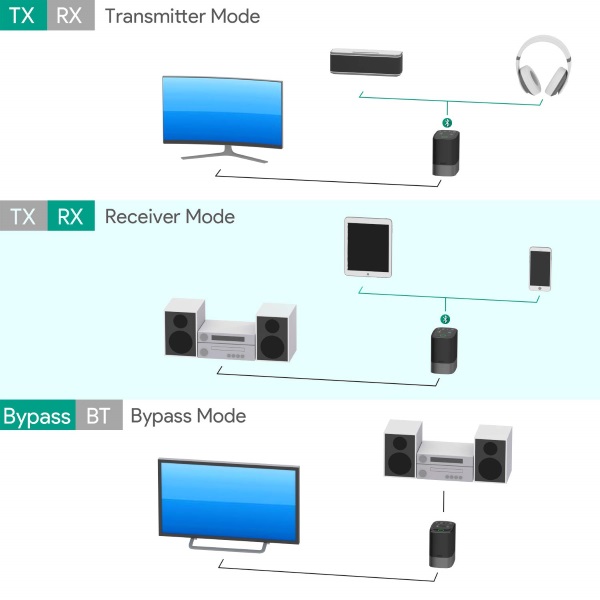
Transmitter Mode:
Wirelessly broadcast audio from your non-Bluetooth TV or computer to your Bluetooth headphones, headset or speakers.
Receiver Mode:
Wirelessly broadcast audio from your smartphone to your non-Bluetooth speaker or home stereo system.
Bypass Mode:
Switch to a pure cable connection between two adjacent or non-Bluetooth devices without unplugging from the BR-O8.

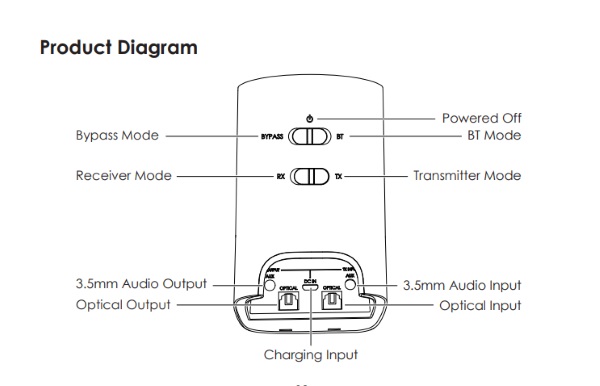
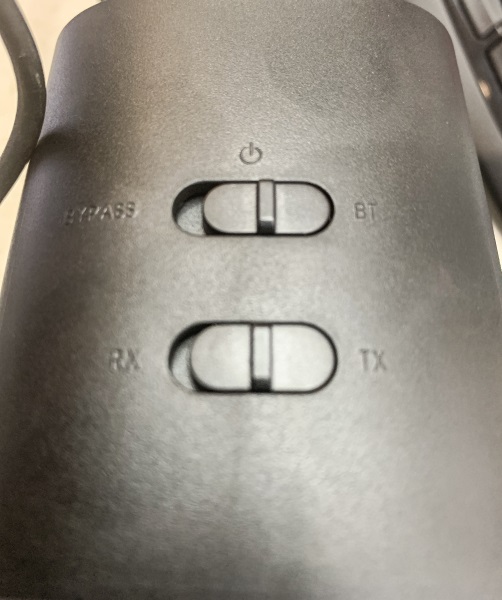
On the back of this device, there are 2 slide switches. the top one allows you to power on in Bluetooth mode or in Bypass mode. The second switches the device to either Transmit or Receive mode.

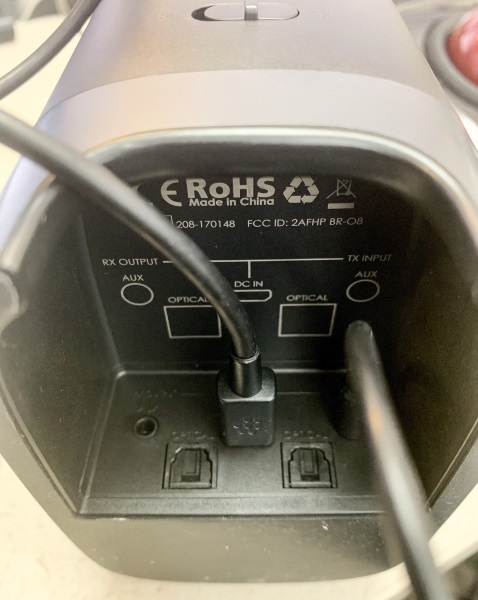
At the bottom of the device, there are the connectivity ports that include a DC in power port, an RX Output 3.5mm port, a TX Input 3.5mm port and one Optical port each for Transmit and Receive connections.
The illustrations below show the functionality, connectivity, and operational options.

Performance

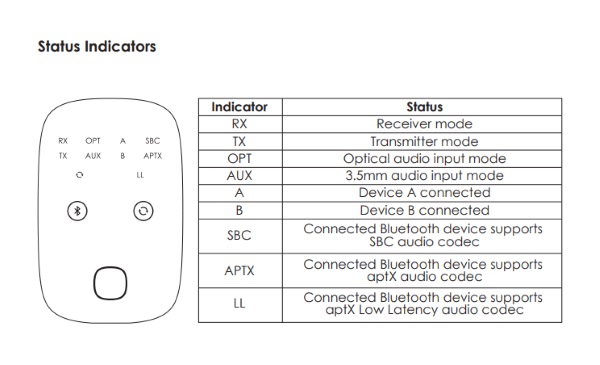
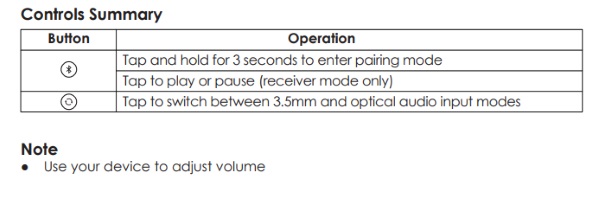
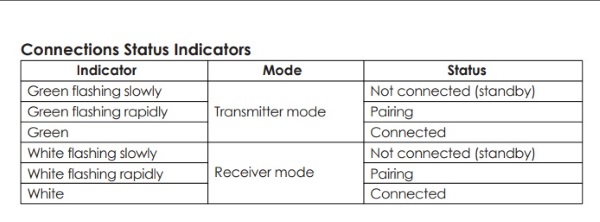
This Bluetooth 5.0 Transmitter Receiver is very easy to use. Right out of the box it is plug-n-play ready. Pairing with one or two devices is quite easy and I did not experience any issues using it in either Transmitter or Receiver mode. The diagram below lists the indicators and the meaning of each.

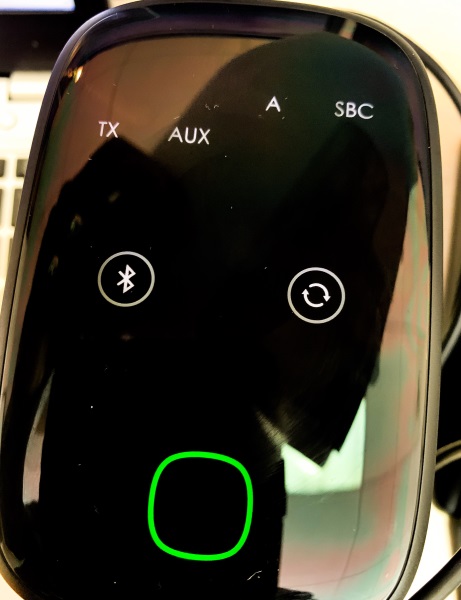
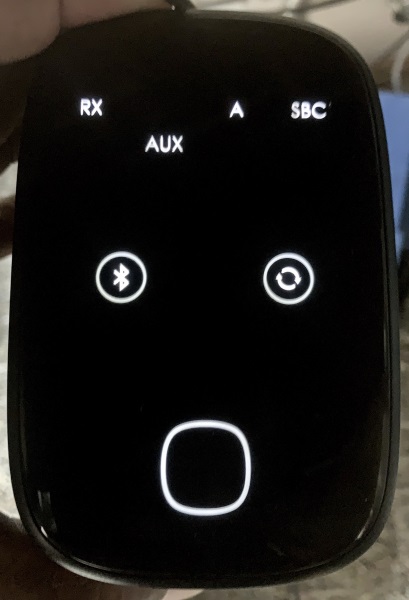
Connecting using Bluetooth is very simple and the instructions are clear and accurate. The touch screen at the top of the device displays the mode of operation (TX/RX), the type of connection and the audio mode. The circular button shown on the bottom right of the touch screen is the selector button that you use to switch connection types. For example Aux or Opt. The “A” shown indicates that one Bluetooth device is connected. In this case, it was headphones.


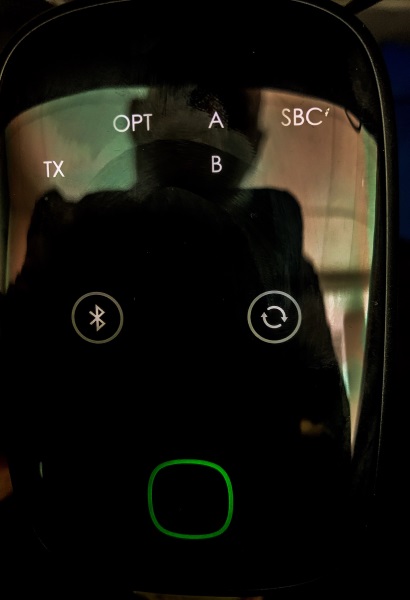
The photo below shows “A” and “B” indicating that I had 2 Bluetooth devices connected. In this case, it was headphones and earbuds. Oddly enough I forgot to change the connectivity selection to Aux, but it still worked in OPT mode with the auxiliary cable as the connection.

As shown in the picture below, the status indicator is white when it is in RX mode as opposed to green when it is in TX mode. The “A” indicates that I had one device connected which in this case was wired earphones, and I used the device in Receive mode to listen to music from my cell phone.


The following information confirms what you see in the pictures above with the indicator as green in Transmit mode and white in Receive mode. It also explains the visual indicators.

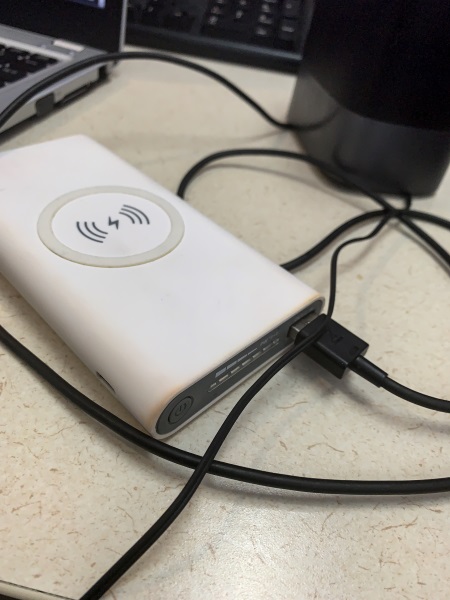
While testing this device, I became obsessed with trying to make it completely portable and I connected it to my USB power bank. It worked, but it seemed to draw too little power to be continuously recognized by the power bank and so the after less than a minute the power bank would turn off.

For additional information, you can read the manual by clicking here.

What I like

  • It is lightweight but not fragile
  • It is both a Transmitter and a Receiver
  • It can connect to two accessories simultaneously
  • The ease of pairing

What can be improved

  • The addition of a built-in battery so it is a stand-alone portable device
  • The touch control top is a fingerprint magnet

Final thoughts

This Aukey Bluetooth 5.0 Transmitter Receiver is a handy, compact and lightweight device that functions very well for what it is designed to do. I have no complaints except that since it is so lightweight, I can think of some scenarios I could use it for if it had a long-lasting built-in battery. Since it seems to need very little power, I would think that the addition of a battery would be doable even if it adds a bit of weight. Regardless, I am giving this device a two thumbs up and a well done!!

Price: $59.99
Where to buy: Amazon
Sample: The sample for this review was provided by Aukey.

Filed in categories: Reviews

Tagged:

AUKEY Bluetooth 5.0 Transmitter Receiver review originally appeared on The Gadgeteer on March 28, 2019 at 11:30 am.

Note: If you are subscribed to this feed through FeedBurner, please switch to our native feed URL http://the-gadgeteer.com/feed/ in order to ensure continuous delivery.

SecureDrive BT hardware encrypted external portable hard drive review

REVIEW – Bluetooth – it seems like it’s everywhere now. How does the SecureDrive BT hardware encrypted external portable hard drive utilize Bluetooth and your mobile device for drive security? Let’s find out!

What is it?

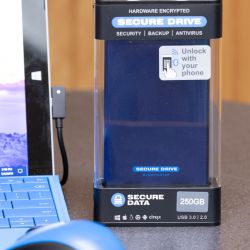
The SecureDrive BT hardware encrypted external portable hard drive is a USB hard drive that uses your mobile device and Bluetooth to unlock the device.

What’s in the box?

List contents – you can remove this heading and section if it doesn’t apply to your review.

  • SecureDrive BT (250GB SSD as tested)
  • Quick Start guide
  • 16″ USB cable
  • Export Notice information sheet


Hardware specs

Capacity:   1TB, 2TB, 5TB, 250GB SSD, 500GB SSD, 1TB SSD, 2TB SSD, 4TB SSD, 8TB SSD
Cryptographic Processes:   AES-XTS 256 Bit Hardware Encryption (OS independent)
Dimensions (L x W x D):   127mm x 77mm x 12.5mm (1&2TB) – x 20.5mm (5TB)
Weight:   Approx. 9 oz. (1TB & 2 TB) Approx. 12 oz. (5TB)
Interface/Power Supply:   USB 3.0 (2.0 compatible) / BUS powered
Certifications:   RoHs, FCC, CE, USB, FIPS 140-2 Level 3
Assembled:   U.S.A
Languages:   English
Warranty:   2 years (limited warranty)
Password Policy:   Strong password (7-15 chars) Alpha Numeric
System Compatibility:   Microsoft, iOS, Android, Linux, Chrome, Thin Clients,
Embedded Systems (No software or drivers  needed)

Design and features

I recently reviewed the SecureDrive KP drive (KP is for Keypad unlock) and found it to be a fabulous device. SecureDrive was nice enough to also send me the SecureDrive BT drive (Bluetooth unlock) for review.

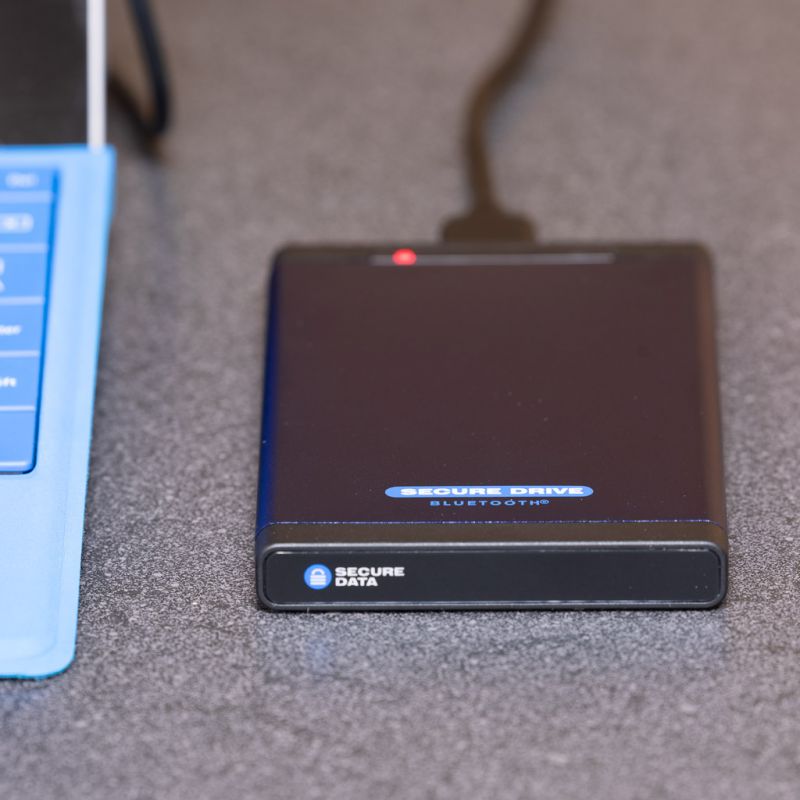
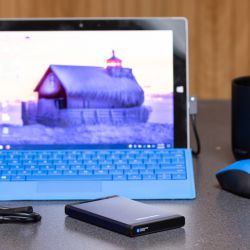
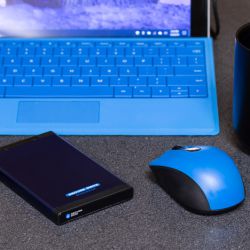
Measuring in at just 3″x5″x0.5″, the SecureDrive BT is just about as small as external SSD and 2.5″ HDD drive enclosures come. It requires no external power supply, and simply operates off the USB cable connection with any host operating system (Microsoft Windows, MacOS, iOS, Linux, Chrome, Thin Clients, Zero Clients, Android & Embedded Systems).

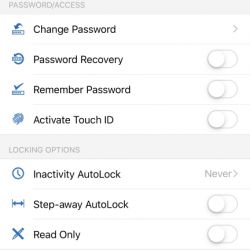
Unlike the SecureDrive KP which features a keypad for unlocking the device, the SecureDrive BT uses an app on your mobile device (iOS and Android) and its Bluetooth connection to unlock and manage the device. Once unlocked, the drive performs as a standard external hard drive.

One of the key ways the SecureDrive keeps your data safe is that there is absolutely no communication between the host Operating System (Windows, Linux, MacOS or similar) and the drive until the User enters the correct PIN via the mobile app. This prevents computer/software brute force attacks and/or hacking of the system. Once the correct pin is entered the drives USB controller is unlocked to initiate communication between the drive and host OS. This also prevents any malicious firmware modifications/updates that might be intended to breach the security of the drive.

The SecureDrive BT uses Military Grade AES256 bit encryption at the hardware level, the complete OS and software free design allows for extremely secure encryption without any OS overhead and speed penalties that software encryption has, which can slow performance by 30% or more.

The 16″ cable and USB 3.0 super speed interface provides for a transfer rate of 5.0 Gbit/s while being backward compatible with USB 2.0 for older hardware.

A secure drive would not be completely secure if it allowed access to the electronics that control the drive. The SecureDrive is certified FIPS level 3 (U.S. government computer security standard) and every vital piece of electronics is covered with a tough epoxy coating cementing the critical components in an indistinguishable solid capsule. There are no externally visible means to open the drive enclosure.

The drive has a brute force anti-hacking self destruct feature that is triggered after entering an incorrect password ten consecutive times. When triggered it will crypto-erase the passwords, all User data and drive formatting. Basically, it will wipe the drive and it will reset the password to the factory password. The drive is still useable, just empty. I tested this feature and it indeed worked perfectly. This is probably a good point to mention that there are no techniques to retrieve the pin. There are absolutely no back-doors and all data will be erased permanently.

The SecureDrive BT has several advantages and disadvantages as compared to the keypad model.

Disadvantages:

  • Requires a mobile device to unlock the drive
  • Admin mode is only available with SecureDrive’s Remote Management Web Console

Advantages:

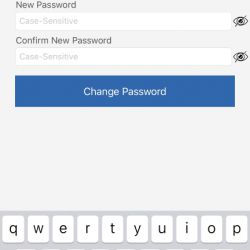
  • Easier to enter/change the device password
  • Can use TouchID/FaceID on iOS (fingerprint unlocking)
  • Easier to make option changes such as Inactivity AutoLock, read-only (optional)
  • Step-away AutoLock and vicinity unlock
  • Works with Apple Watch (digital pin)
  • Password recovery via text message (optional)
  • Compatible with SecureDrive’s Remote Management Web Console

The TouchID on iOS is very nice. You simply tap the drive you wish to unlock and you’ll be prompted to touch the devices fingerprint reader, and the drive unlocks.

Even better for some users may be the AutoLock/Unlock feature that is possible with Bluetooth. When enabled the device will automatically lock when you step about 3m away from the device for longer than 5 seconds. When the remember password option is on, it will also automatically unlock the device when you get in the vicinity of the device.

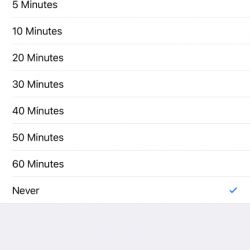
There is also an Inactivity Lock feature, which is off by default. When enabled the device will automatically lock after a pre-set amount of time of inactivity. The options on this feature are 1, 5, 10, 20, 30, 40, 50, and 60 minutes.

These features for unlocking and locking make it very configurable depending on your requirements and environment.

The SecureDrive BT is also compatible with SecureDrive’s Remote Management Web Console  (available as a separate service) which allows the admin to take full control of where/when the drive can be unlocked as well as remotely wiping the data and disabling access even if the user has a drive pin.

Setup

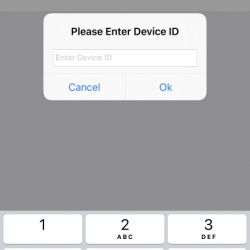
Setting up the SecureDrive BT is as simple as installing the DataLock app and entering the eight-digit device ID number that is located on the back of the device near the connector plug. Once you enter the default password you can then setup the device with the various options and change the password.


Performance

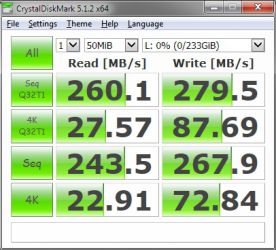
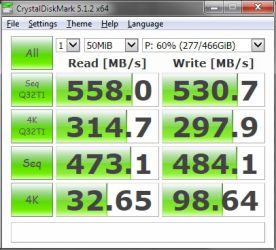
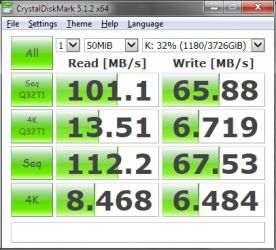
For the technical minded, here are some CrystalDiskMark tests from my setup:


What I like

  • Mobile device unlocking and configuration of options
  • Auto lock and unlock are awesome
  • Compact design

What needs to be improved

  • Did not have a full printed manual with it, but PDF’s are on the drive and a printed quick start instruction sheet was provided.

Final thoughts

I’m really impressed with the SecureDrive BT, and with all of the SecureDrive products. They really have a great variety of devices that seem to fit just about every user’s unique need. The SecureDrive BT provides an easy and portable way to secure data and is available in the following capacities: 1TB, 2TB, 5TB, 250GB SSD, 500GB SSD, 1TB SSD, 2TB SSD, 4TB SSD, 8TB SSD.

Price: $289 250GB SSD as tested, many other models available
Where to buy: SecureDrive
Source: The sample of this product was provided by SecureDrive.

Filed in categories: Reviews

Tagged:

SecureDrive BT hardware encrypted external portable hard drive review originally appeared on The Gadgeteer on March 28, 2019 at 9:00 am.

Note: If you are subscribed to this feed through FeedBurner, please switch to our native feed URL http://the-gadgeteer.com/feed/ in order to ensure continuous delivery.

Mishiko Dog GPS & Fitness Tracker review

REVIEW – A few years ago I went to take our Yorkshire Terrier outside one last time before going to bed.  I was tired and feeling a bit lazy, so I didn’t bother putting a leash on her.  Normally our dog isn’t a runaway kind of dog, but that night there was a deer in the front yard.  Like a flash our dog went after it—yes, our little dog has a Napolean complex—and the deer took off.  She circled our house once and then bolted for the woods with our Yorkie in hot pursuit.  In less than 15 seconds from the time I had opened the front door, our dog was gone.  This story does have a happy ending.  After searching through the forest for 30 minutes, our daughter stumbled upon our dog and brought her home.  We were lucky that night, but maybe it’s better not to reply upon luck.  If you have a dog with a proclivity for running away or chasing the wildlife, Mishiko has a tracker that can help you find your missing canine companion.

What is it?

Mishiko Dog GPS & Fitness Tracker is a gadget designed for two purposes.  One, it can help you find your dog when she runs away; two, it can track your dog’s activity levels to make sure she’s getting enough exercise.

What’s in the box?
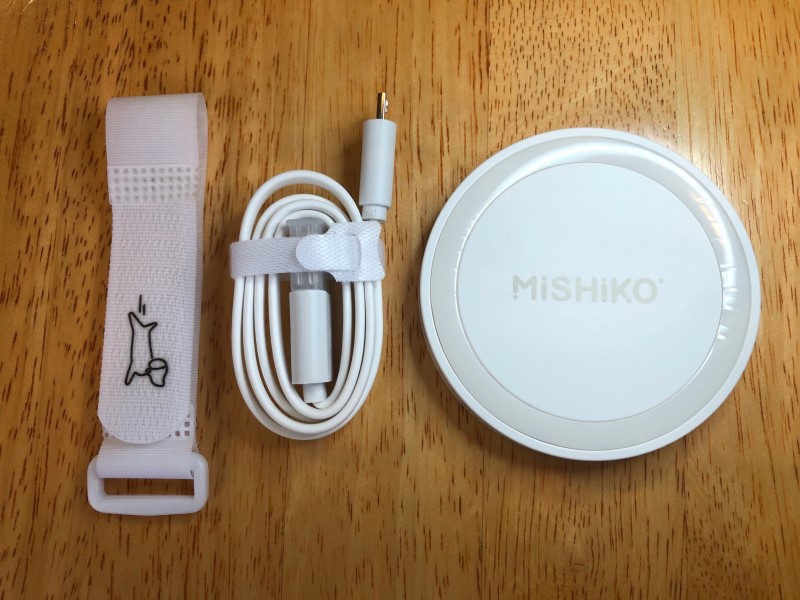
  • The tracker on a collar
  • A universal fastener
  • The charging station with USB cable
  • A quick start guide and a user manual with 2 pages of instructions in English

Hardware specs

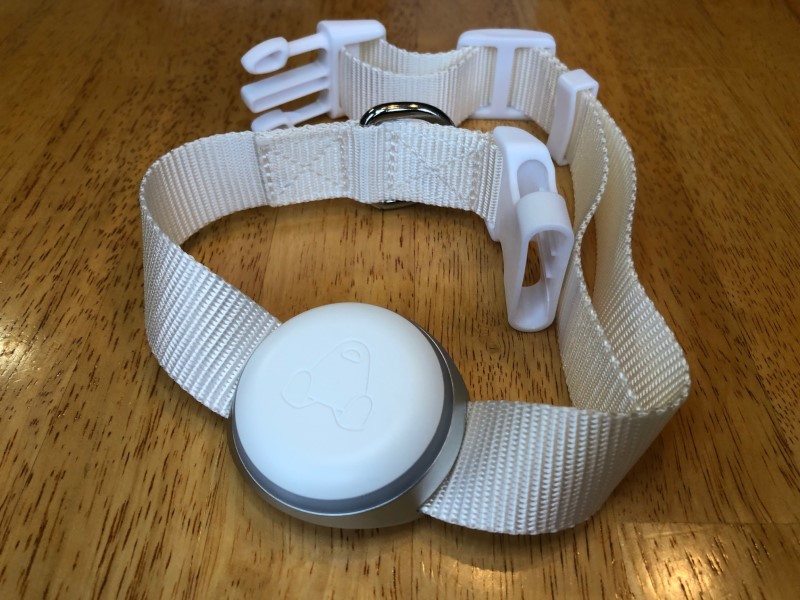
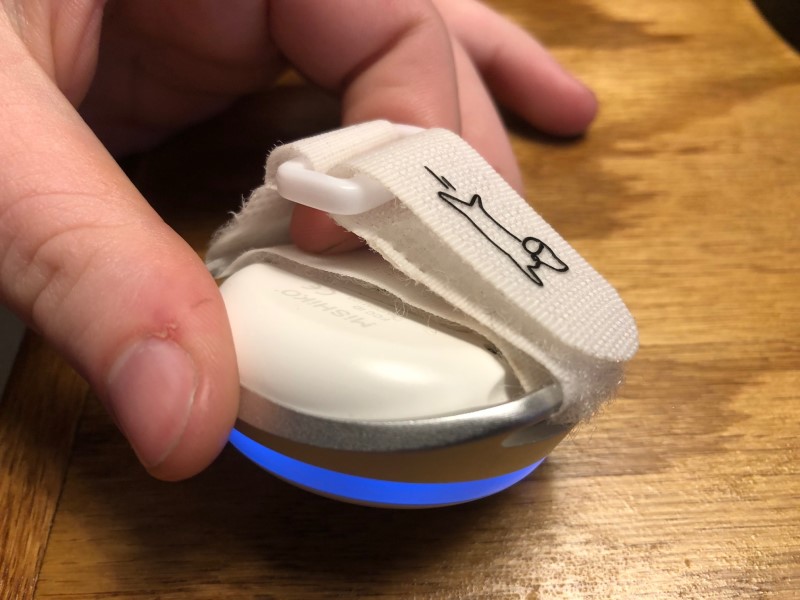
Mishiko says that their tracker is designed for medium and large dogs and for good reason.  At 2 inches wide and 0.75 inches tall, the puck-shaped device is not exactly small.  When attached to the collar, it overwhelms our little Terrier but is perfect for our neighbor’s Golden Retriever.

The tracker is powered by a rechargeable battery.  The Mishiko website says that it takes about 3 hours to charge and should last for a day or two.  The battery can only be replaced by Mishiko service center specialists.

As its name implies, the Mishiko tracker has a GPS receiver that can collect geolocation and time information from both GPS and GLONASS satellites.  When used together, a GPS receiver can fix its position anywhere in the world to within 6 feet.  The Mishiko website, however, says their device, when conditions are good, is at best accurate up to 13 feet and at worst 164 feet.  One limitation for any GPS device is that it requires an unobstructed line of sight to the satellites.  If your dog is in a mountainous area or downtown among tall buildings, then the conditions could be poor and the GPS receiver might not work very well; in fact, the Mishiko website says that it could be off by as much as 3200 feet.  Just as a point of reference, a football field is only 360 feet long, if you include the end zones.

The tracker also contains a cellular device that communicates using 2G and 3G networks.  If you’re out in the boonies where there’s no cell phone coverage, then it won’t be able to transmit its location back to you.  This built-in cellular capability is what the Mishiko device uses to automatically check for and download software updates whenever it is charging.

The device is rated IP67, which means that it can be immersed in water up to 3 feet deep for up to 30 minutes.  In other words, it should be just fine if your dog jumps into the pool or the lake while wearing the tracker.

Installation and setup

The Mishiko Dog Tracker comes in a beautifully stylish little white box.
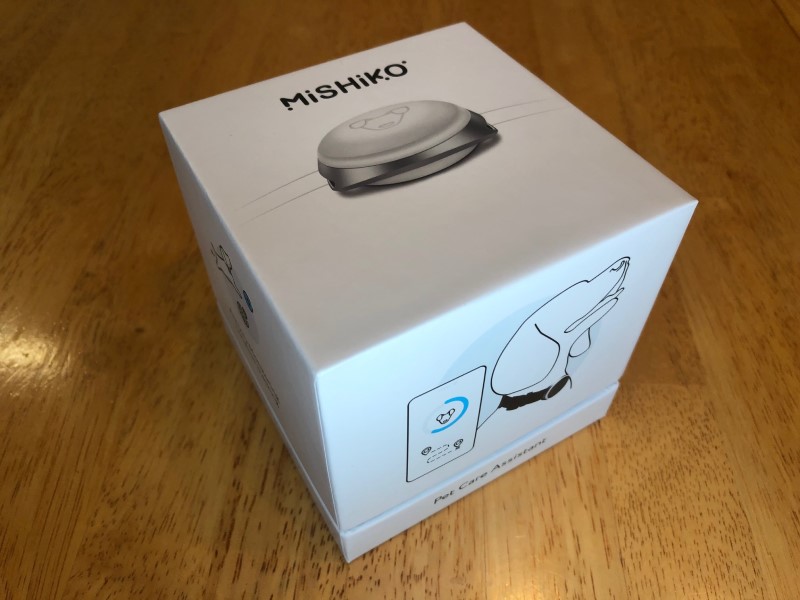
The top slides up and off, revealing a blue interior that highlights the tracker already attacked to a collar.  My tracker and collar were both white; they are also available in black.

The battery in the tracker does not come pre-charged, so the first thing to do is to set up the wireless charging station.  It comes with a USB cable for charging, which I plugged into my Anker USB charger.
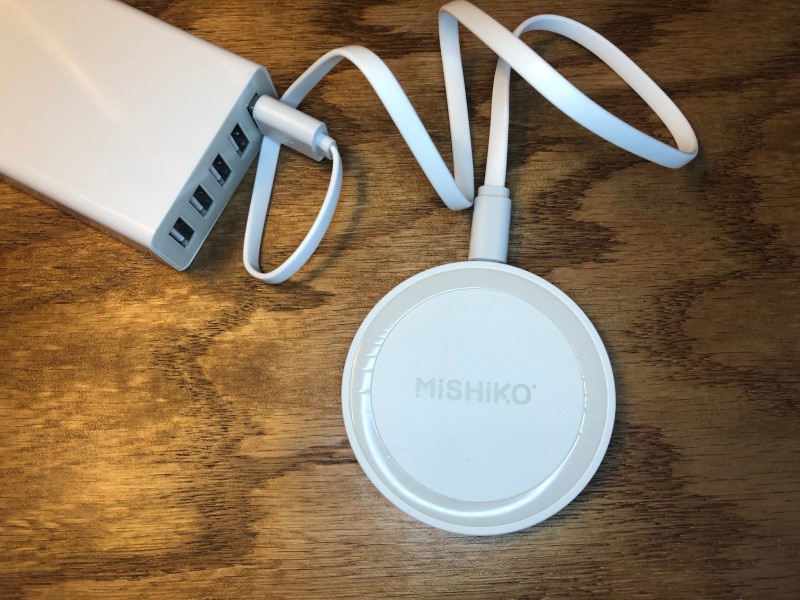
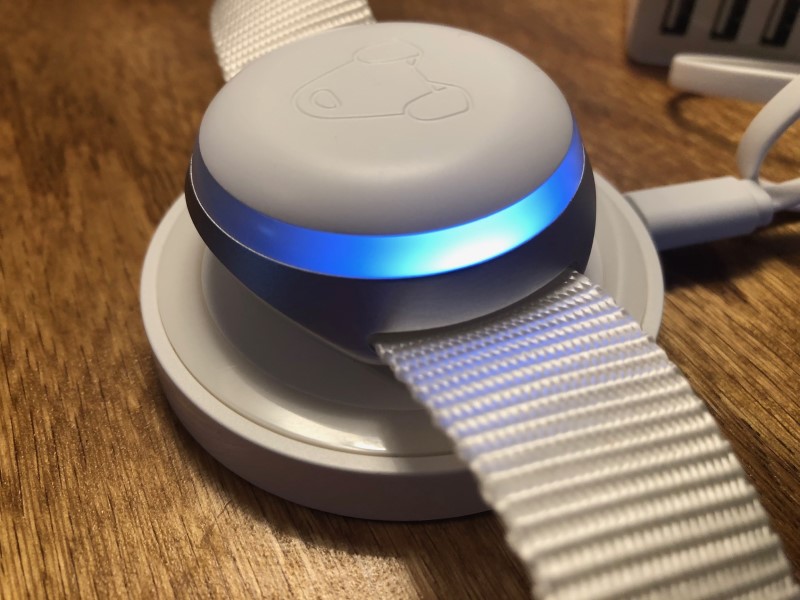
As advertised, it took about 3 hours to charge.  The tracker has a built-in white light that goes all the way around its circumference.  When charging begins, only a small part of this ring is lit; when finished, the entire ring is lit.  As a side note, when fully charged this light is surprisingly bright; one night I woke up, saw the light from my bedroom, and thought I had left a lamp on.  It’s a bit much for around the house—we started calling our dog “Lightbulb” whenever she had the tracker on—but I suppose if your dog ran away at night, it could be very helpful for finding her.
The next step is to download the Mishiko app.  The quick start guide conveniently includes a couple of QR codes, one for Apple’s store and one for Google’s.  As I have an iPhone, I simply took a picture of the correct code, and it took me to the App Store for downloading.  So easy!

Once the app is downloaded, the registration process begins.  First, I created an account.  This requires an email for the username and a password of your choice.  Second, I entered some information about our dog, its breed, age, weight, height, gender, etc. and took her picture.  Although I am only tracking one dog, if you buy multiple trackers, you can track them all in the app with the same account.  Third, I entered the serial number and password associated with the device, which uniquely identifies it.  This info is helpfully found in the quick start guide, the user manual, and on the tracker itself.  Mishiko made sure that you won’t lose this info, without which the tracker isn’t of much use.  Registration was quick and painless!

Once the tracker finished charging, it was time to attach it to the dog.  If you want, you can use the collar that comes with the device.  It’s made of nylon and has plastic clips that are functional.  The collar is quite long (27 inches), and for anything smaller than a Saint Bernard you’ll probably want to trim off some of the excess.  Keep in mind that if you want to use Mishiko’s collar, you’ll need to take off every night or two in order to charge it.  On the other hand, if your dog already has a collar that you like, you can use the universal fastener to clip on the tracker.  I’m glad Mishiko added this little feature, because it makes it easy to take the device on and off.
Design and features

The Mishiko tracker has two main features:  keeping track of your dog and keeping her healthy.

Tracking your dog

If you have a dog that likes to run away, or if you have a new dog that you’re unsure about, the Mishiko tracker can be used to help you keep track of your dog’s location.

The first feature that the tracker offers is a geofence.  You find your house on the map and drop a geofence upon it.  The default shape is a square, but you can manipulate the four corners to make any four-sided shape that you want.
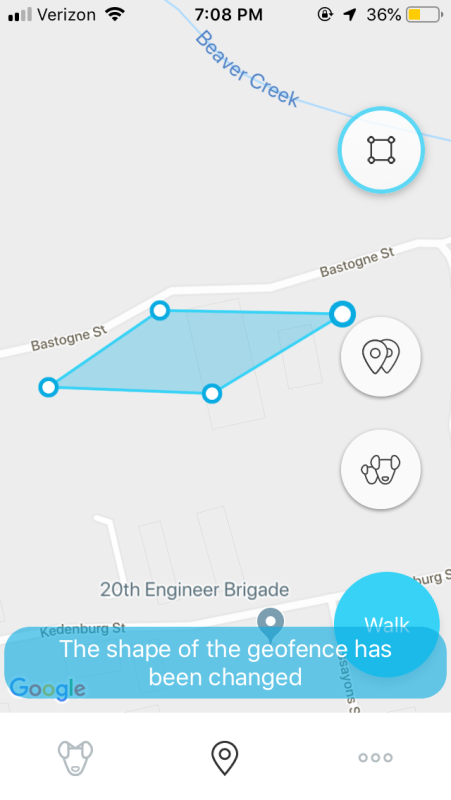
Whenever your dog leaves the geofence, the Mishiko app sends a notification warning you that your pet has breached the geofence.  The default size of the square is about 500 by 500 feet.  On our street, this square is large enough to cover not only our yard but five additional yards in both directions; in other words, it’s a huge geofence.  Shortly after setting up a default-sized geofence, I got an alert.  Our Yorkie had already run away!
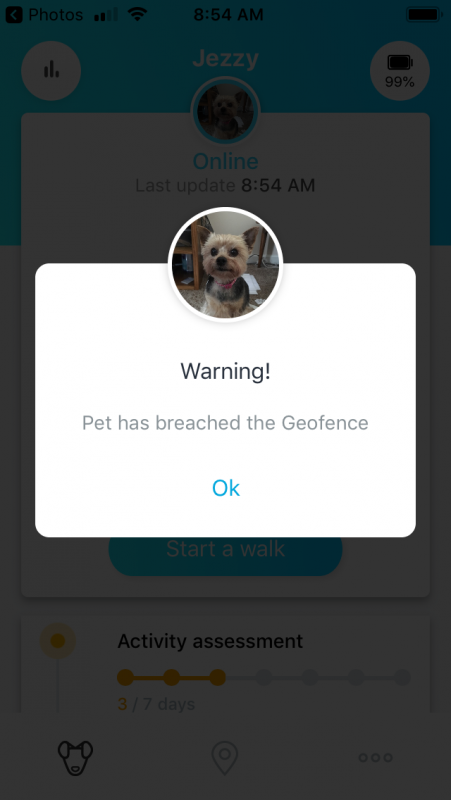
Then I looked down and saw that she was sleeping on her bed right next to me.  Unfortunately, this was not the only false alarm that I got.  Every day I get a few more alerts, and every time the dog is right where she belongs.  This feature is a bit like the boy who cried wolf; it has happened so often that I simply ignore it.

To make matters worse, it’s just as error prone the other way around.  In other words, when I intentionally took the dog on a walk outside of the geofence, sometimes I got an alert, but other times I did not.  There seems to be about a 50-50 chance that the app will tell me that my dog has run away.  Sadly, I think the geofence feature is simply too unreliable to be of any use, which is too bad, because it’s a great idea.

The second feature that the tracker offers is the ability to find your dog once she runs away.  Since our dog doesn’t really run away—we couldn’t find a deer to help us out—we had to “help” her run away.  My wife put the dog in the car and drove off without telling me where in the neighborhood she was going.  I waited several minutes for the geofence alert to warn me, but sadly it never did.  Finally, I just turned the app on and looked at the map; indeed, my dog was no longer near our house.  I hopped into my car and set out to find her.  The good news is that this functioned exactly as intended.  Although the app doesn’t give directions like Google Maps—turn left on Main St—it perfectly overlaid both my position and the dog’s position on the map.  All I had to do was keep my icon moving towards my dog’s icon, and eventually, I found her.  Given Mishiko’s statements about how inaccurate the GPS might be, I was a bit concerned that the app would get me only sorta close to my dog but not really close.  I’m happy to report that this wasn’t the case; it was accurate to within a few feet.

After finding the dog in our neighborhood, my wife drove off again and took the dog out of our neighborhood.  I waited a bit and then tried to find her.  Even though she was a few miles away, the app had no problem leading me right to her, to the dog, and (conveniently) to a Starbucks.  This is really good to know:  If your dog runs away, the Mishiko tracker can take you right to her.

Keeping your dog healthy

The Mishiko tracker can be helpful if your dog runs away, but it’s also useful even if she never leaves your neighborhood.  It can track the health of your dog, ensure that she’s getting enough exercise, and give you some hints about diet.  It’s kind of like a Fitbit for dogs.

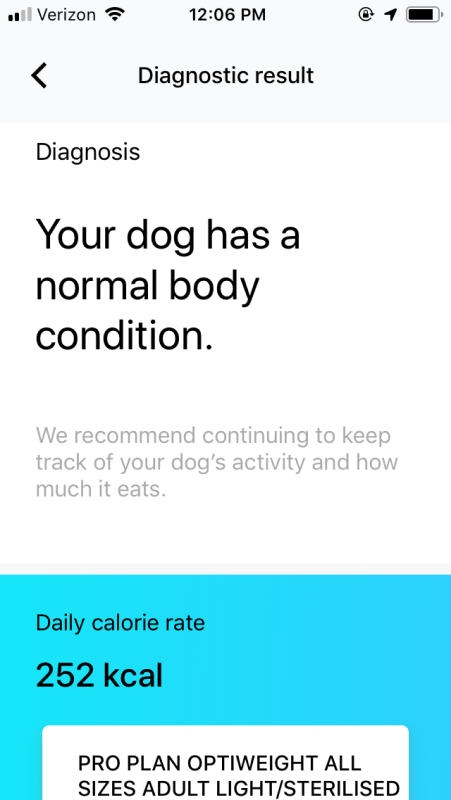
When I began using the app, one of the first things I did was run an assessment.  It’s a week-long evaluation of your dog and how much exercise she’s getting.  When finished, the app gives a diagnosis.  For my dog, the diagnosis was “Your dog has a normal body condition.”  Based on this diagnosis, the app helps you to keep your dog healthy in two ways.  It’s worth noting that the manual says the app works best for dogs that are one year or older, so if you have a puppy, it might be a bit off.
The first way the app keeps your dog healthy is by making sure that she gets enough exercise.  The tracker and the app measure how much exercise your dog has already had each day and how much more she needs to get (or stay) healthy.  You can press the “Start a walk” button, and it will track your path, the number of steps taken, the distance walked, and the total time of your walk.
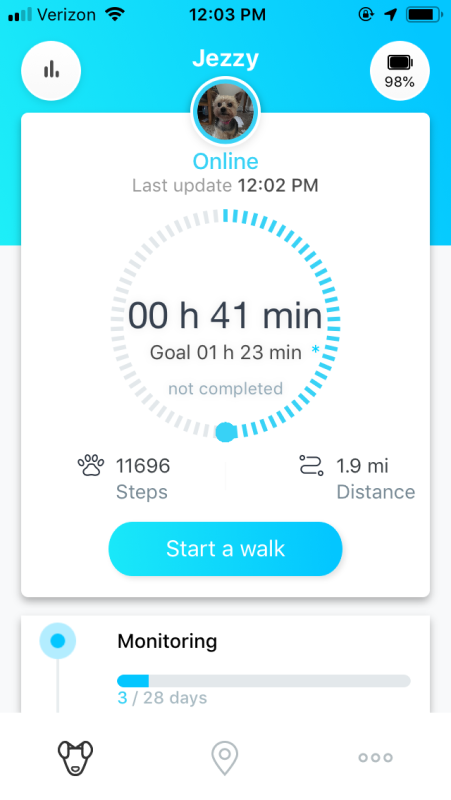
In fact, this app keeps track of a lot of statistics about your dog, which you can find on the Statistics page.  It’s quite fabulous, except for one detail:  Its measurements are sometimes wildly inaccurate.  If you look at this next screenshot, you’ll see that it says that our dog walked 7.1 miles yesterday.  The problem?  Our dog never left the house that day, except when she had to “go” outside.  We didn’t take her for a walk that day; we didn’t even play fetch with her.  (We were pretty bad owners that day, weren’t we?)  Did she walk 7.1 miles?  Not a chance.  It’s unlikely she even walked half a mile.  There are lot of days when the statistics showed wonky values like this.

The second way the app keeps your dog healthy is by recommending good dog food to eat.  Some dog food is healthier than others, so if you enter the type of food that your dog is eating now, it can recommend better food.  Unfortunately, this part of the app looks like it’s not quite done.  It only recognizes a very limited set of manufacturers.  We use Hill’s Science Diet, a very popular brand and one recommended by our vet, yet the app didn’t recognize it and recommended that we switch.  Given the links to buying food from within the app, it feels more like a way for Mishiko to make a little extra money than it does a source of great recommendations.  On the other hand, there is some useful information here.  For example, it teaches you how to gradually change from an old dog food to a new one, something that is especially helpful for dogs with sensitive stomachs.

Overall the app looks nice; the interface is simple and intuitive.  There are, however, a few wrinkles that still need to be ironed out.  If you look back at the screenshot for the Statistics page above, you’ll see that “yesterday” is listed twice; every day is listed twice.  If you look at the monthly view below, you’ll see that it says February at the top, even though it’s actually March (and even says March on the bottom).  These aren’t critical bugs, but they seem like mistakes that should have already been caught by their software testing process.

What I like

  • Rechargeable battery and wireless charger
  • Uses GPS and cellular service, giving a broad range tracking
  • Rated IP67 for water protection
  • Great ability to find a runaway dog

What needs to be improved

  • False alarms for the geofence
  • Inaccurate calculation of our dog’s level of exercise
  • Small bugs in the software

Final thoughts

The Mishiko Pet Dog GPS Tracker leaves me conflicted.  On the one hand, I think the primary value of this device is to find your dog when she runs away, and it does this very well.  On the other hand, there are several things that just aren’t working right.  This gadget has a lot of potential, but for most people, I recommend waiting a bit to see Mishiko can fix the problems.  If, however, your dog likes to run away, and you’re concerned about losing her, then it’s probably worth buying.

Price:  The basic option is £49.99 (~$67) plus £4.49 (~$6) per month after the first month.  Other options are also available.
Where to buyAmazon UK
Source: The sample for this review was provided by Mishiko.

Filed in categories: Reviews

Tagged: ,

Mishiko Dog GPS & Fitness Tracker review originally appeared on The Gadgeteer on March 27, 2019 at 11:00 am.

Note: If you are subscribed to this feed through FeedBurner, please switch to our native feed URL http://the-gadgeteer.com/feed/ in order to ensure continuous delivery.
Armadillo USB Firewall review


REVIEW – I can remember when floppy drives were the craze and then CDs and DVDs all with increasing capacities and abilities. In recent times, our demand for storage capacity and portability has resulted in USB flash drives and portable hard drives becoming the common use norm for storing and sharing files. I have come across a few people who were in a desperate position because they used someone else’s USB drive and accessed a file that was infected with a virus. In other cases, they managed to transfer an infected file from a computer to their USB drive. The result was anywhere from a small and relatively easy to rectify difficulty all the way to having to format their drive and reload their OS. In many cases, they would lose files that they failed to back up. The Armadillo USB Firewall offers protection against this type of disaster and more.

What is it?

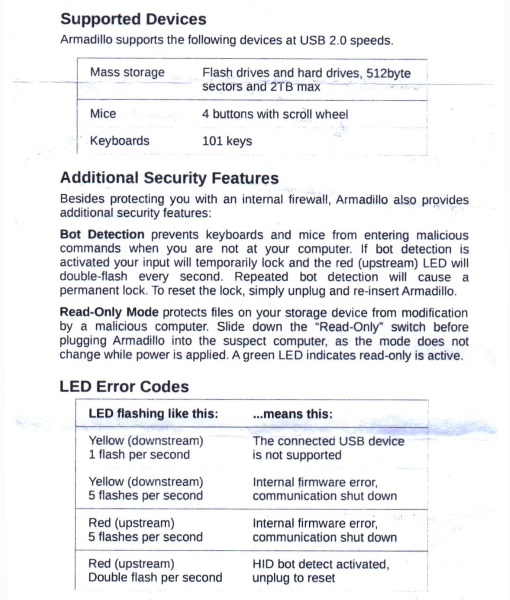
The Armadillo USB Firewall is a high-speed USB firewall that connects between any computer and your USB device, isolating malicious firmware and keeping your computer safe. It can be used for flash drives and portable hard drives where its high-speed USB 2.0 hardware enables quick file transfers.

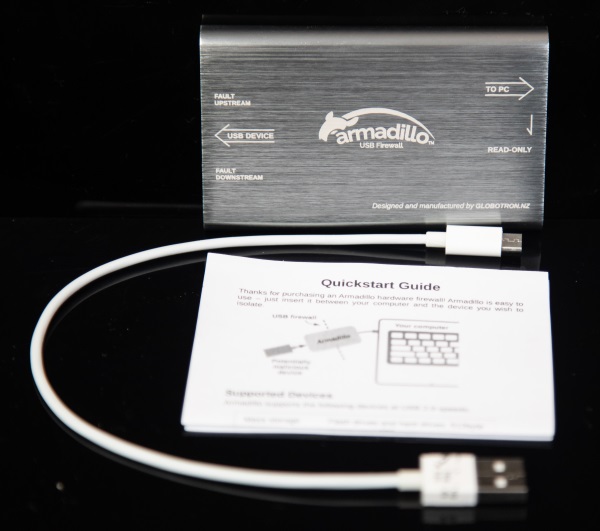
What’s in the box


1 x Armadillo USB Firewall
1 x User Manual
1 x Micro USB

Design and features


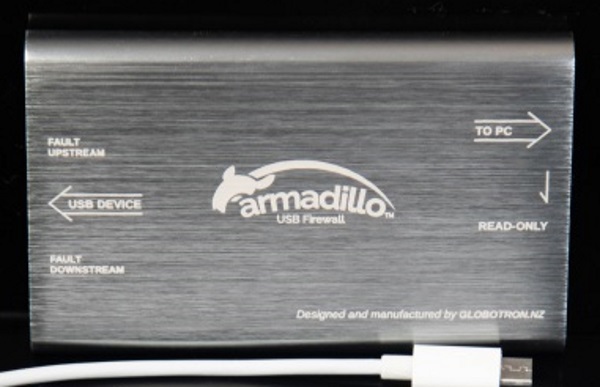
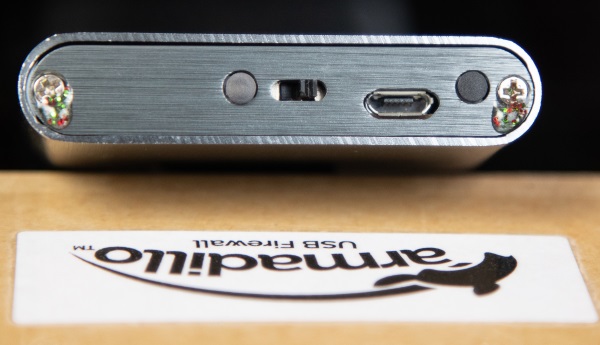
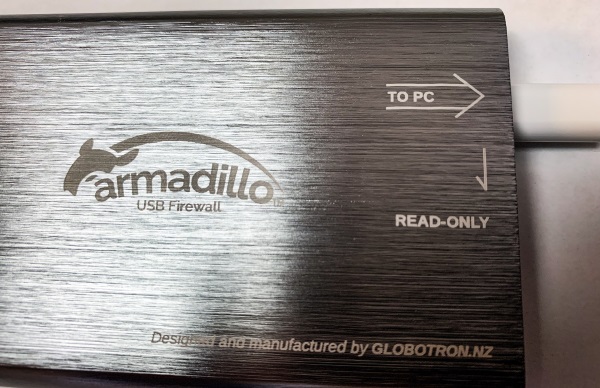
On one side there is a “Read Only’ mode switch that allows or restricts the data passage between two-way and one-way writeability and the micro USB jack that allows you to connect to your computer.


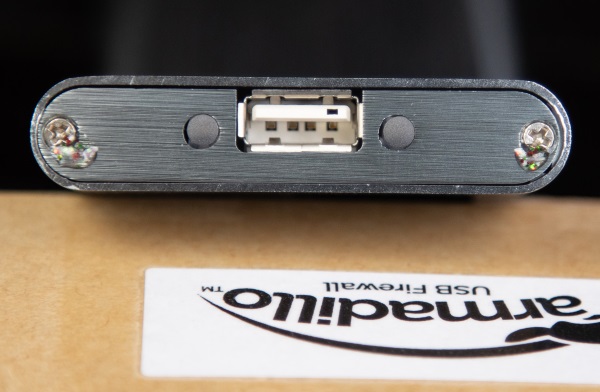
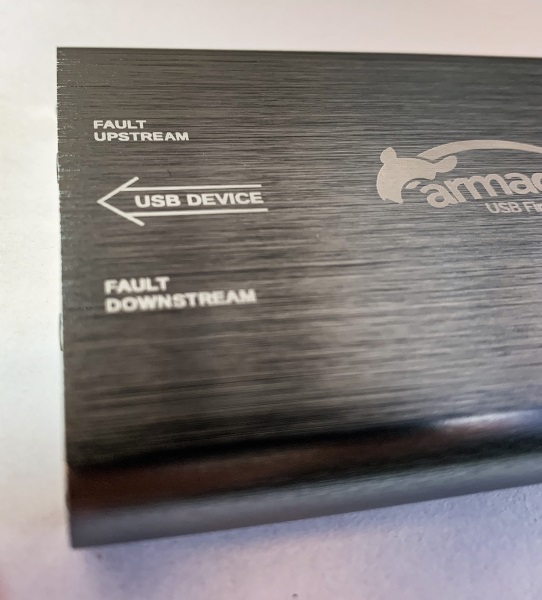
Shown below is the opposite side of the Firewall that has the standard USB port to plug in the portable USB drive.


Performance

The Armadillo USB Firewall is pretty much plug-and-play, and its use is quite simple. Place it in between your USB portable drive and your computer and it will protect your computer and your USB drive from malicious software that can harm your computer files. The “read only” switch allows you to prevent any malicious files from being written to your storage device. Engaging or disengaging this switch requires you to unplug the firewall from your computer and then switch the mode and reconnect. It is also important to note that the firewall only supports drives up to 2TB in capacity.

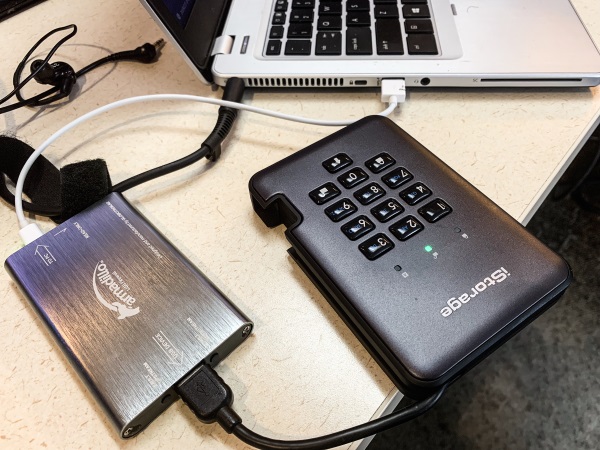
The picture below shows the firewall connected between my 2TB encrypted drive and my laptop.

What I like

  • Build quality
  • Portability

What can be improved

  • The quality of the “read-only” switch. It feels a bit cheesy.
  • The firewall should have the ability to switch modes without unplugging and reconnecting each time
  • The limitation of up to 2TB drives since larger drives are now readily available and commonly used

Final thoughts

If you use USB drives on your computer from various known or unknown sources, this is a useful device to ensure that your computer and your drive are protected from malicious files/software. This is not a device for anyone who uses their own files and never shares drives, but for many of us who do, it is helpful. It is somewhat expensive and could be more efficient. The decision to purchase this firewall device is a personal choice and in my opinion, should be based on how exposed your computer and USB drives are.

Price: $249 NZD = $171.06 US
Where to buy: Globotron website
Sample: The sample for this review was provided by Globotron

Filed in categories: Reviews

Tagged: ,

Armadillo USB Firewall review originally appeared on The Gadgeteer on March 27, 2019 at 9:00 am.

Note: If you are subscribed to this feed through FeedBurner, please switch to our native feed URL http://the-gadgeteer.com/feed/ in order to ensure continuous delivery.
MyHotMat Connect warming tray review

REVIEW – Often when we have dinner guests over, we get lost in conversation and when someone goes back for seconds on a dish, our food is unpleasantly cold. Or we have a party and the queso dip either turns into an inedible block of resolidified processed cheese or gets overheated or burnt in the crock pot from inattention. Given the opportunity to review the MyHotMat Connect warming tray, I hoped to find a solution to these problems.

What is it?

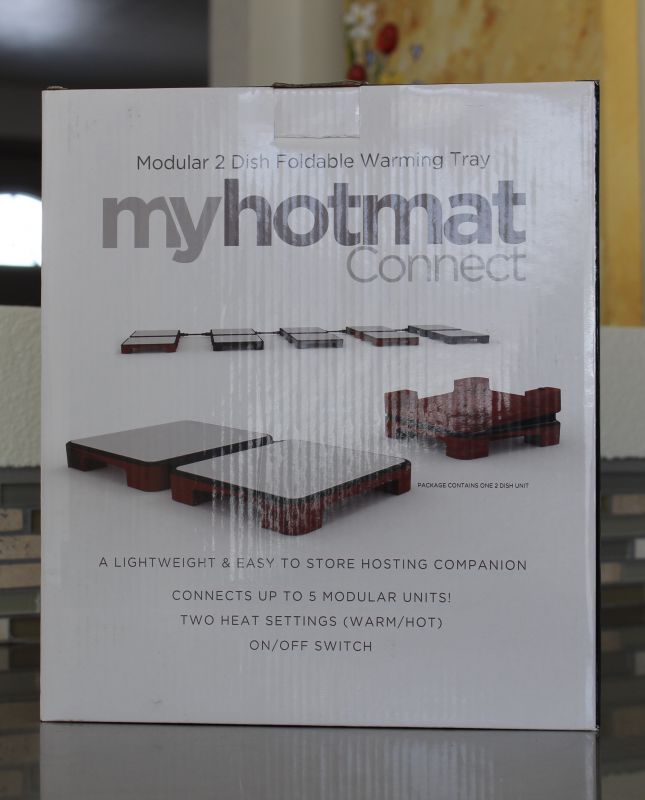
MyHotMat Connect is a dual plate modular warming tray, with the two plates connected by flexible silicon to allow it to be folded over for easy storage. It provides a “Warm” and “Hot” heating level.

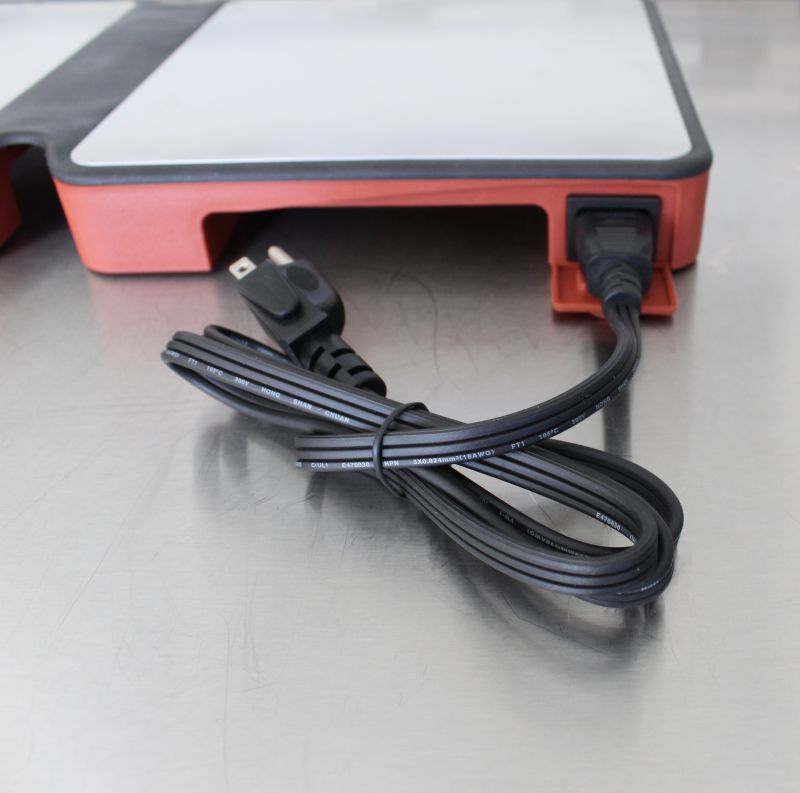
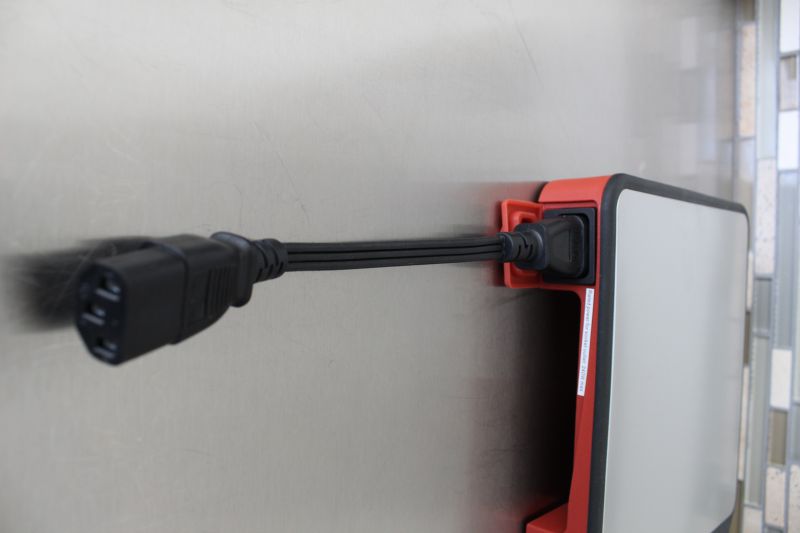
Additionally, each unit has a power port and cord (above) that allows up to 5 total units to be connected together for a total of 10 warming plates.

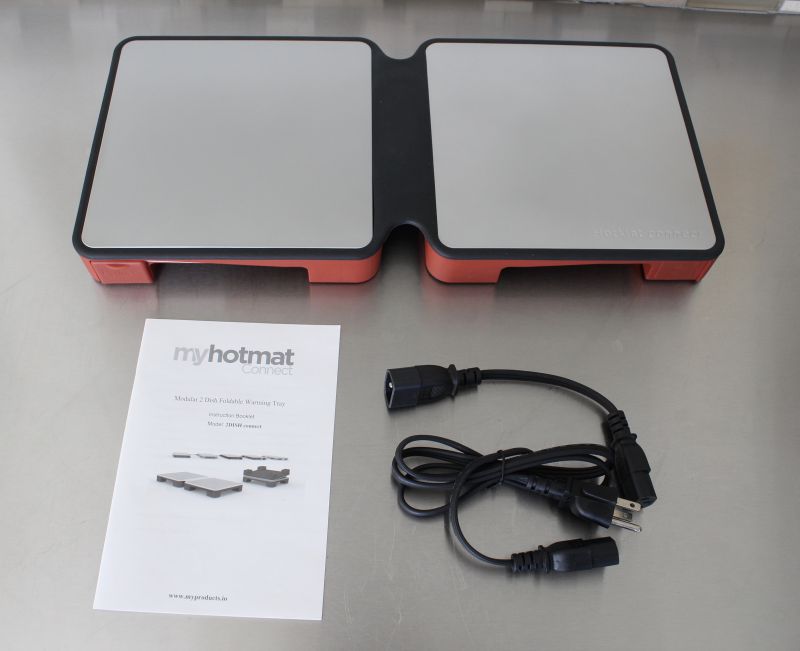
What’s in the box?

  • Two Plate Heating Unit
  • Power Cord
  • Connection Cord (for connecting to additional units)
  • Instruction Manual

Controls

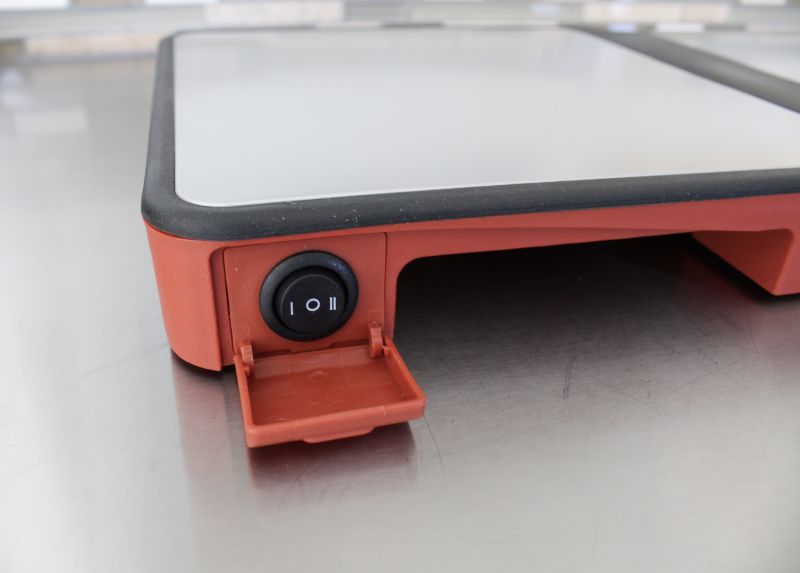
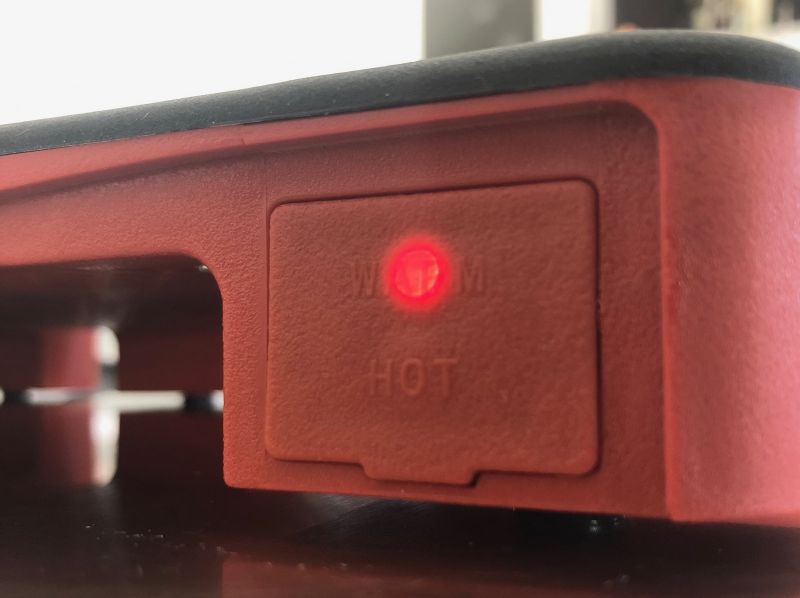
There is one control mechanism on this unit, a toggle switch with three settings: WARM (I), OFF (O) and HOT (II).

Design and features

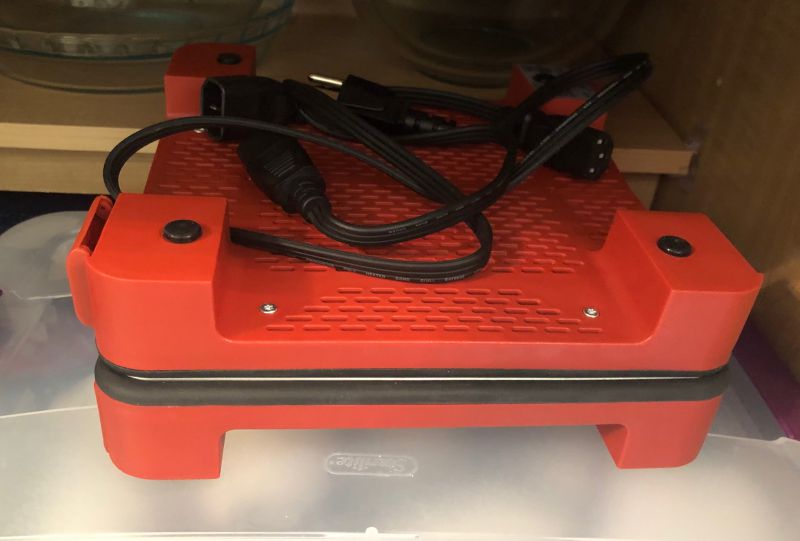
As you can see, it folds over compactly for storage, while folded it has a footprint of 9.8” x 9” x 4.1” and when unfolded for use it is 19.2” x 9” x 1.57”. It is available in red and gray for the plastic molding, while the heating plates have a stainless steel finish. For use, the trays take approximately 20 minutes to warm up, so you’ll need to think ahead a bit.

Per the project specifications, the unit can be used for up to 72 hours, they do not recommend use beyond that time frame. I was interested to read that this product had been tested and approved to be used during the observance of Shabbat, as I have a Jewish neighbor who observes it and could use a product like this. The HOT setting can reach 302 degrees F while the WARM setting reaches 212 degrees F. Care will need to be taken to keep pets and children from burning themselves on these units. An LED light illuminates the setting once turned on.

The HOT setting is recommended for soups, sauces and casseroles while the WARM setting is recommended for roasted, broiled or sautéed dishes and dry, baked goods. Additionally, when multiple units are connected, each unit can be set to its own setting. Finally, any glass, ceramic, stainless steel and aluminum containers, pots or pans can be safely placed on the warming plate surfaces.

For purposes of testing out this product, I had some friends over for a board game night and made a couple of dishes to use on the warming tray. First was a queso (velveta cheese block and rotel tomatoes) and the second was a bean dip. While preparing the food, I set the tray to HOT and let them warm up. Once ready, I moved the pot of queso straight from the stove top to the warming tray. For the bean dip, I took an oven-safe serving bowl we had and simply dumped the bean dip into the bowl and placed it on the other warming tray. Throughout the evening, my 4 friends and I made multiple trips to the trays to refill our plates. The queso stayed hot, liquefied and showed no signs of burning or curdling that I’m accustomed to when using a crock pot to keep it warm. The bean dip did start to dry out a bit as it got low, but that’s expected. The great part of the bean dip part, was that the bowl never got too hot to handle yet the bean dip stayed edible the whole time. A simple stirring of each dish from time to time kept them fresh and warm. Queso is kind of the ultimate test for me personally, as it can be a bit finicky – either burning, resolidifying or curdling if not kept at the right temperature. This warming tray delivered as promised.
What I like

  • Very simple controls
  • Storage is easy with the folding silicone connection
  • Being able to add multiple units for bigger parties/events
  • The color and design are sharp, fits into a modern kitchen very well
  • Worked very well at keeping our food hot

What needs to be improved

  • 20 minute heating time can be a problem if you don’t remember to turn it on early.
  • Cord management: there are two removable cords and if you’re like me, you could end up losing one or another, maybe have a snap lock tie under one of the units to help store the cords when not in use.
  • Price may be a bit of a deterrent.

Final thoughts

I anticipate using this warming tray very often, and may have to add a couple more to our kitchen for holiday celebrations that will require multiple casseroles and other hot dishes. The tray is very easy to use, has very simple controls and meets the expectations of the design. It is aesthetically pleasing as well for those who consider that an important part of their food presentation. Once it cools, it’s easily folded up and put away. I really had to struggle to find a way to improve this product, all of which don’t detract from the utility of the product. Overall, I consider it a great product and a signification improvement over other warming trays, crock pots and heated containers I’ve used to try and keep meals and snacks warm.

Price: $79.99
Where to buy: You can pick up the MyHotMat Connection on Amazon or on the manufacturer website.
Source: The sample of this product was provided by MyHotMat. You can find out more about their product on their website.

Filed in categories: Reviews

Tagged: , ,

MyHotMat Connect warming tray review originally appeared on The Gadgeteer on March 26, 2019 at 11:00 am.

Note: If you are subscribed to this feed through FeedBurner, please switch to our native feed URL http://the-gadgeteer.com/feed/ in order to ensure continuous delivery.