Amarey A800 robot vacuum cleaner review

REVIEW – I’ve been looking at robotic vacuums for some time and hadn’t decided if one would really work for us or not. So when the opportunity to review the Amarey A800 robot vacuum cleaner came up, I decided to bite the bullet and try one out.

What is it?

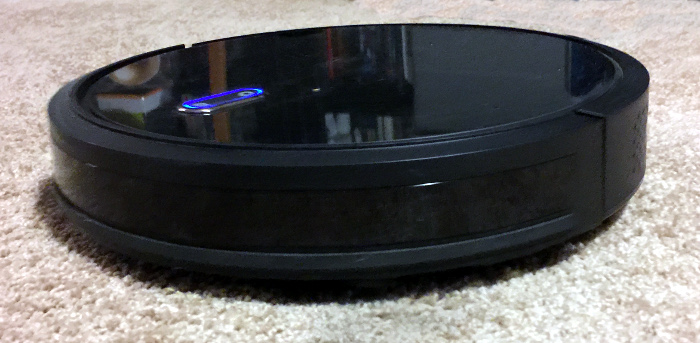
The Amarey A800 is an entry / mid-level robotic vacuum which shares its form factor with the majority of other robotic vacuums on the the market–a giant hockey puck with whiskers. The A800 the mid-level offering from Amarey and offers some advanced features not found on the manufacturer’s other models. The A800 model is aimed at households with pet hair and associated pet debris. The A800 is offered in two color schemes: black and white.

What’s in the box?

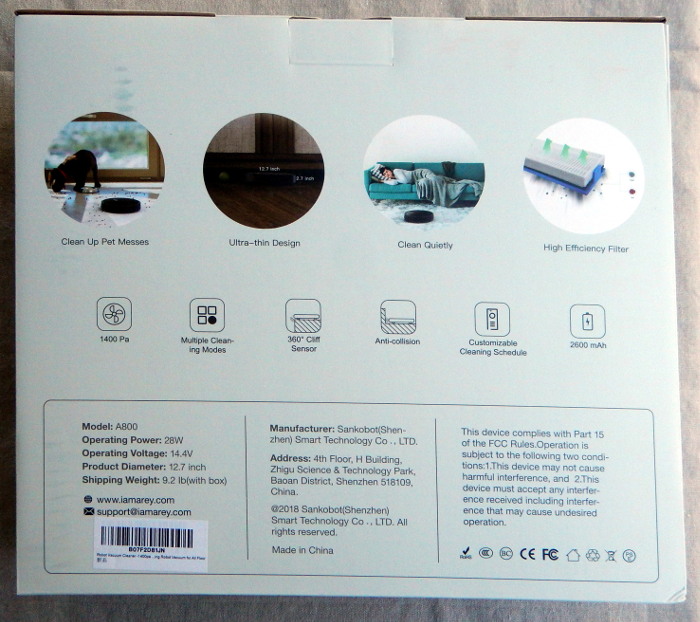
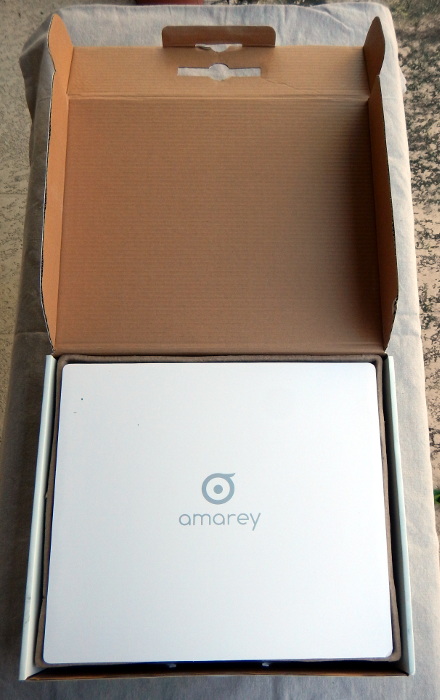
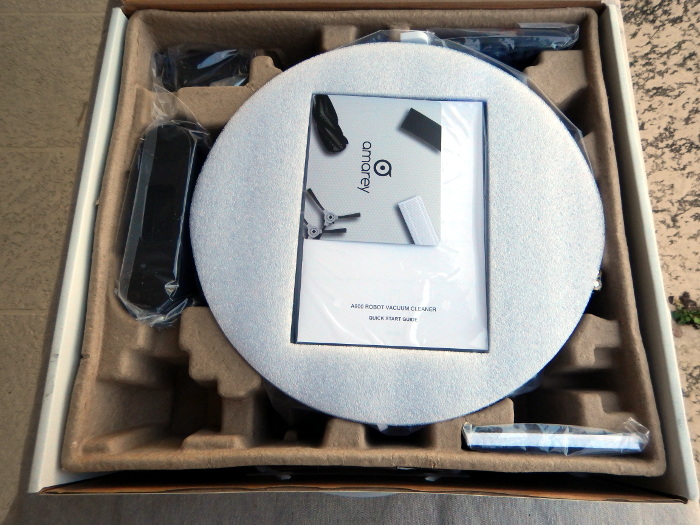
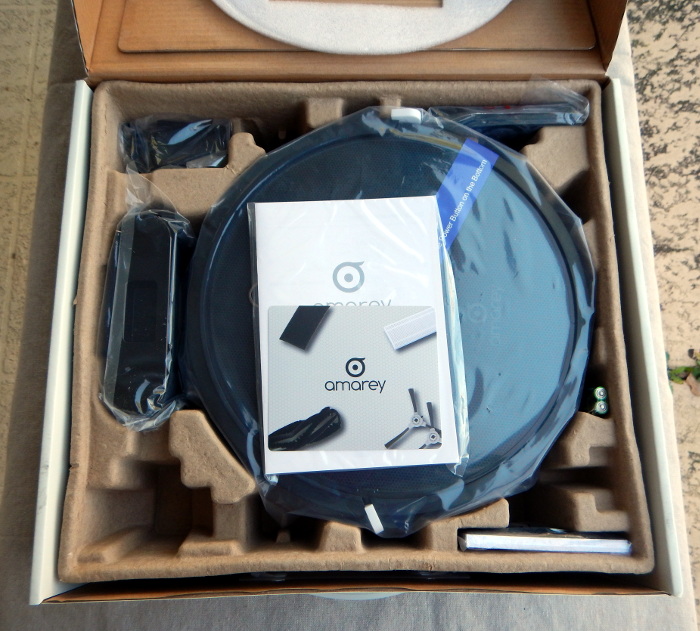
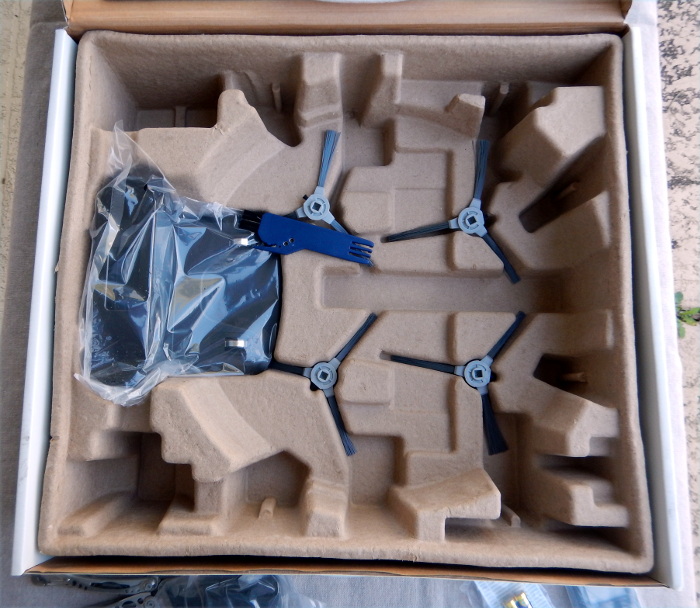
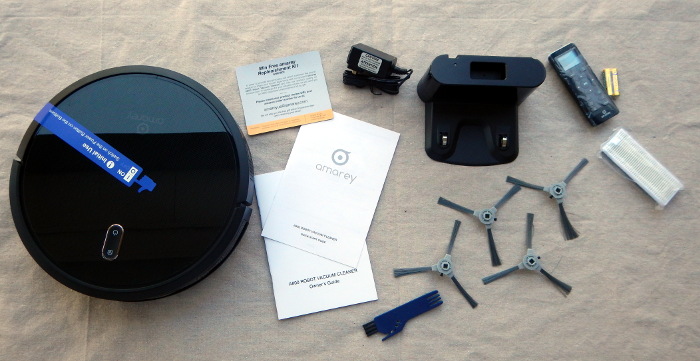
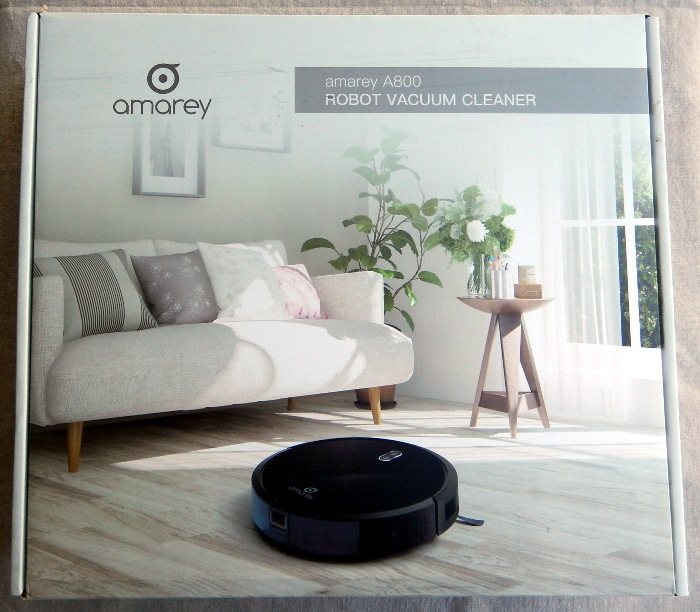
The Amarey A800 that I received is the black color scheme version. It arrived in a full color box which describes many of the features of the A800 Robot Vacuum. The interior of packaging is well designed and uses formed paper to keep the parts in position during shipping. Smaller parts were supplied in bags to keep them together. The tempered glass top of the A800 was protected by a thin foam sheet. The box contains

  • A800 robot vacuum body with pre-installed battery
  • Charging base with power cord and wall-wart power adapter
  • Four edge brushes
  • Installed air filters and spare set of particulate filters
  • Filter / brushes cleaning tool
  • Remote with batteries
  • Quick start and full instruction manual
Design and features

As mentioned above, the Amarey A800’s intended market is households with pet hair and debris. The addition of a second suction setting (“max”) is important to its performance in this area. The physical design of the A800 is unremarkable and follows the hockey puck with whiskers design pioneered by iRobot’s Roomba.

My initial thought upon unpacking my robot vacuum was, “This needs some glow-in-the-dark eyes to really set it off.” My wife quickly squashed (sorry about the joke) that idea. My younger son insisted that the robot needed a name. He rejected several (sorry for some of the jokes that follow) including Nature Abhors, Dusty, Spot, and Oops. We finally agreed on V.I.N.C.E.N.T. (I’ll leave the tortured derivation to the reader). I will interchangeably use A800 and VINCENT to describe the vacuum below.

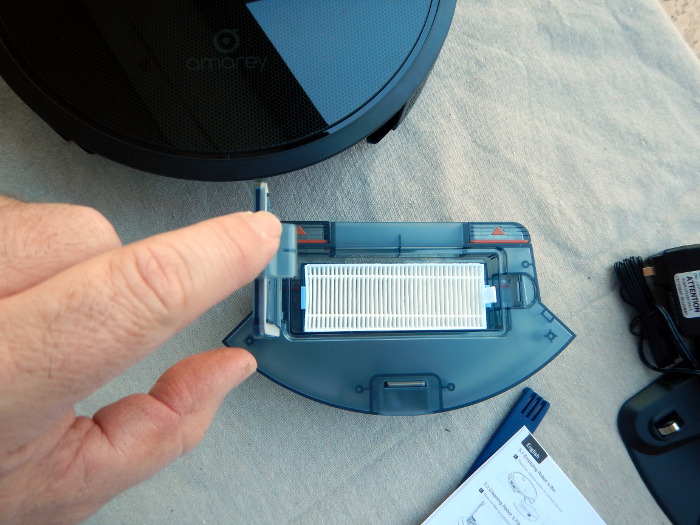
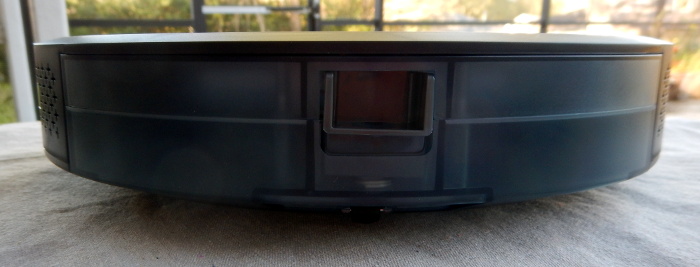
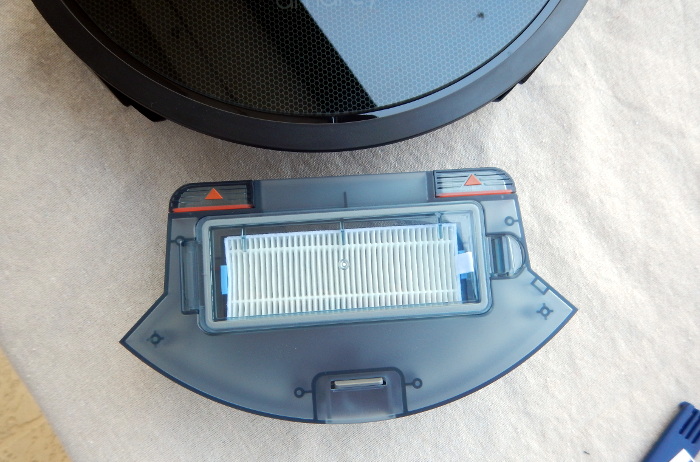
The A800 has twin bumpers on the front-left and -right and cliff sensors in the very front of the unit to help prevent a tumble down the stairs. An easy-to-access dust bin is on the rear of the unit. It is removed by pressing down on a recessed button and pulling the bin out. The bin is equipped with a permanent debris screen and a two-stage replaceable filter which consists of a sponge-like material (which is washable, but ultimately a consumable) and a corrugated paper filter. Spares for the two consumable filters are provided.
Setup

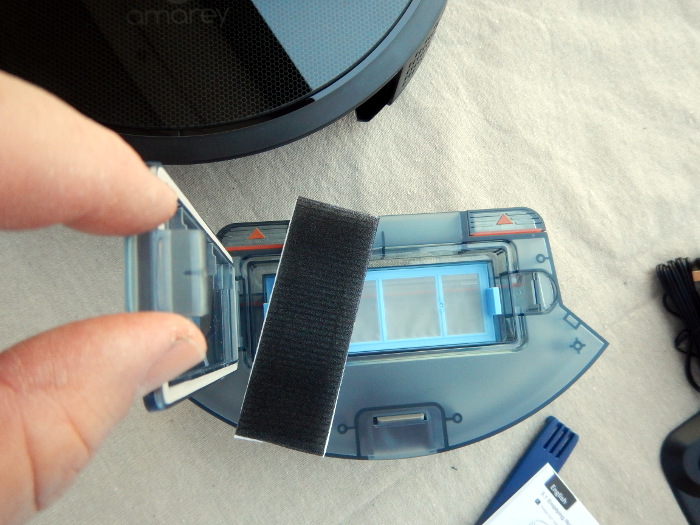
Setting up the A800 involved the removal of some shipping blocks that protect the bumpers / switches and some adhesive panels that kept the dust tray and some other parts secure during transit. I also had to press-fitting two edge brushes onto the appropriate axles on the bottom of the unit. The red master power switch on the bottom of the unit must also be turned on before the unit can be charged and put to work. Once the initial preparations were completed, I had to locate a suitable place for the charging dock and charge the A800. The instructions suggest having a clear 6 foot by 6 foot half-oval in which the charging base is to located. This was by far the most challenging part of the setup. I ended up placing the charging base in front of some of the bookcases in my office.

While the A800 was charging (about 3 hours), I put the batteries in the remote and set the clock on the remote. I also took time to read through the manual to discover what all of the various symbols on the remote’s buttons meant.
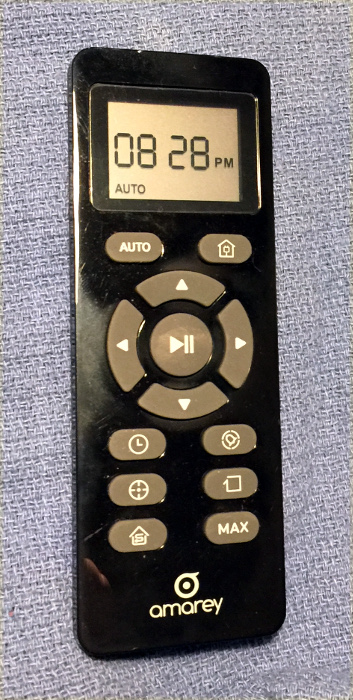
I will discuss the importance of the remote shortly.

Performance

After reading the manual, I soon discovered that many of the important functions of the robot vacuum are triggered only by the remote. The only controls on the A800 itself are buttons for starting / pausing a general cleaning cycle and telling the robot to return to base. The remote may be used to manually drive the A800, sets the cleaning mode, and schedules cleaning cycles.

We are currently between pets, but among two adults, one with long hair and one with a beard, and two teenage boys we generate a lot of hair and debris. Testing revealed that the VINCENT does a fine job of picking up debris that may be missed by casual vacuuming and debris in areas not easily accessible to traditional vacuums. I found that in our house, the standard level of suction was not adequate for our medium-pile carpets or area rugs, but was fine for hard surfaces. The “max” suction setting did a very good job removing debris from our carpets.  I am still amazed at how much debris VINCENT picked up during testing in a routinely vacuumed carpeted hallway, a less routinely vacuumed kitchen, and my office, which, let’s face it, usually only gets vacuumed when I spill something. I attribute this performance to the pedantic nature of the robot as compared to my “it’s good enough” style of vacuuming.

VINCENT’s dust bin is easily removed, as stated above, and is easy to open to empty. After not checking the filters for the first few cleaning cycles (the manual recommends monthly), I found that suction decreased significantly because the debris screen was choked with schmutz. Now, I check the debris screen and black foam pre-filter every time I empty the bin. The photo shows the results of a quick 30 minute clean on max suction.
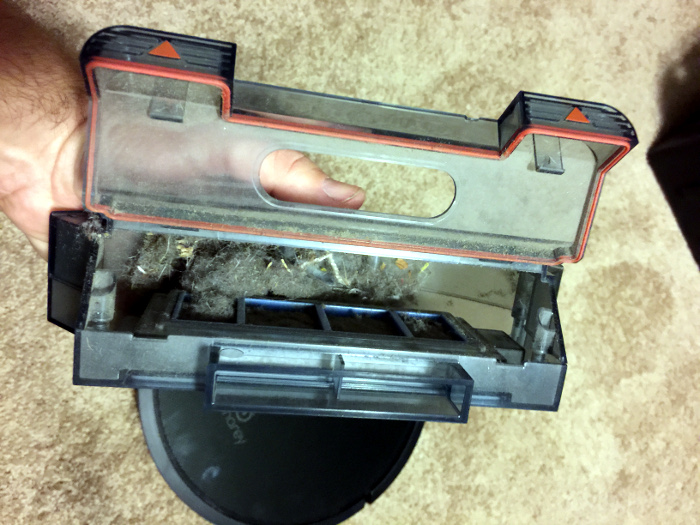
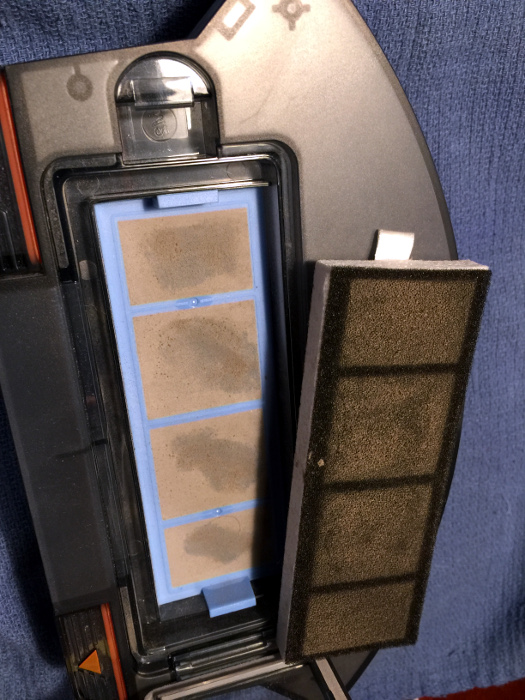
When set for standard cleaning, the VINCENT runs for about 90 minutes before attempting to return to its charging base. On the max setting, VINCENT will only run for about 50 minutes before requiring a charge. Charging times are on the order of 3 hours.

Cleaning modes

The A800 has the following cleaning modes which can be accessed via buttons on the remote.

  • auto cleaning — multiple rooms for the duration of a charge
  • spot cleaning — designed for cleaning localized debris, uses a spiral cleaning pattern
  • edge cleaning — works around the perimeter of the room or rooms
  • single room cleaning — cleans for 30 minutes (timer)
  • max vacuuming — increases the suction to provide a deeper cleaning

The A800 can be run on a schedule or on-demand. Scheduling is handled by the remote, so the remote must be within line of sight of the A800.

Navigation

During my evaluation, I found that VINCENT has trouble avoiding dark-colored (black and black-brown) objects, avoiding low-clearance areas (I am reminded of the infamous “truck eating” bridge of YouTube fame), navigating loose, lightweight throw rugs on slick surfaces (wood floor), and negotiating cords and horizontal tube legs / feet on pop-up tables. All of these objects and conditions were encountered during VINCENT’s initial testing in my office and front hall. I made no preparations other than placing boards at the end of the hallway and in the back door of my office to keep VINCENT somewhat corralled. During the first few test sessions, VINCENT wedged itself under on of my cabinets three times in 10 minutes, high-centered itself on a rag rug after pulling the rug up underneath its body, high-centered itself on a small pop-up table’s tube feet, dragged power and low-voltage cords out from under my secretary desk (used as a charging station for our myriad of iDevices), and became trapped between my desk and trash can where it rattled around for 5 minutes trying to extricate itself.
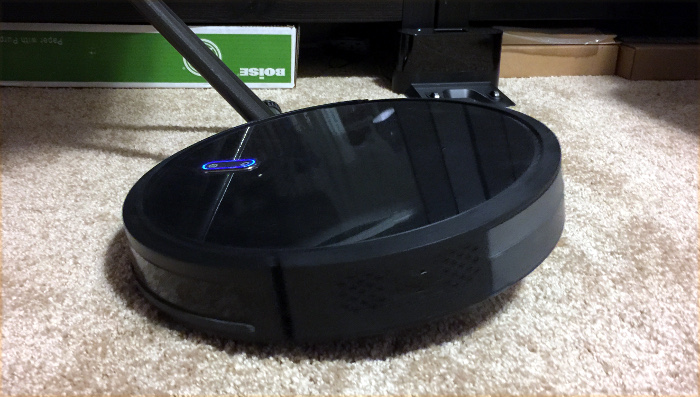
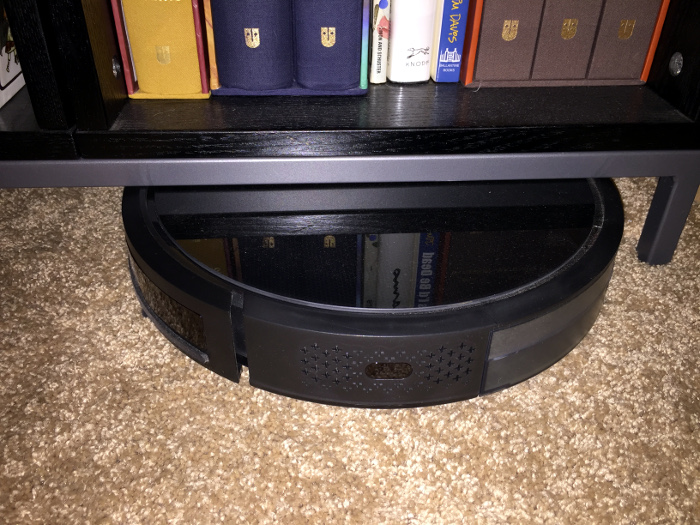
After these first few sessions, limits were placed on where the A800 could travel through the strategic placement of relatively immovable objects, like my trashcan (vintage JustRite rag can), chairs, heavy books, and for one troublesome spot, a pair of antique cloth-wrapped brick that are normally used as doorstops. An Amazon review described preparing for reliable use of the A800 as being similar to toddler-proofing a house. I think that is an apt description.

This brings us to the navigation system on the A800. It doesn’t have one. It follows a set of simple algorithms for free roaming and recovering from collisions that approximate what I call a dunkard’s walk–following a slightly arcing path until a collision occurs and then rotating to change direction and trying to set off again. This can lead to humorous, or frustrating, pirouettes while the robot tries to navigate out of confined spaces.

What I like

  • The diligence of the robot
  • Good suction on “max” setting
  • Entertaining to watch
  • Support for scheduled cleaning, on-demand cleaning, and spot cleaning.

What needs to be improved

  • Collision avoidance
  • Battery life
  • Noise level during operation
  • Mapping / navigation system
  • Ability to place the charging base underneath a bookcase or table rather than taking up a six-foot by six-foot half-oval of clear floorspace

Final thoughts

Despite its foibles, the A800 does a good job of cleaning small spaces with limited clutter and well-controlled cables. I would recommend the A800 for people with studio / loft / 1-bedroom apartments or confined spaces where clutter-minimization is practiced.  I found myself using it as a one room at a time vacuum rather than letting it run on its own schedule. After my experiences with VINCENT, I am definitely sold on the concept of robotic vacuums.

Price: $ 199.99
Where to buy: Amazon
Source: The sample of this product was provided by Amarey.

Filed in categories: Reviews

Tagged: ,

Amarey A800 robot vacuum cleaner review originally appeared on The Gadgeteer on April 14, 2019 at 9:03 am.

Note: If you are subscribed to this feed through FeedBurner, please switch to our native feed URL http://the-gadgeteer.com/feed/ in order to ensure continuous delivery.

LifeShield Wireless Flood Sensor review


REVIEW – Last year, I reviewed the LifeShield Security System, that included full automation via a touchscreen tablet, base station, wireless keypad, wireless camera, and a number of security accessories and sensors. The system has performed flawlessly, and now I have the opportunity to reviews LifeShield’s Wireless Flood Sensor. I am quite confident that this add-on will be another good experience, but I won’t count my chickens before they hatch. Let’s see if I am right.

What is it?

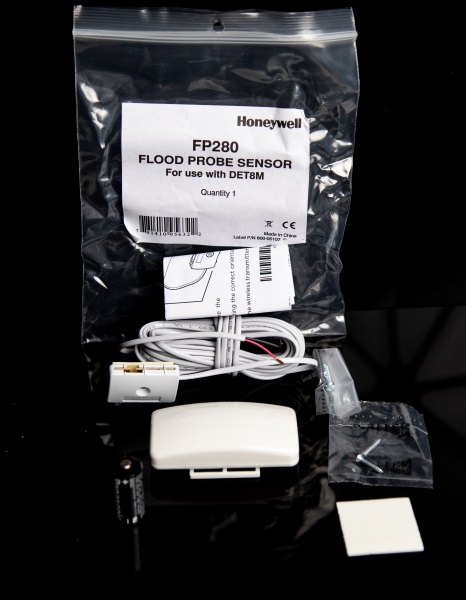
The LifeShield Wireless Flood Sensor connects to the LifeShield Security System and will sound the alarm if water reaches or rises above the level at which it is placed. Since it is wireless, the transmitter is powered by a battery.

What’s in the box


1 x Wireless Transmitter
1 x Flood Sensor
1 x Battery
2 x Set of Mounting Screws
1 x Adhesive Pad
1 x Instruction Leaflet

Design and features

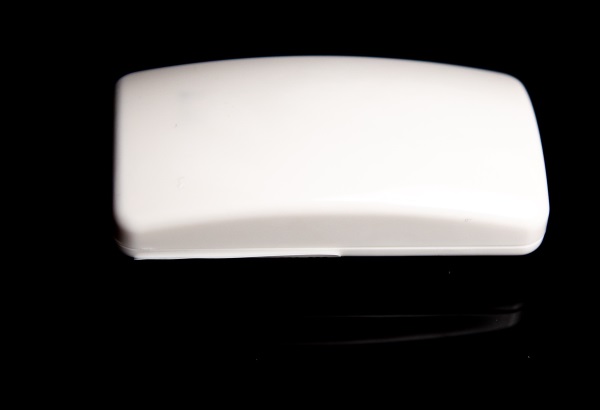
The flood sensor consists of a transmitter and a sensor and the 2 are connected via a wire. The transmitter is battery powered and should be mounted somewhere above the sensor and above any anticipated and possible water level. The transmitter can be used with any one of 4 different types of sensors.

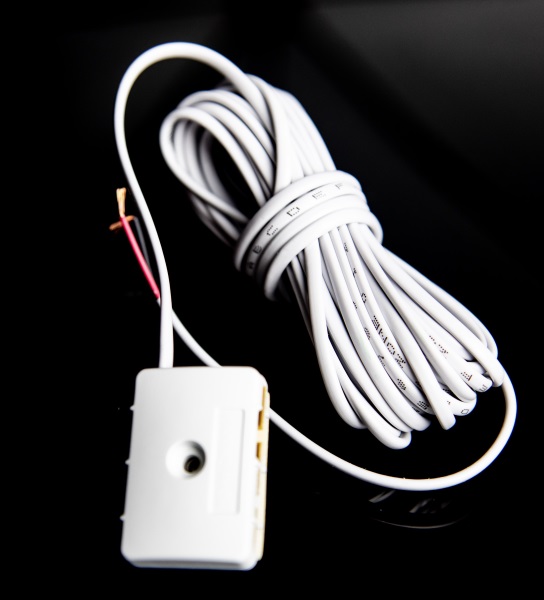
Shown below is the sensor and with the wire that is permanently connected.

Installation

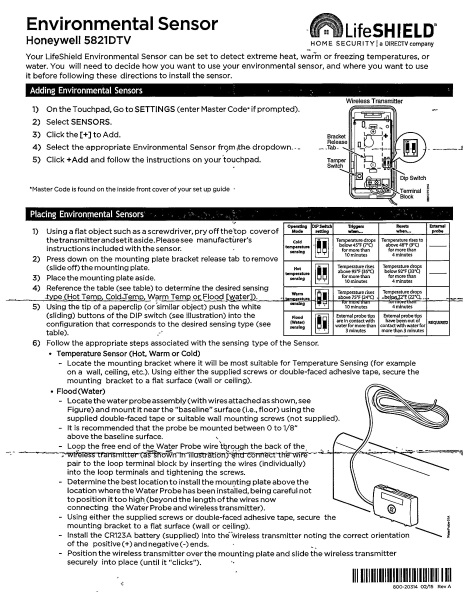
The first illustration below is the one-page instruction sheet that is provided with the sensor. It includes directions on how to open the transmitter, how to set the DIP switches to select the type of sensor that you are connecting, and how to connect the 2 wires from the sensor.

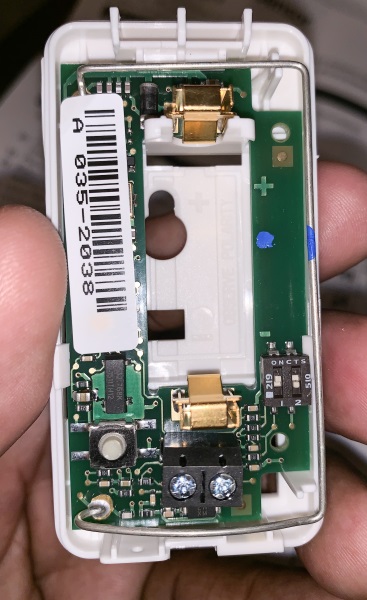
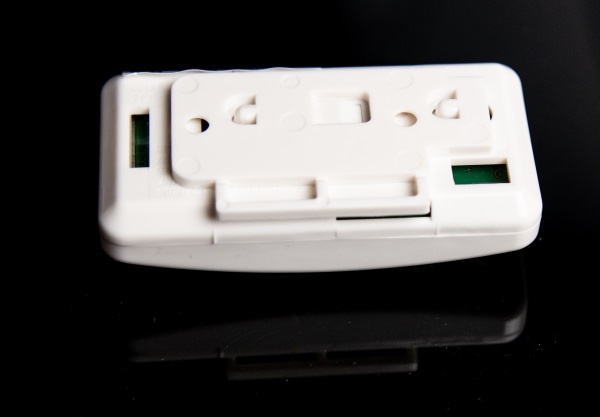
The next picture below shows the inside of the transmitter including the battery holder, tamper switch and DIP switches.
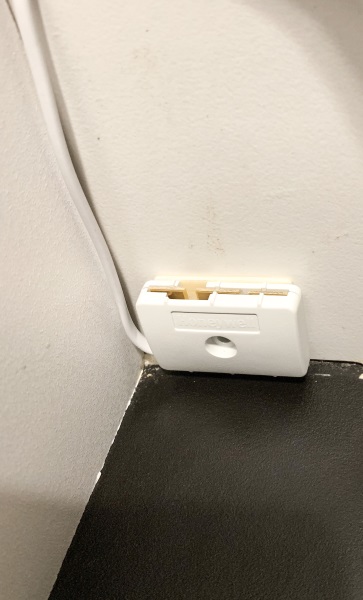
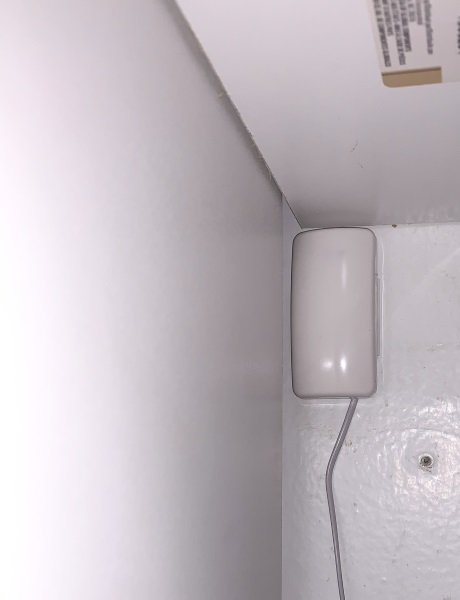
Using the provided double-sided, I attached the sensor on the side of the wall right above the floor and within the recommended height above floor level.

This next picture slows my placement of the transmitter again using the provided double-sided tape. I placed it about 5′ above the transmitter. (By choice).

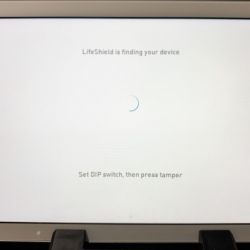
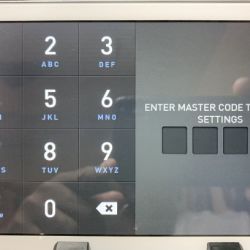
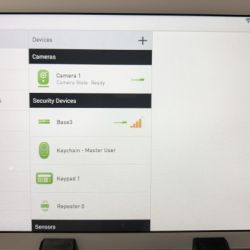
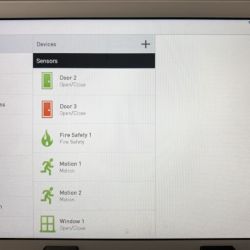
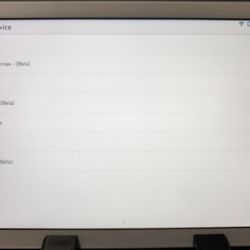
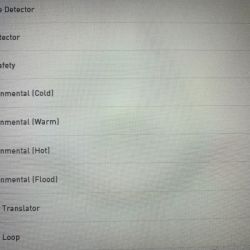
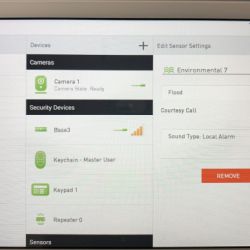
After installing the hardware, there is a simple process that you follow in the settings screen of the LifeShield control panel to add the sensor. The following are screenshots of the process.


What I like

  • Function
  • Easy connectivity with LifeShield Security system

What can be improved

  • Larger print for the provided instructions

Final thoughts

Since I am already a fan of the LifeShield security system, I was very interested when I got the opportunity to try their flood sensor. (They sent 2). Just as I expected, the installation was easy and incident free. Since my 2 young kids are fans of water, and since they have flooded my bathroom more than once before, I readily embraced this device. Just like several other sensors and devices that pair with the LifeShield system, I am happy to give them two thumbs up for this add-on accessory.

Price: $29.99
Where to buy: The LifeShield website
Sample: The samples(2) for this review were provided by LifeShield.

Filed in categories: Reviews

Tagged: ,

LifeShield Wireless Flood Sensor review originally appeared on The Gadgeteer on April 13, 2019 at 10:00 am.

Note: If you are subscribed to this feed through FeedBurner, please switch to our native feed URL http://the-gadgeteer.com/feed/ in order to ensure continuous delivery.
Tronsmart Element Force Bluetooth speaker review

REVIEW – It seems that every few days, there’s an announcement about yet another new Bluetooth speaker.  Today’s entry is the Tronsmart Element Force.  Is it worthy of your consideration?  Read on!

What is it?

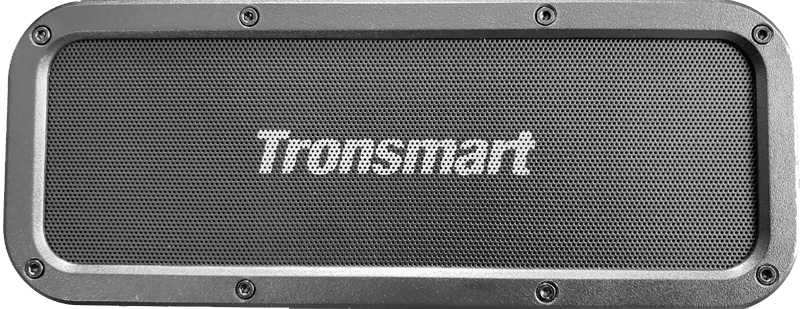
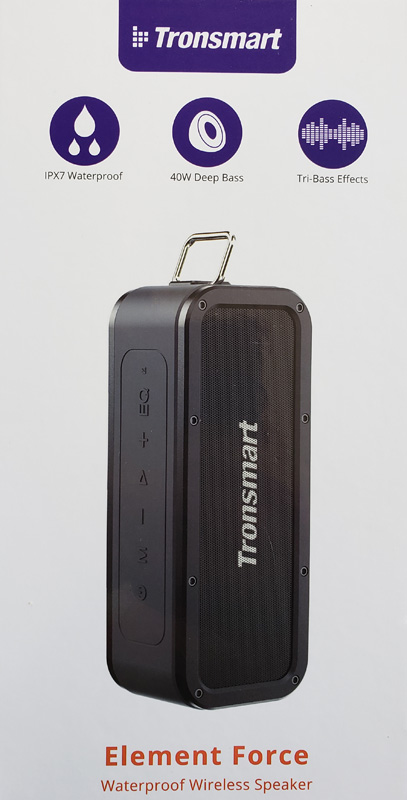
The Element Force is a Bluetooth 4.2 speaker with up to 15-hour battery life. It is relatively small and portable and is IPX7 water resistant (complete submersion up to one meter for up to 30 minutes). It also has a built-in microphone for hands-free calling.

What’s in the box?

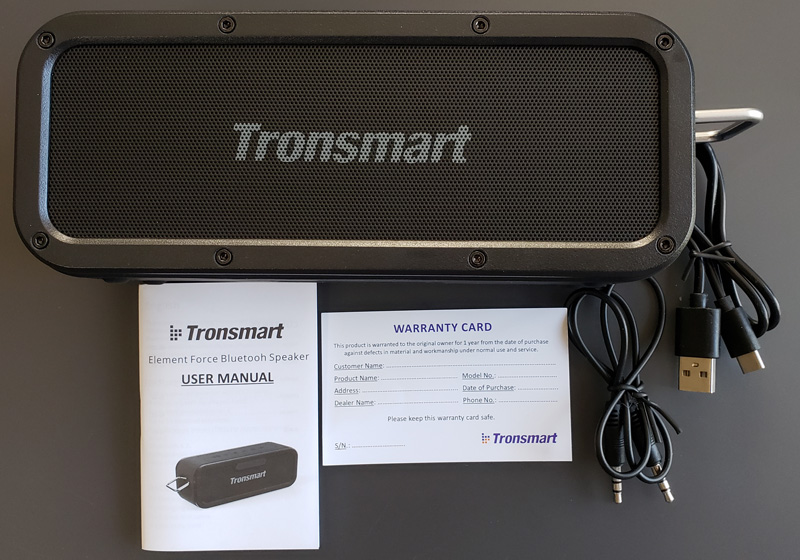
The speaker comes well packaged with a soft cover and foam all around for shipping protection.

  • Tronsmart Element Force speaker
  • USB-A to USB-C charging cable
  • 3.5mm AUX cable
  • User manual (in six languages)
  • Warranty card

Hardware specs

  • Bluetooth version: 4.2 + EDR
  • Bluetooth transmission distance: 20m/66ft (open area)
  • Frequency: 80Hz-18KHz
  • Water resistance: IPX7
  • Power supply: DC 5V/3A (max) USB-C
  • Battery capacity: 3300mAh x 2
  • Charging time: about 3 hours
  • Play time: up to 15 hours (medium volume)
  • Charge time: 3 hours
  • Output: 2 x 20W max
  • Driver unit: 53mm
  • Distortion: ≤1.0%
  • Connectors: USB-C charging port, 3.5mm aux-in port, TF/Micro SD card slot with support for WAV, FLAC, APE, MP3 formats
  • Dimensions: 204 x 64 x 80mm / 8.03 x 2.51 x 3.14in
  • Net weight: 780±5g / 27.51±0.2 o
  • Hanging loop on side

Design and features

Let’s get into how well the Element Force does its job.

Setup

The first thing I did was to charge the speaker.

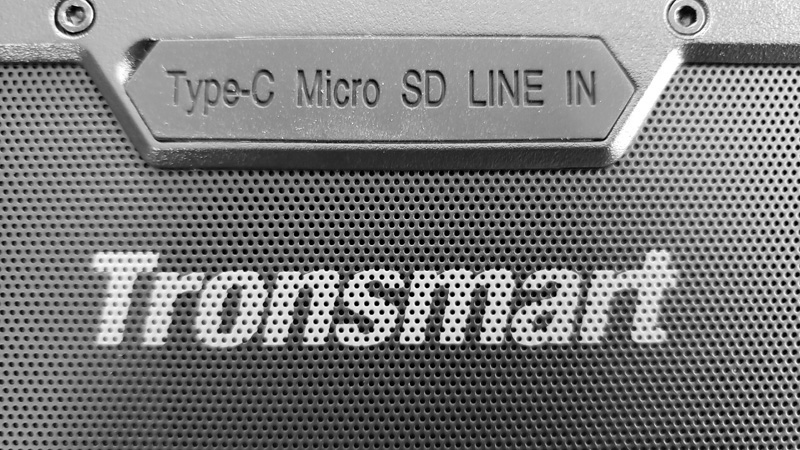
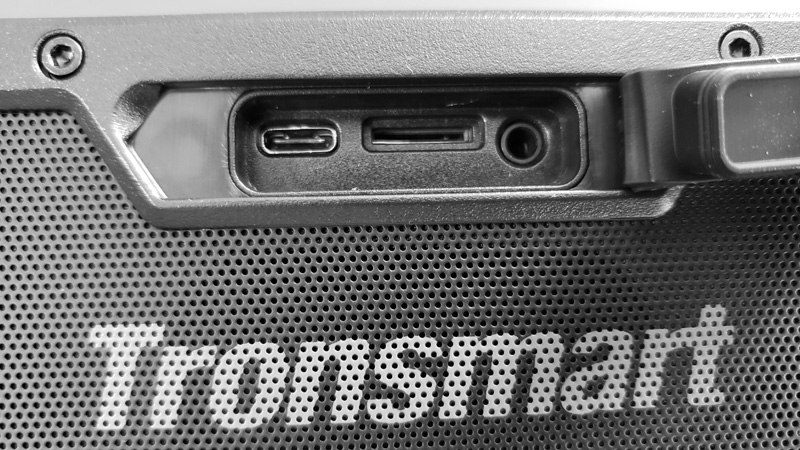
On the back of the speaker, we find a rubber cover embossed with labels for the connection ports underneath.

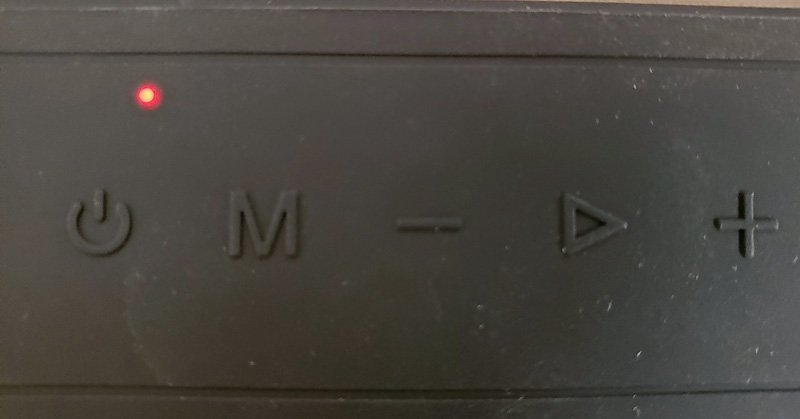
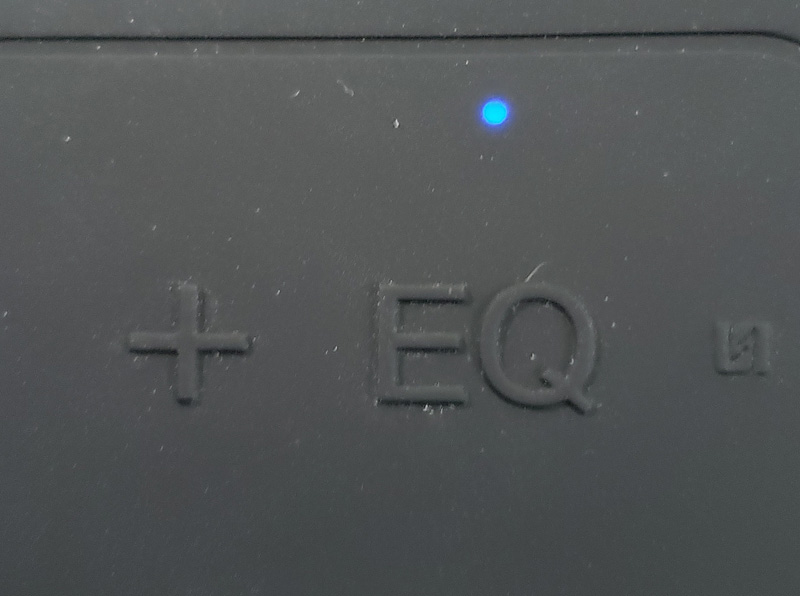
After plugging in the USB-C cord, the speaker started charging.  There is a small red LED above the power button.

The LED goes out when charging is complete.  This happened in just a few minutes, so the speaker shipped nearly fully charged – a nice touch. Expected time for a full charge is three hours. That same LED also lights blue and doubles as the Bluetooth pairing and paired indicator as well as the AUX-in indicator.

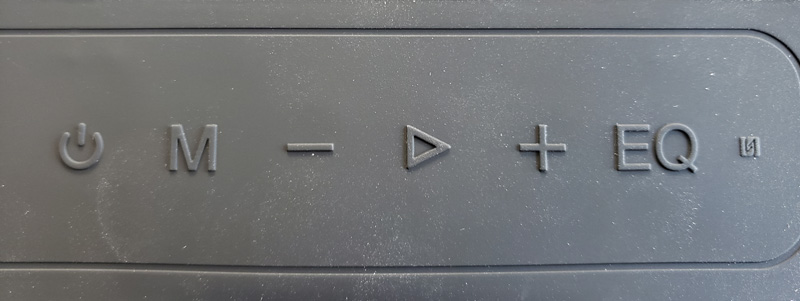
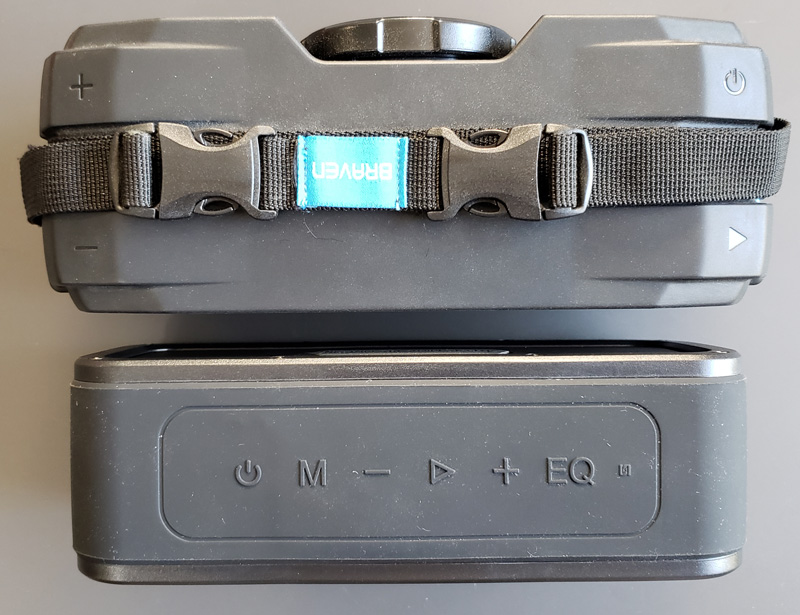
All the control buttons are located under a rubber layer with raised markers indicating button function.

From left to right:

  • Power – press on / press off
  • M – mode – changes inputs from Bluetooth to SD card to AUX-in; also, hold for 6-8 seconds to factory reset and unpair all devices
  • Minus – click lowers volume; long-press skips back one track
  • Play/pause – clicking plays or pauses the music; answer/hangup for phone calls; 2-second press to reject a call; 6-8 second press to force a power down
  • Plus – click raises volume; long-press skips forward one track
  • EQ – change audio effects from extra bass, 3D sound, and standard
  • NFC – the small symbol on the right is the NFC pad – more on that below

The rubber covering offers some impact resistance, and are nice to touch, but…any small dust or debris sticks to it like glue. If you take a look at any of the photos, you will see dust all over.  If that stuff bothers you, you can clean it with a damp cloth – no cleaners or detergents – but, it will be dusty again almost immediately.

There are two methods to pairing the speaker to your device.  For this review, I used my Samsung Galaxy S9+ as the sound source.

Bluetooth pairing

Make sure your device has Bluetooth on and turn on the speaker. The LED above the power button will flash blue. Go into your device’s Bluetooth pairing screen and look for the Tronsmart Element Force and click on it. The pairing worked perfectly and the LED indicator turned solid blue.

NFC pairing

I also tried NFC (near field communication) pairing. On your device, make sure that both Bluetooth and NFC are turned on.  Then, hold the back of your device over the small NFC label on the right side of the speaker’s function buttons. Pairing was almost instant, and like the Bluetooth method, worked perfectly.

I don’t know that one method or the other is better or faster. They both worked well. Now that it is paired, how does it work and sound?

Performance

I fired up music on my phone and went to it. Immediately, I was impressed with the sound quality.  Let’s get this out there right now, I am not an audiophile. I like music, and know what I think sounds good, but I can’t discern minute differences in frequency.  Having said that, this isn’t a speaker that folks will use in an audiophile-type setting.  It is a waterproof, portable speaker that should be where the party is, whether that’s on the beach, by the pool, or out on the hiking trail.

There are three audio modes: extra bass (default), 3D sound, and standard. To move between modes, press the EQ button.  The LED above the EQ button will show the current mode:

  • Off: extra bass (default)
  • Blue: 3D sound
  • White: standard sound

The extra bass mode sounds pretty good. The standard mode sounded a little flat for my tastes.  I preferred the 3D sound.  It was a more full and rich sound and I felt it added some depth to the music.  Given that I will use this as the primary sound source for my golf cart, having the 3D sound enabled adds a lot of presence to the music.  That’s important as you’re zipping along at 20+ MPH with no side curtains.

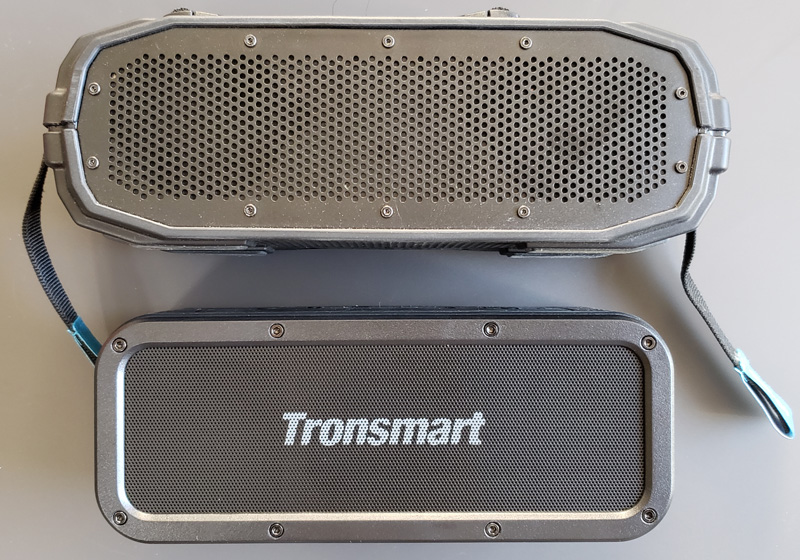
I like the size of this speaker.  It has some heft and feels quite sturdy. It is sized perfectly to fit up in my rear overhead tray on the golf cart.  That space was occupied by a Braven BRV-X speaker.  It was always a little tight getting it in or out when I had to charge it. The Element Force slips right in there perfectly.

Here is a size comparison between the Braven (top) and Tronsmart (bottom).

Since I was already comparing the Tronsmart to the Braven, I figured I would continue. I connected to the Braven and cranked up the volume.  It was loud and sounded good.  Then I did the same with the Tronsmart. Wow. It was so much louder, I was amazed.  And, to my less than perfect ears, it sounded pretty darn good. But, was I really hearing the volume difference correctly?  Let’s get science to help!

I have a sound meter app on my phone.  First, a disclaimer – this app has never been calibrated. This means that the specific decibel readings should be taken with some skepticism. Since I used the same app to measure the sound from both speakers, the relative difference still stands as accurate.

I fired up Fleetwood Mac’s Rhiannon on Amazon Music, turned up the volume as high as it would go and put the phone about 24 inches from the speaker.

The Braven is on the left, the Tronsmart Element Force on the right:

Without getting into the science of volume, sound pressure, and energy, which gets a little dry and science-y, the general consensus is a 6-10 dB increase results in a perceived doubling of the volume. I think it’s safe to say that the little Element Force is at least twice as loud as the Braven. For anyone planning to use this outdoors, in open spaces, that extra volume will be welcome.

Other niceties:

  • 15-minute auto power off when not playing or connected
  • TWS (true wireless sound) capable – you can pair two Element Force speakers as a stereo pair

I put a handful of MP3 files on an SD card and popped in in the back of the speaker.  It was a little tricky getting the SD card in place as the slot is recessed in the back of the speaker.  It clicked into place with a little wiggling.  Getting it back out was another story and ultimately required tweezers to grab the SD card.  The channel that contains all the ports is way too narrow for fingers to actually fit into. My wife tried and even with her smaller fingers, failed to retrieve the SD card.  Tweezers prevailed.

The MP3s played as expected and sounded great.  One complaint – they only play in order.  For those of a certain age, like me, this harkens back to the days when we made our own mix tapes.  Tapes only played in order, so you got super used to the order the songs played in.  Then, once CDs arrived on the scene and Walkmans were everywhere, shuffle play was a revolution, making the next song a pleasant surprise, since you never knew what song was coming next.  That trend continued with iPods and other MP3 players. For some reason, Tronsmart left a shuffle option off the Element Force, so using an SD card will be a lot like the old cassette tape days, in terms of song order.

Battery life is a claimed 15 hours on medium volume.  I had the volume all over the place over several days.  While I don’t have an exact runtime, since it was in bits and pieces at varying volumes, the 15-hour claim seems pretty plausible.

Finally, I tested the Bluetooth connection distance.  Per the specs, it should be 20m or 66ft in open spaces.  I put the speaker on the patio wall and walked out onto the golf course.  I kept my phone between me and the speaker, so my unfortunately thick middle section wouldn’t affect signal transmission.  At my roughly 3ft stride, I got 60 strides out before the speaker started breaking up consistently.  That put the open space distance at somewhere around 180 feet.  Of course, as soon as I got between the speaker and phone, the cut-outs increased, but still, I was impressed.

What I like

  • Great size
  • Solid build quality
  • Terrific volume
  • Good sound quality
  • Good battery life
  • Good Bluetooth distance
  • Multiple input sources
  • USB-C charging so it doesn’t need a special power adapter

What needs to be improved

  • When playing from the SD card, songs play in order – it would be nice to have a shuffle option
  • You can’t get the SD card easily out without tweezers or plyers
  • If you watch your device when the Bluetooth connects, you get a pop-up with the remaining battery life as a percentage – a battery meter would be much easier

Final thoughts

The Tronsmart Element Force is a capable Bluetooth speaker.  Its water resistance is a great plus for outdoor use.  It is small enough to toss in a backpack and take with you. The fact that it also sounds great rounds this out as a great choice when shopping for your next Bluetooth speaker.  If they added shuffle play, it would be almost perfect. This will be a permanent fixture for my golf cart.

Price: $59.99
Where to buy: Amazon
Source: The sample of this product was provided by Tronsmart.

Filed in categories: Reviews

Tagged:

Tronsmart Element Force Bluetooth speaker review originally appeared on The Gadgeteer on April 13, 2019 at 9:00 am.

Note: If you are subscribed to this feed through FeedBurner, please switch to our native feed URL http://the-gadgeteer.com/feed/ in order to ensure continuous delivery.
Plugable NVMe SSD Enclosure review

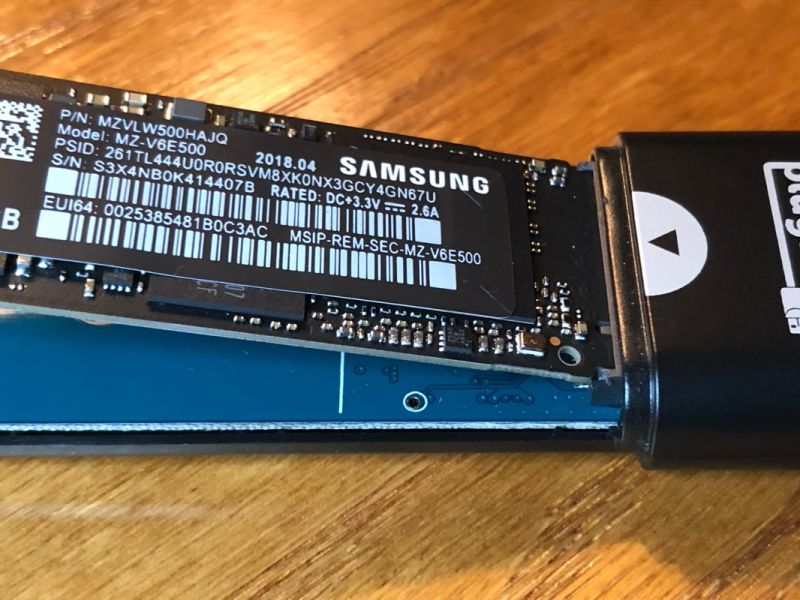
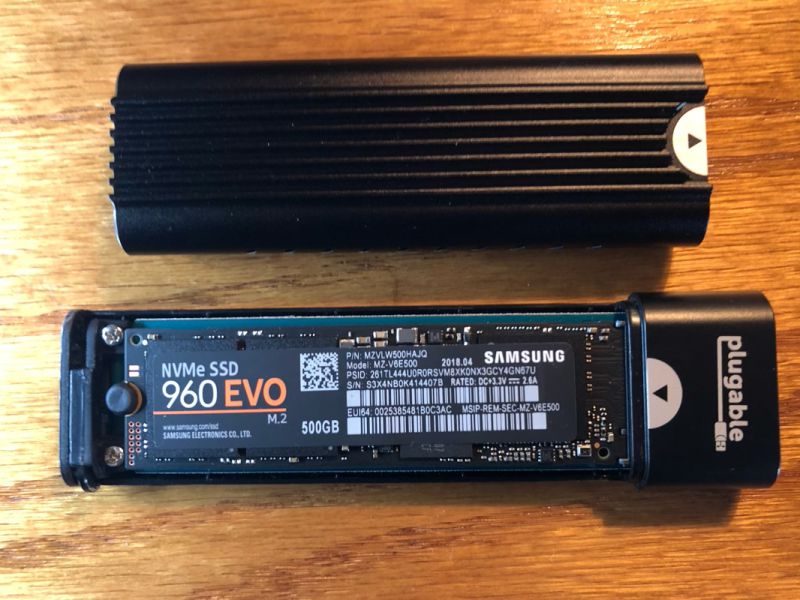
REVIEW – Last year I designed a custom gaming PC and had my local computer shop build it for me.  It was the first time that I had designed a computer that did not have a traditional hard drive; instead, it used a super-fast 500 GB Samsung NVMe SSD 960 EVO M.2.  To maximize performance, this little card—it looks more like a memory card than a hard drive—doesn’t even use a cable; it connects directly to the motherboard.  But what if I decided to build a new computer and needed to quickly copy some files from the old SSD drive?  Or what if I worked in an IT shop where I regularly dismounted these SSD drives from old computers so that I could wipe them before surplus?  If you find yourself needing to quickly mount and dismount SSDs like this, Plugable has a gadget for you.

What is it?

The Plugable NVMe SSD Enclosure is an enclosure for NVMe M.2 SSDs.  It allows you to quickly mount and dismount them without having to use any tools.

What’s in the box?

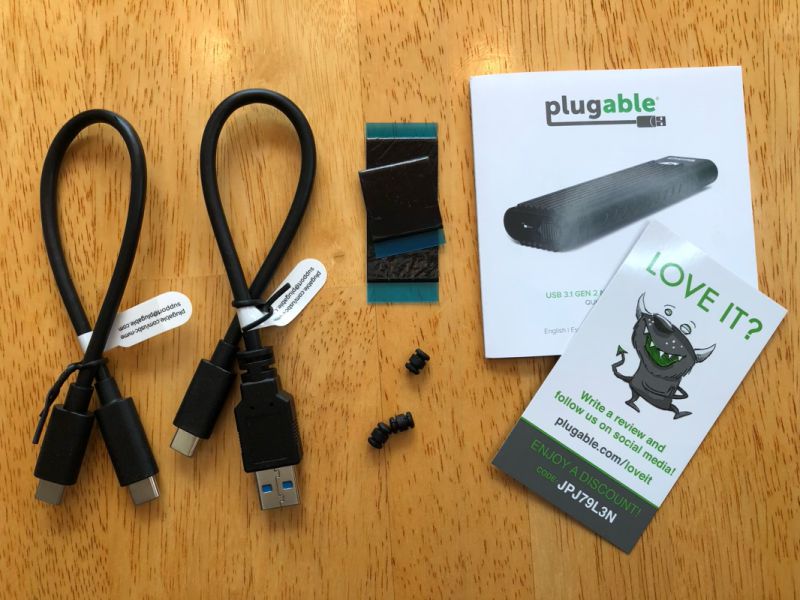
  • The enclosure
  • USB-C to USB-C cable
  • USB-C to USB-A cable
  • 3 extra rubber standoffs
  • 3 adhesive thermal pads
  • A customer care card
  • A manual with 1 page of English instructions

It should be noted that this enclosure doesn’t come with an SSD; that has to be bought separately.  The Plugable site has several compatible recommendations, anywhere from 120 GB to 2 TB in size.

Hardware specs

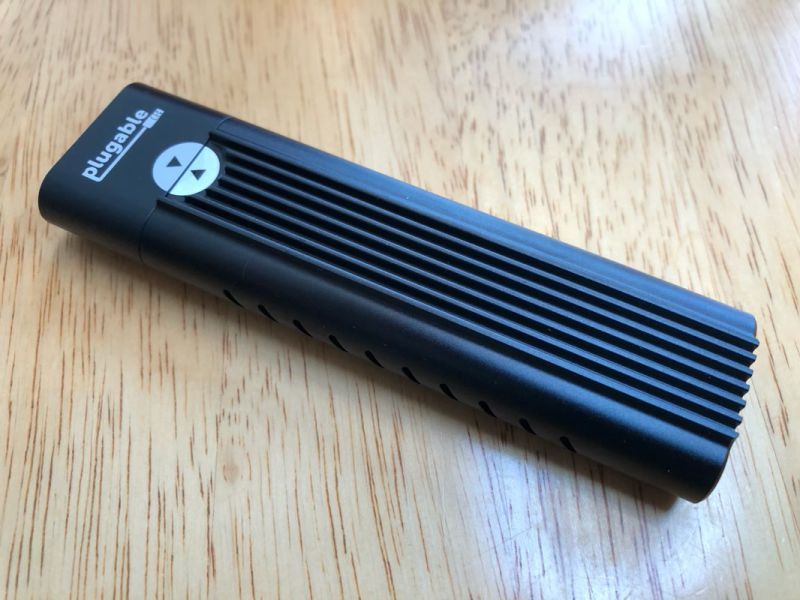
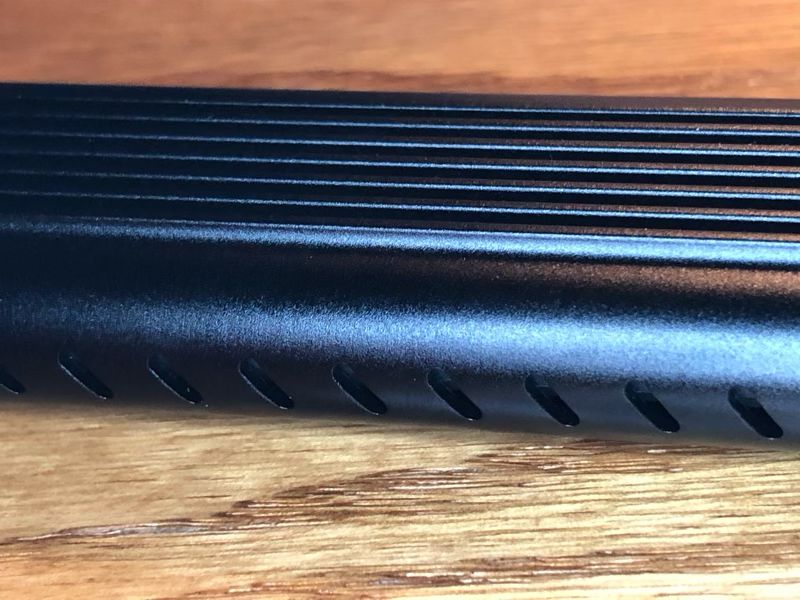
The case is made of aluminum and looks a bit like a giant heat sync with holes cut in the side for extra ventilation.  When used for extended periods of time, SSD drives like this can get rather warm, so this design is intended to keep things cool.  It’s probably a good idea to make sure it has plenty of air flow.

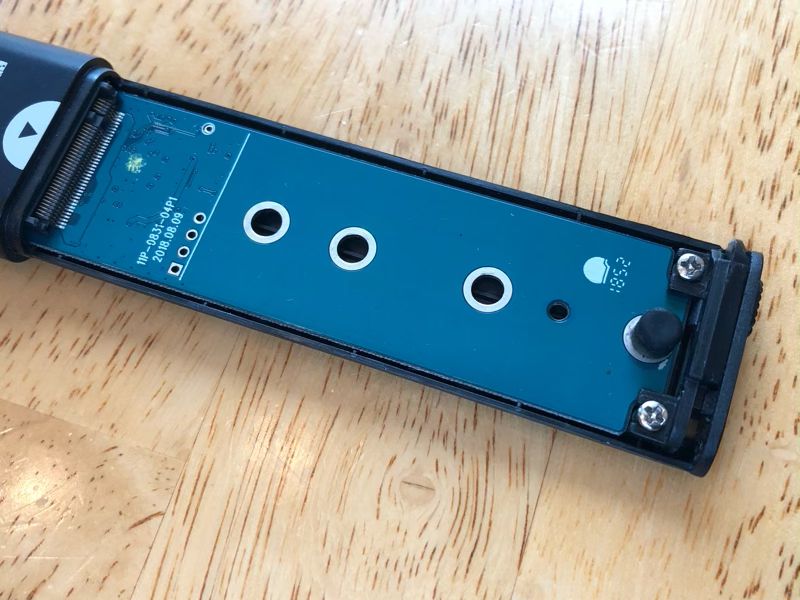
The enclosure is designed to work with SSDs that are of form factor 2230, 2240, 2260, or 2280.  M.2 SSDs come in a variety of widths and lengths, but Plugable’s product only works with those that are 22 mm wide and 30, 40, 60, or 80 mm long.  If you look at the enclosure without an SSD, you can see that there are 4 holes, one for each of the four lengths.  The longest currently has a rubber standoff already in it.  To use a shorter SSD, move the standoff to the corresponding hole.

The drive should work equally well with Windows, macOS, or Linux.

Setup

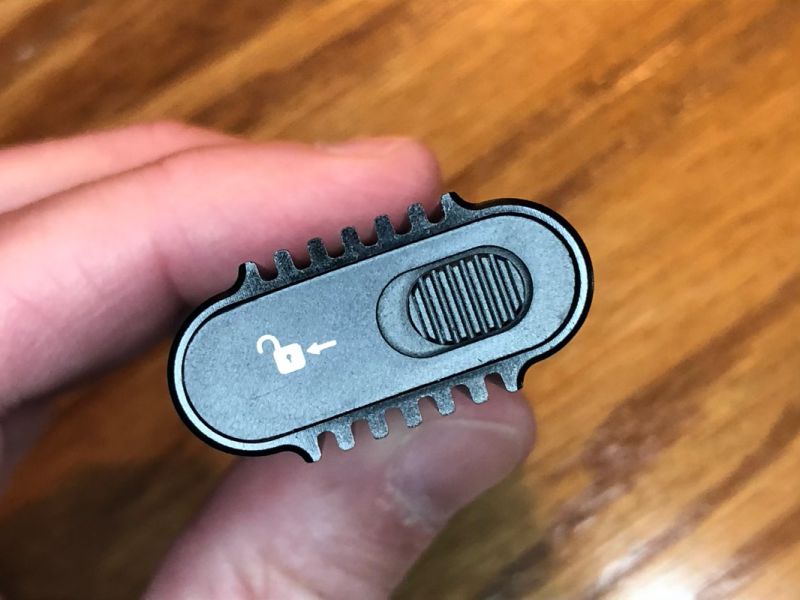
To open the enclosure, push the unlock button on the end and then slide the cover off.

Carefully insert the SSD at a 30-degree angle.

Gently push the other end down and use the rubber standoff to hold it in place.

Slide the cover back on, and then use one of the USB cables to connect it to your computer.  Easy!

Design and features

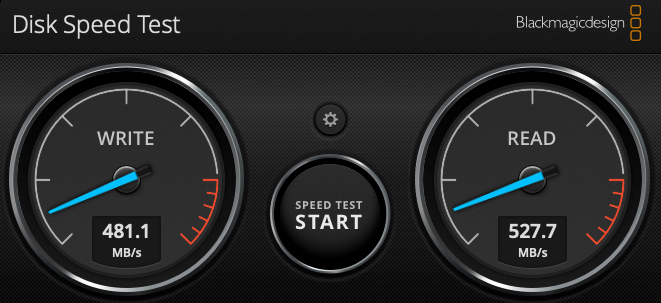
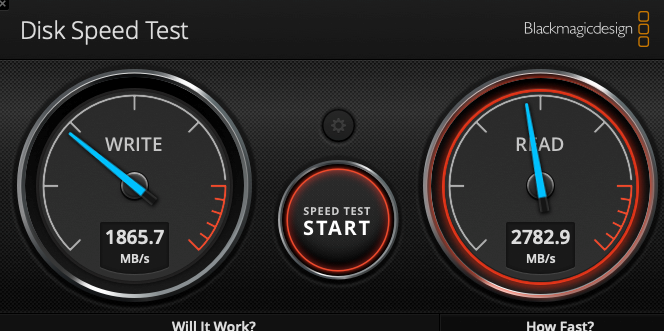
Plugable makes a big deal about how fast their device is, so I decided to run a little speed test to see how it performed.  The host was a 2018 Mac mini with a 3.0 GHz 6-core Intel Core i5, a speedy little machine.  I installed BlackMagic’s Disk Speed Test and ran it against Plugable’s enclosure (with a Samsung 960 EVO NVMe M.2 SSD inside).  For comparison, I also ran it against a SanDisk Extreme Portable External SSD, which I use around the house for data backup.  I tested both using the 5 GB test file size while connected via the USB-C connector.

SanDisk’s drive average write speed was 481 MB/s, and its average read speed was 527 MB/s.  The SanDisk has a serial ATA drive inside, and SanDisk estimates that its max read and write speed is 550 MB/s; thus, this is a respectable score for this gadget.

Plugable’s enclosure smoked it.  Its average write speed was 1865 MB/s, and its average read speed was 2782 MB/s.  That write speed is slightly higher than Samsung’s estimated max (1800 MB/s), though the read spec falls off a bit from its estimated max (3200 MB/s).  Plugable’s gadget is allowing the speed of the SSD inside to come blazing through.

The enclosure comes with 3 extra rubber standoffs.  While these standoffs are the best thing about this enclosure—they eliminate the need for any tools—they may also be a cause for concern.  Why does it need 3 spares?  A couple possibilities come to mind.  One, they are small, so they might be easy to lose, especially if you’re constantly moving them back and forth between the different lengths.  Two, they might wear out easily.  Though I personally didn’t have any problems with them, it’s something to keep in mind.

The enclosure also comes with 3 adhesive thermal pads.  If your enclosure gets hots, Pluggable gives these instructions:  “Locate the thermal pads included with the USBC-NVME, remove backing to expose adhesive, and affix to the controller chip and flash memory module(s) on your NVMe SSD.”  This should improve heat transfer and keep your SSD cooler.

What I like

  • Quick and easy to mount and dismount
  • Super-fast

What needs to be improved

  • Nothing

Final thoughts

The primary purpose of this gadget is to quickly and easily mount and dismount SSDs.  Other storage solutions may be smaller, cheaper, or more ruggedized, but Plugable’s enclosure makes swapping SSDs a breeze.  It also helps that it’s very fast.  It’s the perfect solution for those who need it.

Price: $49.95
Where to buyAmazon
Source:  The sample for this review was provided by Plugable.

Filed in categories: Reviews

Tagged:

Plugable NVMe SSD Enclosure review originally appeared on The Gadgeteer on April 12, 2019 at 11:00 am.

Note: If you are subscribed to this feed through FeedBurner, please switch to our native feed URL http://the-gadgeteer.com/feed/ in order to ensure continuous delivery.
Mohu FirstStage Amplifier review


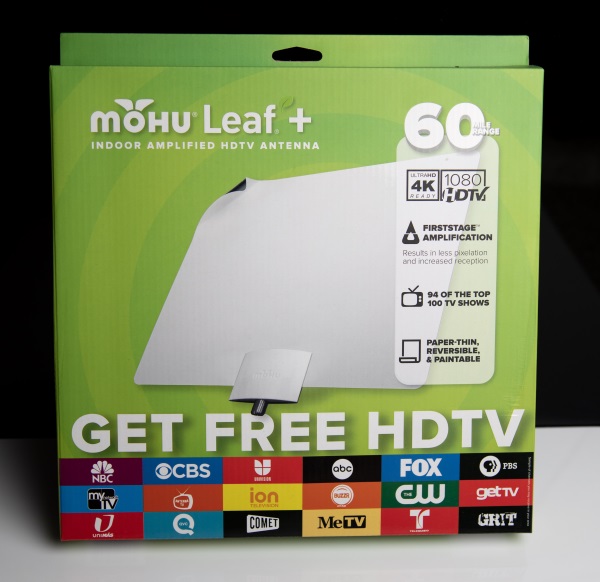
REVIEW – During the past year, I have become a really big fan of Over-The-Air Antennas, and of exploiting all possible options in an effort to receive the maximum number of OTA channels that are available in my neighborhood. Up to a few weeks ago, I was using a Mohu antenna that has been working quite well with my AirTV box. Now I have the opportunity to test and review the Mohu Leaf Plus which now comes with their built-in FirstStage amplifier. Hmm!! I wonder how many more channels I can get and if I can get a better quality picture too!
What it is?

The Mohu FirstStage Amplified Antenna is an over the air HD antenna that is designed to receive high definition TV channels that are being broadcast over the air for free. FirstStage was designed to improve antenna performance with better reception and less pixelation than other similar antennas.

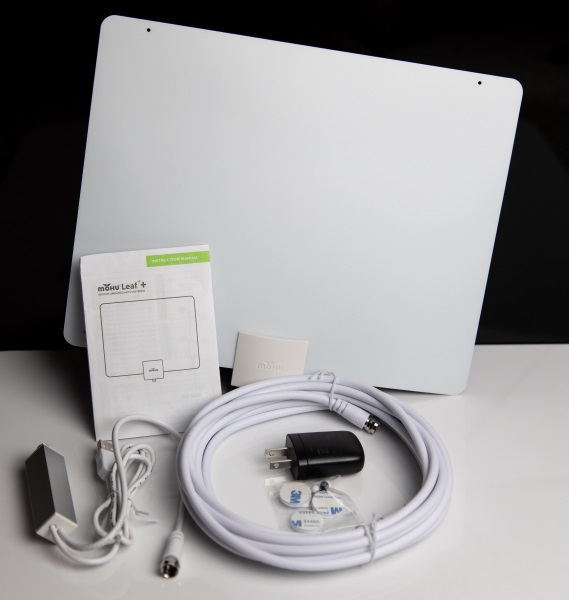
What’s in the box


1 x Leaf + Antenna
1 x Power Injector
1 x 16′ Coaxial Cable
1 x USB Power Adapter
1 x Set of Push Pins and Loop Tabs

Design and features

The FirstStage is integrated and built into the Mohu Antenna. The integration reduces cable loss, making it ideal for those using longer lengths of coax cable. Also designed to make installation as easy as possible, FirstStage amplified antennas don’t need a power source at the amplifier end of the cable, so placement is more flexible.

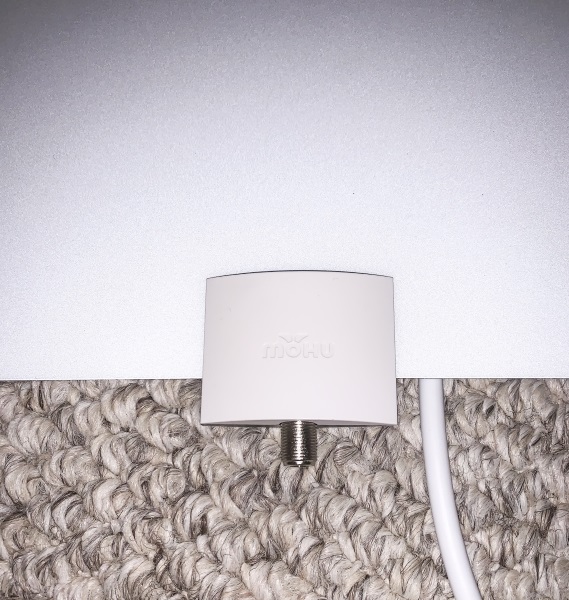
The material used for the antenna makes it lightweight and flexible, and the only built-in connection is the coaxial jack.

Performance

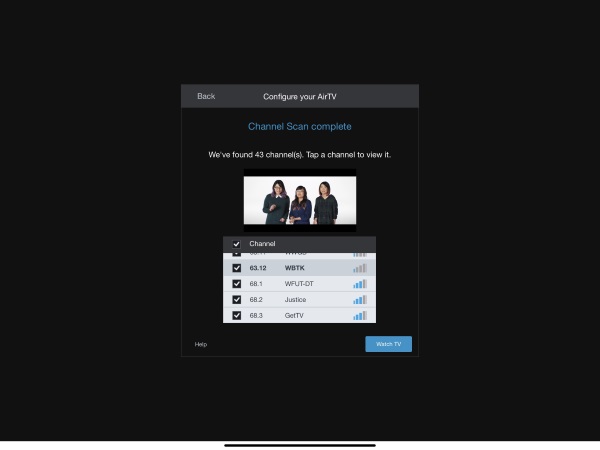
Setting up this OTA antenna is very easy. Before I started the setup, I used the SlingTV app on my iPad to scan the OTA channels on my AirTV box to see how many I was receiving. As shown below, I was receiving 43 channels.

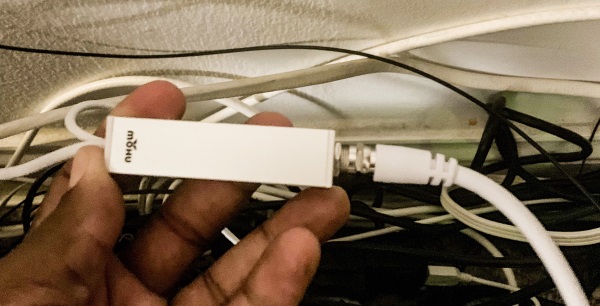
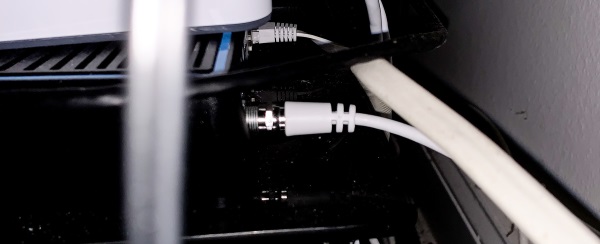
Using the provided or your own coaxial cable, you connect one end to the Power injector and the other end to the antenna. Then you connect the coaxial cable that is built-in to the Power Injector to your OTA TV device. In my case, I used my AirTV box.


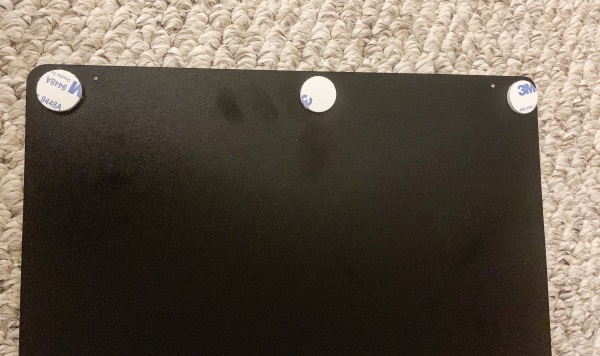
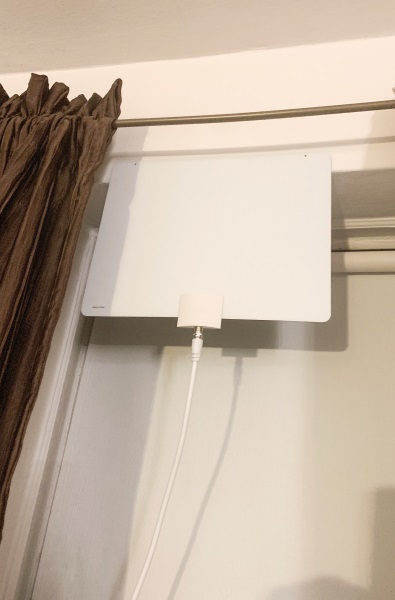
Once the cables are connected, you plug the USB cable that is attached to the Power Injector into the USB power adapter and then into an AC outlet. For my installation, I connected 3 of the 4 provided velcro adhesive loop tabs across the top rear of the antenna and attached it to the edge of the wall in front of a window.

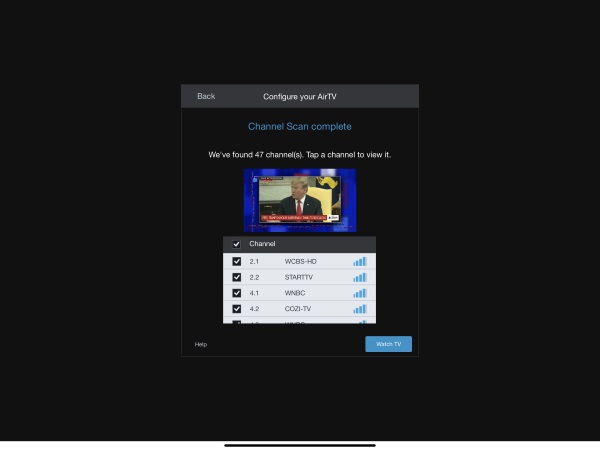
Once everything was connected, I performed a new scan to see if there was any benefit of additional channels. As shown below, the new scan found 47 channels which are 4 more than the number of channels received via the previous model OTA antenna.


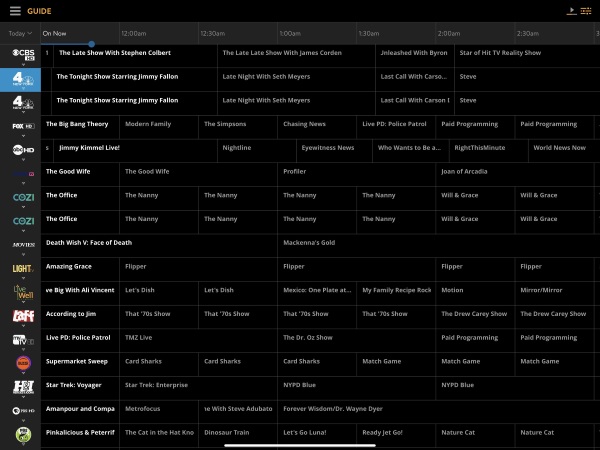
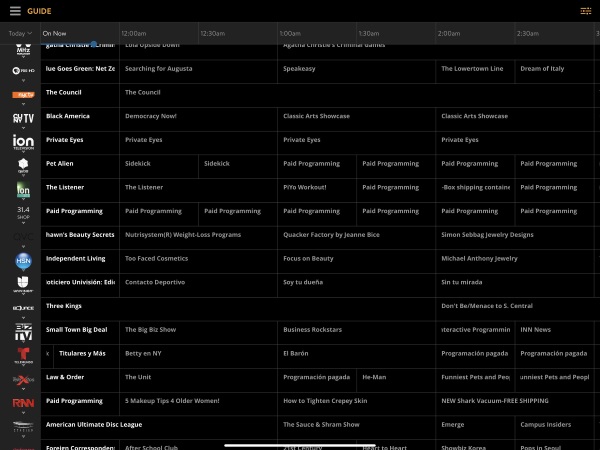
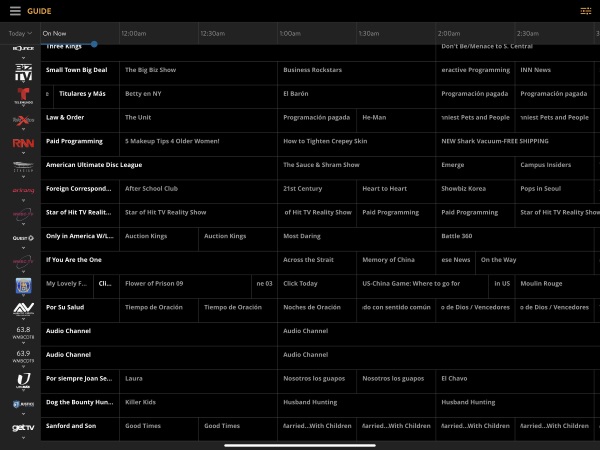
The following screenshots show the list of channels I receive with this antenna:


A sample of the quality of the picture from the channels received is shown below.


What I like

  • That is it lightweight
  • The built-in amplifier means no additional hardware
  • It can be easily mounted and hidden
  • It provides access to more channels than my previous model

What can be improved

  • A longer coax cable should be included to allow for more placement options

Final thoughts

While I am yet to come across anyone who has been able to actually receive as many channels as any of Over The Air antenna promises, I do understand that almost no one has completely ideal placement conditions. This antenna is simple and easy to set up and for a device with a relatively low one-time cost of $60, I am consistently getting 47 HD quality channels. That is good enough for me to give Mohu two thumbs up!!

Price: $59.99
Where to buy: Mohu website and B&H Photo Video
Source: The sample for this review was provided by Mohu

Filed in categories: Reviews

Tagged:

Mohu FirstStage Amplifier review originally appeared on The Gadgeteer on April 12, 2019 at 9:00 am.

Note: If you are subscribed to this feed through FeedBurner, please switch to our native feed URL http://the-gadgeteer.com/feed/ in order to ensure continuous delivery.