Akita connected home Wi-Fi security watchdog review

REVIEW – The Internet of Things (IoT).  That’s the term applied to essentially all connected devices that bring us the ability to control various items via connected apps on our PCs, tablets, and phones.  As soon as we do that, we open potential doors into our networks for bad guys to hack in and do nefarious things.  What to do, what to do?

HighIot, an Isreali-based security company, developed Akita to help address that issue.

What is it?

Akita is a small, stylish device that you connect to your network.  It then discovers your Wi-Fi IoT devices and watches them for unusual traffic.  If Akita detects anything odd, it immediately shuts down the affected device and alerts you.

What’s in the box?
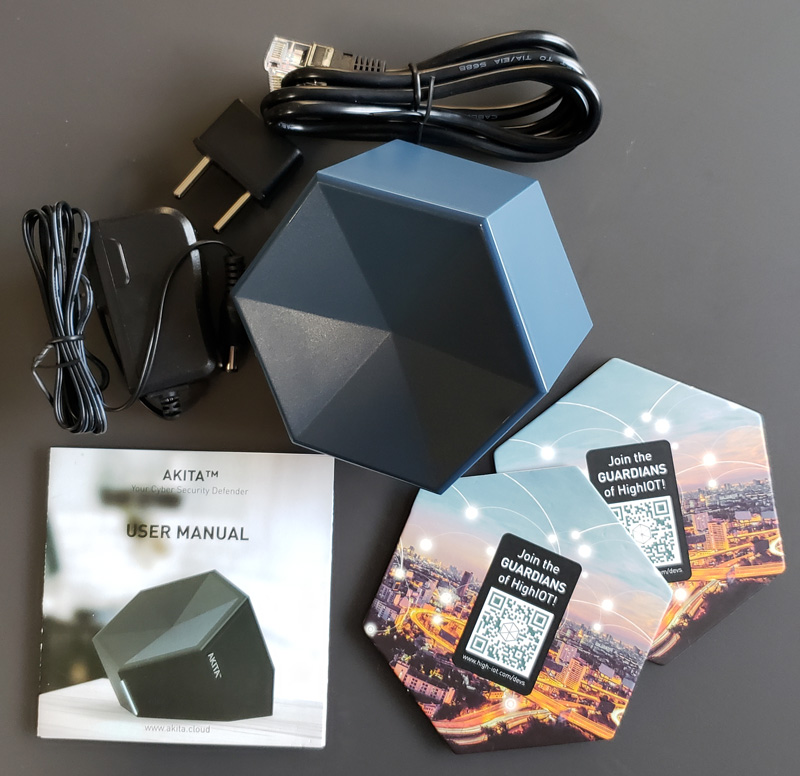
  • Akita device
  • Power cord
  • International power cord adapter
  • Ethernet cable
  • User manual
  • Two cardboard coasters

Hardware specs

  • Dimensions: 3.6″ L x 3.6″ W x 3.1″ H
  • Weight: 9 oz
  • Connectivity:
    • 1 RJ45 Ethernet WAN port (not used)
    • 1 RJ45 Ethernet LAN port
    • IEEE 802.11b/g/n dual-antenna Wi-Fi
  • Processor: Qualcomm QCA9532 650 MHz
  • Memory:
    • 64MB DDR
    • 16MB flash

Design and features

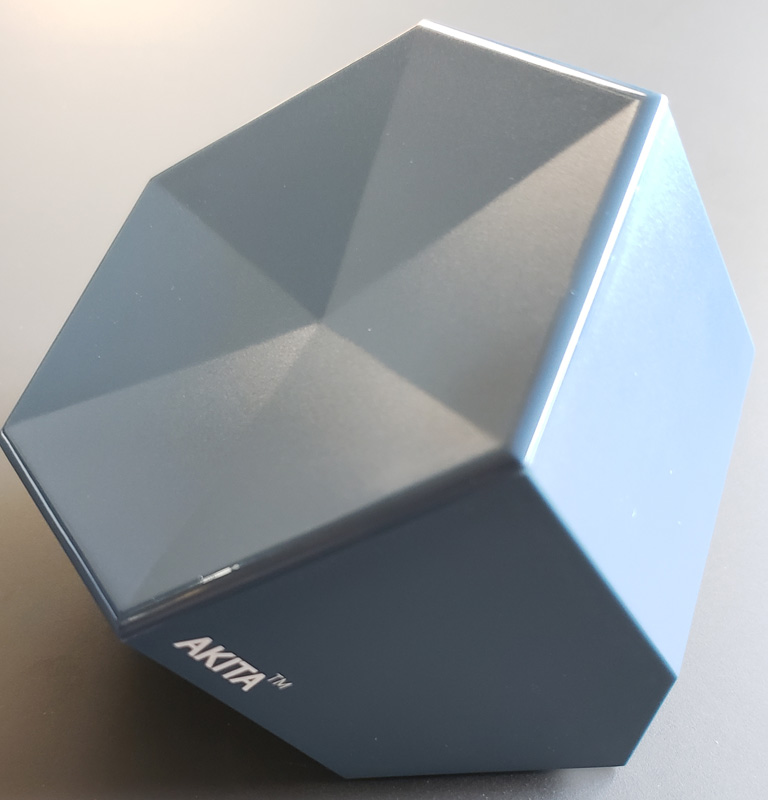
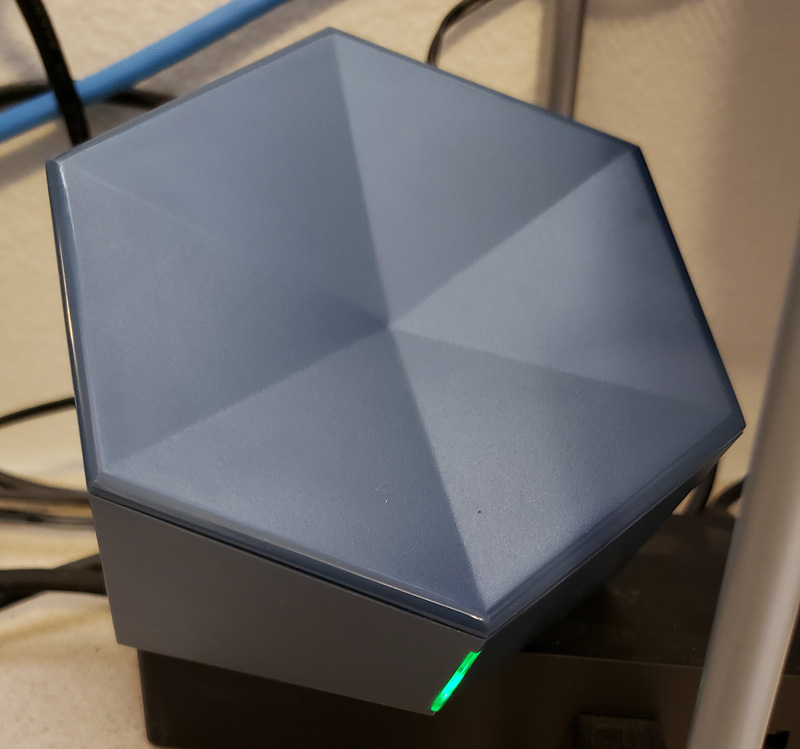
Akita is a hexagonal unit that comes in a semi-matte white or gray.  I received the gray version.

The front vertical edge holds the status LEDs that flash green or blue, depending on the operational mode.
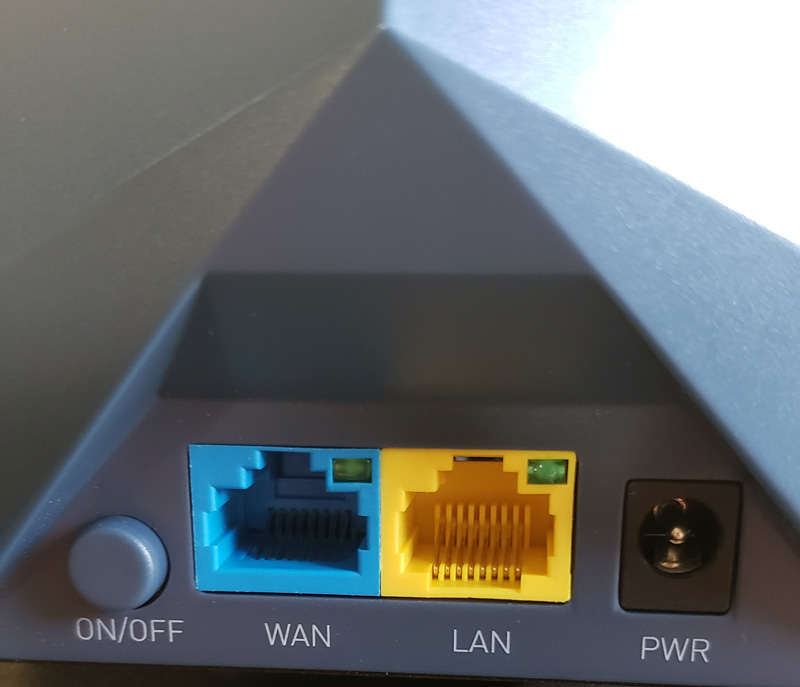
The back of the unit has the LAN and WAN ports, power port and power switch.
On the bottom, we find the product label.  That label has the serial number needed for setup, the MAC address and a QR code for the serial number, plus all the usual product info.  I masked the MAC address, and inadvertently masked the serial number as well.

Setup

Setup starts out pretty standard and as billed as 60-second simple.  Install the app (IOS or Android), plug the Ethernet cable into Akita and your router, plug in the power cord, turn on Akita, scan the QR code on the bottom or manually enter the serial number and *BOOM* you’re online and protected.  It was at this point that everything came crashing down for me.
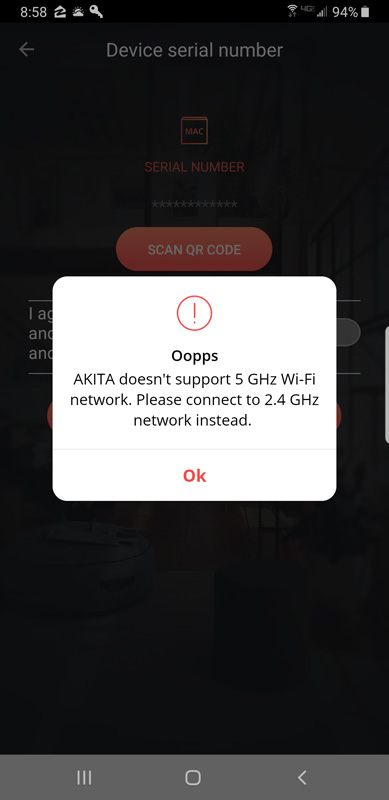
I use an eero mesh router for my home network. It has a main router plus two wireless remote routers that connect to each other to blanket my house in strong Wi-Fi.  They broadcast on both 2.4GHz and 5GHz frequencies, and seamlessly hand supported devices between the two bands depending on signal strength. 2.4GHz is stronger and longer-range yet slower than the shorter range 5GHz. They accomplish this with a single service set identifier (SSID), otherwise known as your wireless network name.

I tried everything, but since my phone automatically connects to the faster 5GHz band, and I have no option to force it to 2.4GHz, I was dead in the water.

After contacting Akita support, I waited.  I waited for six days.  Then, I finally got a reply asking me for my Akita serial number.  I replied with that, and within an hour, I got a reply.  They were able to remotely activate my Akita and confirmed that it was my eero that was causing the problem. They asked me to go into the app, click on my network and provide the password to allow Akita to start monitoring the Wi-Fi devices. *BAM* – roadblock #2.
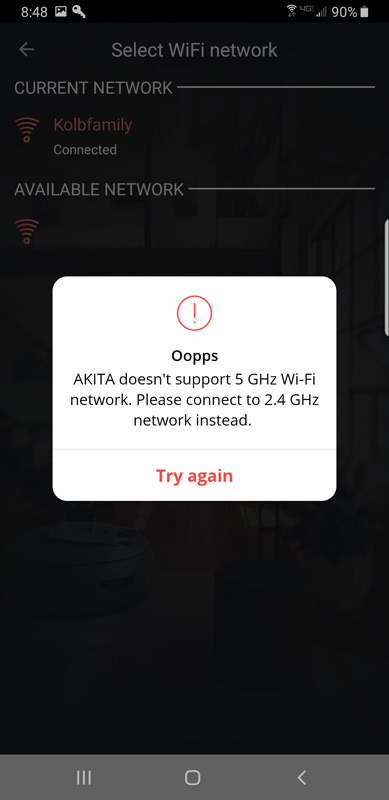
After another back and forth with support, all done very quickly, I was told to click anywhere but on the “Oopps” [sic] window. When I did, it went away and I was able to click on my network and add the password.  Then…

My network name disappeared.  It was there, but the name was gone.  Another e-mail exchange with Akita and they were able to restore it. They said it was expected behavior.  Odd.

So, I was finally online.  The lights started switching from green to blue and back, indicating that Akita was looking for IoT devices on my Wi-Fi network.

Akita quickly found 21 devices connected to my network – again, I have blurred the MAC addresses.
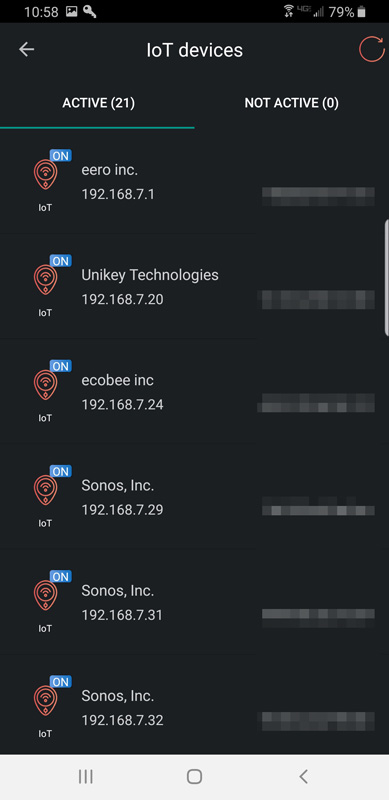
Unfortunately, right after that, my eero received a firmware update and rebooted.  Timing is everything.

Tech support did report that Akita hardware is limited to 2.4Ghz and can’t connect to 5Ghz networks, however, Akita uses 2.4GHz to connect to the network and will monitor 5GHz devices as long as both SSIDs are on the same subnet.  They further reported that initially Akita was not designed nor advertised to support mesh networks and 5 GHz bands. They just updated Akita software several days ago to support mesh networks and hidden SSIDs. Again, timing is everything.

Performance

Now that I am online and Akita ultimately discovered 36 devices and has reverted into monitoring mode.  Opening the app, we see the status screen.
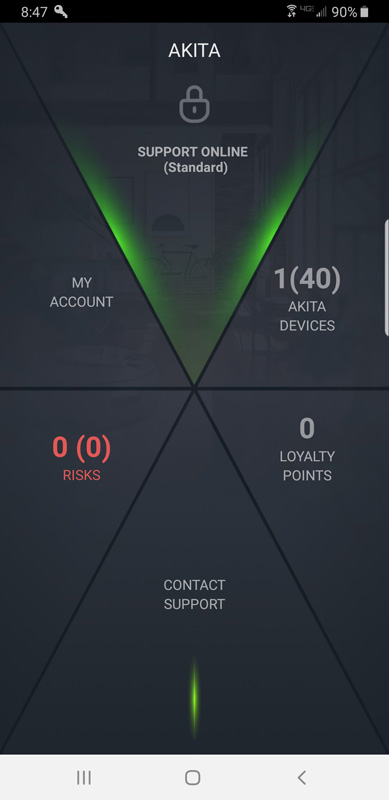
The visual layout of the screen resembles the hexagonal shape of the Akita itself.  Each of the six buttons is clickable. Clicking the top support button brings up the support subscription window.

Akita offers three support options:

Free – Active protection for your Smart Home

  • $0 / month
  • Network status report
  • Vulnerabilities list
  • Critical alerts
  • Monthly network security report

Advanced Protection – Human assistance and enhanced protection

  • $7.99 / month
  • Now available for only $3.99/month*
    *Limited to the first 1,000 subscribers
  • All Free features plus
    • Human assistance to help you solve the security issues discovered by Akita
    • Constant monitoring for unusual activity
    • Cutting-edge botnet attack protection
    • Real-time abnormal behavior alerts
    • Router security verification

Full-Service – Fully customized professional support

  • 29.99 / month
  • All Advanced Protection plan features plus:
    • A dedicated network security expert who will solve the security issues discovered by Akita for you

New users get one month of Advanced Protection included.  Oddly, the website calls the two paid levels “Advanced Protection” and “Full-Service” but the buttons in the app call them “Standard” and “Pro”. There is no mention of the free level in the app, only the paid levels.

Clicking on the Akita devices button brings up your device.
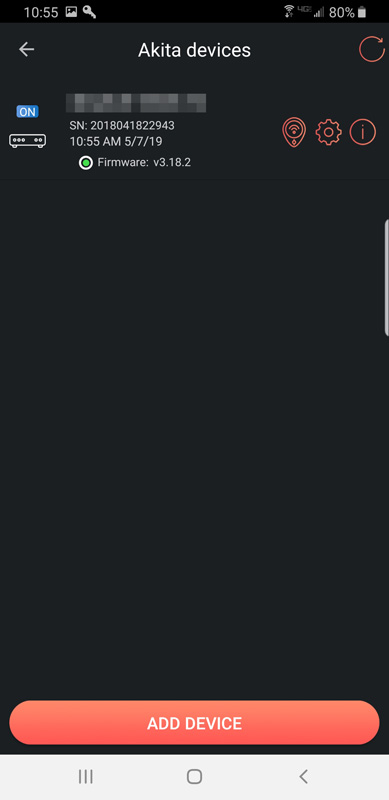
Here you can add more Akita devices – I think that is more of a business thing than a home user thing. You can also see your Akita and get to the settings screen.  The settings screen only shows the network and I showed that screenshot above.  The left button is the connected devices button.  That brings up the device screen that I also showed above.

Clicking on the Risks button brings up the risks screen.
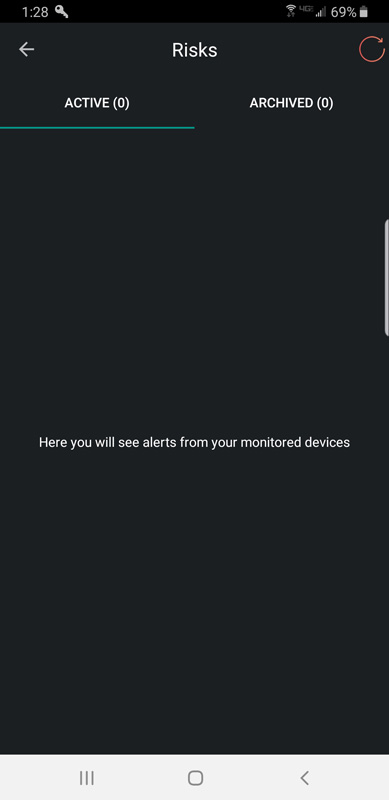
It’s pretty boring and that’s a good thing!  If there were risks to report, for paid customers, it would have alerts like this:
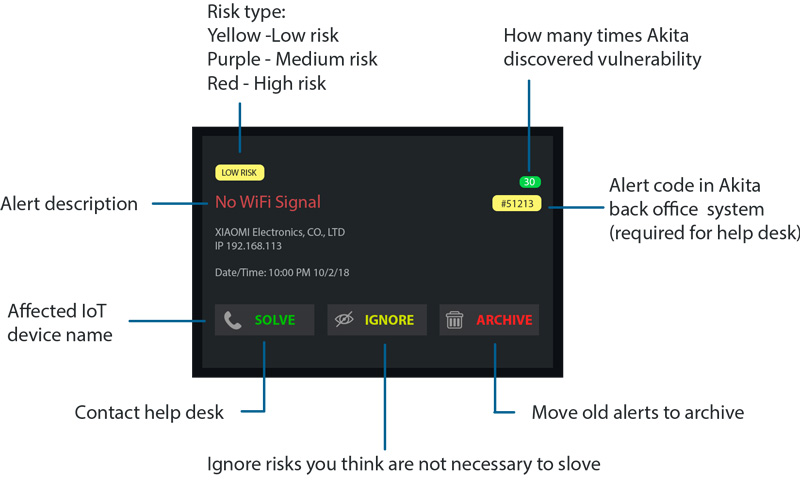
The Account button brings up a screen where you can change your user name, subscription level and enable app notifications.

The Loyalty button brings you to their loyalty screen where you can earn points or use points.  Both options take you to Akita’s website with no further information.  This looks like a future feature.

The Support button brings up a pop-up window with a link to call support.

Other items of note:

From Akita’s website:
Akita protects WiFi devices only. It does not operate on Zigbee or Z-Wave, but it will protect any WiFi-connected hubs/controllers associated with those systems.

So, if you have any of those devices as I do, those will remain unprotected.  Lutron Caseta switches are a great example.

Akita has two types of reporting – a network status report and a monthly network security report.

For paid subscribers, the initial and monthly reports are being delivered via email. In the mobile app, customers receive notifications(alerts) which explain what kind of vulnerabilities were found. Each alert has a “Learn” button which leads to the page with resolving procedures for each of vulnerabilities. Full-Service customers may give Akita experts access to their network, so they could resolve their issues remotely. Advanced Protection subscribers have human assistance via email. Paid subscribers will continue receiving emails from support until the vulnerabilities are solved.

Free subscribers get:

  • Network status report – I have a copy of that below
    • It shows the number of problems found, however, for free subscribers the report doesn’t point on exact problem and device affected
  • Vulnerabilities list – Possible vulnerabilities list and ways to resolve them
  • Critical alerts in mobile app
  • Monthly network security report – Similar to the initial report, but this report contains information about the number of problems found in last two month with a comparison table, so customers can learn if they resolved the issues on their own correctly

Report

I received my first network status report and have copied below. I replaced the MAC addresses of my three eero routers with a description.

Akita Initial Report

Dear Garry Kolb

This is your initial home network security and vulnerabilities report from Akita.

AKITA is protecting your home since 5/7/2019

Please find bellow initial report to provide a record of what work your Akita has done by far and the status of your home network.

Akita (SN: 2018041822943) workstream:
Routers (<mac addr1>, <MAC addr2>, <MAC addr3>) security verification
Problems found * 1

* See below problems description

Network traffic monitoring
Blacklisted IP Addresses N/A
Blacklisted ports N/A
Network performance
WAN connectivity Good
WIFI connectivity Good
How to interpret your report
Parameters Good Bad
Router security verification WiFi password Strong Empty
Using default credentials No Yes
and more than 5 others …
Cyber Threat intelligence Third party#1 Scan result 0/0 > 0/0
Third party#2 Risk Level 1 > 3
Third party#3 Risk Level Not detected Detected
Third party#4 Risk Level Not detected Detected
WAN connectivity Average connection timeout < 300 ms > 300 ms
Average number of network errors per minute < 5 > 5
WIFI connectivity Signal strength > -67 dBm < -67 dBm

As you can see, it reported one issue but gives me no indication of what that issue is.  It provides good and bad ranges for a variety of network parameters but provides no indication of what those values are for my network. To me, this report is essentially useless.  Given that I was given a paid subscription for my first month, I am pretty disappointed with this report.  Based on this report alone, the reporting is essentially useless. I know I have a problem, but don’t know what it is or how to deal with it.

The next day, I received a separate email with the following information:

We want to notify you regarding compromises in your network security. AKITA found several vulnerabilities on your eero router (<mac addr1>, <MAC addr2>, <MAC addr3>):

Enabled UPNP – Some models of routers have bad implementation of UPnP. This makes your router vulnerable. Such vulnerability can help hackers change DNS setting on router. After that all devices on a LAN can be routed to a phishing site, a ransom demanding page or even encrypt your files.
The malware located on any device on the LAN can initiate as many outgoing connections to its server as it wants. If the router has UPnP enabled it means that it would trust any outgoing connections and allow to forward a port. Thus the malware would be able to bypass the router, establish a connection with malicious server and as a result provide a permanent access to your computer.

In eero routers UPNP enabled by default. If you’d like to turn it off, toggle the slider so it’s no longer green.

Based on that email, I did disable UPnP.  Since my issue count was “1”, my expectation is that this resolves all identified issues with my network. So, the combination of the report and the email does add value, but they came a day apart.

Akita does state that for paid customers, they will continue to reach out to them on critical issues until they are resolved.

What I like

  • Nice visual design
  • Easy physical connectivity
  • Easy setup process, although it didn’t work for me
  • It did identify a potential vulnerability in my network

What needs to be improved

  • Inability to connect to 5GHz networks
  • Support for more than Wi-Fi devices
  • Better support for mesh networks with single SSIDs
  • More responsive tech support – waiting six days was pretty bad
    • Once they made contact, further contacts did come quickly
  • Reporting alone conveys almost no information at all and requires a separate, follow-up email to be useful

Final thoughts

Akita is an interesting device.  For users with a more straightforward network than mine, setup should be really simple.  Akita does monitor and find vulnerabilities, as it did on my network. The amount of information you receive about those is determined by whether you opt for the free subscription or pay $3.99 (if you’re in the first 1,000 subscribers) or $7.99 per month, or more for the full-service support option.

Is it worth it?  That’s up to you.  Is insurance worth it?  That all depends on how much risk you want to take on yourself.  And that’s what Akita essentially is – insurance.  If nothing ever happens to your network, then Akita is a total waste of money.  Kind of like fire insurance is a waste of money if your house never burns down.  But, we carry insurance to ease the pain of a catastrophic loss.  Akita goes one step further by working to prevent that kind of loss on your network by proactively identifying vulnerabilities and also by turning off access to compromised devices.

Price: $99
Where to buy: Ingiegogo
Source: The sample of this product was provided by HighIoT.

Filed in categories: Reviews

Tagged: ,

Akita connected home Wi-Fi security watchdog review originally appeared on The Gadgeteer on May 15, 2019 at 11:00 am.

Note: If you are subscribed to this feed through FeedBurner, please switch to our native feed URL http://the-gadgeteer.com/feed/ in order to ensure continuous delivery.

Satechi Aluminum Type-C PD & QC Wireless Charger review

REVIEW – It’s been a while since I had a smartphone with wireless charging capabilities but having recently splurged on a Huawei P30 Pro, I’ve been on the lookout for a Qi charger worthy of taking up space on my desk. The first one up for testing is the Satechi Aluminum Type-C PD & QC Wireless Charger. PD stands for power delivery and QC stands for quick charge. Let’s take a look.

What is it?

The Aluminum Type-C PD & QC Wireless Charger from Satechi is a flat desktop charger capable of charging phones and even Apple’s new AirPods.

What’s in the box?

  • Satechi Aluminum Type-C PD & QC Wireless Charger
  • USB-C cable

Design and features

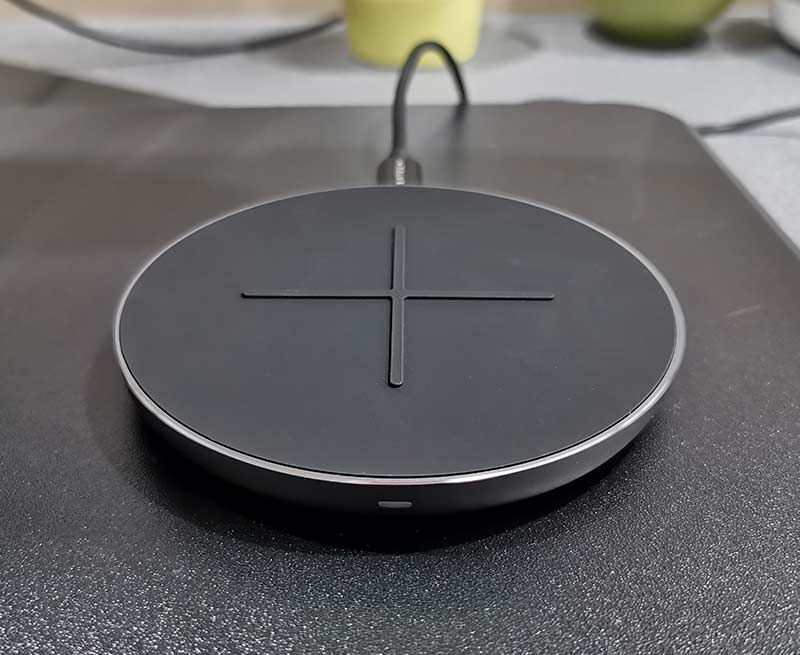
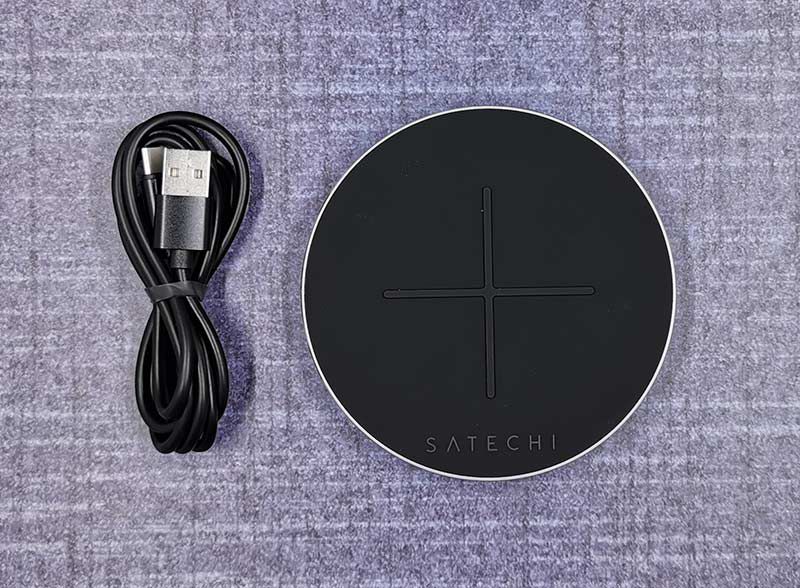
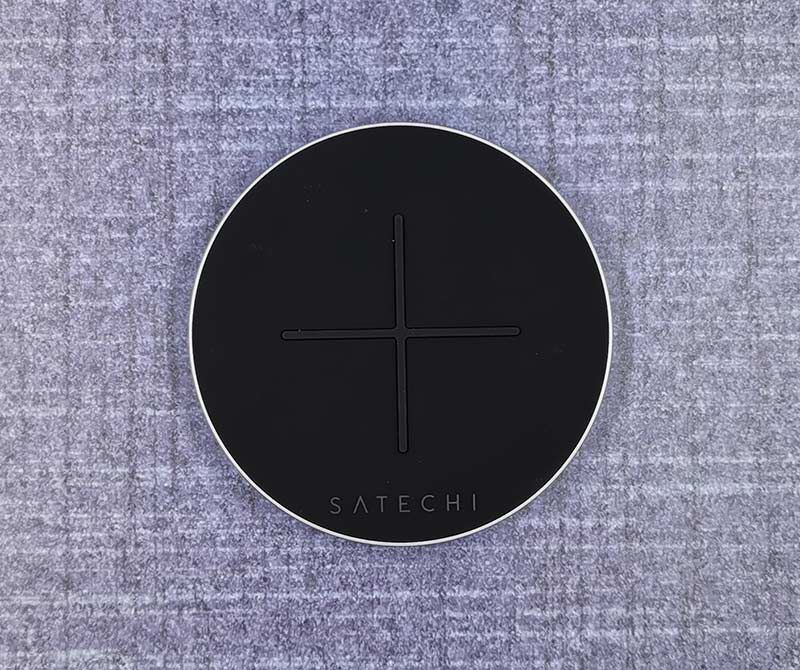
The charger is circular-shaped with a diameter of 4 inches. The top surface has a black rubber mat with a large + in the center and the Satechi logo below it.

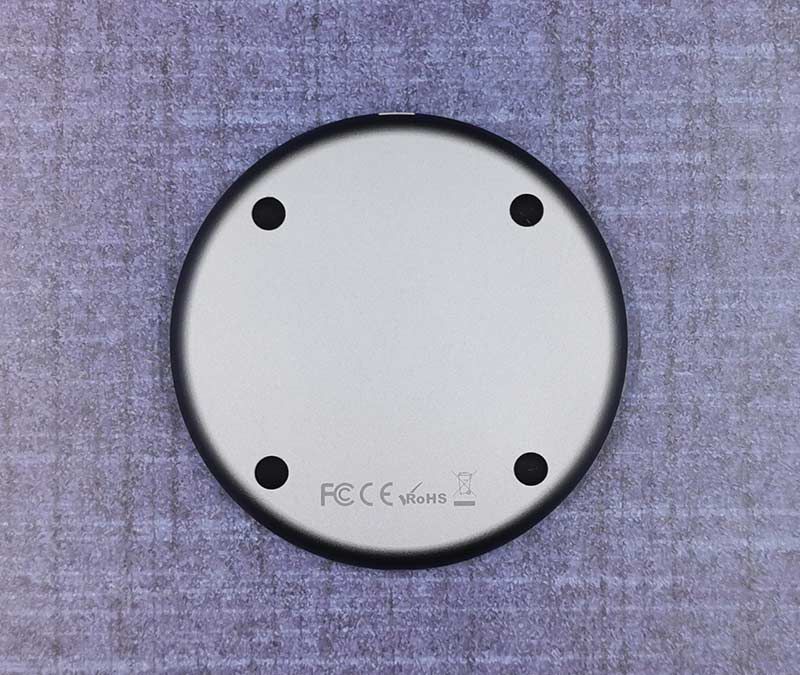
The bottom of the charger is made of brushed aluminum (hence the product name) in either space grey (which is the one I have) or silver. Four small rubber feet are attached to the bottom of the charger to keep it from sliding around on your desk.

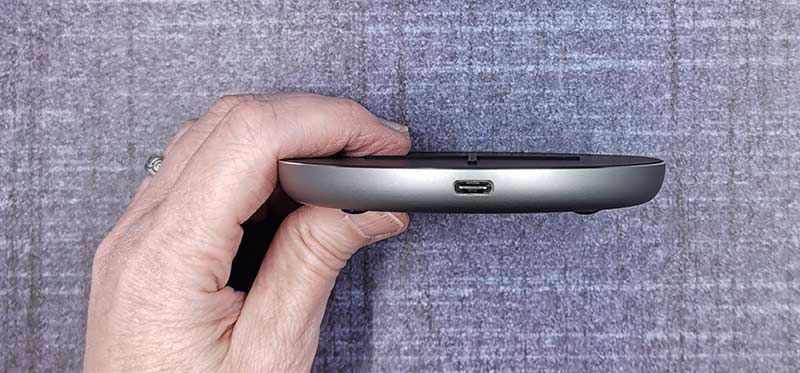
The back of the wireless charger has a USB-C connector that you will obviously use to connect it to power. Note that an AC adapter is NOT included with this charger and it will not work with computer USB ports. That means it’s up to you to supple the power adapter. Just be aware that you will want to use a QC or PD capable adapter in order to take advantage of quick charging speeds of up to 7.5W/10W on compatible smartphone devices.

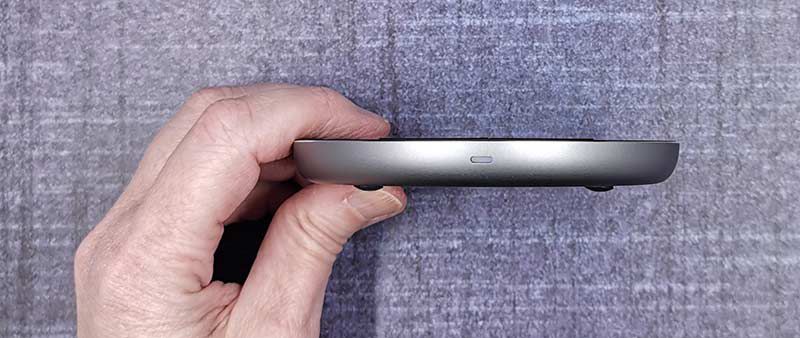
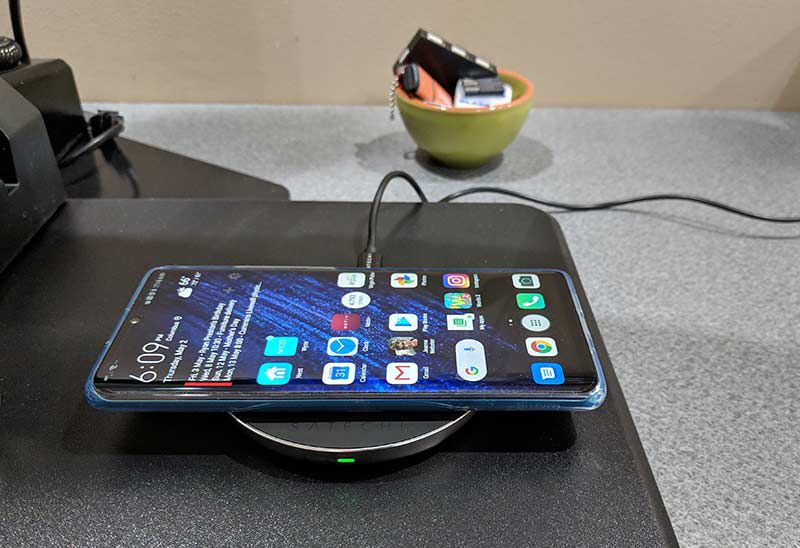
On the front edge of the Satechi charger is a small LED that glows green while it is charging a device, blinks blue if you place a non-compatible device on it, and turns off when the charging is not in use.

There really isn’t a whole lot more to say about this charger other than it looks nice and does a great job charging any Qi capable device on it quickly and safely.

There’s almost no lag to when it detects the device and it either starts charging or lets you know it’s not a compatible device.

What I like

  • Looks nice
  • Simple to use

What needs to be improved

  • Need to include a power adapter

Final thoughts

I forgot how much I enjoyed the convenience of wireless charging after not being able to use one for the last couple of years. It’s funny how satisfying it feels to be able to drop my phone on the Satechi charger to charge it instead of needing to plug in a cable. I know that plugging a cable into a phone is not a difficult task, but the Satechi charger looks so much nicer on my desk than a stray cable. This charger has earned a permanent spot on my desk.

Price: $44.99
Where to buy: Amazon
Source: The sample for this review was provided by Satechi.

Filed in categories: Reviews

Tagged: ,

Satechi Aluminum Type-C PD & QC Wireless Charger review originally appeared on The Gadgeteer on May 15, 2019 at 9:11 am.

Note: If you are subscribed to this feed through FeedBurner, please switch to our native feed URL http://the-gadgeteer.com/feed/ in order to ensure continuous delivery.
Ooni Koda Gas-Powered Outdoor Pizza Oven review

REVIEW – Back in October of last year, I reviewed the Ooni 3 portable outdoor pizza oven. In February of this year, Ooni introduced their new portable gas-powered outdoor pizza oven the Ooni Koda. I really liked the Ooni 3 so you know I couldn’t pass on the opportunity to test out the companies newest addition. After all, what’s better than one pizza oven? Two pizza ovens of course.

What is it?

The Ooni Koda is a gas-powered outdoor pizza oven that can reach temperatures up to 932º in 15 minutes and cook a Neapolitan-style pizza in just 60-seconds.

What’s in the box?

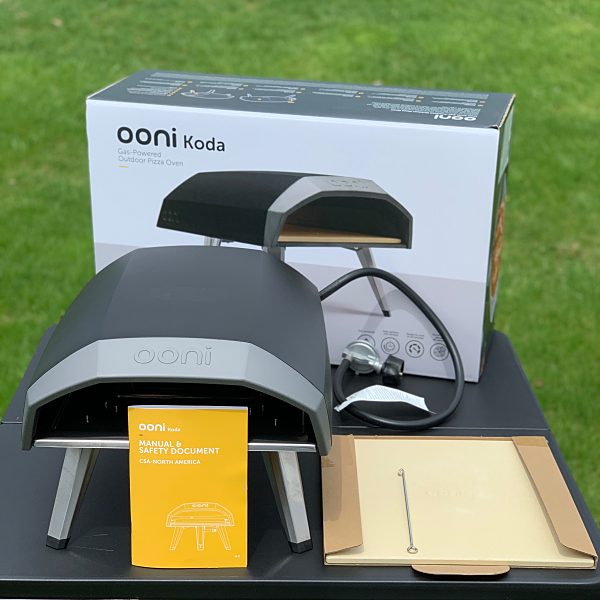
  • Ooni Koda gas-powered pizza oven
  • Stone baking board
  • Ooni Koda Manual and Ooni Essentials Guide with tips and recipes
  • Propane tank gas regulator and hose 
  • Telescoping match holder

Design and features

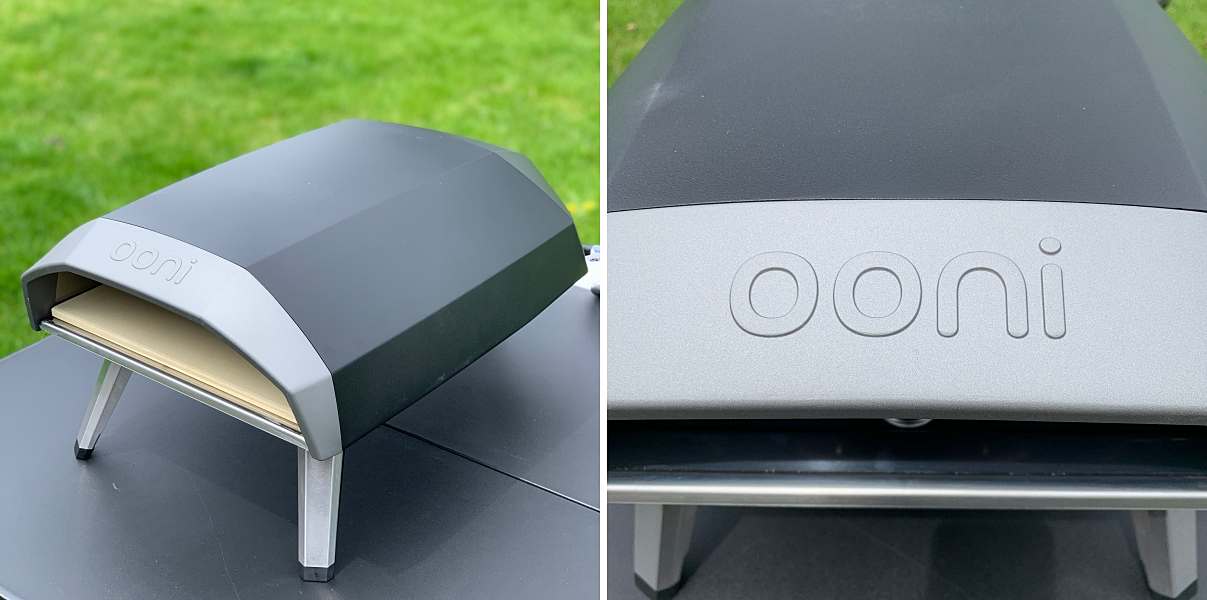
In a word the Ooni Koda’s design is sexy. Yes, I just called a pizza oven sexy. The black powder-coated carbon steel shell and silver aluminum accented front reminded me of a sports car. The ovens shape is even aerodynamic looking. With Koda, Ooni not only made a pizza oven they designed a functional conversation piece that anyone would be proud to have on their patio or deck.

Koda is Ooni’s first gas-only powered pizza oven. Using gas means you can relax and concentrate on making your pizza.

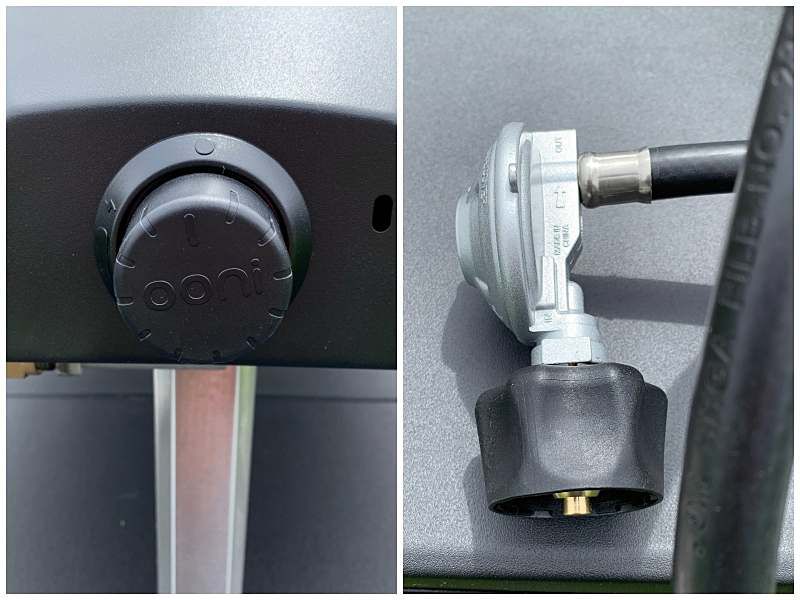
The control/ignition knob is located on the back of the oven along with the propane tank gas regulator and hose.

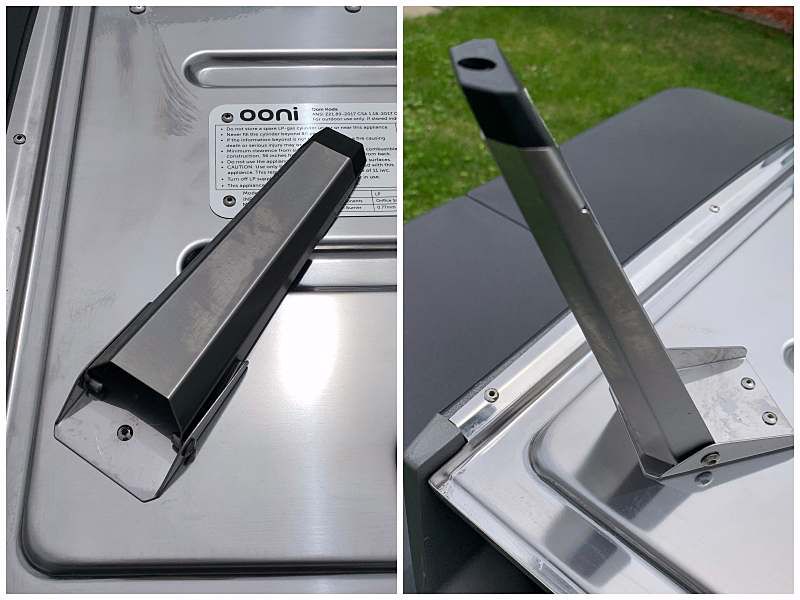
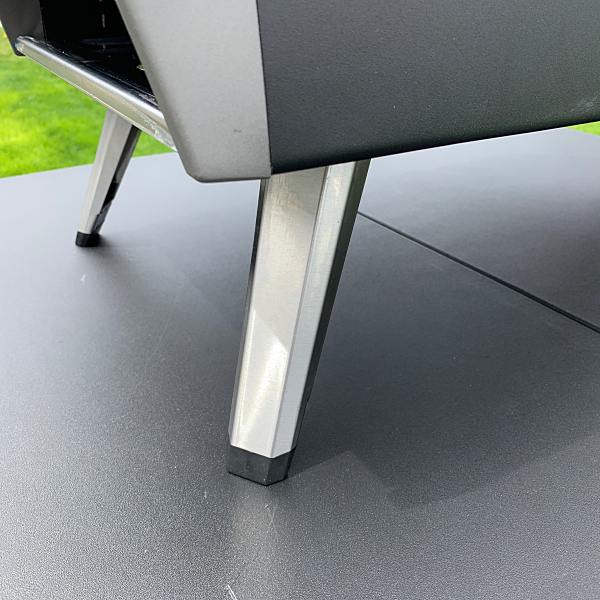
There are 3 foldable legs on the bottom of the oven.

The legs are nearly twice as long as those on the Ooni 3, allowing for easier access to the oven while cooking.

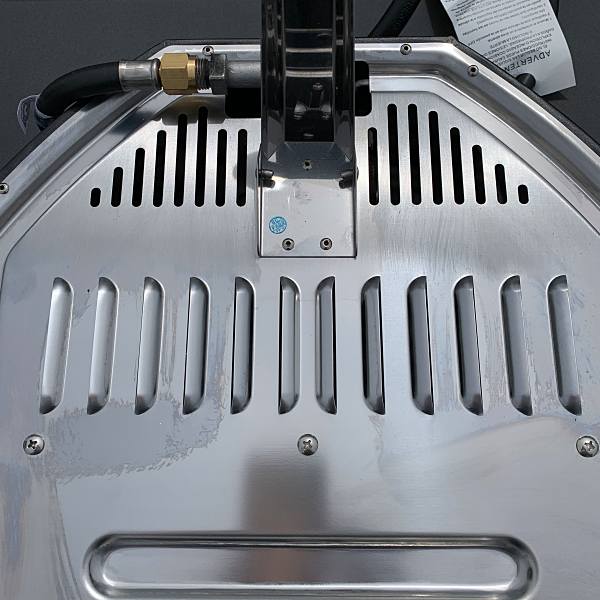
Unlike the Ooni 3, the Koda doesn’t have a chimney. Instead, there are heat vents located on the bottom rear of the oven, adding to its overall compact design.

The oven weighs just over 20 lbs, and the portable compact design makes it perfect for any outdoor space.

Ready, set, cook

Koda is literally designed to be used right out of the box. All you have to do is unfold the legs, insert the stone and connect to your gas supply. It doesn’t get much easier than that.

Firing up the oven is easy using the quick ignition knob. All you have to do is turn on your propane tank and twist the knob to ignite the oven. The dial also gives you more control of the ovens internal temperature.

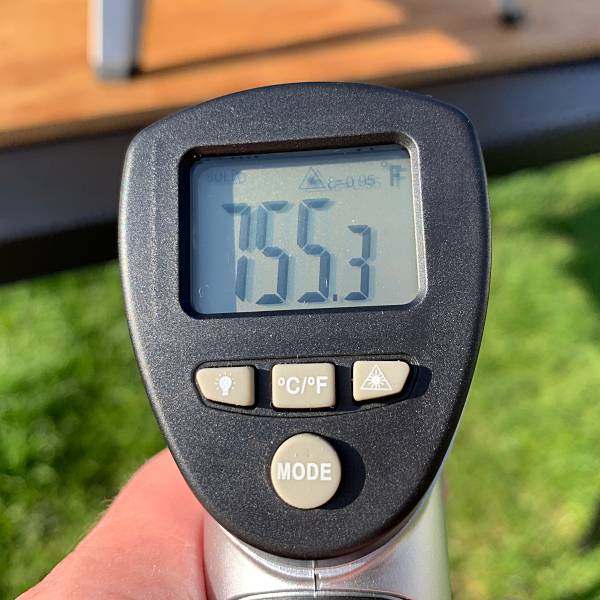
The oven only takes about 10-15 minutes to get up to temperature, thanks to the insulated steel shell and stone baking board. According to Ooni the perfect temp for cooking pizza is right around 752º. I used an infrared thermometer and started cooking my pizza when the center of the baking board reached a temp 755º.

I also turned the control knob down to keep the oven from getting too hot. In my experience using the Ooni 3, I found that if the oven got too hot, it would burn the pizzas toppings.

As far as making the actual pizza is concerned I highly recommend using Ooni’s pizza dough recipe. It’s an easy recipe with the key ingredient being 00 flour. 00 flour is very fine and high in protein, which helps it become stretchy and easy to work with. It also produces a great tasting crust.

And you can freeze any leftover dough balls for next time.

For me, stretching the dough is the toughest part of making a pizza. But like with anything else practice makes perfect. So by the time this summer is over my pizza making game should be on point.

Once the dough is stretched out, and the pizza is topped its time to get it in the oven. Since the Koda cooks so quickly the key is to rotate your pizza about every 20 seconds or so. This allows it to cook evenly and get that nice charred crust. Check out my time-lapse video below.

My first pizza of the season was a rousing success. It tasted fantastic!

The crust was crispy on the outside and soft and chewy inside. I said this about the Ooni 3, and it holds true with Koda. The pizza is as good as any that I’ve ever had from a restaurant.

Making your own pizza from start to finish at home is kinda fun too.

And don’t forget you can also use Koda to cook vegetables, fish, and meats super fast too.

What I like

  • Sexy design
  • Portable and compact
  • Easy to use
  • Makes a great tasting pizza in 60-90 seconds
  • Ready to cook in under 15 minutes

What needs to be improved

  • Pizza peel is not included

Final thoughts

Like the Ooni 3, the Ooni Koda is an outstanding pizza oven. It has a great design, it’s portable, super easy to use and most importantly it makes a great tasting Neopolitan-style amazingly fast. There’s absolutely no better and affordable way to make homemade pizza than with the Ooni Koda. So if you’re a pizza lover or just a fan of outdoor cooking, do yourself a favor and check out what the folks over at Ooni are doing. 

Price: $299
Where to buy: Amazon
Source: The sample for this review was provided by Ooni.

Filed in categories: Reviews

Tagged: ,

Ooni Koda Gas-Powered Outdoor Pizza Oven review originally appeared on The Gadgeteer on May 15, 2019 at 8:00 am.

Note: If you are subscribed to this feed through FeedBurner, please switch to our native feed URL http://the-gadgeteer.com/feed/ in order to ensure continuous delivery.
Eve Energy Strip power strip review

REVIEW – We are moving closer and closer to having our entire house controlled by our voices between Amazon’s Alexa and Apple HomeKit. Having previously review the Eve Flare portable light, I was excited to also get a chance to review the Eve Energy Strip, another Apple HomeKit compatible device.

What is it?

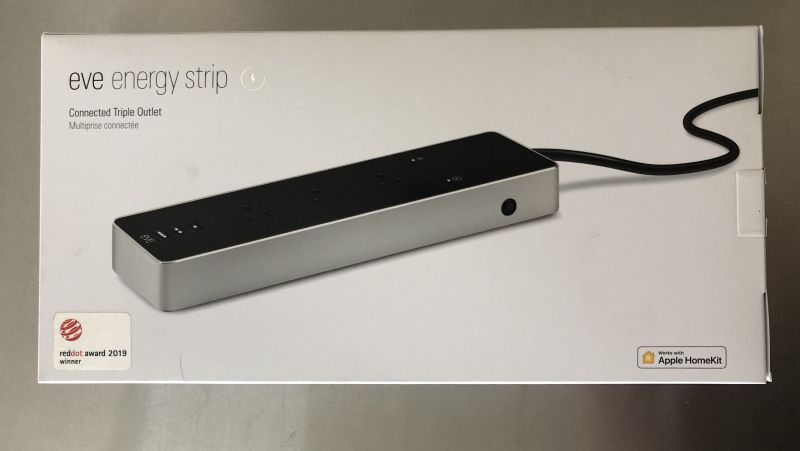
The Eve Energy Strip is a 3 port power strip with surge protection, overcurrent protection and overvoltage protection, that is also compatible with Apple HomeKit – which means it can be controlled via Siri voice commands.

What’s in the box?

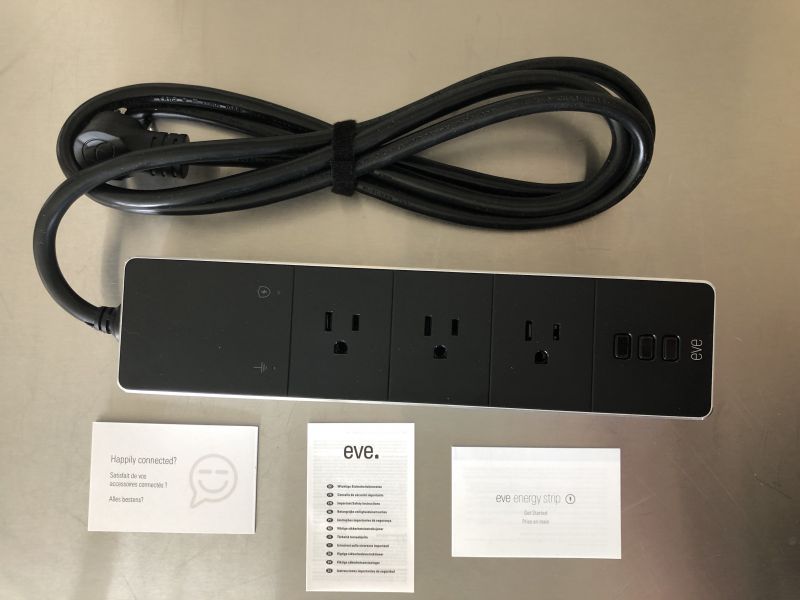
  • Eve Energy Strip
  • Instruction Manual
  • Warranty Info
  • Quick Connect Guide

Design and features

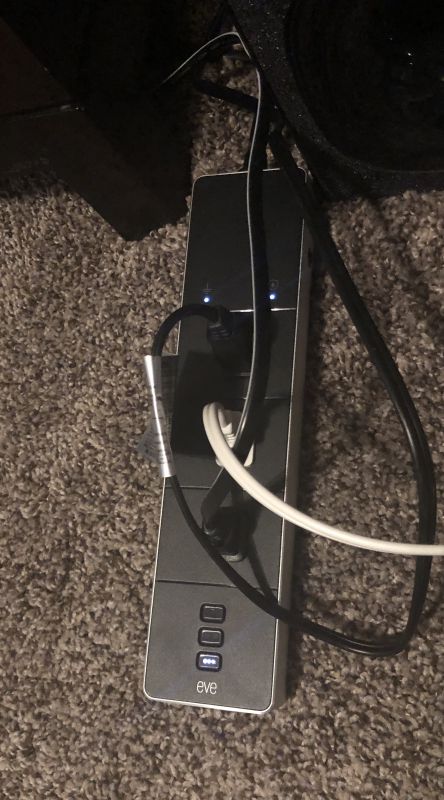
The power strip has a 6.3 ft cord, so plugging it in and then tucking it in behind or under furniture along a wall is pretty easy. It has an aluminum frame and black matte finish on the face of the device. Three buttons with LED indicators allow for manual control of the three outlets, and give a clear indication of whether the plug is currently active or off. There are also separate LED indicators to show proper grounding and surge protection. There is a surge indicator on the side of the unit if a surge protection occurs it will pop out and to reset the unit you just push it back in.

Setup

The first step is to download the Eve app onto your phone. Then it’s a pretty painless app guided set-up that involves plugging in the unit, getting it connected to your wifi and then assigning the individual plugs to the type of device that will be utilized. For us, we put it in the bedroom to control our fan, air humidifier, and sub-woofer for our sound system. Set-up couldn’t have been easier and the app does a great job of guiding you through each step.

Performance

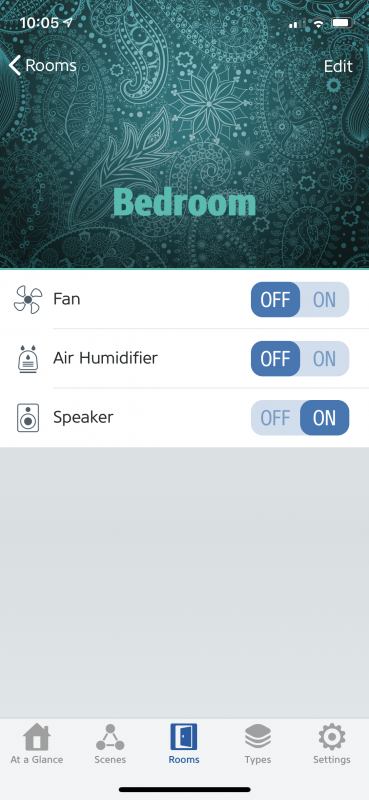
After set-up, it’s simply a matter of telling Siri to “Turn on Fan” or “Turn off Air Humidifier” – whatever item you’ve assigned to the outlets. If you have an iPad that stays at home on the same wifi as the power strip, you can then set it up to turn items on and off while you’re away. This would be highly beneficial if you use this for lighting in an entry or if you leave in daylight & come home after dark. Additionally, you can use Apple HomeKit automation tools to have, for instance, outlets controlling lights to activate when you come home – triggering off your phone connecting to your wifi when you arrive home. Here are some screenshots of our set up:

So from the main “room” menu, you can see each item and its current status. Here you can manually control the On/Off function as well. By clicking on one of the items, you can go into the detail of the overall unit.

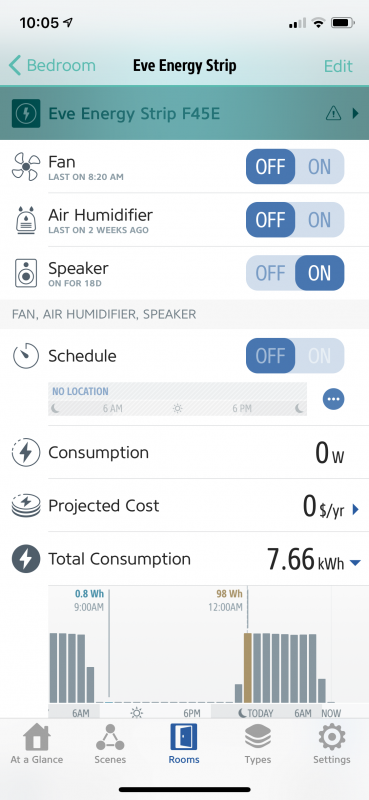
Here we get into the meat of the app utility, where you can schedule on/off times, look at consumption & projected cost per day as well as total consumption. Then there is the bar chart showing the usage by hour. There is quite a bit of information pulled into the app for a simple power strip, in my opinion.

Initially, the plug and Siri seemed to have a bit of an issue communicating. Several times as I got ready for bed and told Siri to turn on the fan and air humidifier, it had problems communicating – but this may be an issue with our wifi, so I’m not going to hold this against the product. Over time though, it has become very consistent and reliable with either my wife or me using our phones to activate Siri’s commands.

What I like

  • Easy command use with Siri to activate or deactivate plugs
  • Surge Protection for our devices and surge protection indicator
  • Sleek Design
  • Long cord
  • Manual buttons to turn on/off in case wifi isn’t working or you’re just nearby

What needs to be improved

  • More plugs, having only 3 plugs is a bit limiting
  • Possibly add USB ports as many items are now powered directly via USB

Final thoughts

We love the Eve Energy Strip, it provides us an easy way to control the devices we use every night and provides the surge protection that gives a bit of peace of mind against some of the major storms here in Colorado. Incorporating it into our HomeKit devices and automations was easy as well. The only thing I could find for improvement, I kind of felt I was knit-picking in wanting more outlets and possibly some USB ports. For those looking for more automation and voice control capabilities for home electronics, this is an ideal unit to add to your connected home. Eve seems to be rapidly expanding its product line, and I’m pretty impressed with their products thus far.

Price: $99.92 on Amazon or $99.95 on Tink.us
Where to buy: Amazon and Tink.us
Source: The sample of this product was provided by Eve.

Filed in categories: Reviews

Tagged:

Eve Energy Strip power strip review originally appeared on The Gadgeteer on May 14, 2019 at 10:17 am.

Note: If you are subscribed to this feed through FeedBurner, please switch to our native feed URL http://the-gadgeteer.com/feed/ in order to ensure continuous delivery.
Tineco A11 HERO Vacuum review


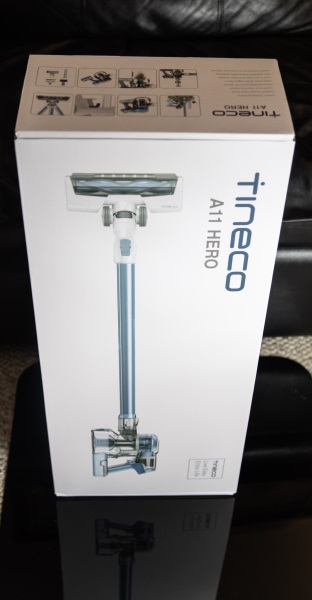
REVIEW – When I first saw the Tineco A11 HERO vacuum, it immediately reminded me of the current similar and very famous brand vacuum that I own and have been using for quite a while. The main glaring difference is that this vacuum is available for half the price. Hmm!! I wonder if its performance is even close. Let’s see!!

What is it?

The Tineco A11 HERO Vacuum is a portable rechargeable battery powered vacuum that is versatile enough to be used for carpets, floors, stairs, couches, blinds, etc. It can also be used for your car.

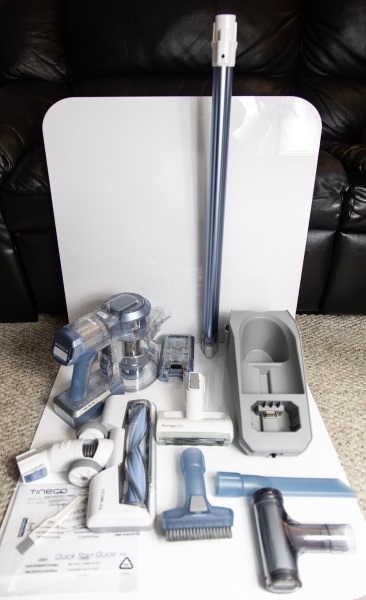
What’s in the box


1 x Tineco A11 Vacuum Main Body
1 x Extension Tube
1 x Full-size LED Multitasking Power Brush
1 x Mini Power Brush
1 x 2-in-1 Dusting Brush
1 x Crevice Tool
1 x Extra Battery
1 x Powerhouse Storage/Charging Base
1 x Pre-Filter Cleaning Tool & Extra Pre-filter
1 x Hair Cleaning Tool

Design and features

Features

      • Two batteries for a total of 60 minutes runtime
      • Enhanced extreme suction
      • Inside-out beautility
      • Dual charging powerhouse Base
      • 4 stages of fully-sealed filtration system
      • Continuous power mode switch lock
      • Rinse-free pre-filter cleaning tool
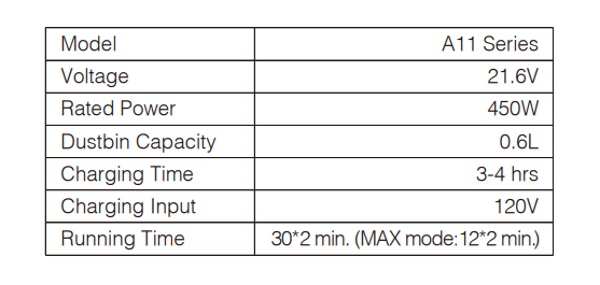
      • 450W digital motor 120W suction power
      • 50% larger one-touch-empty dustbin

Specifications


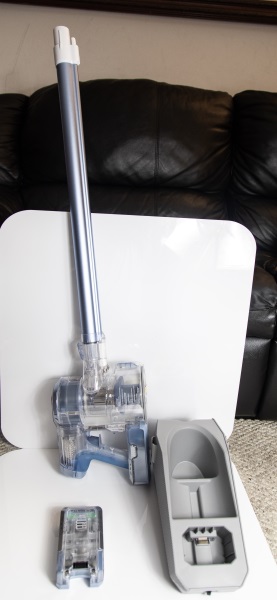
The main components of this vacuum that would be most often used are shown in the first photo below. They are the main body of the vacuum, the battery, and the extension tube. These would be used along with the full-size LED Multitasking Power Brush for general vacuuming of carpets and floors, etc. All other uses would involve adding one of the included accessories.


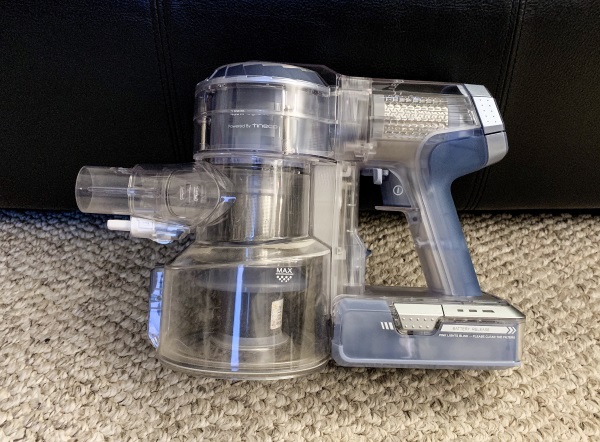
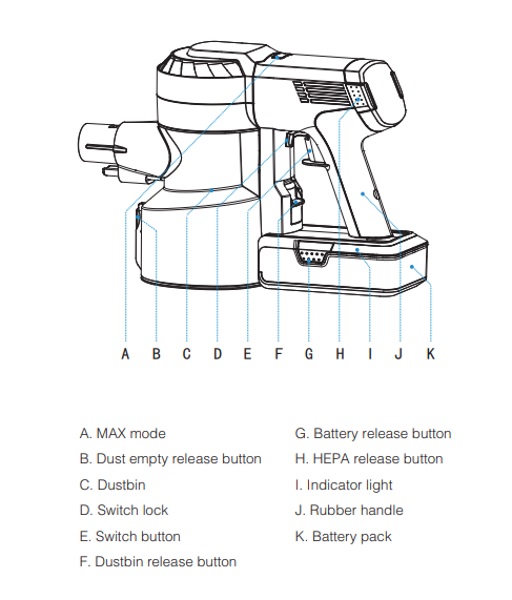
The following illustration shows the parts/functions of the main body of the vacuum:

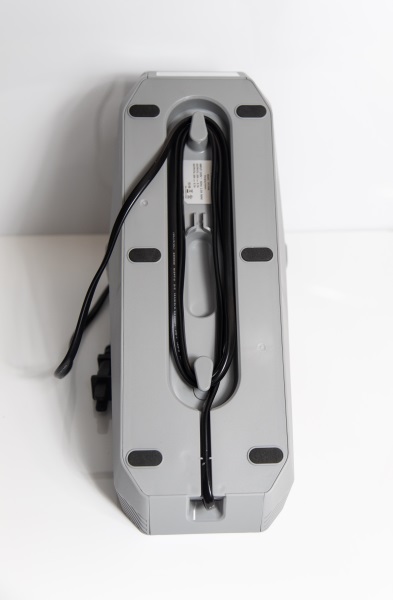
The base storage/charging unit has a cable storage capability on the bottom.


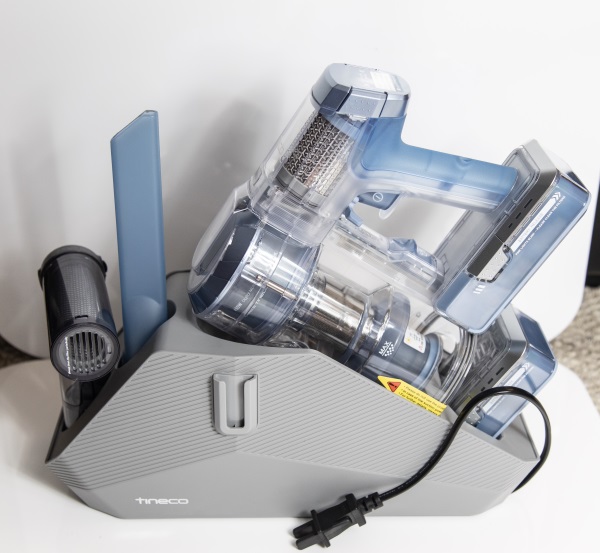
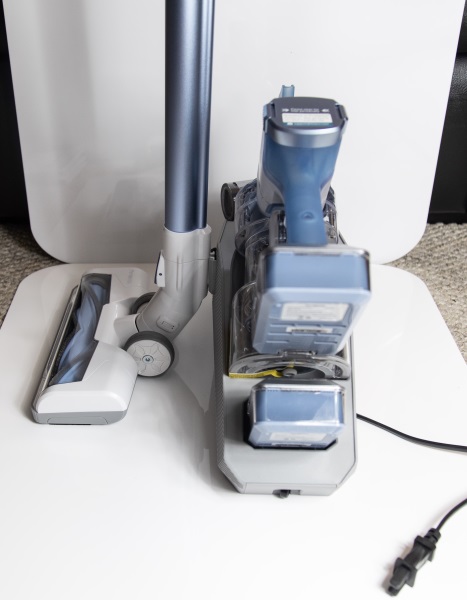
The picture below shows the storage/charging base with the main body of the vacuum inserted along with the spare battery, and some of the accessories which in this case are the crevice tool and the pre-filter cleaning tool.


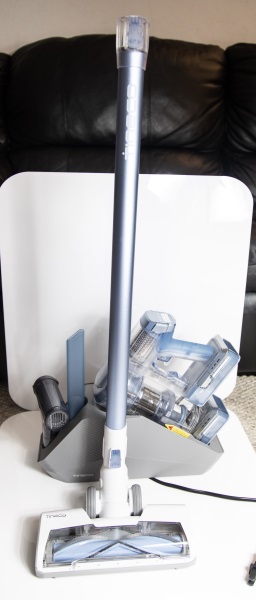
As seen above, the storage/charging base has a built-in clip/slot on the side that allows for the storage of the long vacuum tube extension and attached accessory such as the power brush.


Performance

Having used an expensive famous brand of this type of vacuum for a few years, I have to be honest and say that I did not know what to expect and that I really did not expect much. Unboxing it was very simple and within minutes I was ready for testing on my living room carpet. And, what a surprise!! The first thing I liked was the power button lock that allows you to lock the spring loaded power button in place and to vacuum without having to keep a finger on the button. So, I turned it on, locked the button in place and started vacuuming. It did a pretty good job in the standard mode, and then I pressed the “Max” button for maximum suction, and the effect was just great. This vacuum will suck up just about any dirt and debris in the “Max” suction mode, and with its large size canister, it can take care of a whole lot of square footage without any need to empty the canister. Then there is the feature of the removable battery and the fact that a second battery is included. My problem with the famous brand vacuum that I already own is that when I select the maximum suction option, the charge lasts about 12 to 15 minutes and then I have to place the entire vacuum back on the charger and wait for what seems like forever before it is fully charged and ready to go again. With this vacuum, I can just swap out the batteries, and keep going. I am quite sure that in standard more I can get about an hour of vacuuming out of the 2 batteries collectively, but I always use it in the maximum suction mode which gives me about 15 minutes each.

The next feature that I love is the pre-filter that is reusable and the cleaning tool that you just attach to the vacuum that cleans the pre-filter. And to make things even more convenient, an extra pre-filter is included with the vacuum. Once again, this is an issue with my previously owned famous brand vacuum because I have to wash that pre-filter and leave it to dry and I eventually had to buy an extra one to be able to use the vacuum while the initial one dried.

This vacuum has a charging/storage base that charges both the battery attached to the vacuum and the extra battery in a charging slot at the same time, so there are always 2 batteries at the ready.


The additional attachments perform all of the functions as regular vacuum including sofas and stairs, etc.

To add icing on the cake so to speak, its compact size allows me to use it to vacuum the car and solves the problem that I have been dealing with of finding a vacuum for this use that has enough suction power.

The vacuum is also attractive even when being used. The top half of the main body of the vacuum lights up nicely with blue LEDs as well as the front of the Full-size LED Multitasking Power Brush. With one touch you can switch into the maximum suction mode. You can see the vacuum in action in the video below.

What I like

  • The build quality
  • The removable battery
  • The dual battery charging function
  • The Suction power
  • The filter cleaning system
  • The portability
  • The usability time of each battery per charge
  • The included charging/storage base

What can be improved

  • It does exactly what it is designed to do and what is promised by the manufacturer

Final thoughts

This is the second vacuum of this type that is used regularly in my household. The other of this type is a famous and expensive brand that is referred to as the leader in devices of this type, (I will still not mention the brand but I am sure you can guess). This vacuum has an easily removable/swappable battery while the other brand thas an expensive battery that has to be screwed in and used as what can be considered permanent to the extent that is cannot be just swapped out during vacuuming and replaced so that you can continue. I also love the pre-filter cleaning process of this vacuum that is practical and does not involve washing and drying the filter. The suction of this vacuum is really great and since it is portable, I plan to make it the primary vacuum for the cars in my household. All of the car vacuums that I have tried lack the proper suction, but this vacuum does the trick. I am giving it two thumbs up!!

Price: $299.99
Where to buy: Amazon
Source: The sample for this review was provided by Tineco

Filed in categories: Reviews

Tagged:

Tineco A11 HERO Vacuum review originally appeared on The Gadgeteer on May 14, 2019 at 9:00 am.

Note: If you are subscribed to this feed through FeedBurner, please switch to our native feed URL http://the-gadgeteer.com/feed/ in order to ensure continuous delivery.