Casio PRO TREK WSD-F30 Android WearOS smartwatch review

REVIEW – Casio manufactures a wide range of electronic goods, from calculators to musical instruments. But I would argue, Casio is best known for their wrist watches…particularly their G-SHOCK line. For decades the G-SHOCK has been one of the goto watches for rugged dependability. A watch engineered to survive a march thru hell and back without batting an eye. Well, this review isn’t about any of Casio’s G-SHOCKs but on their PRO TREK WSD-F30, a modern smartwatch with much of the G-SHOCK’s DNA which is apparent the moment you lay eyes on it.

I am not going to be diving into WearOS in detail other than how well it works operating on this watch. Like the Apple Watch OS, Android’s WearOS is a pretty well-known quantity these days. That said, my focus will be on the watch hardware and noteworthy features this smartwatch brings to the table.

What is it?

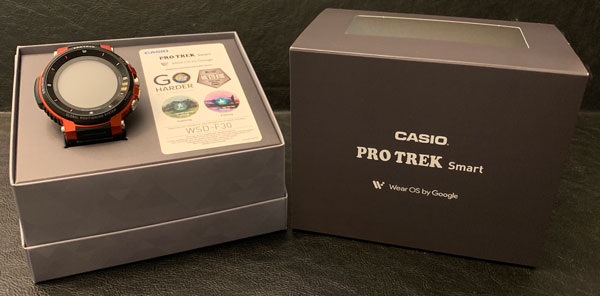
The PRO TREK WSD-F30 is Casio’s latest flagship GPS enabled smartwatch engineered for the outdoor enthusiast. The PRO TREK WSD-F30 runs on Android’s smartwatch WearOS software, has a built-in compass/mapping/navigation/barometer/altimeter, and is hardened to MIL-STD-810G (United States military standard) survivability specifications.

What’s in the box?

  • Casio Pro Trek WSD-F30 smartwatch
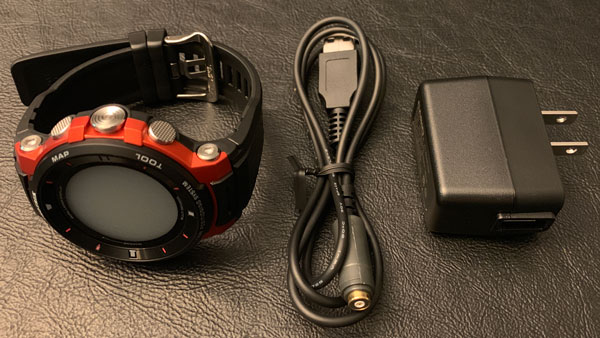
  • USB charging cord
  • Power plug

Hardware specs

  • Charging time: Approximately 3 hours at room temperature
  • Bluetooth: Bluetooth® 4.1 (Low Energy support)
  • Wi-Fi: IEEE802.11b/g/n
  • Memory & storage: 768 MB RAM, 4 GB internal storage
  • Charging method: Magnetic crimped charging terminal
  • Measuring unit: 1 degree
  • 5-bar (50-meter) water resistant
  • Environment performance: MIL-STD-810G (United States military standard issued by the U.S. Department of Defense)
  • Sensors: GPS, Pressure sensor, Accelerometer, Gyrometer, Magnetic sensor
  • INPUT: AC 100 V to 240 V 50 Hz/60 Hz
  • OUTPUT: 5.0 V
  • Charger cable: Length: Approximately 0.75 m (2.46 ft) Type: AC adaptor USB Type A
  • Operating temperature: -10℃ to 40℃ (14℉ to 104℉)
  • Crystal: Mineral glass (dirt resistant coating)
  • Approx. Size (Body H × W × D): 60.5 × 53.8 × 14.9 mm (2.4” × 2.1” × 0.6”)
  • Approx. Weight (including band): 83 g (2.9 oz)
  • Included accessories: Charger (AC adaptor), Special charger cable

TOOL Apps:

Compass:
  • Measurement range: 0° to 359°
  • Measurement unit: 1°
  • Continuous measurement duration: 1 minute
  • North Indication hand, Magnetic declination calibration, Bearing memory, Gradient calibration
Altimeter:
  • Measurement range: –700 to 10,000 m (–2,300 to 32,800 ft)
  • Measurement unit: 1 m (5 ft)
  • Measurement accuracy: within ±75 m (within ±250 ft) (When frequent manual calibration is performed)
  • Shortest measurement interval: 1 minute
  • Altitude graph: Past 24 hours
  • Manual altitude calibration, Auto altitude calibration using location information*2*3
Barometer:
  • Measurement range: 260 to 1,100 hPa (7.6 to 32.5 inHg) Measurement unit: 1 hPa (0.1 inHg) Measurement accuracy: within ±3 hPa (within ±0.1 inHg)
  • Atmospheric pressure tendency graph: Past 24 hours
  • Barometric pressure measurement interval: 1 minute
  • Manual barometric pressure calibration
Tide and Fishing:
  • Tide graph: Past 12 hours + Next 12 hours
  • Fishing time (Calculated according to current location, and moon hour angle and age.)
  • Sunrise/sunset: Sunrise/Sunset times (Current location sunrise/sunset) Sunrise/Sunset directions: Accuracy depends on compass

Design

As I mentioned, the PRO TREK WSD-F30 is Casio’s latest and greatest Android WearOS smartwatch engineered for the great outdoors. The F30 is Casio’s third generation flagship in the PRO TREK line. And even though this watch is massive and hardened against the elements, it does have a well thought out and refined design to it. The watch takes many design queues from the G-SHOCK line and is built to survive many epic adventures.

The fixed bezel is thick and raised well about the face of the watch to protect the WSD-F30’s screen from impacts. The capacitive touchscreen has a mineral glass exterior layer with a dirt resistant coating. Shame Casio did not use a sapphire crystal instead for added durability, strength, and scratch resistance.

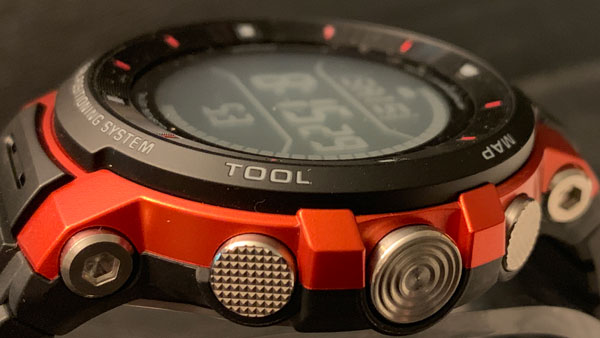
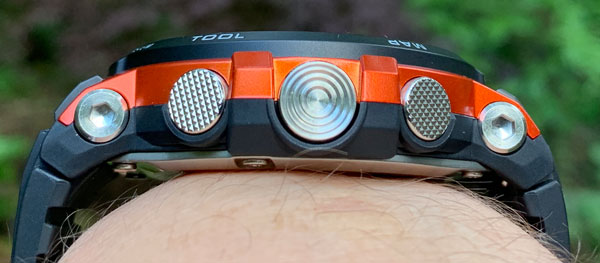
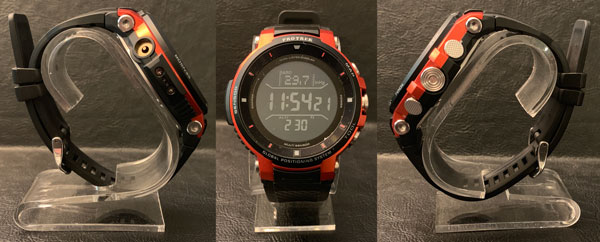
The case is well made from metal and hard plastic. The build quality is good but the design of this watch is much more about ruggedness than polish and finish…definitely a tool watch. The right side of the F30 has the main physical controls (aka the buttons 😉 ). The buttons are large and easy to find and press. The upper (mapping) and lower (tools app) buttons have a nice knurled pattern with the center button having more of a bulls-eyed pattern. The buttons work fine but are a bit squishy when pressed vs having a definitive click to them.

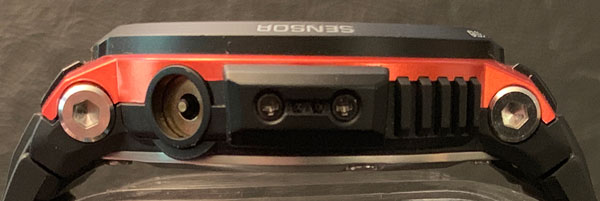
The left side of the watch has the magnetic crimped charging terminal and atmospheric/magnetic sensors. To add to the F30’s rugged good looks, Casio uses stainless steel hexbolts and screws to hold the smartwatch together.

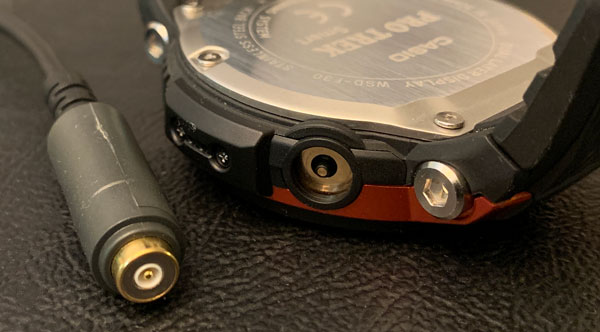
Here you can see the proprietary charging cable and magnetic crimped charging terminal.

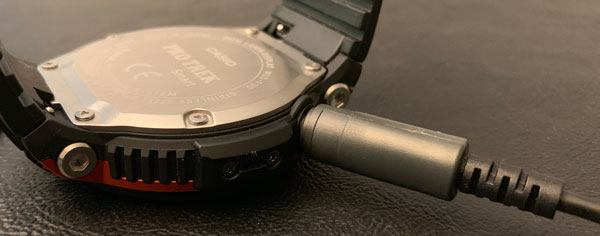
The charging system works well though the cable does have a habit of popping off too easily. The back of the case is a large stainless steel plate held on by six screws.

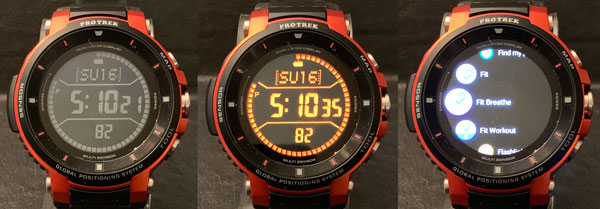
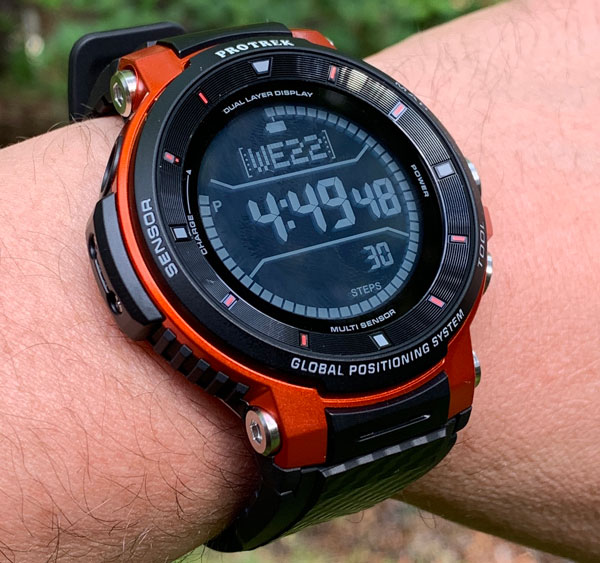
The WSD-F30 has a dual-layer OLED/monochrome display. The monochrome display shows the time, power level, and either the day/date and your step count or sensor information (altitude, barometric pressure, and compass heading) while saving power by turning off the full color display. The 390 × 390 pixels OLED layer provides a vibrant viewing experience when using apps. The touchscreen’s clarity and responsiveness is excellent.

Outdoor Features

Casio includes a handful of very outdoor-centric functions on this smartwatch including: digital compass, mapping & navigation, altimeter, and barometer telemetry. And even though this watch can provide you your notifications, music, current news, etc…one of its main missions is help you navigate and survive when you’re getting back to nature, escaping the modern world. Even though the screen is pretty small, the mapping and navigation capabilities of the F30 are impressive with the ability to download offline maps, preset routes, and waypoints, backtrack, etc. Barometric pressure data lets you know of a potential change in the weather. And the usefulness of the compass and altimeter when you’re lost in the middle of nowhere are pretty obvious.

Just one thing is missing…

I would say the most glaring omission on the PRO TREK F30 is the lack of a built-in heart-rate sensor. For being such a get out and get moving, outdoor and explore smartwatch not having an HR sensor could definitely cause the fitness crowd to pause when considering the F30 as their next wearable purchase. With the likes of Apple, Polar and many others doubling down on accurate, always monitoring fitness, I think Casio probably should have added this function by the third generation of this watch. That said, the F30 does count your steps, monitor activities, and does include Google’s and other various fitness apps.

Setup

The Casio WSD-F30 is compatible with both Android and iOS devices. Setting up the F30 with my iPhone was quick and easy. Since I already had my Google WearOS app setup, getting the F30 talking to my iPhone didn’t take long at all. The app configures all my preferences, info, and music nearly seamlessly, though music transfer did take a bit of time.

Performance

Overall the performance of the WSD-F30 is surprisingly good. I have tried/reviewed more than my fair share of smartwatches and most, if not all, of the WearOS devices fell well short in the performance category (especially compared to the Apple Watch). The F30 is relatively responsive with less lag than previous WearOS devices, apps don’t crash, and the special features/tools actually work as advertised.

With its dual-layer display technology you can get one to two days of use out of the PRO TREK before needing to recharge it…pretty standard for today’s smartwatches. The F30 has an Extended Mode for when you don’t have power and need to stretch battery life for many days. Extended Mode does limit functionality but can be switched off when need be.

Comfort & Wearability

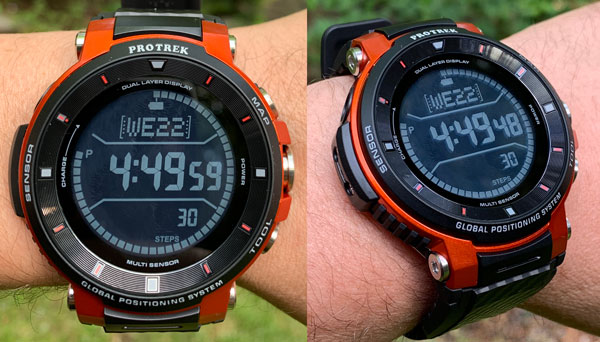
Even though the F30 is smaller than its predecessors, this watch is HUGE. The width is 54 mm with a lug-to-lug wingspan distance of over 60 mm. I typically wear 38 – 40 mm diameter watches with a lug-to-lug distance under 50 mm, so this watch does feel large and a bit cumbersome. Here you can see the watch on my 7 inch wrist and the lugs overhang the sides of my wrist. The F30’s dual layer display measures 1.2 inches with much of the watch’s overall diameter coming from the thick bezel.

The WSD-F30 is pretty thick as well. The watch sits 14.9 mm high on the wrist and does occasionally bump into things while moving through the world. Though at 83 g / 2.9 oz, the WSD-F30 feels light on the wrist especially when you consider its overall dimensions.

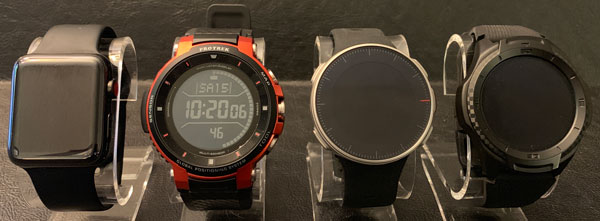
Here you can see the WSD-F30 compared to the 42mm Apple Watch, Polar Vantage V Pro, and Mobvoi TicWatch S2. The PRO TREK wears bigger than the other three though it is pretty comparable to the TicWatch in size.

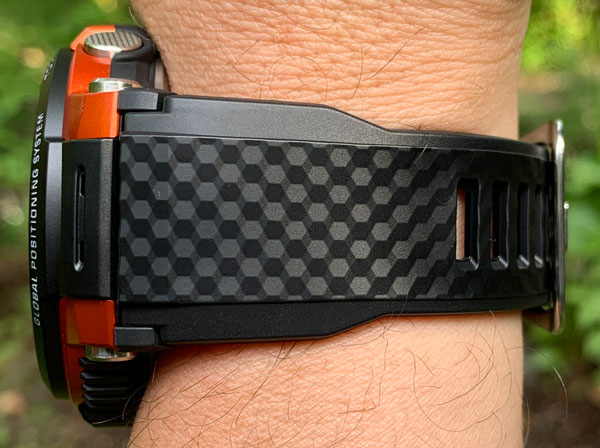
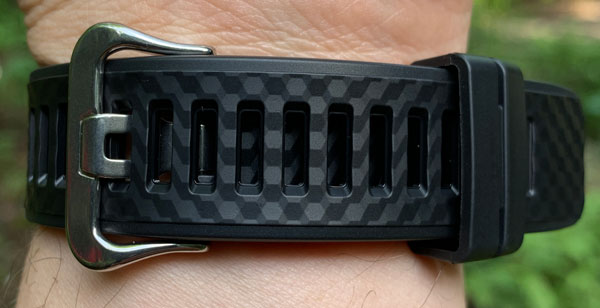
The band is made from a black plasticky rubber material with a carbon fiber-like look on the exterior. The watchband is OK, definitely not my favorite, feeling more like plastic than rubber. The band wears fine but not nearly as comfortable as my Everest or RubberB watchbands or even the bands of my Apple and Polar watches.

The F30’s watch band has many notches for a precise/better fit as your wrist expands and constricts due to weather conditions and effort level.

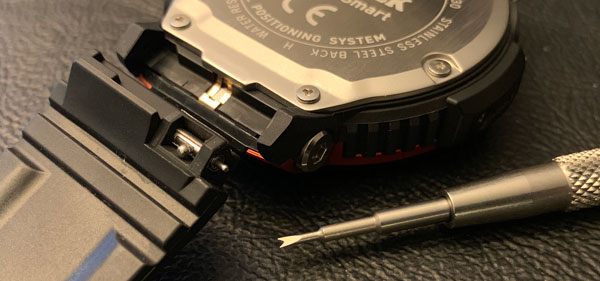
A nice feature of the WSD-F30 band is that Casio uses a quick release spring bar system for easy tool-free removal/swapping of the wristband. Funny thing is, the tiny quick release slider is recessed into the band and after a minute or two I gave up trying to make it work with my fingernail. My spring bar tool made quick work of getting the band on & off of the watch. But in reality, if your fingernail wasn’t working a paperclip or toothpick would work just as well.

What I like

  • Well made rugged design
  • Solid build and material quality
  • Created for the outdoor enthusiast
  • Pretty responsive for an Android WearOS smartwatch
  • Feature rich
  • Offline navigation and compass
  • Good dual layer screen design
  • Decent battery life

What I’d change

  • Make it smaller
  • Lower the price
  • Watchband is too plasticky
  • Include a heart-rate sensor
  • Charging plug disconnects easily

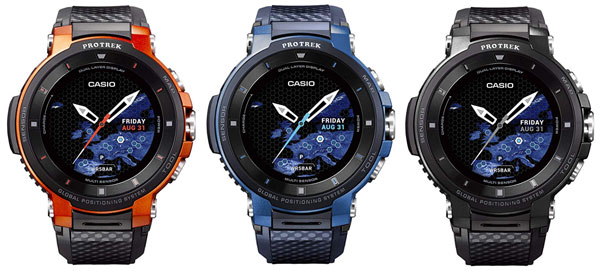
In addition to the orange-red color I received, the PRO TREK WSD-F30 is also available in blue and black.

Final thoughts

Even though it is not perfect, I really like the PRO TREK WSD-F30 smartwatch. It is unapologetically big, bold, and engineered to weather whatever Mother Nature throws at it. Casio has done a good job combining the latest wearable technology and navigation/survival tools into a rugged, mil-spec watch. This smartwatch provides the outdoor enthusiast tools to get around the middle or nowhere with confidence. It would have been nice if the F30 had a built-in heart rate sensor but if I had to choose, I’d rather have a map and a compass than know my calories burned when lost out in the woods.

One more thing: the Gadgeteer Kid is heading off to college soon and will be attending the Colorado School of Mines, located in Golden. Along with studying engineering, he plans on embracing all that Colorado has to offer: skiing, hiking, rafting, etc. while he’s there. I can’t think of a better tech-tool to hand him as he walks out the door and heads off to God’s country.

Price: $549.99
Where to buy: Amazon or directly from Casio.com.
Source: The sample of this product was provided by Casio.

Filed in categories: Reviews

Tagged: ,

Casio PRO TREK WSD-F30 Android WearOS smartwatch review originally appeared on The Gadgeteer on June 24, 2019 at 10:18 am.

Note: If you are subscribed to this feed through FeedBurner, please switch to our native feed URL http://the-gadgeteer.com/feed/ in order to ensure continuous delivery.

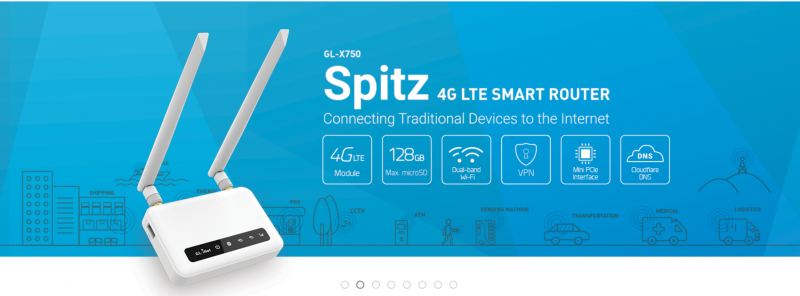
GL.iNet GL-X750 Spitz mini router review

MINI REVIEW – Firstly let me clarify, this is not a “Spitz Mini” review, it’s a Spitz  “mini review”. That being said, just like all the GL.iNet  range of products this is small, not your normal size router.  Why a mini review?  Because unlike a normal router, there’s a heap of different factors that will affect how well this unit will work for you including your country, your telco, etc.  That makes it really hard to say if this will work well because of the differing environments.  But if you’re looking at using a small LTE modem router the Spitz (GL-X750) is well worth a look.  Read on below the break:

So why do you need an LTE modem router? In Australia, the National Broadband Network (NBN) hasn’t quite met the expectations set for it (and let’s leave it there and not get into any sort of technology or political discussions 🙂 ).  People are putting in landline broadband solutions and finding them inadequate for even the most basic requirements.  Australia is ranked about 60th in the World at the moment in the broadband speed rankings. That’s not so good 🙁  That being said however we are ranked about 5th in the World for mobile broadband speeds. Many people are changing from fixed line to mobile broadband to attain better speeds for internet access especially as prices get cheaper for mobile broadband.

But that’s not the only reason you might want LTE mobile broadband internet. Some examples are:

  • Maybe you want a 4g backup line for when landline provider goes down
  • When you’re away from home  and don’t trust the free/public wifi
  • When you’re away from home and there’s no free/public WiFi
  • When the public/free WiFi is slow
  • If you are moving house a lot
  • When the family needs internet while you’re driving/touring in a vehicle

Like the other GL.iNet units I’ve reviewed, the X750 (Spitz) comes loaded with OpenWRT (with a neat little OEM wrapper on the front-end) and does all the WISP and router functions I’ve already covered so I’m not going to go over old ground and instead concentrate on the differences. Note that you could achieve the same solution using an LTE WiFi dongle attached to either the Slate or the Mango as I’ve discussed before in my previous reviews.

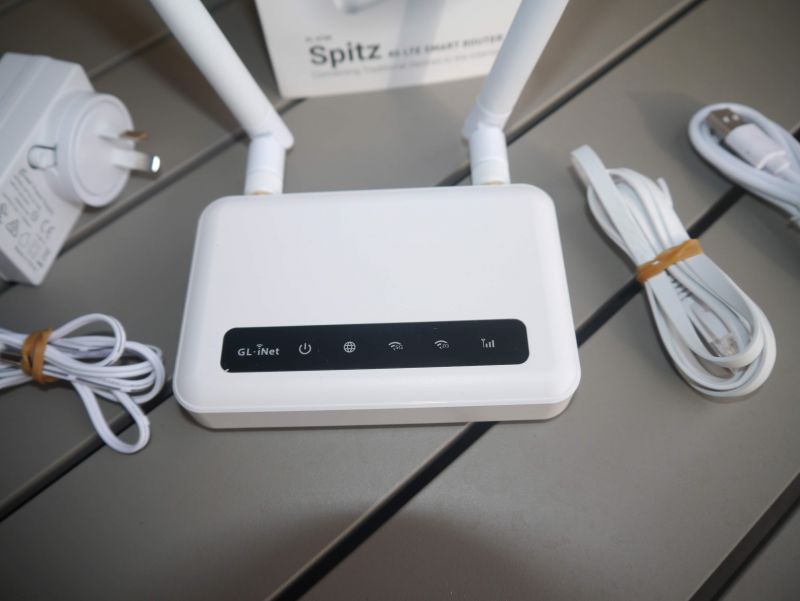
As I said in the beginning, the Spitz isn’t your normal size router at 115 x 74 x 22mm / 86g it’s still pretty small and can easily be thrown into your gadget bag. The Spitz comes with everything you need to get started.  A country-specific power supply, an ethernet cable, and a USB micro cable. On the front, there are 5 LEDs showing power, WAN connection, 2.4Ghz, and 5Ghz activity and LTE connection.  The Spitz is an AC750 WiFi router so supports both bands so all the advantages I mentioned in the Slate review hold if you just wanted to use this in a WiFi environment.

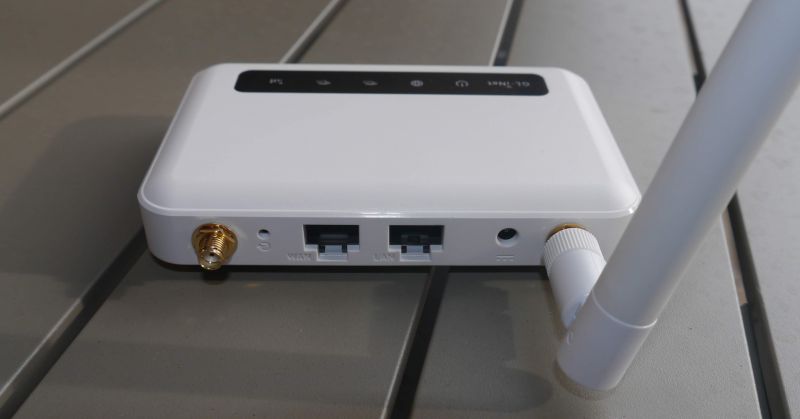
On the back are two removable antennas, they’re two 5DBi antennas for LTE not for WiFi; both the WiFi antenna are internal to the unit. If you wanted you could replace the antenna with different ones like higher gain or maybe directional rather than omnidirectional. There’s a reset switch, a 10/100 LAN and Wan port and a barrel power connector (12V/1.5A). So unlike the previous GL.iNet routers I’ve reviewed, it can’t be run off a normal USB power adapter or via your notebook/computers USB port. With the correct adapter/cable/power bank however you could run this off a powerbank or the cigarette lighter port in your car.

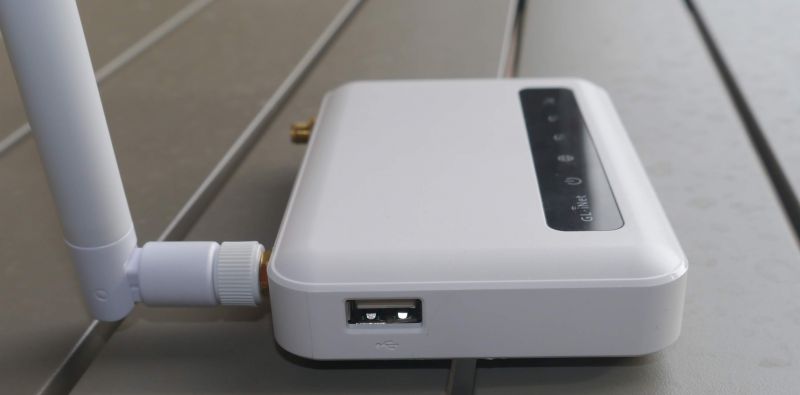
On the left is a USB 2.0 port for sharing a USB stick across your network.

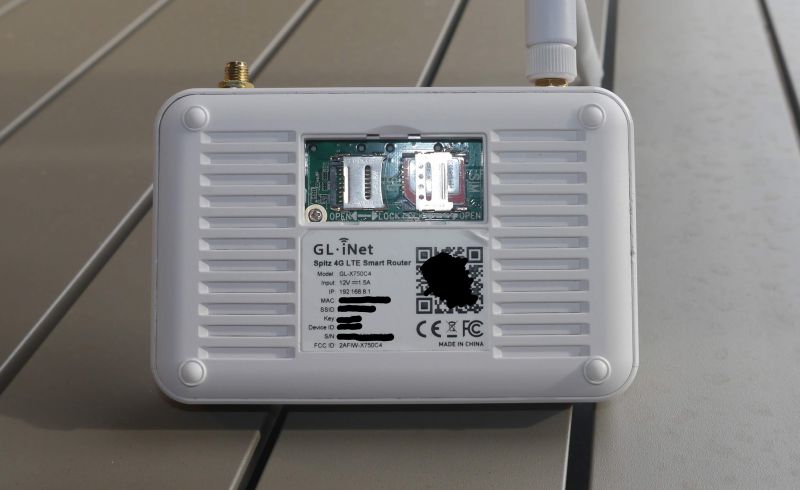
Underneath a cover on the back is a micro sd-card slot and a slot for your mobile SIM card.

Sample image

The Spitz has a Mini PCIe slot underneath the bottom cover (user removable)  and currently, you can purchase with either a Cat 4 or Cat 6 Mini PCIe modem from Quectel. It can also use Mini PCIe LTE modems from other vendors as well as long as they’re “recognized” by OpenWRT).  In theory, the Cat 6 modem will give you better speeds as it supports better Carrier Aggregation.  Because each country and each telco uses different bands for the LTE broadband, there’s a number of different variations of the boards and you need to make sure you purchase the correct board for your country and telco when ordering.  They are user changeable as well if you needed multiple boards but you need to be willing to lose any warranty, use a screwdriver and one thing I really worry about is the delicate little uFL antenna connectors; you have to be VERY careful when removing and reclipping the antenna cables so as not to damage them.

The unit also allows for optional Bluetooth and Zigbee if you wanted to make this unit the “hub” for you IOT home automation system.

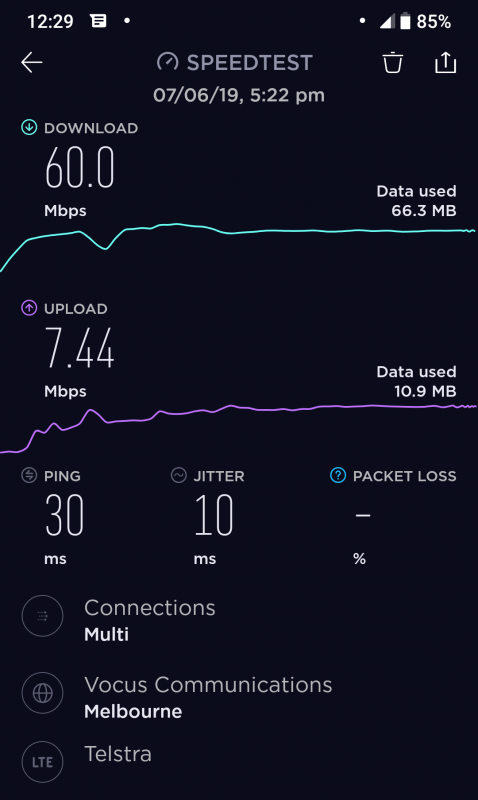
So here’s the sort of speeds I am typically getting using the X750 on the main telco (Telstra) available here in Australia. They’re known to have the best coverage and speeds (which comes at a price of course 🙂 ) .  That being said I’ve seen speeds from 24Mb to speeds up to about 190Mb depending on circumstances and yet, in many cases the 24MB is better than people are getting on their landlines.  My internet needs aren’t complicated, at most a couple of streams of Netflix or other streaming service at the same time, so even the lower speeds will do me.  Other telcos (there are 2 main other ones) I’ve tested so far peak at around 40Gb, still a good result and normally adequate for my needs. If I got really serious I could start sending AT commands to the modem and start locking it to bands and forcing carrier aggregation depending on which telco and which tower and which band and…….. to try and get the best possible connection but I really don’t have the time. These results are as it ships.

Final Thoughts

If you’re looking at LTE mobile broadband for whatever reason, there’s a number of things you need to take into account:

  • Country
  • Telco
  • Bands supported
  • Distance from Tower
  • Bands supported on that tower
  • Congestion (traffic) on that tower
  • Tower coverage
  • The list goes on and on for factors that will affect your final throughput….

But if you’re looking for a small, flexible, well supported device, then the GL-X750/Spitz is well worth having a look at.  It’s flexible both as a normal router with potentially a 4G link as a backup for your home or business, or as a portable LTE modem solution when you’re out and about (and have the power to run it).  I am currently looking at building a house at the moment and knowing that there’s only Fibre to the Node (FTTN) available there I am seriously considering just using mobile broadband and the Spitz (GL-X750) will definitely be a part of my infrastructure if that happens and most likely even if mobile broadband isn’t the best option just as a standard router.

As mentioned though please do your research before you commit to one of these LTE modem units (whatever brand)  and ensure that the modem card you are purchasing suits the environment in which you’re going to use it. As the old IT adage goes;  YMMV 🙂

Price: From $119 (US) depending on the configuration
Where to buyGL-iNet
Source: The sample for this review was supplied by GL.iNet.

Filed in categories: Reviews

Tagged:

GL.iNet GL-X750 Spitz mini router review originally appeared on The Gadgeteer on June 24, 2019 at 9:06 am.

Note: If you are subscribed to this feed through FeedBurner, please switch to our native feed URL http://the-gadgeteer.com/feed/ in order to ensure continuous delivery.
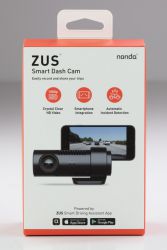
Nonda ZUS Smart Dash Cam review

REVIEW – I’ve reviewed quite a few different dash cams in the past. When the Nonda Smart Dash Cam review came along I saw that it was quite a bit different in form factor and jumped at the opportunity to review something a little different – and different it was!

What is it?

The Nonda Smart Dash Cam is a screenless dash cam. It records on its own, but you use your smartphone to configure its settings and, if desired, view the video.

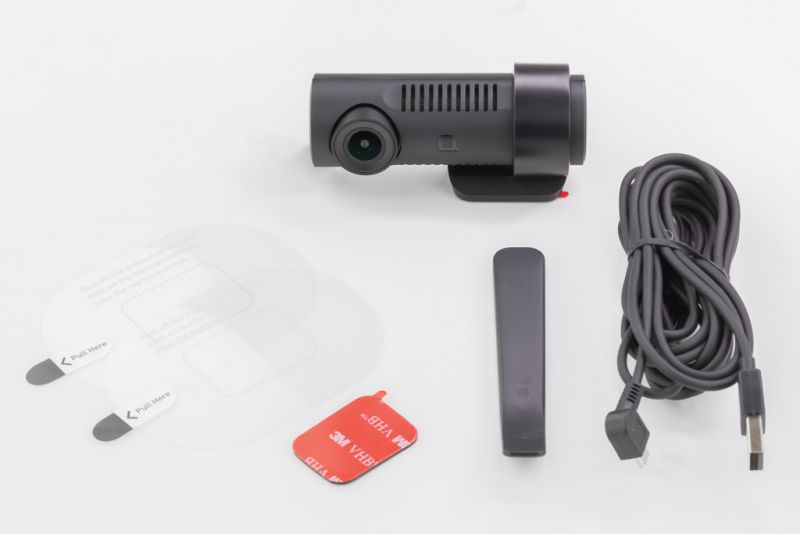
What’s in the box?

List contents – you can remove this heading and section if it doesn’t apply to your review.

  • Dash cam
  • Micro-USB power cord, but no power adapter
  • Window mount film (2)
  • Extra mounting tape
  • Removal tool


Setup

First, you install and start the ZUS app. After six intro screens that advertise features, you’re brought to a screen that prompts you to sign in. You must either sign in with Facebook or create an account with an e-mail address.


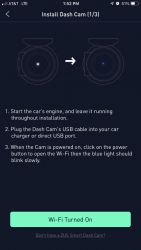
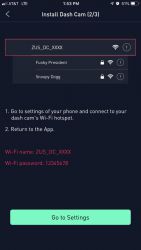
Next, you have to add the camera to the app. After signing in you have to press the button on the camera once to turn on Wi-Fi mode. Then in your phone settings connect your phone Wi-Fi to the camera. Once connected you can add a device.


Design and features

The Nonda Smart Dash Cam has a design that is unlike most other dash cams in several ways. This unusual design has both benefits and drawbacks.

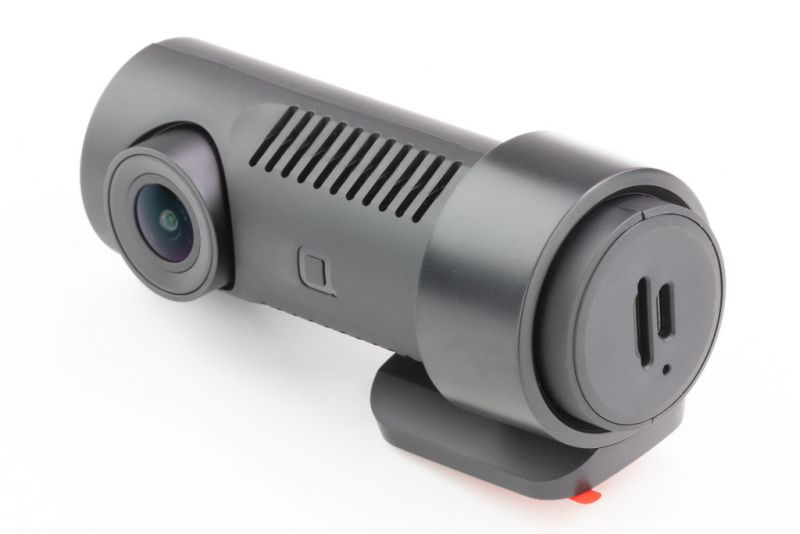
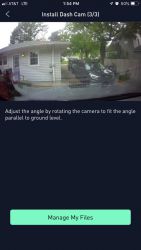
First, its mounting method is different in that instead of a suction cup and ball swivel mount, it uses a small window cling and a tape mount. The cylindrical body can rotate allowing vertical view adjustment, but there is no horizontal adjustment.

This mounting method provides a very sturdy mount but lacks the adjustability that some people may like. It also limits the mounting location to the area in the center of the window, near the rear-view mirror in order for the camera to point directly forward. The sturdy mount most likely won’t move during an impact like many of the ball type mounts can.

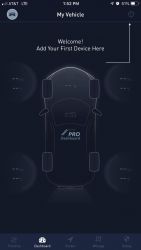
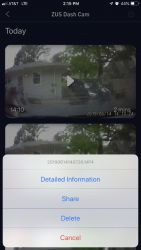
Secondly, the screenless design means that to make any changes to the settings you must first start the Wi-Fi mode, connect your phone’s Wi-Fi to the camera, then start the Nonda app. Once the app is connected, you tap “Dashboard” then select the camera which will show you the recorded clips. Once on that screen, you can access the camera settings.

There are a couple of benefits to this design that I could think of. 1) If you have teen drivers, they don’t have access to erase videos. 2) There’s no screen to distract you or others.

As for buttons and lights, there’s one button with an LED light in it. Pressing the button once turns on Wi-Fi mode, which is indicated by the LED blinking. It’s worthy to note that while in Wi-Fi mode that camera does not record, so you can’t just use your phone as a screen for that camera while driving. I did find the LED status light a but hard to see in the daytime, I would prefer it to be a little brighter.

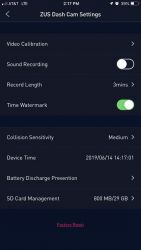
The camera itself has a 140-degree view and records in 1080p. It has auto collision detection to automatically save files in the event of an impact. An SD card is not included. The camera settings include the ability to turn on and off sound recording (default is off), record length, time watermark, collision sensitivity, device date/time, battery discharge prevention, and SD card management.

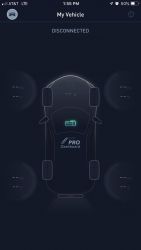
The app for the Nonda Smart Dash Cam is called “ZUS Smart Driving Assistant” that connects to the camera and other optional Nonda smart devices for your car such as a backup camera, tire pressure monitors, vehicle health monitor, and more. The app is designed to work with those other devices, so the dash cam is not the primary focus of the app, making the viewing of video or getting to the camera settings a multi-step process. Without the other devices, you’ll tap something only to be presented with information about buying or connecting the other device.

The app opens to a “Timeline” view, which is basically a blog for Nonda’s website and ads for their stuff. This is quite annoying as I would rather have it open to the “Dashboard view” where it shows all of your devices. Once there you can tap on the dashcam to access the video and settings.

The app has a “Finder” feature that is supposed to locate your car, but when tapped it only prompts me to “Add a ZUS smart Device” – which I thought the dash cam was, but when I tap “Add a ZUS smart Device” it just takes me to the vehicle settings, which lists the devices, including the camera, but does not allow you to select one. The “Mileage” and “Safety” features work the same way, but the Safety feature is understandable because it requires a separate device. I contacted Nonda Customer Care via their in-app contact feature. Not only did they respond on a Sunday, but they also did so in about 20 minutes. Their response was: “The Finder feature will only work with the ZUS charger or ZUS smart vehicle monitor… The Smart Dash Cam is only a camera and does not have any other functions on the ZUS App.” – Well, so much for it being a “Smart Dash Cam”.


The app also notified me of a firmware update for the camera. The process to upgrade the camera firmware through the app was easy and had great instructions during the process.

There are a bunch of settings in the app for your vehicle information, however, these aren’t used for anything unless you install one of the other smart devices such as the Smart Vehicle Health Monitor.

Sample Video

The video from the Nonda Smart Dash Cam is as expected, a high-quality 1920×1080 video. The camera also saves a 640×360 version of the video, presumably to make smartphone playback quicker and/or easier to share.

What I like

  • Sturdy design
  • Large lens
  • Hides well behind the rear-view mirror

What I’d change

  • You shouldn’t have to create an account to use a dash cam
  • The app leaves you feeling like they’re just trying to sell you more stuff
  • There’s no way to manually save a recording from being overwritten
  • Better LED status light

Final thoughts

Although I could see this camera appealing to certain persons, I personally prefer a camera with a screen. It does not have the features of many other dashcams such as photo taking ability, or the ability to do a time-lapse video or monitor while the vehicle is parked. I also prefer the adjustability of the suction cup mounts. I think if you added the smart charger the app would feel much more useful with its parking monitoring and mileage log.

Price: $99.00
Where to buy: Nonda and Amazon
Source: The sample of this product was provided by Nonda.

Filed in categories: Reviews

Tagged: ,

Nonda ZUS Smart Dash Cam review originally appeared on The Gadgeteer on June 24, 2019 at 8:00 am.

Note: If you are subscribed to this feed through FeedBurner, please switch to our native feed URL http://the-gadgeteer.com/feed/ in order to ensure continuous delivery.
NITECORE TIP2 Rechargeable Keychain Flashlight review

REVIEW – If I were browsing the Personal Ads for the perfect flashlight, I’d look for the following qualities: small, rechargeable, bright, rugged and loves long walks on the beach. Well, maybe not that last part. Is NITECORE’s TIP2 Keychain Flashlight a perfect match? Read on!

What is it?

The TIP2 is a small, rechargeable LED flashlight with a surprisingly powerful maximum output of 720 lumens. Its rugged design and diminutive size, along with a magnetic tail and multipurpose clip, makes it highly versatile.

What’s in the box?

  • NITECORE TIP2
  • Removable pocket clip
  • Keychain clasp
  • User manual
  • Warranty card

Hardware specs

  • Max output of 720 lumens with over 100 yards of throw
  • 4 levels of brightness with direct access to turbo
  • 1m impact resistance
  • L-2.46″xW-1.06″xH-0.53″
  • 1.35oz
  • Separated magnetic tail cap for hands-free use & quick detachment
  • USB rechargeable, built-in Li-ion battery
  • Detachable multipurpose clip ideal for carrying in a pocket, backpack and more

Design and features

I don’t know if it’s just a geek thing, or a guy thing, or just a me thing, but the first thing I always have to do whenever I get a new flashlight is to turn it on, at its highest setting, directly into my face. Most of the time, I think, “Ooh, that’s pretty bright.” And then you pick up a little keychain light like the TIP2, turn it on Turbo brightness, get blinded for a good 60 seconds and think, “Okay, now that’s bright.”

NITECORE’s TIP2, the sequel product to their TIP keychain LED flashlight, is compact, rugged, and all the brightness you’ll likely need out of something this small.

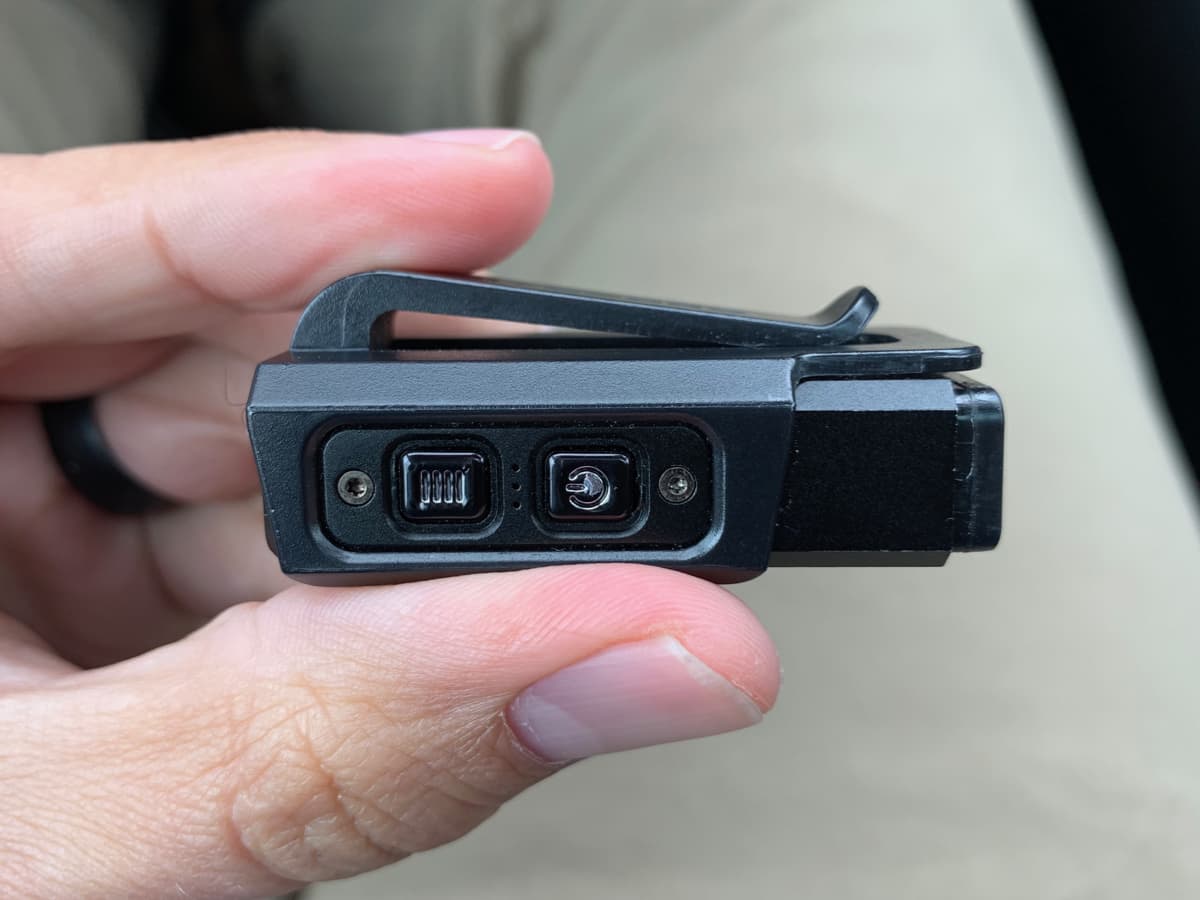
The buttons and the clip.

Sporting a max brightness of 720 lumens, twice as bright as their previous model, the TIP2 provides almost too much brightness for such a small flashlight. What I mean by that is that yes, you can generate that might light, but only for about 15 minutes until the battery straight up dies.

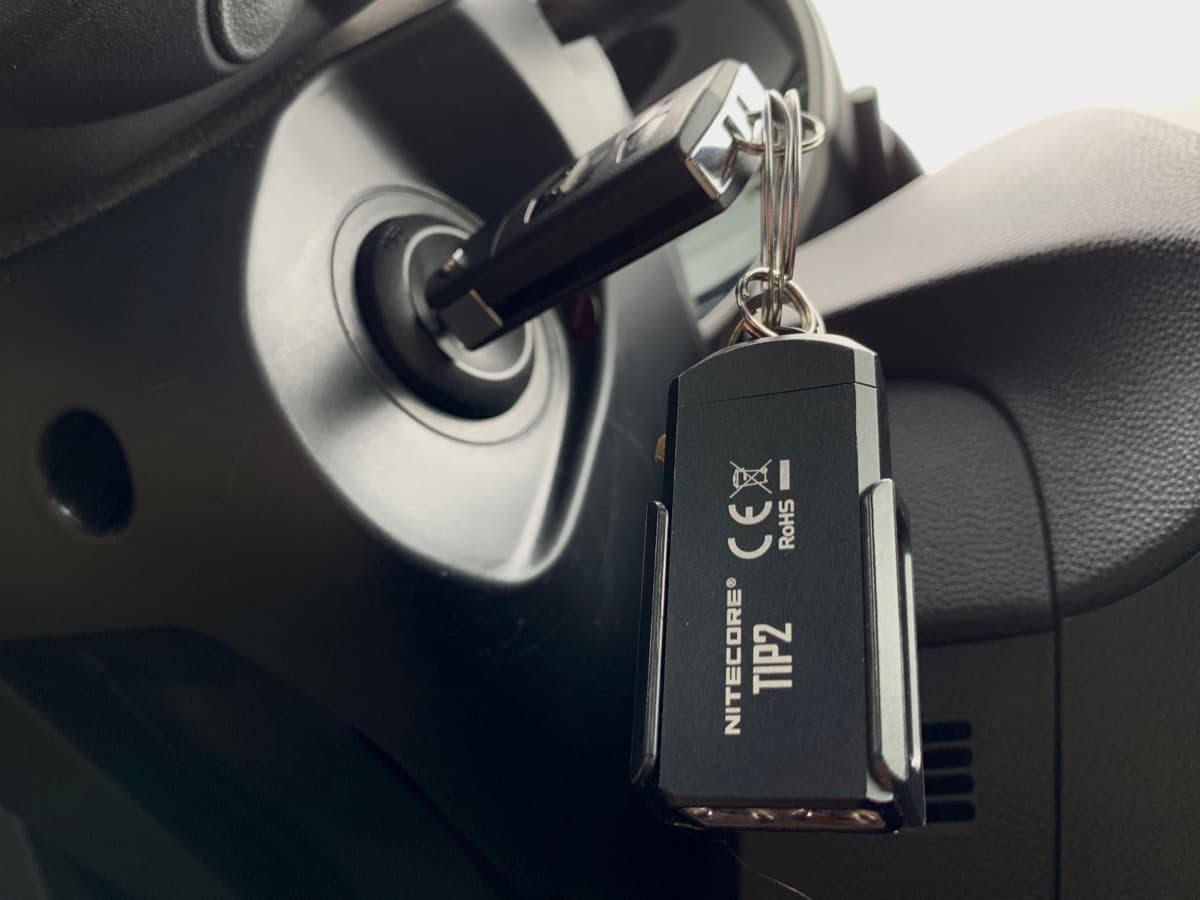
I’ve been carrying this small torch around for a few weeks, now, primarily keeping it attached to the magnetic key ring attachment on my keychain. It’s no larger than the key fob for my Mazda. Having a flashlight within the same proximity as my car keys makes it indispensable.

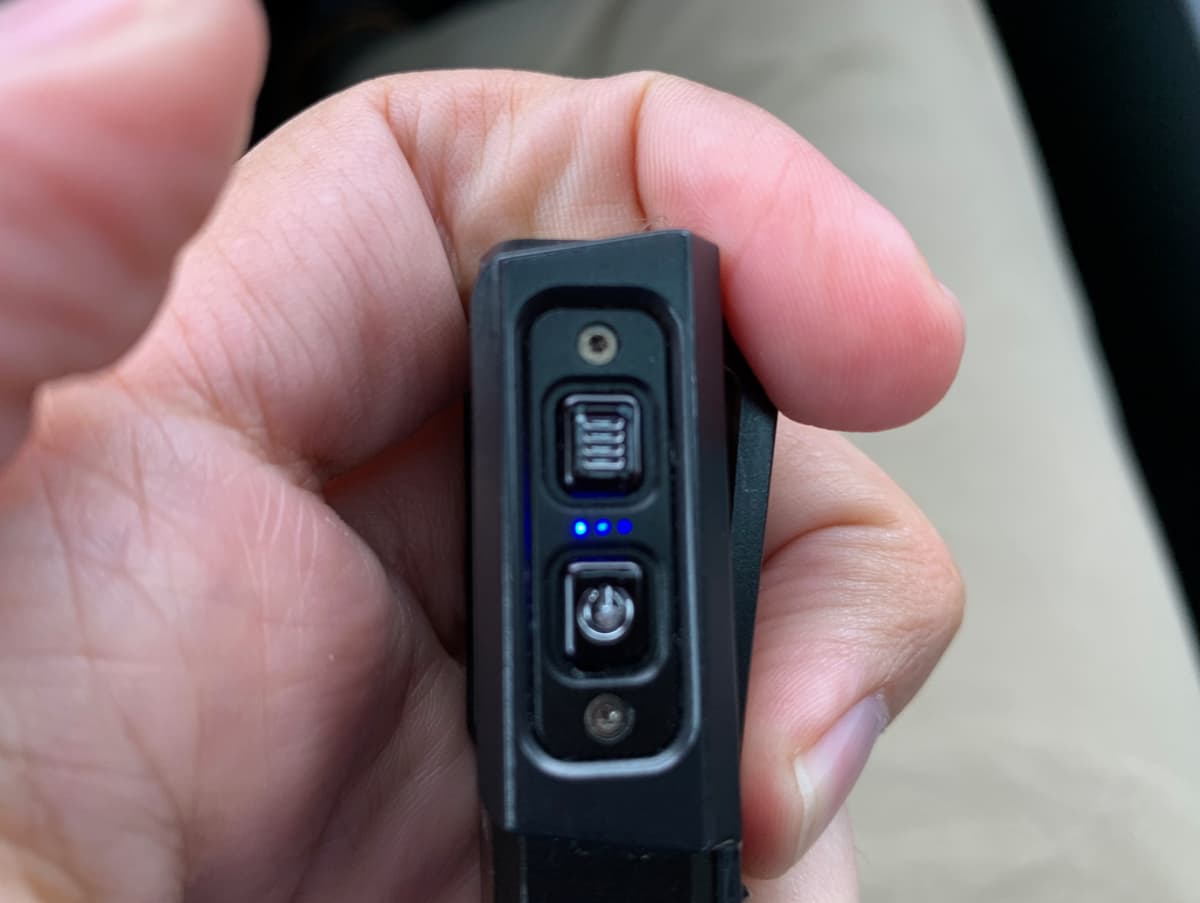
There is a row of tiny LEDs in between the buttons that acts as a battery power indicator.

Holding the TIP2 in your hand, it does feel about the size and weight of an average modern car key fob, maybe a couple ounces heavier. There are two buttons on the side of the flashlight, a power button and a mode selection button, with a row of 3 tiny LEDs in between. Pressing the mode button quickly flashes the small LEDs, which display the amount of battery power. By holding down the power button for a few seconds, the light turns on at whatever the last setting was: low, medium or high.

It does take about 4 seconds to power on, preventing from accidental lighting in your pocket or pack. Pressing the power button while it’s on turns the light off immediately. While lit, the mode selection button cycles from low to medium to high and back to low again.

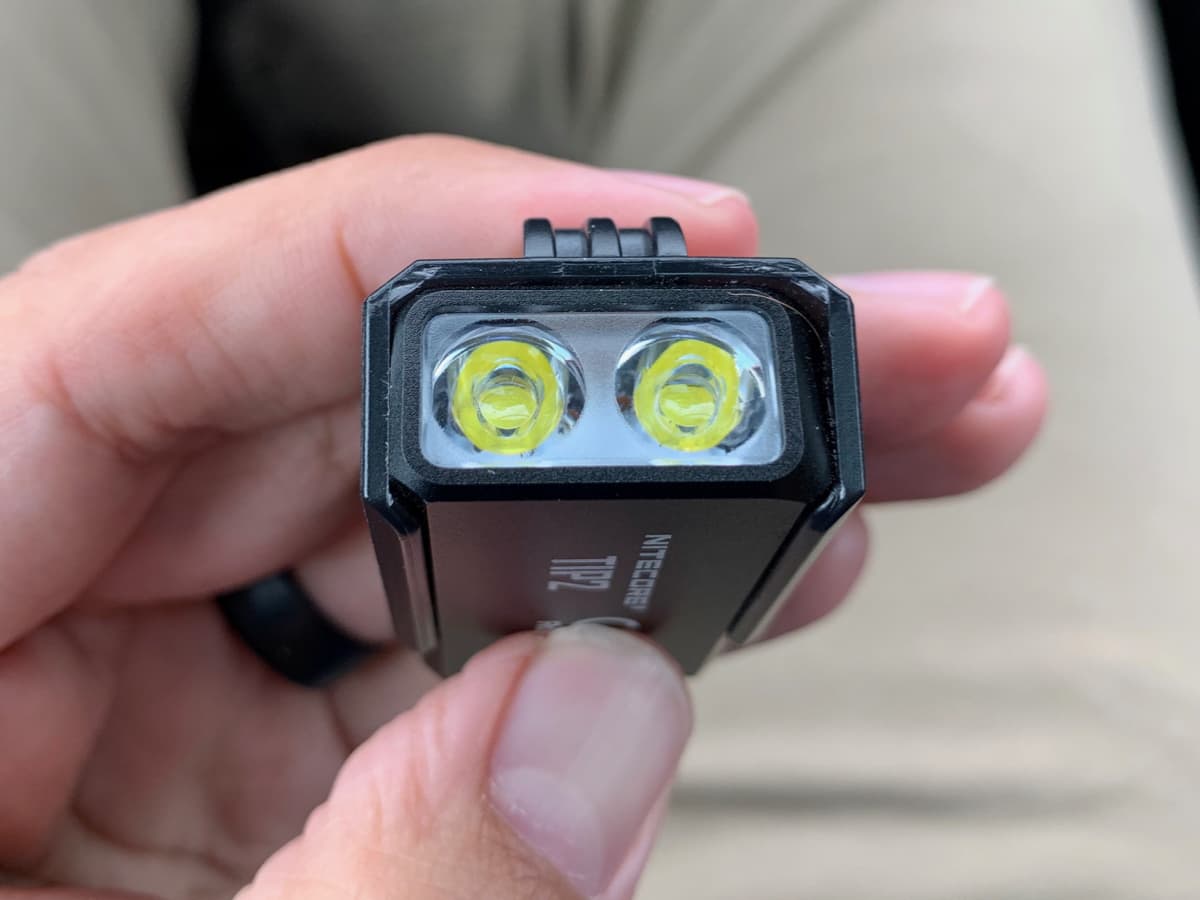
Two CREE XP-G3 S3 LEDs in the front of this flashlight.

While the TIP2 does offer a lighting power of 720 lumens, it’s a limited feature in that the battery will only supply, at most, 15 minutes of juice in this maximum “Turbo” mode. To access this mode, you must hold down the tiny mode select button, the entire time you want it to shine that brightly. So the 720 lumens Turbo mode is really meant for very short bursts when you need a lot of extra light, like a during a quick sweep of a darkened field or trail.

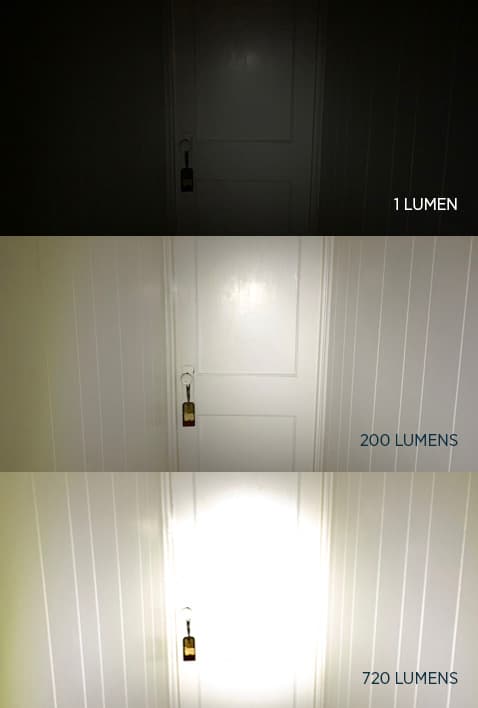
Below is the approximate amount of time you can use each of the levels of lightning per charge:

This is a pretty rudimentary way of showing the brightness settings, since the camera’s own settings — shutter speed, ISO and aperture — changed a bit in between shots.

Turbo • 720 lumens • 15 min
High • 200 lumens • 1 hr 15 min
Mid • 30 lumens • 8 hr
Low • 1 lumen • 55 hr

Mid power is pretty much what you would expect from a typical LED keychain light, and that’s what I’d recommend using in most cases. High is quite bright. I think in most use cases, like a darkened room or parking lot, high would only be needed if you wanted to see far off into the darkness.

I really like the inclusion of a Low power. One lumen sounds paltry compared to the super-bright maximum of 720, but in an absolutely dark room or tent, it’s perfect. Just enough to see where you’re going without ruining your night vision, or to just leave on, clipped to a backpack or hat brim. And since a full batter lasts for around 55 hours at this level, it’s sort of nice to have a light you can stick virtually anywhere for the entire evening, if needed.

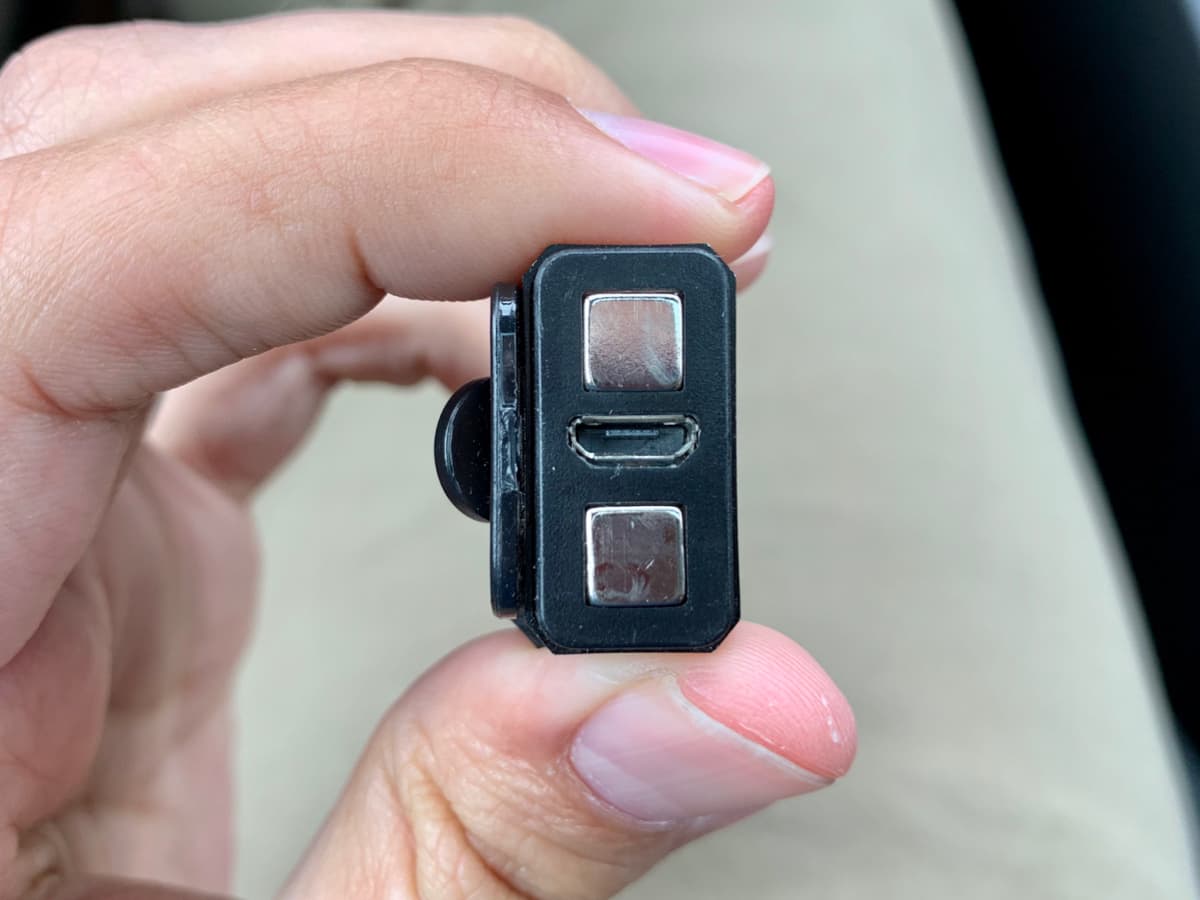
The “tail” end of the TIP2 contains a powerful magnet, which keeps it firmly attached to the metal keyring cap, but also detaches with a quick tug. This also allows the TIP2 to be placed on any metal steel surface, such as a car hood. This cap also shields the micro-USB port, keeping out water and dust.

The exposed magnets and micro-USB port.

The TIP2 also comes with a handy pocket clip, which can be attached to, obviously, a pocket, or even something as thick as the brim of a hat. You can essentially turn any ball cap into a mining helmet using this clip… it’s such an easy and useful hack.

Check it out, and instant mining cap.

All in all, NITECORE put a lot of thought into refining their TIP light to create the quintessential keychain flashlight. It’s waterproof, shock-resistant, super-bright, pocketable and rechargeable, which ticks off all the requirements for a truly essential flashlight in my book.

What I like

  • Very small and very bright
  • Rechargeable battery
  • Clip/magnet combo make it extremely versatile

What I’d change

  • Make the buttons larger
  • A better way to activate TURBO brightness

Final thoughts

The TIP2 is a great addition to any everyday-carry fan’s arsenal. Not only is it only the size of your car’s key fob, it’s powerful enough to light almost any situation you’d find yourself in, save for needing an extremely bright light for extended periods of time.

Price: $44.99
Where to buy: You can pick up your own NITECORE TIP2 directly from the NITECORE Store website.
Source: The sample of this product was provided by NITECORE.

Filed in categories: Reviews

Tagged:

NITECORE TIP2 Rechargeable Keychain Flashlight review originally appeared on The Gadgeteer on June 23, 2019 at 12:50 pm.

Note: If you are subscribed to this feed through FeedBurner, please switch to our native feed URL http://the-gadgeteer.com/feed/ in order to ensure continuous delivery.
Firewalla review


REVIEW – By now, almost everyone who uses an internet connected device knows something about the dangers that lurk online. For those of us that have children, there is or should be a greater sense of awareness and desire to monitor and control what content they are exposed to, at least when they are home in an environment that we can control. I have tried a couple of firewall devices in the past, but they required major configuration and they came preset to block traffic that actually was required for some online college portals and other needed websites. The process of reconfiguring them was very tedious and ultimately, I unplugged them. I just got an opportunity to test and review a similar device called Firewalla. Let’s see if it is more of the same or a more user-friendly yet effective device and experience.

What is it?

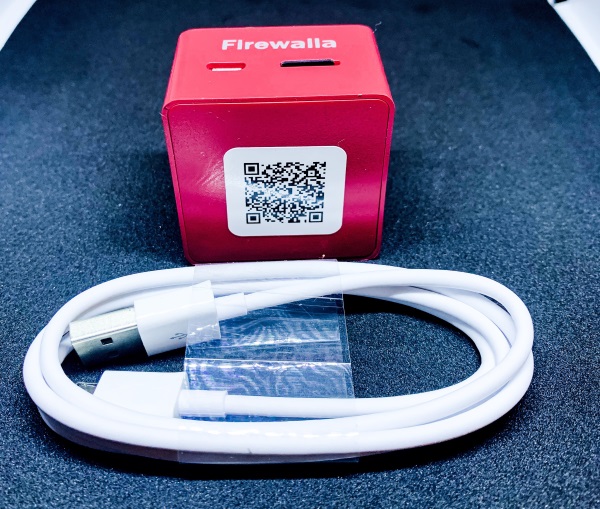
The Firewalla Red is a Cyber Security Firewall device that is designed mostly for home use. Its features include network protection from Viruses & Malware, Parental Control, the blocking of unwanted Ads, and a free VPN Server. It connects directly to your router via its 100Mbs Ethernet port and there is no associated monthly fee. There is also a Firewalla Blue device that offers additional features and is designed with business users as its focus.

What’s in the box


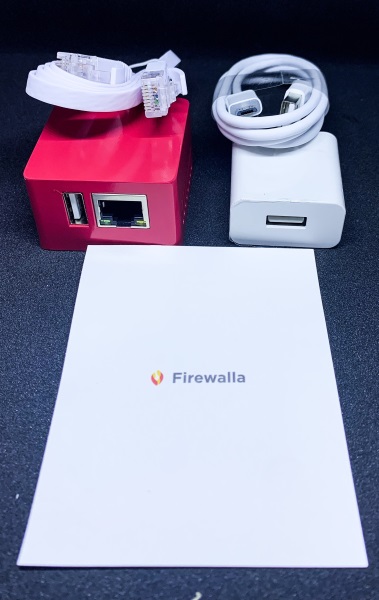
1 x Firewalla Red
1 x Ethernet Cable
1 x Micro USB Cable and AC Adapter
1 x Information Card

Design and features

Specifications
Dedicated hardware for cybersecurity at 100 Mbit
Quad-Core 32bit 1.0 GHz CPU, 512MB RAM, 16GB SD Storage

Features

    • Auto-blocking: automatically block malicious sites
    • Device Management: manage who can get on the network, and what they can do when on the network.
    • Multiple apps manage one Firewalla: allow you to manage firewalla from anywhere in the world
    • Bandwidth Usage: prevent internet over usage, know your bandwidth usage from minutes to days to a month
    • Internal and External vulnerability scans: allow you to manage “open doors” in your network
    • Dynamic DNS: allows you to safely expose certain internet services
    • Alarm Management: easily view, allow, block, and archive alarms
    • Content Filtering and activity detection: always know what each device is doing

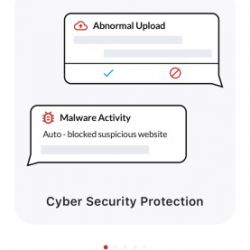
COMPLETE CYBERSECURITY PROTECTION – “Firewalla’s unique intrusion prevention system (IDS and IPS) protects all of your home wire and wireless internet of things devices from threats like viruses, malware, hacking, phishing, and unwanted data theft when you’re using public WiFi.”

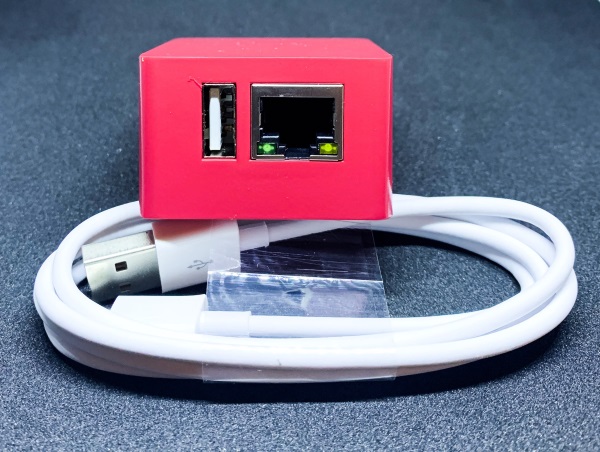
One one side of the Firewalla, there is a USB port and an Ethernet port. The ethernet port connects to your router.

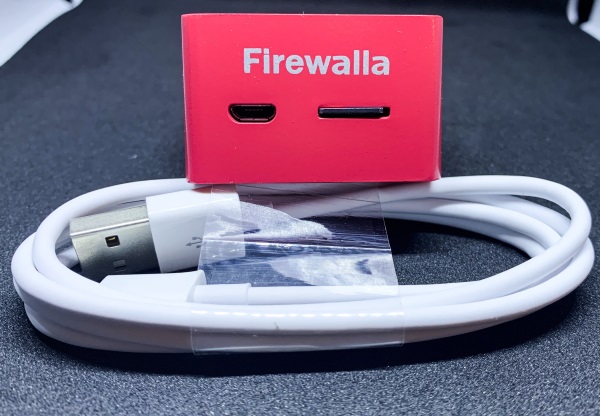
The micro USB port seen below is used for power via the micro USB cable and the provided wall adapter or you can also connect Firewalla Box to any power source that has 2A current. To the right of the power port, there is the installed SD storage.

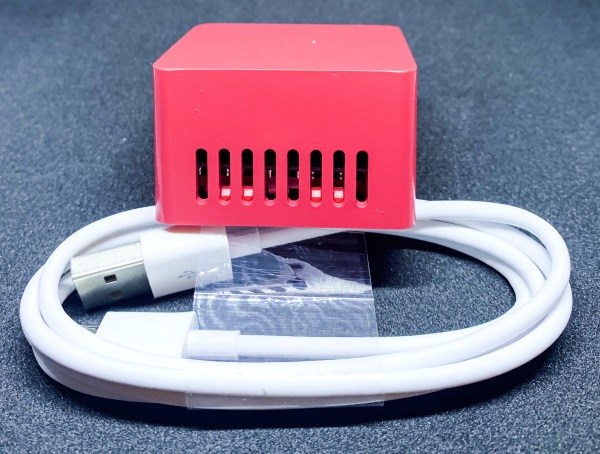
There are air vents on the other 2 sides of the device.

At the bottom of the device, there is a QR Code that you scan via the Firewalla app to initiate the setup process.

Performance

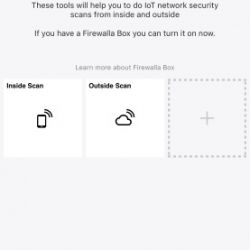
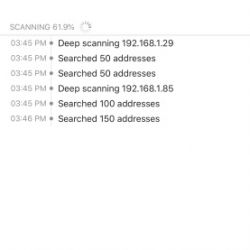
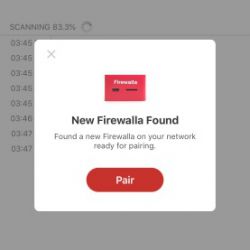
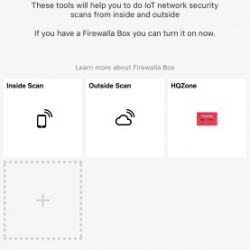
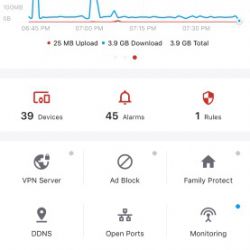
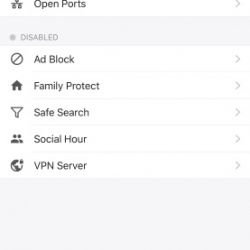
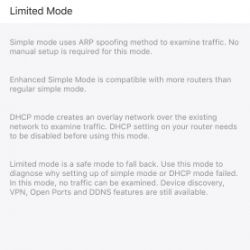
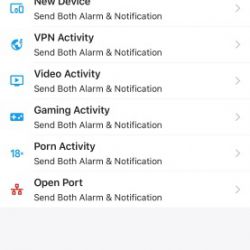
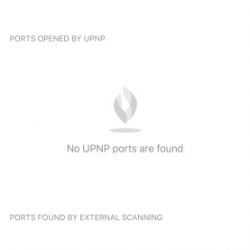
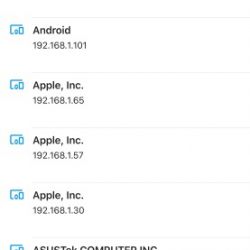
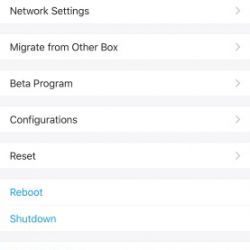
This device is very easy to set up and use. I simply downloaded and installed the app from the IOS app store. Android is also supported. I then plugged in the device and scanned the QR code on the bottom of the device from within the app. The rest of the setup was automatic, and with a few selections like the mode option, in my case, I chose the Enhanced Mode (Beta), everything was operational. The operation and features of this device are better showcased via the following screenshots from the app:
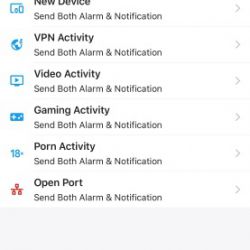


Important note: COMPATIBILITY: This is * Firewalla RED * (NOT THE FIREWALLA BLUE), The IPS functionality is limited to 100 Mbits. The manufacturer suggests that not all routers are compatible with Firewalla. Click here to view the router compatibility list. You msy be required to log in to your router to do the basic configuration.

What I like

  • Compact size
  • Ease of installation
  • Ease of use
  • Performance

What I’d change

  • I would prefer an included hard copy basic user guide

Final thoughts

The Firewall was very easy to install, and so far I like it much better than other similar devices that I have tried. It is set up wide-open in its initial state, so you get to observe and make choices as you go as opposed to others that have preset values that can be a headache to configure if the setup is complicated. I have read reviews that suggest that this device slows down the network, but I have not experienced that, and it has been simple and easy to use. I would prefer that a hard copy manual is included as opposed to having to look for the desired info on their website, but so far it is doing a good job and in my opinion, it gets a thumbs up!!

Price: $119
Where to buy: Amazon
Sample: The sample for this review was provided by Firewalla

Filed in categories: Reviews

Tagged: ,

Firewalla review originally appeared on The Gadgeteer on June 23, 2019 at 10:00 am.

Note: If you are subscribed to this feed through FeedBurner, please switch to our native feed URL http://the-gadgeteer.com/feed/ in order to ensure continuous delivery.