Sandman 4 Port USB Charging Alarm Clock review

How many of you wake to sounds from your smartphone, charging on or near your bed? How many of you still have a clock in your bedroom for timekeeping (not for decoration)? These two questions will determine your interest in the latest gadget to cross my review desk: the Sandman Alarm Clock.

Note: Photos may be tapped or clicked for a larger image.

We all sleep, and most of us are cursed with the necessity of having to be awakened at a specific time. For this, most of us use some sort of alarm clock or alarm app. While we’re sleeping, most Gadgeteers also plug in their phone, tablet, watch, or another device for charging. The result has made for a lot of tangled confusion on and under nightstands the world over. A company called Palo Alto Innovations has developed something to tame some of this with the Sandman alarm clock. They sent one to me for testing, and I’ve done so with great enthusiasm. (Anything that includes me sleeping is met with great joy.)
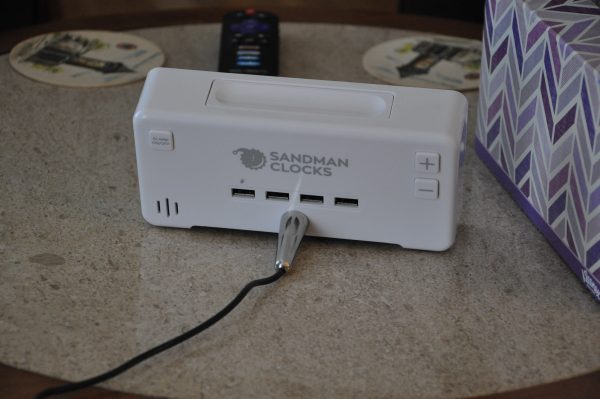

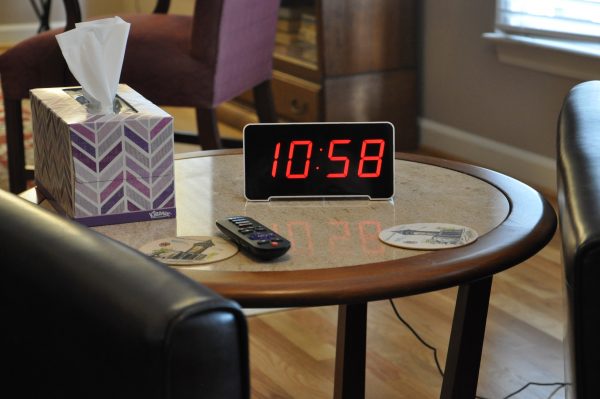
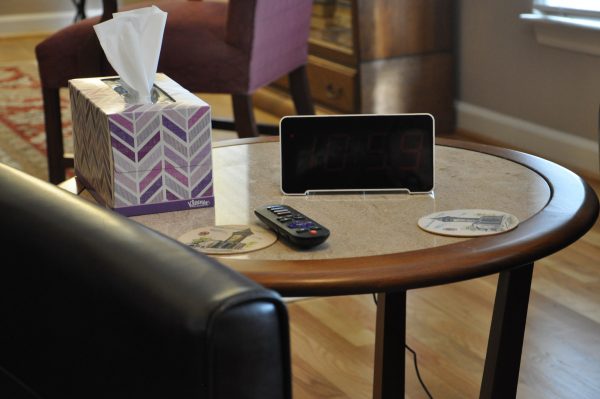
The clock itself resembles any of the thousands of LED clocks you’ve seen over the years: black plastic face with large numerals and small dots nearby to indicate alarm status and AM/PM. There are buttons to allow you to change the time, set the alarm, etc., on the back. There’s also a built in backup battery in case of power outage. The Sandman, however, features a multi-level brightness adjustment on the display, which means you’ll actually have a dark room to sleep in once more. (My youngest actually puts an index card over her current clock to dim the display.)
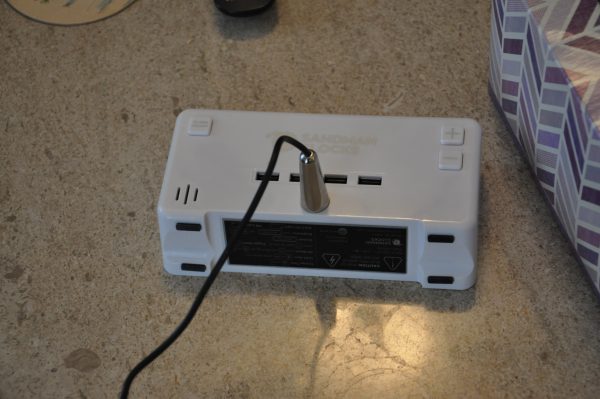

The other secret superpower this clock brings to market is four USB charging ports across the back. No longer do you have to flail about under the bed and nightstand for that cable to plug in your device(s) at the bedside. In fact, since it’s right there on the nightstand, using a short cable or one with several tips makes lots of sense.
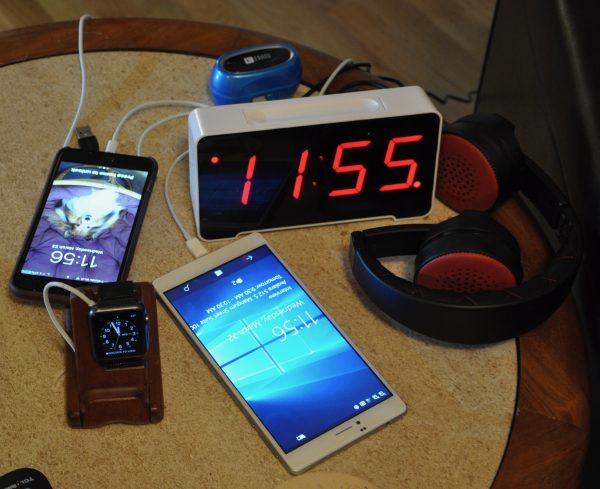

With these features, what’s not to like, right? Well, a few things. First, the buttons have no way to lock. So, in the middle of the night, you reach to turn the clock around and read it, and you’ve grabbed the button to change the time. Or you’ve turned off the alarm if you grab the other side. Second, setting the alarm takes a lot of twiddling to get the hang of. With only three buttons, you’d think they could have made some other location for them, or built up a collar around them to make it more difficult to change or add a lock button. And holding the snooze bar while holding one of the buttons on another plane means this is never a one-handed operation.
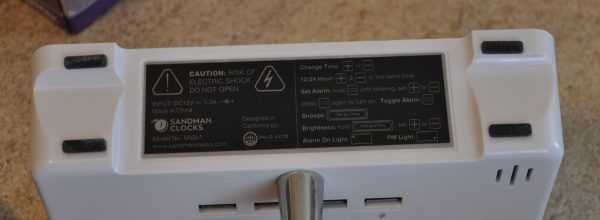

The sound is loud enough to wake me, but I’d like to change the sound or make it louder on those days I’m going to need some added encouragement to rise. These things should be easy enough to add for the next version, but without them, the addition of USB ports is not quite enough to make me change from my current clock.
How has what you keep on your nightstand changed in the last 10 years? How about the last 15? That question brings into sharp relief the changes brought about by cell phones, iPods, smartphones, and our move from needing clock radios to using phones to wake us. This could be an interesting social science study, actually. Let’s discuss it in the comments.

Source: The sample for this review was provided by Palo Alto Innovation. Please visit their site for more info and Amazon to order.


Product Information

Price: $44.99
Manufacturer: Palo Alto Innovation
Retailer: Amazon
Requirements:
  • AC outlet
Pros:
  • Variable brightness levels
  • USB port allows charging up to 4 gadgets
  • Backup battery
Cons:
  • Time and alarm status are easily changed when picking up clock
  • No control over alarm sound or volume level
  • Fiddly controls for setting alarm and time

Filed in categories: Reviews, Watches and Clocks

Tagged:

Sandman 4 Port USB Charging Alarm Clock review originally appeared on on March 23, 2017 at 12:23 pm.

Note: If you are subscribed to this feed through FeedBurner, please switch to our native feed URL http://the-gadgeteer.com/feed/ in order to ensure continuous delivery.

Mpow Bluetooth Over-the-Ear Bluetooth Headphones review

These Mpow Bluetooth headphones are a decent, moderately priced option for people who prefer traditional over-the-ear headphones versus earbuds. They are stylish, portable and offer the choice of a wired connection as well as Bluetooth.

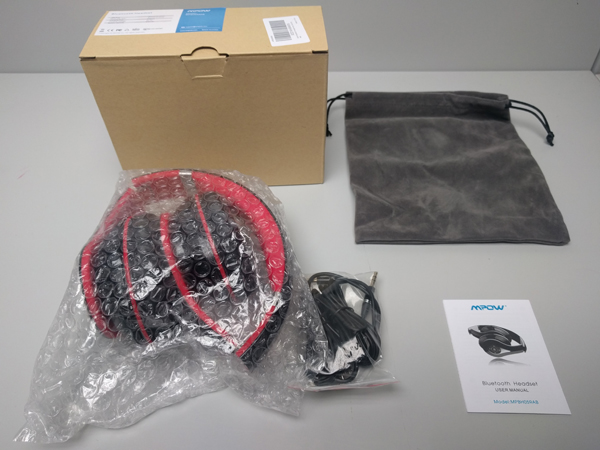
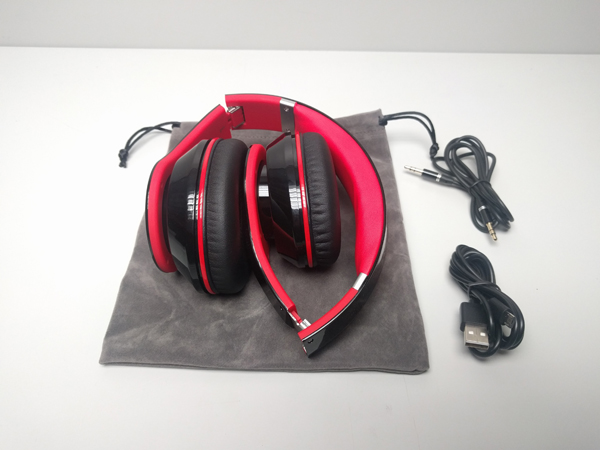
In the box:

  • Mpow Bluetooth Headset
  • 3.5mm Audio Cable
  • USB Charging Cable
  • Packing Bag
  • User Manual

Specifications:

  • Bluetooth Version: 4.0
  • Range: 33 feet (10 meters)
  • Talking Time: Around 15 hours
  • Playback Time: Around 13 hours
  • Charging Time: 4 hours
  • Charging Voltage: 5V
  • Battery Capacity: 420mAh

Design:

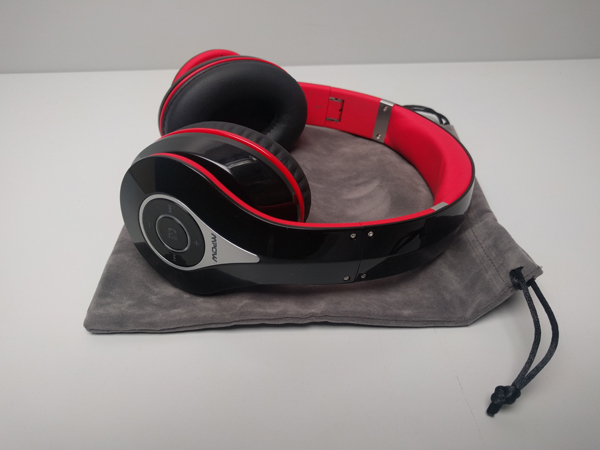
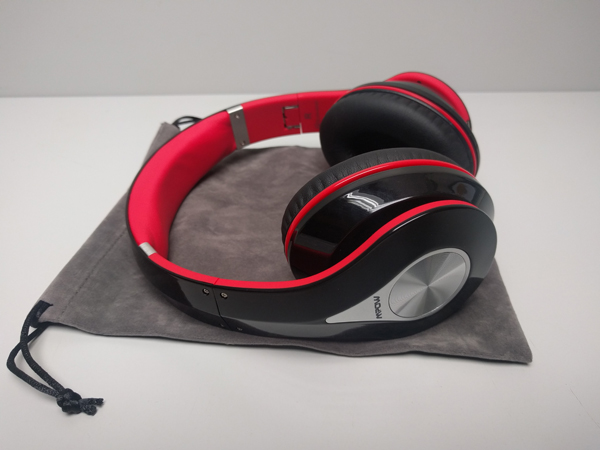
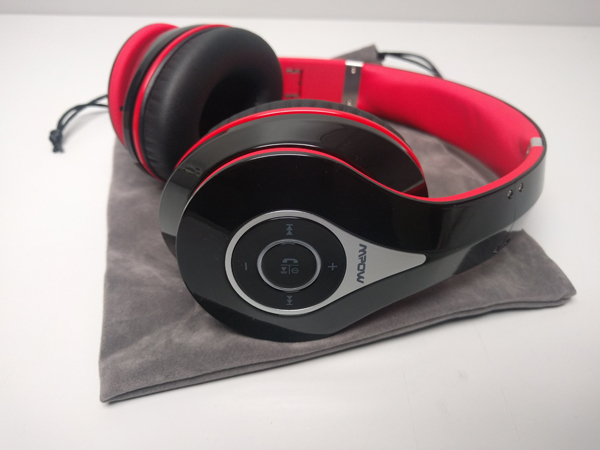
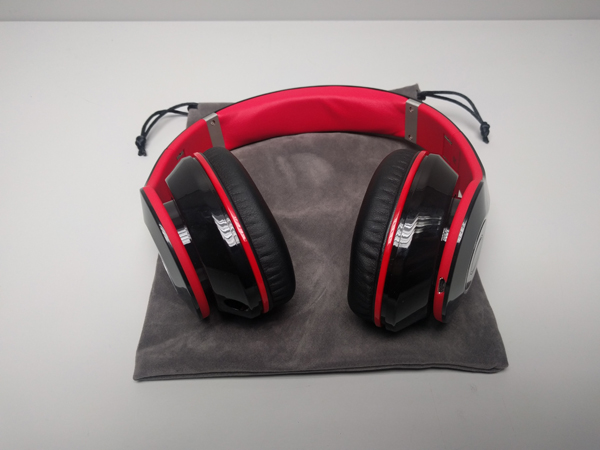
It is very obvious that Mpow mimicked the design of the more expensive Beats Studio Wireless headphones when designing this unit. It has similar curves and angles to the Beats and a shiny black plastic exterior with plastic silver inlays over cups.

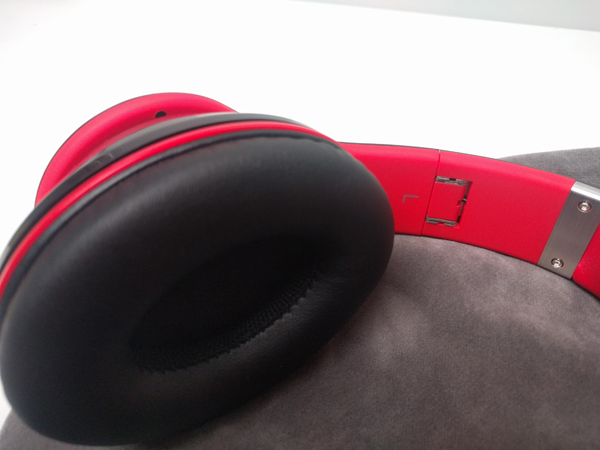
I did appreciate the small but clear indicators on the inside of the headband denoting the left and right cups.

Comfort:

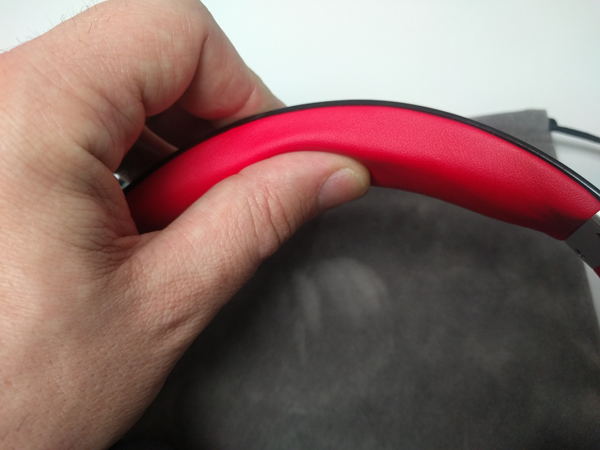
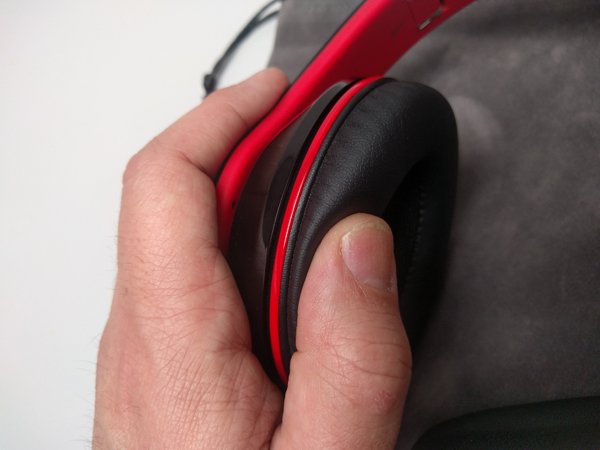
The inside of the headband is matte red plastic with a very thin “memory-protein material” cushion for the top of your head and the same “material” on the cups for your ears. The cups are oval and quite narrow so these may cause discomfort for users with larger ears. The headphones were very uncomfortable for me after about thirty minutes of continued use. The headband has seven notches for adjustment, but even with that range I experienced some pressure on top of my head and ears. My ears also felt very warm after a short time.

Use:

Following the included instructions I was able to connect via Bluetooth to both my Android Nexus 5X and Apple laptop very easily. Setup is aided by a female voice which tells you when the headphones are powered on or off, when in pairing mode and when you’ve reached the maximum volume.

The controls are on the outside of the right cup and are a little difficult to access when you are wearing the headphones. You have to feel around a bit for the buttons and the clicks on the controls are very loud and require some pressure. The controls include volume up and down, next and previous track, power, play/pause, and call. The buttons don’t light up and are marked in very light grey on the black headphones, so they are difficult to see. The only lit area of the controls is a small ring around the center play/call button which blinks blue when powered or red and blue when pairing.

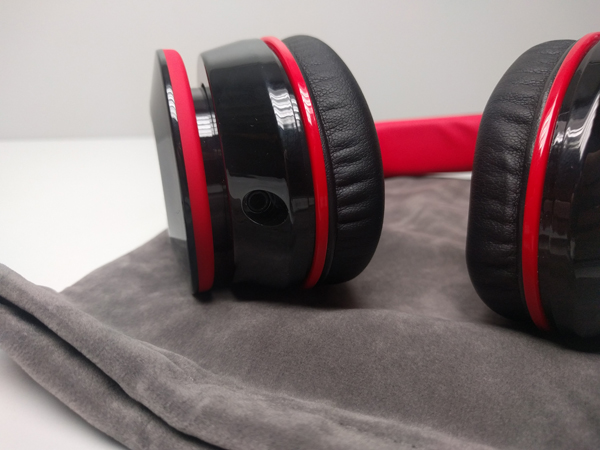
You can also connect the headphones to your device with an included male-to-male 3.5mm audio cable and an audio port on the bottom of the left cup. It is nice to have the option to use these as wired headphones, but once connected by wire neither the controls nor the microphone work. The sound quality of the wired connection and Bluetooth connection was the same in my testing. The bass was a little light on most tracks and on higher volumes the sound suffered from slight distortion and a loss of clarity. There were occasional dropouts in sound when connected through Bluetooth.

There is significant sound leak at all volumes. You would not be able to use these in an office environment or in public without annoying those around you. This is most likely because these headphones are designed to be passive noise isolating, as opposed to having active noise cancellation. Passive noise isolation simply means that once you have the headphones on and are listening to content, you can’t hear any outside noises. Active noise cancellation counteracts outside noises by creating an inverted waveform to cancel out the noise waveforms and requires extra power.

For phone calls or chatting via computer, there is a small microphone hole on the lower right cup, but maybe because of the design, my voice was muffled on all calls. The sound quality of the caller was fine, but I would not use these as my main headphones for calls or chatting on my computer.

Storage:

The headphones fold at hinges just above the cups for storage in the included case. When fully opened, the cups lock into place with a satisfying click.

Power:

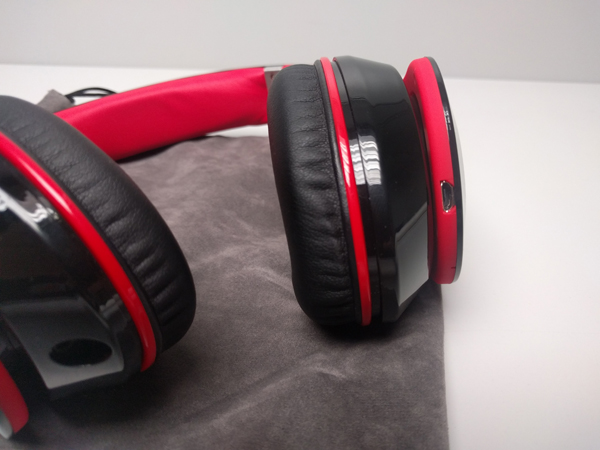
The headphones charge via a micro USB port on the outside of the right cup with included USB cable. The unit takes about four hours to attain a full charge. In my tests, the battery life for playback was right along with Mpow’s specifications, about 12-13 hours. This amount of playback time is great for a set of headphones you plan on using a lot during the day.

Final thoughts:

The Mpow Bluetooth over-the-ear headphones aren’t a great piece of audio equipment by any measure, but for the price, portability and option of a wired or Bluetooth connection, they are a good back-up set to have around.

The sample for this review was provided by Mpow. Please visit their website or Amazon to order.


Product Information

Price: $36.69
Manufacturer: Mpow
Retailer: Amazon
Requirements:
  • Bluetooth Version 4.0
Pros:
  • Moderately priced
  • Bluetooth and wired connection
  • Included carrying bag
  • Passive Noise Cancellation
Cons:
  • Significant sound leak at every volume level
  • Cheap plastic build
  • Poor sound quality at higher volumes
  • Controls difficult to use when wearing
  • Uncomfortable after prolonged use

Filed in categories: Audio, Video, TV, Bluetooth Gear, Reviews

Tagged:

Mpow Bluetooth Over-the-Ear Bluetooth Headphones review originally appeared on on March 23, 2017 at 7:08 am.

Note: If you are subscribed to this feed through FeedBurner, please switch to our native feed URL http://the-gadgeteer.com/feed/ in order to ensure continuous delivery.

Kanex MultiSync Foldable Travel Keyboard review

If you can touch type on your mobile device faster than you can tap type (I just made up that new term), then a Bluetooth keyboard is a useful productivity tool when you have a lot of text to enter. There are already eleventy billion different travel sized Bluetooth keyboards on the market, so let’s look at another one. It’s the MultiSync Foldable Travel Keyboard from Kanex. Let’s take a look.

What is it?

The Kanex MultiSync Foldable Travel Keyboard is a universal folding travel sized keyboard that is compatible with iOS, Android, and Windows devices. It uses Bluetooth 3.0 to wirelessly connect to and switch between up to four devices.

Design and features

The Kanex keyboard is the perfect travel sized keyboard because it’s only 4.0″ x 6.5 inches when folded. For scale, I show it in the image above next to a Nexus 6P.

It has a dark gray soft touch plastic cover that is a dust magnet. And speaking of magnets, the two halves of the keyboard are held closed with one.

The keyboard opens into a unique V shape that’s 4.0″ x 13.0″ inches. You might be wondering about the big gap between the two halves of the keyboard. Do touch typists have to stretch their fingers to type? No, they do not. The left-hand types the letters on the left side of the keyboard and the right-hand types the right keys. There is no obvious learning curve if you’re already a touch typist other than just getting a feel for the key spacing. The gap in the center of the keys is actually kind of nice because it makes this keyboard feel roomy and comfortable unlike some cramped travel keyboards that I’ve tried in the past.

The keys are made of hard plastic and are slightly smaller than the keys on a full-sized keyboard like the Apple Wireless Keyboard. The keys are nicely spaced, have good travel and good tactile feedback.

On the top edge above the 6 key are two status LEDs. One blinks blue during pairing and the other one will glow red while charging and green when charging is completed. The battery capacity can be checked at any time by holding down the FN and R keys. The right LED will then blink 1 to 4 times to signify if the battery is only 25%, 50%, 75% or 100% (4 flashes) full.

I could not find any information on Kanex’s site about battery life but I’ve been using the keyboard on and off for a few weeks and it’s still on the first charge.

You can click the image above for a larger view of the keyboard key layout.

I didn’t have any issues with the layout. I could type without looking at the keys and didn’t have problems pressing the wrong keys for characters like ;/@? etc.

Using the Kanex Multisync Foldable Travel Keyboard

The first thing you have to do before you can use this keyboard is to pair it with an iOS, Android, Windows, or macOS device. If you want to use this keyboard with more than one device, you’re in luck as it can pair and switch between up to four devices. I tested it with a Nexus 6P and my MacBook Pro (I’m typing on the Kanex right now as I am writing this review).

When you pair a device you assign it to one of four keys (Z, X, C, or B) by holding the desired key with the Fn key. Then you just check for the keyboard in the device’s Bluetooth settings to connect it. Pairing is easy and quick. But switching between multiple devices, which is done by pressing the Fn + the desired device key (Z, X, C, or V), is slower. It takes several seconds for the switched device to “wake up” when you press the Fn + the desired device key. At least I found this to be the case switching between my MacBook Pro and an Android phone. Switching to the MacBook is faster and only takes about 2 seconds for it to recognize a key press. With the Nexus 6P, it can take as long as 10 seconds for it to finally wake up.

Final thoughts

I like the Kanex Multisync Foldable Travel Keyboard because it has a nice form factor. It’s small and flat, so it easily fits in my gear bag.

There is one small gotcha though. You have to use the keyboard on a flat surface because it’s not designed to be used on your lap, which is a bummer. But this isn’t a huge issue since most travel keyboards have this limitation.

At $49.95, the Kanex keyboard is a little spendy. But I noticed when I was searching Amazon for the price, that iClever offers a version of this keyboard for $20 less on Amazon as long as you don’t need multiple device pairing capabilities and only plan to use it with one device.

If you need to be able to switch between four devices when you’re on the go, then the Kanex Multisync Foldable Travel Keyboard will do that for you and you’ll barely notice it in your gear bag.

Source: The sample for this review was provided by Kanex. Please visit their site for more info and Amazon to order one.


Product Information

Price: $49.95
Manufacturer: Kanex
Retailer: Amazon
Pros:
  • Compact folding design
  • V shape feels roomy
  • Pairs with up to 4 devices
Cons:
  • Switching between some devices is a little slow

Filed in categories: Computer Gear, Reviews

Tagged:

Kanex MultiSync Foldable Travel Keyboard review originally appeared on on March 22, 2017 at 4:31 pm.

Note: If you are subscribed to this feed through FeedBurner, please switch to our native feed URL http://the-gadgeteer.com/feed/ in order to ensure continuous delivery.
PureSwitch Wireless Smart Plug review

If you’re a seeker of new and innovative accessories to control your smart home, read on fellow venturer!  The PureSwitch smart plug, made by PureGear, is a gem of a find and integrates with Apple Homekit to allow you to operate your appliances and doohickeys from wherever you are.  Let’s check it out. 

The Device

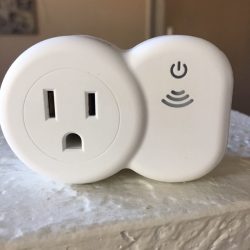
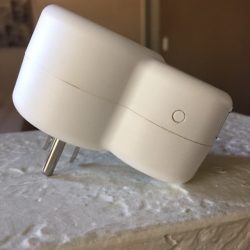
There is one outlet on the plug and one USB charge port.  This will be pretty convenient to plug in my bluetooth earbuds and free up a USB port on my computer. You can see in the pic on the right below that there is a little circular button that is flush with the edge of the outlet that you really wouldn’t know was there unless you searched for it. That is the manual on/off toggle switch if for some reason you want to power it on or off without unplugging the particular appliance that is plugged into it.


Setup

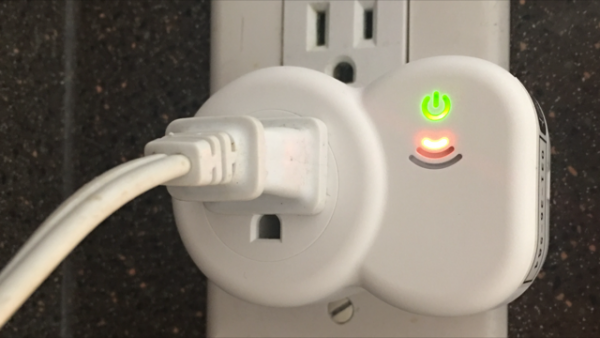
I decided that I would use this device to control the fan located in my daughter’s room, so I simply plugged the outlet into the wall, and plugged the fan into it. The image below depicts the plug being on, but not connected to the wireless network. After the outlet is paired, the wireless indicator turned green.

One thing to note is that this smart plug is only compatible with devices running iOS 8.1 or later and you must have your Wi-Fi enabled on the device (by saying device I’m referring to iPhone, iPad or iPod touch).

Next up is heading over to the App store on your device and downloading the free PureSwitch app. Once I downloaded it, I opened it and it asked me to add a “home”. If you already have a home set up in Homekit you will see it listed and you simply add this accessory to whatever room you’d like. If this your first accessory using the Apple Homekit, then you will need to set up your home.

The App

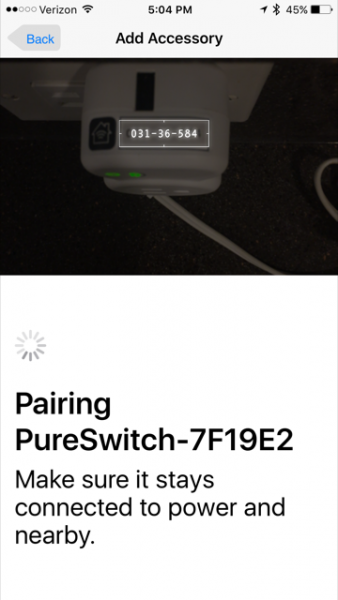
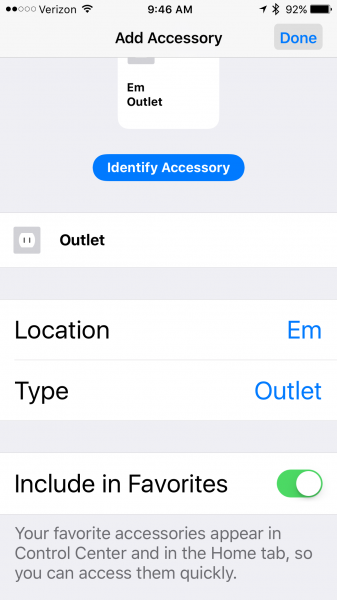
There are all sorts of things you can do with HomeKit and I’ll try and limit this review to the PureSwitch Smart Plug and not make this a tutorial for using HomeKit. The app walks you through step by step how to add the accessory by adding a room and then it will ask you to add an accessory to the room. The room I added the smart plug to is called “Em” which is my daughter’s name. When I tapped “new accessory” it began to browse for new accessories. PureSwitch popped up and the app instructed me to hold the viewfinder up to the six-digit code located on the plug.

The below pic is what it looks like when pairing. You can also type in these numbers manually if the light is too low or it’s at an angle that’s hard to get to.


The pic above instructs you to make sure you keep the plug connected to power and stay near it so your device can connect. Now the plug is paired to my network and the fun can begin! You can choose to turn on “Include in Favorites” if you’d like to be able to access the outlet quickly in the Home app that controls your other Homekit accessories.


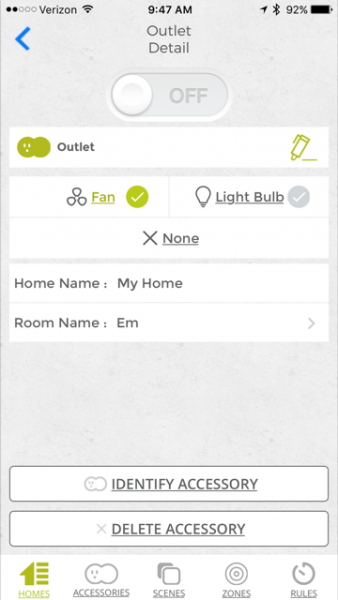
This screen in the app shows the outlet detail, what home and room it is located in, and you can switch the outlet on and off from here as well.

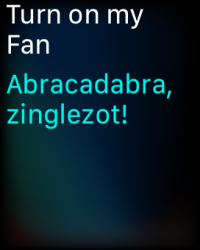
My favorite way to turn the fan off and on is to use Siri on my Apple Watch. I instructed Siri to “Turn on my fan” and this is her response. Siri always makes me smile.  🙂

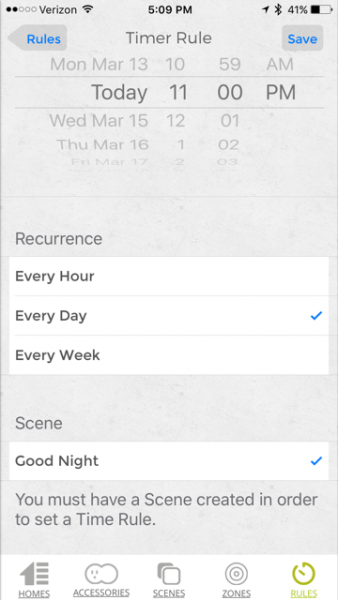
Another fun thing to do is to make scenes. If you make a scene, you can add a timer to it so that it will turn off or on at whatever time you specify. I set scenes called “Good Morning” and “Good Night.” You can see the menu along the bottom of the screen where you can choose to add a scene, set zones and make rules for the scenes.

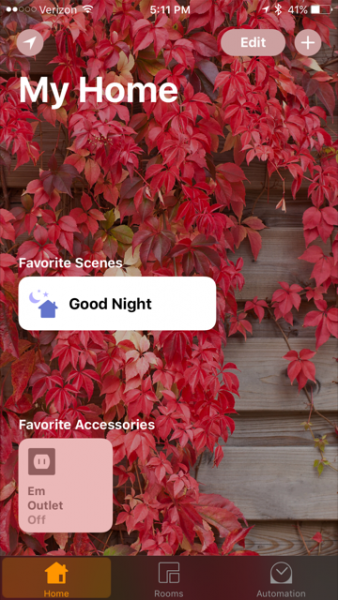
So now I have the fan all set to turn on at 11PM and to turn off at 8:30AM every day. I don’t have to do or say anything now that this is set up and it just turns on and off like I intended. I can still override these setting by either going into the app and turning it on or off, or asking Siri to do it for me. After the scene is set up, and you’re using it in your Home app with Homekit, you can simply say the name of the scene, like “Good Night” to Siri and she will do whatever is detailed in that scene. The below pic is the Home app, not the PureSwitch app, which shows my favorite scene and favorite accessory.

Summing it up

All in all, this is a great little plug. There are so many things that you can do with this smart plug because of its integration with Apple’s HomeKit. You certainly don’t need to use Apple HomeKit if you don’t want to, but if you do and you have the Apple TV (3rd Gen running Apple TV software 7.0 or later) then you can control your appliances even when you are not home. You can even set scenes so that they will turn on when you get home or when you leave home which really has me thinking I need to get and Apple TV! I liked how easy the plug was to set up and how useful the app was in helping to set up the scenes and set a timer. Having the added USB port is a nice little extra too. I thought the price was a bit high for this product as there are others on the market that are cheaper, but I haven’t reviewed all of them either to know if they work as well.

Source: The sample for this review was provided by PureGear, please visit their site for more information and Amazon to order.


Product Information

Price: $49.99
Manufacturer: PureGear
Retailer: Amazon
Requirements:
  • A place to plug it in
  • An appliance to plug into it
Pros:
  • Ability to control your electronics using Siri
  • Ability to control your electronics while you are away
  • Works with Apple's Homekit
  • Has a USB port for charging other accessories
Cons:
  • Only compatible with Apple products
  • A bit pricey for just one plug

Filed in categories: iOS, Reviews

Tagged: ,

PureSwitch Wireless Smart Plug review originally appeared on on March 22, 2017 at 8:08 am.

Note: If you are subscribed to this feed through FeedBurner, please switch to our native feed URL http://the-gadgeteer.com/feed/ in order to ensure continuous delivery.
Hive Design Edwin Wallet review


If you’ve ever used a binder clip as a pseudo-minimalist wallet, then you’ll want to check out this review of the Edwin Wallet from Hive Design. It’s like a binder clip on steroids and it just might become your new favorite wallet. Let’s take a look.

What is it?

The Edwin Wallet is a wallet based off a common binder clip.

The edwin wallet is the namesake of Mr. Edwin Baltzley, an avid writer, inventor, and father of Louis Baltzley, the inventor of the binder clip. In 1910 Louis created the binder clip as a more efficient way for his father to secure his manuscripts without damaging them. Fast forward a century and we’re still using the same basic mechanism of his original design.

Design and features


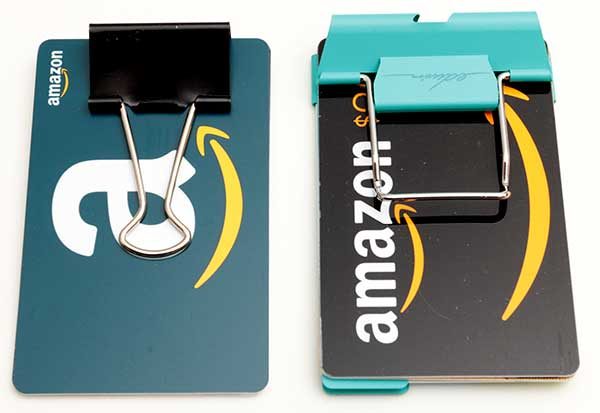
The “wallet” above on the left is a regular binder clip and the one on the right is the Edwin Wallet. Both are made of steel and feature a clamp that can hold several cards. But from there, the Edwin Wallet veers off into real wallet territory.
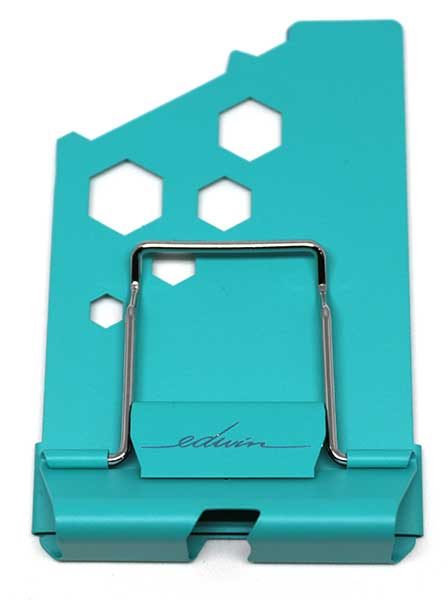
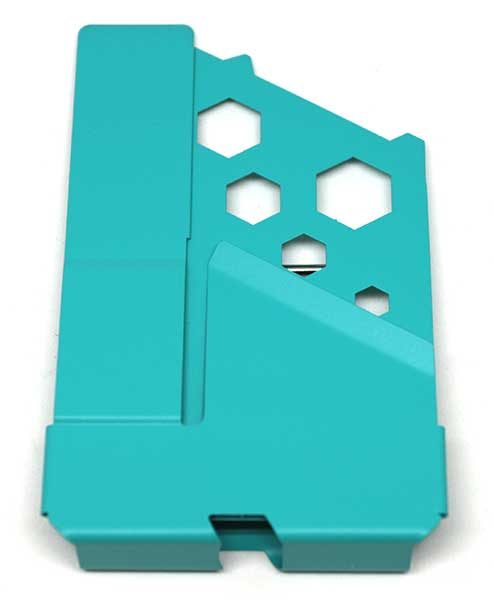
The Edwin Wallet is available in six colors including the shoal bay (aqua blue) shown above. The Edwin Wallet is also available in two styles. A Classic style not shown and the Plus style shown here. The difference between the two versions is that the back plate on the Plus has five hex wrenches, a flat head screwdriver, and a Phillips head screwdriver. The Plus version also has a bottle cap lifter on the edge, while the Classic version is just a solid plate without any built-in tools.

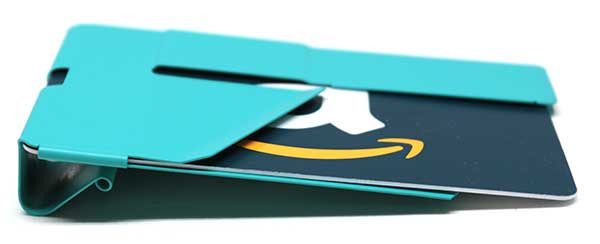
On the back of the Edwin is a quick draw slot for your most used card and a cash stem that is used to hold your paper money.
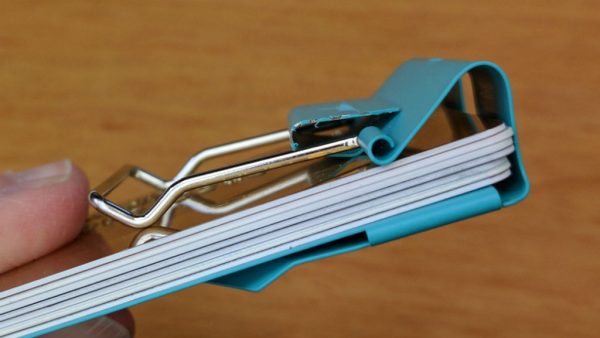
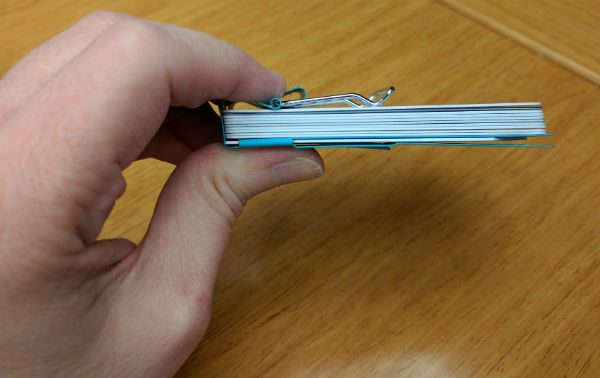
Like a binder clip, the Edwin Wallet has a spring loaded clamp that can hold from one card up to 10 cards.
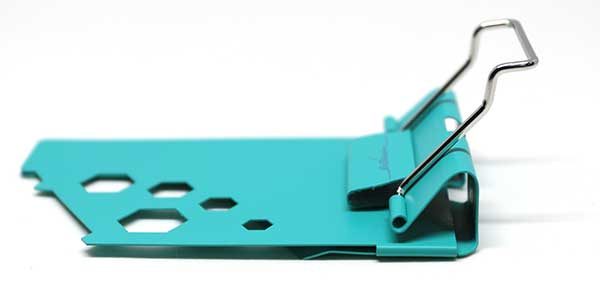
Add the quick draw card slot on the back and you can carry a maximum of 11 standard sized plastic credit cards in this wallet.

The clip opens the jaws of the clamp so you can feed it credit cards. It works pretty well, but it’s not quite as easy to open the clamp as it is with a regular binder clip because there’s only one set of clip arms to squeeze instead of two.

One thing that I noticed is that the clip’s arms rub against the edges of the clamp which causes the paint to peel off the edges of the clamp. Click the image above for a closer view.

Here’s the Edwin fully loaded with 10 cards in the clamp and 1 card in the quick draw slot. Although the wallet can hold this many cards, I don’t recommend going full capacity because it makes the quick draw slot tight and not so quick to draw.

I think the sweet spot for the wallet is six cards in the clamp and one card in the quick draw slot for a total of seven cards.

If you’re careful, you can fan the cards to find the one you want without removing them from the clamp.

The main feature that sets the Edwin Wallet apart from an ordinary binder clip is the cash stem on the back. I’ve never liked money clips and the cash stem is a genius alternative to one. To use it, you just slide the bills under the stem and fold them in half.


Then you wrap the bills around the side of the wallet.


And finally, tuck the edges under the clip where they are held in place. The cash stem can hold one bill up to a max of about seven bills.

I like the Edwin Wallet quite a bit because it’s credit card sized. I just wish the clamp didn’t stick up on the edge like it does. If it was flatter, this would be my new favorite.

Final thoughts

I think the Edwin wallet is a cool minimalist wallet because it’s easy to use and well made if you don’t count the paint peeling issue with the clip.

If you’re already a fan of DIY binder clip wallets, the Hive Design Edwin Wallet is a big step up in functionality when you factor in the cash stem, quick draw card slot, and the built-in tools of the Plus version.

Source: The sample for this review was provided by Hive Design. Please visit their site for more info and check prices on Amazon.


Product Information

Price: $32.95 Classic, $37.95 Plus
Manufacturer: Hive Design
Retailer: Amazon
Pros:
  • Holds up to 11 cards
  • Quick draw card slot for most used card
  • Holds cash too
Cons:
  • Clip rubs paint off of clamp edges

Filed in categories: Reviews, Wallets

Tagged:

Hive Design Edwin Wallet review originally appeared on on March 21, 2017 at 10:38 am.

Note: If you are subscribed to this feed through FeedBurner, please switch to our native feed URL http://the-gadgeteer.com/feed/ in order to ensure continuous delivery.