Plotagraph iOS image animation app review

The iPhone’s camera can take amazing pictures, but if static images bore you and you want to take your photography up a notch, you need to check out Plotagraph.

What is it?

Plotagraph is an easy to use image animation app for the iPhone or iPad.

How does it work?

First, you take a static image that can be improved with an animated element. The image above looks fine as it is, but wouldn’t it be cool if the water showed movement? Plotagraph can’t do that with just a few clicks.

The app has a very simple interface with the tools at the bottom.

I like to anchor or mask all the parts of the image that I don’t want to animate first. This is can be done using the mask or anchor tools at the bottom of the screen. I like the anchor tool best. All you do is tap around the areas that you don’t want to move.

Then you use the animate tool to draw little lines in the direction that you want the image to move. That’s it! When you press the play button, you’ll see the results which are pretty freaking cool. I’ve exported this example as a 3 second MP4 video clip below.

Pretty cool right? The app will also let you crop the image and adjust the speed of the animation.

Let’s do another.

Water and cloud images are a good choice to animate.

Load the image from your existing camera roll.

Mask off or anchor the area of the image you don’t want to move.

Draw some animation lines.

And check the results. This app is a lot of fun because it’s so easy and fast to use.

Here’s another one saved as a PNG.

In the Plotagraph app, you can choose different time lengths for the clips and export them to your device’s camera roll as an MP4 video or animated PNG. You can then submit them to your favorite social media sites like Instagram or Facebook. Unfortunately, you can’t share directly to those sites from the Plotagraph app.

Watch the video below which shows the whole process.

Final thoughts

I had a lot of fun playing around with the Plotagraph app on my iPhone 7 Plus and my iPad Pro 10.5. Animate images like this remind me of Harry Potter. 😉

I found it was easier to use the app on the iPad Pro just because the screen is larger and it’s easier to do a better job masking off areas that you don’t want to animate. With the iPad Pro, you can also use the Apple Pencil to make things even easier.

If you’re wondering why I haven’t mentioned using this app with Android device, that’s because this app is not available for Android devices yet. Supposedly a version for Android is in the works but there’s no info when it will be available.

Source: The sample for this review was provided by Plotagraph Inc. Please visit their site for more info and App store to buy it.


Product Information

Price: $4.99
Manufacturer: Plotagraph
Retailer: App store
Requirements:
  • iOS device
Pros:
  • Easy to use
  • Transforms old photos into living photos
  • Can't see where there loop starts and ends
Cons:
  • Can't share directly to social media from app
  • No Android version

Filed in categories: Reviews

Tagged: , ,

Plotagraph iOS image animation app review originally appeared on The Gadgeteer on July 31, 2017 at 9:00 am.

Note: If you are subscribed to this feed through FeedBurner, please switch to our native feed URL http://the-gadgeteer.com/feed/ in order to ensure continuous delivery.

Berrolia No.2 Aluminum iPhone mount review

If James Bond was looking for an iPhone mount appropriate for his vintage Aston Martin, he’d probably pick the Berrolia No. 2 iPhone Mount. It’s classy. It’s beautifully constructed. Is it right for you? Let’s grab a martini (preferably shaken, not stirred) and check it out!

First Impressions

When I received the Berrolia No. 2 iPhone Mount for this evaluation, my first impression was… luxurious. Just look at it. Not only does it look premium, but it feels weighty and substantial in your hand. It even comes packed in a cool aluminum cylinder, with molded foam inserts for protection.   

Looks aside, construction and materials are top-notch. The frame is made from premium-grade aluminum, which looks to be powder coated with a slightly rubberized surface. The wood is mahogany, with the Berrolia logo laser etched into the back piece. Everything is precision cut and the assembly is rock solid, with no noticeable gaps or cheap bits to be found. Even the clips are heavy & solid, and look like they won’t bend or snap after repeated use. All the finishes are smooth and pleasant to the touch.

This is no bargain-basement car cradle, folks. It just oozes style and quality craftsmanship.

Mounting the Cradle

The Berrolia mounts to the air vent on your car, and it requires that your vent employs horizontal fins to clip onto. There’s another quality twist here: there’s a leather (possibly leatherette) mounting pad included in the package. You place the pad on the fin of your air vent, then slide the clip over the pad. Not only does this add extra grip, but it prevents scratching from the beefy metal clip. In my car, I found that the cradle stayed put once it was mounted, and was not prone to getting knocked off by an accidental bump. Nice.

Once you have the mount in place, you can install your lightning cable. I found this to be another nice aspect to the design. There’s a knob on the front of the unit that you unscrew to allow the cable to pass through. The cable is inserted perpendicular to the unit. You pull the cable through, twist it to a position parallel to the mount, and pull the cable back down to lock it in position. Screw the knob back in place, and the lightning cable isn’t going anywhere.

The whole operation took about a minute to complete, at which point I could add my phone.

Daily Use

There are tracks on either side of the mount specifically designed for the iPhone, so it slides smoothly in and out of the cradle and plugs right into the lighting plug. It’s a silky smooth, one-handed operation that requires no wiggling or adjustment to get the phone in and out of the cradle.

After dozens of car trips, I’ve found that the construction continues to deliver. There’s no looseness anywhere in the unit. The lighting cable mount hasn’t loosened up. The finishes continue to look good after regular abuse, with no abrasions or scratches developing in the surfaces. It’s rock solid.

As far as on-the-road use goes, it’s a great mount. It stays firmly planted where you set it, even with the occasional bump or nudge. It’s nice to have the phone in a position where it doesn’t distract you from driving, especially if you are using Google Maps to get from point A to B. And one handed operation is a great for safety, so you are not fumbling around for your phone while trying to focus on the road. I really like it.

Some Caveats

There are three important issues that you should aware of in the middle of all of this luxury precision goodness. First, the mount is designed precisely to fit your iPhone. You can’t use it with a cover or case. I don’t like my iPhone to go naked, so this required me to take off my case every time I got in the car. I get that this detracts from the whole look and slick performance, but it is kind of an annoyance (especially if you have a complicated cover). Berrolia does make the leather versions of the mount that we have reviewed here, and they appear to have some tolerance for accepting a thin case on your phone.

Second, the cable mount is precisely machined to fit the Apple lightning cable. Third party cables are not likely to work with this setup. I found this out the hard way, as my car has a MIDI port that requires a third party MIDI-to-lightning cable. It would not fit in the mount, so I needed to acquire a lightning-to-USB adaptor, then I could plug the Apple-supplied cable into that. Most newer cars have a USB port so this won’t be an issue, but it’s a bit of a bummer if you use third-party lightning cables.

Finally Berrolia only provides this particular style of mount in the black/walnut finish, specifically for the iPhone 6, 6s and 7. They do offer a range of leather covers in different colors and styles which also accommodate iPhone 5 models or the larger iPhone 6 Plus and iPhone 7 plus. You’Il want to check your iPhone model and car interior to find the right match for you. 

Conclusion and Pricing

There’s no doubt that the Berrolia No. 2 iPhone Mount is a classy upgrade from a cheap plastic car mount. Not only does it deliver on style, but it is impeccably constructed and sure to stand up to years of abuse. Retail price is placed at 79 Euros (about $85 USD) which seems in line with the quality of the unit. If you are OK with the caveats, I feel its a luxury upgrade that’s worth the price. Happy motoring!

Source: The sample for this review was provided by Berrolia. For more info visit their site.


Product Information

Price: €79 (~$84.50 US)
Manufacturer: Berrolia
Pros:
  • Luxury look and feel
  • High quality materials and construction
  • Easy to install
Cons:
  • Does not work with iPhone covers
  • Requires original Apple lightning cable
  • Sized specifically to the iPhone 6/6s/7, though leather options are available for other models

Filed in categories: Car Gear, iOS, Reviews

Tagged:

Berrolia No.2 Aluminum iPhone mount review originally appeared on on March 31, 2017 at 10:00 am.

Note: If you are subscribed to this feed through FeedBurner, please switch to our native feed URL http://the-gadgeteer.com/feed/ in order to ensure continuous delivery.

Cover-Up MacBook and iPhone stone cases review

“That’s the coolest MacBook cover I have ever seen! Is that real stone?” This was the comment I received in my first meeting after setting up my new Cover-Up laptop Stone Skin. Yes, it is cool. And yes, it’s real stone. Cover-up sent me two covers for this evaluation, they are unlike anything I have seen before. They are real, all natural stone cases that have been crafted for your iPhone and MacBook. But how do they hold up to practical use? Let’s dig deeper into these beauties…

First Impressions

Cover-Up is a company based out of South Wales, UK that produces elegant covers and skins for mobile phones, laptops, and tablets. All covers are made from natural materials such as wood, stone and wool felt. Hand cut and finished, each cover is a unique product that highlights the natural grains & textures of the material. I received a MacBook skin and an iPhone 6s cover from the Stone collection, in different color schemes that use natural slate as the base.

MacBook skin in Burnt Copper, iPhone case in Aztec Gold.

The real stone finishes are stunning. This is not a composite material or some sort of synthetic. Running your hand across the surfaces reveals all the contours & textures of the natural stone. Turn them in your hands and you see the colors shift and shimmer, highlighting the unique grains and patterns in the material as the light plays across them. They are just delightful to look at, and definitely get attention. I just can’t figure out how they make them!

The MacBook Skin

When I pulled the skin out of the package, I was a bit surprised at how simple it is. It’s a single-cut piece of stone backed to a thin rubberized base layer that’s been precisely cut to the device specifications (I have a 13″ MacBook Air). There’s a peel-off plastic backing that you remove to reveal the 3M adhesive material to apply it to your device.

Top view of the skin in place. Shimmery!

The instructions state that you should run your MacBook for 10 minutes to ensure optimal adhesion. Application is pretty straightforward: peel off the plastic, line it up, and stick it on. The adhesive material is forgiving, so you can pull it up and reposition it if you feel like you are not aligned quite right. I found it took a couple of attempts to get it right where I wanted it.

Side view of the skin in place.

I found that the skin doesn’t quite align edge-to-edge with the MacBook, but I think this is intentional to allow for some tolerance in application. I don’t think anyone has noticed it but me. There is also a slit in each corner which I think is designed to accommodate the rounded corners of the MacBook, but I have not found that it detracts from the overall package once it’s in place. I did find that the edges took some buffing to get them to adhere tightly. Given that it’s real stone, it’s a pretty impressive piece of engineering.

Closeup of the Burnt Copper material.

This cover is called the Burnt Copper pattern and highlights oranges, greens, and browns with shimmering metallics. The textures are more pronounced than I expected, and I was concerned about possible chipping or flaking. After two weeks of work commuting and meeting jumping, however, I’ve seen no signs of wear & tear. It also provides a nice layer of protection for the computer, which is cool.

The edging and cornering could use some refinement.

A couple of minor issues did crop up during testing. First, the edges could be finished cleaner. The edging is rough (you’ll feel it if you run your hand across it), and the adhesive pulls up a bit. It should also be noted that this is a skin. I believe it will protect the MacBook from a direct hit but it doesn’t provide corner protection from accidental drops. It’s also a thick cover compared to some others that I have played with. Other than those minor points, it’s great. It provides a beautiful, distinctive look and presents a unique sense of style.

The iPhone Cover

iPhone 6s case in Aztec Gold.

The iPhone cover design is a pretty straightforward affair. It’s a snap-style cover that snugly fits my iPhone 6s, with the stone glued to an insert in the backing. Application is easy, and there’s no looseness to the cover once it’s on.


All port access and rocker buttons are precision cut.

Given the unique stone material that is the highlight, one of the nice surprises here is that Cover-Up didn’t skimp on the cover itself. It’s a well-engineered, rubberized material that provides bumper-style protection including a full rubberized backing under the stone. All the slots are cut precisely for your camera, audio jack, adapter port, ringer switch, etc. and don’t interfere with normal operation. The integrated button stud for the volume rocker & on/off switch work perfectly. There’s a nice ridged texture that runs up each side, which helps grip the phone but doesn’t cause the phone to get stuck in your pocket. Overall, it’s a good cover that matches the quality of the stone surface.

Closeup of the Aztec Gold pattern on the iPhone cover.

For the iPhone, I chose the Stone style called Aztec Gold. It sports a smoother texture than the Tempest MacBook skin. Colors are subtle, highlight greys and blacks with veins of gold running through the stone. It’s really classy and understated.

Overall, I really enjoy using the cover. It’s slim and unobtrusive, so you can comfortably slip it into your pants pocket. I’ve even dropped it once (maybe twice), and it does the job protecting the phone. Like the MacBook skin, I have not seen any signs of chipping or cracking of the stone finish after twin weeks of constant use.

Conclusion

Cover-Up has done a nice job of fulfilling their mission with the Stone Skin MacBook skin and iPhone case. Not only do they add unique style to your gear, but they are beautifully crafted pieces. You should know that they are not inexpensive: prices range between $50 and $60 for the iPhone cases and $60 and $100 for the MacBook skins depending on the size of your device. After playing with them for a few weeks, however, I think the materials and quality are in alignment with the premium pricing. They offer a range of stone styles, each one with its own distinctive personality. If you’re looking to invest in a truly unique look for your gadgets with natural materials, check out cover-up.com for more information!

Source: The sample for this review was provided by cover-up. For more info visit their site and you can check their Amazon store as well.


Product Information

Price: $49 – $99 for the MacBook skin, $15 – $55 for the iPhone cases
Manufacturer: Cover Up
Retailer: Amazon
Pros:
  • Adds a beautiful, unique look to your iPhone or MacBook.
  • High-quality craftsmanship.
  • The real stone actually works as a protective surface for your devices.
  • iPhone cover doesn't sacrifice looks for solid build and functionality.
Cons:
  • Premium pricing.
  • MacBook cover could use some more refinement around the edges.

Filed in categories: iOS, Laptops and Gear, Reviews

Tagged: , ,

Cover-Up MacBook and iPhone stone cases review originally appeared on on March 27, 2017 at 12:06 pm.

Note: If you are subscribed to this feed through FeedBurner, please switch to our native feed URL http://the-gadgeteer.com/feed/ in order to ensure continuous delivery.

PureSwitch Wireless Smart Plug review

If you’re a seeker of new and innovative accessories to control your smart home, read on fellow venturer!  The PureSwitch smart plug, made by PureGear, is a gem of a find and integrates with Apple Homekit to allow you to operate your appliances and doohickeys from wherever you are.  Let’s check it out. 

The Device

There is one outlet on the plug and one USB charge port.  This will be pretty convenient to plug in my bluetooth earbuds and free up a USB port on my computer. You can see in the pic on the right below that there is a little circular button that is flush with the edge of the outlet that you really wouldn’t know was there unless you searched for it. That is the manual on/off toggle switch if for some reason you want to power it on or off without unplugging the particular appliance that is plugged into it.


Setup

I decided that I would use this device to control the fan located in my daughter’s room, so I simply plugged the outlet into the wall, and plugged the fan into it. The image below depicts the plug being on, but not connected to the wireless network. After the outlet is paired, the wireless indicator turned green.

One thing to note is that this smart plug is only compatible with devices running iOS 8.1 or later and you must have your Wi-Fi enabled on the device (by saying device I’m referring to iPhone, iPad or iPod touch).

Next up is heading over to the App store on your device and downloading the free PureSwitch app. Once I downloaded it, I opened it and it asked me to add a “home”. If you already have a home set up in Homekit you will see it listed and you simply add this accessory to whatever room you’d like. If this your first accessory using the Apple Homekit, then you will need to set up your home.

The App

There are all sorts of things you can do with HomeKit and I’ll try and limit this review to the PureSwitch Smart Plug and not make this a tutorial for using HomeKit. The app walks you through step by step how to add the accessory by adding a room and then it will ask you to add an accessory to the room. The room I added the smart plug to is called “Em” which is my daughter’s name. When I tapped “new accessory” it began to browse for new accessories. PureSwitch popped up and the app instructed me to hold the viewfinder up to the six-digit code located on the plug.

The below pic is what it looks like when pairing. You can also type in these numbers manually if the light is too low or it’s at an angle that’s hard to get to.


The pic above instructs you to make sure you keep the plug connected to power and stay near it so your device can connect. Now the plug is paired to my network and the fun can begin! You can choose to turn on “Include in Favorites” if you’d like to be able to access the outlet quickly in the Home app that controls your other Homekit accessories.


This screen in the app shows the outlet detail, what home and room it is located in, and you can switch the outlet on and off from here as well.

My favorite way to turn the fan off and on is to use Siri on my Apple Watch. I instructed Siri to “Turn on my fan” and this is her response. Siri always makes me smile.  🙂

Another fun thing to do is to make scenes. If you make a scene, you can add a timer to it so that it will turn off or on at whatever time you specify. I set scenes called “Good Morning” and “Good Night.” You can see the menu along the bottom of the screen where you can choose to add a scene, set zones and make rules for the scenes.

So now I have the fan all set to turn on at 11PM and to turn off at 8:30AM every day. I don’t have to do or say anything now that this is set up and it just turns on and off like I intended. I can still override these setting by either going into the app and turning it on or off, or asking Siri to do it for me. After the scene is set up, and you’re using it in your Home app with Homekit, you can simply say the name of the scene, like “Good Night” to Siri and she will do whatever is detailed in that scene. The below pic is the Home app, not the PureSwitch app, which shows my favorite scene and favorite accessory.

Summing it up

All in all, this is a great little plug. There are so many things that you can do with this smart plug because of its integration with Apple’s HomeKit. You certainly don’t need to use Apple HomeKit if you don’t want to, but if you do and you have the Apple TV (3rd Gen running Apple TV software 7.0 or later) then you can control your appliances even when you are not home. You can even set scenes so that they will turn on when you get home or when you leave home which really has me thinking I need to get and Apple TV! I liked how easy the plug was to set up and how useful the app was in helping to set up the scenes and set a timer. Having the added USB port is a nice little extra too. I thought the price was a bit high for this product as there are others on the market that are cheaper, but I haven’t reviewed all of them either to know if they work as well.

Source: The sample for this review was provided by PureGear, please visit their site for more information and Amazon to order.


Product Information

Price: $49.99
Manufacturer: PureGear
Retailer: Amazon
Requirements:
  • A place to plug it in
  • An appliance to plug into it
Pros:
  • Ability to control your electronics using Siri
  • Ability to control your electronics while you are away
  • Works with Apple's Homekit
  • Has a USB port for charging other accessories
Cons:
  • Only compatible with Apple products
  • A bit pricey for just one plug

Filed in categories: iOS, Reviews

Tagged: ,

PureSwitch Wireless Smart Plug review originally appeared on on March 22, 2017 at 8:08 am.

Note: If you are subscribed to this feed through FeedBurner, please switch to our native feed URL http://the-gadgeteer.com/feed/ in order to ensure continuous delivery.

ADATA AI910 Card Reader Plus review

I have a lot of devices.  There, I said it.  Each has a purpose, but all share one common need for data, whether that is supplying it in the form of pictures (my Nikon S220 camera) or consuming it as video (my iPad and Android tablet).  The problem is that each has a different connector and a different way of getting data on or off the device.  This has required a variety of solutions to move data directly without using a single device as a central hub (like my MacBook Pro or my Surface Pro).  That is until I was introduced to the ADATA AI910 card reader.  The packaging says that it works with iOS, Android, and Windows.  Conspicuously absent from that list is macOS.  Let’s see whether this reader lives up to the claim.

The device

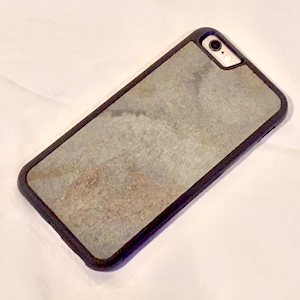
The reader can handle both standard SD cards as well as microSD.  That should cover most device needs.  Note, though, that the reader cannot simultaneously access both types – if you insert both an SD card along with a microSD, the default for the device is to use the SD card.  The same rule applies to external connections.  If you try to connect the reader to multiple devices (say, your Windows laptop and your iPad), the reader will default to the Lightning connector and ignore any other connections.  That behavior is expected, so nothing unusual there.  Just interesting to note in that you can’t use this device as a pass-through data transfer unit.

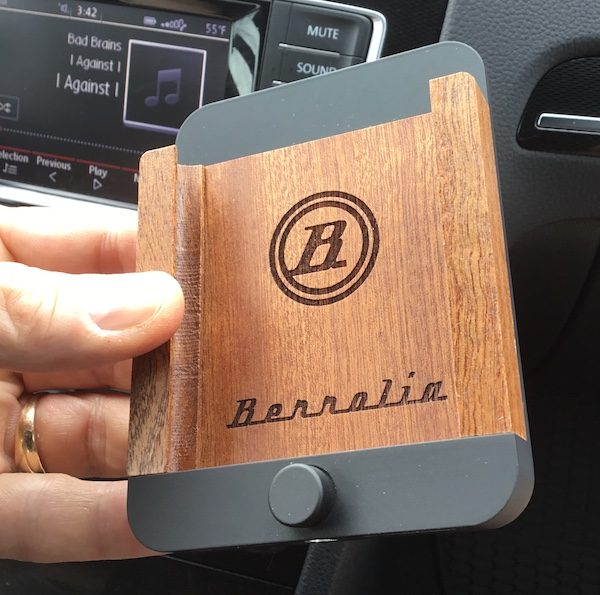
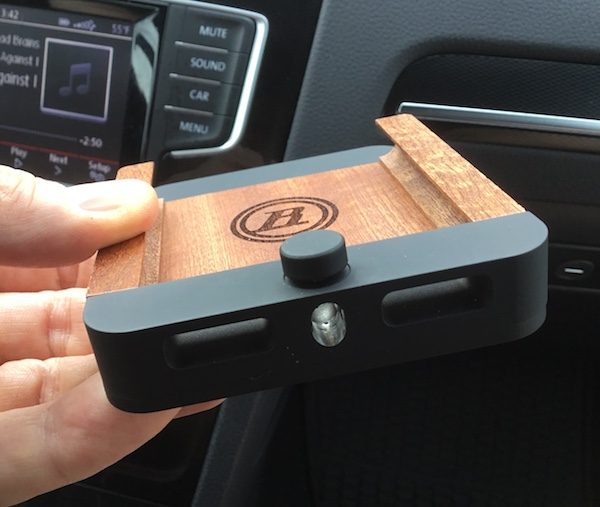
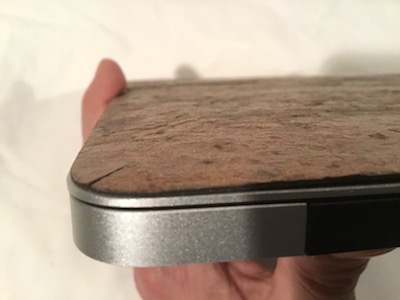
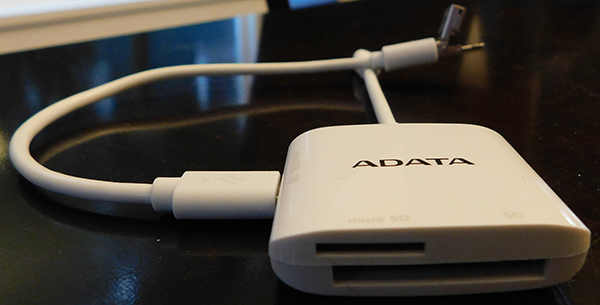
Somewhere between the 2 card slots, there is a blue LED that lets you know the device is being accessed.  If you have an SD card in the slot and that card is facing up, then the device oddly is upside down – that is, the logo is now down, which in turn makes the light less visible.  The next picture illustrates this – the device itself is what I would consider to be “top side up” and as you can see, the SD card label is facing down.  This would allow you to see the LED flashing, though.  Just seems a little like an odd orientation.

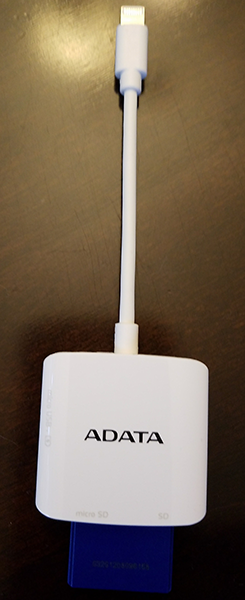
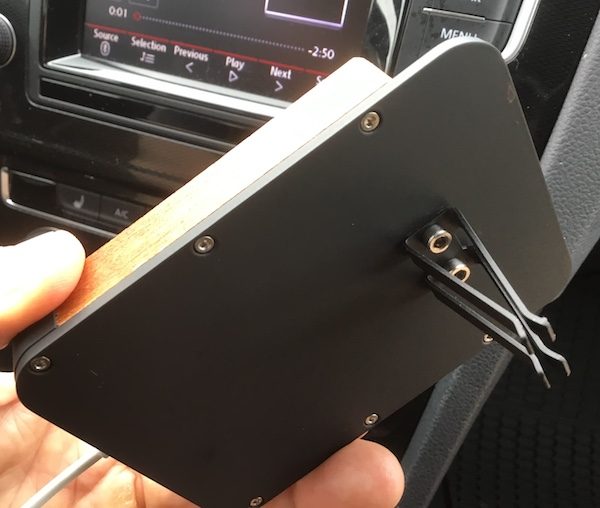
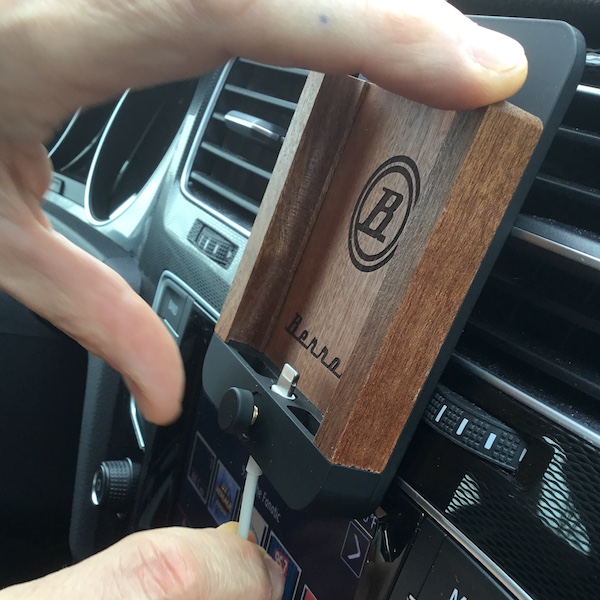
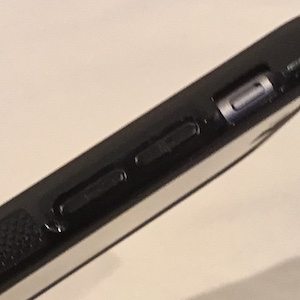
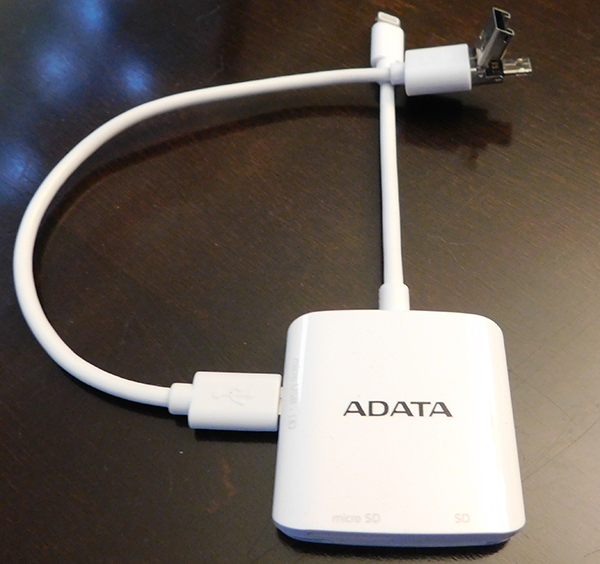
Looking at the front of the device, the Lightning connector is hard-wired into the top.  There is a micro USB port on the left side, and a supplied cable plugs into either a standard USB type A connector or another micro USB port.  It is kind of ingenious how they have built the device end of this cable – instead of 2 device cables, the top of the USB type A lifts to reveal the micro USB plug.

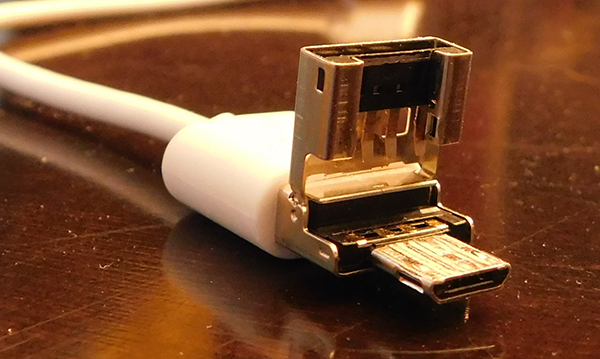
My only concern with this is simply that cables get lost, and small, essential cables even more so.  I searched the Internet briefly and could not find a USB micro to micro cable, so hopefully, if you lose this ADATA will sell you another – otherwise, you would lose the ability to connect the reader to any micro USB host (like most Android phones or tablets).  Also, ADATA does not appear to have a USB type C solution.  At the moment, that is not as big a problem as it would seem – it affects only a smallish segment of users like late model MacBook and MacBook Pro users or Google Nexus/Pixel owners.  Still, something to keep in mind if you own a device with the latest USB type C connector.

Windows

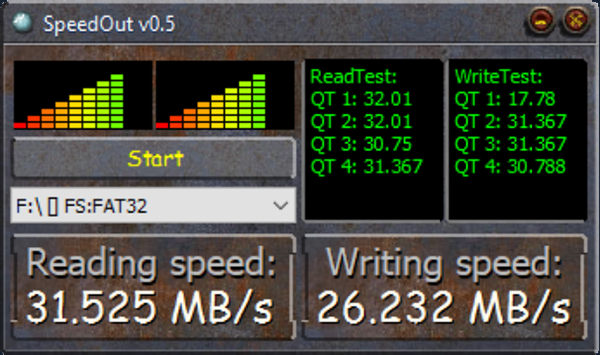
To test the card reader, I used an ADATA supplied and branded 32GB Class 10 SD card.  According to the label on the card, this should be capable of 95 MB/s reads and 45 MB/s writes.  Of course, the ability to achieve those speeds is not always within reach as a lot will depend on the type of port you will plug in to, the number of other devices competing for bandwidth on that channel and on.  For this test, I plugged the card into an Amazon Basics USB 3 10 port hub with 6 other devices simultaneously connected, ranging from a Logitech web cam to a Dymo LabelWriter.  The hub was connected to a Microsoft Surface Dock which in turn was connected to a Surface Pro 4 via the proprietary (and also under the hood, USB) connector.  The card was formatted as FAT32 and not exFAT just because I really wanted to cripple this test.

All of that to say this setup should bring the card reader to its knees in terms of read and write speeds.  I used the free SpeedOut utility to benchmark.  I was surprised by the results – approximately 31 MB/s reading and 26 MB/s writing.  Not stunning performance, but honestly better than expected given the circumstances.  The following is the average of 6 tests – once I managed to get reads up to 46 MB/s, but for the most part this is what I saw.

The verdict?  It should be fast enough for all but the most demanding of people – like, perhaps, professional photographers who are pushing 256GB worth of images at a time.  The device shows up as a standard external drive in Windows 10 – no special drivers to load.  Checkmark in the Windows column.

macOS

The packaging does not specifically name macOS as a supported operating system, but I didn’t see any reason why this would not work.  Using my MacBook Pro (early 2015 running Sierra), I plugged the device directly into the laptop, and within a second or so, the card mounted and was visible.  I did not benchmark on macOS, but the card reader felt snappy and responsive.  I copied a 2.5GB 1080p MKV video of The Hunt for Red October from a network share to the SD card in a little under 3 minutes.  Not bad at all, and a checkmark in the macOS column (the virtual one since ADATA did not say it would work).

Remember, though: my MacBook Pro is not the 2016 model.  I have USB type A ports where the newer model has only type C.

Android

Next, I plugged the card into my Nikon camera and took about 20 pictures of my dogs.  What can I say – Steve and Edie are cute.

My Nikon S220 does not have built-in wifi or pretty much any native way to get images from the camera to the cloud.  Long ago I lost the special data cable (see what I mean about external cables?), so every time I want to get images from the camera to Google Photos, for example, I use the tried and true “sneaker-net” – remove the card and follow a set of steps with my laptop to get the images into the cloud.  This meant I would have to wait until I got back to my laptop and that I had Internet connectivity.

I removed the card from the camera, plugged it into the ADATA reader and then using the extended data cable I plugged the reader into my Samsung Galaxy S7 Edge.  The device was recognized as an OTG (or On The Go) device type and in a couple of seconds, the card was mounted as external storage on the phone without the need for any special drivers or applications.  I opened Google Photos, and within another second or so, my images were on the way to the cloud directly from the reader.  Nice.  I also copied a video from my phone’s storage to the card.

Checkmark in the Android column.

iOS

Things are a little different in the iOS world, but not overly cumbersome.  In order for the reader to work on an iPhone, iPod or iPad, you must first load ADATA’s special reader application called i-Memory.  No, I don’t know why it is called that, either.  Regardless, a quick download and install from the app store and iOS was ready for the reader.

After plugging the reader into my iPad Air 2 via the Lightning connector and running the i-Memory app, the card mounted as external storage.  The app gives you the option of backing up your camera roll to storage or copying items to the tablet’s internal storage.  Instead of doing either, I opened the video player app and played the video I copied from my network under Windows.  It was apparent the player buffered the video by the delay starting it, but once playing it was smooth and glitch-free.

Checkmark in the iOS column.

Final Thoughts

The ADATA Card Reader Plus is a solid performer that works well with every platform it says it will and with one it doesn’t even mention.  At $49.95 retail, it is a little more expensive than other options, but then most of those options do not offer the cross-platform capabilities this reader does.  Other than the possible loss of the external data connection cable, there no real downsides to this device.  And if you have a need to transfer files between a variety of devices, the AI910 is a great choice.

Source: The sample for this review was provided by ADATA. For more info visit their site and Amazon to price check.


Product Information

Price: $49.95
Manufacturer: ADATA
Retailer: Amazon
Pros:
  • Solid performer
  • Compact size
  • Reads the 2 most common card types
  • Works with macOS even though it is not specifically named
Cons:
  • Connector cable for Windows and Android easy to lose

Filed in categories: Android, iOS, Reviews

Tagged:

ADATA AI910 Card Reader Plus review originally appeared on on March 20, 2017 at 10:08 am.

Note: If you are subscribed to this feed through FeedBurner, please switch to our native feed URL http://the-gadgeteer.com/feed/ in order to ensure continuous delivery.