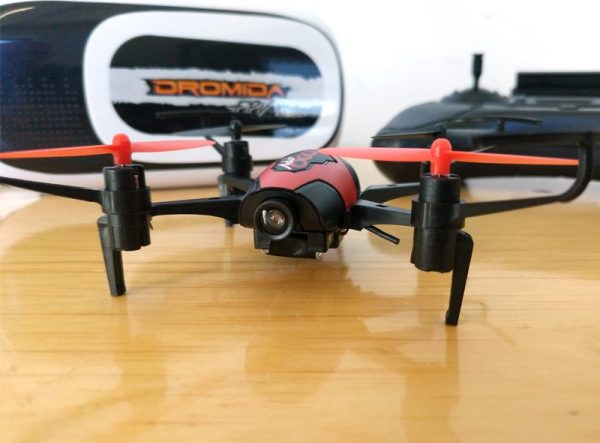
Dromida Kodo FPV Camera Drone review

The Dromida Kodo FPV Camera Drone is a fun, easy-to-set-up, beginner drone with some great extra features. Unfortunately, because of a poorly designed app and subpar hardware, it is not a true First Person View (FPV) drone. At $89.99, it’s still a good deal though for a drone that can (barely) stream Wi-Fi video and take pictures on command.
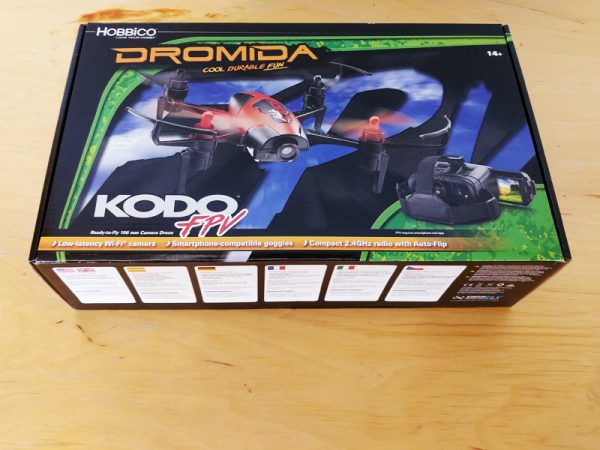
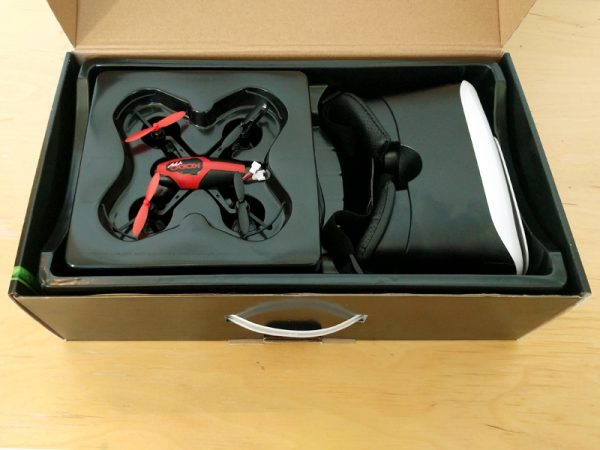
The Kodo FPV Drone comes in a standard flip top box adorned with pictures making promises the little drone definitely cannot keep.

In the box

  • Dromida Kodo FPV Camera Drone
  • FPV Goggles/Smartphone holder
  • LiPo Battery
  • USB LiPo Charger
  • Replacement Props
  • AAA Batteries (4)
  • Screwdriver

The box the Kodo ships in has compartments for the drone and a built-in handle which makes it pretty useful for storing and transporting the drone and its accessories.
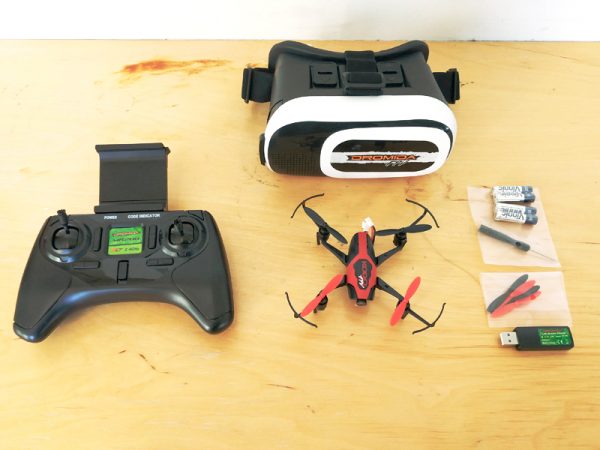
The Kodo FPV Drone comes with a 2.4GHz radio controller with AA batteries, FPV Goggles, a LiPo battery with USB charger, replacement props and a tiny screwdriver for accessing the battery compartment on the controller.
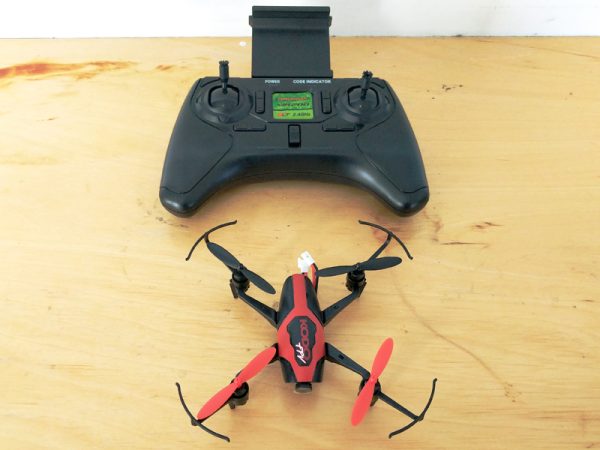
The design of the Kodo FPV is very similar to other entry-level drones. One thing I like in particular are the built-in prop protectors.
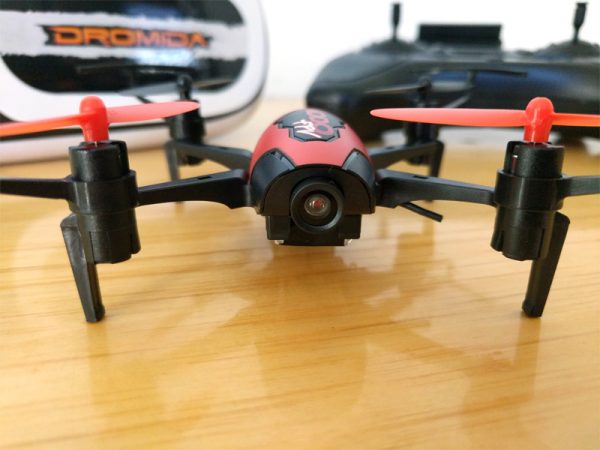
Like most drones, the props are color-coded for front and back. The Kodo has a small Wi-Fi camera on its nose and the angle of the camera can be manually adjusted before flight.
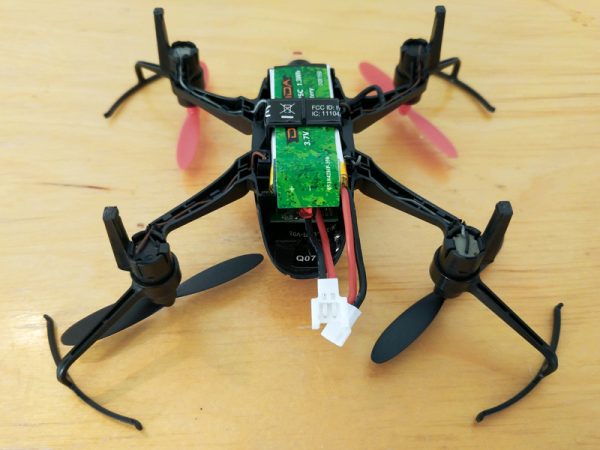
The included Lithium polymer battery hangs under the body of the drone and connects via power cables to the rear.
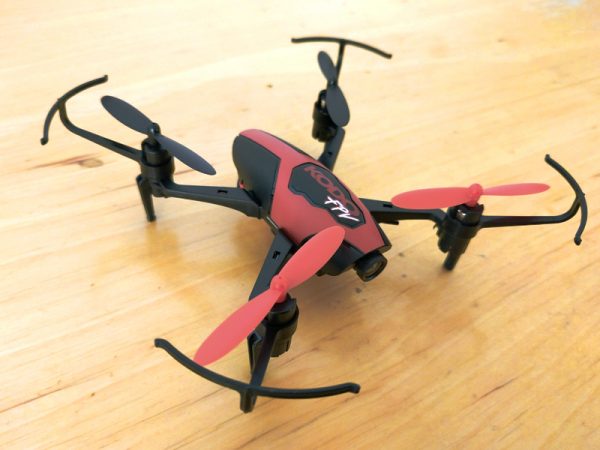
In my tests, I was able to fly indoors for just under five minutes per full charge. During that time I streamed video via Wi-Fi and captured both stills and video files with the drone’s camera.
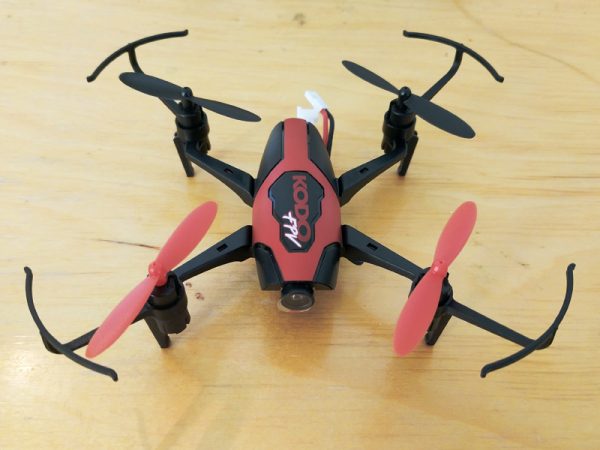
Because of its light weight and small battery, the Kodo FPV is primarily an indoor drone. It can be flown outside, but fighting even the slightest breeze will quickly have you losing control and the battery will drain that much faster.
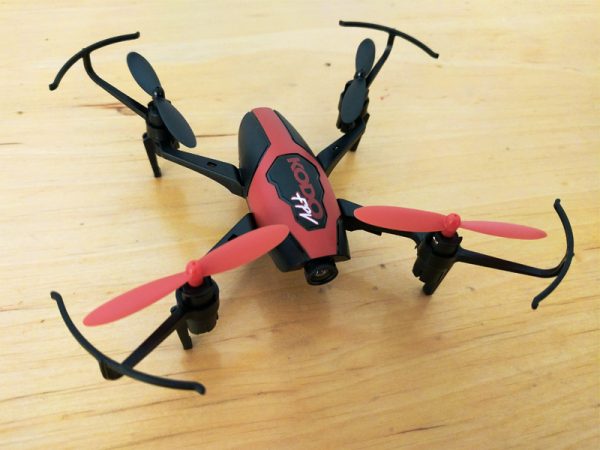
The controller for the Kodo is larger than what usually comes with a drone this size, which is great because larger controllers and control sticks make any drone much easier to fly, especially for novices.
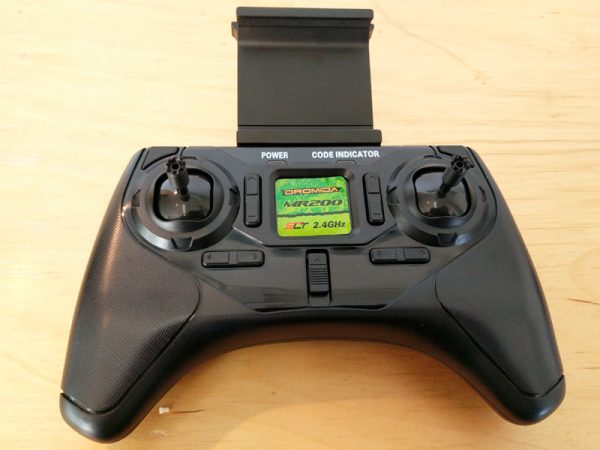
The controller has a spring-loaded smartphone holder which can fit just about any standard phone. Once connected to the drone via Wi-Fi, you can monitor the view from the drone’s camera via your phone.
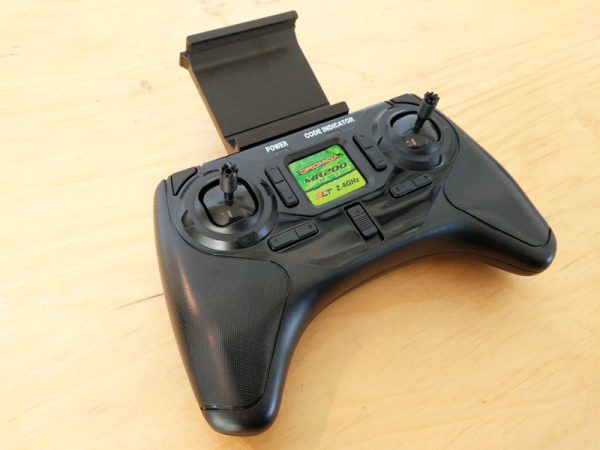
The controller has dedicated buttons for taking pictures and recording video, as well as a “stunt” button which initiates a flip when the drone is in flight. Like most drones, the Kodo and its controller have a “Power-On Fail-Safe”. This prevents the drone propellers from starting up until the flight stick is moved to the up and down position.
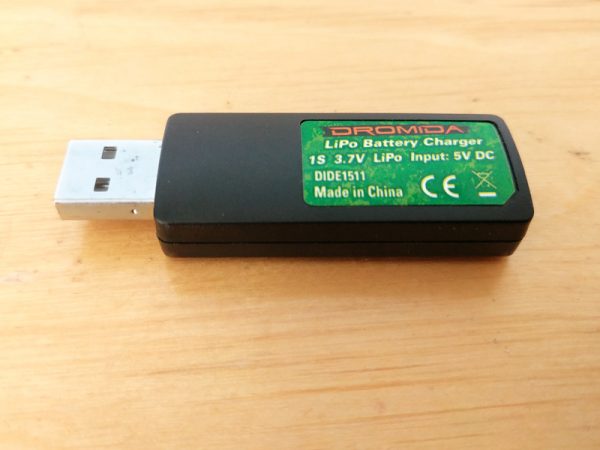
The included USB charger allows you to charge the drone’s LiPo battery via any powered USB port or by connecting it to a USB power plug. In my tests it took about 35-40 minutes for the battery to fully charge.
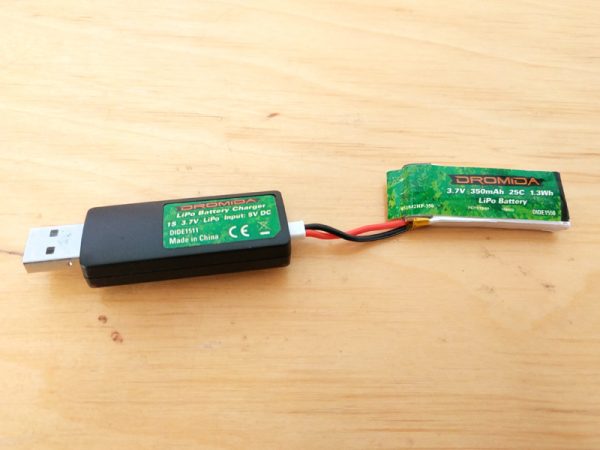
The same cable that connects the battery to the drone fits into a port on the charger. A great feature of this particular charger is that it has a red LED which flashes during the charging cycle and then glows steady red when charging is complete.

Also included with the Dromida Kodo is a complete set of replacement props. For novices and pros alike, it only takes a few crash landings to see how valuable these replacements will prove to be.
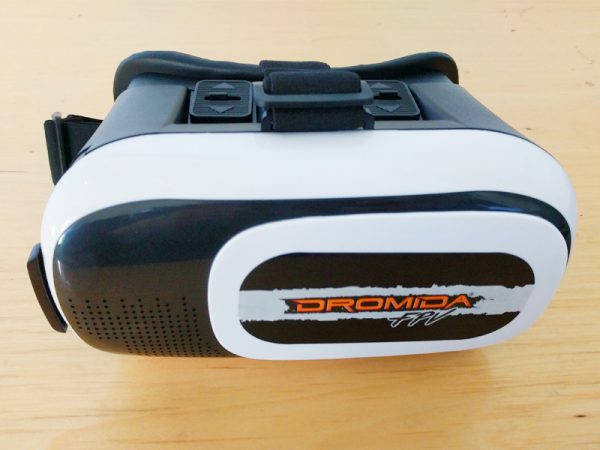
The main sell of the Dromida Kodo FPV Drone is the “FPV” aspect of it. The goggles that are included with the Kodo are meant to hold your smartphone and allow you to fly the drone in First Person View.
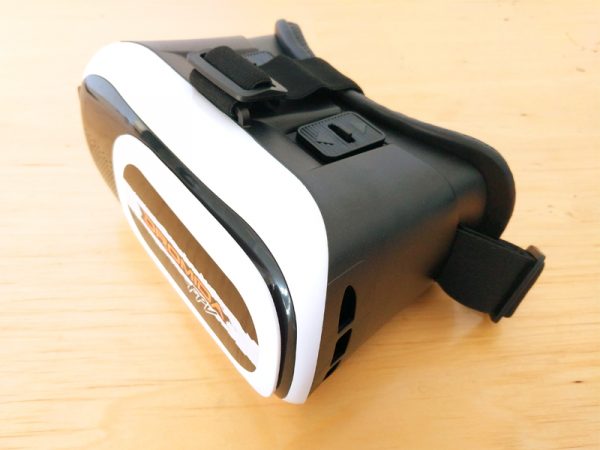
The goggles are very similar to any number of “Virtual Reality” googles that are sold on the web which allow you to access Google Cardboard or similar Virtual Reality apps and games.
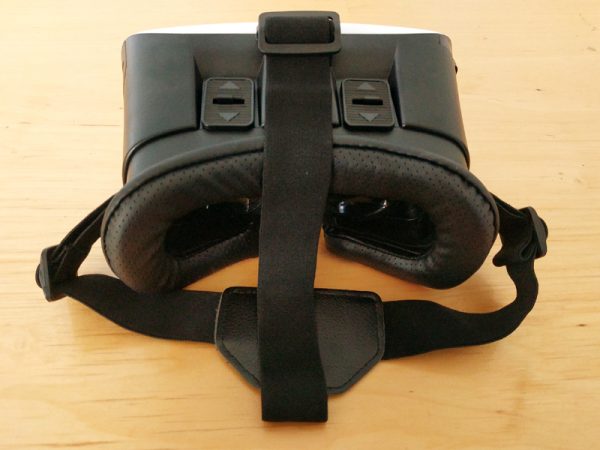
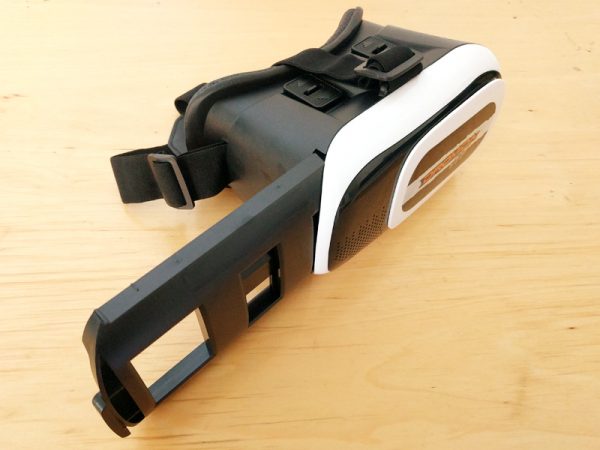
The goggles themselves are comfortable and will fit most smartphones. They’re not too heavy when worn for long periods of time and are adjustable for kids and adults.
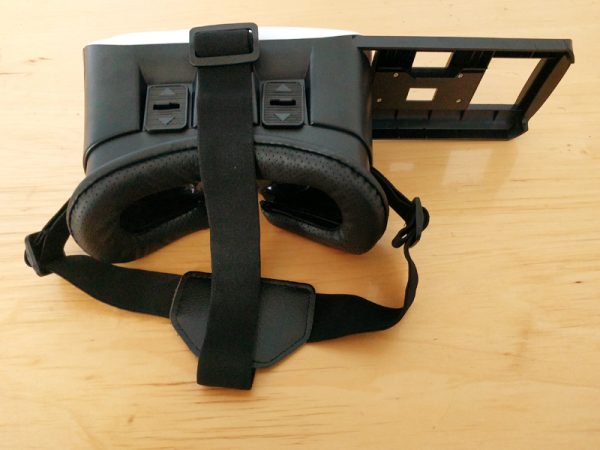
A sliding bracket on the right of the goggles allows a user to place their compatible smartphone in the unit and once closed, view the app content through the googles.
The app and its functionality, as usual, are the biggest disappointments of the Dromida Kodo Drone. The Kodoview app can be downloaded and installed on your device, via the QR code in the manual or by searching the Google Play Store or Apple App Store.

Once installed and running, you’ll need to power on the drone and controller and then find the drone’s Wi-Fi signal. After choosing the correct Wi-Fi signal you SHOULD be able to access the camera view from the drone by clicking on FLY in the app.

Unfortunately, that doesn’t always happen at first. It took me several tries and a good fifteen frustrating minutes when, for some unknown reason, the camera finally started streaming to my device, a Google Pixel. The quality of the camera is very low, both for the videos and stills. What’s interesting about the Kodo, that I haven’t seen on other camera drones is that the media files are not stored on the drone at all. Usually, a camera drone will have an internal SD card and the camera will write to it when accessed.

Instead, the Kodo transmits and stores all content on to the attached smartphone. I like this better than an SD card mainly because it makes it a lot easier to access your media. The Kodoview app creates a folder on your device where it stores all the media captured by the Kodo Drone and through the app you can view, select, and delete any of the pictures or videos.

There’s an option in the Kodoview app which allows you to view the First Person View of the camera and utilize the included FPV goggles.

In my tests though, as you can see in the video and pictures captured from the Kodo, the quality of the video is very low and the lag of the transmission is much too high to be able to fly via the FPV goggles alone.

There is a lot of artifacting and it’s incredibly difficult to navigate with such poor laggy feedback.

The good news is that the googles and FPV are good for something. It’s great fun for someone else to view the First Person View while you’re flying.
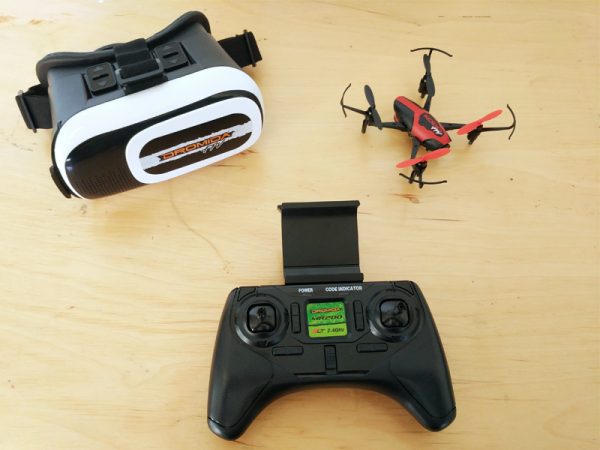
Even though the Dromida Kodo FPV Camera Drone doesn’t quite deliver on the promise of a true First Person View experience, it is a good value at the price of $89.99 and great fun for drone novices.
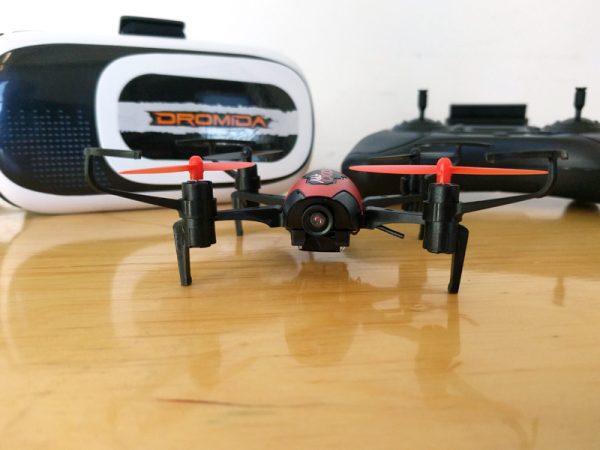
It’s easy to get from box-opening to flight time and the battery life and performance are on par with other drones in this price range. The added features like FPV don’t work like they should, but do allow for some alternative enjoyment.

Source: The sample for this review was provided by Dromida. Please visit their site for more info and Amazon to order.


Product Information

Price: $89.99
Manufacturer: Dromida
Retailer: Amazon
Requirements:
  • Android or Apple smart device compatible with KODOVIEW mobile app
  • USB Power Source (such as PC with USB port) or a USB AC Adapter
Pros:
  • Good price for a Wifi enabled live-view drone
  • Durable construction
  • Easy setup for drone flight without app or FPV mode
Cons:
  • Cannot be flown in First Person View
  • Poorly designed App doesn't always connect with Drone
  • Poor video and picture quality

Filed in categories: Reviews

Tagged:

Dromida Kodo FPV Camera Drone review originally appeared on The Gadgeteer on November 24, 2017 at 9:00 am.

Note: If you are subscribed to this feed through FeedBurner, please switch to our native feed URL http://the-gadgeteer.com/feed/ in order to ensure continuous delivery.

ConnectSense Smart Outlet review

I grew up watching Star Trek and always thought that talking to a computer was the coolest thing! With Siri, Google and Alexa were getting darn close to Captain Kirk’s Enterprise. Ahhh, the joys of home automation! I love it when something cumbersome becomes effortless. Adding ConnectSense’s new Smart Outlet to my home automation system has made that dream one step closer. 

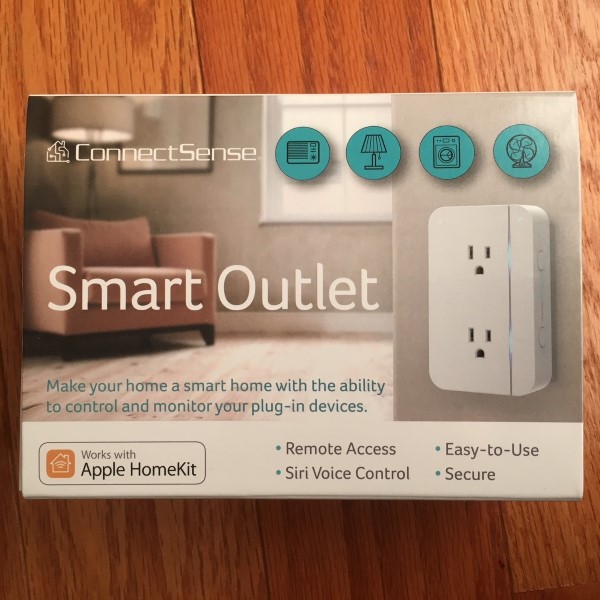
The Smart Outlet arrived in small packaging with only a brief “Getting Started” manual. Turns out, that’s all that was needed to get it working. Plug in the outlet, open Wi-Fi settings on my iPhone, follow the directions to connect to the home network, download the app, create an account, then open Home Kit, enter the device number and, voila, it works. I have to say it was among the fastest and simplest setups I’ve done for a device of this type. Literally, just minutes and everything was up and running.

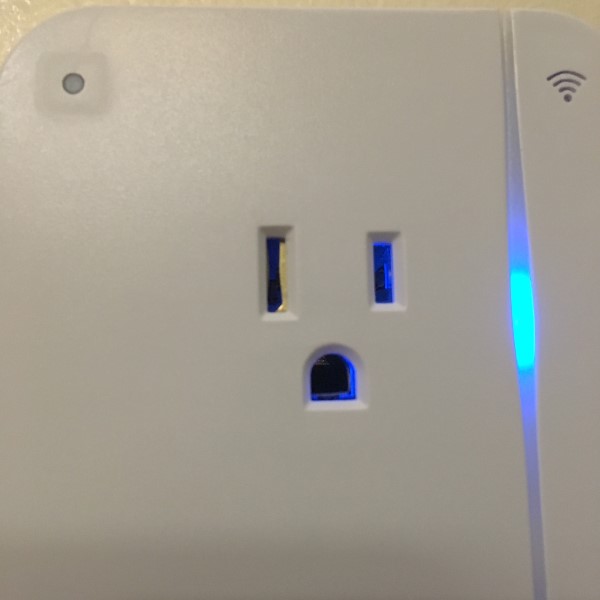
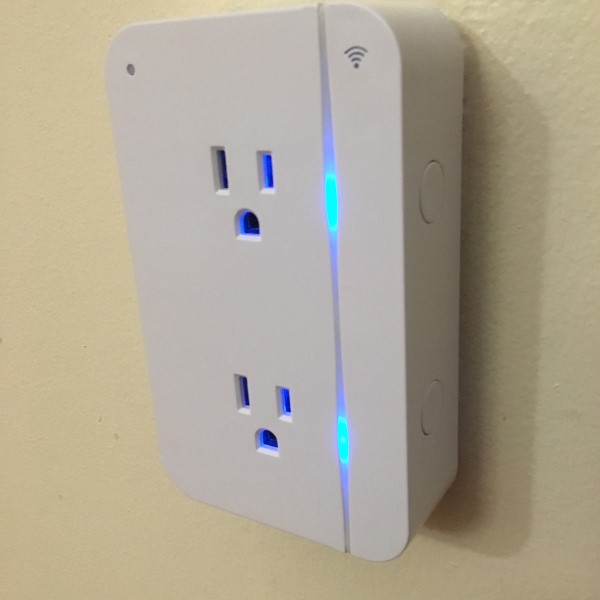
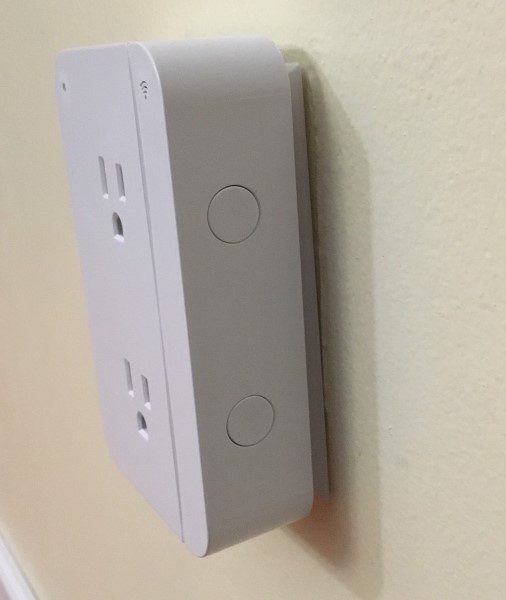
As soon as the outlet was added to Home Kit, I was able to ask Siri to turn on or off outlet one, two or both using simple phrasing like, “Hey, Siri, turn on outlet 1,” or “Hey, Siri, turn off the living room fan.” Each outlet has a pleasant blue LED to let me know it was on. As an Easter egg, there is even a USB port on the side. The other side has pushbuttons to control the outlets locally, although if plugged behind a couch, they might not be easily accessible.

The device plugs into a wall socket, but it should be noted that while it has only one grounded plug on the back, it blocks both outlets in a standard duplex outlet. It’s about 5 X 3-1/4 and the case protrudes about 1-1/4 inches from the wall, so if you have a tight space, say, behind a dresser, some creativity might be needed to preserve room aesthetics.

Like many Home Kit compatible devices, an Apple TV console is needed to enable control away from the home network. I don’t have one, so I’m hoping Santa thinks I’ve been good this year.

The ConnectSense Smart outlet was very easy to setup get working. It enables voice control of almost any 110volt device up to 15 Amps. I tested it with several lamps and a fan. But have not decided which outlet it will ultimately occupy, but it will be fun figuring it out. Now, if I could just get Siri to speak in Majel Barrett’s voice…

Source: The sample for this review was provided by ConnectSense. Please visit their site for more info and Amazon to order.


Product Information

Price: $59.95
Manufacturer: ConnectSense
Retailer: Amazon
Pros:
  • Easy setup
  • Home Kit compatible
Cons:
  • Expensive

Filed in categories: Reviews

Tagged:

ConnectSense Smart Outlet review originally appeared on The Gadgeteer on November 23, 2017 at 1:00 pm.

Note: If you are subscribed to this feed through FeedBurner, please switch to our native feed URL http://the-gadgeteer.com/feed/ in order to ensure continuous delivery.
iAsus Stealth Bluetooth mic review

I don’t use Bluetooth headsets anymore since I seem to text and email more than voice. But a Bluetooth headset that is completely immune to ambient noise?  Say hello the iAsus Stealth Bluetooth Mic.

If there’s one thing I can’t stand about Bluetooth headsets for phones is poor outbound quality due to environmental noise, or garbled digital artifacts.  But how does the iAsus Stealth Bluetooth Mic do it?

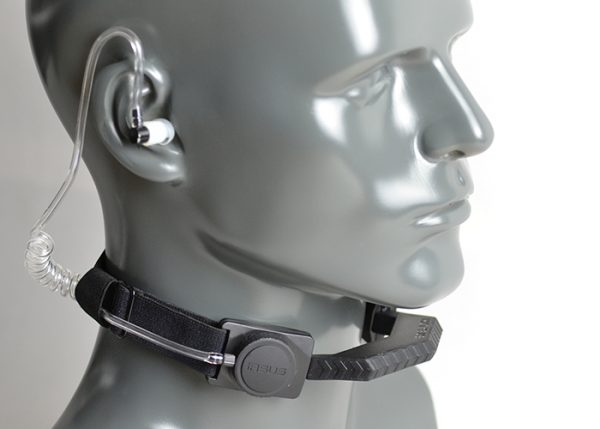
The answer?  This headset uses conduction points on the throat to pick up your voice.

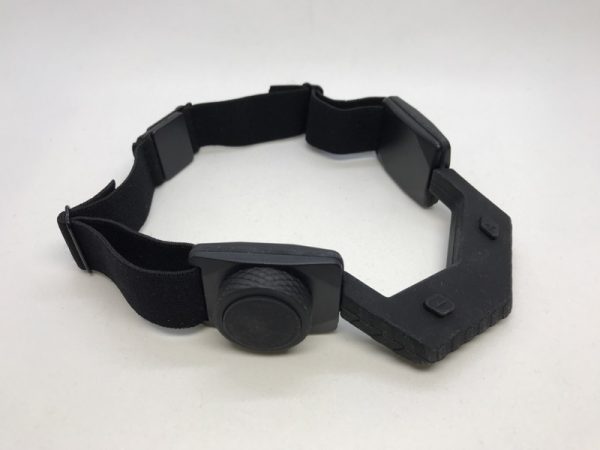
Here’s the headset without the earpiece.

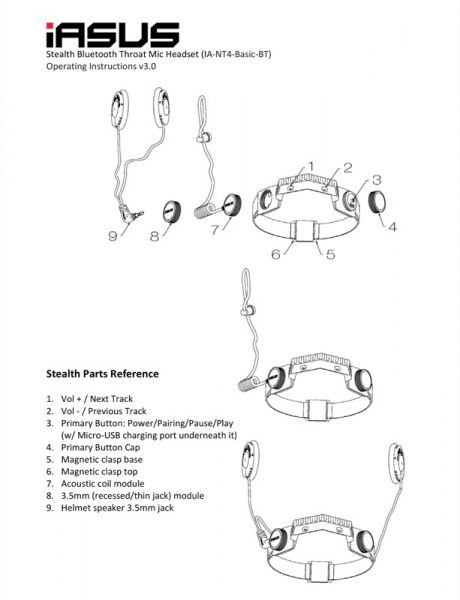
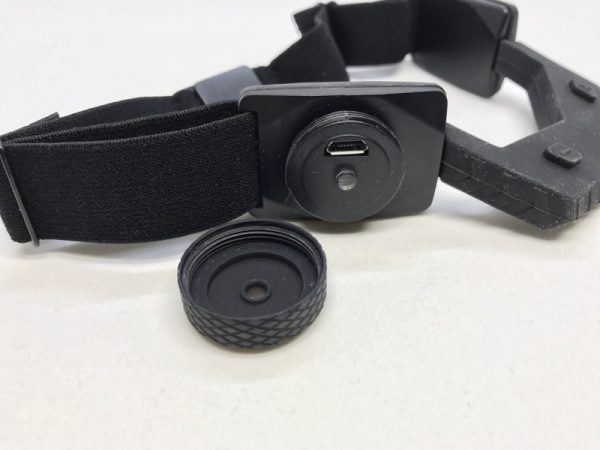
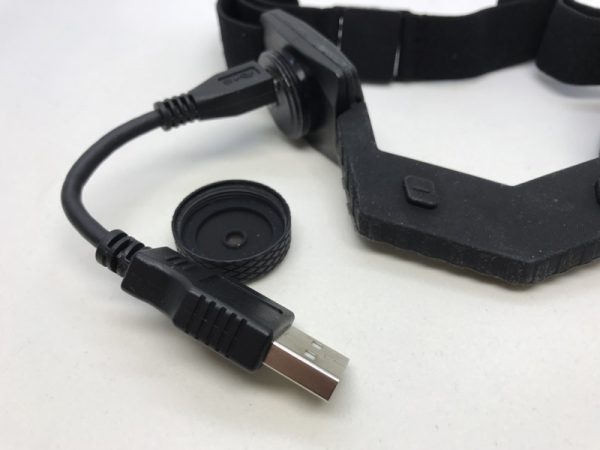
A screw-off cap reveals a charging port and a blue/red LED for status.  It also functions as the power on button.  Strangely enough, you don’t use this to power the headset off (press and hold the volume + button for that).

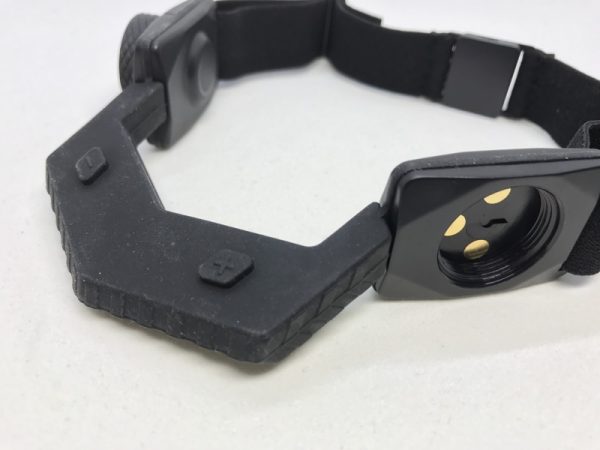
Speaking of volume buttons here are the two diamond-shaped volume up and down buttons.  These normally face down when worn.

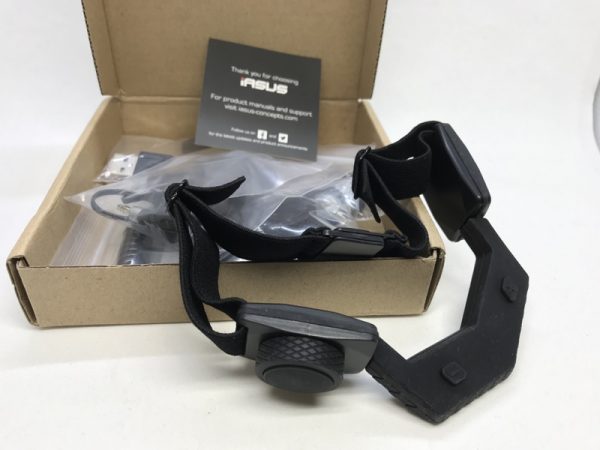
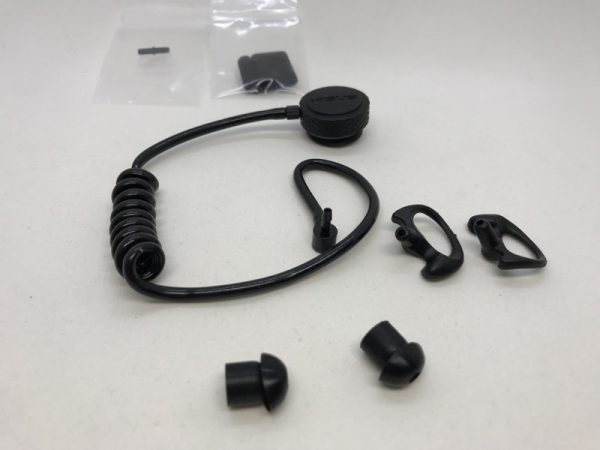
The kit comes with an audio “tube” earpiece, which is essentially a hollow plastic tube.  It differs from the clear one shown on the website photo.

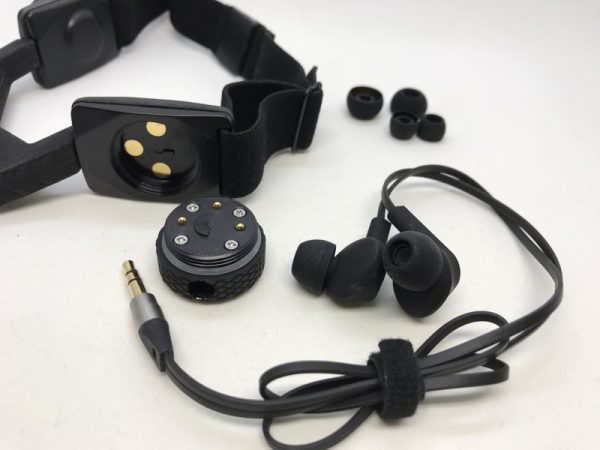
Alternatively, you can use the electrical minijack option, familiar to most  The three gold-colored contacts on the neck band interface with the round puck that the headphones attach to.

Here’s the short USB cable plugged in…

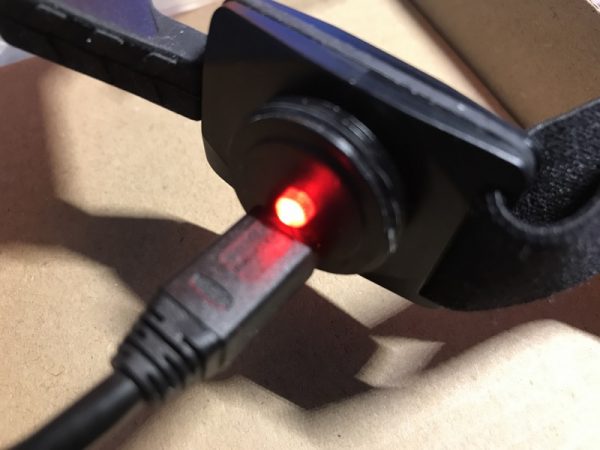
…and the LED lights up red when charging.

There’s no way around it.  I felt silly wearing it.  It instantly reminded me of the Collars of Obedience Captain Kirk wore.  (I’m the one on the left).

The million dollar question is:  How does it sound?  To test this, I performed a test in my garage with this dusty shop vac.  Take a listen:

First up:  iPhone recording only

Now here’s the same with the Stealth Mic.

I’m happy to say that you can barely tell the Shop Vac is turned on but at the expense of voice intelligibility.  Hard consonants seem to be a little hard to pick out.

If you’re looking for a Bluetooth mic for your phone that absolutely ignores outside noise, this is the one to get.  However, this comes at the cost of clarity.  If you think the test clip is “good enough”, and you want minimum visibility, the iAsus Stealth Bluetooth Headset might be for you.

Source: The sample for this review was provided by iAsus. Please visit their site for more info and check Amazon for ordering.


Product Information

Price: $199 (base configuration), $30 for coiled earpiece, $50 for 3.5mm earpiece module
Manufacturer: iAsus
Retailer: Amazon
Requirements:
  • Bluetooth, USB for charging
Pros:
  • No visible microphones, immune to environmental noise
Cons:
  • Reduction in voice clarity

Filed in categories: Reviews

Tagged:

iAsus Stealth Bluetooth mic review originally appeared on The Gadgeteer on November 23, 2017 at 11:00 am.

Note: If you are subscribed to this feed through FeedBurner, please switch to our native feed URL http://the-gadgeteer.com/feed/ in order to ensure continuous delivery.
Jaybird Freedom 2 wireless sport headphones review

Now that smartphones like the latest iPhones and my new Pixel 2 XL have abandoned 3.5mm headphone jacks, the quest to find the perfect pair of Bluetooth earbuds has been high on my tech wish list. The latest test buds to show up on the Gadgeteer testing bench are the Freedom 2 wireless sport headphones from Jaybird.

What is it?

The Freedom 2 wireless sport headphones are earbuds that connect to a smartphone, tablet, or computer using Bluetooth.

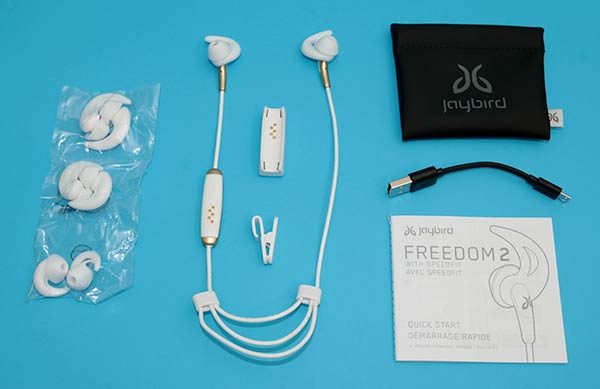
What’s in the box?

Freedom 2 buds
Charge clip/Battery pack
USB charging cable
4 pairs of silicone tip/fin combos
Shirt clip
Carry pouch
Quick start guide

Design and features

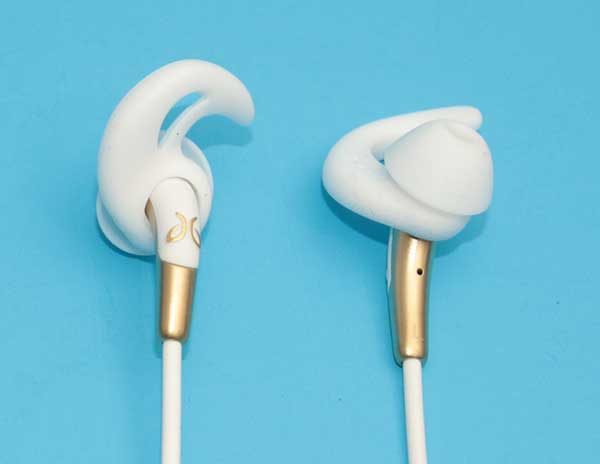
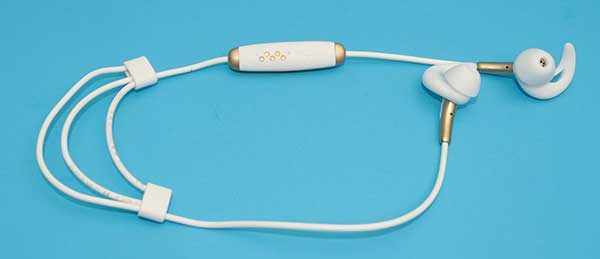
The Jaybird Freedom 2 wireless sport headphones are available in black and in white/gold like you see above.

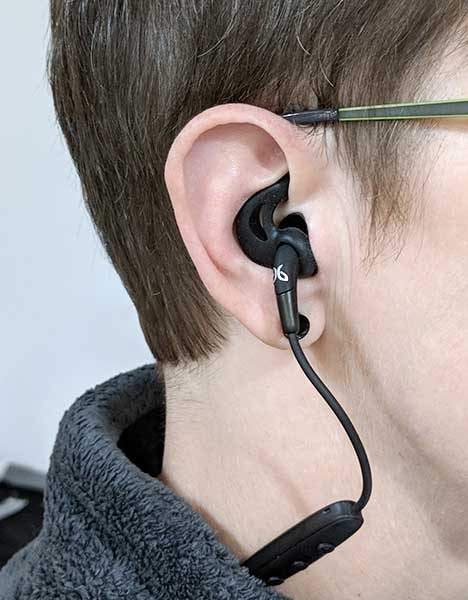
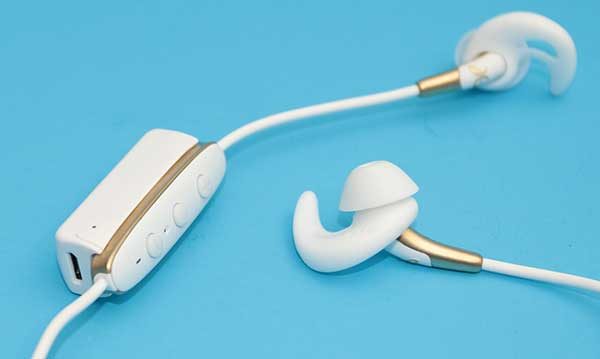
These are in-ear style headphones which come with 4 sets of ear tips with built-in fins that really help keep the earbuds in your ears even when you’re working out or running. Speaking of which, the Freedom 2 headphones are water and sweat resistant, so you can get as icky as you like and the headphones won’t skip a beat.

I found these headphones to be comfortable even for extended wear. I like the fin design of the ear tips because they never feel like they are about to fall out of my ears. They easily stayed put when I was sitting at my desk and when I was working out. I’m not a runner, so I didn’t test how well they stay in your ears while pounding the pavement, but I am pretty confident that that won’t fall out.

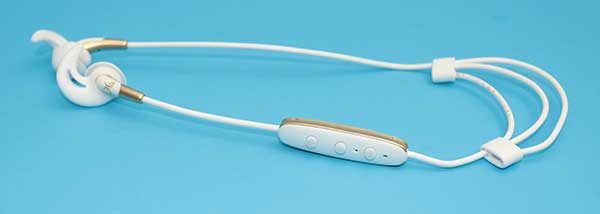
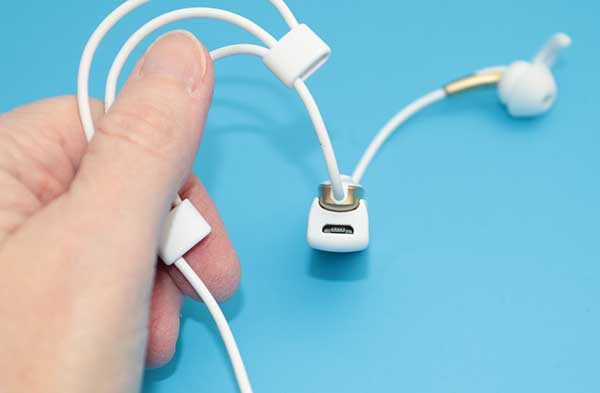
The headphones are small and compact and feature an inline controller and speedfit cord clips that allow you to customize the length of the cable for the perfect fit.

The inline controller has three buttons on one side that control volume and functions like power, pairing, play, pause, call answer, call end, and next track.

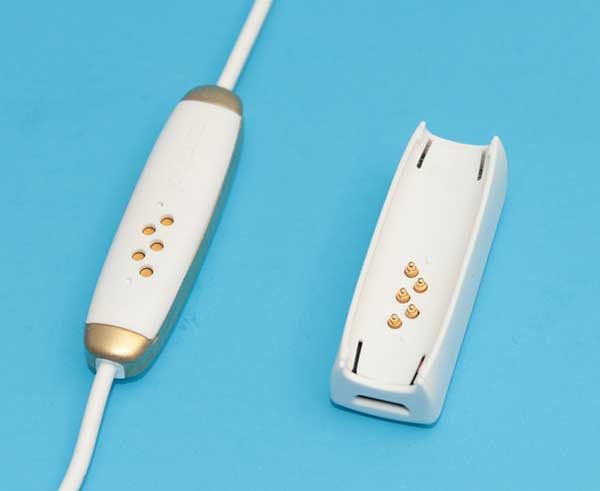
On the other side of the controller are electrical contacts that mate with contacts on the snap-on backup battery/charger.

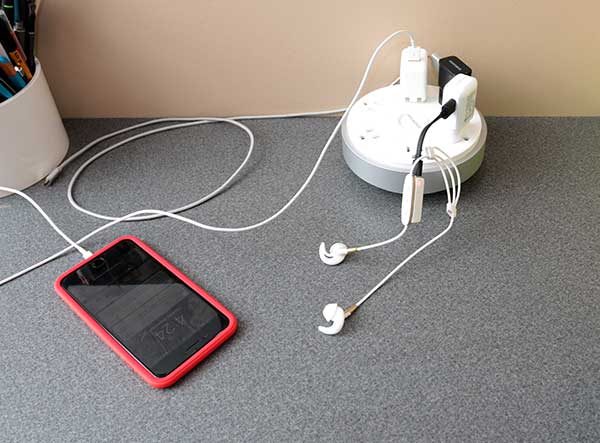
To charge the Freedom 2’s battery, you snap on the charger and then connect it to a USB port or AC adapter.

Yes, that means that you’ll always need to carry the snap-on charger with you so you’ll be able to charge the headphones where ever you are.

If that sounds like a hassle, I agree with you. But, the good news is that the snap-on charger is pretty small and easily fits in the included pouch. Even better news is that it doubles as a battery extender that will provide up to 4 hours of extra play time for the headphones. As you charge the headphones, the backup battery also charges.

Without the backup battery snapped to the controller, the Freedom 2 headphones will play for about 4 hours on their own. Snap on the charger/backup battery and they will play for an additional 4 hours, for a total of 8 hours of play time. Note, that when you connect the battery clip it will power off the headphones and you’ll have to power them back on which is a little annoying.

I rarely listen to music for more than a couple of hours at a time, so 4 hour battery life isn’t a problem for me.

Pairing the headphones

I had no problems pairing the Jaybird Freedom 2 headphones with my Pixel 2 XL Android smartphone and so far I’ve had no problems with the phone and headphones reconnecting after cycling power on both devices.

The headphones have a female voice that will tell you that the headphones are powering on, battery level, when they are connected, and when they are powering down.

These are multi-point headphones which means that you can pair them with two devices at the same time. You can have the headphones connected to your phone for calls and your computer for media. The headphones will also remember up to 8 devices.

How do the Jaybird Freedom 2 headphones sound for music?

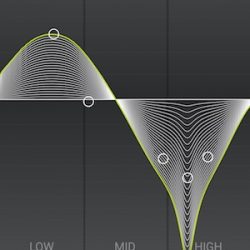
I wasn’t initially that impressed with the audio quality while listening to my favorite tunes through Spotify and Amazon Prime Music apps. But then I installed the Jaybird app on my Pixel 2 XL and customized the sound settings and was MUCH happier.


The app offers pre-configured sound settings or you can start from scratch to create your own. The app also offers music playlists that might help you find some new favorite tunes.

Depending on the sound setting that you choose (my current favorite is called Perfect Quality) through the Jaybird app, you should be happy with lows, mids, and highs.

I don’t listen to just one type of music, I like almost all genres and so far the Jaybird Freedom 2 headphones have not disappointed me. If I don’t think a particular type of music sounds as good as it can, I choose another setting in the app and am happy again. But honestly, the Perfect Quality sound customization pick has been the one I settle on about 95% of the time.

How do the Jaybird Freedom 2 headphones sound for calls?

I don’t like taking calls with in-ear headphones because I feel like I’m talking in my head with the way my voice sounds. That said, using the Freedom 2 headphones to take calls is fine. I could clearly hear the person on the other end of the call and they said that they could hear me. Only one time did someone tell me that I sounded a little quiet.

Final thoughts

Right now the Jaybird Freedom 2 wireless sport headphones are my favorite Bluetooth headphones because they are comfortable to wear, sound great, and have the ability to play for up to 8hrs with the clip on battery. They get two thumbs up from me.

Source: The sample for this review was provided by Jaybird. Please visit their site for more info and Amazon to order.


Product Information

Price: $149.99
Manufacturer: Jaybird
Retailer: Amazon
Pros:
  • Comfortable
  • Very good sound quality
  • Good battery life + extra snap on battery
Cons:
  • Proprietary charger/backup battery
  • Connecting the battery clip will power off the headphones

Filed in categories: Reviews

Tagged:

Jaybird Freedom 2 wireless sport headphones review originally appeared on The Gadgeteer on November 22, 2017 at 2:25 pm.

Note: If you are subscribed to this feed through FeedBurner, please switch to our native feed URL http://the-gadgeteer.com/feed/ in order to ensure continuous delivery.
EPSON Expression Photo XP-8500 Printer review

For this review of the EPSON Expression Photo XP-8500 Printer, I am turning it over to my lovely wife who is obsessed with photography and documenting our family’s life.  Her experience with at home photo printing far exceeds mine so I will turn it over to her. 

I am scrapbook obsessed. Seriously. I am a firm believer that pictures shouldn’t stay on your phone forever and that all the little bits of your life have a story and deserve to be told.  So, every year, week by week, I document what is going on in our lives.  While I appreciate the prints from professional labs, I just don’t like waiting for my pictures.  So several years ago I started printing at home.  I print a minimum of 10 pictures per week, but sometimes many many more, so I need a printer that can keep up.

What’s in the box?

The Epson Expression XP-8500 all-in-one, manual/start here guide, CD ROM for product setup (everything can also be downloaded from the Epson website, power cord, 6 Claria Photo HD ink cartridges (cyan, yellow, magenta, black, light cyan and light magenta)

System Requirements

Windows – 10,  7, 8.x and Vista, Macintosh – OS 10.12.x, 10.11.x, 10.10.x, 10.8.x, 10.7.x and 10.6.8

Let’s take a look

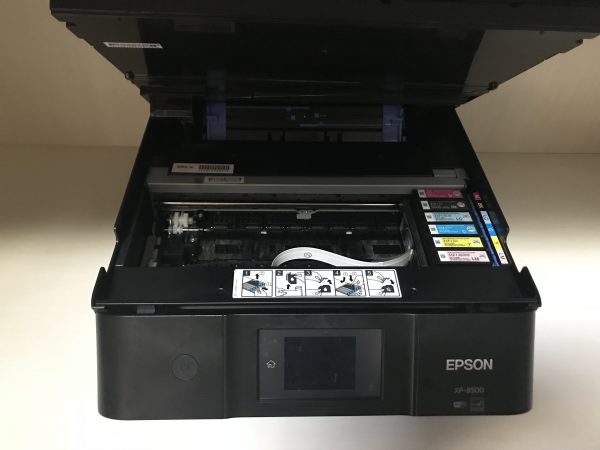
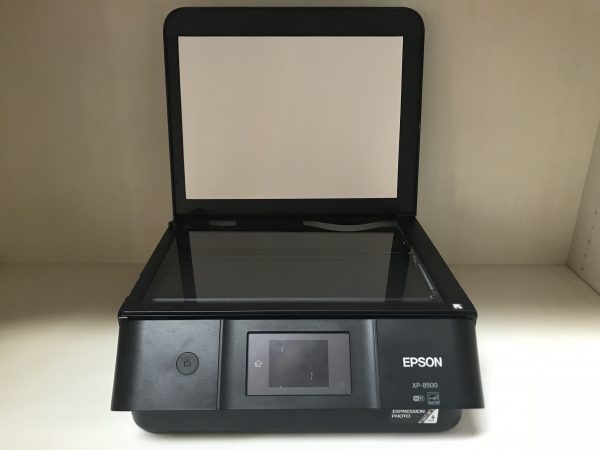
Out of the box, set up was simple.  Just plug it in, lift the scanner glass to insert the ink cartridges and the printer walks you through the setup.  The calibration process is rather lengthy compared to other printers and requires you to print a few items and answer multiple questions about the print quality.  Overall, the set up took about 15 minutes.  I was then able to connect it to our wireless network and install the driver on my computer.

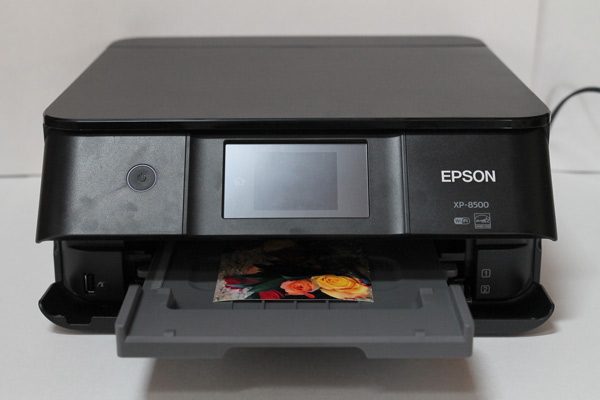
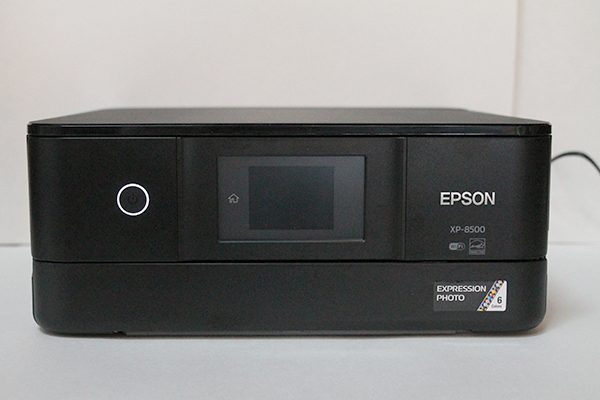
This printer has a small footprint (13.7″w x 13.4″d x 5.6″h) and it is lightweight (14.8 pounds).  You could easily place this on the corner of your desk and not lose much workspace.  Please note that these dimensions will be slightly different when the printer is actively printing because the paper output tray opens and slides out.

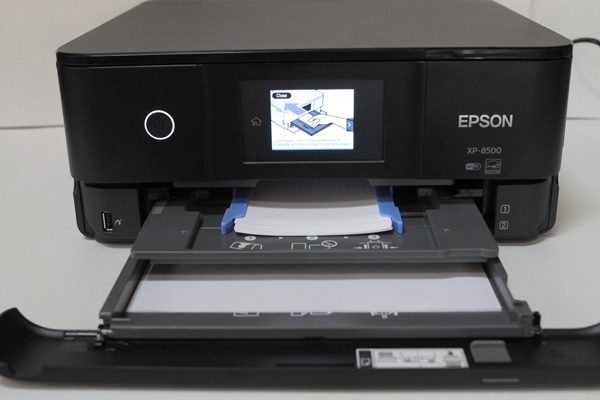
There are only two buttons – a power button and a home button.  The home button will take you to all the options – copy, print photos, scan, various prints, settings, and maintenance.  The Various Prints menu has a variety of options such as types of design paper, calendars, greeting cards and more.

There are three ways to load the printer.  The upper cassette is designed for photo paper in the following sizes: 3.5″ x 5″, 4″ x 6″, 5″ x 7″, 16:9 wide.  The lower cassette is designed for your copy paper, presentation paper, and legal sized paper.  There is also a rear paper feeder for one-off projects and it can accommodate a variety of paper sizes and types.

The printer has both SD and USB ports on the front so you can print without using your computer or phone.  I usually don’t print directly from a memory card; however, for me, this was convenient when scanning a document so I could automatically save it to the device.  Also, with the Epson Event Manager software installed on my computer, I was able to select my computer as the destination and the scanned document showed up on my computer screen a few seconds later.

There is not an automatic document feeder.  To be fair, most printers in this class do not have them.  Since I mostly use my printer for printing photos this wouldn’t deter me from buying this printer, but anytime I have to scan more than two pages at a time, I wish I had one.  This may be something for readers to consider if you feel that the scan and copy feature will be used often.

Let’s start printing.  There is a catch in the paper tray when removing and inserting but I found if I was a little too fast it was easy to pull the tray all the way out or push it too far in.  Once I realized this, I was a little more careful and it was easy to feel when it was inserted correctly.  When you insert paper into the tray, there will be prompts on the screen to select the type of paper to ensure proper printing.  I have other printers that I can hear printing from an adjacent room but not this one.  The printer is very quiet.

For everyday document printing, the XP-8500 can print about 9 pages per minute.  It can also print two-sided documents to reduce the amount of paper used (print speed is 4.7 ppm for all black ink when printing 2-sided).  There are certainly faster document printers out there but this was sufficient for my home printing needs.  After all, this printer is a photo printer first.

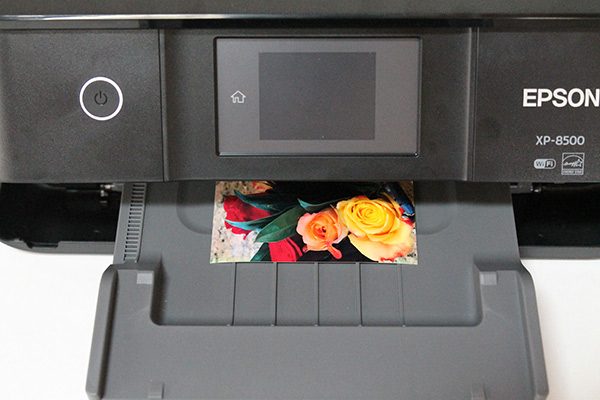
Epson says this will print professional quality photos in as little as 10 seconds when printing in draft mode and I found that to be true.  I printed a majority of my pictures in a higher quality but the time it added was negligible.  I have been printing pictures wirelessly from my phone for almost a month and it produces crisp images with vibrant colors.  Also, the ink used is the Claria Photo HD ink, which Epson says will produce images that last up to 300 years in an album.  As a scrapbooker, archival quality photos is a must and it is awesome that an at-home printer can produce them.

When selecting a printer for home use, there are a lot of factors to consider – primary use, print speeds, running costs, etc.  If you are looking for a printer to document your memories, the Epson Expression Photo XP-8500 Small-in-One should be a high contender on your list.  At a retail price of $249.99, I believe you get a great bang for the buck and would highly recommend this printer to our readers.

Source: The sample for this review was provided by Epson.  For more information please visit the product page and you can order from Amazon.


Product Information

Price: $249.99
Manufacturer: Epson
Retailer: Amazon
Pros:
  • Compact, vibrant colors, crisp images, long lasting prints, very quiet, easy set up, great value
Cons:
  • No automatic document feeder

Filed in categories: Reviews

Tagged: ,

EPSON Expression Photo XP-8500 Printer review originally appeared on The Gadgeteer on November 22, 2017 at 11:00 am.

Note: If you are subscribed to this feed through FeedBurner, please switch to our native feed URL http://the-gadgeteer.com/feed/ in order to ensure continuous delivery.