Honeywell TurboForce Tower Fan Review

REVIEW – I’ve got quite a few fans around my house, mainly because my wife has asthma and likes the air to circulate – all of the time. The Honeywell TurboForce Tower Fan looked like it might be able to finally make her happy.

What is it?

The Honeywell TurboForce Tower Fan is an oscillating dual tower fan that has separate controls for each fan.

What’s in the box?

List contents – you can remove this heading and section if it doesn’t apply to your review.

  • Honeywell TurboForce Tower Fan
  • Base


Design and features

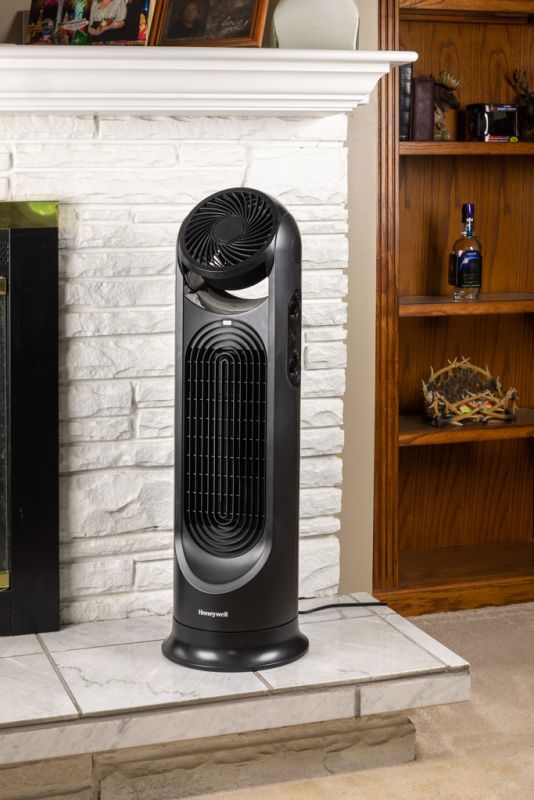
The Honeywell TurboForce Tower Fan is a pretty simple design that incorporates two fans with an oscillating base. A top and a bottom fan ensure a very wide range of air movement. At 32″ tall it stands tall enough to be a bit off of the floor, but not so tall that it will get in the way.

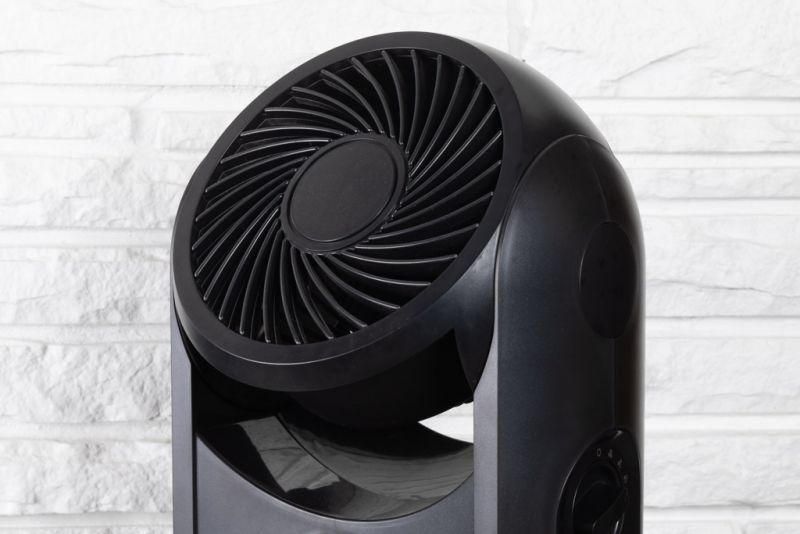
The smaller top fan unit has a tilt-adjustable head that tilts up to 90 degrees upward which helps circulate the air from the ceiling area of a room. The top fan is a standard circular style 6″ fan. The bottom fan is a 12″ drum style fan that blows air directly forward. It really moves the air!

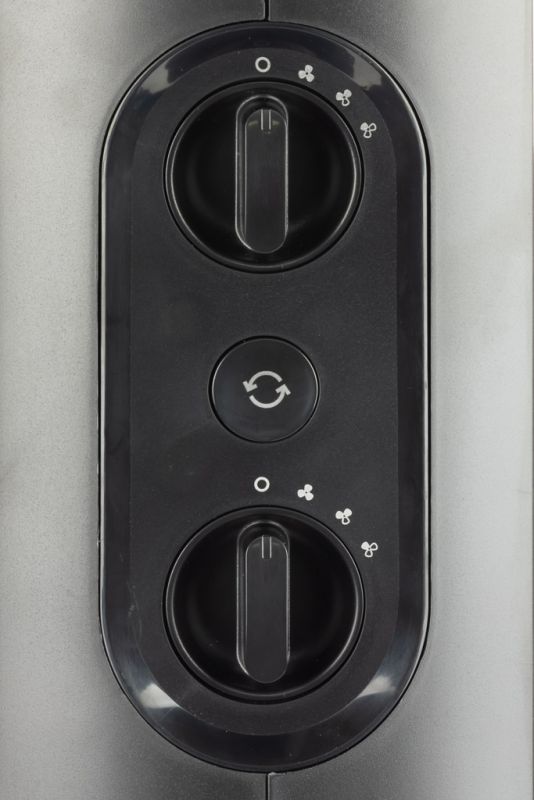
Each fan has a separate, easy to operate, 3-speed control knob. The unit has a separate on/off push switch for the oscillation feature instead of a rotating knob like some fans have.

This fan really moves a lot of air. My living room is 14’x20′ and this fan is plenty strong enough to not only move the air around, but I actually get chilled from it.

The oscillating tower design is nice in that it does not swing widely from side to side like other oscillating fans. This makes it not only operate in less space, but it does not have any distracting motion that you can see out of the corner of your eye.

What I like

  • The top tilt-adjustable fan is great
  •  4 position knobs (Off-Low-Medium-High)

What I’d change

  • Nothing I can think of

Final thoughts

Overall both my wife and I both love this fan. It moves the air around very nicely and it’s not very loud. It also eliminates the need for several fans. I like the fact that it’s a pretty standard design without any cryptic push-button features that are difficult to figure out. Simply plug it in, turn a knob and enjoy!

Price: $79.99
Where to buy: BestBuy and Amazon
Source: The sample of this product was provided by Honeywell.

Filed in categories: Reviews

Tagged: ,

Honeywell TurboForce Tower Fan Review originally appeared on The Gadgeteer on August 8, 2019 at 8:00 am.

Note: If you are subscribed to this feed through FeedBurner, please switch to our native feed URL http://the-gadgeteer.com/feed/ in order to ensure continuous delivery.

Ecovacs DEEBOT 500 robot vacuum review

REVIEW – Ever watch the videos of the cat riding around on a vacuum? Those cute little automated vacuums have been around for years, but I’ve stuck with my tried and true push vacuum. I had the opportunity to try the Ecovacs DEEBOT 500 robotic vacuum cleaner, and while my cats won’t sit on it for internet points, it did roam around sucking up all in its path.

What is it?

The Ecovacs DEEBOT 500 robotic vacuum cleaner is a cordless, hands-free vacuum. With the accompanying app, it can be remotely started or scheduled to clean the floors.

Hardware specs

  • Anti-Drop/Collision Sensors
  • Auto, Edge, and Spot Modes
  • Scheduled Cleanings
  • Automatic Charging
  • Up to 110 minutes run time and 520 mL dust bin
  • Works with Amazon Alexa and Google Assistant

What’s in the box?

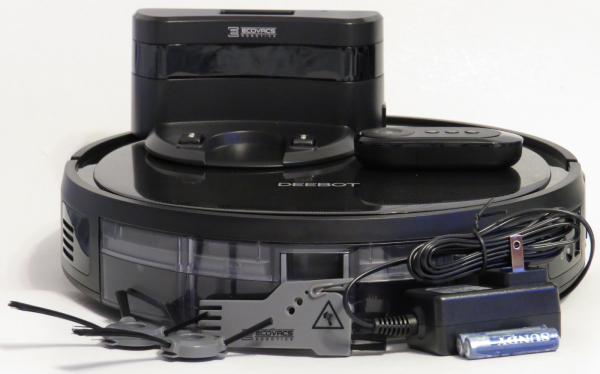
  • DEEBOT 500 robot
  • Charging Dock + Power Adapter
  • Side Brushes
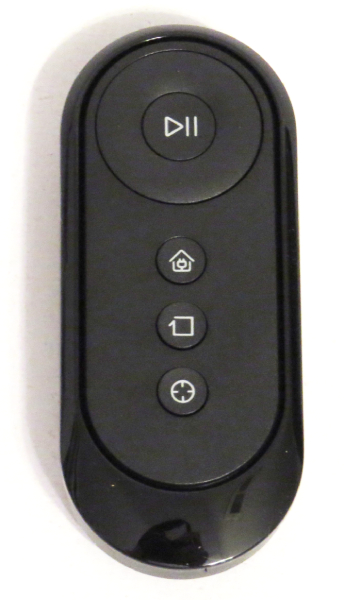
  • Remote Control w/ batteries
  • Cleaning Tool
  • Instruction Manual
  • Quick Start Guide

Design and features

With the included quick start guide, setup for the DEEBOT was a breeze. I sat it on the base and let it charge overnight while I got the app ready. While I couldn’t find the QR code to scan to easily identify my device, I was able to search it up on the app and pick it out via the picture/model. I then connected it to my Wifi on the app, which was easy, and I was ready to start scheduling cleanings.

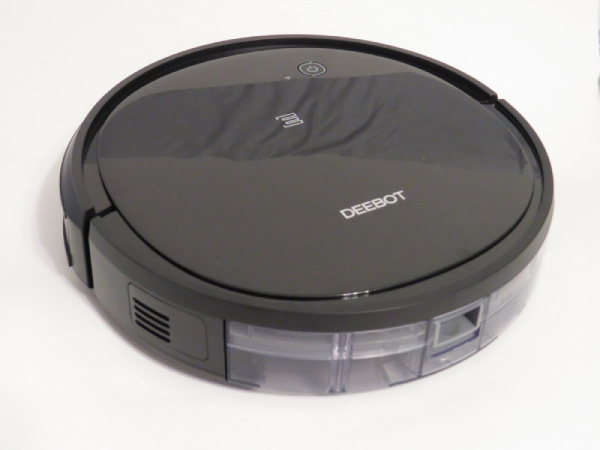
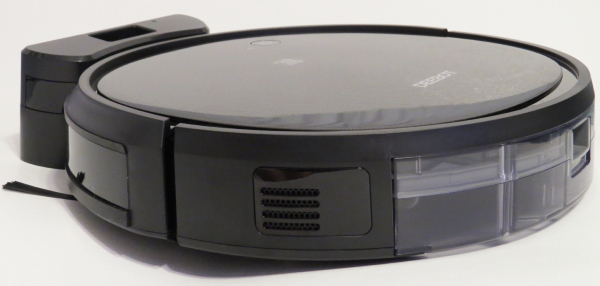
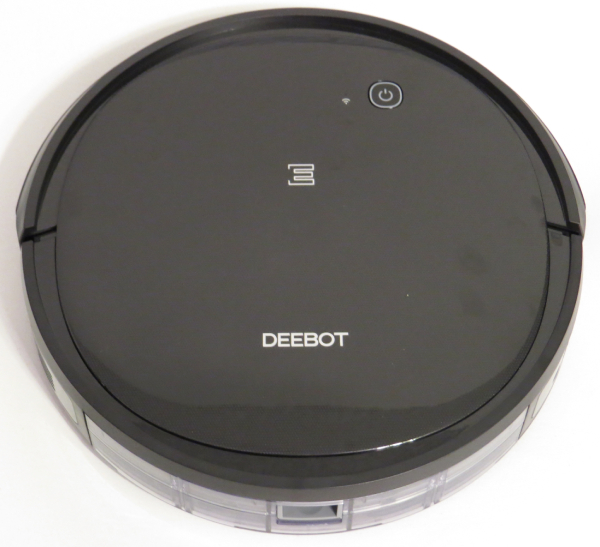
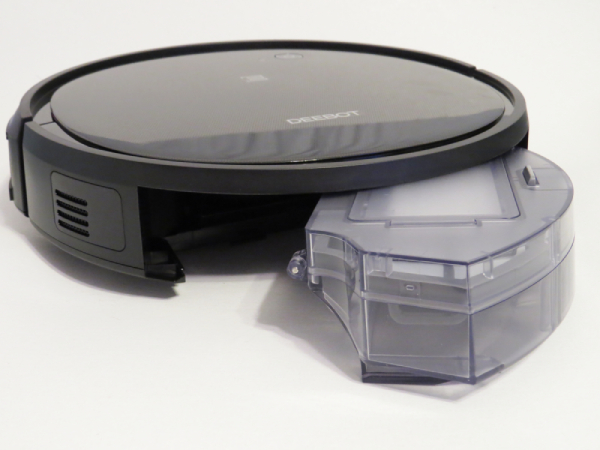
Before we start cleaning, let’s talk about the DEEBOT itself. It seems to be a pretty standard-sized, non-obtrusive looking vacuum, with minimal buttons. On top, you’ll find the main button, which will start a cleaning session, bring the DEEBOT out of standby, and is also used to indicate the vacuum status.

There is an on/off switch and a reset button on the side, and that’s all the buttons the vacuum has. The rest of the controls are on the app or remote control.

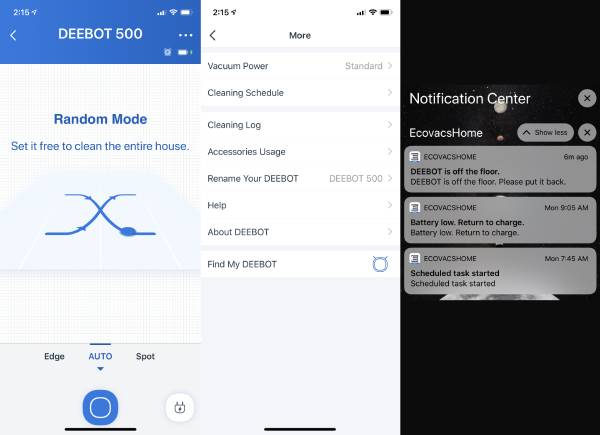
On the Ecovacs Home app you can control the mode you want the vacuum to run in; Edge, Auto (random), and Spot. Edge will just go around the edges of your room, Auto is the standard mode, and Spot will run in a spiral in a certain area that you place it. You can also check the battery level, schedule cleaning times, and change the suction power. Lastly, if you ever lose your DEEBOT in the house, you can press the Find my DEEBOT button and it will cause the DEEBOT to beep. You can also set up notifications to alert you when something is going on with the vacuum.

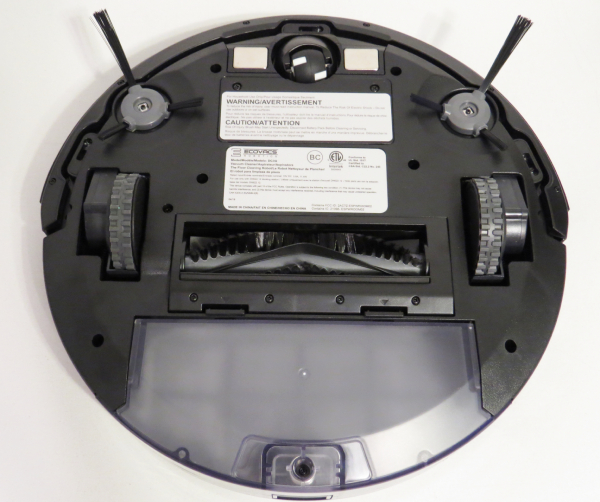
There are two side brushes and one main brush for vacuuming. The side brushes push the dirt towards the center where the main brush is. I noticed the side brushes tended to get tangled with hair, though it didn’t seem to affect the performance. The main brush stayed pretty clean.

The back of the vacuum has a pretty decent sized dust bin with built-in filters. I can’t tell if the air quality is better, but the big filter gets dusty pretty fast. It is really easy to remove, empty, and replace the dust bin. One thing I wish with the dust bin is that it would send a notification when the bin is full.

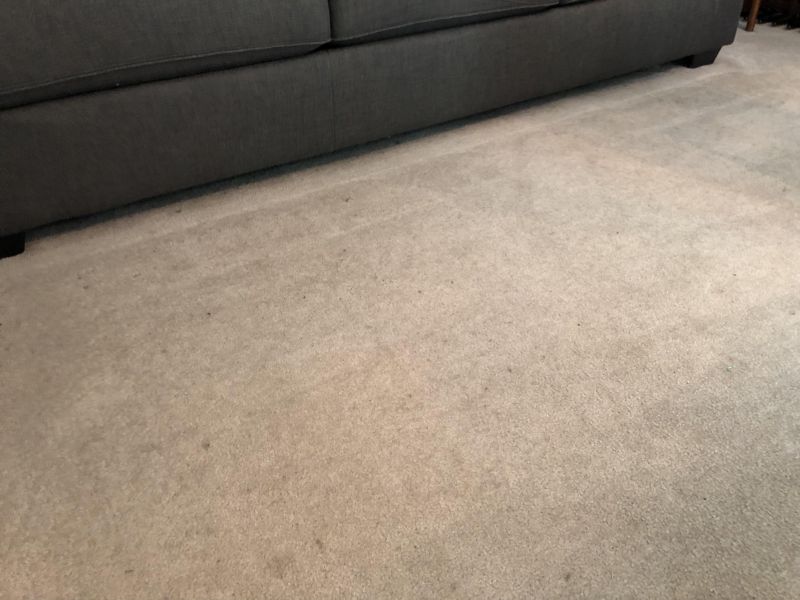
Before

Now, how much does this thing pick up? The first go around, it did a fantastic job navigating all around my small dining room area, except it missed one two foot square of carpet space. Since then, however, even if I clear out the area of all chairs and obstacles, it still misses the area to the right of the base. It’s a bit annoying, since the left side and in front of the unit gets very, very clean. Above and below are before and after pictures of a cleaning. As you can see, it cleaned up the dirt and cat hair very well.

After

The DEEBOT would run for a good 90-110 minutes before heading back to the charger. A few times it got ‘stuck’ going back to the charger, which baffled me. At one point it spent five minutes going around the leg of my kitchen table with nothing around it trying to get back to the base. It made it back before it ran out of juice, however. It took about 4-6 hours for the DEEBOT to fully charge after returning to the dock.

Since this is the standard model, there is no set pattern for how the DEEBOT scoots around on the floor. It will bump into things and turn to find another way. It does have stair detection, and will even stop and turn around when it finds a lip on the flooring, such as going from carpet to linoleum in my kitchen.

What I like

  • Easy to set-up/use
  • Scheduled cleanings
  • Seems sturdy

What I’d change

  • Will completely miss areas of carpet
  • Doesn’t inform when dust bin is full

Final thoughts

Overall, I had a difficult time figuring out whether or not I liked the DEEBOT 500 robot. Where it cleaned, it cleaned well, but despite moving around and clearing furniture, it would barely go over certain areas. This vacuum has a good start, but for the price, I would expect it to do a little better.

Price: $279.99
Where to buy: Amazon
Source: The sample of this product was provided by Ecovacs.

Filed in categories: Reviews

Tagged:

Ecovacs DEEBOT 500 robot vacuum review originally appeared on The Gadgeteer on August 7, 2019 at 9:00 am.

Note: If you are subscribed to this feed through FeedBurner, please switch to our native feed URL http://the-gadgeteer.com/feed/ in order to ensure continuous delivery.

EverlyWell at home lab tests review

REVIEW – Do you have questions about your health? Maybe you wonder how your body reacts to stress or if you’re sensitive to certain foods. Maybe you want to check your levels of vitamin D or even take an HIV test. Going through your family doctor for a variety of lab tests can be very expensive especially if they are not covered under you your health insurance plan. Is there another way to get health tests done quickly and without a huge expense? EverlyWell thinks so. To try their service, they sent me two of their at home lab tests to try, let’s check out the tests, the experience, and the results.

What is it?

EverlyWell is a company that offers physician-approved lab tests that you can do yourself in the privacy of your home without requiring a visit to your doctor’s office.

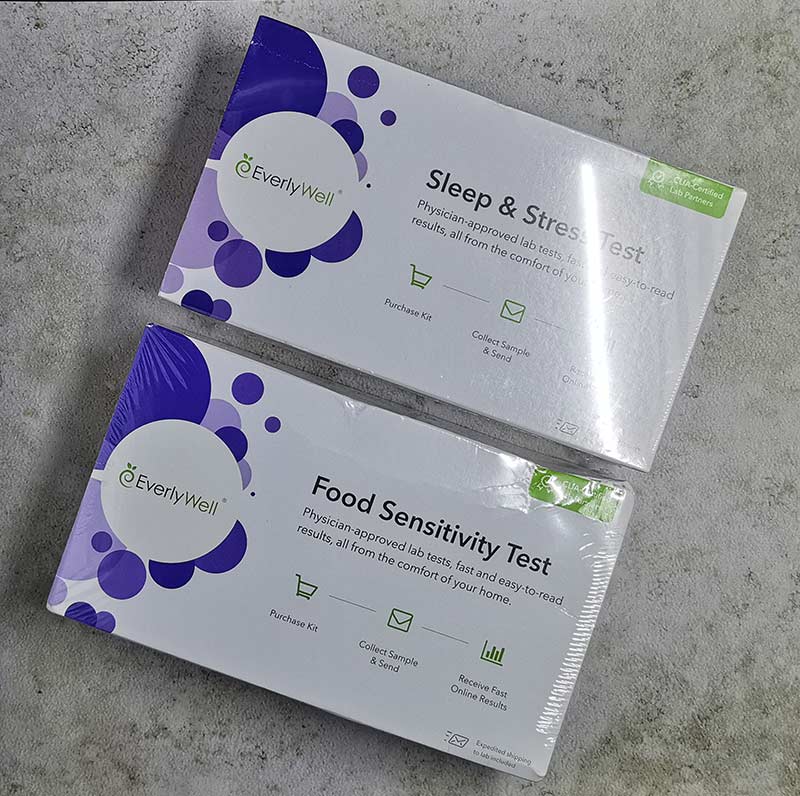
EverlyWell offers a wide variety of health tests like an HIV test, cholesterol test, Vitamin D test, Lyme disease test, and many more. I was sent a stress/sleep test and a food sensitivity test.

Sleep & Stress Test
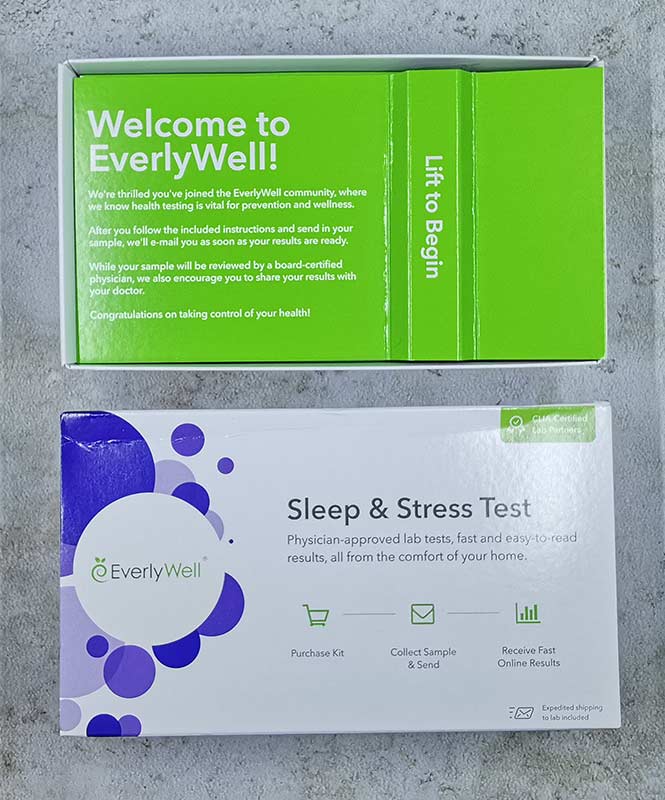
EverlyWell sent me their Sleep & Stress Test which provides some guidance on how four hormones that deal with stress and sleep change throughout the day and can affect your sleep.
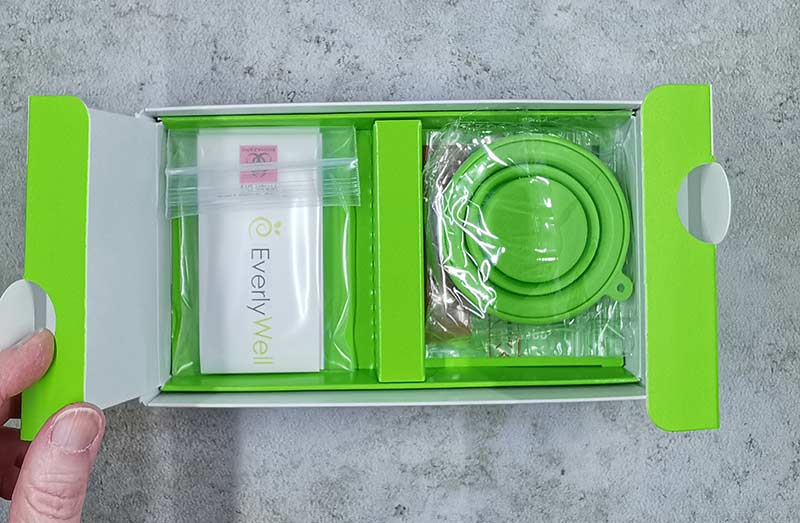
This test requires that 4 urine samples be collected throughout the day. Oh boy, I get to pee in a cup! Basically, you collect urine first thing after you wake up, again in 2hrs, again at dinner time in the evening, and one last time before going to bed.

Special filter paper is included with this test kit along with a collapsible cup. So you pee in the cup, place the paper in the cup, remove the paper, let it dry, and place all the dated/timed sample collection papers in a biohazard bag and ship them back to EverlyWell for testing.

Results

I mailed the completed test kit to Everlywell on a Monday and received the results four days later on Friday.  The sleep and stress test results provided levels info on the hormones Cortisol, Cortisone, Melatonin, and Creatinine (not a hormone) for each of the 4 collections. Although the results showed the levels, I was confused about what I should do with the info. Luckily, EverlyWell provides free help to understand the test results. They have online chat or one on one phone calls from a health professional who can answer questions and provide insight into the results.

I was able to schedule a call at a time that worked best for me and was called promptly at the scheduled time. I was able to ask all the questions I needed to ask to understand the results. It was interesting that she was asked if I watch a lot of screens before I go to bed because she could tell that one of the hormones was low at the before bedtime reading and suggested that I try to stop screen use 1-2hrs before bedtime. I don’t really have sleep issues, but I may try that tip just to see if my sleep can be improved even more.

Food Sensitivity test

First of all, it’s important that you understand that this test does not tell you if you are allergic to a food. Unlike food allergies, food sensitivities aren’t life-threatening, but they can cause a body immune response like skin problems, GI problems, headaches, body aches, bloating, etc hours, and even days after the food is consumed.  For example, if you are lactose intolerant, you won’t die if you drink a glass of milk or eat some ice cream, but doing so might leave you feeling bloated or cause other GI issues.

The EverlyWell Food Sensitivity Test tests the IgG reactivity to 96 foods that are commonly found in western diets. IgG stands for Immunoglobulin G which is an antibody which circulates our immune system and can trigger to show sensitivity to certain foods that we eat.
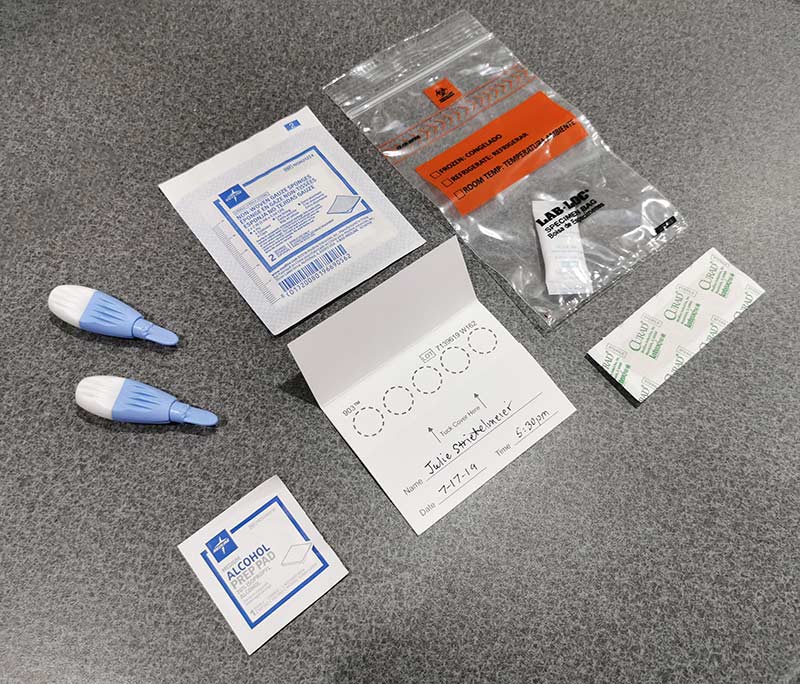
Each kit contains everything you need to collect the bio samples needed for the test and then mail them back to EverlyWell. Depending on the test, the package contains different items. The food sensitivity test includes:

  • Alcohol prep pad
  • Collection card
  • 2 lancets
  • Bandaid
  • Gauze pad
  • Biohazard bag
  • Return envelope and a paid return label
  • Instructions

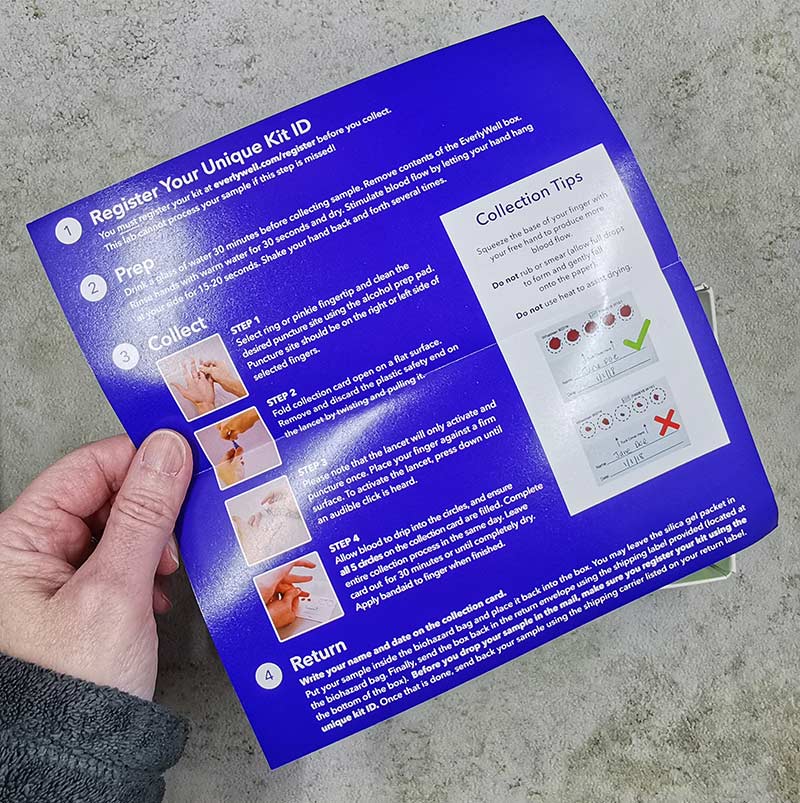
The tests also include easy to understand step by step instructions for collecting the samples.
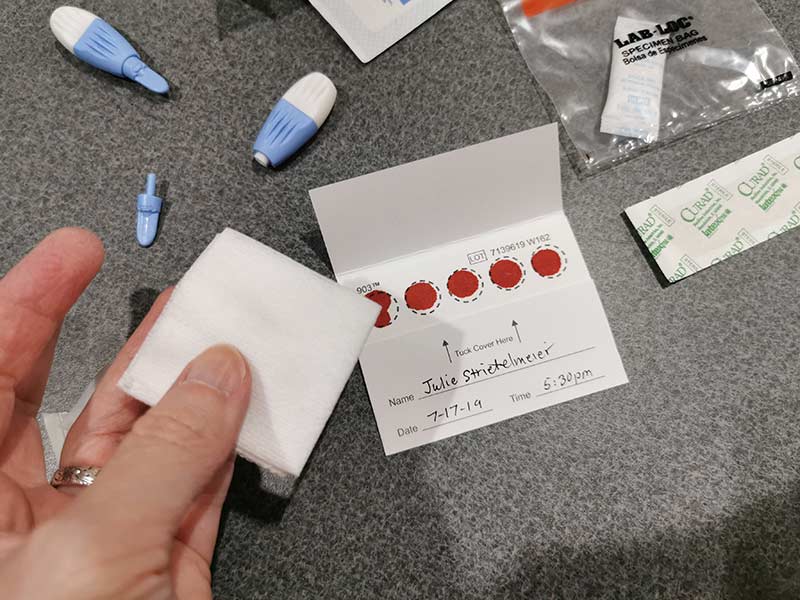
The Food Sensitivity test requires that you collect blood samples by using a lancet which is a small plastic device that has a tiny spring-loaded blade which pricks your finger so you can place 5 drops of blood on a special collection card.

Once the samples are collected, the card needs the patient’s name, date, and time written on it. Then the card is placed in the included biohazard bag and the bag is placed back in the box. The box is then placed in the included bag and the paid shipping label can be pasted on it. All that’s left to do at this point is to mail the test via USPS back to the lab and wait for the results which only takes 1-2 weeks give or take.

Results

The results are provided on EverlyWell’s website in an easy to read format. It should be obvious that results for any medical test will be different for each person. My results for the Food Sensitivity test surprised me quite a bit.

The test showed that I have a high reactivity/sensitivity to Brewers Yeast. Good thing that I don’t drink beer, eat much soy sauce, or vegemite which contain a lot of Brewers Yeast. I do however take B vitamin supplements which contain this substance.


Another food item that I’m supposed to be moderately sensitive to is oats. This really concerned me because I eat oats like… well, a horse! I have oatmeal many times a week and drink a lot of meal replacement shakes which use oats as a protein source.

Should I be concerned? It’s not like these eating these foods will kill me, but could they be causing some of the minor problems that I have taken for granted like sinus issues, and minor aches and pains?

Everlywell suggests that the best way to see if high and moderately reactive foods in the test results are causing you issues is to do a 2-part elimination diet where you stop eating the foods for 30 days and then reintroduce one food at a time to see if any symptoms are noticed.

You can also do a quick test where you eliminate the foods for just 4 days and then on the 5th day reintroduce one food, wait for 3-4 days to see if any symptoms are noticed and then add the next food back for 1 day and again wait 3-4 days for symptoms.

I’ll post an update to this review after my elimination diet time is completed. Right now I’m just doing the quick test because going 30 days without oats sounds terrible to me because I enjoy them so much. 😉

What I like

  • Easy tests that can be done at home
  • Relatively inexpensive
  • Fast results

What I’d change

  • Unsure of the usefulness of some test results

Final thoughts

I went into this review with a healthy dose of skepticism especially about food sensitivity test and after doing some research, I find that I’m not alone. While there are many people who rave about IgG tests and finding foods that have caused them many problems, I found articles from others, including doctors that say tests like the one I’ve reviewed here are unproven and controversial and can show many false positives. Here are a few articles that I found on the subject.

The myth of IgG food panel tests from the American Academy of Allergy, Asthma & Immunology

A ‘Shark Tank’-funded test for food sensitivity is medically dubious, experts say

IgG Food Intolerance Tests: What does the science say?

While tests from EverlyWell that test for things like Vitamin D levels, and sexually transmitted diseases seem like they should be accurate, tests like the Food Sensitivity test could actually be harmful if someone sees a bunch of foods that are so-called reactive and eliminate them from their diet. On the other hand, it’s possible that the IgG test can help a person find a culprit for chronic health problems. Can you tell that I’m on the fence on this one? For that reason, I’m trying the elimination diet just to see what happens. If my sinus issues and aches/pains disappear, by cutting out oats and vitamin B, you all will be the first to know. In the meantime, be careful with tests like the Food Sensitivity test. If you’re having health issues, it’s always best to consult your family doctor first before trying at home health tests.

Price: $49.99 and up. Varies depending on the test
Where to buy: EverlyWell and Amazon
Source: The sample for this review was provided by Everlywell.

Filed in categories: Reviews

Tagged:

EverlyWell at home lab tests review originally appeared on The Gadgeteer on August 6, 2019 at 9:32 am.

Note: If you are subscribed to this feed through FeedBurner, please switch to our native feed URL http://the-gadgeteer.com/feed/ in order to ensure continuous delivery.
Voamoko Type-C Wireless Numeric Pad with USB Hub review

REVIEW – Do you wish your laptop had a real number pad on it? There are definitely times where I’ve had a project pop up during a trip where a full size keyboard was nowhere to be found. Voamoko’s Type-C Wireless Numeric Pad with USB Hub might just be the solution that you can keep in your bag without taking up much space.

What is it?

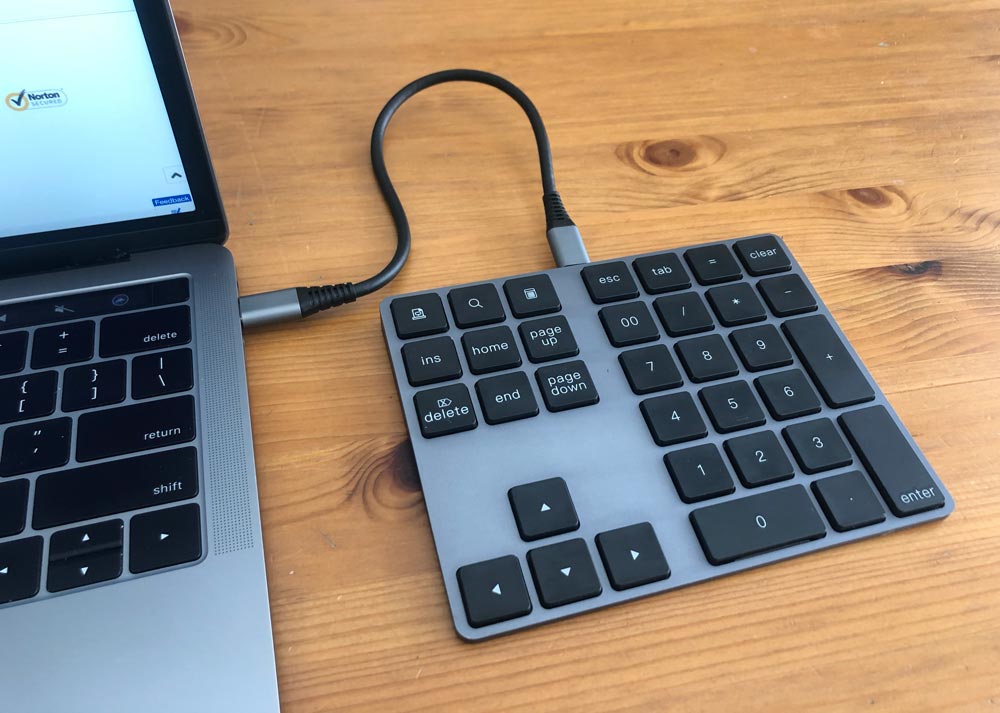
The Type-C Wireless Numeric Pad with USB Hub is a portable number pad that you can use with your laptop for the feel of a full size numeric keyboard without the bulk. The built-in USB hub adds some needed backwards compatibility to newer computers.

What’s in the box?

  • Numeric key pad
  • USB cable (Type-C to Type-C)
  • User manual

Hardware specs

Support: Windows/macOS/iOS/Android (Some shortcut keys are not supported on macOS & iOS)
– Keyswitch life & response: 500 million strokes times & 5 millisecond
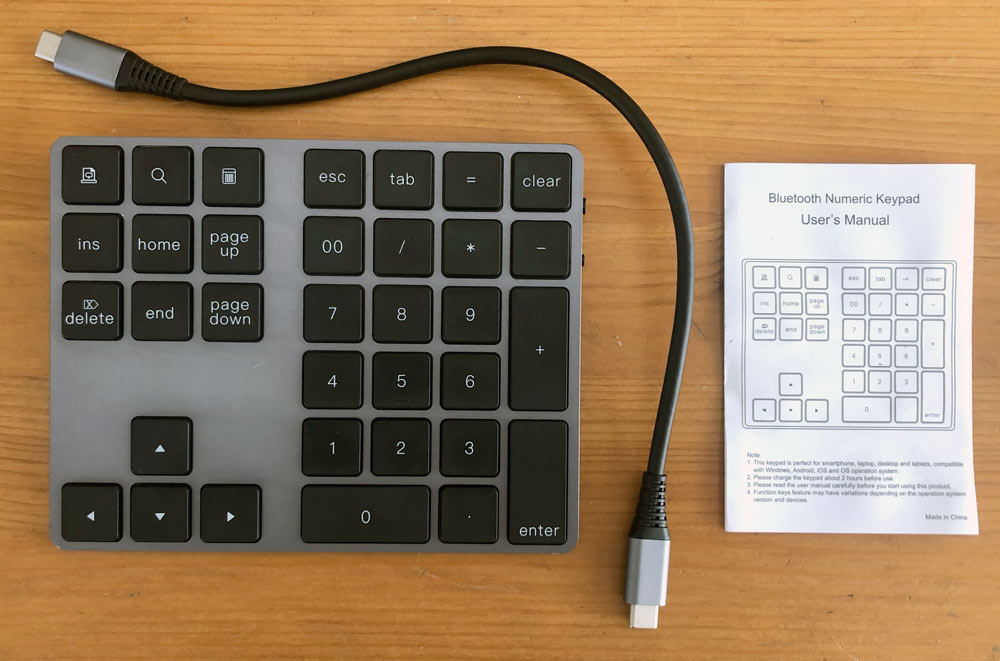
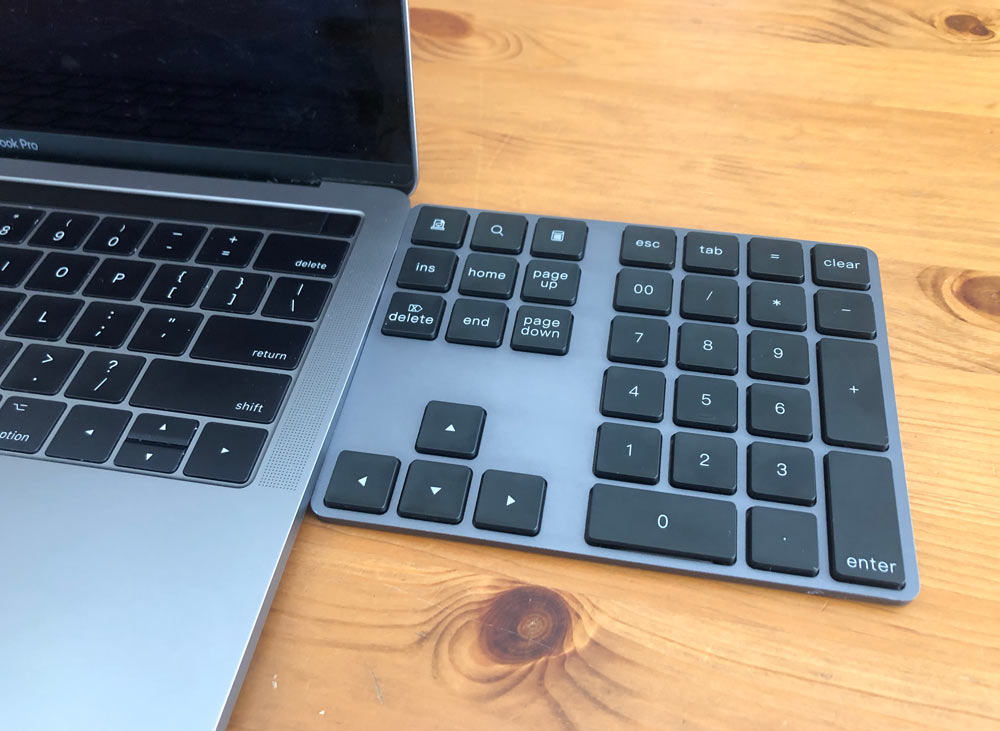
Design: 34 key aluminum keypad
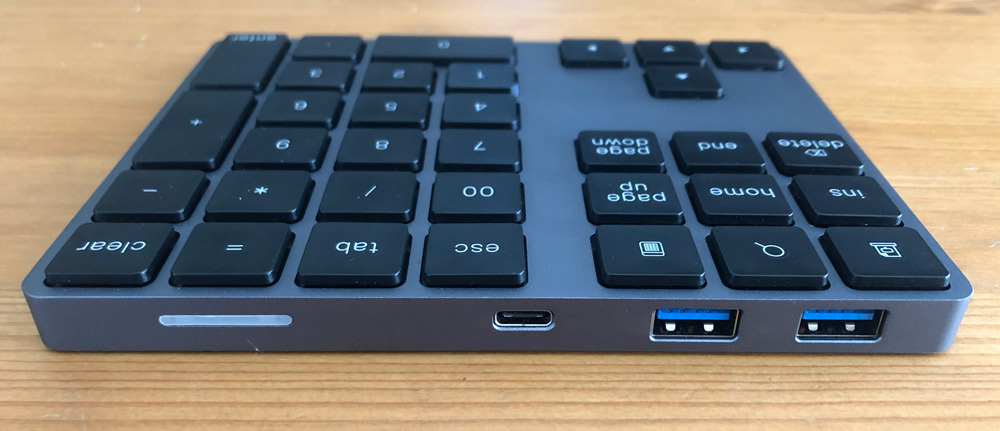
USB hub: Two USB-A 3.0 ports (when connected with USB-C cable)
Wireless: Bluetooth 3.0 for keypad only functionality
– Controls: Power switch, BT pairing button and LED indicator
Power: Input of 5V at 100mA, Output at 900mA per port
Duration: 2 hours to charge, 50 hours use, ~2 months standby
 Dimensions: ~ 5.5″ x 4.5″ and 0.5″ at top of the ramped design

Design and features

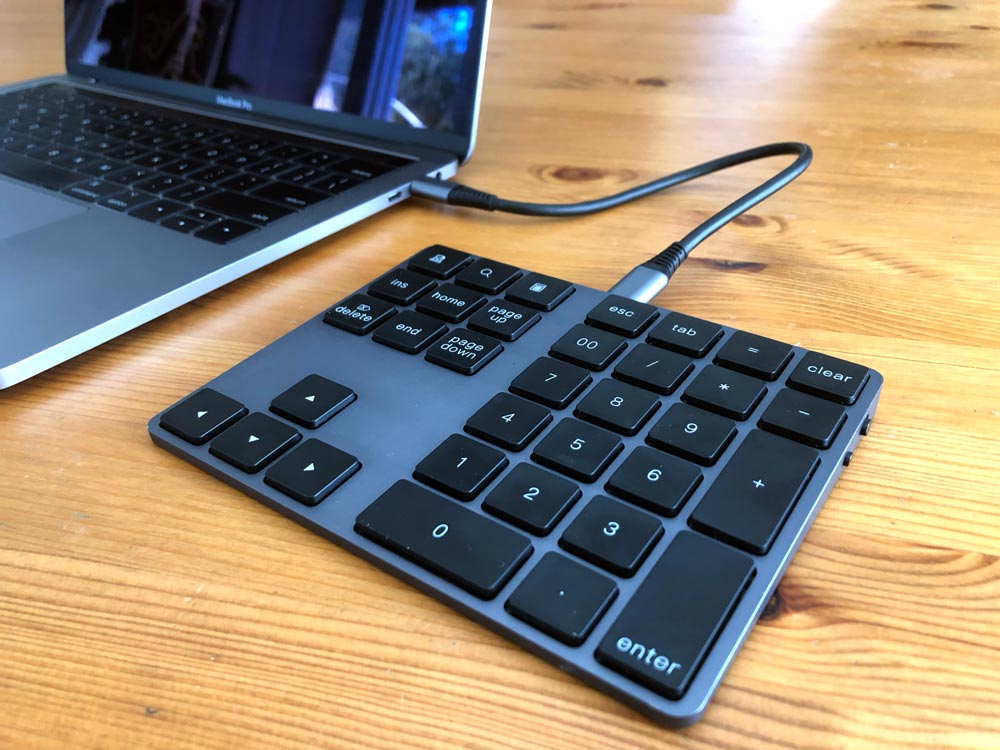
Voamoko’s numeric pad was clearly designed to aesthetically match MacBooks from Apple. It’s available in both silver and space gray so you can complete your kit. It’s also compatible with PCs running Windows and iOS devices.

The solution provides a true number pad for anyone craving that extended keyboard feel that’s missing from almost all laptops. Because it’s Bluetooth you can move it exactly where you need it.

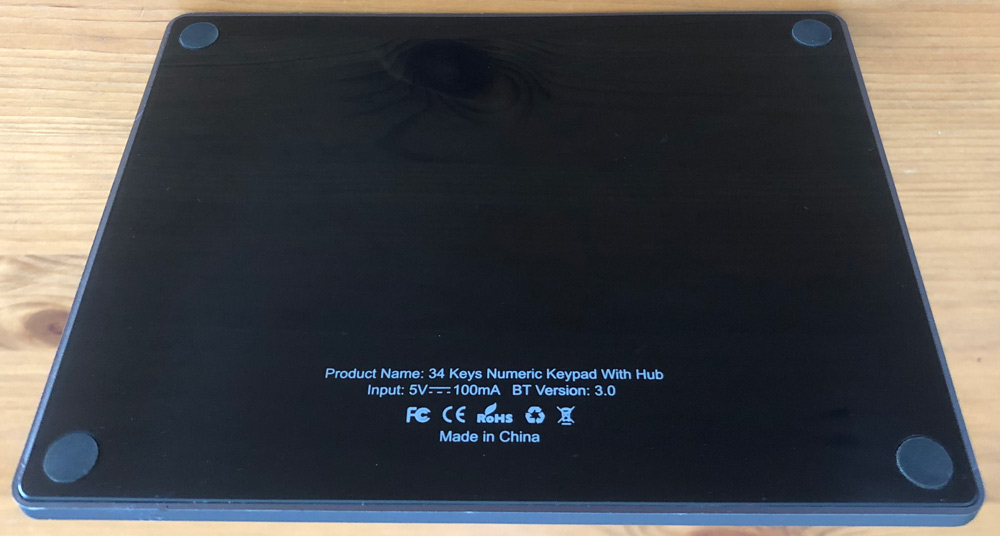
The bottom is plastic which helps with wireless signals and the four rubber feet keep it from moving around.

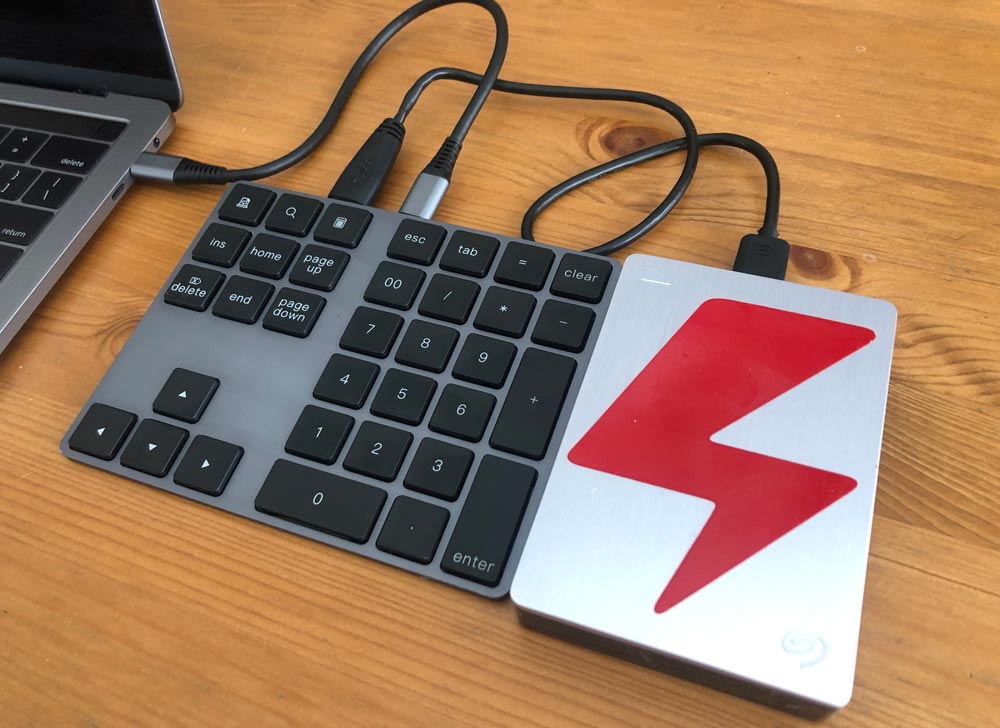
It also adds two USB-A ports when connected with the included USB-C to C cable, which makes it easier to continue using any peripherals you haven’t upgraded to USB-C.

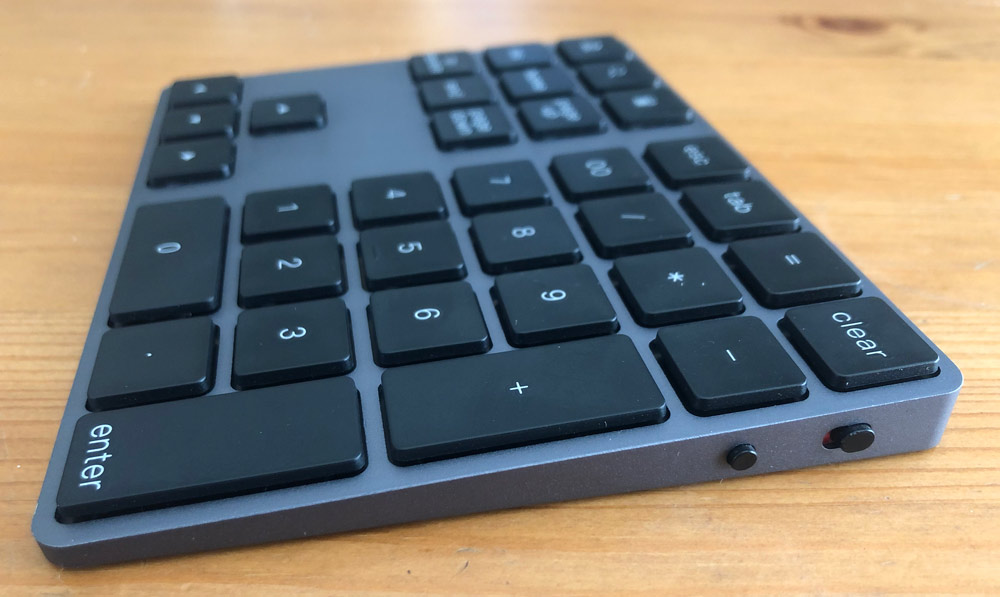
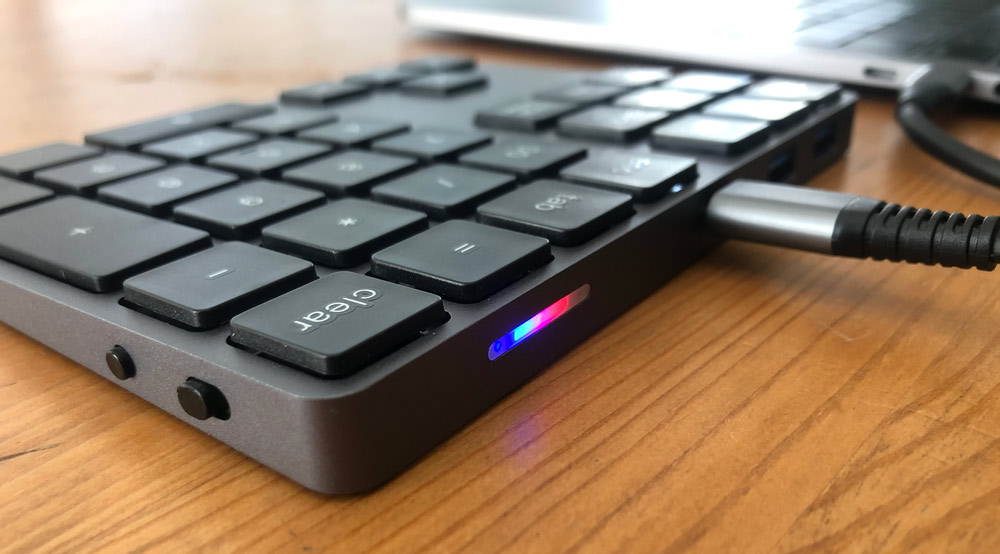
A power switch and a paring button can be found on the right side where you can see the tapered design very similar to the Apple Magic Trackpad.

Setup

First you’ll need to connect the keypad’s USB-C cable and connect it to your computer or a wall adapter.

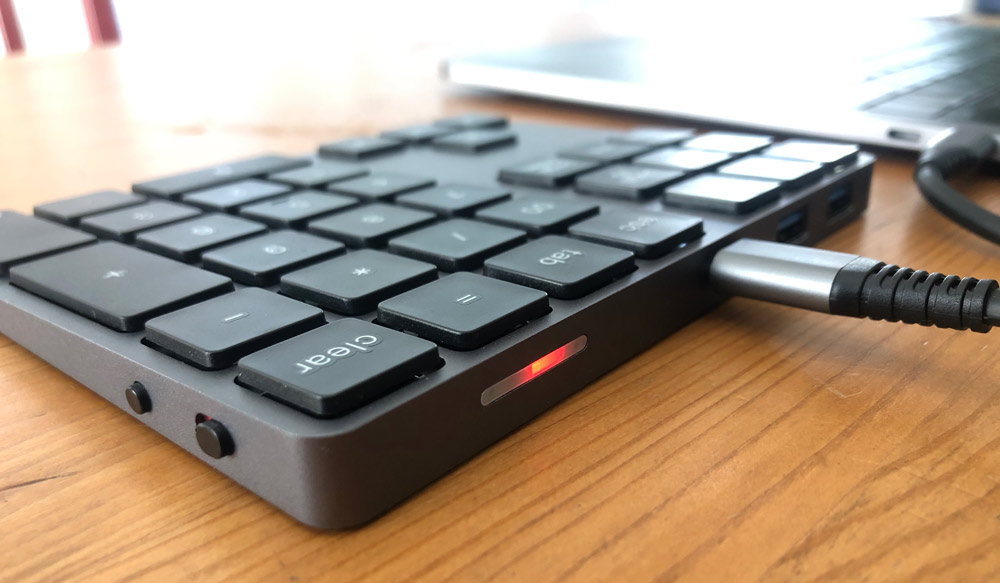
You’ll see a solid red light at the back of the keypad confirming it’s charging. Allow about 2 hours for a full charge. Note that you will not be able to use the keypad until you setup Bluetooth.

Slide the switch so that green is showing (instead of red) and then press the small round button to place it in pairing mode. On the back you’ll now see a flashing blue light next to the red light. On you computer open your Bluetooth preference panel, look for “Bluetooth Keypad” and click connect.

Performance

I use a standing desk and a large monitor at work with Apple’s Magic Trackpad 2 and full-size Magic Keyboard with Numeric Keypad. It’s a great setup as I work in spreadsheets and gantt programs regularly. The funny part is that I’m actually not at my desk for the majority of the day. When I’m in meeting rooms and elsewhere I’m limited to the numbers along the top of my Macbook Pro. Definitely works, but it’s just not the same as having a number pad when you’re really trying to enter numbers quickly and accurately.

The Voamoko Numeric Pad straight up solves this problem. It’s lightweight, small and fits in a back pocket or between your hand and the laptop you’re lugging around anyway. Just place it next to your computer and switch it on.

When placed directly next to the right side of my 15″ laptop it’s lays out just like the keys on my Magic Keyboard.

The USB hub is a great feature as you likely have some hard drives, peripherals or that USB-A to lighting cable that came with your iPhone that you connect to your computer with some frequency. It’s a welcome benefit that doesn’t add volume to the keypad in any negative way. It does mean that you need to keep that cable handy or always hanging out of the back of the keypad.

That included cable is short (only x inches) with straight connectors. I connect it to the right side of my laptop since I’m right handed. Does that mean that this could be a great solution for left handed users? As “I’m am not left-handed” (Princess Bride sword fighting scene playing in my head now), I can’t speak to if that would actually be a benefit since you’re likely used to standard key layouts. But back to my previous point, connecting it to the right side ports pushes it further away from my laptop to a point that it starts to feel awkward.

This is either not an issue at all, or an easily remedied problem. If you are only using the number pad functionality and charge the keypad when not it use, you won’t run into this issue. If you want the USB hub functionality, a cable with a 90º connector on the computer end of the cable, or just a longer cable that can reach around to ports on the left side will solve the problem.

As for the actually hub functionality, the USB 3.0 seems to work great. I connected a 3.0 Seagate drive through the keypad and moved a large file (1.36GB) from my computer to the drive in about 10 seconds.

There also seems to be no issue using both USB ports simultaneously. As with any hard drives, make sure your cables are fully pushed in and try not to bump things around while working with them. They all tend to disconnect way too easily.

I was also able to easily pair it with my iPad Pro. I’m not sure I’ll be using it in that scenario very often, but it’s great to know that it can. Finally, there is no backlighting on the keypad which is to be expected, but just wanted to make sure you know.

What I like

  • Number pad with my laptop!
  • Lightweight and low profile
  • Wireless in number pad only mode
  • USB 3.0 hub when used with cable

What I’d change

  • Longer cable to reach to far side of laptop

Final thoughts

If you miss having a numeric pad when you’re on your laptop, this is a great solution. If you need a USB-A 3.0 ports on your laptop, this is a great solution. Either of those alone plus the solid build quality, portability and price puts the on the Voamoko Type-C Wireless Numeric Pad with USB Hub on the recommended list for me.

Price: $49.99
Where to buy: Amazon or Voamoko
Source: The sample of this product was provided by Voamoko.

Filed in categories: Reviews

Tagged: , ,

Voamoko Type-C Wireless Numeric Pad with USB Hub review originally appeared on The Gadgeteer on August 6, 2019 at 8:00 am.

Note: If you are subscribed to this feed through FeedBurner, please switch to our native feed URL http://the-gadgeteer.com/feed/ in order to ensure continuous delivery.
Panther Vision PowerCap 2.0 review

REVIEW – For those of us of a certain age, the need for wearable illumination with a wide vertical field to light both fields of view in our bifocals is very important. For years I have been struggling to find a good single-point method that doesn’t require me to adjust the light to provide both distance and reading illumination. Let’s see if the Panther Vision PowerCap 2.0 baseball cap with integrated LEDs fits the bill (pun intended).
What is it?

The Panther Vision Power Cap 2.0 is a ball cap style hat with an LED light built into the brim / bill of the cap. The Power Cap is advertised as a “Headlamp in a Hat.”

What’s in the box?

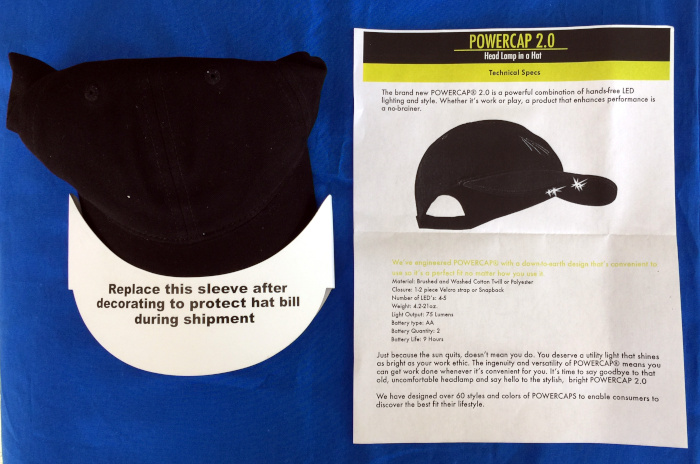
The Power Cap that I received is a black, hook-and-loop adjusting cap. The bill of the cap was protected with a cardstock sleeve that is intended to protect the LED light and its wiring during shipping. A one-page descriptive flyer was also included in the box.

Hardware specs

The PowerCap 2.0 weights approximately 22 ounces when loaded with 2 AA (LR6) batteries. The maximum light output of 75 lumens. Estimated battery life is 9 hours in mixed power-level use.

The PowerCap is available with either a snapback or Velcro strap to adjust sizing.

Design and features

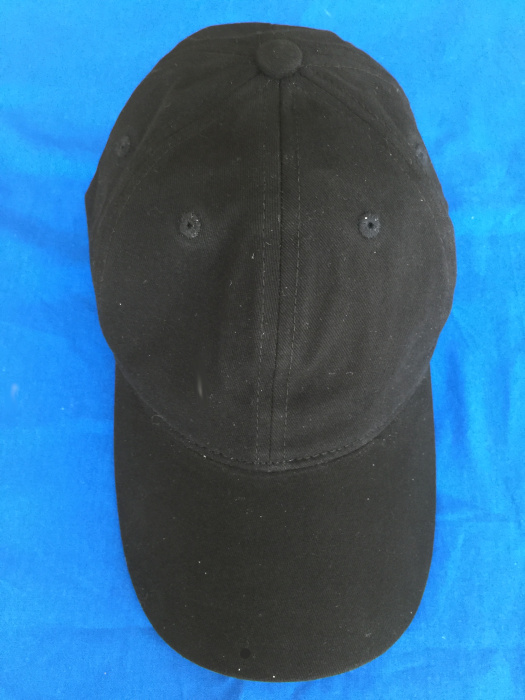
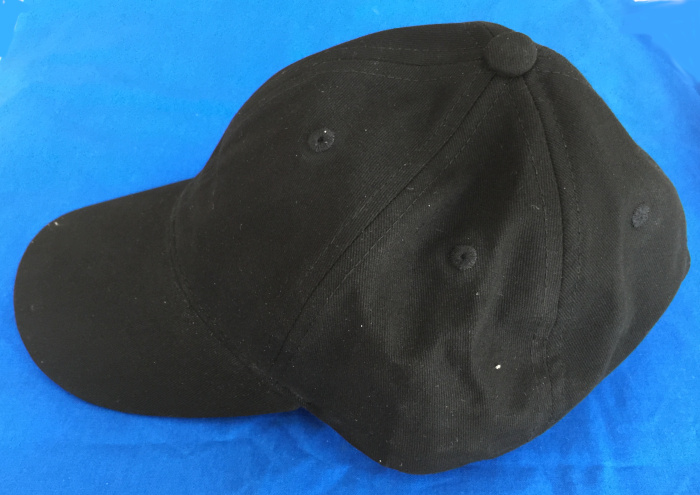
I was sent a plain black, Velcro strap PowerCap 2.0 made from brushed and washed cotton twill with a two-piece Velcro strap that is used to adjust the fit of the cap.

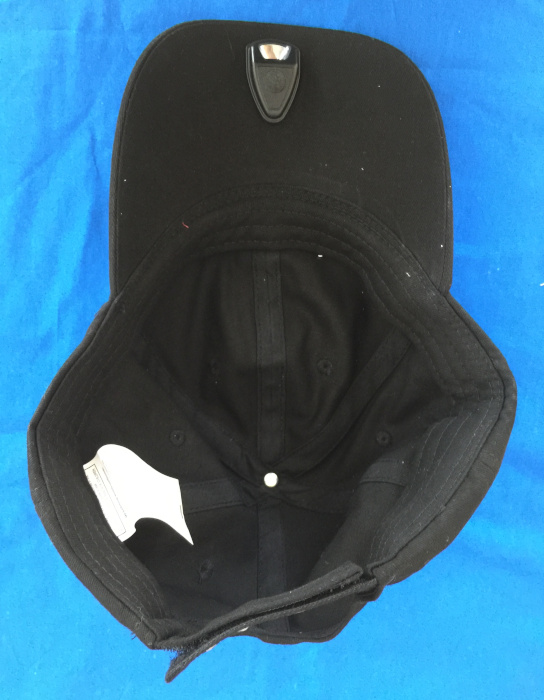
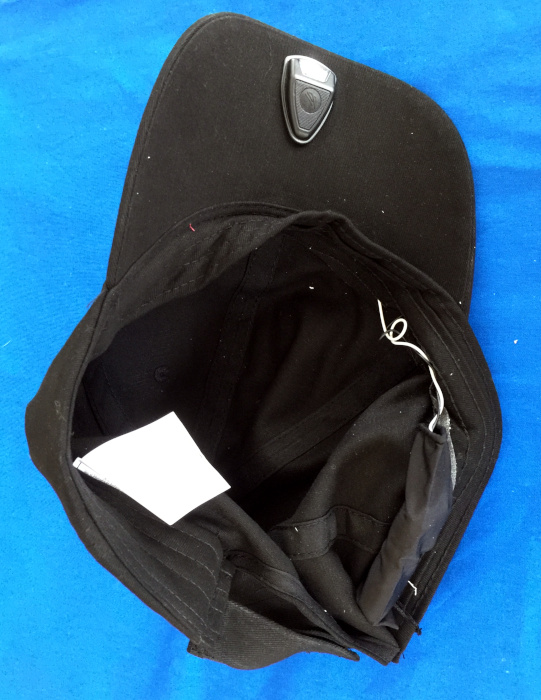
The cap has a single LED module with an integrated switch in the front center of the bill with wires running inside the cloth of the bill and around the side of the cap inside the sweatband. The batteries are housed in a standard AA battery holder that is housed in a cloth sleeve that keeps the battery pack contained in the hat. The battery holder rests just above the sweatband inside the hat, but is noticeable, both visually and by feel when wearing the cap. However, the battery pack does not make the cap uncomfortable, but it does take a period of adjustment.

The location of the battery pack means that the cap is balanced front-to-back better than most headlamps or lights that clip onto the bill of caps (I have about 15 different models of headlamps and clip-on lights and most have a tendency to slip with use).

I would like to see Panther Vision offer the PowerCap with a flex-fit back in addition to the Velcro strap and Snapback size adjusting systems. While I have the beginnings (or early middle) of male-pattern baldness, I still have sufficient hair on the back of my head that it sticks out uncomfortably through the little hole between the adjuster and the body of the cap. This is a general critique I have of most adjustable caps, not just the PowerCap.

The cap is water resistant and hand washable, but the batteries must be removed before immersing the cap for an extended wash.

The PowerCap 2.0 differs from the first generation PowerCap design which sport a larger 2 LED module which spaces the lights out across the bill of the cap placing one roughly over each eye. I find this dual light system distracting due to the dual shadows created by the widely-spaced LEDs.

Performance

Until now, I have been unimpressed with the caps with integrated lighting. At various times, I’ve looked at models with multiple LED lights that cast weird shadows or that don’t cover both near and far parts of my field of vision. Some use coin cell batteries that run down quickly while others place the batteries in positions that make the cap unbalanced or just uncomfortable. I have been equally unimpressed with wearing traditional headlamps over the top of ball caps because the bill of the cap tends to block the light needed for close-up work and the elastic straps have a tendency to either pull the light out of position or pull the whole cap back off of my head. My solution for the past few years has been to attach third-party clip-on lights to my existing hats and caps. My lights of choice have been lightweight models that won’t alter the balance of my hat/cap significantly but eat coin-cell batteries and have a limited lifespan. The PowerCap 2.0 has checked off all of the boxes toward being my unicorn cap (not to be confused with the Figment hat that I purchased at Epcot).

I have been using the PowerCap for several weeks now in situations from crawling around in my attic to wire a new garage light,  to checking my pool pump in the middle of the night, to looking for a dropped pen under my desk, to trips to the latrine on camping trips. It has performed well in all these scenarios (maybe a little too well when camping, I’m not sure I wanted to see all of the latrine’s details).

The LED module on the PowerCap 2.0 has a single LED and a large round button that serves to cycle the LED through a typical Off-High-Medium-Low-Off pattern. There is a significant step down in lumens from the high to medium setting and a smaller step down between medium and low. I do not have a light meter to give you the specific reading, but the pictures below, show the setting in a dark test environment–my master bath WC / shower which is the only room in the house without either a window or skylight. The band across the top of the pictures is due to the brim of the cap (50%) and the top bar of the sliding shower door (50%). The pictures show the cycle of off-high-medium-low.

The difference between medium and low is greater than the pictures suggest.  The only time I really use the low setting is for those midnight trips to the latrine when camping (after the first visit).

I would like to see a more intelligent switch design that lets me rapidly cycle through the various light intensities and then switch to an on-off mode after say 10 seconds without pressing the switch. For example, it would be nice for the system to allow me to press the switch button twice to select the medium illumination level and then in two minutes when I’m done with the light, just press the button once more to switch it off, rather than having to cycle through low before arriving at off. It would also be nice if the electronics remembered what setting I last used and return to that setting when I next turn on the light.

What I like

  • Overall comfort
  • Good light coverage (it illuminates both the  distance and reading portions of my field of view through my bifocals)
  • Single point of light rather than multiple
  • Uses AA (LR6) batteries rather than coin-cell for longer battery life

What I’d change

  • I would prefer to see the hats available in flex-fit style
  • Battery pack could be better padded and/or possibly relocated
  • A more intelligent switch that doesn’t require cycling through the different illumination levels to turn it off.

Final thoughts

I find the Panther Vision PowerCap 2.0 to be a big improvement over both the previous generation of PowerCaps and lights that clip on the bill of your existing cap.  I also like it better than traditional headlamps because they don’t work well when worn over the top of a cap, specifically because the bill of the cap blocks the illumination from the headlamp for close up work. I anticipate purchasing many of these to be given away as gifts in the 2019 holiday season.

Price: $29.99
When available: It will be available at Bass Pro Shop, Cabela’s, Dick’s Sporting Goods, and Field & Stream shops by August 5. It will be available at LL Bean by mid-August.
Where to buyPanther Vision, Amazon, Dick’s Sporting Goods, and others.
Source: The sample of this product was provided by Panther Vision.

Filed in categories: Reviews

Tagged:

Panther Vision PowerCap 2.0 review originally appeared on The Gadgeteer on August 5, 2019 at 10:13 am.

Note: If you are subscribed to this feed through FeedBurner, please switch to our native feed URL http://the-gadgeteer.com/feed/ in order to ensure continuous delivery.