Plotagraph iOS image animation app review

The iPhone’s camera can take amazing pictures, but if static images bore you and you want to take your photography up a notch, you need to check out Plotagraph.

What is it?

Plotagraph is an easy to use image animation app for the iPhone or iPad.

How does it work?

First, you take a static image that can be improved with an animated element. The image above looks fine as it is, but wouldn’t it be cool if the water showed movement? Plotagraph can’t do that with just a few clicks.

The app has a very simple interface with the tools at the bottom.

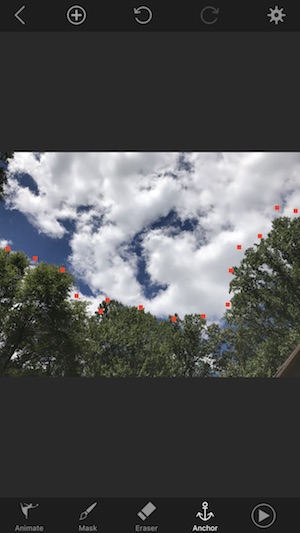
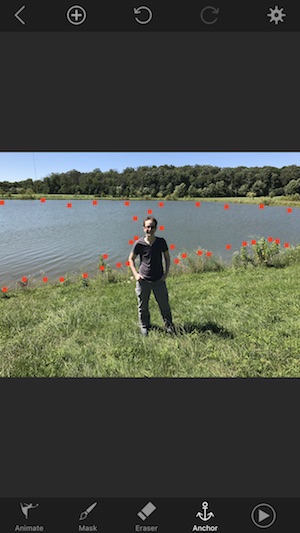
I like to anchor or mask all the parts of the image that I don’t want to animate first. This is can be done using the mask or anchor tools at the bottom of the screen. I like the anchor tool best. All you do is tap around the areas that you don’t want to move.

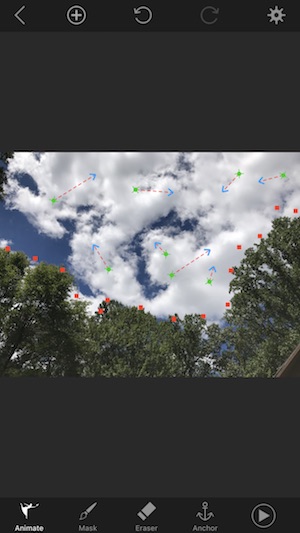
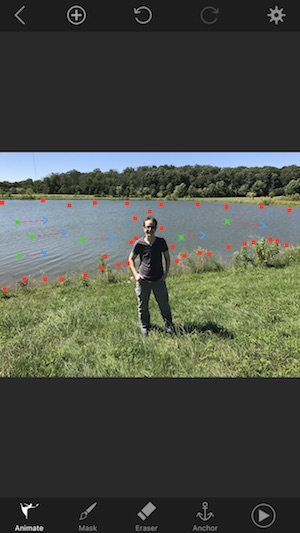
Then you use the animate tool to draw little lines in the direction that you want the image to move. That’s it! When you press the play button, you’ll see the results which are pretty freaking cool. I’ve exported this example as a 3 second MP4 video clip below.

Pretty cool right? The app will also let you crop the image and adjust the speed of the animation.

Let’s do another.

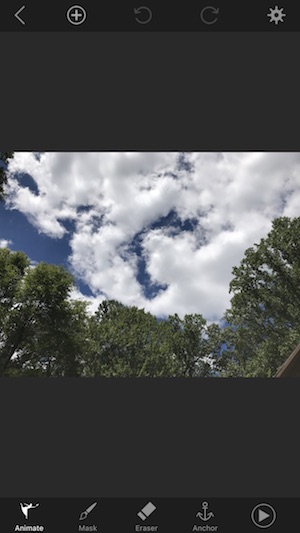
Water and cloud images are a good choice to animate.

Load the image from your existing camera roll.

Mask off or anchor the area of the image you don’t want to move.

Draw some animation lines.

And check the results. This app is a lot of fun because it’s so easy and fast to use.

Here’s another one saved as a PNG.

In the Plotagraph app, you can choose different time lengths for the clips and export them to your device’s camera roll as an MP4 video or animated PNG. You can then submit them to your favorite social media sites like Instagram or Facebook. Unfortunately, you can’t share directly to those sites from the Plotagraph app.

Watch the video below which shows the whole process.

Final thoughts

I had a lot of fun playing around with the Plotagraph app on my iPhone 7 Plus and my iPad Pro 10.5. Animate images like this remind me of Harry Potter. 😉

I found it was easier to use the app on the iPad Pro just because the screen is larger and it’s easier to do a better job masking off areas that you don’t want to animate. With the iPad Pro, you can also use the Apple Pencil to make things even easier.

If you’re wondering why I haven’t mentioned using this app with Android device, that’s because this app is not available for Android devices yet. Supposedly a version for Android is in the works but there’s no info when it will be available.

Source: The sample for this review was provided by Plotagraph Inc. Please visit their site for more info and App store to buy it.


Product Information

Price: $4.99
Manufacturer: Plotagraph
Retailer: App store
Requirements:
  • iOS device
Pros:
  • Easy to use
  • Transforms old photos into living photos
  • Can't see where there loop starts and ends
Cons:
  • Can't share directly to social media from app
  • No Android version

Filed in categories: Reviews

Tagged: , ,

Plotagraph iOS image animation app review originally appeared on The Gadgeteer on July 31, 2017 at 9:00 am.

Note: If you are subscribed to this feed through FeedBurner, please switch to our native feed URL http://the-gadgeteer.com/feed/ in order to ensure continuous delivery.

Hasselblad True Zoom Camera Moto Z Mod review

When you shop for a new smartphone, do you base your decision on how good the camera is? It’s a determining factor for me. I wouldn’t consider buying a phone that has a sub par camera because my phone is my main camera. That’s why I’ve been fascinated with camera accessories like clip on lenses that might improve my images and when Motorola and Hasselblad created the True Zoom camera Moto Mod, it perked my interest and I was happy to get the chance to try one out for a few days. Let’s take a look.

What is it?

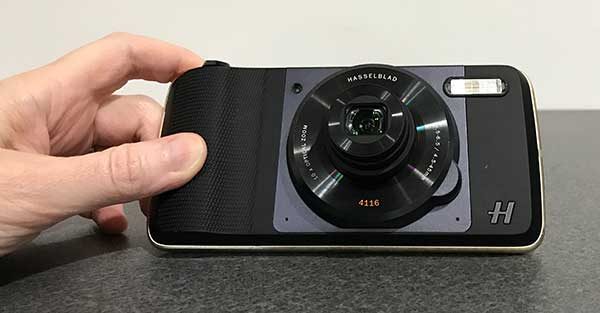
The Hasselblad True Zoom is a Moto Mod for Motorola Moto Z smartphones that turn the Moto Z into a true pocket camera with a zoom lens.

This quick review isn’t going to be super technical because I’m not a professional photographer and I don’t know all the ends and outs of lenses and camera gear. I just am a casual photo snapper who mainly uses automatic mode to snap a few images every day. But I am always interested in making those images look better with the least amount of effort.
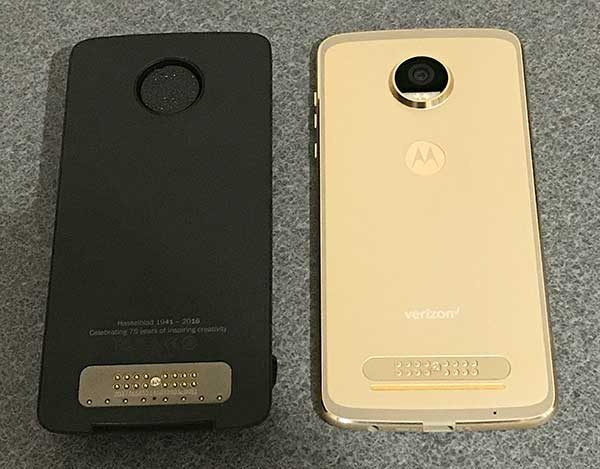
You probably already know what Moto Mods are by now, but just in case you don’t, they are magnetic attachments for Motorola Moto Z phones that offer extra functions and customizations. There are decorative covers for the back of the phone, Bluetooth speakers, projectors, gaming controllers, and more.

The Hasselblad True Zoom Camera Moto Z Mod shown above on the left has electrical contacts that match up with contacts on the back of a Moto Z phone to create an electrical connection. The mod is also magnetic which allows it to attach to the back of the phone without clips or latches.
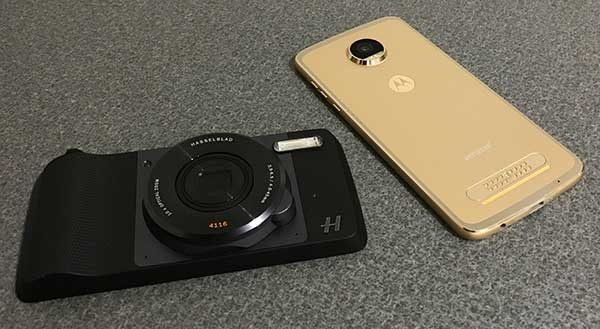
At first glance, the True Zoom looks like a point-and-shoot camera. But upon closer inspection, you will notice that it doesn’t have a viewfinder, a display or a memory card slot. That’s where the Moto Z comes in.
The True Zoom snaps securely to the back of the Moto Z to turn it into a full fledged 12MP camera with 10x optical zoom, a xenon flash, shutter button, and zooming mechanism.

What’s in the box?
Hasselblad True Zoom Moto Mod
Protective carrying case
User guide

Camera specs
Sensor type: BSI CMOS
Sensor size: 1/2.3-inch
Pixel size: 1.55 um
Aperture: f3.5-6.5
Zoom: 10x optical/4x digital
Focal length: 4.5-45 mm (25-250mm 35mm equivalent)
Macro: 5cm @1x – 1.5m @10x
Image stabilization Still: OIS Video: EIS
ISO equivalent: Auto, 100, 200, 400, 800, 1600, 3200
Dimensions: 152.3 x 72.9 x 9.0 – 15.1 mm
Weight: 145g
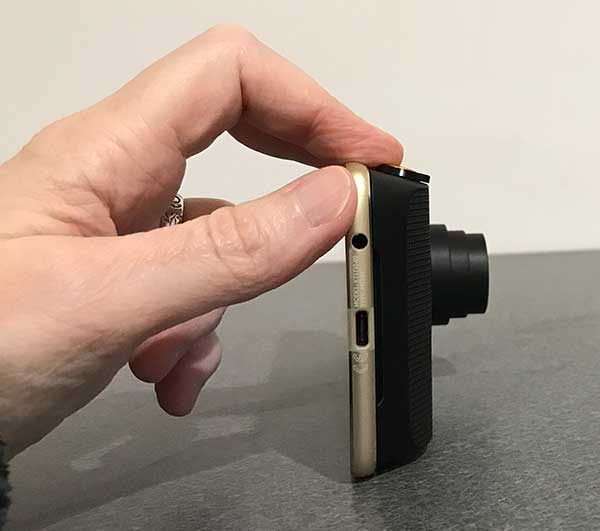
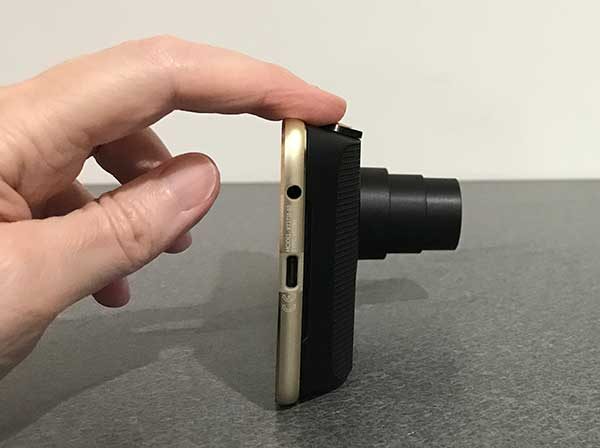
The True Zoom doesn’t need to be charged as it gets all the power it needs directly from the phone it’s attached to. It also doesn’t need its own software because it uses the built in camera app. So all you need to do is snap it on the back of the Moto Z and you’re ready to shoot.

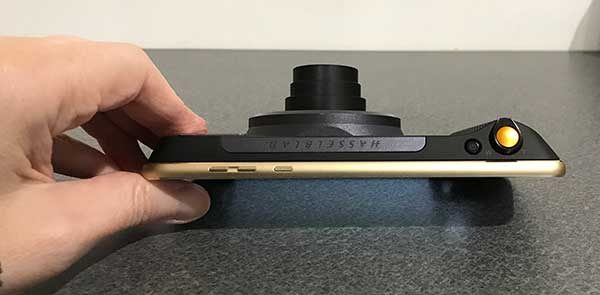
The True Zoom Moto Mod adds considerable thickness to the very thin Moto Z2 Play Android smartphone that was included with the True Zoom for my evaluation. It’s a bulky mod and as such, it’s not something that you would leave attached to your phone all the time.
The True Zoom lives up to its name because it does indeed have a built in lens that zooms from 4.5-45 mm (25-250mm 35mm equivalent).
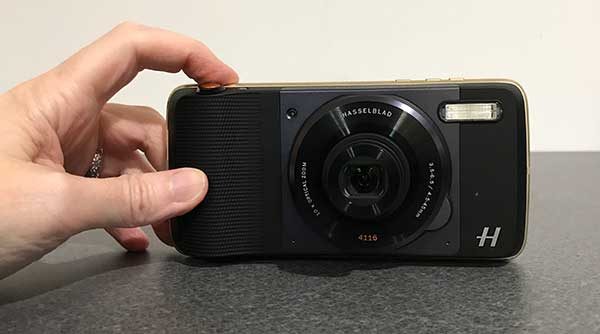
The Hasselblad True Zoom Moto Mod has a small power button on top and a larger shutter button with a spring loaded collar around it that is used to zoom the lens in and out.
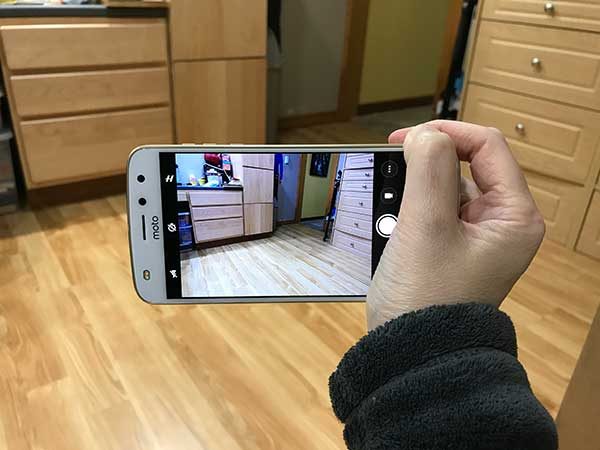
Just like true cameras, you can press the shutter half way to focus and then all the way to snap the image.

The mod also offers a nice grip that adds even more to the pocket camera feel when you’re using it.

Let’s check out some images to see if the True Zoom makes a noticeable difference shooting images compared to capturing the same images with just the Moto Z2 Play.

Example images

I tried to frame the comparison shots as closely as I could and snapped them one after the other. So I would take a picture with the Moto Z2 Play and then put the Hasselblad True Zoom Moto Mod on the back and shoot the same image in that order. Also, all shots are taken without a tripod.

All images can be clicked to see the original full size photo.


Indoor shot with bright backlight. Both were taken with no zoom applied.


Both images above were taken without any zoom applied. They are similar except that I think the True Zoom captures colors that look more natural compared to the Moto Z2 Play’s image on the left which has too much green/yellow tint to it.


Both images have zoom applied and we start to notice that the True Zoom is sharper than the digital zoomed image from the Moto Z2 Play without the moto mod attached. The color tinge on the Moto picture is still noticeable.


More zoom applied to both. Both are blurry when you view the full sized image but the True Zoom pic looks considerably better in small sized web images.


Max zoom applied to both. The Moto Z2 Play image looks very blurry compared to the True Zoom pic. But if you click to see the full sized image, the True Zoom is also a little blurry. That could be because the picture was taken without a tripod which probably should be used with 10X zoomed pics. A threaded tripod socket on the True Zoom would be a nice feature that is lacking.


The yellow mailbox in the True Zoom image looks better than the Moto Z2 Play’s image because the color on the top curve of the mailbox is smoother and not over exposed like in the Moto Z2 image.


Again, the True Zoom’s image looks better when you compare the two Android figures.


When it comes to indoor low light pics, the Moto Z2 Play’s image without flash is brighter than the True Zoom’s image.

Using flash, the True Zoom’s image looks better. Check out the window in both images and notice how you can see the trees in the True Zoom’s picture (FYI: this is a basement window).

Note: you can shoot in RAW format with the True Zoom.

Using the Hasselblad True Zoom Moto Mod was easy for the most part because all I had to do was place it on the back of the phone and launch the camera app. No other special changes are needed. But I did notice a few issues.

The camera app seemed to crash on a semi-regular basis while the True Zoom was connected to the phone. I also noticed that sometimes the lens would extend when I would pull the phone with the attached mod out of my pocket because it was easy to press one of the buttons on the mod which sometimes (but not always) cause the mod to activate and wake the phone.

Final thoughts

I like the idea of the Hasselblad True Zoom Moto Mod, but when it comes down to the images improvements over a Moto Z without the True Zoom, I wasn’t overly impressed especially with non-zoomed images. I’d personally only carry this mod with me when I knew I’d be taking a lot of telephoto (zoomed) shots. Otherwise, I wouldn’t bother using it due to the added bulk. There’s also the price which puts this accessory in the “I’d like to have this but I don’t want to pay this much for it” category for most people.

Source: The sample for this review was provided by Verizon Wireless. Please visit their site for more info.


Product Information

Price: $249.99
Manufacturer: Hasselblad / Motorola
Retailer: Verizon Wireless
Requirements:
  • Moto Z family of smartphones
Pros:
  • Easily snaps on the back
  • No charging necessary
  • 10 X zoom
Cons:
  • Bulky
  • Expensive
  • Camera app crashes regularly
  • Lacks a tripod socket

Filed in categories: Reviews

Tagged: , , ,

Hasselblad True Zoom Camera Moto Z Mod review originally appeared on The Gadgeteer on July 28, 2017 at 4:53 pm.

Note: If you are subscribed to this feed through FeedBurner, please switch to our native feed URL http://the-gadgeteer.com/feed/ in order to ensure continuous delivery.

ShiftCam is a 6 in 1 dual lens case for the iPhone 7 Plus

Do you consider yourself an iPhoneographer? You’re not alone if you do. By itself, the iPhone 7 Plus has a great camera, but is there a way to make it and your photos even better? The people behind the successful Kickstarter campaign for the ShiftCam Camera Lens Case think so.

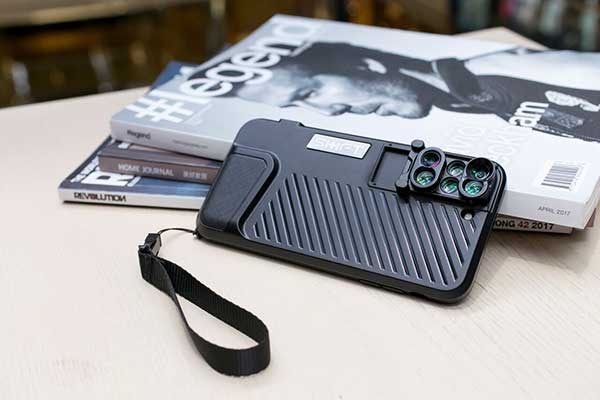
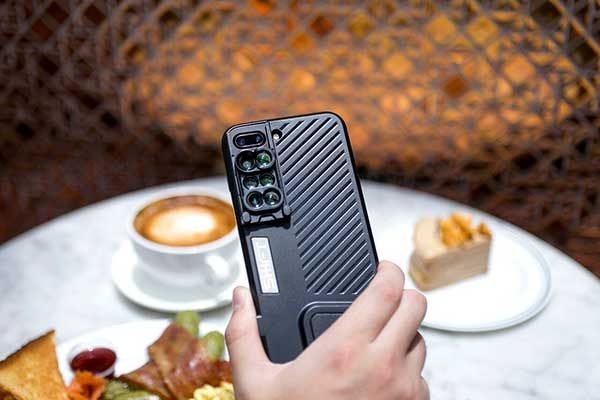
What is a ShiftCam? It’s a specially designed case for the iPhone 7 Plus that features a set of sliding lenses that add telephoto, wide-angle, fisheye and macro capabilities to the built in camera.

The lenses are built right into the case so you don’t have to remember to carry clip-on style lenses with you when you are traveling.

The ShiftCam also offers a hand strap and a built-in grip to give your iPhone a true pocket camera feel. Check out the video below to see how the ShiftCam works.

Do you want a ShiftCam case for your own iPhone 7 Plus? It’s priced at $59.00 through shiftcam.com. You can also check out their Kickstarter campaign page for extra info.

Filed in categories: News

Tagged: , ,

ShiftCam is a 6 in 1 dual lens case for the iPhone 7 Plus originally appeared on The Gadgeteer on July 26, 2017 at 10:00 am.

Note: If you are subscribed to this feed through FeedBurner, please switch to our native feed URL http://the-gadgeteer.com/feed/ in order to ensure continuous delivery.
AirSelfie is a pocket-sized drone designed to take your picture from the air


Taking a selfie by holding your phone at arm’s length is usually fine if you’re only taking a snap of yourself or at most another person. But when you try to squeeze more people into the frame or want to see the background too, a camera at the end of your arm just won’t cut it. Neither will a 3-foot long selfie stick. Is there a better alternative? The folds at AirSelfie think so.

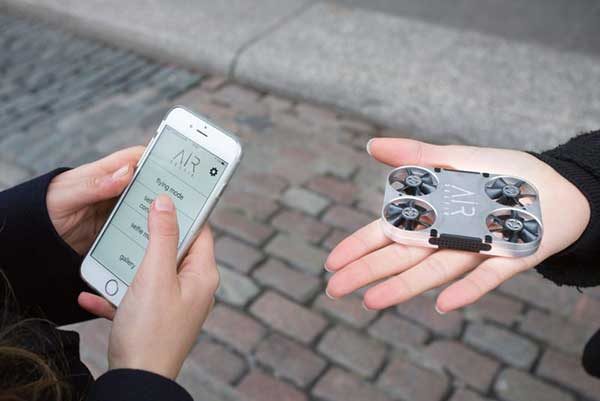
AirSelfie is a small smartphone-sized drone whose sole purpose is to take pictures of you as quickly and easily as possible.

This drone is made of lightweight anodized aluminum and features a flat design for easy launching and landing and a 5-megapixel camera with 4GB of storage for images.

It’s powered by a rechargeable battery that provides 3 minutes of flight time and it communicates with your phone via 2.4Ghz WiFi.

AirSelfi comes with a smartphone charging case that provides up to 20 charges in the field.

The AirSelfie drone will be shipping in July and is currently available for pre-order on airselfiecamera.com with a limited time special discount of $279.13 for the drone without the charging case and on Amazon for $329.00 with the charging case and free shipping.

The fine folks at AirSelfie will be sending me a drone to review, so stay tuned for some Gadgeteer selfies very soon!

Filed in categories: News

Tagged: ,

AirSelfie is a pocket-sized drone designed to take your picture from the air originally appeared on on June 25, 2017 at 10:00 am.

Note: If you are subscribed to this feed through FeedBurner, please switch to our native feed URL http://the-gadgeteer.com/feed/ in order to ensure continuous delivery.
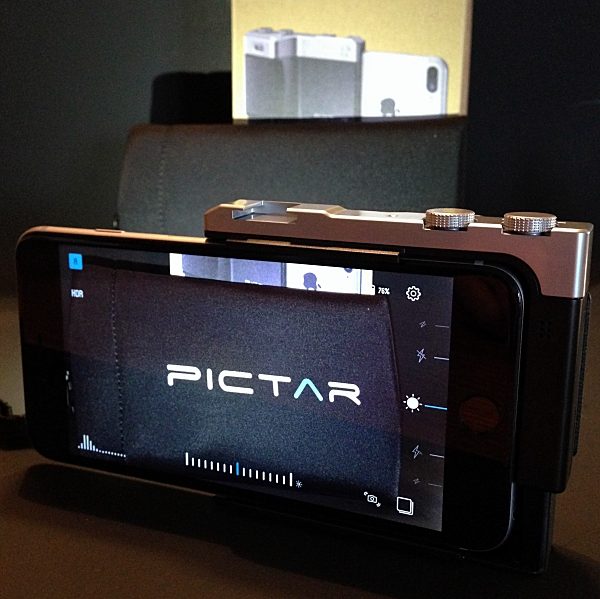
Miggo Pictar Plus iPhone camera grip review


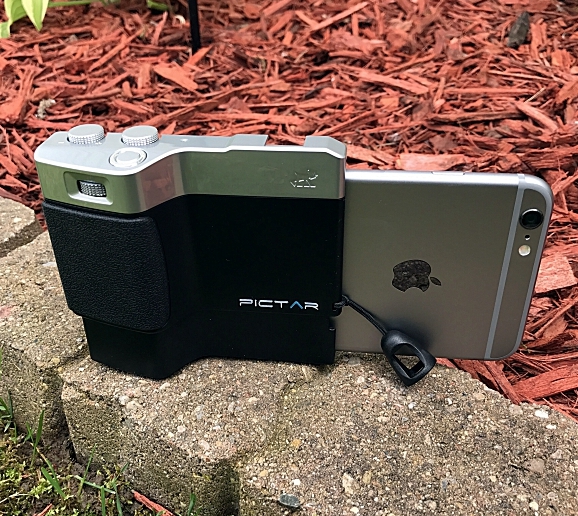
I fashion myself as somewhat of an amateur photographer. I’ve been fascinated with photography ever since I took Mr. Bunton’s “Intro to Photography” class way back in the ninth grade. And like a lot of people I love taking photos with my iPhone. Apple forever changed the way we take photographs when they introduced the first iPhone 10 years ago. With each iteration, the iPhones camera gets better and better. It takes amazing photos, but taking them has always presented different issues. The fact is the iPhone isn’t a camera, it’s a phone, and holding it with one hand to take a photo can be tricky. And if you want to use a tripod you have to buy special cases and or mounts made specifically for the iPhone. Miggo has changed all of that with the Pictar and Pictar Plus. Pictar is a camera grip that claims to turn your iPhone into a DSLR camera. Since I love taking pictures with my iPhone both recreationally and for my product reviews for the-gadgeteer, I jumped at the chance to review the Pictar Plus. Does it really turn the iPhone into a DSLR camera? Let’s take some photos and find out.

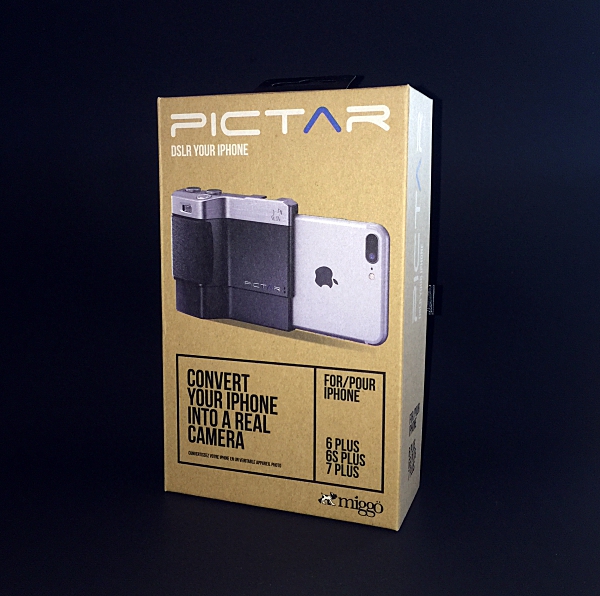
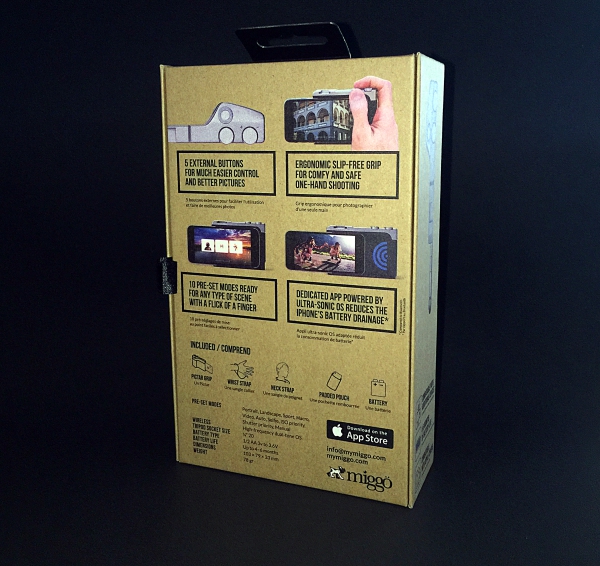
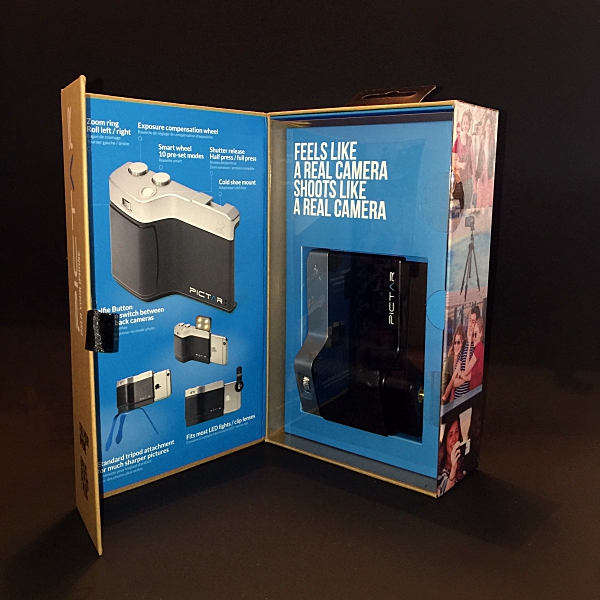
I don’t usually start off a review by talking about the product’s packaging, but when I received the Pictar Plus from Miggo I was really impressed. I thought to myself “Wow if they put this much thought and innovation into the packaging I can’t wait to try out the actual product”. The box opens like a book (the front flap is held closed by a magnet) and the Pictar Plus is displayed behind a plastic window. The box itself is covered with lots of information about the Pictar Plus. A real nice presentation that I thought was worthy of a mention.

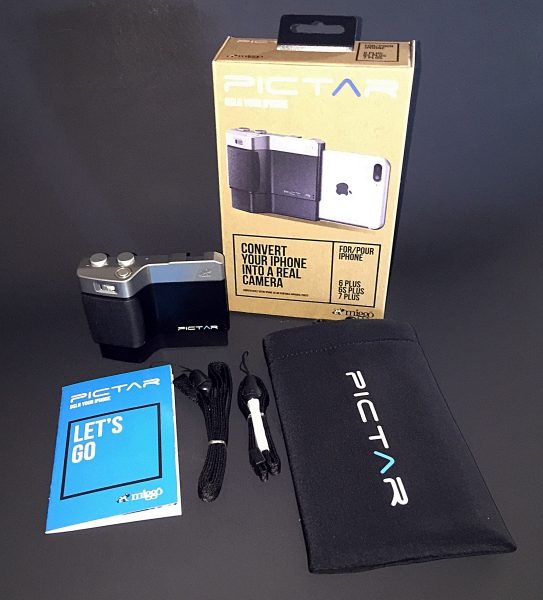
Inside the box, you get the Pictar Plus, wrist strap, neck strap, neoprene padded carrying case and Users Manual.

The Pictar comes with a CR1/2AA battery already installed. To activate the battery, first, open the battery compartment by pushing in the release catch and removing the battery cover. Then pull out and discard the pull tab at the bottom of the battery. This will then allow the battery to connect fully with Pictar. Then click the battery cover back in place. According to Miggo, the battery should last up to 6 months with normal use.

Installing my iPhone into Pictar was easy. After taking it out of its case (you can use Pictar with some very slim-fitting silicone bumper cases) I slid it into the spring loaded bottom of the Pictar, with the back of the phone facing in. Then pressed down until the top of the iPhone clicked into place. Removing it was just as easy.

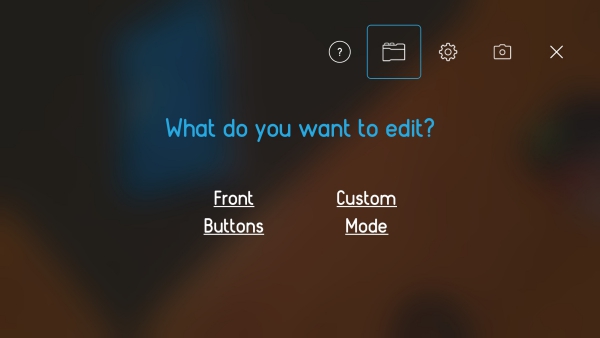
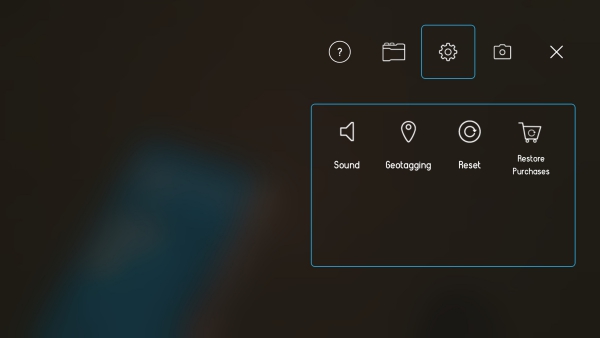
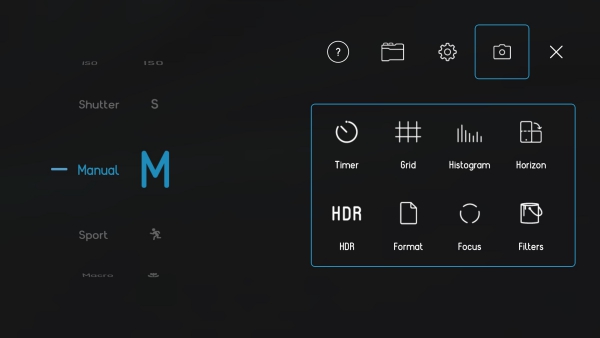
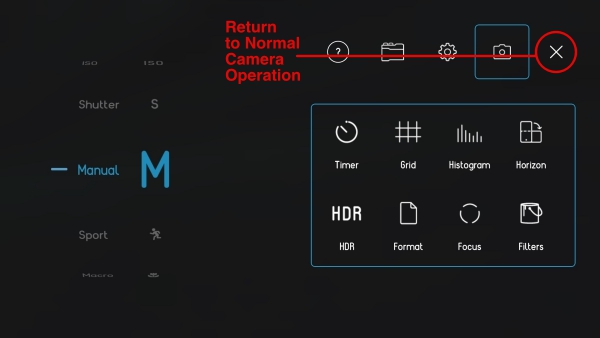
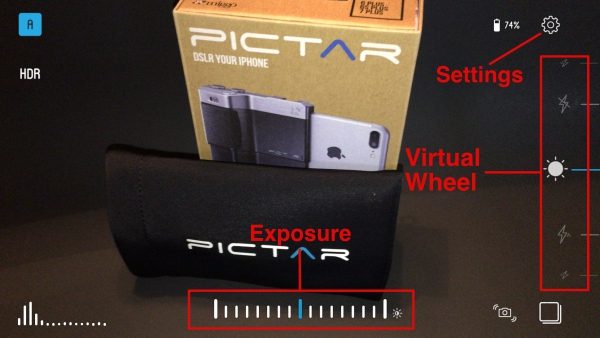
Before you can use Pictar you have to download their free app from the app store. The app is really the brains of the whole operation. Pictar’s Camera app unlocks key features that are inaccessible on iPhone’s native camera app. It connects with the iPhone using a high-frequency dual tone that is inaudible to the human ear. When used, each dial and button emit a unique tone that is detected by the app generating a corresponding action. This also significantly increases the battery life when compared to Bluetooth connectivity. The app itself is easy to use. The first time you launch it there is a short tutorial that prompts you to use each different dial and button, showing in real time what function each performs. The app has nine different built-in modes, Auto, Sports, Macro, Shutter priority, ISO priority, Manual, Selfie, Movie, and Filter. A note about the Filter mode. There are 38 different filters that can be applied before taking a picture which is really cool. However, only 2 of them are free to use. If you want to use any of the other 36 you have to purchase them. Separately each is a $1, or you can buy the bundle for $10. All things considered, that’s not bad, but it would have been nice to include more than 2 free filters. Clicking on the gear icon in the upper-right corner of the Home screen allows you to change and customize lots of settings. There are five main icons at the top right of the settings screen. The question mark icon takes you to the Tutorial / User Guide menu, the Pictar icon to the customization of buttons menu, the Gear icon to Sound, Geotagging, Purchase Restore and Reset menu, the Camera icon to the camera settings menu and the X returns you to normal camera operation.

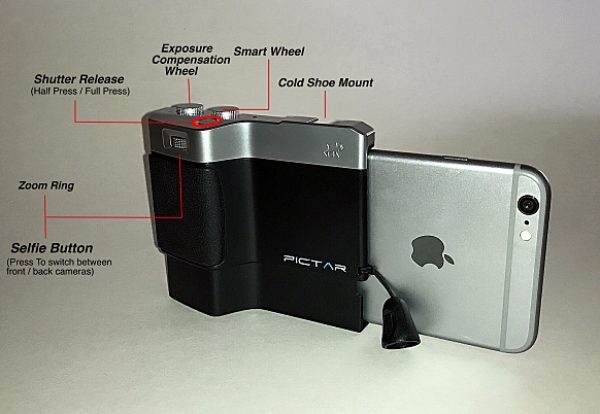
Much like a DSLR camera, Pictar Plus offers five external control buttons. This allows you to easily change settings and take pictures with one hand. No more tapping your iPhone’s screen to set focus, exposure, etc.

The Smart wheel allows you to choose between Pictar Plus’s 9 different modes. The Exposure compensation wheel allows you to control brightness levels even before shooting. And just like with an advanced camera, the exposure compensation wheel changes the exposure in steps of 1/3 aperture, and the clear display appears at the bottom of the iPhone screen. The Shutter release has two functions. A half-press locks focus and exposure for easy tracking of a moving object and a full-press for immediate shutter release. The shutter button also allows you to take pictures while wearing gloves during the cold weather. The Zoom Ring allows you to zoom in on a subject without having to touch the screen to pinch-and-zoom. It also doubles as a Selfie button. Clicking the Zoom ring will switch between the iPhone’s front and back camera for easy “selfie” shots. The Virtual Wheel is located on the right side of the Camera app screen and allows you to control different modes such as Flash modes, Shutter speed, ISO and more – simply by using your thumb.

The dials can all be reprogrammed to do different things. For example, you can have the Zoom Ring control the flash, white balance, etc. In that case, zoom in and out would be done by “pinching” the iPhone’s screen, like before. All of this can be done in the settings menu I mentioned earlier.

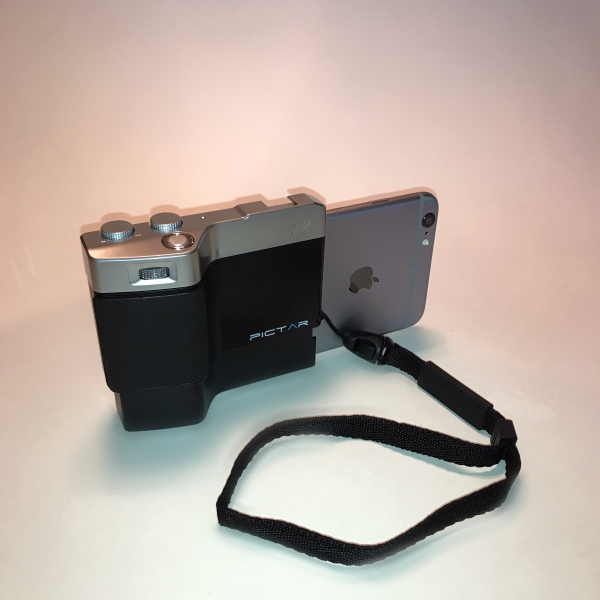
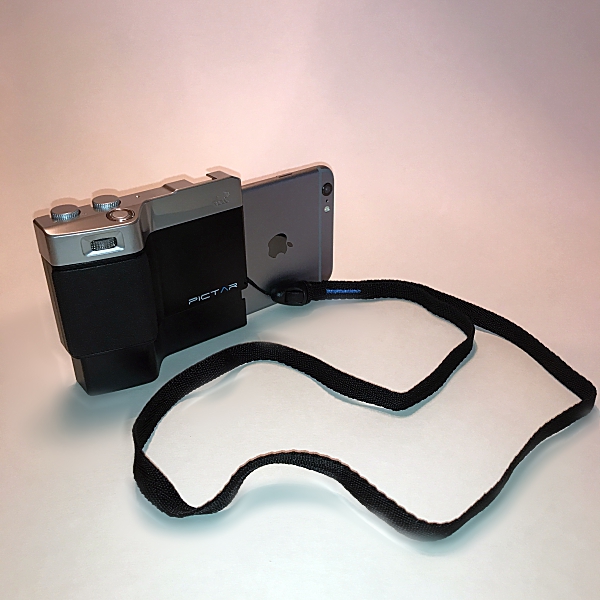
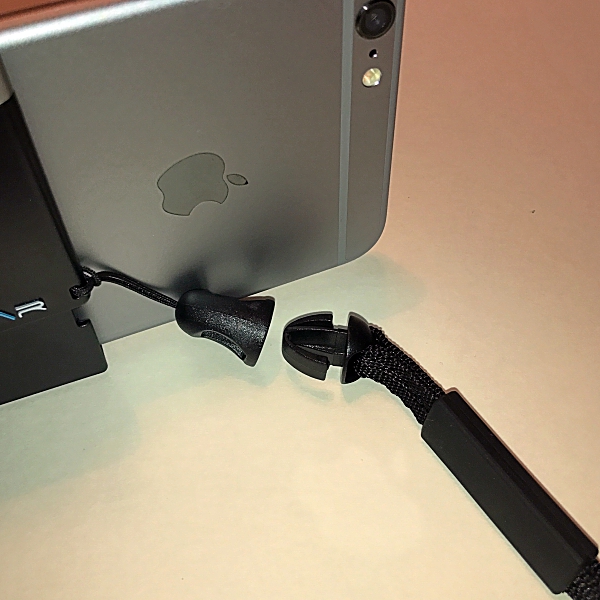
The Pictar Plus also comes with wrist and neck straps. This is nice because if you’re like me you’ve dropped your iPhone more than once trying to get that perfect shot. Once you attach the connector to the Pictar Plus you can easily change between the two straps with just a snap.

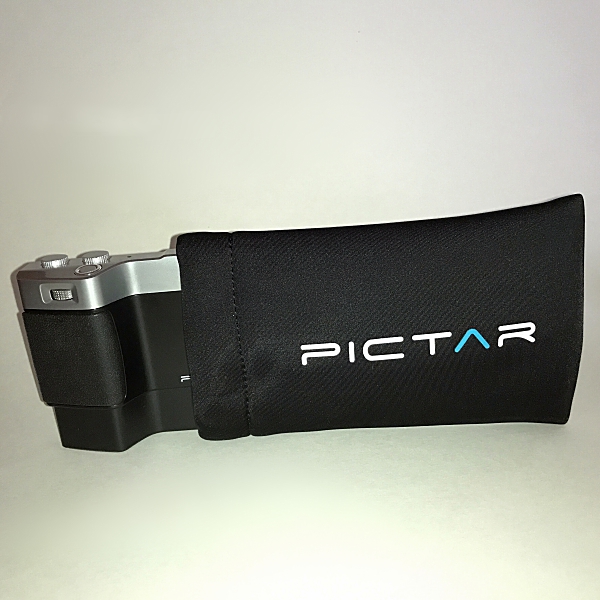
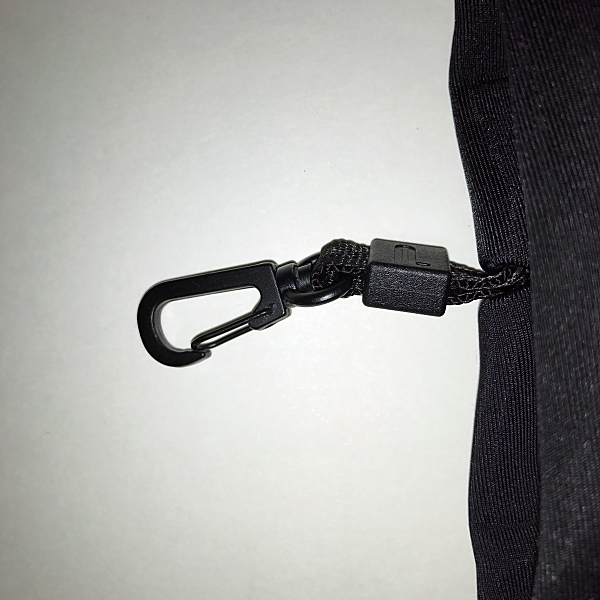
There’s also a nice neoprene padded carrying case for the Pictar Plus. It comes with the added feature of a small metal carabiner that can be attached to a bag or belt loop.

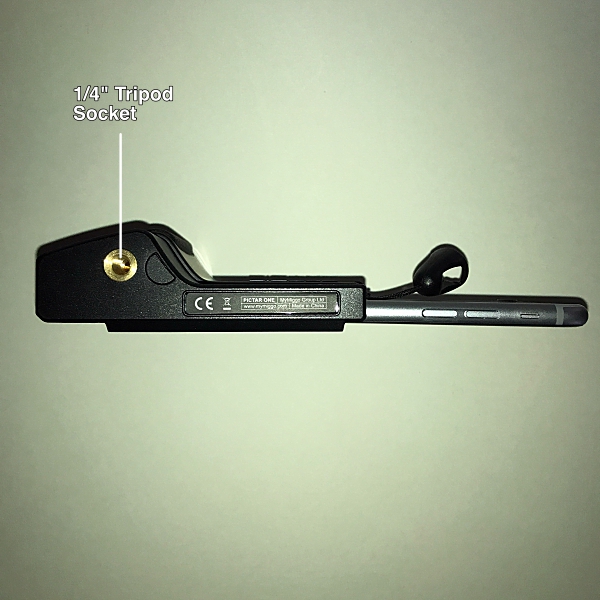
Just like a real camera, Pictar has a standard 1/4” thread tripod socket on the bottom. This is ideal to attach a tripod or other stabilization device and is great for selfies or night time shots, that require long exposure times where the camera needs to be steady.

The top of the Pictar has a standard-size cold shoe mount to allow you to attach many full-size camera accessories, such as LED lights or microphones. I also like that the iPhone’s lens is open when attached to Pictar, giving you the ability to attach most ‘clip on lenses’.

I really loved using the Pictar Plus. It turned taking pictures with my iPhone into a more camera-like experience. It’s really light weight coming in at .17 lbs. so it doesn’t add any extra weight to the iPhone. I like how it’s designed to be held and operated with one hand. And the non-slip grip and wrist strap gave me a real sense of security. I took Pictar Plus along with me while walking my dog and took some photographs using some of the different functions and modes. I was very impressed with how much easier the Pictar Plus made taking photographs. I took a selfie with my dog Zoey and liked being able to switch cameras from back to front simply by pressing the Zoom Ring.

Using the Action Mode I took pictures of the flags that were flying above the local High School football field. It was really windy, but with the Action Mode I was able to capture the flags with no blur, and the images came out sharp and clear. With the Zoom Ring, I was even able to get a close up of Old Glory.

Miggo even provides a link to a Mobile Photography Workshop that has videos on how to use Pictar to capture better pictures in different scenarios. Definitely worth checking out before using Pictar. I look forward to using these tips on my next photography adventure with the Pictar Plus.

Does the Pictar Plus turn your iPhone into a DSLR camera? I might not go that far, but it’s pretty darn close. All and all I think it’s a great product. It makes taking photographs with your iPhone fun and easy, whether you’re an amateur like me or a seasoned photographer. And with all of the Pictar Camera apps built-in features, the photo possibilities are endless. I know it got me excited about taking pictures with my iPhone and I’m sure it will do the same for you.

Pictar comes in 2 models, Pictar, for iPhone sizes, 4s / 5 / 5s / 6 / 6s / SE and 7 and, Pictar Plus, for iPhone, 6 Plus / 6s Plus and 7 Plus. They’re priced at $99.99 and $109.99 respectively.

Source: The sample for this review was provided by Miggo. Please visit their website for more info, or Amazon to purchase.


Product Information

Price: $109.99
Manufacturer: Miggo
Retailer: Amazon
Pros:
  • Easy to use
  • Can operate with one hand
  • Lightweight
  • Wrist and neck straps
  • Multiple modes and settings
  • Neoprene carrying case
Cons:
  • Not enough included free filters in Camera app

Filed in categories: Reviews

Tagged: , ,

Miggo Pictar Plus iPhone camera grip review originally appeared on on June 23, 2017 at 8:46 am.

Note: If you are subscribed to this feed through FeedBurner, please switch to our native feed URL http://the-gadgeteer.com/feed/ in order to ensure continuous delivery.