Scan photos without removing them from the photo album

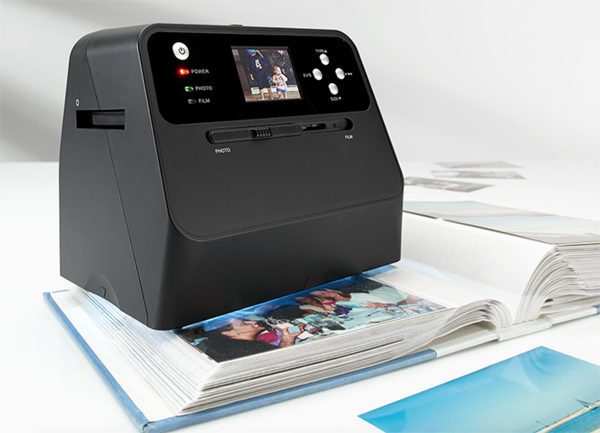
A few years ago, everyone seemed to be scrapbooking – taking old and new photos out of existing photo albums and creating new photo books filled with more decorations than photos.  I remember the bane of everyone’s existence then was those old “magnetic” photo albums.  Seems those adhesive strips that held the photos in place welded themselves to the photos over time.  Removing photos from those albums often resulted in wrinkled (at best) or torn (at worst) photos.  With the Rapid Photo Album Scanner, you can get a digital scan of photos in those books, or any other album, without removing the photo or without having to disassemble the album.  The scanner can copy any paper image (up to 4″X6″) on a flat surface, plus 35mm negatives and slides. 

The scanner has a built-in 14MP CMOS sensor, LED lights to illuminate the subject, holders for negatives and for slides, and a 2.4″ color screen so you can see how to position the scanner.  Scans of black-and-white or color photos, negatives, or slides are converted to JPEG format and stored on the included memory card.  You can connect the device to a PC or Mac computer via USB to transfer scanned images.

The Rapid Photo Album Scanner is $199.99 at Sharper Image.  Right now, use code SHIP99 for free shipping and 20% off purchases over $99.00.

Filed in categories: News

Tagged:

Scan photos without removing them from the photo album originally appeared on The Gadgeteer on December 1, 2017 at 8:00 am.

Note: If you are subscribed to this feed through FeedBurner, please switch to our native feed URL http://the-gadgeteer.com/feed/ in order to ensure continuous delivery.

PhotoBulk 2 image editing software for macOS review

So there you are, staring at that big batch of beautiful images on your desktop that needs to be prepped for publishing and/or distribution. Image editing can be a time-intensive task when done manually, especially if you’re dealing with a lot of content. You could be in for a long night. Enter PhotoBulk 2 for the macOS, an app that enables you to batch process common image editing tasks like resizing, converting formats, optimizing, and renaming. You can even create custom watermarks that include both text and graphics.

How does it work? Will it save you some precious sleep? Let’s go find out!

PhotoBulk 2 is the latest update to Eltima Software’s well-received bulk image editor, with a bunch of new enhancements and features. The interface is wonderfully simple. Select the batch of images you want to edit, which will then appear in a carousel at the bottom of the app window. Then you can select from a menu of 6 processing functions to apply to the batch, which can be toggled independently.

Watermarking

You have four watermark options to choose from, each of which is customizable to your specifications. Check the “Watermark” box to set your options, at which point you can any combination of watermarks you like.

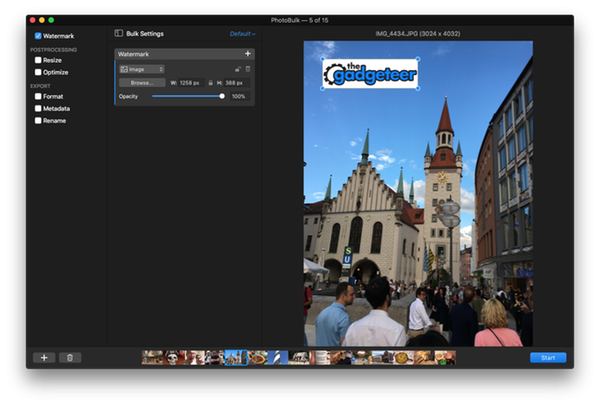
You can import an image (like your logo) which can be resized, rotated, and set to the opacity of your preference.
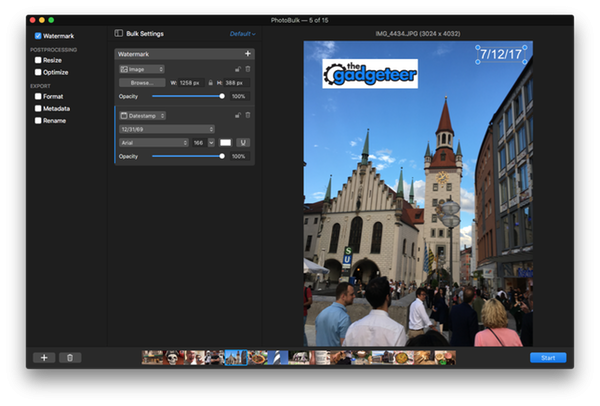
You can also add a date stamp for the image, with complete control over the font, size, color, positioning, and opacity. The date is automatically pulled from the photo metadata. You can also rotate the text placement if desired.
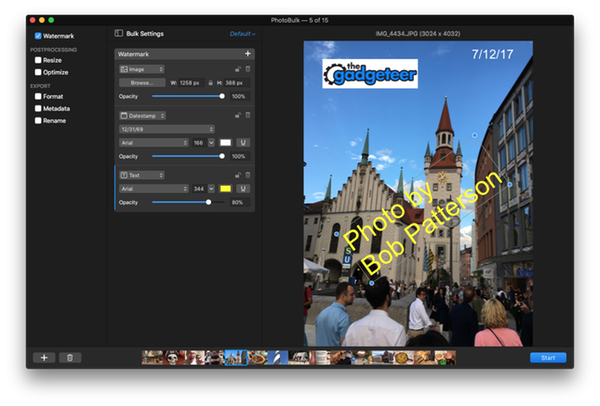
Additional text (like a byline or web site address) can also be added. As with the date stamp, you can customize all aspects of the text presentation (font, size, color, position, opacity, and rotation). Double-click on the text window to type your text, which can include multiple lines if desired.
Finally, there’s a “script” watermark (not shown here) that will automatically wash the formatted text across the entire image in a repeating pattern. This is especially useful if you want to embed a copyright tag, and can be formatted like the other text options (except for rotation).

The chosen options appear in the preview window, and you can toggle through images in the carousel to see the final results.

Post processing options

You have two post-processing options you can toggle: resizing and optimization.

The resizing process has 5 options that enable some pretty sophisticated flexibility. You can resize each image to a fixed height, a fixed width, a specific height & width for a “max size” to resize everything up to the largest possible size specified. Any of these choices also have a toggle that prevents the batch from enlarging images that are smaller than the set size. You can also set a generic “percentage” resizing that applies to every image in the batch.

Optimizing is an automated process that reduces the file size without deterioration. You can set your options on a sliding scale.

As with watermarks, you can use the preview window (and the carousel) to see how the selected options will impact your final images.

Export options

After you’ve set your desired watermark and post-processing options, you can set up the details for the final file exports. Note that PhotoBulk 2 enables you to choose your destination folder (or create a new one), retaining your original images if you want to process them again.

The “format” option allows you to export your final images to JPEG, PNG, GIF, BMP or TIFF format. You can also select the quality level for JPEGs if desired. You can also use the “metadata” option to keep or discard GPS data, camera info data, and copyright/contact info data embedded in the image. You can edit these options, but you can choose to keep or discard the data.

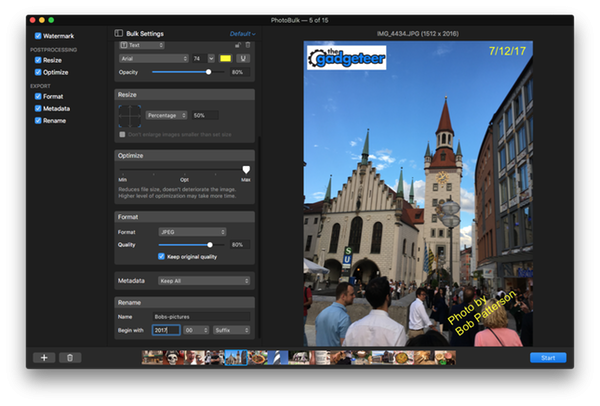
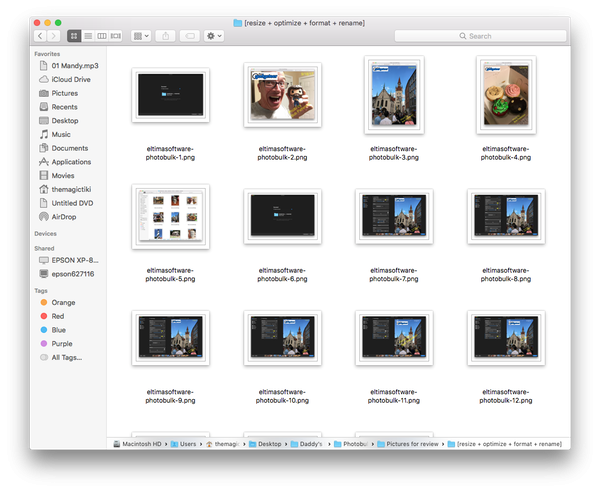
Finally, you can set your renaming options for the images if desired. You can pick a generic image name and append a common prefix or suffix to the file name, including sequential numbering with up to 4 digits (such as 1, 01, 001, or 0001). When I set up the processing for this review, this made it a snap to standardize my file naming. Here’s a screenshot of the output folder. No selecting and renaming for every picture!
Processing and saving your preferences

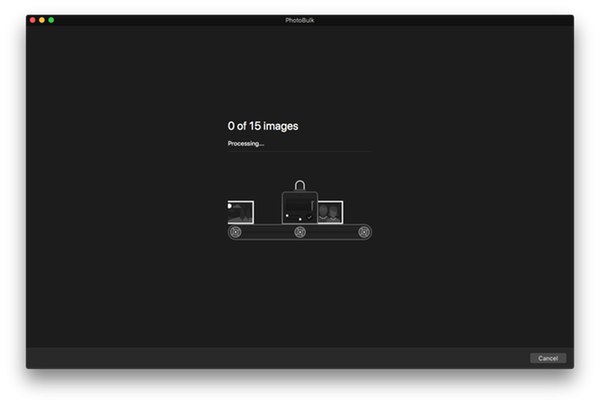
Once you have all of your options set, you press “start” to begin the processing. PhotoBulk 2 lets you choose your destination folder, and off you go!
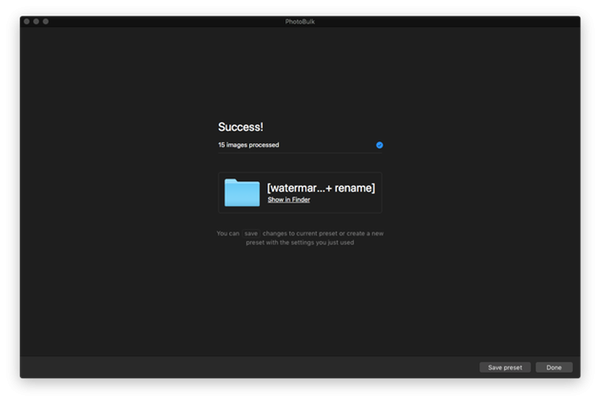
You have the ability to save your presets for future use, including the watermarking options. We use a standard image sizing and naming convention for our work here at The Gadgeteer, which I now have set for bulk processing of my review photos. I also do illustration work as a hobby, and I can save a different batch setting for managing the images I put up on my website or in social media. I can also change preset options and save them for future processing (like changing copyright dates with the new year). It’s a nice option that saves a bunch of time.

General notes on use

I really like the PhotoBulk 2 package. The user interface is intuitive and easy to use, enabling you to be up and running with a few minutes of orientation. Eltima also does a nice job with tutorials and support to help you along the way if needed. The app is also very fast, significantly faster than the previous edition based on my research.

You should note that the same watermark settings are applied the same way to all photos in the batch, regardless of the image size. It looks like PhotoBulk defaults to a standard xy measurement for positioning from the image edges, and uses the same size specifications for watermark options. I tested three photos here to show this. The first two are the same vertical orientation and size, while the third image is horizontal in orientation and 50% smaller. Check it out:
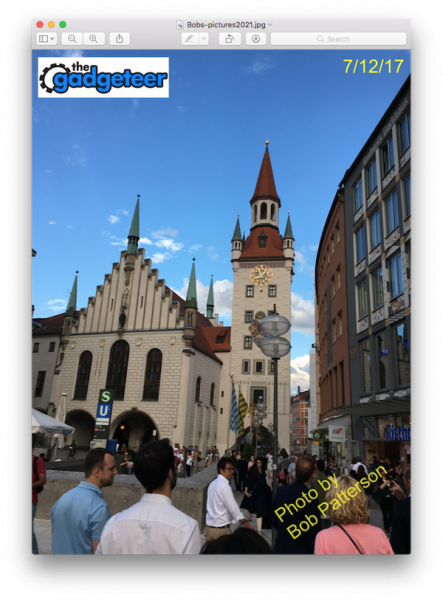
See the difference? If you’re processing a bunch of images that are the same (or close to the same) dimensions, this probably won’t be an issue for you. If you have dramatically different sized images in your collection, however, you may want to set up two different batches. Again, you can check all the images in the preview screen before you run them out.

Finally, please note that this app is designed specifically for use on the Mac desktop. If you’re on a windows device or an iPhone or iPad, you’ll need to look elsewhere for a batch processing solution.

Conclusions and Pricing

If you need a simple batch processing app with robust watermarking, formatting and export features, you can’t go wrong with PhotoBulk 2. With a clean, easy-to-use interface and intuitive functionality, I really like it as a massive time saver. It’s also bargain priced at $9.99. Check it out at the PhotoBulk web site or buy it at the macOS app store!

Source: the sample for this test was provided by Eltima Software. Please visit their site for more information.


Product Information

Price: $9.99
Manufacturer: Eltima Software
Retailer: macOS app store
Pros:
  • Intuitive, easy to use interface
  • Robust processing capabilities
  • Versatile watermarking options
  • Great value for under $10
Cons:
  • Only works on the macOS… no support for iPhone or iPad use

Filed in categories: Reviews

Tagged: ,

PhotoBulk 2 image editing software for macOS review originally appeared on The Gadgeteer on November 28, 2017 at 9:00 am.

Note: If you are subscribed to this feed through FeedBurner, please switch to our native feed URL http://the-gadgeteer.com/feed/ in order to ensure continuous delivery.
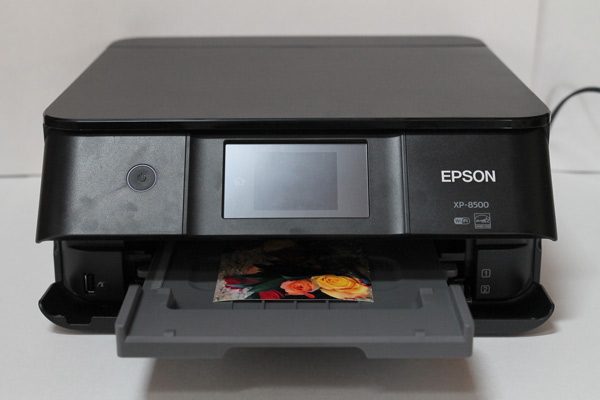
EPSON Expression Photo XP-8500 Printer review

For this review of the EPSON Expression Photo XP-8500 Printer, I am turning it over to my lovely wife who is obsessed with photography and documenting our family’s life.  Her experience with at home photo printing far exceeds mine so I will turn it over to her. 

I am scrapbook obsessed. Seriously. I am a firm believer that pictures shouldn’t stay on your phone forever and that all the little bits of your life have a story and deserve to be told.  So, every year, week by week, I document what is going on in our lives.  While I appreciate the prints from professional labs, I just don’t like waiting for my pictures.  So several years ago I started printing at home.  I print a minimum of 10 pictures per week, but sometimes many many more, so I need a printer that can keep up.

What’s in the box?

The Epson Expression XP-8500 all-in-one, manual/start here guide, CD ROM for product setup (everything can also be downloaded from the Epson website, power cord, 6 Claria Photo HD ink cartridges (cyan, yellow, magenta, black, light cyan and light magenta)

System Requirements

Windows – 10,  7, 8.x and Vista, Macintosh – OS 10.12.x, 10.11.x, 10.10.x, 10.8.x, 10.7.x and 10.6.8

Let’s take a look

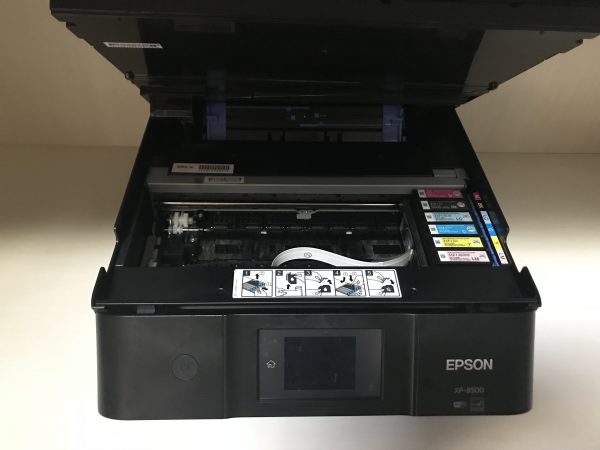
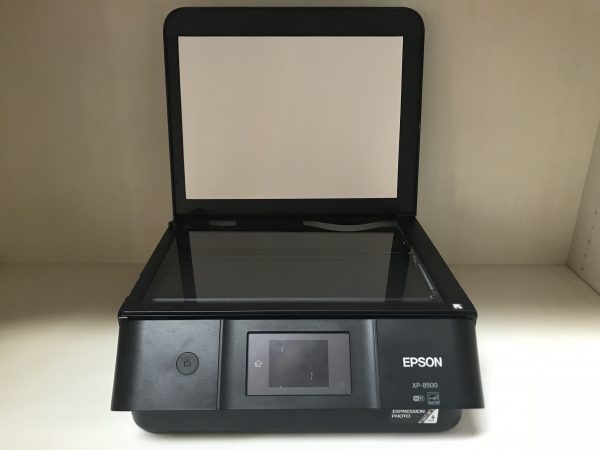
Out of the box, set up was simple.  Just plug it in, lift the scanner glass to insert the ink cartridges and the printer walks you through the setup.  The calibration process is rather lengthy compared to other printers and requires you to print a few items and answer multiple questions about the print quality.  Overall, the set up took about 15 minutes.  I was then able to connect it to our wireless network and install the driver on my computer.

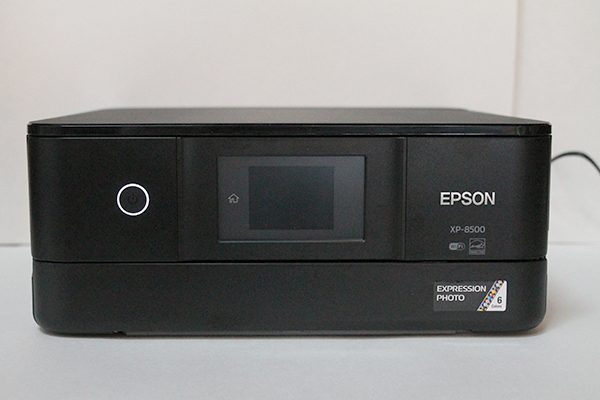
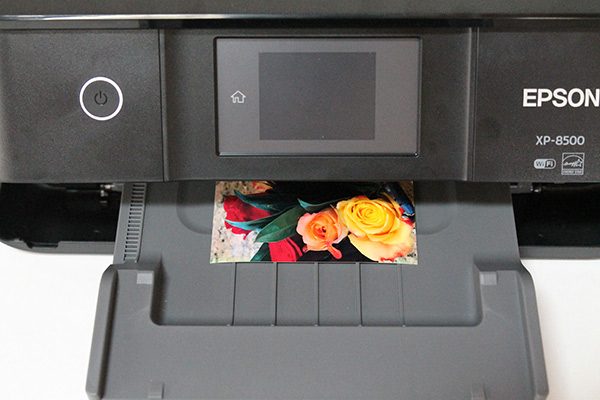
This printer has a small footprint (13.7″w x 13.4″d x 5.6″h) and it is lightweight (14.8 pounds).  You could easily place this on the corner of your desk and not lose much workspace.  Please note that these dimensions will be slightly different when the printer is actively printing because the paper output tray opens and slides out.

There are only two buttons – a power button and a home button.  The home button will take you to all the options – copy, print photos, scan, various prints, settings, and maintenance.  The Various Prints menu has a variety of options such as types of design paper, calendars, greeting cards and more.

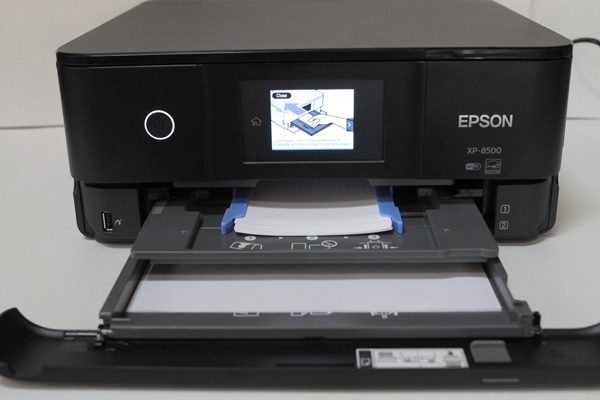
There are three ways to load the printer.  The upper cassette is designed for photo paper in the following sizes: 3.5″ x 5″, 4″ x 6″, 5″ x 7″, 16:9 wide.  The lower cassette is designed for your copy paper, presentation paper, and legal sized paper.  There is also a rear paper feeder for one-off projects and it can accommodate a variety of paper sizes and types.

The printer has both SD and USB ports on the front so you can print without using your computer or phone.  I usually don’t print directly from a memory card; however, for me, this was convenient when scanning a document so I could automatically save it to the device.  Also, with the Epson Event Manager software installed on my computer, I was able to select my computer as the destination and the scanned document showed up on my computer screen a few seconds later.

There is not an automatic document feeder.  To be fair, most printers in this class do not have them.  Since I mostly use my printer for printing photos this wouldn’t deter me from buying this printer, but anytime I have to scan more than two pages at a time, I wish I had one.  This may be something for readers to consider if you feel that the scan and copy feature will be used often.

Let’s start printing.  There is a catch in the paper tray when removing and inserting but I found if I was a little too fast it was easy to pull the tray all the way out or push it too far in.  Once I realized this, I was a little more careful and it was easy to feel when it was inserted correctly.  When you insert paper into the tray, there will be prompts on the screen to select the type of paper to ensure proper printing.  I have other printers that I can hear printing from an adjacent room but not this one.  The printer is very quiet.

For everyday document printing, the XP-8500 can print about 9 pages per minute.  It can also print two-sided documents to reduce the amount of paper used (print speed is 4.7 ppm for all black ink when printing 2-sided).  There are certainly faster document printers out there but this was sufficient for my home printing needs.  After all, this printer is a photo printer first.

Epson says this will print professional quality photos in as little as 10 seconds when printing in draft mode and I found that to be true.  I printed a majority of my pictures in a higher quality but the time it added was negligible.  I have been printing pictures wirelessly from my phone for almost a month and it produces crisp images with vibrant colors.  Also, the ink used is the Claria Photo HD ink, which Epson says will produce images that last up to 300 years in an album.  As a scrapbooker, archival quality photos is a must and it is awesome that an at-home printer can produce them.

When selecting a printer for home use, there are a lot of factors to consider – primary use, print speeds, running costs, etc.  If you are looking for a printer to document your memories, the Epson Expression Photo XP-8500 Small-in-One should be a high contender on your list.  At a retail price of $249.99, I believe you get a great bang for the buck and would highly recommend this printer to our readers.

Source: The sample for this review was provided by Epson.  For more information please visit the product page and you can order from Amazon.


Product Information

Price: $249.99
Manufacturer: Epson
Retailer: Amazon
Pros:
  • Compact, vibrant colors, crisp images, long lasting prints, very quiet, easy set up, great value
Cons:
  • No automatic document feeder

Filed in categories: Reviews

Tagged: ,

EPSON Expression Photo XP-8500 Printer review originally appeared on The Gadgeteer on November 22, 2017 at 11:00 am.

Note: If you are subscribed to this feed through FeedBurner, please switch to our native feed URL http://the-gadgeteer.com/feed/ in order to ensure continuous delivery.

SHOTBOX portable photography light box review

As a product reviewer, the pictures that I take of the products that I’m reviewing are almost as important as the words I write about those products. The old adage “a picture is worth a thousand words” is still true and I want my pictures to be as good as they can be. I’ve been using a Canon 70D DSLR and a Canon Speedlite flash for years but now I’m actually switching over to using my Pixel 2 XL as my main camera and the SHOTBOX is going to make that transition much easier. Let’s take a look.

What is it?

SHOTBOX is a portable and collapsible photography light box that has been designed to be used with your smartphone.

What’s in the box?

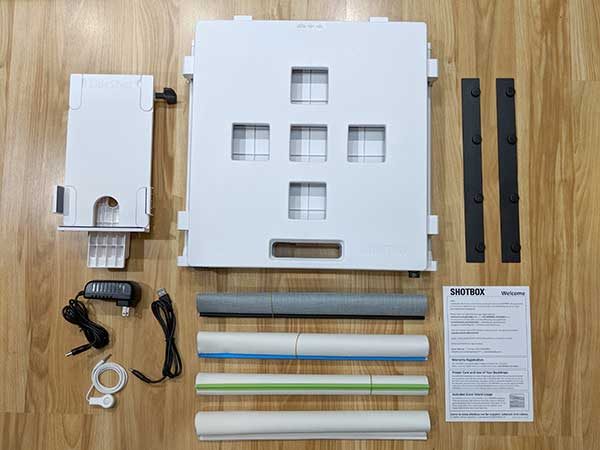
I was sent the SHOTBOX Deluxe Bundle with the SideShot, Backdrops and Deluxe Tote, a PANELS Complete set,

SHOTBOX light box
SideShot smartphone holder
4 backdrops
2 glare strips
Smartphone shutter release cable
USB to power cable
AC power adapter
Instructions

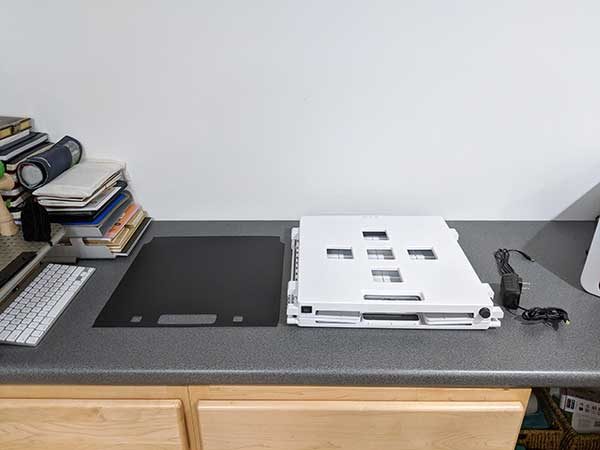
Also included is black/white reversible floor panel.

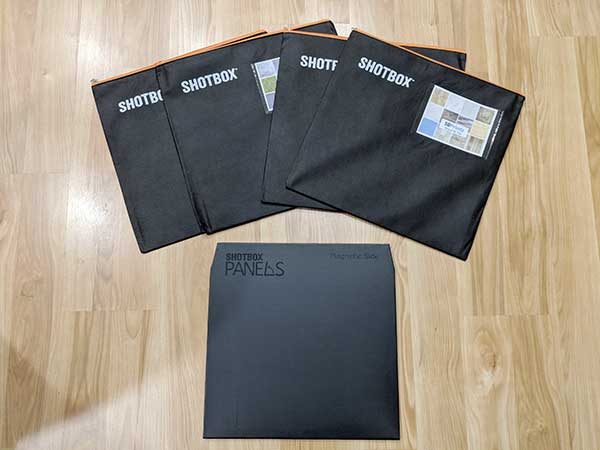
The PANELS Complete set includes:
Magnetic base unit
12 Hematite magnets
4 panel sets that are separated into zippered storage sleeves

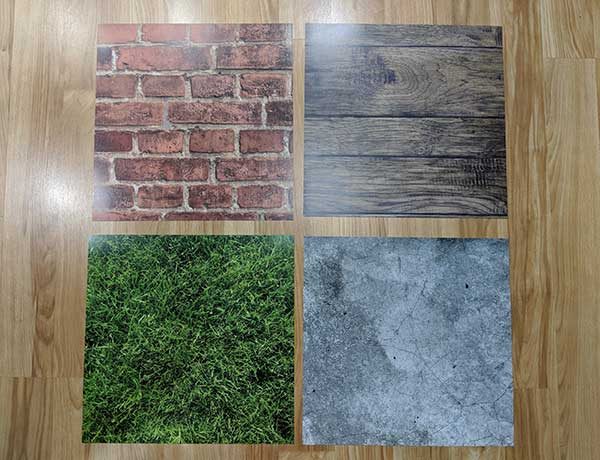
The panels include a variety of different textures and colors like you see above. They really help you get different looks for your product shots.

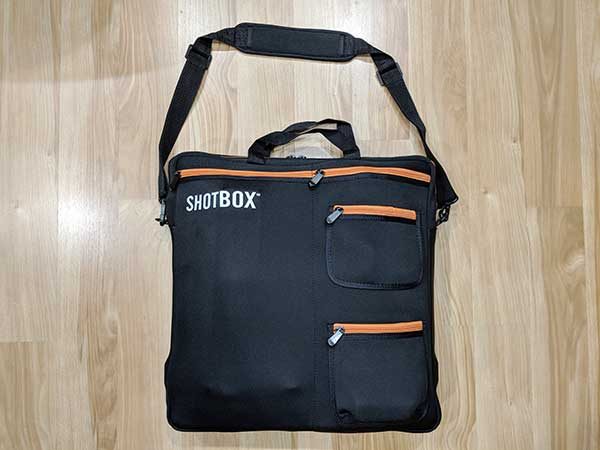
The deluxe carry tote is an awesome neoprene bag that has zippered pockets for everything that you see above except for the PANELS sets.

Setting up the SHOTBOX

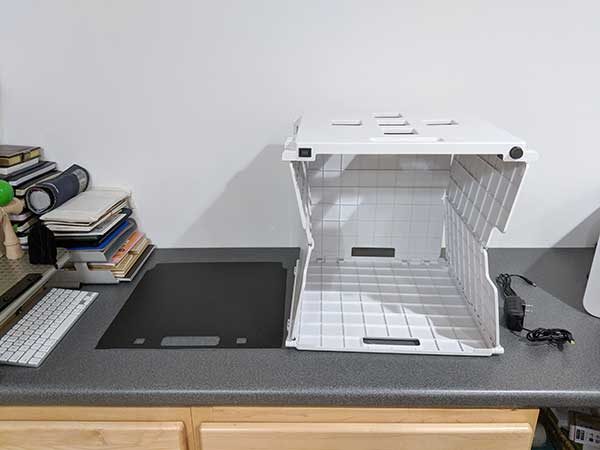
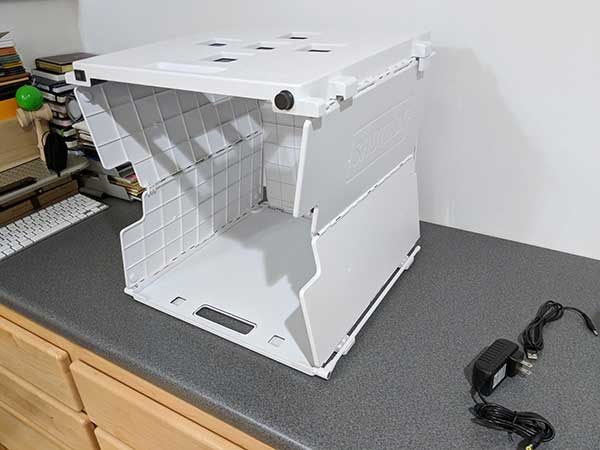
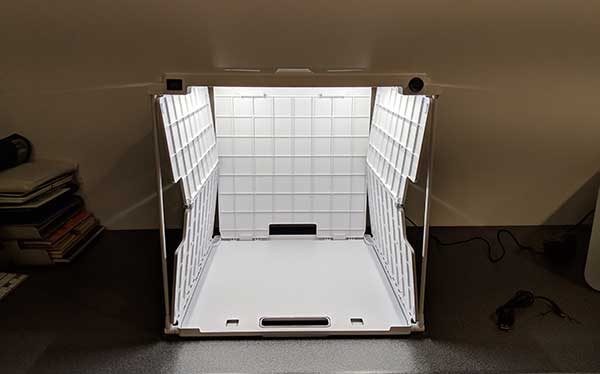
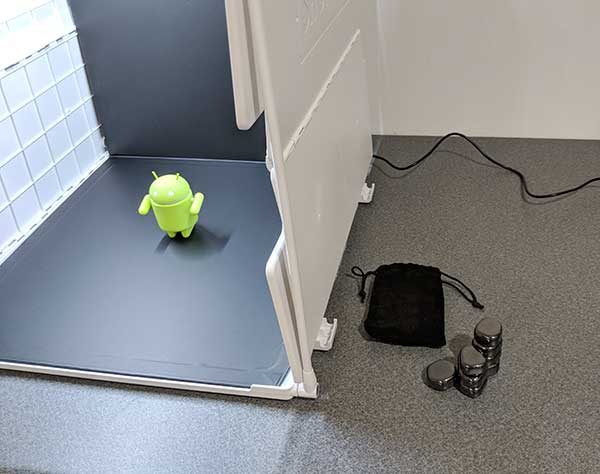
The heavy duty plastic SHOTBOX is easy to setup because all you really have to do is lift up on the top and reach inside to position the back panel into the slots on the bottom.

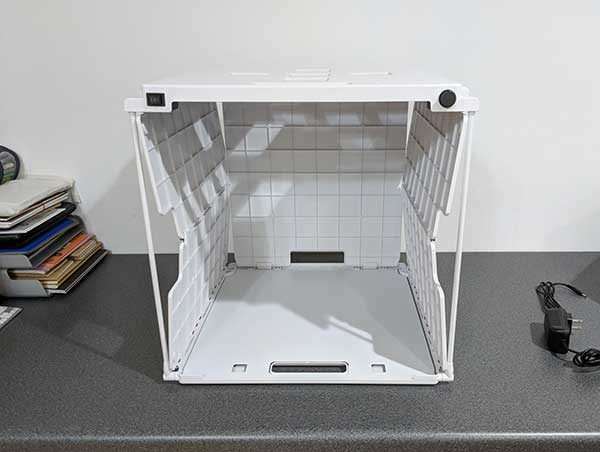
The next step is to lift the support legs on each side to secure the box.

You can then slide in the reversible floor panel that has a white and a black side. In the image above, I have the white side up.

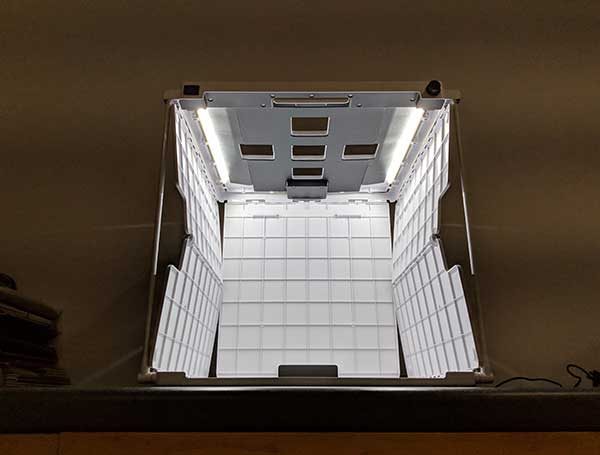
All that’s left to use the basic functionality is to attach the included AC adapter and flip the switch on the right to either have the left LED light strip on, the right LED light strip on, or both on.

Then the knob on the right will let you control the brightness. This knob also doubles as the power switch.

The LED lights strips are very bright and have a 50,000 hour lifespan which equals about 22+ years of use using the box for 6 hours a day.

At this point, you can start using the SHOTBOX to take product shots by placing the product inside the 14.25 wide x 15 tall x 15 inch deep box and shoot pictures either straight into the box from the front or from the top through one of the openings.

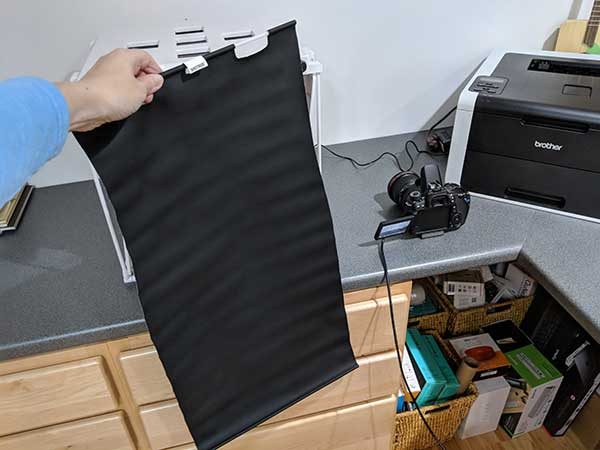
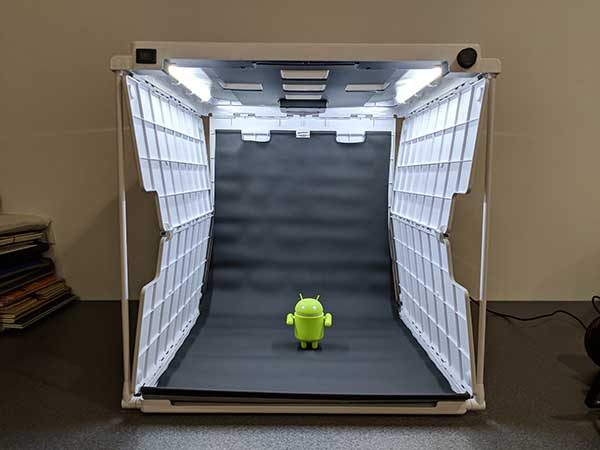
But to make the background look seamless, you will want to use one of the included backdrops.

The backdrop hooks to the back wall of the SHOTBOX to cover the back and the bottom like you see above.

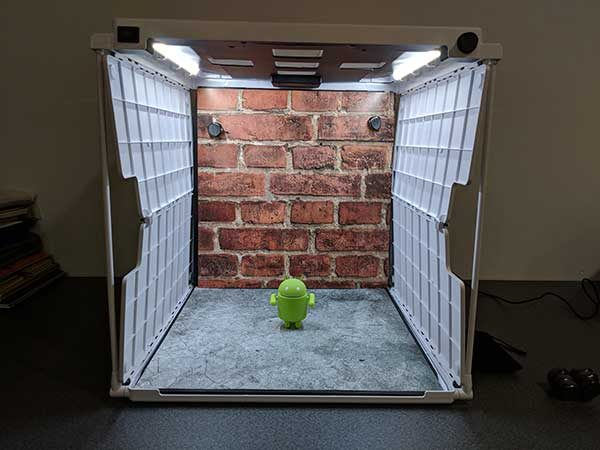
If you want to create an even nicer background, you can buy the optional PANELS set which comes with a folding magnetic panel that slides into the SHOTBOX. Then using the included magnets, you can use a panel on the back and a panel on the bottom to create the look you want.

In the example above, I used a concrete panel for the floor and a brick panel for the back wall.

Here’s the resulting image. Very cool right?

Your options are almost limitless using all the different panels.

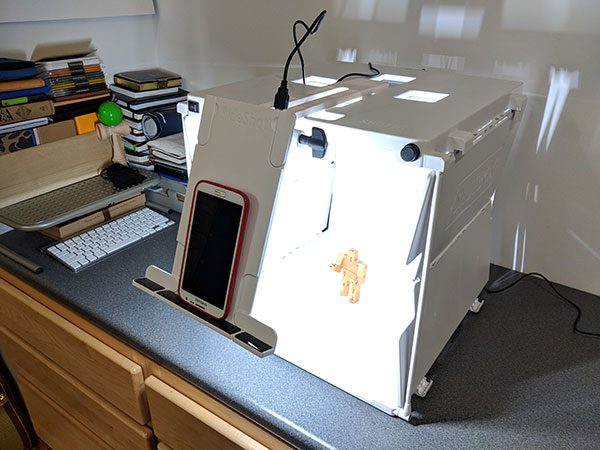
But wait, there’s more! You can also use the SideShot which is designed to hold your smartphone.

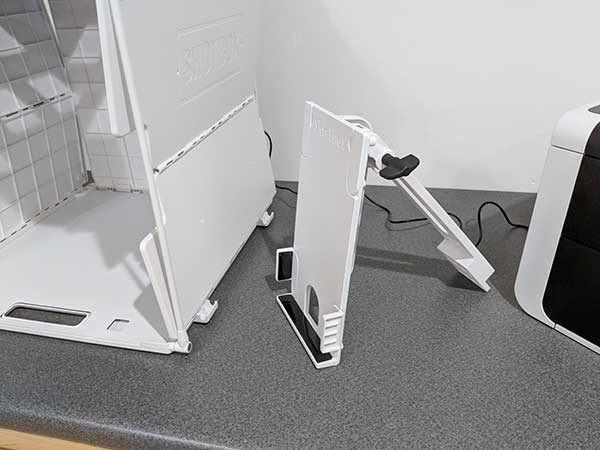
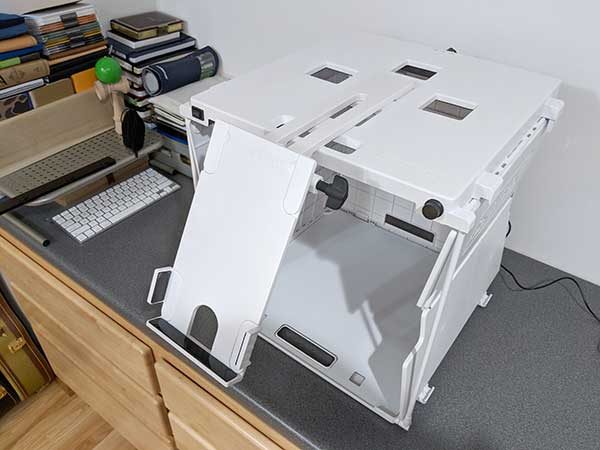
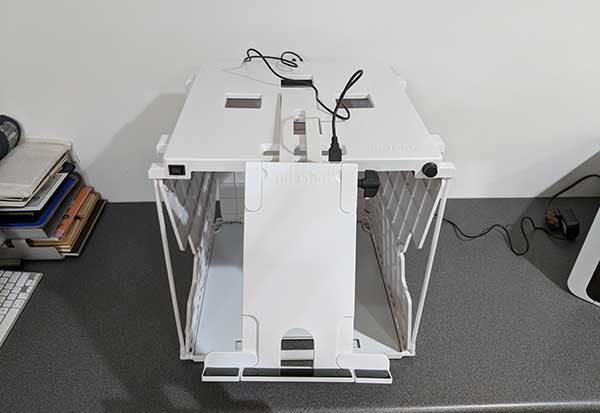
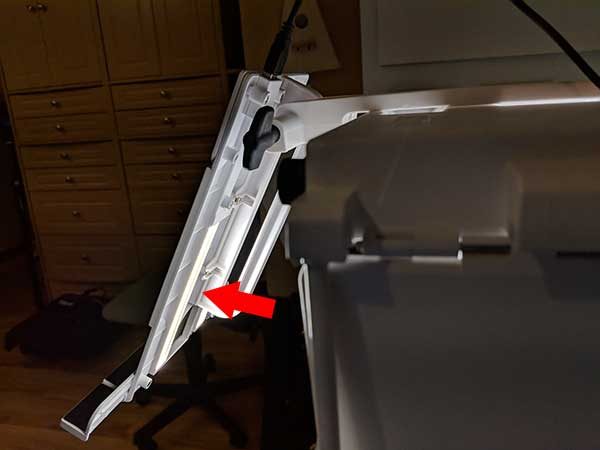
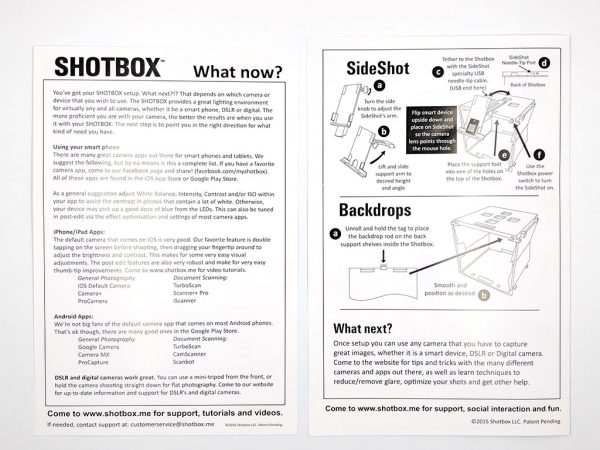
The SideShot has a support arm that fits into one of the openings on top of the SHOTBOX and then you can use the side knob on the SideShot to adjust the angle.

The included USB cable connects from the SideShot to the back of the SHOTBOX to provide power to the SideShot. Why does the holder need power you ask?

Because it lights up too! The SideShot has two LED strips of its own that shine into the SHOTBOX to provide more light on the product that you’re photographing.

When the SideShot is in position you can then place your smartphone upside down or sideways on the SideShot ledge so that the main camera points through the opening that looks into the SHOTBOX.

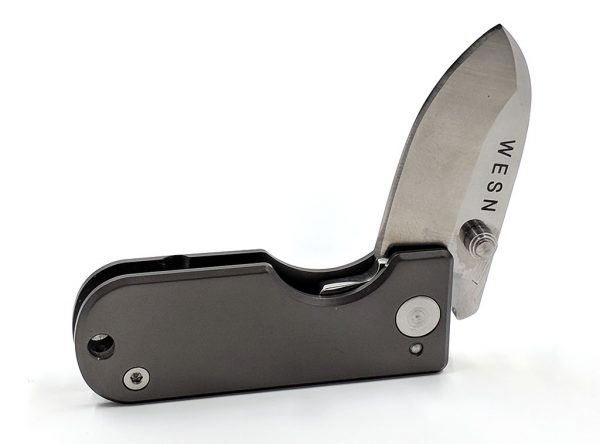
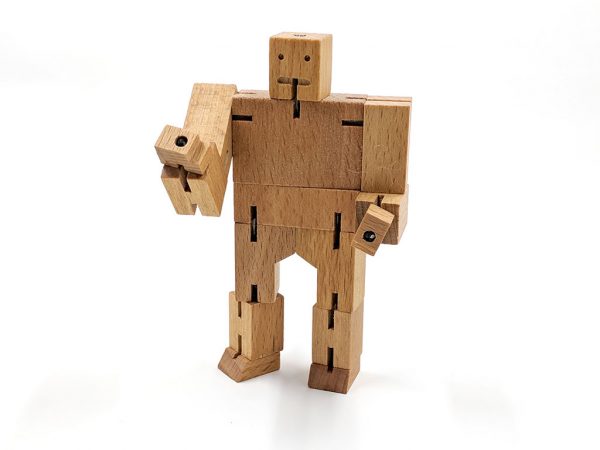
Here are some product shots that I’ve taken with the SHOTBOX and my Pixel 2 XL.

The first shot above of the fidget spinner was touched up in Photoshop to adjust the white balance and crop. The other two shots were straight out of the camera, so you can see that there can be some shadows that may or may not need to be cleaned up. But there is a way to minimise or even prevent shadows and glare, which is important if you use the SHOTBOX to take pictures of documents.

The SHOTBOX does a great job if you need to take pictures of documents. To do this, you just place the document on the bottom of the box and then use your smartphone or camera to shoot straight down from one of the openings on the top of the box.

You may run into glare issues from the side LED strips like you see in the image above.

To fix that, you can use the included glare strips which are magnet strips that you place over the LED light strips inside the SHOTBOX. These strips will cause the resulting image to be darker, but you can fix that with some post processing in Photoshop or even in your camera app.

Final thoughts

I won’t beat around the bush, I love the SHOTBOX. It’s allowed me to simplify my photography setup so that I no longer need a DSLR. The SHOTBOX is easy to use, folds down and can be stored when I don’t want to leave it set up on a desk, and just plain works great. I have tried another small light box, but the SHOTBOX is the one to get if you’re serious about document scanning and small object photography.

Source: The sample for this review was provided by SHOTBOX. Please visit their site for more info and Amazon to order.


Product Information

Price: $109.00 for just the SHOTBOX, $290.50 for everything reviewed here
Manufacturer: SHOTBOX
Retailer: Amazon
Pros:
  • Well made
  • Lots of features and add-ons
  • Easy to adjust LED light strips
Cons:
  • None

Filed in categories: Reviews

Tagged:

SHOTBOX portable photography light box review originally appeared on The Gadgeteer on November 18, 2017 at 11:38 am.

Note: If you are subscribed to this feed through FeedBurner, please switch to our native feed URL http://the-gadgeteer.com/feed/ in order to ensure continuous delivery.

This handy gadget lets you take 360 NoMatterWhat

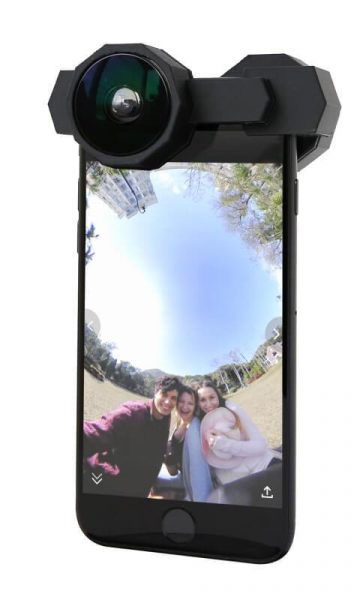
The NoMatterWhat Fusion Lens is a lightweight battery-free attachment for an iPhone that allows the phone’s front and rear cameras to capture seamless 360-degree content. The companion app combines and processes the images from both cameras into a 6K resolution composite image.  The composite image is available as 360 view or tiny planet mode. Currently, the app is limited to 360 images but in the future, the app will be able to take 4K video. The app includes native social sharing on Facebook and Instagram. The Fusion Lens will be available on Indigogo in the near future. In the meantime, you can register your email on the NoMatterWh.at  site to be notified of news regarding the lens system.
Filed in categories: News

Tagged: , ,

This handy gadget lets you take 360 NoMatterWhat originally appeared on The Gadgeteer on October 18, 2017 at 11:15 am.

Note: If you are subscribed to this feed through FeedBurner, please switch to our native feed URL http://the-gadgeteer.com/feed/ in order to ensure continuous delivery.