VOAMOKO Mouse Pad with USB Hub review

REVIEW – Our family computer is a MacBook Pro that lives on the kitchen table but floats around the house wherever it’s needed.  It’s not a particularly powerful laptop, but we only use it for ordinary things, like banking online, writing documents, and checking Facebook.  In general, our setup works, but it does have a couple of drawbacks.  One, our table isn’t a great mousepad, and two, our MacBook doesn’t have enough ports.  The perfect solution to our problem would be a mousepad that doubles as a USB hub, and that’s exactly what VOAMOKO’s gadget is!

What is it?

The VOAMOKO Mouse Pad with USB Hub is exactly what its name says:  It’s a metallic mousepad with a built-in USB hub designed to work with laptops.

What’s in the box?

The only two things in the box are the mousepad and a 7-inch-long USB cable.  Atypically, there are no manuals, quick start guides, or any warranty information.

Hardware specs

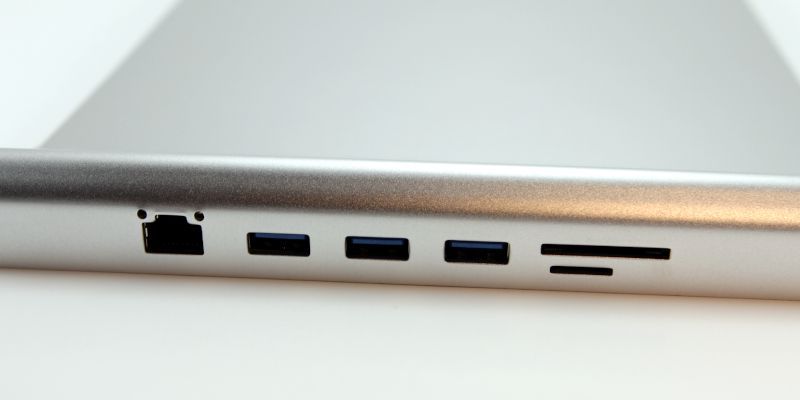
The mousepad is made of an aluminum alloy.  It’s available in gold, rose gold, black, space gray, or silver. It’s 10.5 long x 8 inches wide and has 6 ports on the back:

  • 1 x RJ45
  • 3 x USB 3.0
  • 1 x SD
  • 1 x Micro SD

Design and features

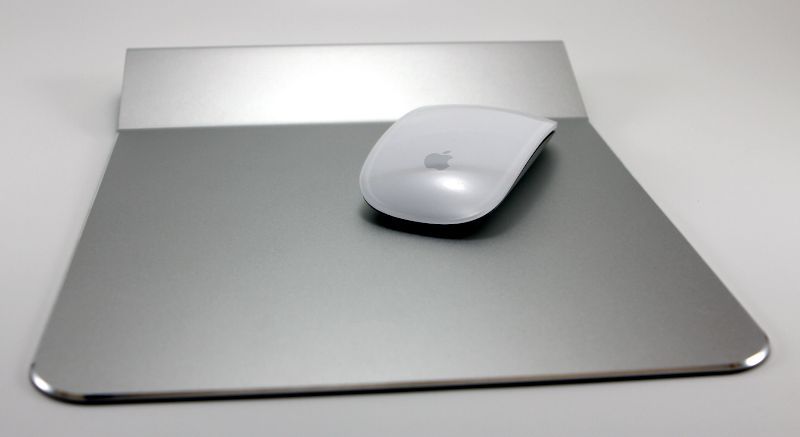
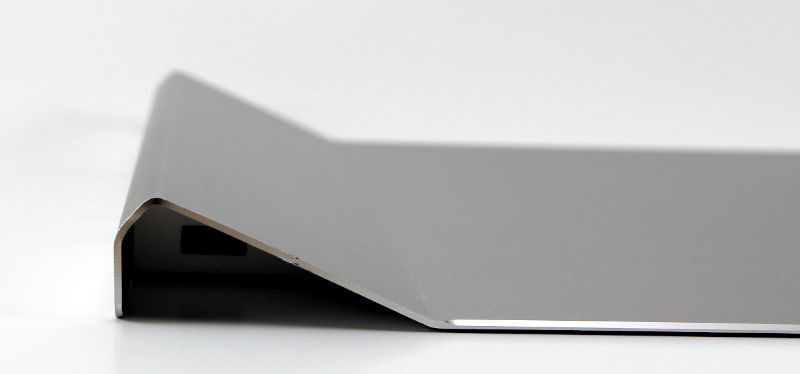
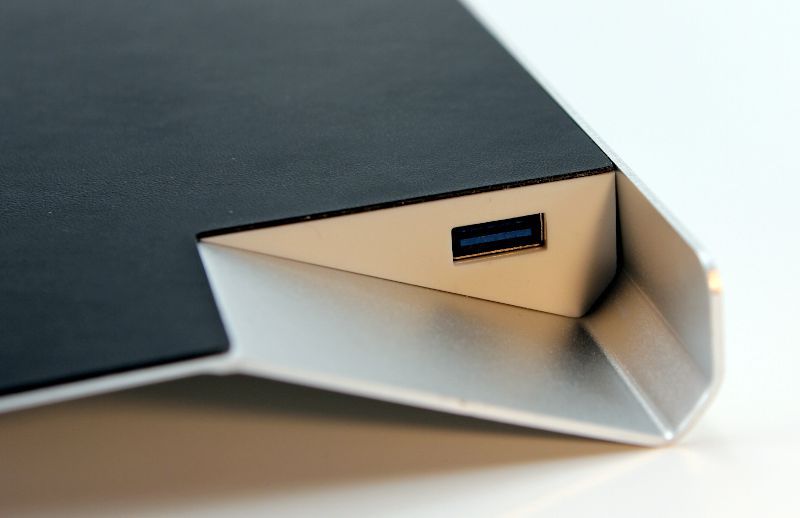
I have the silver mousepad, and it matches the silver on our MacBook Pro pretty well.  The main part of the mousepad is a flat surface, like any mousepad, but the back part that houses the hub is a raised, triangular shape.  The connector to the host is indented on the left side.  It almost looks like something that Apple would have designed.
Installation and setup

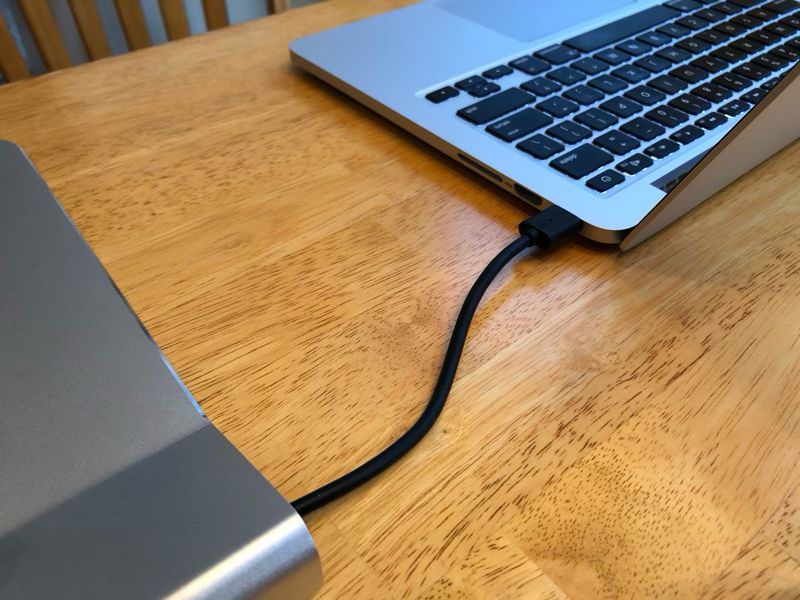
Installation is super simple.  I connected the USB cable to the port on the left side of the mousepad to the USB port on the right side of the laptop.  Done.  No power supplies or drivers required.

Performance

The mousepad is a slick, metallic surface, which means it’s very fast and not very tactile.  Personally, I prefer this to the slower speed of a cloth mousepad, but if it’s too fast for you, you can adjust the tracking speed of your mouse, if it supports this feature.  The mousepad seems very rigid and sturdy to me, and I expect it will work very well for a long time.

The great thing about this design is that when I need to use the laptop somewhere else, I only need to disconnect two cables, the USB cable to the mousepad and the power cable.  Everything else can remain right where it is, ready for whenever I bring the computer back.
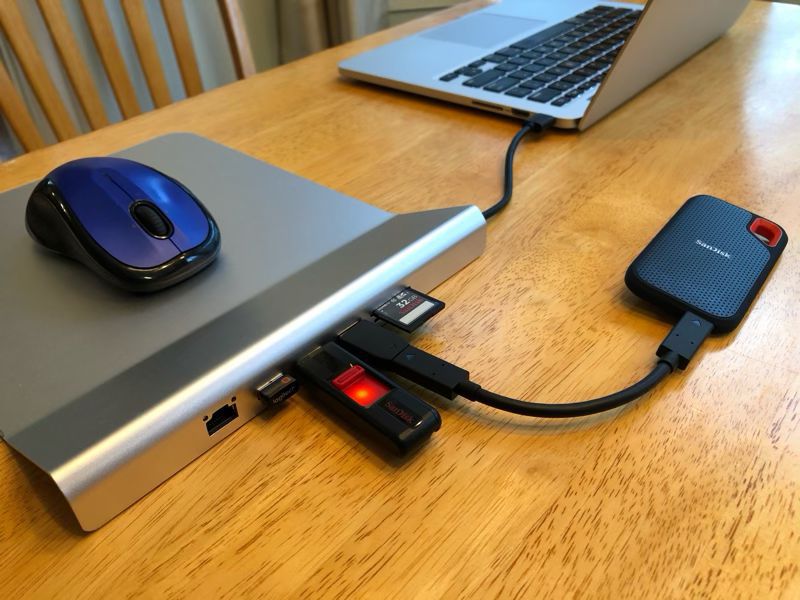
The ports on the back of the hub work great!  I connected an SD card from my Canon EOS 60D camera, a SanDisk USB drive with some files, the wireless dongle for my Logitech mouse, and my SanDisk SSD drive for Time Machine.  Everything just works without any fuss or drama, which is exactly what I want, and there’s plenty of space between each port.  It should be noted that the 3 USB ports implement the older, slower USB 3.0 specification, so the max throughput is only 5 Gbps.  If you consistently need to move lots of large files, you may find this to be too slow, but for normal, everyday usage, it’s probably just fine.  Amazon has an alternate version of this mousepad that connects to the host computer using USB-C, but as far as I can tell its ports are still USB 3.0, so you won’t see any difference in performance.
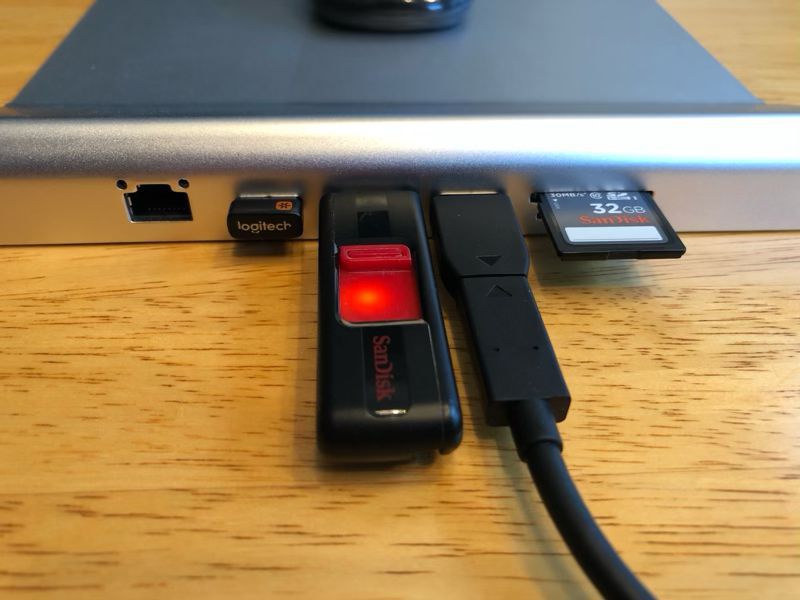
There are a couple of constraints that you should be aware of.  First, the port for connecting to the host computer is only available on the left side of the mousepad, which means that the mouse pad only works on the right side of your laptop.  Unfortunately, all of you “lefties” out there have been left out.  If you want to move the mousepad to the left side of your laptop, or if you don’t want your mousepad to be right next to your laptop, you’ll need to buy a longer USB cable.  Second, the cable is fairly rigid, which means that the mousepad is exactly 6 inches away from my laptop.  My personal preference would be to move it closer, but the cable won’t let me move it very far.  I wish that VOAMOKO had included a braided cable, which would provide the flexibility to adjust the mousepad’s location.
The bottom of the mousepad has a black, rubber surface attached to it, which provides good traction.  I never have problems with it slipping around while using it.
One final consideration is the price, which is currently $59.99 on Amazon.  You can buy an aluminum mousepad for less than $20, and you can buy a similar USB hub for less than $20.  That means you’re paying an extra $20 for the convenience of merging these into one product and decluttering your workspace.  I’m a fan of simplicity, so this seems like a good deal to me.

What I like

  • Solid construction
  • Nice aesthetics
  • Functional ports

What I’d change

  • A braided USB cable for connecting to the host computer

Final thoughts

I like this mousepad from VOAMOKO.  It does everything that I hoped it would do without any problems.  The functionality of the extra ports and the convenience of only having to plug in the one USB cable are good things.  If you’re in need of a mousepad and a hub, then I commend the VOAMOKO Mouse Pad with USB Hub to you.

Price:  $59.99
Where to buyAmazon
Source: The sample for this review was provided by VOAMOKO.

Filed in categories: Reviews

Tagged: ,

VOAMOKO Mouse Pad with USB Hub review originally appeared on The Gadgeteer on July 17, 2019 at 10:03 am.

Note: If you are subscribed to this feed through FeedBurner, please switch to our native feed URL http://the-gadgeteer.com/feed/ in order to ensure continuous delivery.

Lexip Mo42 Ceramic Glide Feet review

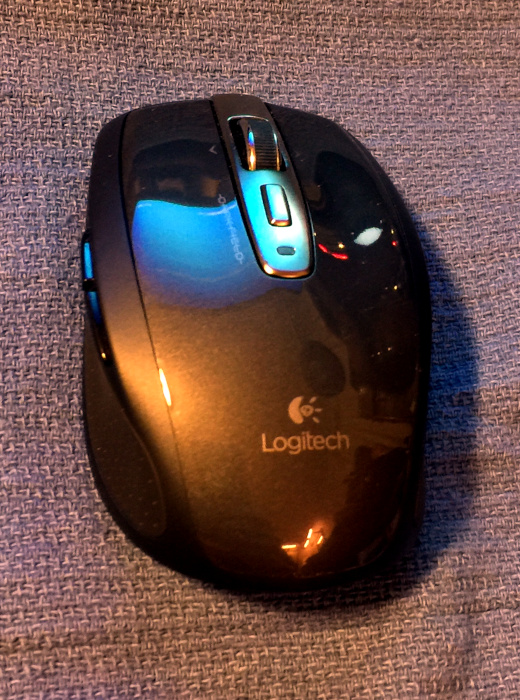
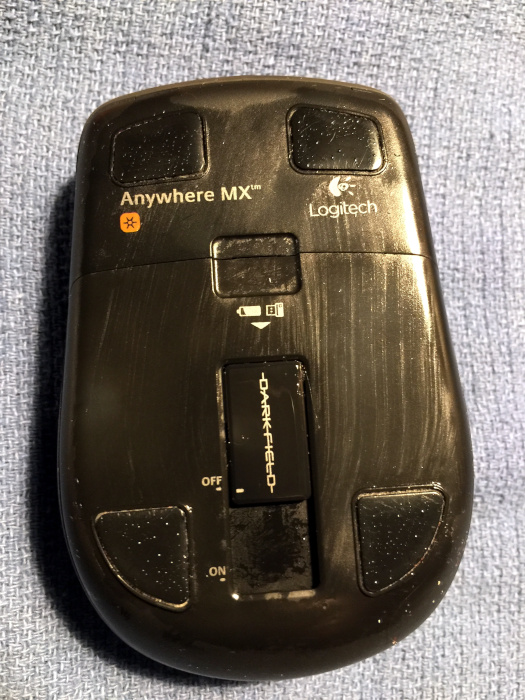
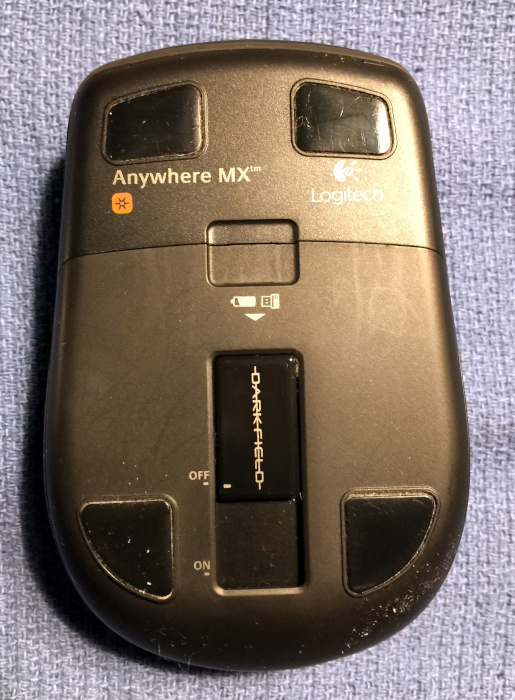
REVIEW – While I’m a HUGE fan of the Trackpoint navigation device–to the point of not buying laptops without it and having used TrackPoint-equiped keyboards for the past 25 years, navigating 2K and 4K displays using a TrackPoint is an exercise in frustration and loss of patience, and I’ve resorted to using a mouse when using my big screens. I’ve been happy with the general performance of my Logitech Anywhere MX (on my second one currently), but, after 5 years, it was starting to feel long in the tooth, so for the past year or so, I’ve been auditioning new mice for my daily-driver computer.  I haven’t found any that I like well enough to spend the money to upgrade from my trusty MX, including the new MX Anywhere 2. Each model that I tested was either just a bit off in the way it felt, way more expensive than what I wanted to spend, or worst of all, corded. So when Lexip offered the chance to upgrade my current mouse with some new shoes, I decided that I would give them a try.

What is it?

Lexip Mo42 Ceramic Glide Feet are add-on upgrades for your existing mouse which provide a more precise mousing experience.

What’s in the box?

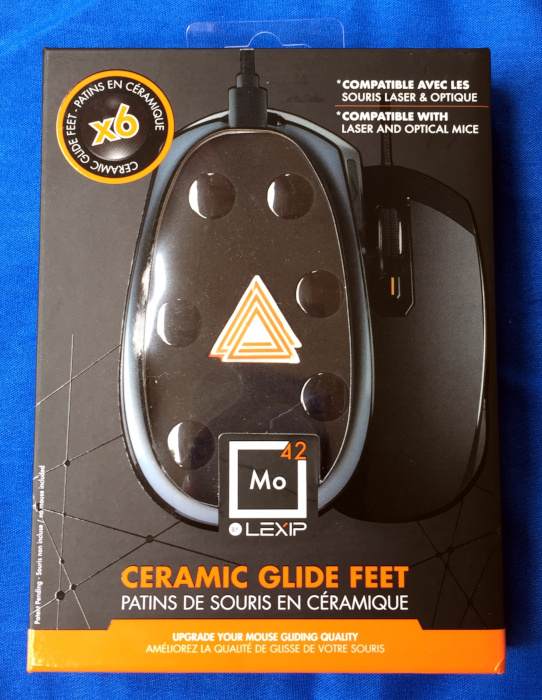
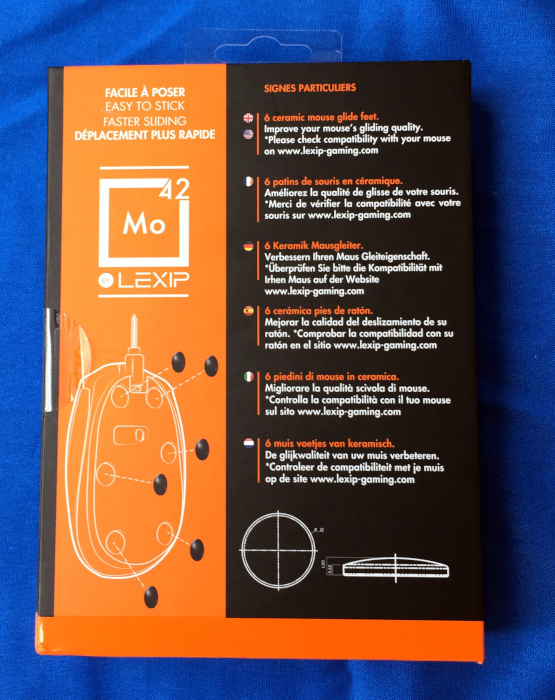
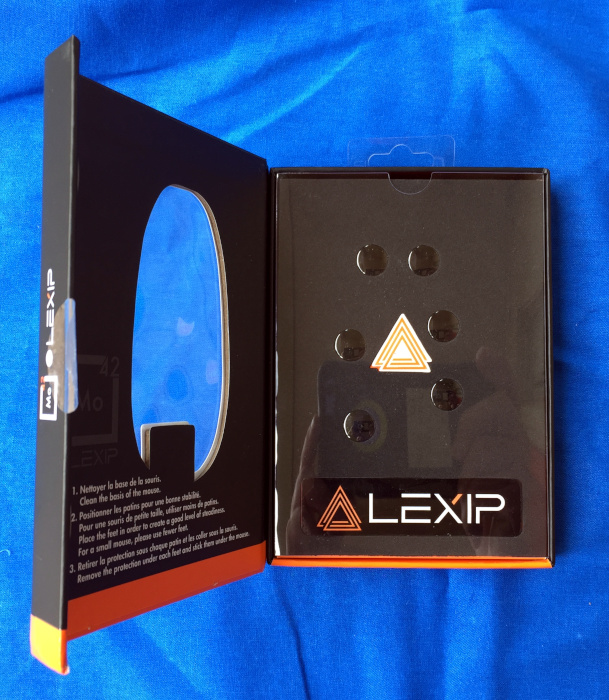
The Mo42 Ceramic Glide Feet, like beer, come in a 6-pack in a colorful container. This is where the libation simile will stop.

The full-color packaging shows off the mouse feet via transparent window and cutout on the front of the package. The rear of the package provides some basic sales information in a variety of European languages, including English. Lifting the magnetic side latch allows access to the package contents which are housed in a plastic sleeved foam and cardboard holder.

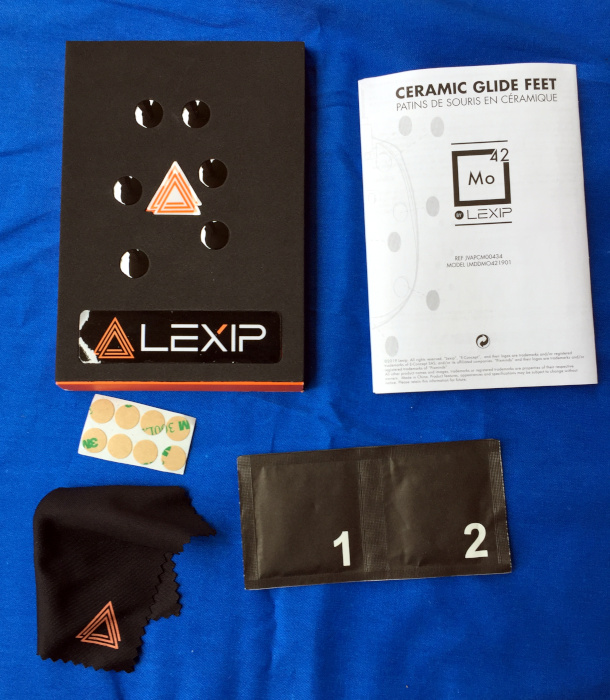
The package includes

  • 6 ceramic mouse feet
  • 8 3M adhesive dots
  • 2 cleaning wipes (alcohol swabs)
  • 1 cleaning cloth
  • 2 Lexip sticker
  • Instruction booklet

Hardware specs

Each of the individual Mo42 Ceramic Glide Feet is 12 mm in diameter and approximately 1.2 mm thick. The adhesive pad holding the foot to the mouse adds less than 1 mm to the overall height.

Design and features

In-depth description of the product and what it can do. This is the meat of your review. If there are additional sub-headings that you want to add in the main part of your review, use H3 titles (use the drop-down menu that is set to paragraph by default). Here are some examples that you might want to use but can remove if you don’t need them.

Setup

Installing the feet involves

  • cleaning the bottom of the mouse with one of the included wipes
  • drying in / removing lint and debris with the included cloth
  • removing one of the feet from the package
  • removing one of the adhesive dots from the sheet and adhering it to the foot
  • carefully removing the backer paper from the other side of the adhesive dot
  • placing the mouse foot on your mouse
  • repeat 2-5 times (3-6 feet / mouse)

By far the most difficult part was getting the mouse-side adhesive exposed once the dot was adhered to the feet. I had to fall back on my model decal placing skills to get the round backer paper loose from the identically sized adhesive disk.

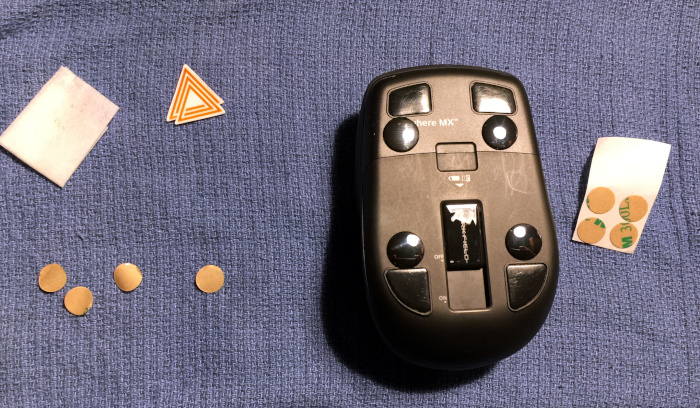
Here is the patient waiting for pre-op

Peri-operative cleaning

Post-operative recovery

I chose to only install 4 of the 6 feet as this matched up with the number of original pads on the mouse.

Performance

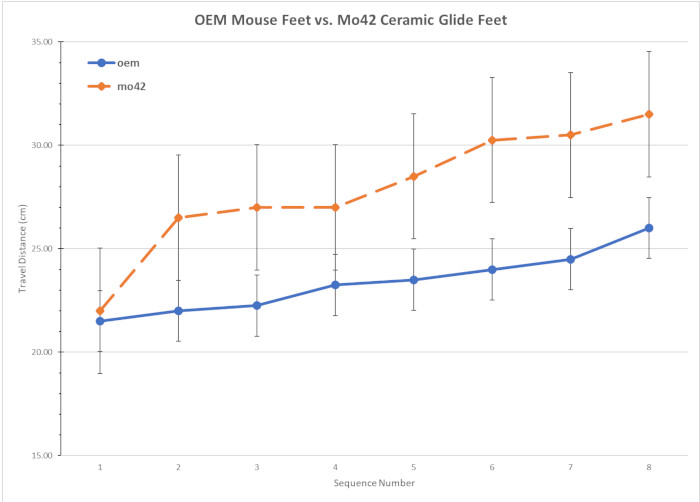
I would love to provide a detailed specifications about the coefficients of static and dynamic friction, but I sadly do not have access to force gauges that have fine enough resolution to measure the movement of the mouse. However, I did perform some surrogate testing by building an a-frame and swing arm from LEGO Technic pieces and used a large novelty eraser as both the swinging weight and striker to measure how far my mouse traveled when given an impulse from test rig. The mouse was not constrained as to travel direction. Measurements were made perpendicular to the axis of the swing arm.

The raw results were not as impressive as I had hoped based on the sales material, but showed a both a practical difference and a statistically significant difference between the two groups. The increased standard deviation in the Mo42 data is due to the mouse traveling at an angle to the the perpendicular measurement axis. All distances are in cm.

OEM Mouse Pads: 21.5, 22, 22.25, 23.25, 23.5, 24,  24.5, 26    mean:   23.38   standard deviation: 1.48
Mo42 Ceramic Feet: 22, 26.5, 27, 27, 28.5, 30.25, 30.5, 31.5    mean:  27.91    standard deviation: 3.02
Student’s T Test: p = 0.003


From a purely subjective standpoint, I will say that the Mo42 Ceramic Glide Feet feel like they have a smaller difference between the coefficient of static friction and the coefficient of dynamic friction. The practical upshot of this is that it takes less effort to get the mouse to start moving and keep it moving than it did with the OEM mouse pads. With the OEM pads, it took a bit more effort to get the mouse moving and then less to keep it moving.

The Mo42 Ceramic Glide Feet also seem to provide a better “road sense.” By this I mean that I can feel the texture (including debris) of my mousing surface which I think give me better control of the mouse.

What I like

  • Easy to install
  • Upgrade any mouse to move like a more expensive mouse

What needs to be improved

  • Nothing

Final thoughts

While I’m still not 100% happy with my Logitech Anywhere MX mouse, I’m much happier with my post-upgrade mouse. I’ll probably stick with my upgraded mouse for the foreseeable future, but will, like all Gadgeteers, be on the lookout for the next cool mouse.

Price: $19.99 MSRP
Where to buy: Lexip’s US store front and Amazon.
Source: The sample of this product was provided by Lexip.

Filed in categories: Reviews

Tagged: ,

Lexip Mo42 Ceramic Glide Feet review originally appeared on The Gadgeteer on April 30, 2019 at 9:00 am.

Note: If you are subscribed to this feed through FeedBurner, please switch to our native feed URL http://the-gadgeteer.com/feed/ in order to ensure continuous delivery.
Mousetrapper 2.0 alternative mouse review


REVIEW – By now, many of us that use computers frequently and as part of our daily lives have felt the discomfort that can occur when using a conventional mouse. The Mousetrapper Advance 2.0 is classified as a Wellness mouse that alleviates the inherent stresses of using the conventional mouse. Let’s see if this is true.

What is it?

The Mousetrapper Advance 2.0 is designed for ease of use, and to eliminate the stresses that are inherent with the use of a standard/conventional mouse. It is available in two versions with stylish accent colors: white or turquoise. There are six programmable buttons that allow you to customize the settings according to your needs. The reconfiguration of the buttons is accomplished via the MT Keys software which is available for download via the manufacturer’s website. The software lets you easily reconfigure all the button functions, add standard texts, create user profiles and more. MT Keys software is available for both Mac and PC.

What’s in the box


1 x Mousetrapper Advance 2.0
1 x Mini USB Cable
1 x User Manual

Design and features

Features

  • Super-slim, ergonomic design
  • Accent colors in white or turquoise
  • Control pad with click and scroll functions
  • 6 programmable buttons for customization to your needs, using MT Keys
  • Replaceable wrist supports
  • Height adjustment with folding non-slip surface
  • 2000 dpi

Specifications

  • Control pad with click function and scroll on the right side
  • 6 programmable buttons
  • USB connection
  • 2,000 dpi
  • Compatible with all PC and Mac computers with a USB port. MT Keys requires Windows 7 or later, or Mac OS 10 or later
  • Width: 480 mm; Height: 20 mm; Depth: 110 mm; Weight: 670 g

In the immediate mouse control area, there is the mouse in the center which is a ribbed control pad surface that moves as the mouse, and it is surrounded by the six programmable buttons.


On the bottom of the Mousetrapper, there is a rubber pad that can be used in a few ways such as a surface grip, for height adjustment or in my case I extended it under my laptop. On the hard surface of the bottom, there is a basic instruction diagram.


On the left side of the Mousetrapper, there is a mini USB port that allows you to connect to the computer, The device is USB powered.

Performance

The laptop that I tested this mouse with has Windows 7 installed. Once I connected the Mousetrapper, Windows automatically downloaded and installed the driver. For my use, I placed the rubber pad under the laptop and I was ready to go.

No matter how much I try, I find the control mouse pad to be stiff when moving it and its movement is also very jerky and inconsistent. The control pad does move in every possible direction just like you can a conventional mouse, but to me, it feels really strange and it is a feeling that is a bit difficult to explain. In my mind, it feels somewhat like moving a piece of silicone on a smooth and somewhat lubricated surface. Using it along with the buttons just seems completely awkward to me. Nevertheless, I continued testing and proceeded to the next step to download the software that allows you to program/reprogram the buttons. As shown in the picture below, there are 3 options to download the appropriate MT Keys software. Since I am using Windows 7, I selected the middle option.


No matter how many times I tried, the picture below shows the result I get when I select the Windows 7 option shown in the middle. I was able to get to a proper download screen if I selected the Windows 10 option, but that is not the OS that I am using, and Windows 10 uses a Windows app.

What I like

  • Ease of install
  • The built-in wrist pads

What can be improved

  • Functional application and use as a mouse
  • Website support options/availability

Final thoughts

When I first saw this mouse, I was very eager to try it and to experience its functionality. While I have a feeling that some people may have a better experience than me, I find it awkward and not very practical or functional. There are a large variety of mouse styles and options available to consumers, and based on the Kensington mouse I currently use, in my opinion, many of the available options work better and cost way less. This device is expensive.

Price: $245.63
Where to buy: Amazon
Sample: The sample for this review was provided by Prestige International

Filed in categories: Reviews

Tagged: ,

Mousetrapper 2.0 alternative mouse review originally appeared on The Gadgeteer on March 21, 2019 at 12:22 pm.

Note: If you are subscribed to this feed through FeedBurner, please switch to our native feed URL http://the-gadgeteer.com/feed/ in order to ensure continuous delivery.
Mouse where you want with the Cherry MW 8 Advanced optical mouse

NEWS – Mousing is sometimes a hit or miss proposition, depending on where you rest your mouse.  Some colors, or even worse, glass, with a complete lack of color or contrast, can confound many optical mice.  Cherry aims to end that problem with the Cherry MW 8 Advanced optical LED laser mouse.

Sporting a metal surface and mouse wheel and anodized aluminum shell with rubber sides, the mouse has a build quality that should last. Optical resolution can be set to 600, 1,000, 1,600 or 3,200 dpi, allowing for precise cursor movement, even on 4K monitors. Six buttons and a scroll wheel allow for versatility in mousing functions.

The mouse is powered via its internal lithium 550 mAh battery that should allow for several weeks of pointing and clicking between charges.  Charging is done with the included USB cord. The mouse can be used while charging.  The micro USB charge port is in the front of the mouse, essentially making the MW 8 Advanced mimic a corded mouse while charging.

The MW 8 Advanced can connect to your PC via the included 2.4 GHz USB receiver or Bluetooth 4.0.  It can switch between the two allowing for easy movement between two different PCs.

Cherry introduced the MW 8 Advanced in Europe late in 2018. It should be available very soon in the US for a suggested retail price of $50. Head over to Cherry’s site for more details.

Filed in categories: News

Tagged:

Mouse where you want with the Cherry MW 8 Advanced optical mouse originally appeared on The Gadgeteer on February 16, 2019 at 10:00 am.

Note: If you are subscribed to this feed through FeedBurner, please switch to our native feed URL http://the-gadgeteer.com/feed/ in order to ensure continuous delivery.
HyperX Pulsefire FPS Pro gaming mouse review

REVIEW – I’m a huge fan of good accessories for my PC for home or work. I need a good sturdy keyboard and solid mouse for regular tasks as well as some light gaming. I prefer first-person shooters like Overwatch and CS:GO, and got the chance to review the HyperX Pulsefire FPS Pro mouse, I had to give it a try!

What is it?


The HyperX Pulsefire FPS Pro is a gaming mouse equipped with RGB lighting, precision sensor and six programmable buttons for customization. I was also sent the HyperX FURY S Pro gaming mouse pad which its optimized for use with the HyperX Pulsefire FPS Pro.

Hardware specs

  • Pixart 3389 sensor with native DPI up to 16,000
  • Attached braided USB cable
  • RGB lighting
  • Six programmable buttons
  • Onboard memory to store customizations
  • Extra-large mouse skates for smooth, controlled gliding
  • Weight: 4.6 oz
  • Dimensions: 5in x 2.8in x 1.7in

What’s in the box?

  • HyperX Pulsefire FPS Pro
  • User manual

Design and features

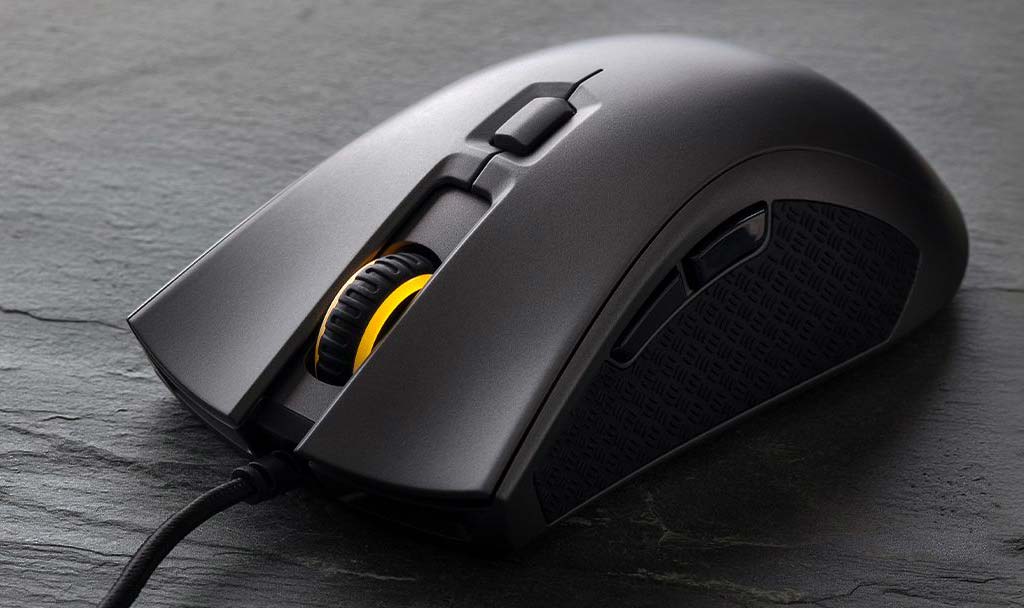
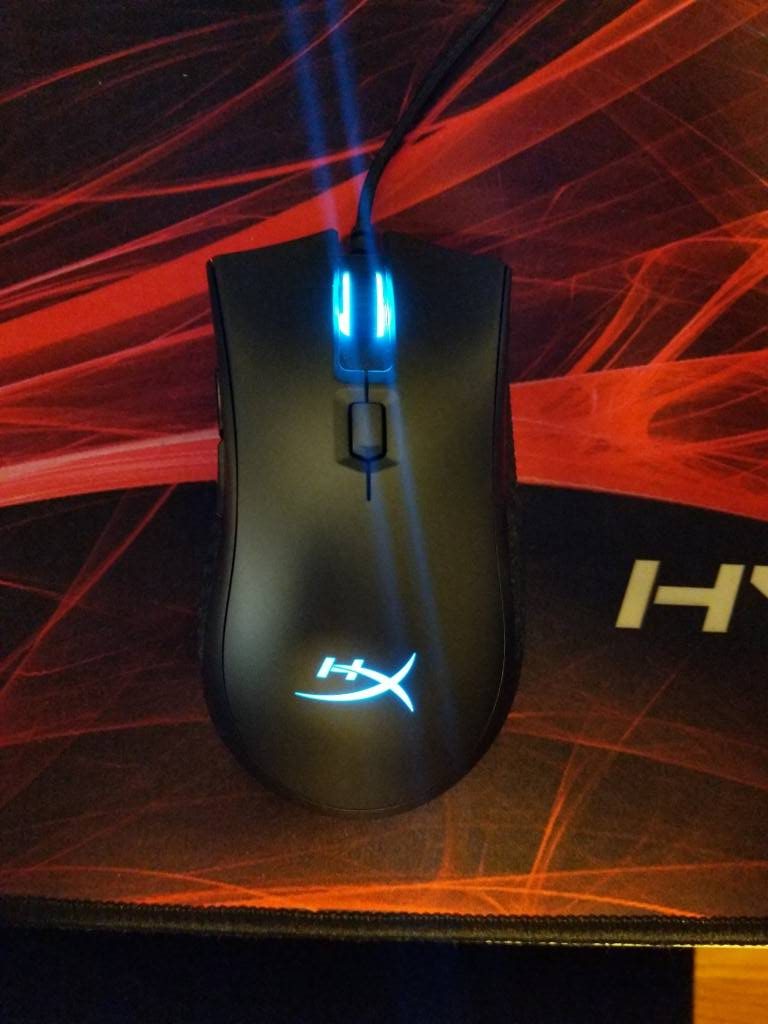
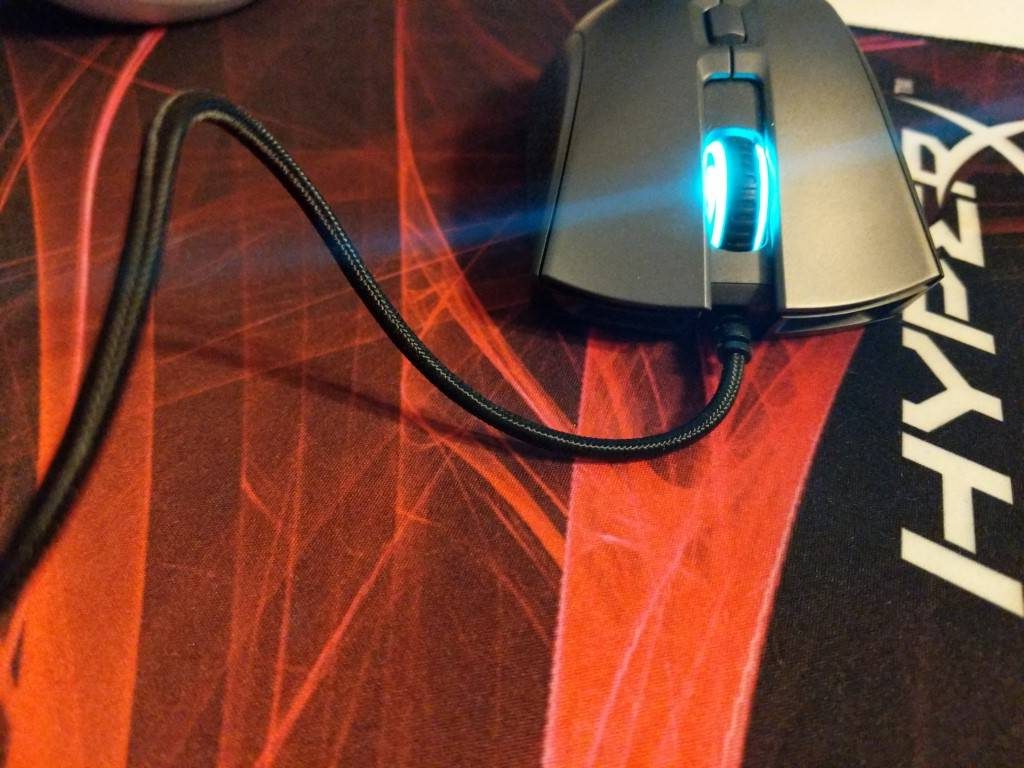
The HyperX Pulsefire FPS Pro comes in a sleek slate grey color, with an RGB backlit HyperX logo on the palm of the mouse and RGB backlight on the scroll wheel. It has a good hefty weight to it and fits the palm of the hand nicely.

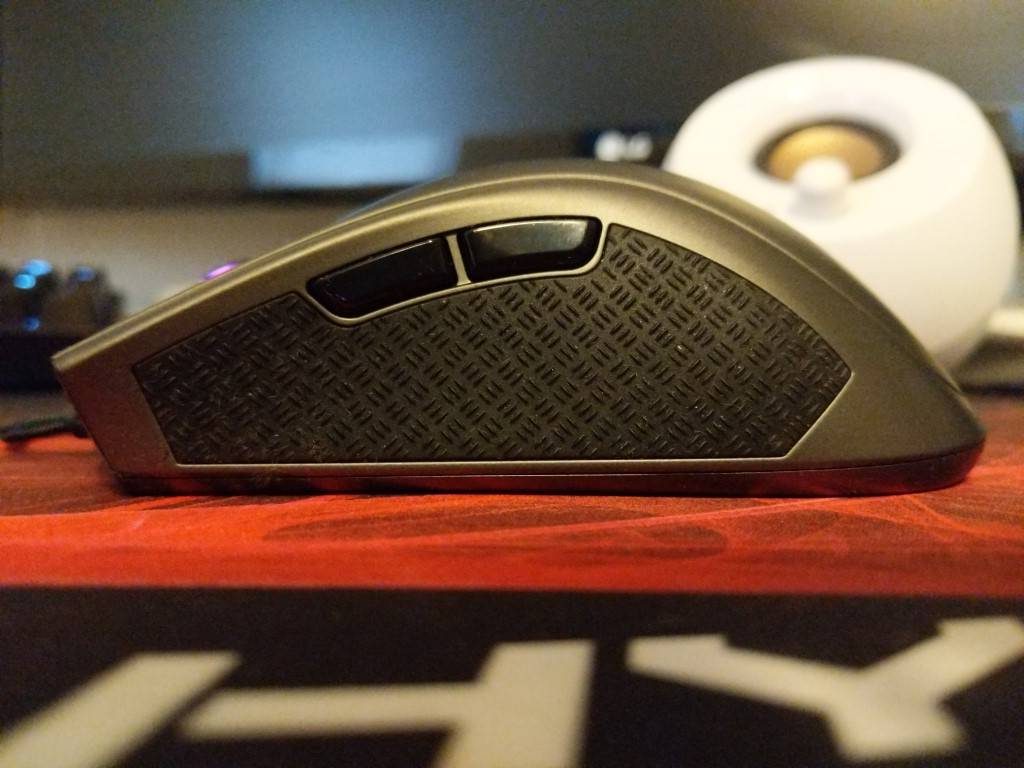
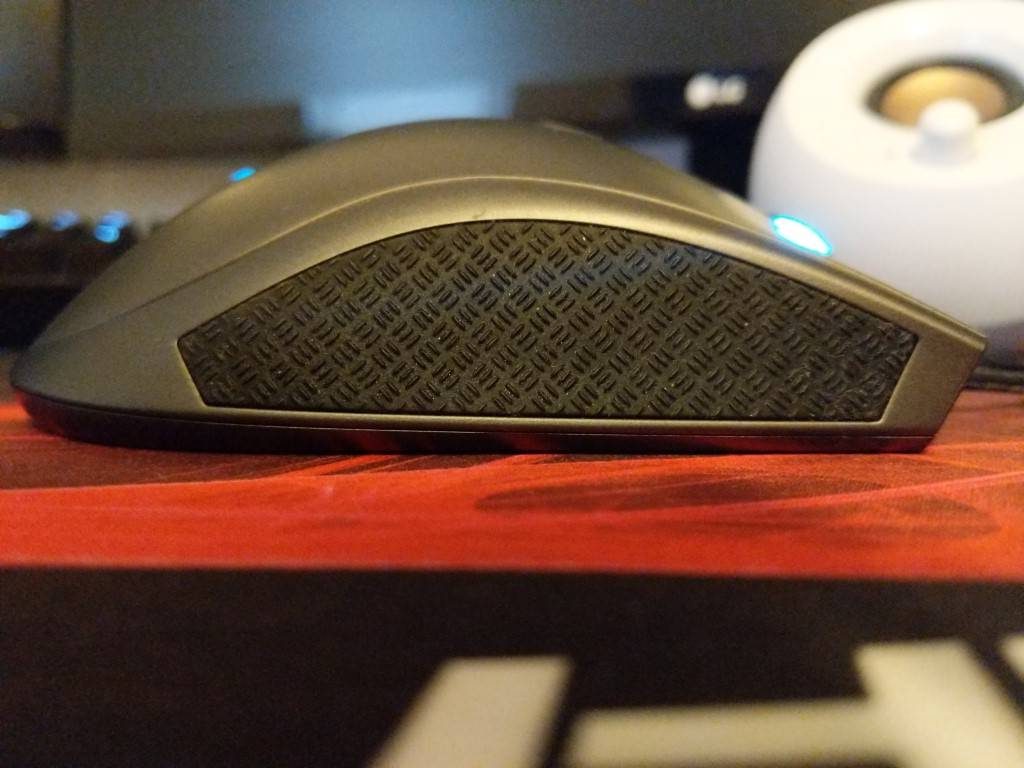
On each side of the mouse, there are black, textured side grips to prevent slippage.

The USB cord is braided, which allows flexibility in movement around the desk.

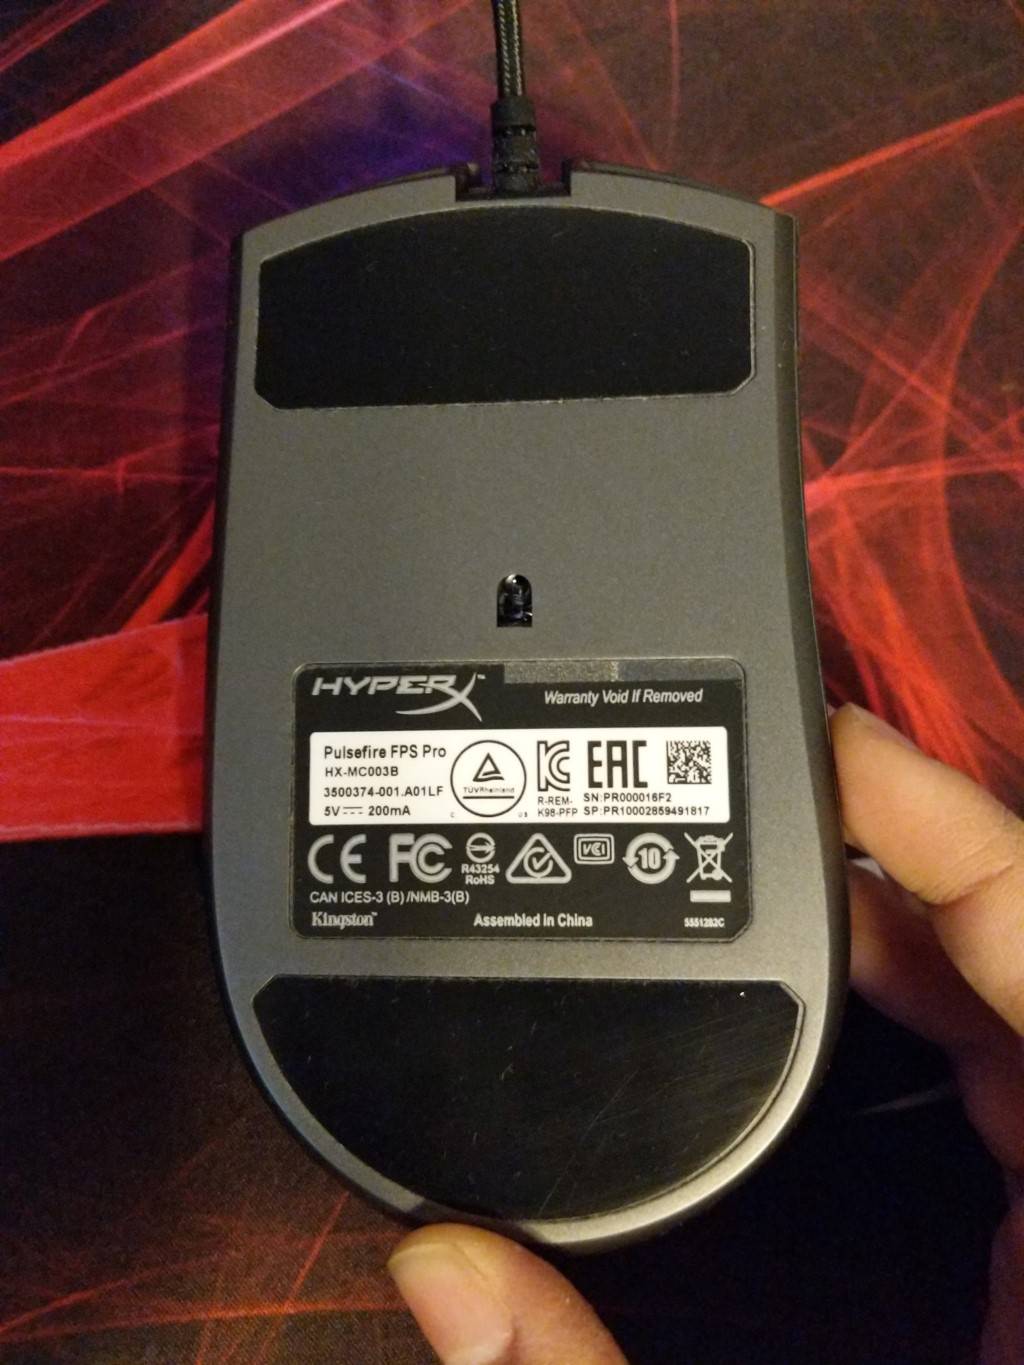
The bottom of the mouse has nice large surface skates to glide over a desk or mouse pad.

Setup

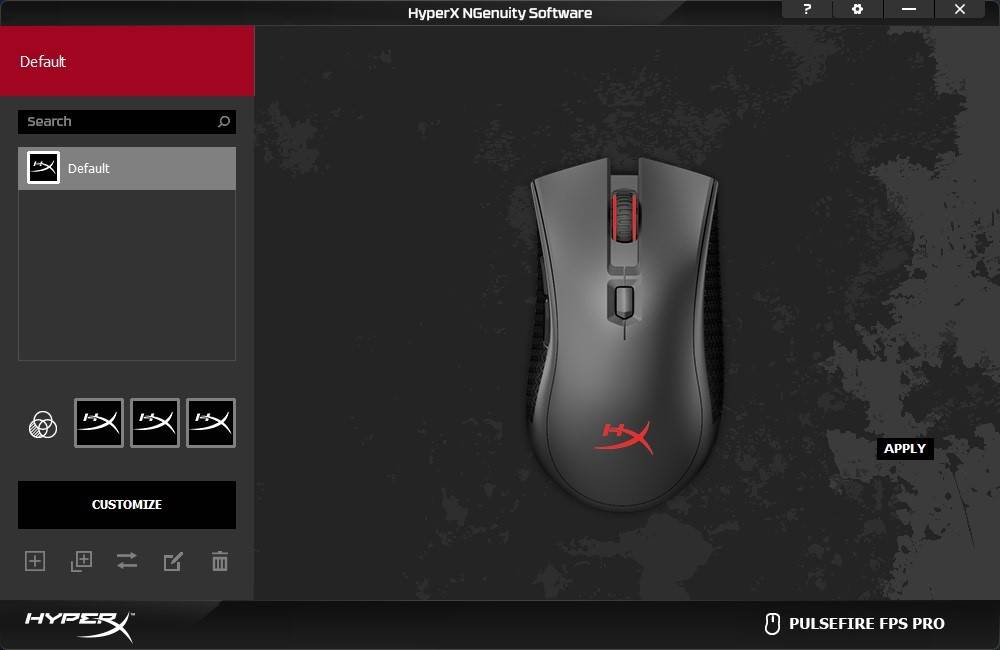
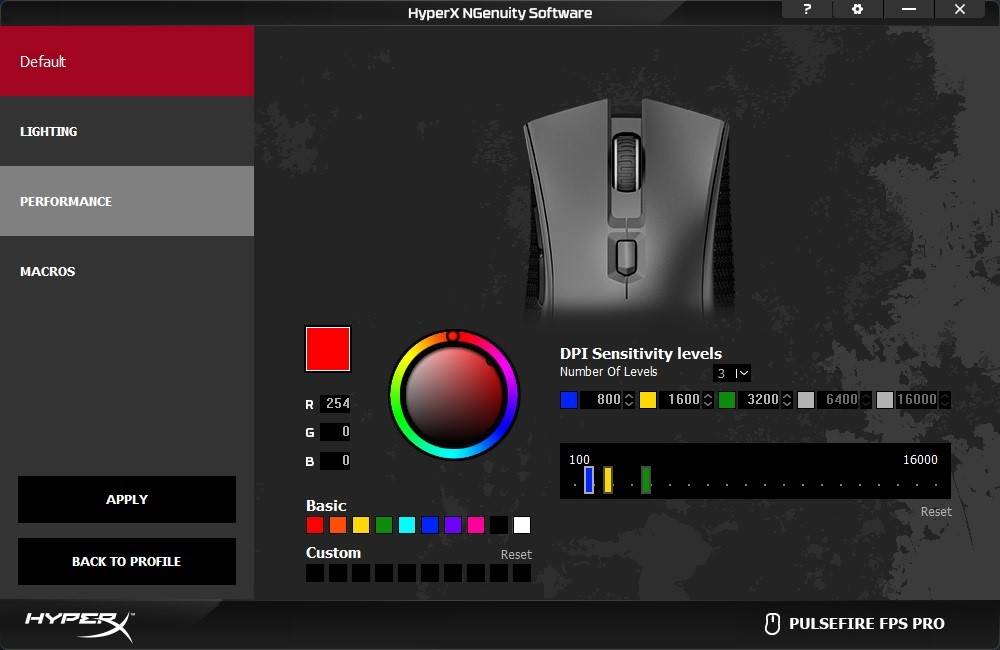
Setup was a breeze as the mouse is wired USB. Upon connection, I was prompted to install the HyperX NGenuity software. This allows for customization of key bindings, RGB lighting, and macro recording on various profiles.

Full range of RGB color effects are customizable as well as DPI sensitivity levels.

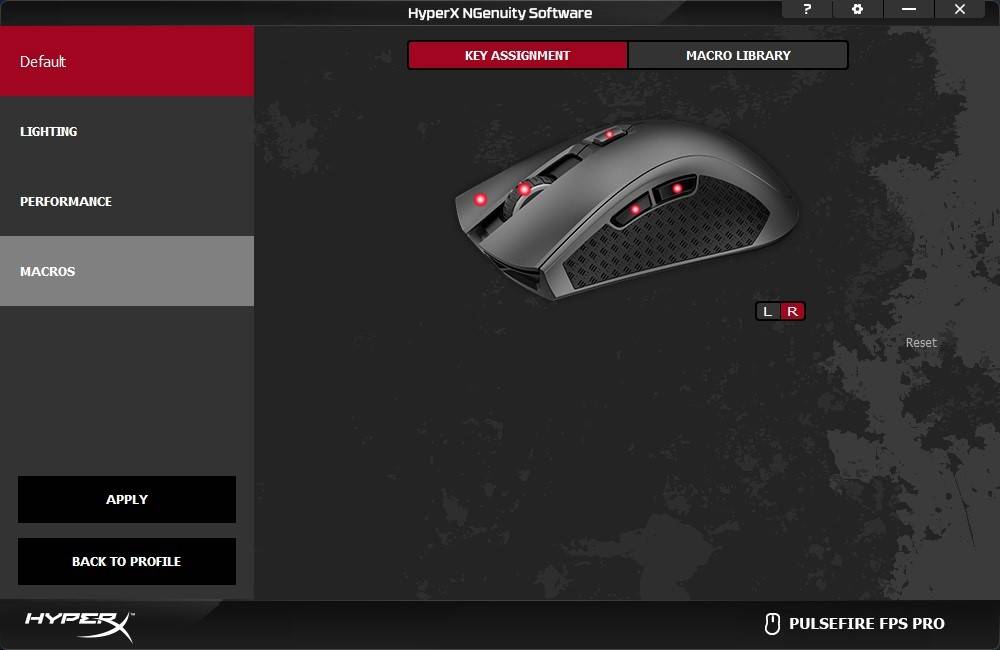
The HyperX NGenuity software also allows for six customized button assignments and macros.

Performance

The HyperX Pulsefire FPS Pro gaming mouse is a pleasure to use for both gaming and everyday tasks. The cursor tracking was excellent, as I was able to customize the speed and sensitivity to my preference. The weight is perfect and feels smooth due to the ergonomic design of the mouse.

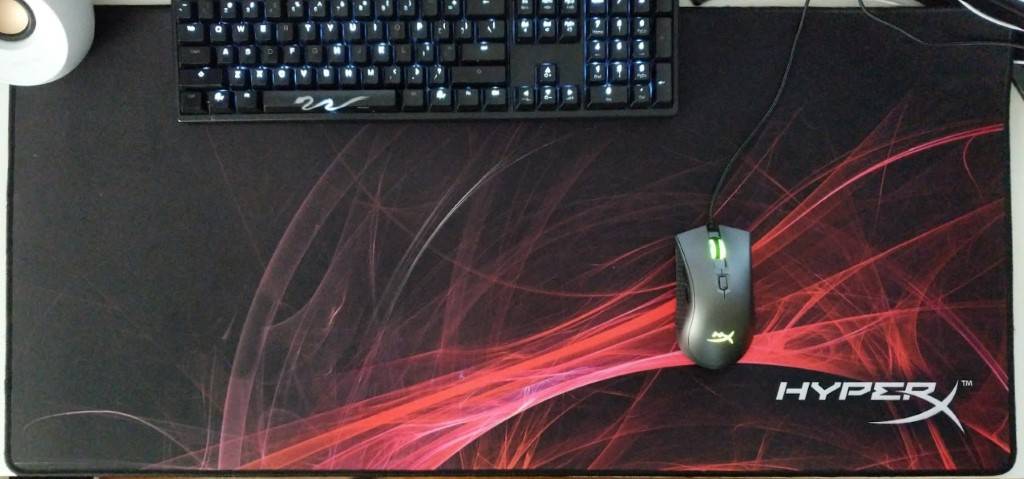
As mentioned previously, I was sent the extra large HyperX FURY S Pro gaming mouse pad, which was great to keep my speakers, keyboard, and mouse on top of. It was nice to use with the Pulsefire FPS Pro mouse, but not too necessary for the desk I use.

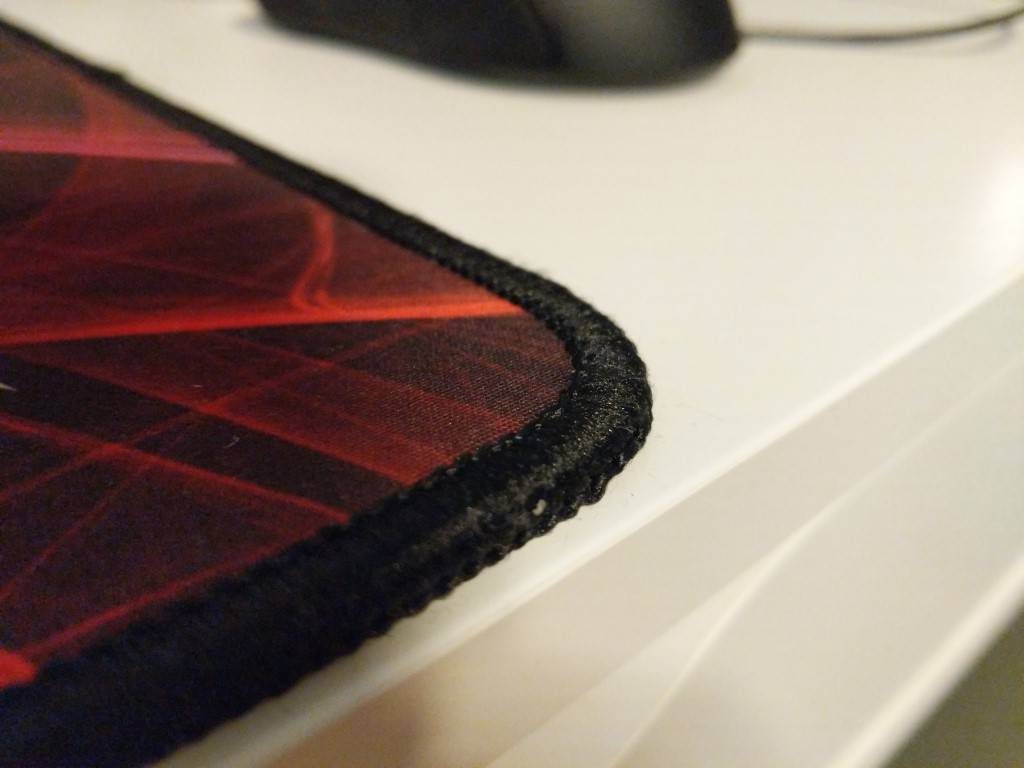
It has anti-fray stitched edges and a rubber textured underside, so everything on top of it stays stable and doesn’t slip around.

What I like

  • Well built construction
  • Smooth optical sensor
  • Software for customizable buttons and DPI settings

What needs to be improved

  • The mouse is a bit big for my medium sized hands, but this is a personal preference and doesn’t affect usage
  • The HyperX Fury S Pro mouse pad had a strong chemical smell uponopening, but lightens after time

Final thoughts

I really enjoyed using the HyperX Pulsefire FPS Pro even though it was a bit big for my grip. I tend to pick up the mouse alot while moving it, so that may or may not work for you. It feels great in hand otherwise, and I like customizing the lighting and programmable buttons via their software. If you want a smooth user experience and mouse upgrade, I’d recommend picking one up. The HyperX Fury S Pro mouse pad is optional, but good if you need a large anti-skid surface for the mouse to glide over.

Price: $59.99
Where to buy: HyperXgaming.com and Amazon
Source: The sample of this product was provided by HyperX.

Filed in categories: Reviews

Tagged: ,

HyperX Pulsefire FPS Pro gaming mouse review originally appeared on The Gadgeteer on September 23, 2018 at 11:00 am.

Note: If you are subscribed to this feed through FeedBurner, please switch to our native feed URL http://the-gadgeteer.com/feed/ in order to ensure continuous delivery.