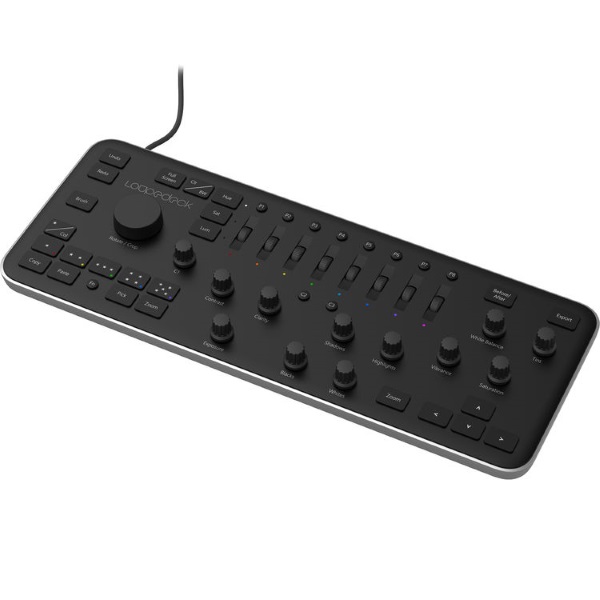
The Loupedeck Photo Editing Console makes editing easy

Whenever I go on a photo shoot whether it is a professional event, a “people” shoot or my own getaway seeking amazing nature shots, I always come back home with hundreds if not thousands of photos. Many of them are multiple shots of the same subject with maybe some difference in the lighting, or movement or angle. Once I get back to my home studio, I am usually faced with the daunting task of going through the pictures in Adobe Lightroom one by one, to rate the shots, and to find the best ones to edit to ultimately produce the best final photographs. The actual task of editing the photos with precision and accuracy using a mouse is even more daunting.

For many years, I have experimented with reprogramming midi audio boards to create an effective and efficient electronic hardware control board, to manipulate the software sliders, knobs, and controls in Lightroom. While I have been somewhat successful, I was never adequately satisfied with the result.

A few months ago, I was able to buy the Loupedeck Photo Editing Console for Lightroom, which was designed specifically to do what I was trying to with my reprogrammed midi boards. The Loupedeck works amazingly well with Lightroom, and rating and editing of photos are done with ease and accuracy. It has dedicated dials, wheels and keys, programmable preset buttons, and specifically assigned buttons, for the most common editing tasks. It allows me to adjust each characteristic with great precision, and to ultimately produce simply amazing pictures. And, since it connects and is powered via its USB cable, it is very portable.

Once you download the installation software form the Loupedeck website, installation is a breeze, and overall is it a very professional, fun, and reliable photo editing solution.

You can purchase the Loupedeck at B&H Photo Video for $259.

Filed in categories: News

Tagged: ,

The Loupedeck Photo Editing Console makes editing easy originally appeared on The Gadgeteer on March 3, 2018 at 9:00 am.

Note: If you are subscribed to this feed through FeedBurner, please switch to our native feed URL http://the-gadgeteer.com/feed/ in order to ensure continuous delivery.

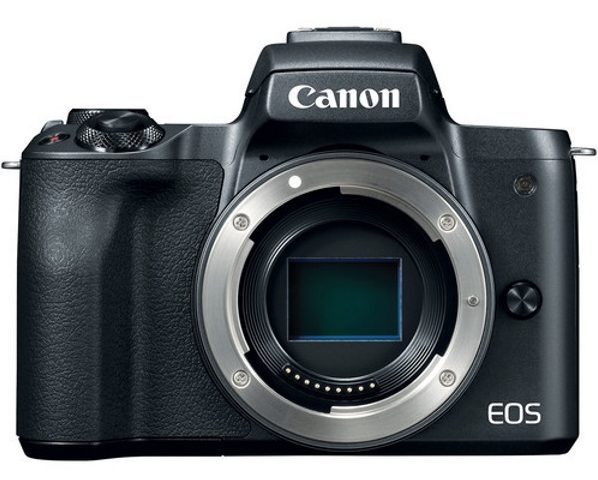
The Canon EOS M50 – finally a camera that may fill a critical void in their lineup!

Whenever I go on a photography shoot, I always feel uneasy only having one camera with me. While it makes a lot of sense to have a backup camera, it is also very important to have a camera that is lighter, smaller, very capable in features, and otherwise not lagging very far behind my larger professional series DSLR. As a Canon fan, I have looked at their line of cameras to find one that would closely meet my requirements, but so far, they have fallen short in several ways.

This past week, Canon announced the EOS M50 Mirrorless Digital Camera and I immediately got excited. The M50 prominently features a new Raw format, a new DIGIC 8 processor which is a first for Canon, an OLED electronic viewfinder, a shooting rate of 10 fps and yes!!, 4K video.

Canon has chosen to use a 24.1MP APS-C CMOS sensor and they have included the options for Wi-Fi with NFC and Bluetooth. They also feature Dual Pixel CMOS Autofocus and 5-axis image stabilization, but it seems that the Dual Pixel Autofocus is not available when shooting 4K video. (I will confirm this when I get one in my hands!). The inclusion of their eTTL flash system makes it easy to swap my flash from my professional EOS DSLR and the M50, and just keep going.

This combination of features makes this camera very appealing as a “go to” backup camera, especially since it weighs less that one pound with the battery and memory card installed.

The M50 is expected to be released in March 2018, and can be pre-ordered as a body only, or with a couple of options for kit lens.

You can head over to B&H Photo Video and pre-order at a starting price of $779.00.

Filed in categories: News

Tagged: ,

The Canon EOS M50 – finally a camera that may fill a critical void in their lineup! originally appeared on The Gadgeteer on March 1, 2018 at 10:00 am.

Note: If you are subscribed to this feed through FeedBurner, please switch to our native feed URL http://the-gadgeteer.com/feed/ in order to ensure continuous delivery.

Prynt Pocket iPhone photo printer and camera grip review

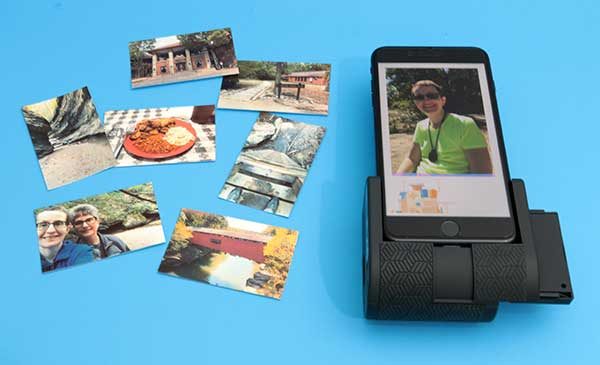
If you own a smartphone, I am willing to bet that you have more than a few images on your phone. Except for a Canon 70D DSLR that I use to take most of my product review shots, I use my iPhone 7 Plus to take all my personal shots. 90% of those images stay on the phone and don’t get shared which is kind of sad. Remember the Polaroid cameras from decades ago that had a built-in printer that printed and spit out the picture as soon as you snapped them? The Prynt Pocket iPhone photo printer reminds me of a smaller version of that product. 

What is it?

The Prynt Pocket is a photo printer and camera grip made especially for the Apple iPhone 7 Plus, iPhone 7, iPhone SE, iPhone 6s Plus, iPhone 6s, iPhone 6 Plus, iPhone 5s, and iPhone 5.

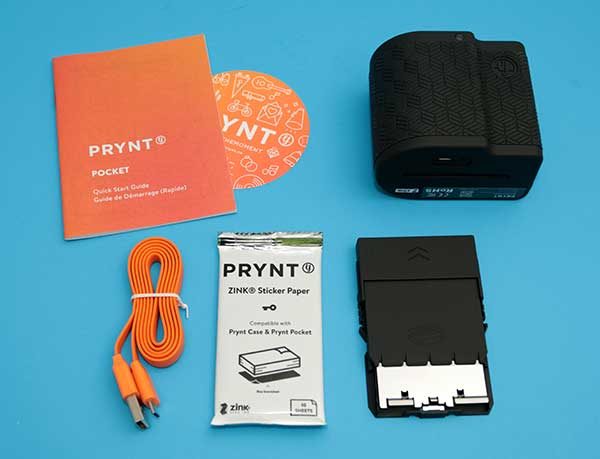
What’s in the box?

Prynt Pocket grip/printer
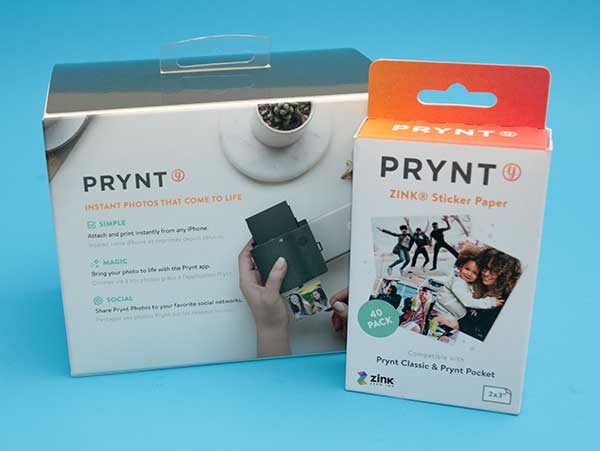
Zink paper pack with 10 sheets
MicroUSB cable
Quick start guide

Design and features

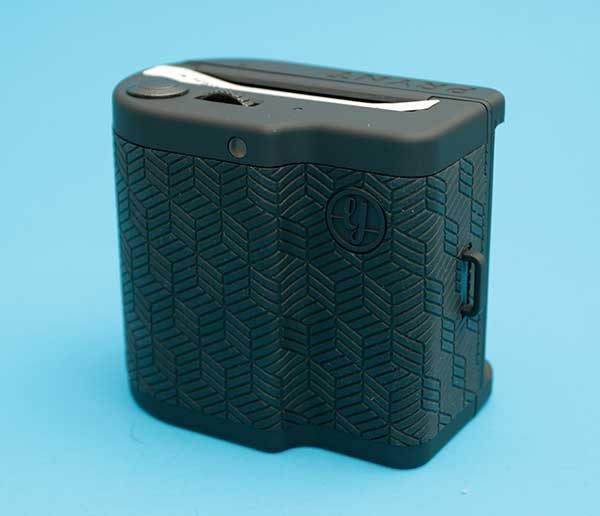
The Prynt Pocket is a more compact version of the Prynt Case which Elizabeth reviewed earlier this year. It is available in several colors including the black version that was sent to me. It’s made of plastic with a textured grippy covering.

One side of the Prynt Pocket has a molded grip with a lanyard loop on the edge.

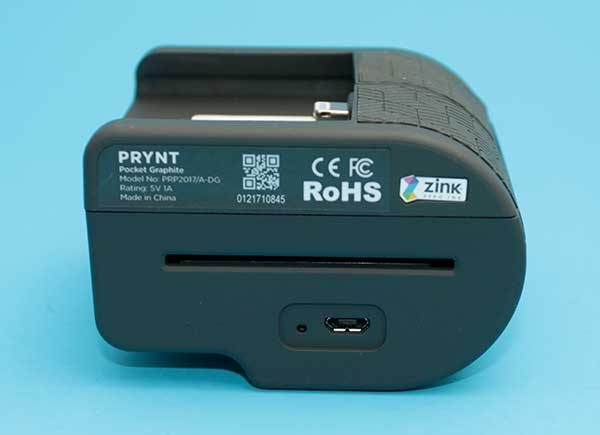
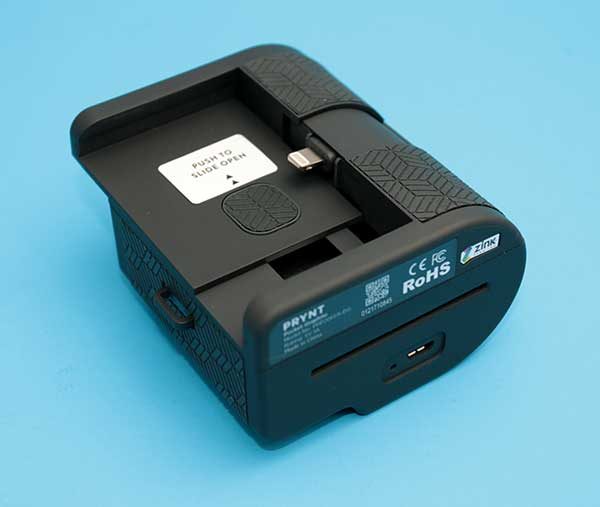
The bottom of the Prynt Pocket has the slot where the printed image comes out, a micro USB charging port and a charging status LED.

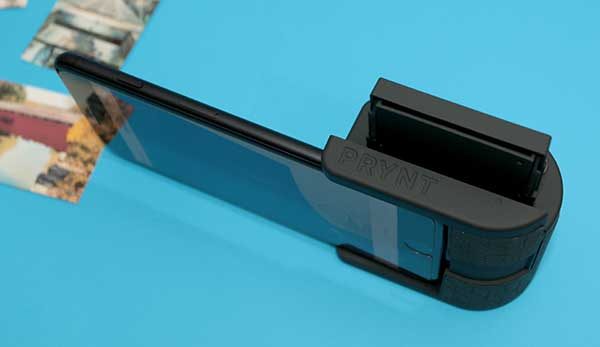
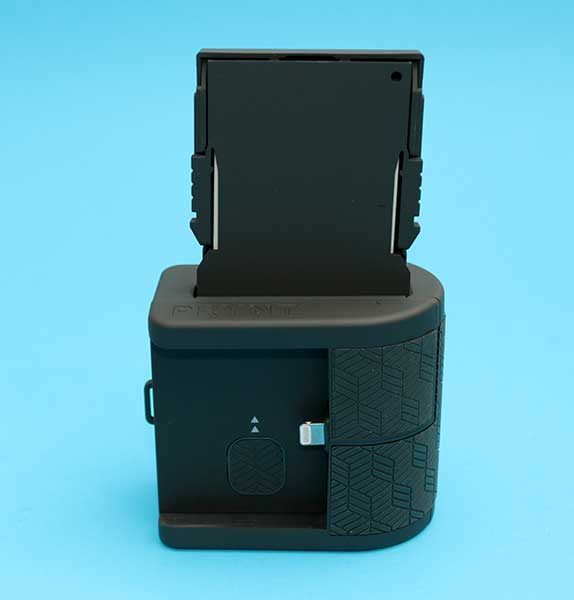
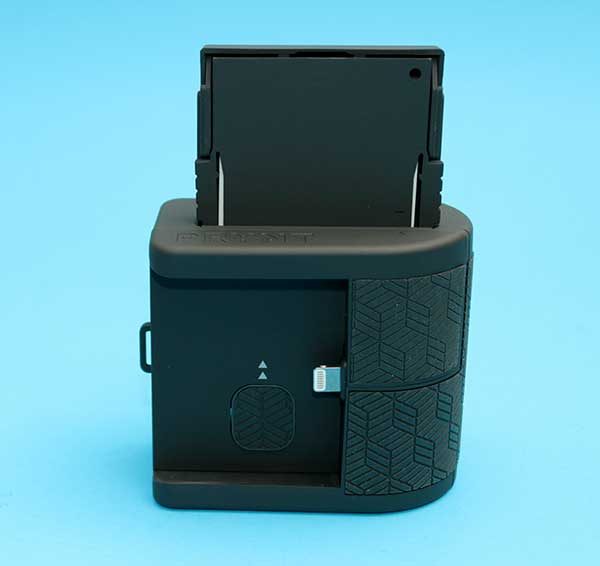
The top of the Prynt has an expandable slot with a lightning connector that can accommodate different sized iPhones.

Depending on the iPhone model, it may or may not be able to fit in the Prynt slot with a case. My iPhone 7 Plus would only fit with a very thin case like the Totallee thin leather case. Other cases I tried made the phone too wide for the slot.

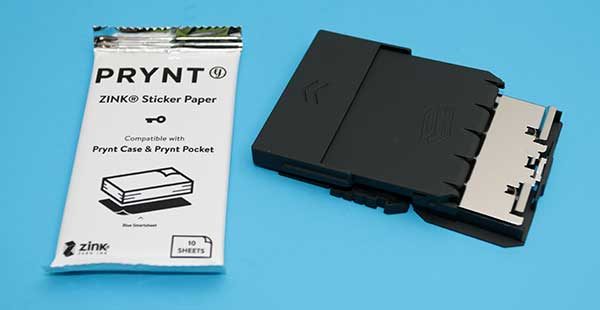
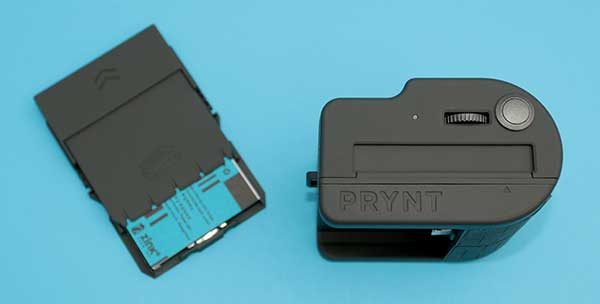
The Prynt Pocket doesn’t use ink to print pictures, it uses special Zink thermal printer paper. It’s exactly the same type of sticker paper used with the Polaroid Zip printer. At least I thought it was the same.

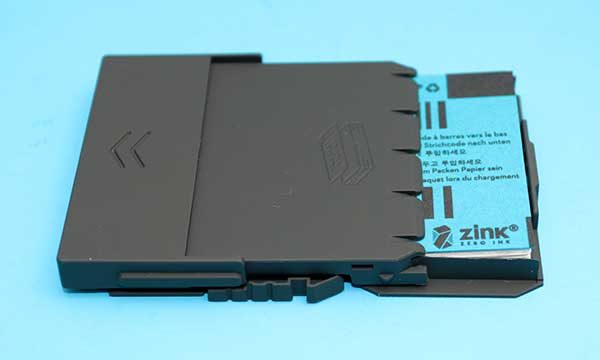
The Zink paper comes in packs of 10 sheets. The pack with the special blue top sheet loads into the Prynt paper cartridge.

The Prynt Pocket comes with one pack of 10 sheets. I was also sent a box of 40 sheets with my review sample. Instead of opening the extra box after I had used the first 10 sheets, I pulled out an old package of Zink paper that I use with my Polaroid Zip printer. Although the paper looks and feels identical, right down to the blue top sheet which is used to tell the printer the type of paper, the old pack wouldn’t load into the Prynt Pocket. It was very slightly too wide. Grrrrr…

After you have the right paper loaded into the cartridge, the cartridge slides into the slot on the top of the Prynt Pocket.

Unfortunately, that’s as far as the cartridge can be inserted. A little less than half of it remains sticking out of the Prynt. This isn’t a huge problem if all you plan to do with the Prynt Pocket is print pictures that you’ve already snapped. But if you want to use the Prynt Pocket as a camera grip, it makes the whole setup feel pretty awkward.

Even if the cartridge wasn’t sticking out the top of the module, the grip is still awkward to hold and use. The shutter button is too close to the edge of the grip and needs to be more centered.

Let’s print some pictures

To print pictures with the Prynt Pocket, you will need to install the iOS Prynt app on your iPhone. You’ll also need to create an account to use the printer which is annoying.


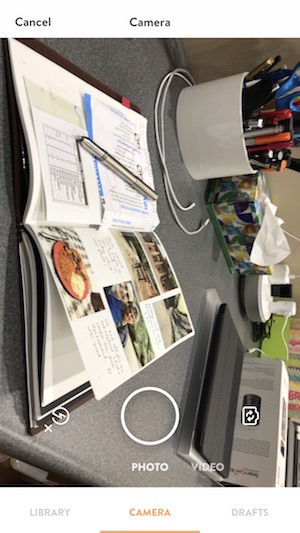
But once the app is installed, you’ve created an account and are logged in, the rest is pretty easy. You can choose to print images in your existing library or take a new image.


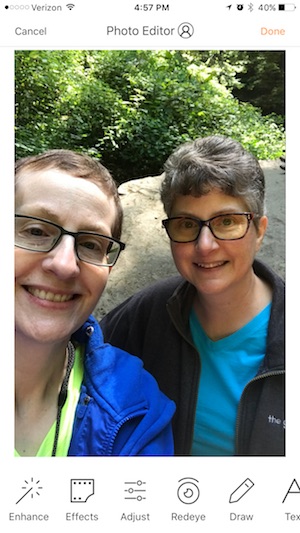
The app has some basic photo editing capabilities including cropping, enhancing, and even adding some text.


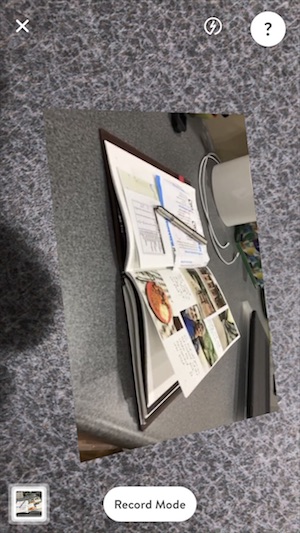
Another fun feature is the ability to record a video that will play when you view the image through the Prynt app. Think of it like live images or Harry Potter style images.

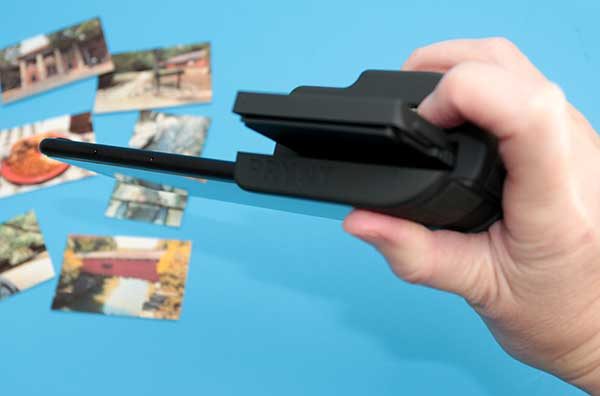
After you’ve chosen a picture to print, you just press the print button and in a few seconds, you’ll have your printed picture.

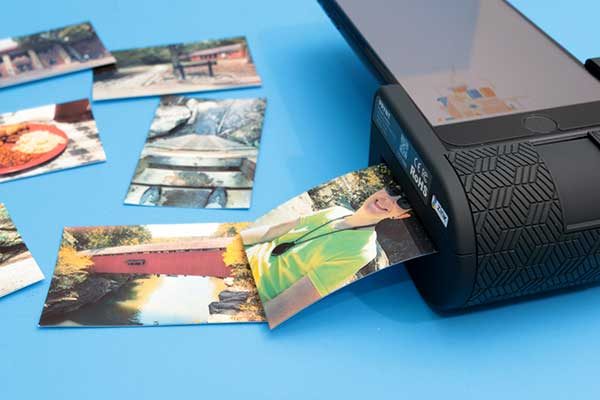
The image comes out of the Prynt completely dry since actual ink isn’t used.

The quality of the images is about the same as other Zink printers that I’ve used. The colors are a bit washed out with a yellowish or greenish cast to them.

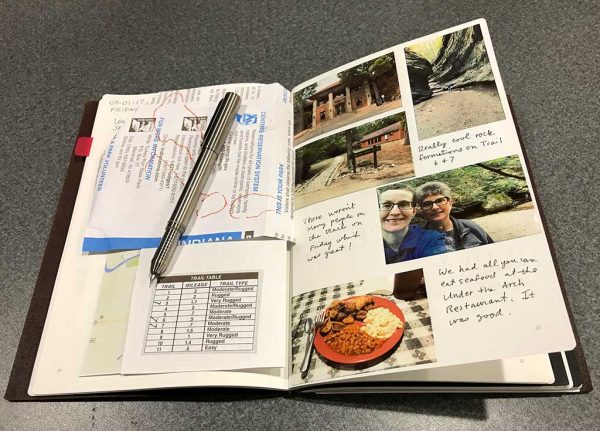
The best part about the images is that the paper is peel and stick. This makes it easy to stick the pictures in your journals, which has been my main use for them. Even if they aren’t the best quality prints, they are more than adequate to make me relive the memory of when I took them.

Final thoughts

At $149.99 for the Prynt Pocket and the relatively high cost (.50 cents) for each print, the Prynt Pocket isn’t very economical compared to other Zink printers like the one I mentioned earlier in the review. That said, the Prynt Pocket is fun to use and it’s really handy for people who like to journal like me. If you are shopping for a photo printer that’s plug and play and has a built in camera grip, this is the one to get.

Source: The sample for this review was provided by Prynt. Please visit their site for more info and Amazon to order.


Product Information

Price: $149.99
Manufacturer: Prynt
Retailer: Amazon
Pros:
  • Easy to use
  • No Bluetooth pairing required
Cons:
  • Can't use other versions of Zink paper with this printer
  • Grip is awkward
  • Expensive

Filed in categories: Reviews

Tagged: , ,

Prynt Pocket iPhone photo printer and camera grip review originally appeared on The Gadgeteer on September 11, 2017 at 12:44 pm.

Note: If you are subscribed to this feed through FeedBurner, please switch to our native feed URL http://the-gadgeteer.com/feed/ in order to ensure continuous delivery.

DxO ONE camera attachment for iPhone and iPad review

I have been a digital photographer for over 15 years now. I started with the equivalent of an Instamatic, and moved up to a prosumer, then full DSLR cameras. I have bought and sold lenses, filters, and other equipment. While I don’t pretend to know how to adjust f-stops and ISO for challenging conditions, I have made some nice photos, been paid for some and awarded prizes for others. I’m rarely ashamed or embarrassed by my work. I’ve also bought into the iOS ecosystem hook, line, and sinker. So it was only a matter of time before I subsumed to the Siren call of the DxO ONE iOS camera. I pre-ordered this about three years ago, and my Lovely Bride kept asking “What is this charge on our credit card?” to which I would reply “It’s a new camera. It’ll be here any day now.” She’s sweet to believe in me. And she’s seen much more funneled into my photography habit. And it only took nine months to ship!

Note: Photos may be tapped or clicked for a larger image.

DxO has a long history in Photographic software. Their measurement software for photo accuracy is an industry standard for many. The DxO ONE, however, is the first piece of hardware they have produced. It doesn’t look much like a standard camera. For one, it doesn’t have a viewfinder of any kind. Second, there is no way to see what your settings are. The first version, before the first firmware update, could only shoot from within an app on a connected iOS device.

A physical release pops out a lightning connector, and attaching it to your iPad, iPod touch or iPhone launches the software that controls the camera and turns your device’s screen into a viewfinder.

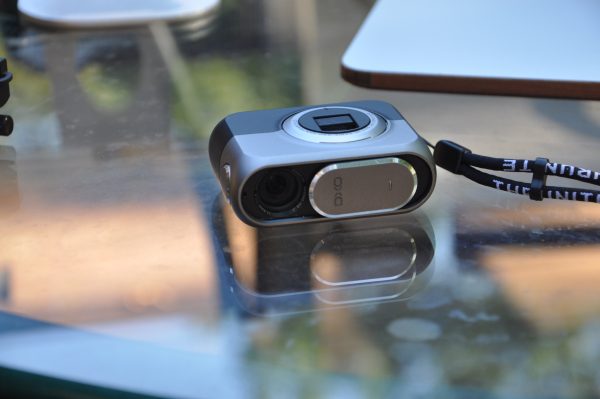
While that was cool enough (and the DxO ONE’s 25-megapixel sensor easily bested the resolution of the 8 megapixel iPhone 5s I was using at the time), the first firmware update added the ability of the unit to take pictures independently of the iPhone using the black-and-white screen as a rough viewfinder. (Yes, black-and-white. Zero shades of gray. Think original Macintosh. See picture below – loads of dithering. Those are the boards of my deck, through a glass table.)

Crazy as it sounds, this is a James Bond/Man from U.N.C.L.E-type spy camera. I can pull something out of a cigarette pack that doesn’t look like a camera and grab a really, really good photo in dim light. In full color. My 10-year-old self would be screaming for joy about now. I regularly use it for concerts and candid shots, but just this weekend, I discovered what the newest firmware update added: remote control. As in, I can turn this camera on, set it up, and walk away, and snap photos from it at will from anywhere on the same wifi network. (Pictures below are of me snapping hummingbird photos. The first pic is focused on my phone, the second photo is focused on the DxO ONE on the tripod. Since the devices are both on wifi, I could have been anywhere on my network monitoring the camera.)

And the camera is so quiet and unassuming, it’s more stealthy than some nanny-cams. And, as I was researching further, I found it can also be controlled from an Apple Watch! Sure, you don’t get the nice preview with the watch like you do with the iPhone, but you can hit the shutter release without touching it, or looking at your camera screen.

Another advantage of using the Lightning Port is that you can easily pull the camera off and turn it 180° to make a selfie camera of amazing quality. (It doesn’t help the subject matter, sadly, but you get more details to edit out.)

Sometimes, you find a case that doesn’t give good access to the flat area around your Lightning port, but there are many on the market that do. I recently spent some credit card points on a tripod mount and lens mounting adapters, in hopes of finding a decent telephoto lens to fit.

Since this is a camera review, I guess I should have some comparison shots from a known camera. I shot three scenes on full auto indoors with no flash, outdoors with full sun, and indoors in a dimly lit area with flash. The ones on the left were taken with the onboard iPhone 6s Plus camera. The ones on the right were taken with the DxO ONE attached to the same phone. (The DxO is attached to the lightning port, so it’s on the opposite end from the built-in phone. This is what accounts for the slight shift in point-of-view.) The only changes to the basic auto setting I made was to force flash to fire in the indoor flash shot. There are no lights turned on in the room, or in my mini-studio, only the camera flash. The images are full-frame with no cropping or enhancement added.


In the first shot, it’s easy to see the increase in light the ONE’s sensor makes. There is some fuzziness, but that’s to be expected with handheld shots. The shutter button on top of the ONE makes you have to pay much more attention to camera shake since it’s a physical button, rather than the virtual button on the iPhone app.

In the outdoor shot, things look equal in the well-lit areas, but the details under the shade, like the bark on the tree left of center, fall apart on the iPhone. If you’re wanting to get all CSI on the background, like my neighbor’s garage or porch area, the DxO has way more data to play with.

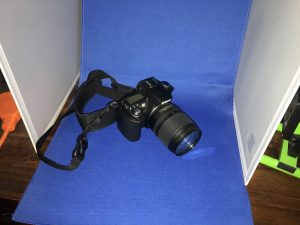
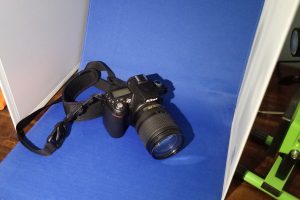
In the final flash set, the body of the camera is about the same, with a little fuzziness on both shots. The texture of the strap in the DxO shot is far more clear when you blow it up, however. Given the distance from the light source, the lighting is better, too.

So, is the difference worth the price? Hard to say. Three years ago and two generations of camera phones, it was to me. On our last vacation, most of my travel photos were taken with just the iPhone 6s Plus. While I always wish for more glass for zoomed shots, I was very happy with the outcome. Adding a clip-on polarizing filter (which is not easily doable with the DxO) made a lot of difference in sunny outside shots.

Computational photography is making the size of the sensor obsolete much faster than the “camera guys” are improving the optics of camera hardware. Given Cupertino’s income from sales, they have far more resources to spend in this area than companies like Canon and Nikon, let alone poor little DxO. But, still, it’s a neat gadget, and I don’t regret purchasing it. Meanwhile, the price is down $100 from what I paid, but with the software updates, I’m still up to date. I love living in the future.

Source: The item for this review was purchased with personal funds. Please visit DxO for more info and Amazon to order.


Product Information

Price: $469.99 (retail is $499)
Manufacturer: DxO, Inc.
Retailer: Amazon
Requirements:
  • iOS device
Pros:
  • Small and light.
  • Tight build quality.
  • Software under active development.
  • Easy to connect to iOS device.
Cons:
  • It's so small, attaching lenses is difficult, and finding quality lenses is difficult.
  • Some cases don't let it fit device fully.

Filed in categories: Reviews

Tagged: , ,

DxO ONE camera attachment for iPhone and iPad review originally appeared on The Gadgeteer on August 14, 2017 at 8:30 am.

Note: If you are subscribed to this feed through FeedBurner, please switch to our native feed URL http://the-gadgeteer.com/feed/ in order to ensure continuous delivery.