Blackwing Pencils – the Cadillac of writing implements?

NEWS – If you still like taking notes and writing journal entries the old way with paper and a pencil or pen, you need to check out Blackwing Pencils.  These pencils were first introduced by the Eberhard Faber Pencil Company in the 1930s.  They immediately found a loyal following, including novelist John Steinbeck and Chuck Jones, who used Blackwings to create Bugs Bunny and other Looney Tunes characters.  Eventually, Blackwings were discontinued in the 1990s, but a devoted cult following would pay as much as $40 per pencil to buy up leftover stock.  In 2010, the Blackwing company started production again.

Blackwing says their pencils combine the best wood and best graphite.  The body is made of incense-cedar wood from California and Oregon that sharpens evenly and easily.  They are filled with premium Japanese graphite that’s crafted with clay for strength and wax for smoothness.  All of them have an eraser that’s unlike any I’ve seen on another pencil; they remove from the holder so you can use every bit of the eraser, and you can purchase replacements for $2.95 for a pack of 10.

There are three models of these pencils.  The Blackwing has a matte black finish and a black eraser.  It has soft graphite that’s perfect for scoring or illustrating.  The Blackwing Pearl has a pearl white finish and a white eraser.  It has a balanced graphite for lettering and line work.  The Blackwing 602 has a gunmetal gray finish and pink eraser.  Its firm graphite is great for writing and everyday use.  Each type is $21.95 for a set of 12 pencils.  They can be purchased at Blackwing.

Filed in categories: News

Tagged:

Blackwing Pencils – the Cadillac of writing implements? originally appeared on The Gadgeteer on July 25, 2018 at 8:00 am.

Note: If you are subscribed to this feed through FeedBurner, please switch to our native feed URL http://the-gadgeteer.com/feed/ in order to ensure continuous delivery.

Adonit’s Snap 2 stylus sticks to the back of your phone and has a camera shutter button

NEWS – Adonit’s Snap 2 stylus takes a fun shaped Bluetooth stylus and adds a magnet so you can attach it to the back of your iPhone or iPad so you’ll always have a stylus when you need it. But that’s not the only cool feature that this Adonit stylus has to offer. It also includes a built-in shutter capture button so you can use the stylus as a wireless image capturing gadget for your iPhone 6 and newer devices. Sorry Android fans.

The carpenter pencil shaped Snap 2 stylus has a 1.9mm PixelPoint tip and it comes with a stick-on metal plate. You can read more about the Snap 2 Bluetooth stylus and other styluses at Adonit.net and you can buy the Snap 2 for $34.99 on Amazon.

Filed in categories: News

Tagged:

Adonit’s Snap 2 stylus sticks to the back of your phone and has a camera shutter button originally appeared on The Gadgeteer on July 24, 2018 at 2:00 pm.

Note: If you are subscribed to this feed through FeedBurner, please switch to our native feed URL http://the-gadgeteer.com/feed/ in order to ensure continuous delivery.

MIOPS Smart controllable camera and flash trigger review

REVIEW – Each photographer has his or her own type of photography that is special to them. I like to photograph subjects in nature, and I also like to use existing objects to create my scenes. Water drop photography is a favorite of mine, and this device promises to greatly help me to expand my creativity.

What is it?

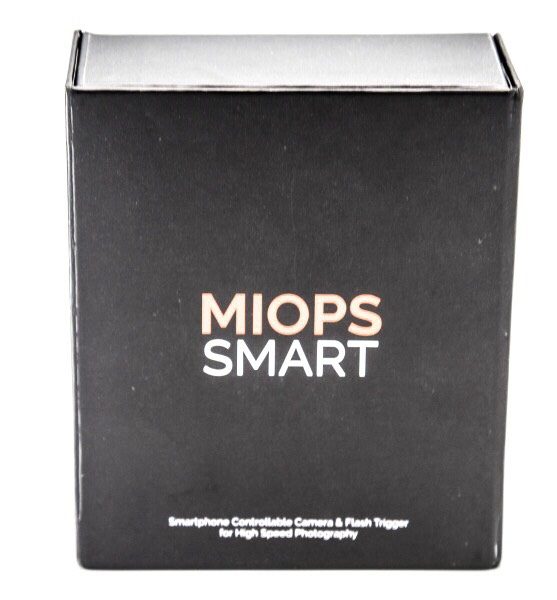
The MIOPS Smart is a device that responds to Lightning, Sound, Laser, Timelapse, HDR and more to trigger the shutter of a camera to take a picture.

What’s in the box


1 x MIOPS Smart
1 x Mini USB Cable
1 x Camera Trigger cable
1 x Quick Start Guide

Design and features

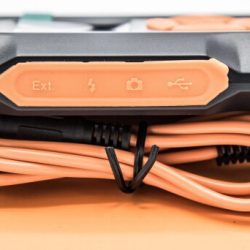
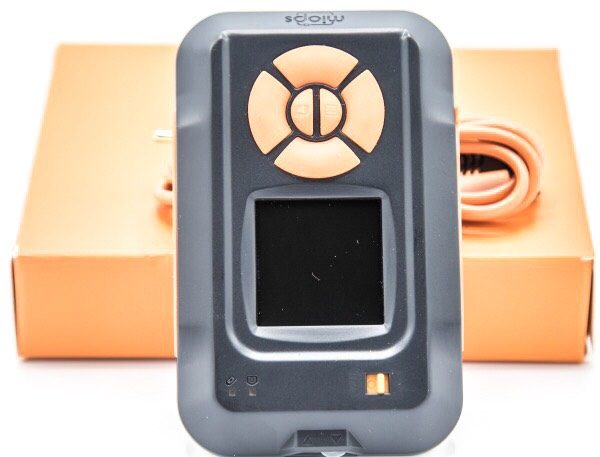
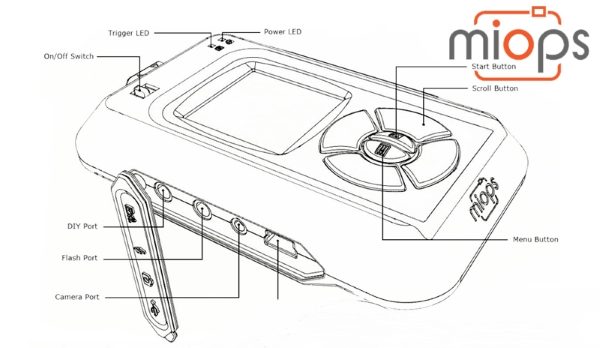
The MIOPS Smart is a small and nicely built camera shutter trigger that can be activated in several modes. On the front there is a display screen and buttons to navigate the screens should you choose to do so from the device. On the side under a removable cover, there is a port for extension DIY projects, a flash trigger port, a camera trigger port, and a mini USB port for charging the battery.


On the top, in addition to the control buttons and the display screen, there is the trigger LED, the power LED and the on/off power button.


On the front (side), there are an infrared sensor and a motion sensor lens.

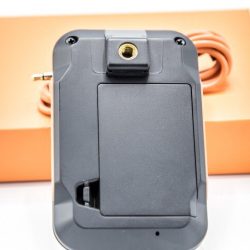
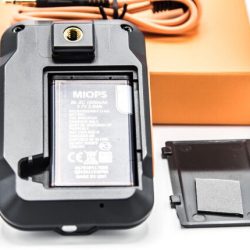
On the back of the MIOPS Smart, there is a 1/4-20mm female mount that sits on a Hot Shoe mount, the microphone and a battery door that covers the slot that holds the rechargeable battery.


Performance

While you can control the MIOPS Smart via the buttons on the device, the optimal way to use it is via the app. It has several operational modes and setup screens that are available via the app.

App

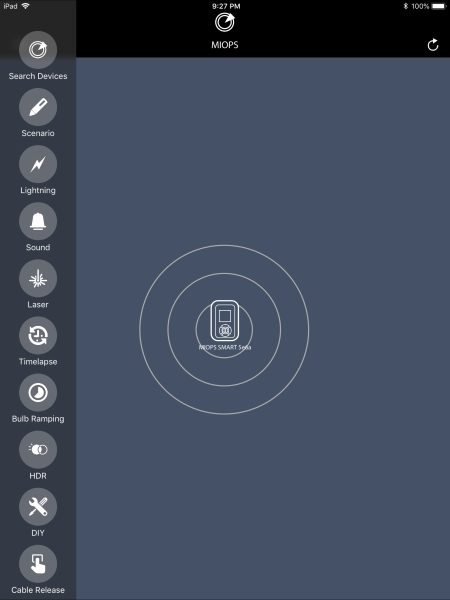
Once you install the app and launch it, and turn on the MIOPS Smart, it appears on the app. If you have more than one MIOPS device turned on, they will all show up as available for selection.


Once you select the MIOPS Smart by touching the icon on the screen, it connects to the app and is ready to be controlled via the app. At this stage, all of the available modes and options are available on the left of the screen. (I used the app on my Pad for this demonstration)


Scenario option:

For example, you can create custom scenarios by combining all available modes with up to five different steps. You can do so by using any combination of the sensors or by using different sensors for various steps of your scenario. For instance, you may want the MIOPS to trigger the camera shutter to take a picture after an object breaks the laser beam and then makes a sound either from hitting a surface or by some other action.


Lightning option:

This option has one screen which gives you the ability to set the sensitivity level to trigger the device.


Sound option:

Settings for Sensitivity, Delay, and Lock.


Laser option:

Threshold, Delay and Frame settings screens.


Time Lapse option:

Settings for Interval, Exposure, and Limit


Bulb Ramping option:

There are 4 settings screens for this option: Interval; First Exposure; Last Exposure; Frame.


HDR option:
Settings screens are for: Center; EV (+-); Frame.


DIY option:
Settings screens: Threshold; Delay; Mode.


Cable Release option:

For my testing of the MIOPS Smart, I chose the sound option. I set up for water drop photography using the MIOPS Splash Water Drop Kit and the MIOPS Smart, within a photography lightbox enclosure. (Additional items like a catch basin for the water, etc are necessary)


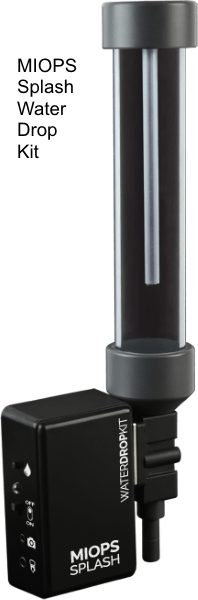
The enclosure that I used does not have any built-in lighting. To light the effect, I used a flash strobe with a colored gel insert. To take the pictures, I used a Canon EOS 7D Mark II with a 70mm Sigma Art Macro Lens. The MIOPS Smart was connected to the 3-pin trigger port on the Canon and mounted close to the MIOPS Splash. A flash trigger transmitter was attached to the shoe on top of the camera, and a receiver was connected to the strobe. I used 2 iPhones to simultaneously control the MIOPS Splash app and the MIOPS Smart app. When I trigger the MIOPS Splash device to drop water, the mechanism makes a sound that in turn triggers the MIOPS Splash to trigger the camera shutter. This setup takes time and a whole lot of patience to get the size and timing of the waterdrops as desired, as well as to get the sensitivity and timing correct for the MIOPS Splash to receive the sound and trigger the camera to take the picture at the right time. This setup is actually one of my less complicated setups and describing the details of it is challenging.

The MIOPS Smart is a great device, and I do plan to try it with a laser beam for the laser option, as well as with lightning when a safe and convenient opportunity presents itself. The following are 2 pictures of water drops that were taken as a part of the testing:


What I like

I like the build quality and the functionality of this device. So far it has worked flawlessly and has allowed me to increase my photography creativity.

What can be improved

1: Longer camera trigger cables must be made available
2: Include a tested laser that works with the device. (They are quite inexpensive but all may not work with this device)

Final thoughts

The MIOPS Smart is a great camera trigger device that is nicely built, and that offers endless opportunities for creative photography. I am thoroughly enjoying using it, and every day I am designing more elaborate photo opportunities. As long as it continues to function well, it is well worth it.

Price: $219
Where to buy: MIOPS Website or Amazon
Source: The sample for this review was provided by MIOPS.

Filed in categories: Reviews

Tagged: ,

MIOPS Smart controllable camera and flash trigger review originally appeared on The Gadgeteer on July 24, 2018 at 1:00 pm.

Note: If you are subscribed to this feed through FeedBurner, please switch to our native feed URL http://the-gadgeteer.com/feed/ in order to ensure continuous delivery.

This iPhone selfie case is made of recycled fishing nets and scrap aluminum

NEWS – The POPSICASE makes taking selfies with your iPhone just a little easier because the case features an aluminum handle that slides out from the back of the case. But that’s not the only thing that is cool about the POPSICASE. It’s also made from 100% recycled fishing nets and scrap aluminum. Why fishing nets you might be asking? Because according to POPSICASE, every year 1.28 billion pounds of fishing nets are discarded in our oceans, killing more than 365,000 whales, seals, turtles, and birds. Fishermen in 17 ports along the Mediterranean are doing their part to fix this problem by discarding their old nets into special recycle bins.

The Barcelona based POPSICASE company takes these old nets and converts them into plastic pellets that are then used to create POPSICASEs for iPhone 6, 6S, 7, 8, X as well as the larger sized iPhone Plus 6, 6S, 7 and 8.

These eco-friendly iPhone cases come in a variety of colors and are priced at 29.00€ which is about $34 US. You can read more about them and order one by visiting POPISCASE.com

Filed in categories: News

Tagged: ,

This iPhone selfie case is made of recycled fishing nets and scrap aluminum originally appeared on The Gadgeteer on July 24, 2018 at 12:00 pm.

Note: If you are subscribed to this feed through FeedBurner, please switch to our native feed URL http://the-gadgeteer.com/feed/ in order to ensure continuous delivery.

Well Desk Double Monitor standing desk review

REVIEW – I don’t know about you but I have seen a great influx in the number of convertible and standing desks at my office. This got me thinking. I wonder if I would like something like this? Julie offered to let me review the Double Monitor standing desk from Well Desk. Let’s dive into it and see what we think.

What is it?

The Well Desk is standing desk that is designed to help you be more ergonomic and burn more calories at work by standing. This desk like the name implies is made to hold 2 monitors for double duty while working.  The desk is designed to be easy to assemble and to be fully adjustable.

Design and assembly

In the box were the 4 pieces that make up that standing desk. Each was packed without any wrapping around them but none of my pieces had any damage. The biggest piece is the back of the desk which is made up of 3 pieces that are already assembled using screws and hinges. The entire desk is made out of Baltic Birch plywood and is really a high grade of plywood if you ask me. In fact, a colleague of mine asked where I got the plywood to make it because he wanted to make something with such nice plywood.

The first step in the easy assembly process is to add the rear monitor guard to the main legs of the desk. This will keep your monitors from falling off the back of the desk. Yeah, probably a pretty good thing! I would hate to lose a 24in monitor! Really, I would hate to have to explain to my boss why I need a new monitor!

The next step is to add the monitor and keyboard shelves and you are good to go! Then the fun part starts when you put your desk back together again. I think that it took all of 2 minutes to put together the Well Desk and that is probably a pretty long estimate.

This is one of the setups that I had using the desk. I tried several different setups to see what I might like better.  The two monitors on the top are 24-inch monitors and they fit well with only about an inch of each base sticking over the end of the monitor. Not enough to really worry about them falling off. I like to have my monitors pointed in for a more immersive environment. You can see that in this picture my mouse and keyboard fit nicely on the keyboard shelf with plenty of room to spare. You might have a bigger keyboard but I went with a Logitech K780 that Julie reviewed and I now enjoy. Thanks, Julie!

In this picture, you can see the cord cutouts to run cables to cut down on the crazy wires going everywhere. This is a nice feature. I have been trying lately to get my wires tamed at my desk.

This picture gives you a feel for the thickness and quality of the plywood. It is made up of 1/2 in. thick plywood. This makes the unit very sturdy.

One of the neat features of the Double Monitor Well Desk is the mobile device slots on both the keyboard and the monitor shelves. The original model of the Well Desk does not come with these slots. I found it very useful for holding my phone throughout the day. They also have holes cut out so that you can charge you phone while it is in the slot. You can also see the keyboard and mouse cord cutouts in this shot but I use wireless so I had no need for them.

Standing vs. sitting

This is my original setup before I started reviewing the Well Desk. I had the three external monitors that I was using and then the laptop display as well. A lot of the time I found myself getting very tired in the afternoon.

This is me standing at the desk after it was all set up and after a little engineering of the Well Desk. Well not on the desk itself but the setup of the monitors that I was using. I did find that in the afternoons while I was standing I did not get as groggy and tired as I had when I was sitting all day.

The Well Desk is not designed for sitting, but…

After some thought, I figured out that even though the Well Desk is not designed to be a convertible desk why not try anyway! So low and behold you can fit a 27 in. monitor very nicely under the monitor stand on the top. This was my way to help with the transition to standing a lot of the time. One can never have 2 many monitors or in my case 3 monitors!

The shelves are easy to move and only take a few seconds to move.  Because of the way the slots are cut they slide together easily without a lot of effort. I don’t think though that I would try moving the monitor shelf with two 24-inch monitors on the shelf. I have a feeling this might end badly!

What I like

  • Easy to Assemble
  • Very solid even with 2 heavy monitors on it
  • Quality materials

What needs to be improved

  • The corners of the shelves could be sharp depending on how you put your hand on them
  • For me being 6ft. 3in. tall, the top slot for the keyboard shelf was too short so I had to use the lowest slot for the monitor shelf which put me a little closer to the monitors than I would have liked

Final thoughts

The Double Monitor Well Desk is easy to put together and because it is not convertible, it is cheaper than most convertible desks. It is made of a high-quality plywood and seems like it will hold up very well. The desk is supposed to provide health benefits like burning more calories and reducing back pain. I would assume that this probably depends on the person using the device. I know for me, I started standing the majority of the day and ran into my back hurting but when I switched from sitting to standing throughout the day no problems. I have enjoyed using the Well Desk and will continue to use it at my office to see how it can help me long term. If you are looking to get a standing only desk then this would be a great and economical purchase.  You might want to think about it more if you are needing a convertible desk.

Price: $179.99
Where to buy: Well Desk and Amazon
Source: The sample for this review was provided by Well Desk.

Filed in categories: Reviews

Tagged: , ,

Well Desk Double Monitor standing desk review originally appeared on The Gadgeteer on July 24, 2018 at 11:00 am.

Note: If you are subscribed to this feed through FeedBurner, please switch to our native feed URL http://the-gadgeteer.com/feed/ in order to ensure continuous delivery.