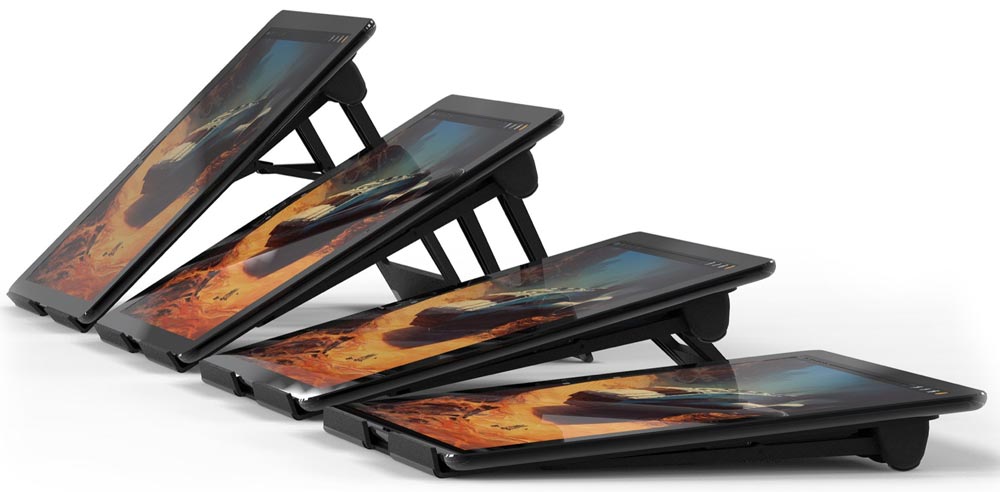
NEWS – Many stands for iPads are designed for the smaller iPad. They just aren’t big enough nor stable enough to support the biggest of the iPad Pros so that you can actually do some work. The DraftTable from ElevationLab is designed for the iPad Pro 12.9. It functions rather like an artist’s drafting table, and it was designed by digital artists for use by digital artists. Whether you’re doing app development, photo editing, drawing, or just typing an email, you’ll love the DraftTable for using your iPad Pro.
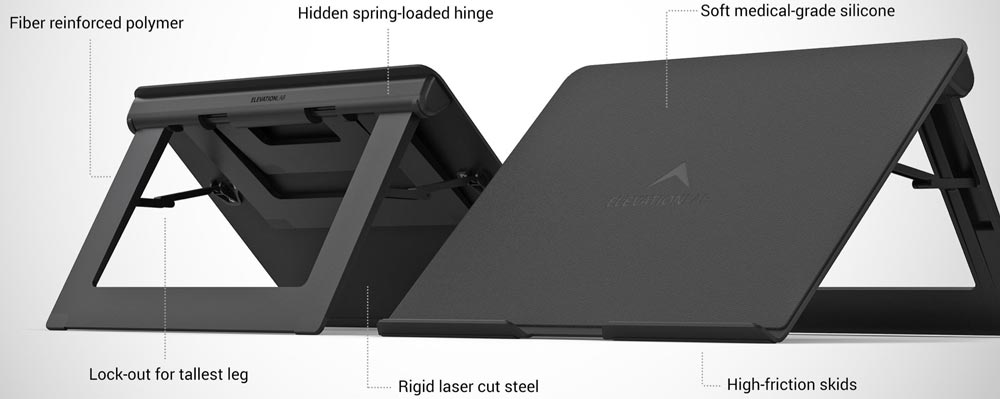
Strength and stability is built into the DraftTable, with its rigid, laser-cut steel table; fiber-reinforced polymer legs and hidden, spring-loaded hinges; soft, medical-grade silicone cover for the table; and high-friction skids to prevent sliding.
Adjusting the angle is as simple as folding down a leg. The spring-loaded hinges keep the legs locked in place, although the tallest leg does have additional locks for extra stability. Although it’s big enough for the biggest Pro, it works with all iPads, including the iPad mini. You can even use it with Wacom tablets.
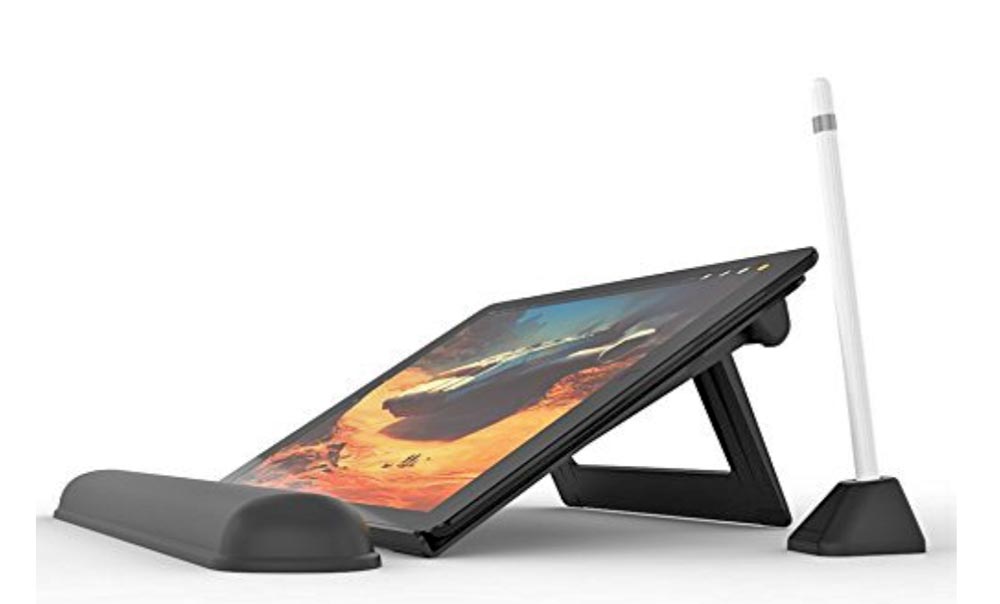
Use the DraftTable with just the iPad, or connect the iPad to a Mac, and the DraftTable transforms the iPad into a Wacom Cintiq-like drawing tablet for your computer when used with the Apple Pencil and the AstroPad app. When you’ve finished work, the DraftTable folds up for storage in your desk or for traveling along with you in your gear bag.
However you use it, the DraftTable kit ($69.95) comes with a wrist pad and a Pencil stand to make it comfortable to work for hours on the iPad. If you don’t need the accessories, the DraftTable is $49.95 alone. DraftTable is available at the ElevationLab website or at Amazon.
Note: If you are subscribed to this feed through FeedBurner, please switch to our native feed URL http://the-gadgeteer.com/feed/ in order to ensure continuous delivery.
REVIEW – There are a few wallet junkies on the Gadgeteer team and I’m one of them. I’m probably the pickiest wallet person on the team because the wallet I use has to look a certain way, feel a certain way, and perform a certain way before it earns a spot in my pocket. In other words, it has to be just right. The latest wallet to be put through my testing is the GRID wallet. It looks great, but how does it feel and how does it perform? Let’s find out.
What is it?
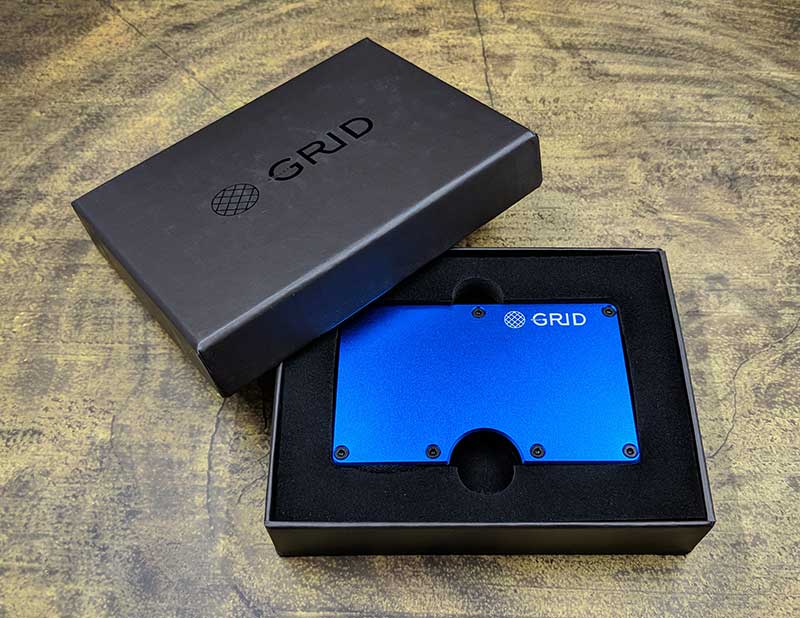
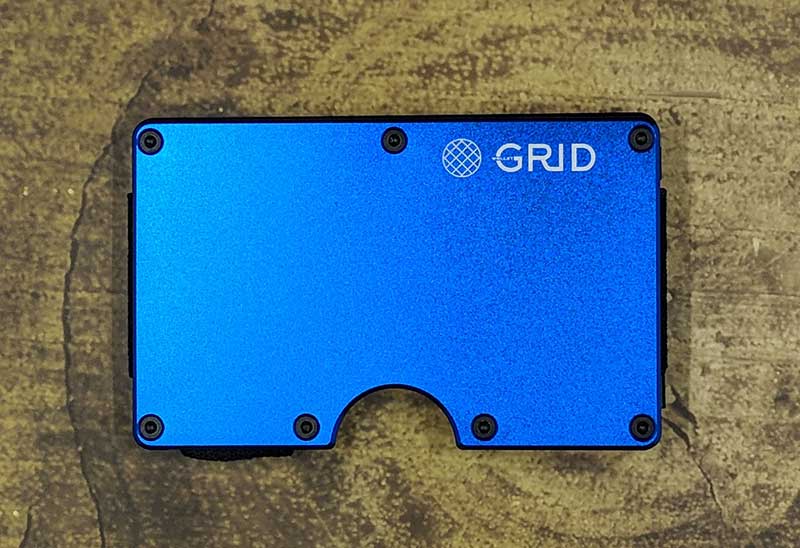
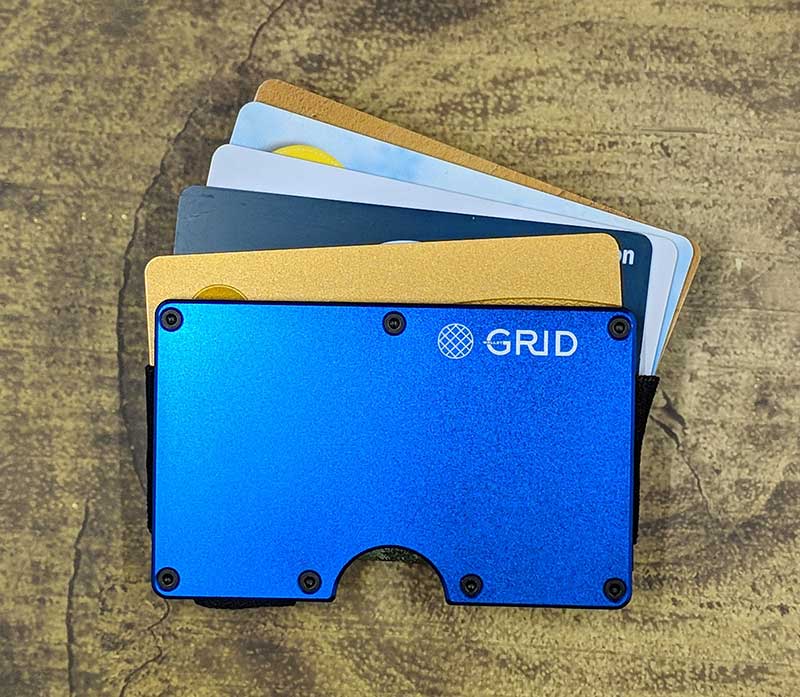
The GRID wallet is a minimalist RFID blocking wallet that can hold 1-12 credit cards and folded cash and is available in either anodized aluminum, carbon fiber, forged carbon, or titanium. I was sent the blue anodized aluminum GRID wallet that you see here.
Design and features
This wallet follows the minimalist design as it is made of two plates of anodized aluminum that are held together on three sides with strong elastic bands. If the GRID looks familiar to you, you might be thinking of another wallet review that we did about 5 years ago of the Ridge wallet. The GRID looks identical to the Ridge except that it has the card push slot in the center instead of off to one side.
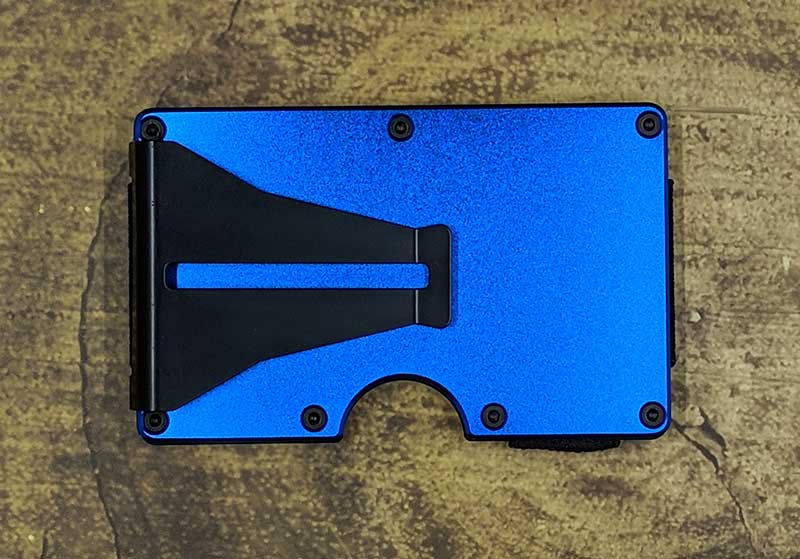
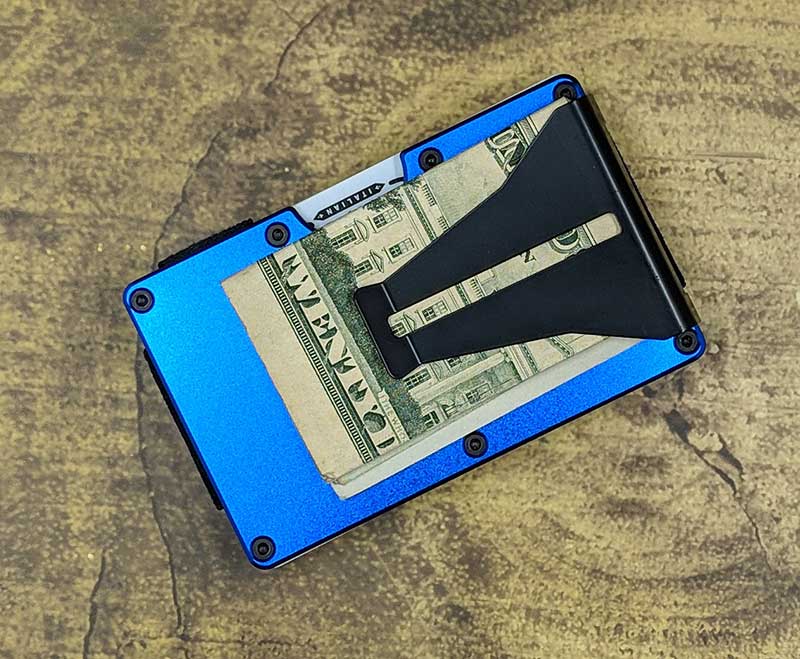
On the back of the GRID wallet, you will find a steel money clip that will hold a stack of folded dollar bills.
The GRID wallet is thin and lightweight when it’s empty.
To load it with credit cards, you just pull the two plates apart and slide in a stack of cards or load each card one at a time by sliding it between the chamfered edges of the plates. The elastic on the sides and bottom will stretch or retract to accommodate a changing stack of 1-12 cards while holding them securely. There’s no worry that the cards are going to fall out of this wallet.
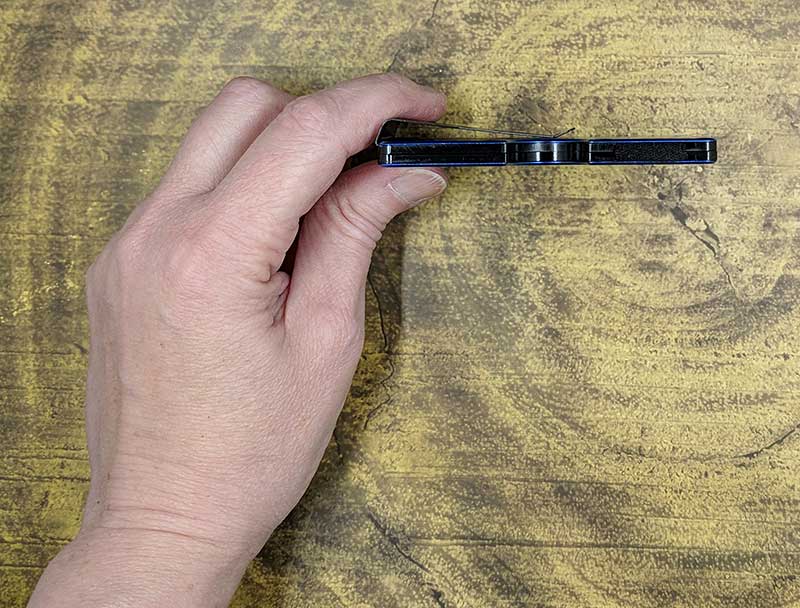
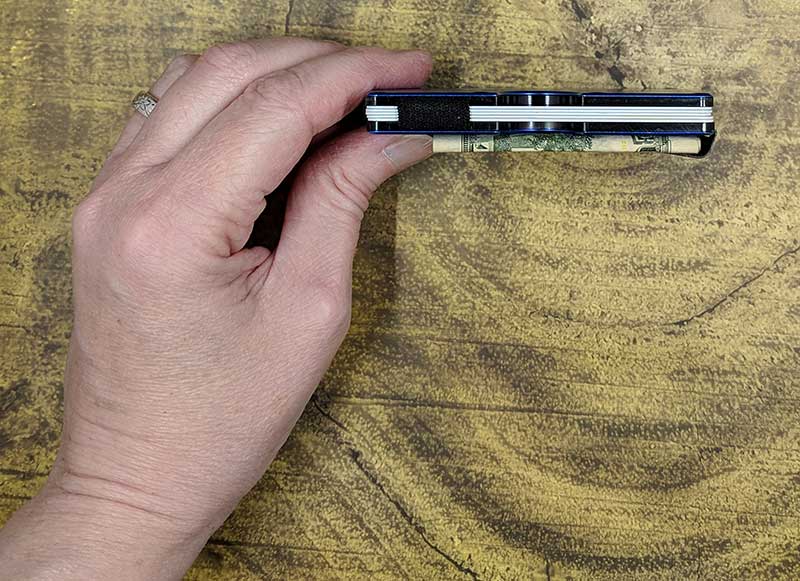
I started out testing the GRID with 5 standard sized plastic credit cards and 4 folded dollar bills.
Loading the cards is easy as they just slide in between the front and back plates.
The wallet has the same form factor as a credit card, so it’s compact and pocketable. You will notice the half-circle cutout along the bottom edge. This cutout helps you push the cards up so you can retrieve one of them when needed.
The money clip on the back of the GRID wallet is very strong so it will securely hold 1 dollar bill to 10 or more bills. I only had a few bills to test because I don’t usually carry cash and I’m not Oprah.
Here’s a side view of the wallet with 5 credit cards and 4 folded dollar bills.
Does it pass the look and feel test?
When it comes to look and feel, I like the GRID quite a bit because it has a simple but attractive look and style. As far as the feel, it is lightweight, but I feel like it’s slightly bulky due to the money clip. Since I don’t usually carry cash, the money clip is just in the way for me and causes the wallet to get caught in my pocket. It would be nice if there was an easy way to remove the clip if it’s not a feature that you need. As is, it appears that it might be possible to remove the clip if you have a hex driver that fits the screws used to assemble the wallet. I can’t be 100% sure of this though as I’ve not tried it.
Does it pass the performance test?
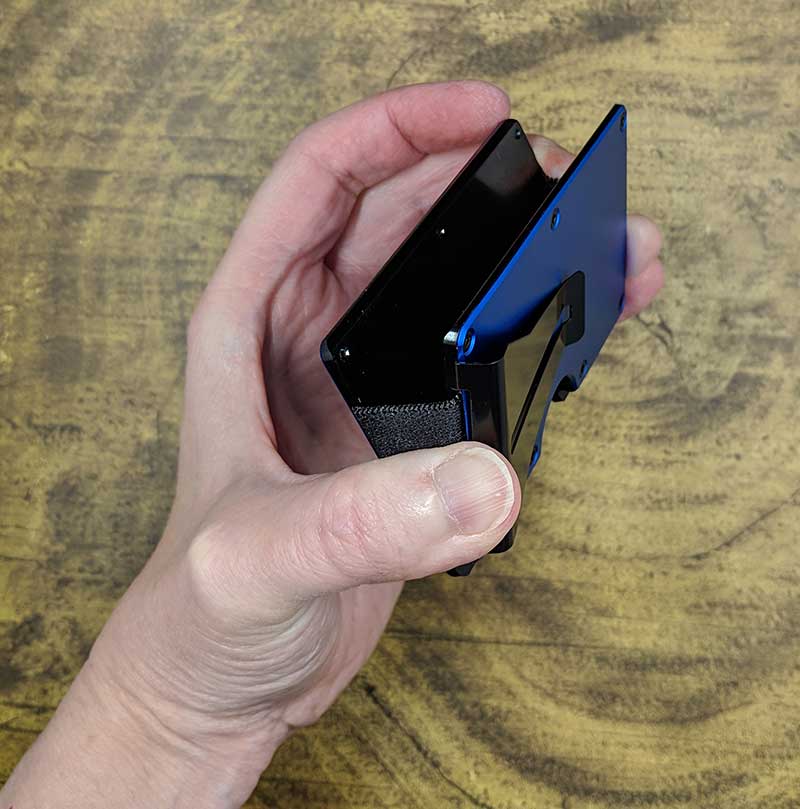
I really wanted to love the GRID Wallet, but I found it awkward to use with one hand compared to my current favorite wallet (see my favorite gear page). The wallet is like a credit card sandwich. The elastic holds the front and back plates of the wallet/slices of bread around the credit card/meaty center. To remove a credit card from the stack, you need both hands. One hand to hold the wallet, and one hand to press slide the cards up. Then one hand to find and retrieve the desired card.
Removing the top or bottom card is semi-easy, but if you want a card in the center of the stack, it’s a little more tedious. You can either slide the cards almost completely out of the wallet so you can fan them out to find the one you want, or you can also pinch the bottom of the wallet to let you flip through the cards like they are an accordion. The pinch feature isn’t easy to do especially if you have dexterity problems with your hands. It felt like the process of removing a card took too long for my liking. Here’s a quick video that demonstrates what I’m talking about.
What I like
RFID blocking
Expands and contracts to hold your credit cards
What needs to be improved
Not easy to remove a specific card from a stack
Final thoughts
The GRID wallet looks nice and is well made, but I think it’s one of those products that you’ll either love to use or you’ll be looking for a refund. I won’t say that I hate it, but it’s just not a wallet that I personally would want to use on a daily basis because it feels too awkward and time-consuming to retrieve a card compared the wallet that I’m using now.
Price: $65.00 Where to buy: GRID Source: The sample for this review was provided by GRID.
Note: If you are subscribed to this feed through FeedBurner, please switch to our native feed URL http://the-gadgeteer.com/feed/ in order to ensure continuous delivery.
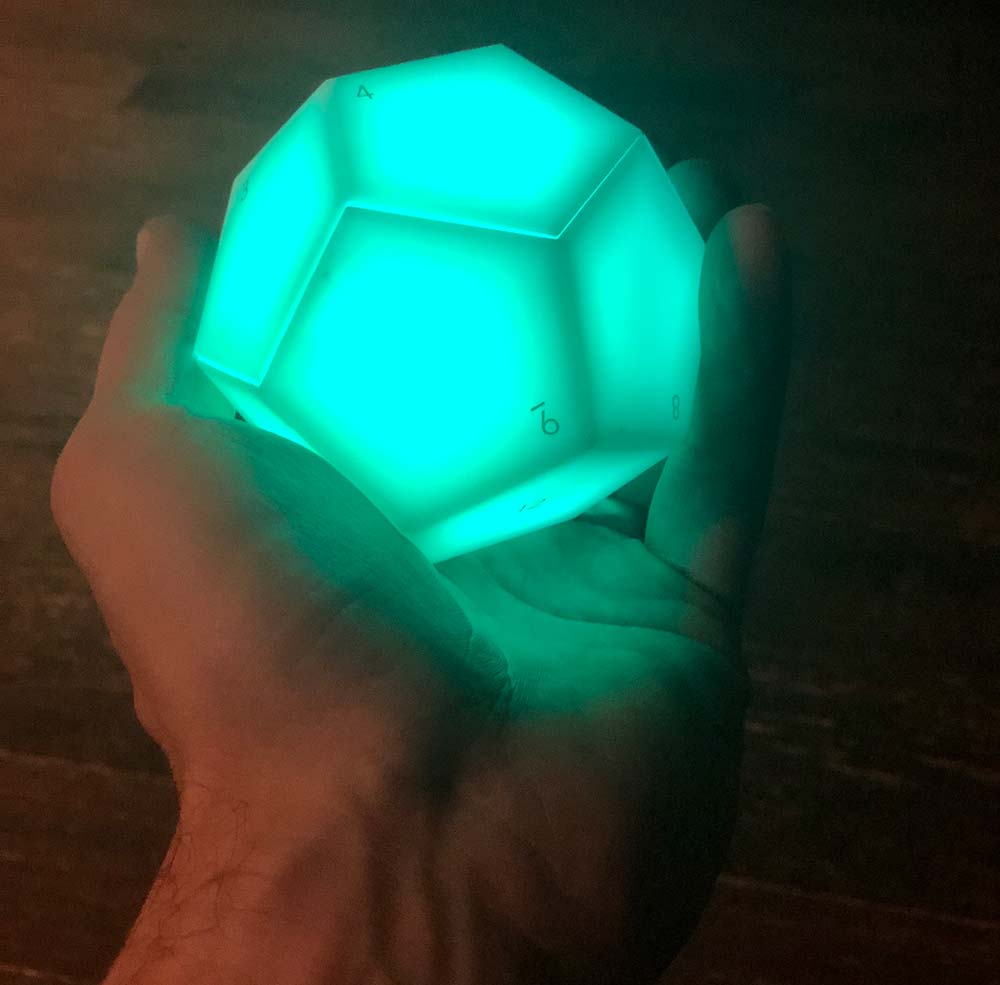
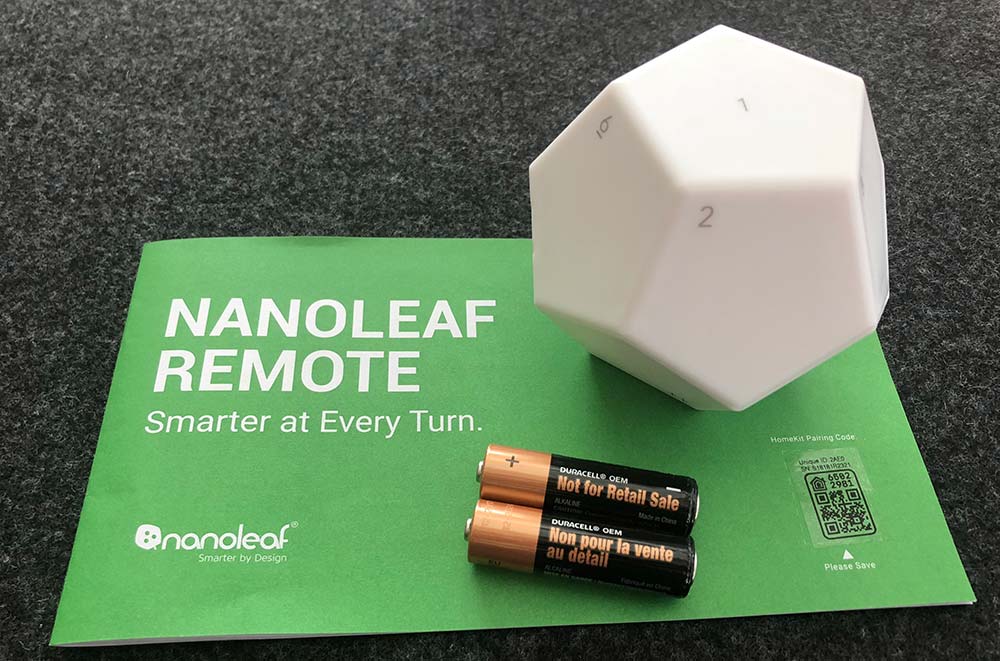
REVIEW – Not all 12 sided dice are for role-playing games. At least one of them can help automate your home.
What is it?
The Nanoleaf remote is pretty unique as remotes go. It doesn’t have any buttons, screens or even charging ports. Instead, it has 12 sides that encourage you to pick it up and play with it. How does it work? What can it control? Let’s find out.
Hardware specs
Dimensions: about the size of a tennis ball (but 12 sided)
Power: runs on 2 AA batteries
Battery Life: 3 years standby, 1 year of active use
What’s in the box?
1 Nanoleaf remote
1 Pair of AA batteries
1 Instruction manual
Design and features
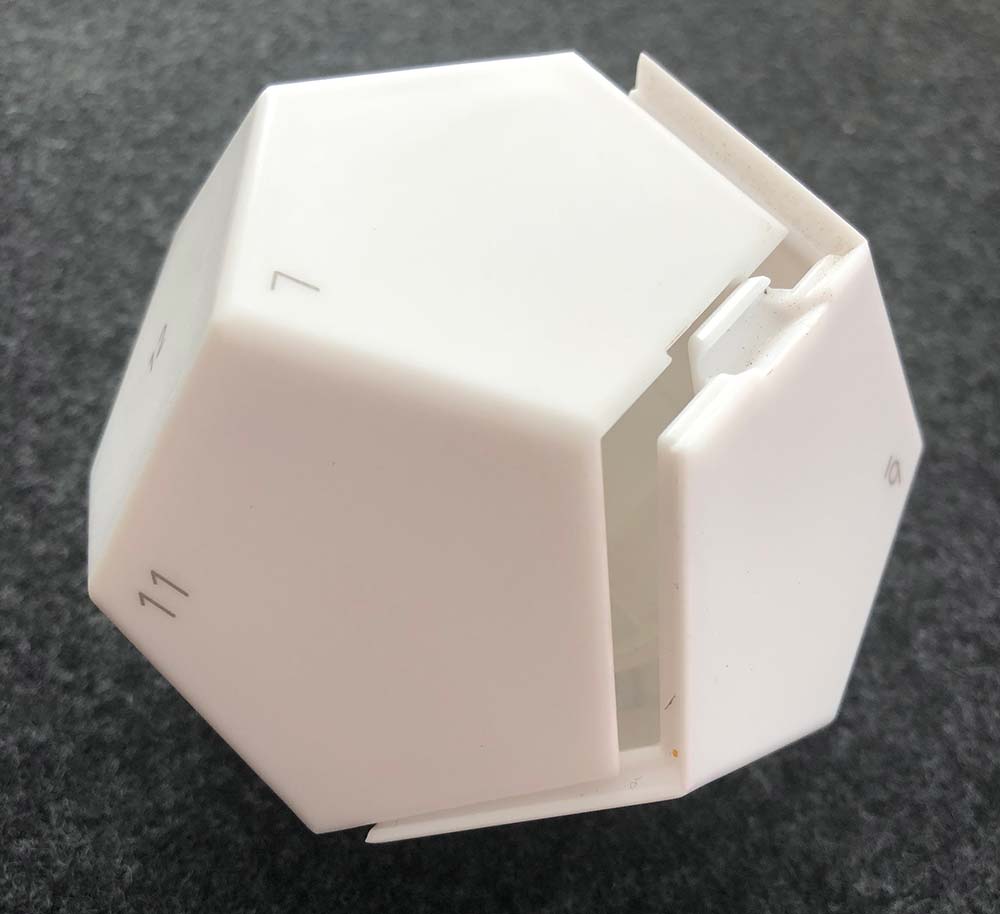
The Nanoleaf remote is a dodecahedron with softly rounded corners and edges. It feels good in the hand and it should as the whole premise is that this remote is meant to be touched, picked up and rotated. It’s also a very visual system which makes sense given that Nanoleaf’s core product is a modular lighting system. Each side is numbered 1 through 12 while producing its own color. Each can be individually programmed to act as a trigger for Homekit scenes or Nanoleaf panel color changes. There’s additional functionality if you’re using it with the Nanoleaf panels, as rotating the remote on a given side can adjust the brightness of your panel’s lights.
Setup
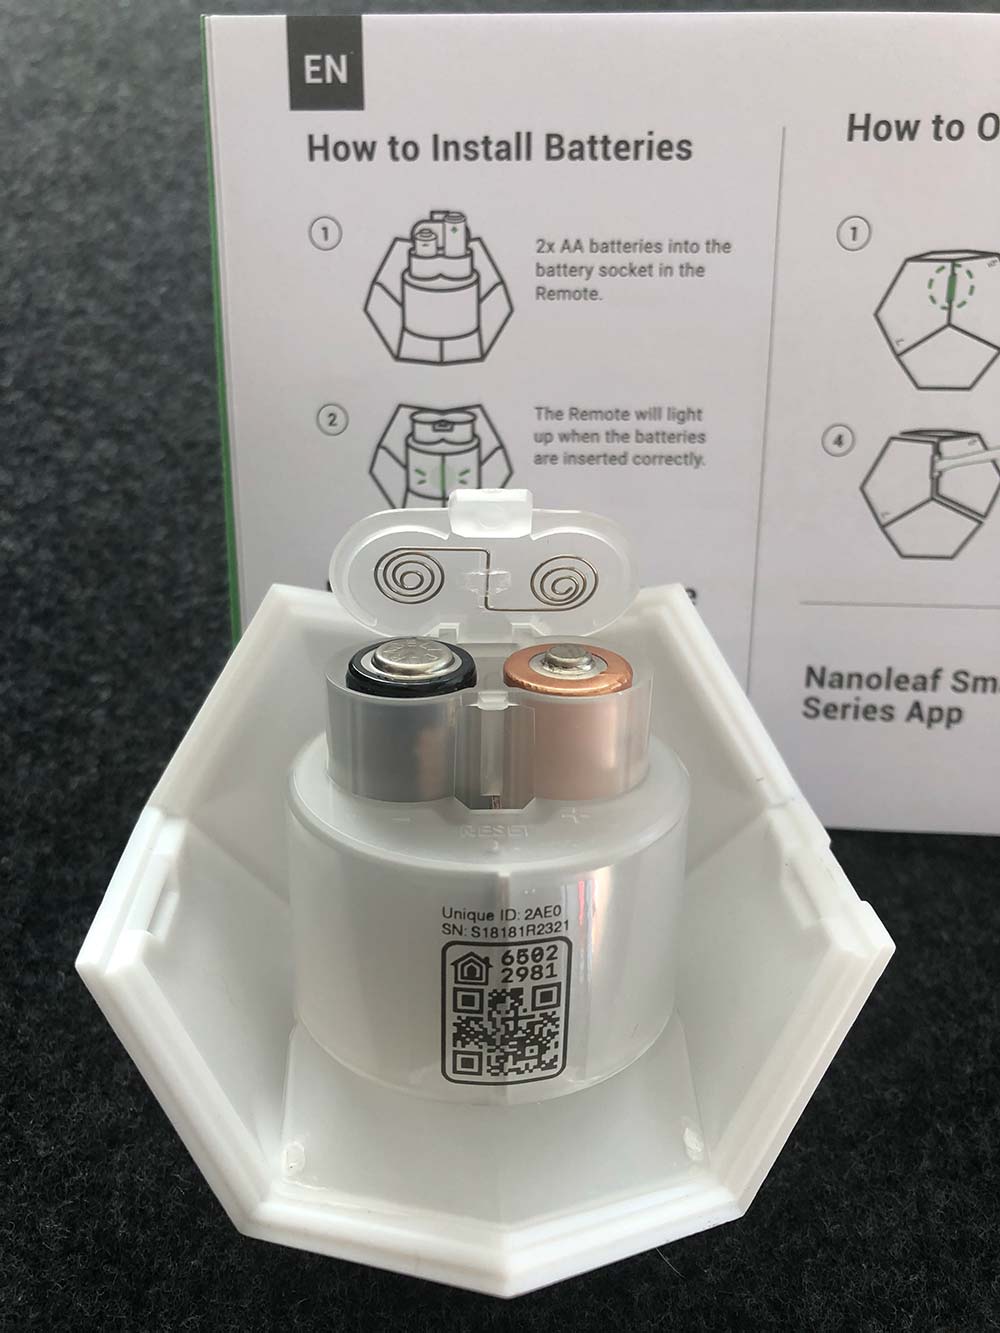
Physical setup is as simple as installing the batteries. The remote is already disassembled in the box.
The only thing to note is that the left battery should be negative up and the right is positive up. There’s no physical markings inside on the battery compartment that I could see and the illustration is confusing.
Pretty trivial though as the compartment is easy to open and close, and it lights up right away if you’ve got it right. Here’s a quick video of that startup sequence. (Please excuse the vertical video. I have no idea what I was thinking.)
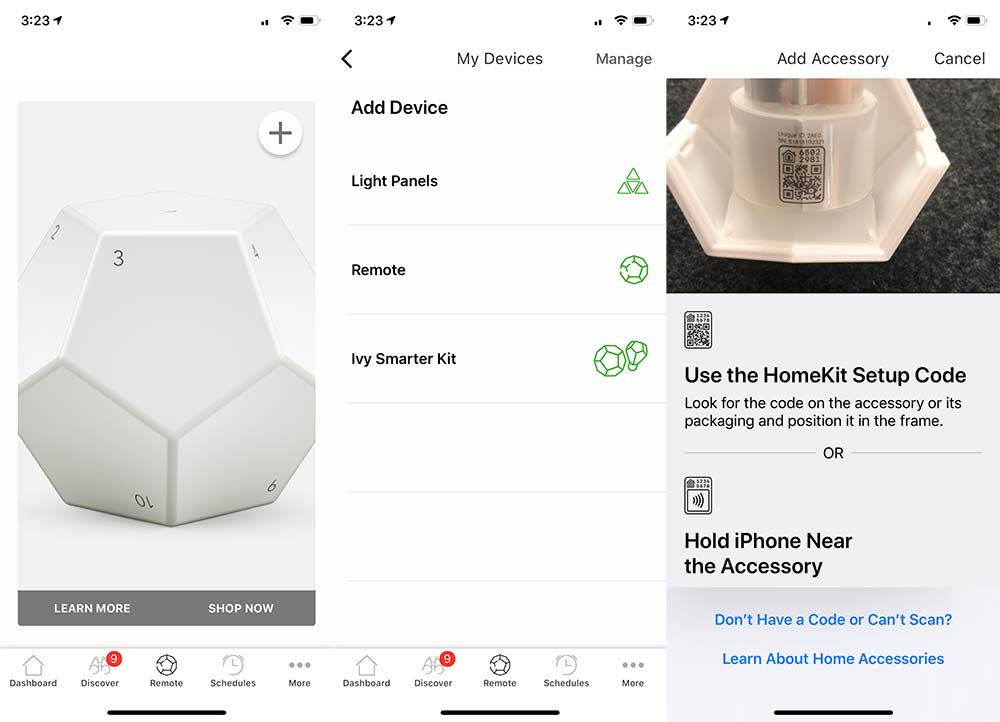
Before you snap the two sides together, you’ll need to download the Nanoleaf app for Apple or Android and there are QR codes for both in the manual to get you to the right place quickly. Once you’re in the app, create an account and you’re now ready to pair with the remote.
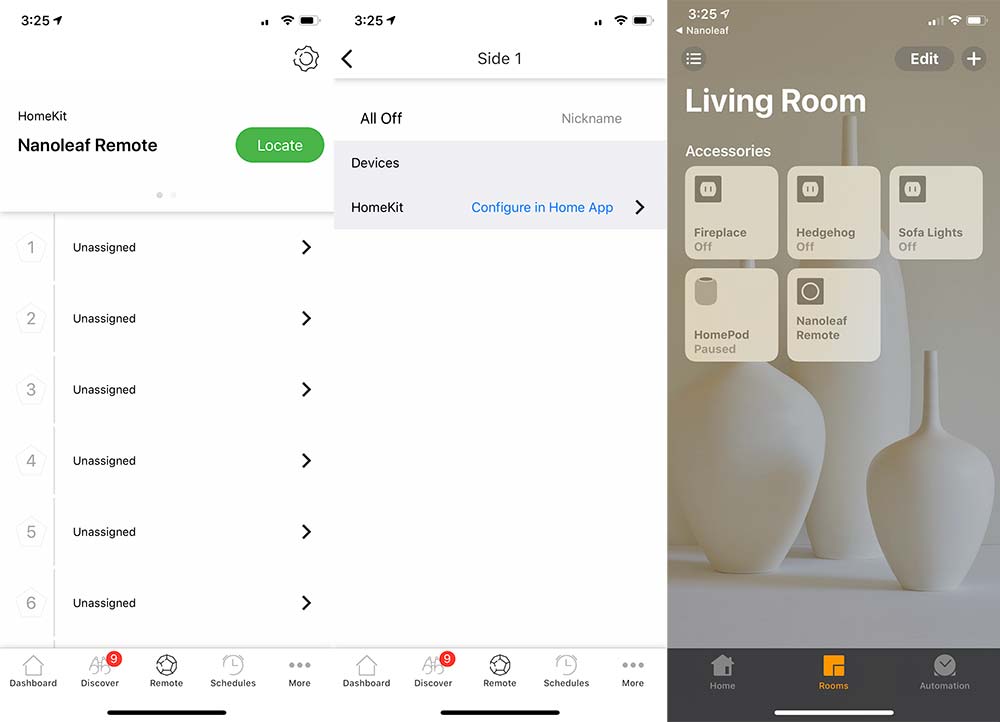
Click the ‘Remote’ button in the bottom center and then the big ‘+’ at the top. Click on ‘Remote’ and then follow the instructions. I used the Homekit Setup Code which found the remote quickly and landed me on a page to customize the name and choose from the rooms I already have set up in Homekit.
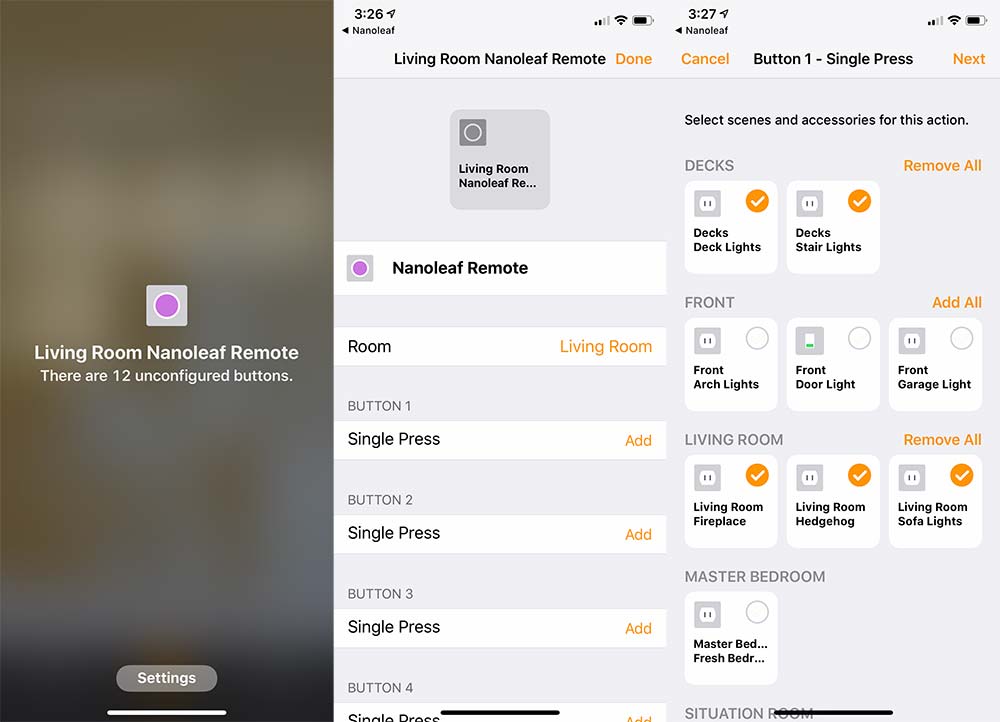
That same ‘Remote’ icon at the bottom now drops you to a screen where you’re presented with all 12 sides to customize. From having set this up originally I had ended up setting side 1 to an ‘All Off’ function, so I repeated that step in the Nanoleaf app for this walkthrough. As you can see in the pic, it has you finish the configuration in the Apple Home app.
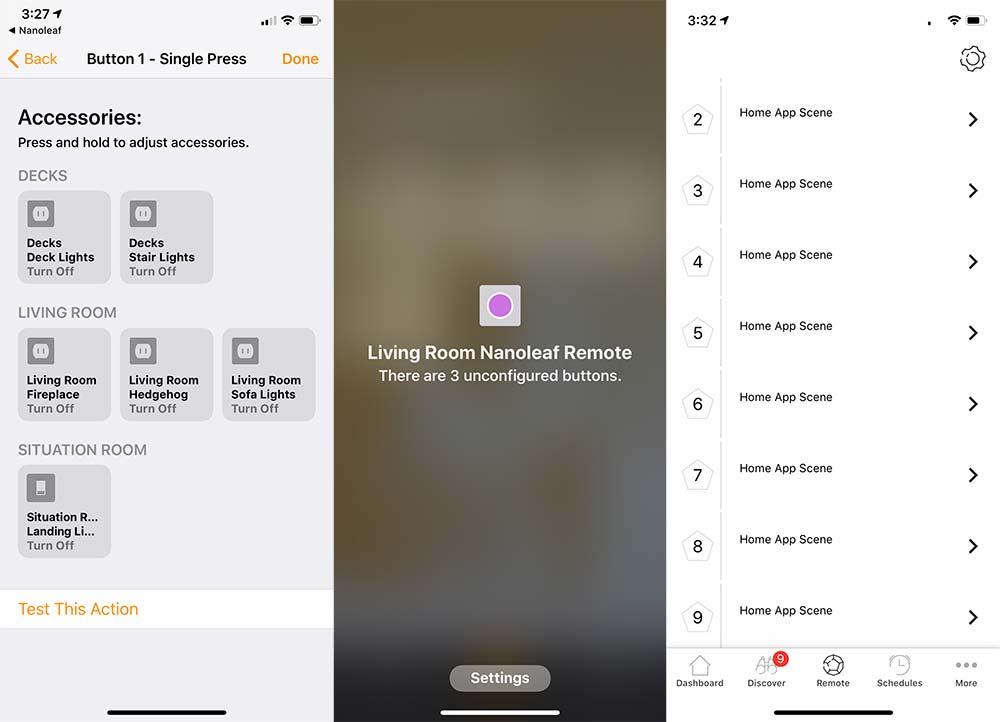
From the Home app, you need to press and hold ‘Nanoleaf Remote’ to see that I have 12 unconfigured buttons and see the ‘Settings’ button. Pressing ‘Settings’ lets you customize all 12 sides. For side 1, I’ve selected 5 lights that I want to turn off. All the others are already on schedules or infrequently used.
When you hit next, you need to define what action is being taken. In my case, they’re all set to ‘Turn Off’. Then you click done. Continue this for each side and set the action that you’re looking for. In my case, I set each even number to turn a specific Wemo on, and the next odd number to turn that same one off. I did not have actions for the final 3 sides.
I’ll cover that last pic a bit more about the way I programmed the remote in the next section as I definitely feel like I’m using the remote for a very specific, narrow functionality and not taking advantage of its power.
Performance
In our house, we recently set up an Apple Homepod and added a Wemo Bridge to allow our multiple Wemo products to be Siri/Homepod compatible. We primarily have Wemo Outlets (both original and the newer minis) and then two Switches. As we continue please know that my review is based on controlling Wemo products and not any other Homekit accessories or Nanoleaf products.
We’ve been using Siri to turn on our various accessories, and used Alexa before getting a Homepod. The Nanoleaf remote added a very tactile (and quiet) action to accomplish the same thing. It’s actually quite refreshing instead of talking to a disembodied voice. In our case, picking up the remote and turning it from side 1 to side 2 activates the lights around our sofa.
I started realizing how narrow my use was when I originally set up the remote. I had 2-6 turning on different lights and realized that I needed the ability to turn off specific ones while leaving others on. That meant I needed to be able to remember which sides did what which led me to the even/odd setup which has been working pretty well.
Here’s a video of turning on and off our deck lights at night to give you an idea of the interaction of using it as an on/off trigger.
I can imagine that if you’re using the remote to control Nanoleaf’s own light panels or any other Homekit compatible color changing bulbs, part of the charm may be in the discovery of different color palettes as you rotate to find one that fits your mood. When using it as a binary on/off, you end up looking at each side more to find the number you want to turn to.
It helps that each side produces a different color as you can pick it up and rotate it in your hand until you see the color you want and then wait or set it down to trigger the action. It still means you need some recollection of what each color means. Here’s what that looks like.
There’s also haptic feedback as you rotate the remote in place looking for which number you want to turn to. I’m guessing this is to provide tactile feedback when controlling brightness levels on compatible hardware.
Within the Apple Home app, there’s no additional interaction unless you want to change settings. Back in the Nanoleaf app, however, I was surprised to see that each of the different sides all had the same name… ‘Home App Scene’ (the last photo in the setup section shows this). You could go into each one and retitle it, but it appears that there’s no back and forth communication between the Home and Nanoleaf apps as far as naming action goes, so it would really just be a housekeeping exercise. The Home app (settings) is going to be your source of truth for what the action is anyway.
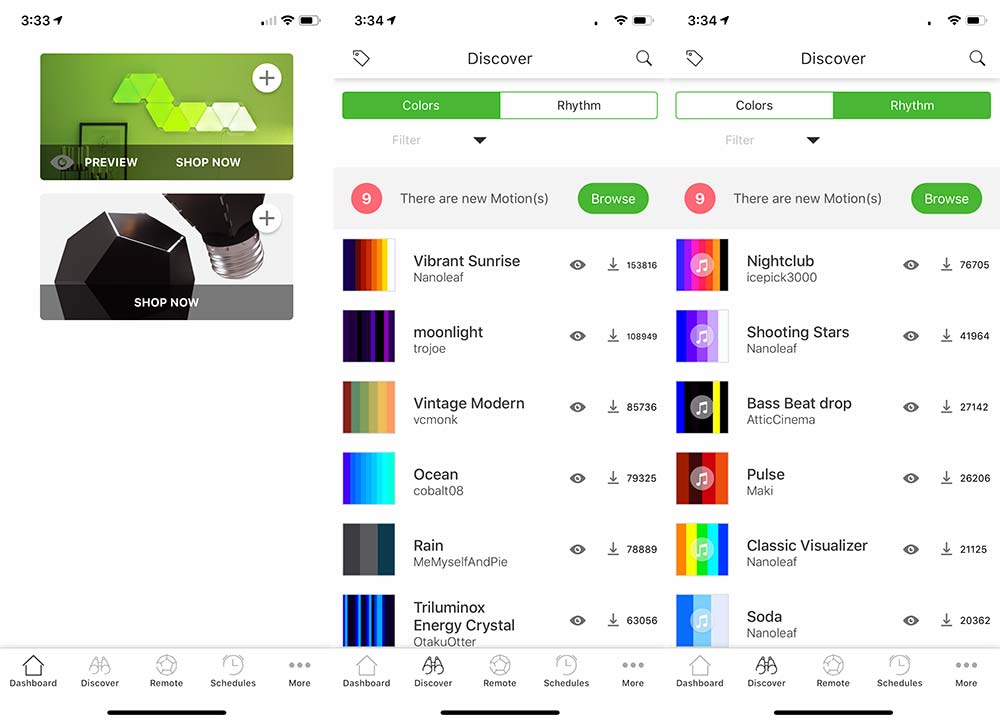
The Nanoleaf app does show a good bit more of what I’m missing by not having Nanoleaf light panels. There are schedule settings, a store and a ‘Discover’ section that has some amazing looking Colors and Rhythms which unfortunately look like they don’t work with the lights within the remote itself as I cannot select it as a device to download to.
As often as Alexa would respond with ‘you have multiple devices with that name’ (I guess many of them share the word ‘lights’); the Nanoleaf remote is not a surefire replacement either. It’s pretty reliable, but sometimes you’ll turn to the side and nothing happens. I’m going to hedge my bets here and say that this is unlikely to be a sole Nanoleaf issue. Nanoleaf plus Homekit, plus Wemo Bridge, plus Wemo outlet… You get my point. Multiple opportunities for a handoff failure.
What I like
The size, shape, and illumination
The action of picking it up and rolling/rotating to trigger an action
The battery life (assuming it meets their claims)
What needs to be improved
Would like to see some of that color customization available for the remote
When it doesn’t trigger a light, it’s hard to understand what didn’t work
Final thoughts
I have to say that it’s incredibly fun to play with. It’s also a great conversation starter. It looks cool, so guests pick it up and are intrigued by the light changing on the remote itself, and even more so when lights around them power up. Somehow this just feels more magical than asking our non-human family member/assistants to do the same thing.
Price: $49.99 Where to buy: Nanoleaf Source: The sample of this product was provided by Nanoleaf.
Note: If you are subscribed to this feed through FeedBurner, please switch to our native feed URL http://the-gadgeteer.com/feed/ in order to ensure continuous delivery.
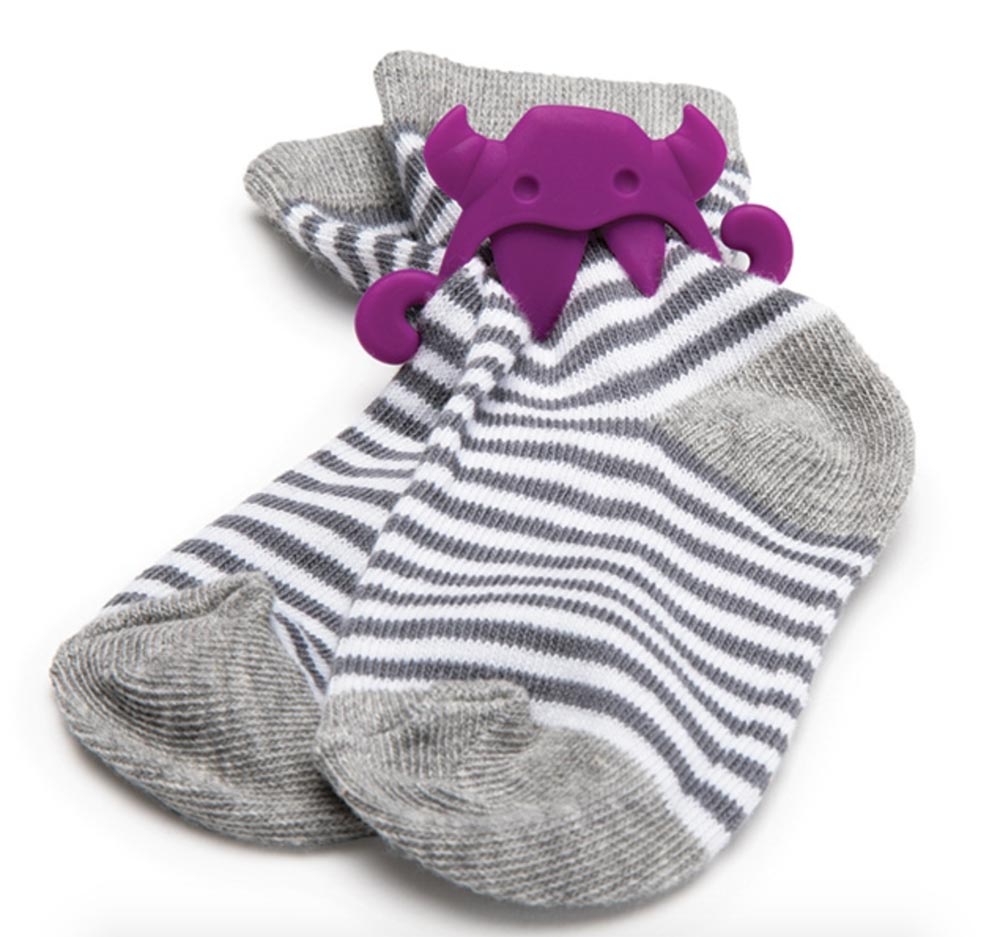
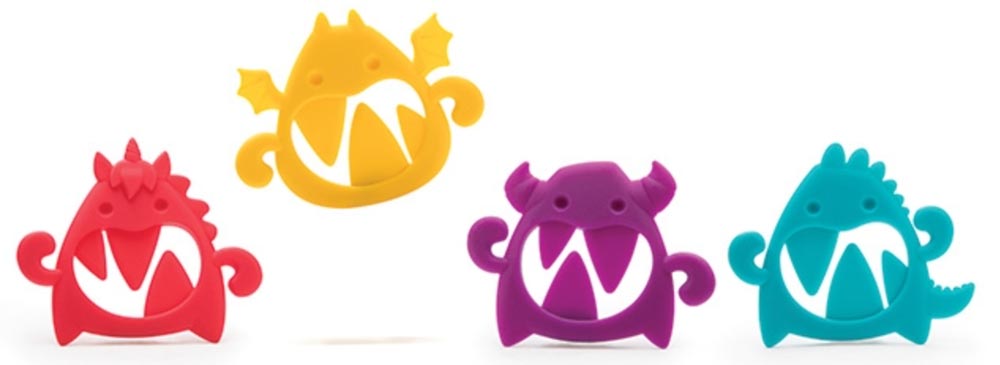
NEWS – Get your own army of monsters to combat the monster that eats your socks every laundry day! Insert a pair of socks into one of these Sock Monsters, and the pair will make it through the washer and dryer together. You can even leave the socks in a Monster for drying on a clothes line.
Each Monster is 1.96″ x 2.55″ x 1.96″. They are made of silicone and are, of course, washer- and drier-safe. You’ll get 8 sock grippers in each set. Sock Monsters are $12.99 at Animi Causa. You might want to pick up a set for each family member!
Note: If you are subscribed to this feed through FeedBurner, please switch to our native feed URL http://the-gadgeteer.com/feed/ in order to ensure continuous delivery.
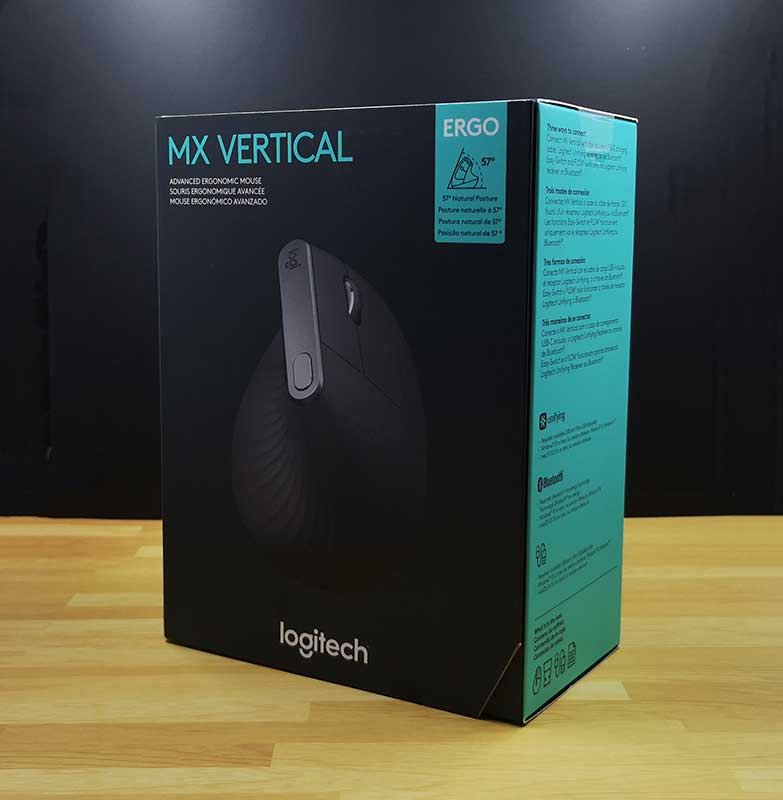
REVIEW – Do you have hand or wrist issues due to an RSI (repetitive stress injury) from using a mouse with your computer day in and day out? I’ve had some issues with my mousing hand for a year or so and have been trying a variety of ergonomic mice to see if one of them might help with those issues. The newest mouse that I’ll be testing is Logitech’s MX Vertical advanced ergonomic mouse.
What is it?
The MX Vertical is Logitech’s latest mouse which has been designed to provide a more neutral grip to prevent forearm twisting which can lead to RSI.
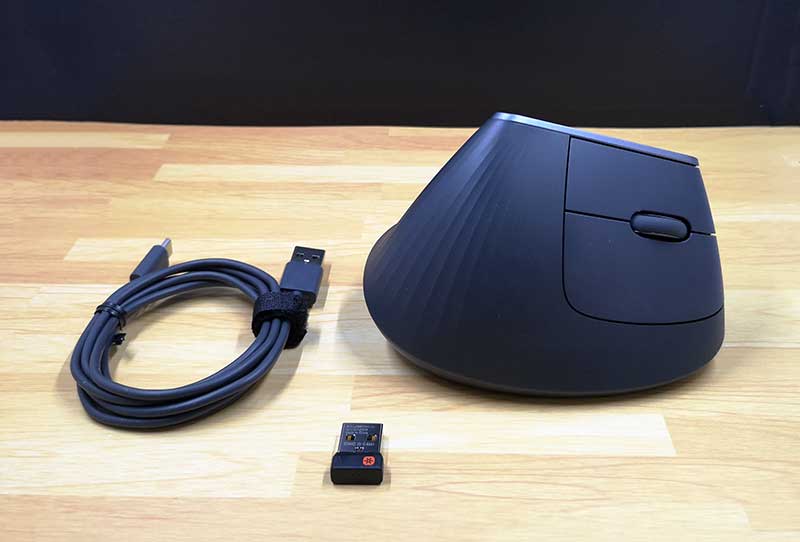
What’s in the box?
Logitech MX Vertical mouse
USB receiver
USB-C charging cable
Design and features
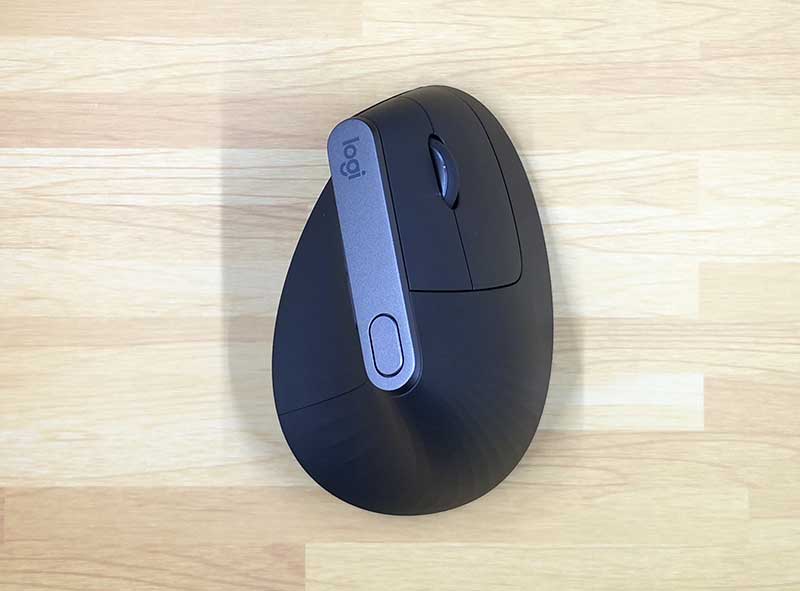
The MX Vertical mouse has a similar style to Logitech’s other mice including the MX Master 25 which I’ve been using for the past year or so. The MX Vertical has a dark gray / slate colored soft touch covering that provides grip and comfort.
This is a 2 button mouse with a click scroll wheel, and 3 other programmable buttons. A large button on the top and rocker button above the thumb rest area.
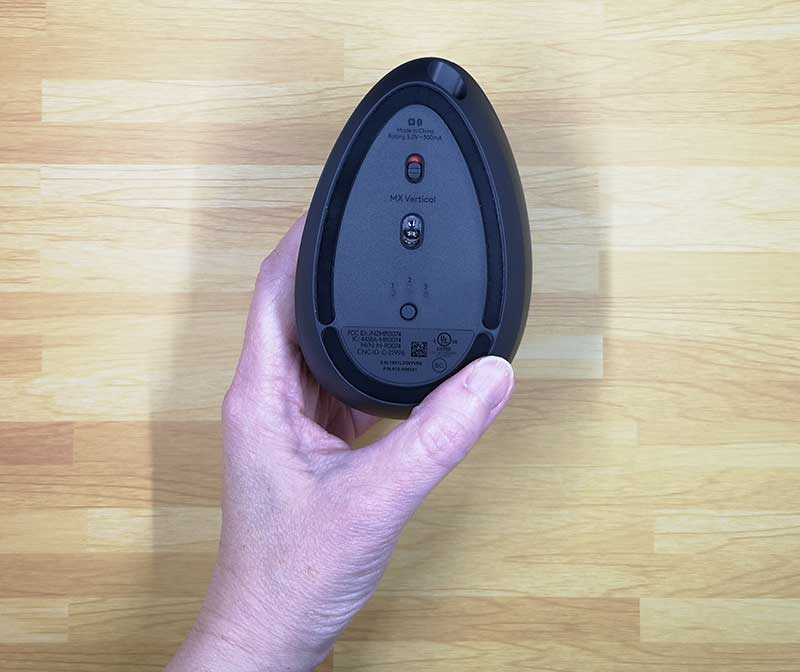
On the bottom of the mouse are the power switch and the channel switch that allows you to switch between up to 3 different devices that are paired with this mouse since the mouse can be connected to your computer, or tablet via Bluetooth or the included USB receiver. You can have the mouse connected to your laptop using the USB receiver and your phone or tablet using Bluetooth and easily switch between them with a press of the button on the bottom of the mouse.
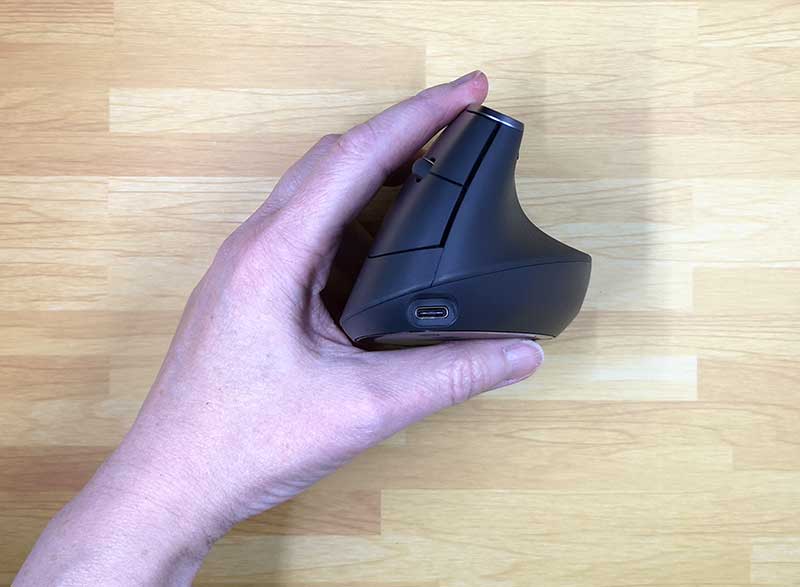
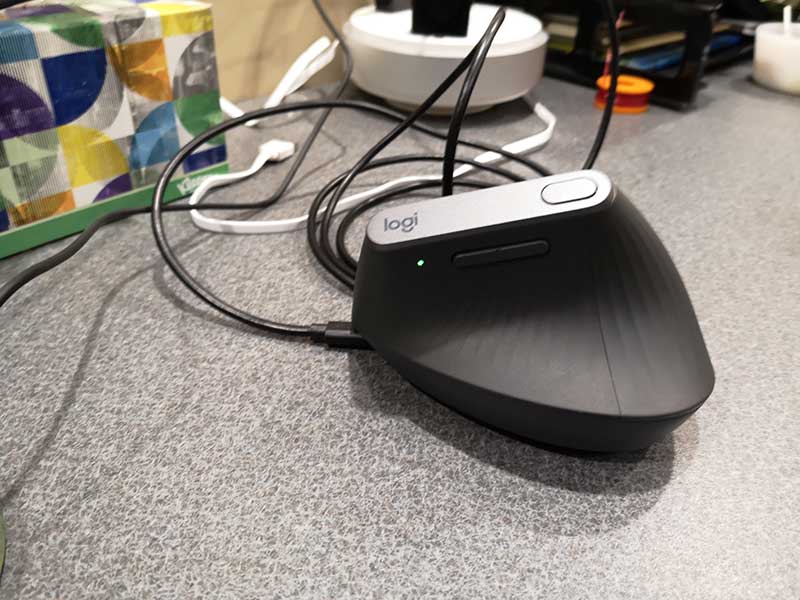
You can also connect the mouse to your computer using the included USB-C cable which plugs into the front of the mouse.
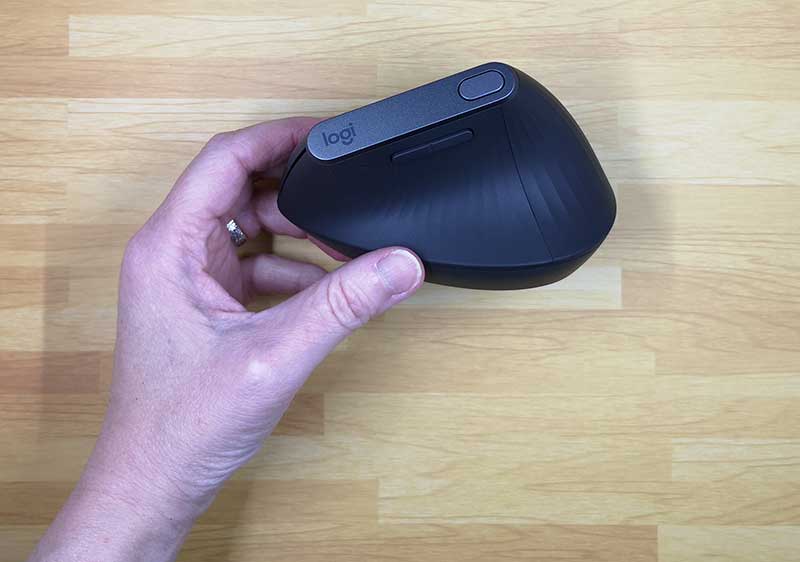
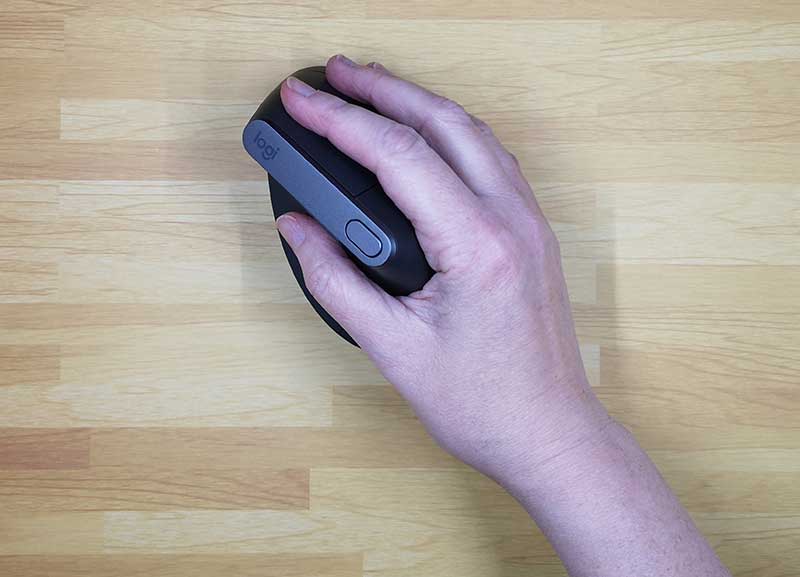
As mentioned, the MX Vertical is designed to provide a neutral grip so that you don’t have to rotate your forearm counterclockwise to use it. It provides a 57-degree angle that is supposed to deliver the optimal ergonomic posture for your hand. There’s a ledge for your thumb to rest and your index finger and middle fingers rest on the left and right buttons.
Let’s mouse around!
Like with any battery powered device, the first step before using it is to charge it up. To charge the Logitech MX Vertical mouse, you just connect the included (or any) USB-C cable to your computer or a USB power adapter. A small LED will light up to let you know that the mouse is charging. A full charge power the mouse for up to 4 months and if it does run out of juice, you can get 3hrs of use out of a quick 1-minute charge.
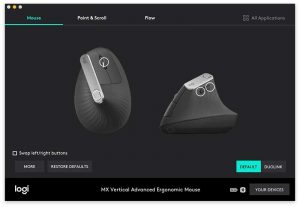
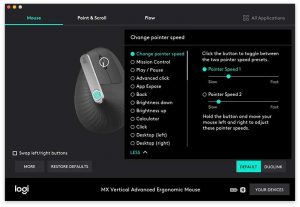
After charging is completed, you can start using the MX Vertical right away but connecting it to your computer using one of the three methods already described above. Out of the box, the left and right mouse buttons work as you would guess they would and the scroll wheel does what scroll wheels do… it scrolls. The scroll wheel can also be clicked to select things like most scroll wheels can do. By default, the top button can be used to switch between two pointer speeds and the rocker button scrolls left and right. However, if you don’t like those settings, you can customize them using the Logitech Options app for PC or macOS.
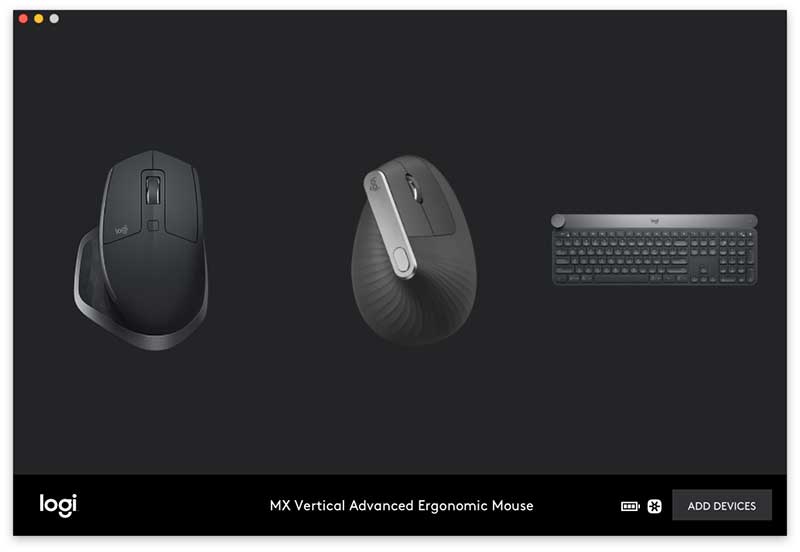
This app will detect all your Logitech connected devices and let you program and customize buttons and settings.
The options app will also let you setup Duolink which gives you the ability to control the computer using gestures with the mouse while holding a function key on the keyboard.
What I like
4-month battery life on a full charge
Smooth movement on desktop
Multiple device switchable
What needs to be improved
Scroll wheel feel
Needs to be heavier
Final thoughts
I’m a big fan of Logitech products and have been using their mice and keyboard for years. I use their Craft keyboard daily and the MX Master 25 mouse daily. I was excited to try the MX Vertical because I do have inflammation in my mousing thumb and thought it might help. But, after using the MX Vertical for the last couple of weeks, I’ve switched back to the MX Master 25 which feels better to me for a couple of reasons.
First of all, I don’t like the feel of the MX Vertical’s scroll wheel. It has a ratchet click feel (and sound) when you scroll it vs. the completely smooth scroll setting on the MX Master 25 mouse which I prefer.
I also found that it was harder to do select text and do finer cursor movement in apps like Photoshop when I use the MX Vertical vs. the MX Master 25.
For me, I didn’t find that the ergonomics provided enough benefit to make me want to switch from my current favorite mouse. All that said, there’s nothing wrong with the Logitech MX Vertical. It’s a nicely made wireless mouse that works just fine for most people and for most tasks. It’s just not going to become my new favorite.
Price: $99.99 Where to buy: Amazon Source: The sample for this review was provided by Logitech.
Note: If you are subscribed to this feed through FeedBurner, please switch to our native feed URL http://the-gadgeteer.com/feed/ in order to ensure continuous delivery.