Minger Govee Wireless Thermo-Hygrometer with WiFi Gateway Review

REVIEW – I have always been a weather nerd.  From my earliest memories, I remember watching the sky hoping and praying for a good thunderstorm to roll across the area.  I had even originally planned to be a meteorologist until I found out how many calculus classes were required for the degree!  That being said, the lack of a degree in meteorology never kept me from being fascinated by the weather and capturing the data associated with it. Hey, my real job is a data analyst so go figure!  When the Gadgeteer offered up the opportunity to review the Govee Wireless Thermo-Hygrometer with WiFi Gateway I jumped at the review.  Read on to see how well it worked out for me.

What is it?

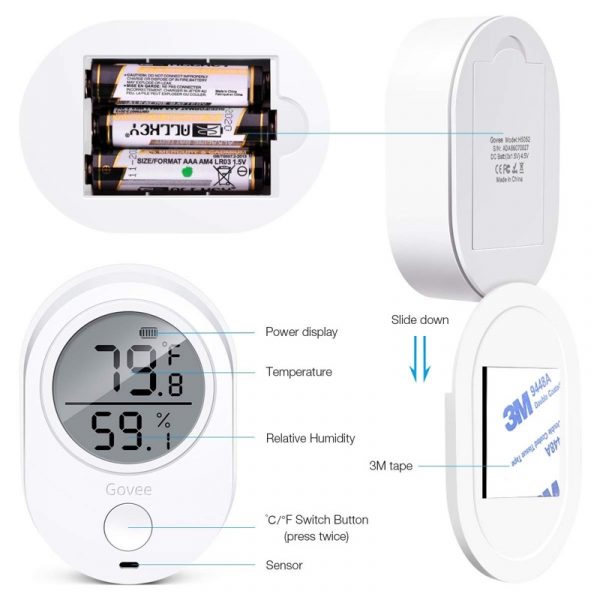
The Govee Wireless Thermo-Hygrometer with WiFi Gateway is exactly what it says it is.  It comes with a wireless hub you plug into the wall and connect to your home’s WiFi.  Then you can attach multiple of their Thermo-Hygrometer units to the gateway and monitor the temperature and humidity in various places around your home.  You just need to be sure you place the sensors where a WiFi signal is available.  You can then install the Govee Home app on your IOS or Android device and see the values those sensors are returning anywhere your phone gets a cellular signal.

They mention monitoring a baby’s room or maybe a wine cellar for those who are lucky enough to have one.  Another good place to put one if there is enough room is a cigar humidor.  Basically put them anywhere you want to monitor the temperature and humidity.   I placed one on my back deck on a side rail (it did not blow off in 45 mph wind gusts the other day so I put it in a good spot) that was out of any direct sunlight but had good airflow.  The other I placed in my living room.

I have owned what I call a professional weather station and have learned a lot about where you should place temperature sensors outside.  Ideally, they should be 6 feet off the ground in a well ventilated spot not in direct sunlight.  Way back when I first got my original weather station I had the temperature sensor mounted under an eve on the side of my house.  Yes, it was in shade, but all the heat rose and was trapped under that eve so my temperature readings were a good 10 degrees or more than they should have been!

What is in the box?

The box was very plain and simple, but it may have been because I received this device for review and it was not the true public packaging.  That being said, there were only four things in the box.

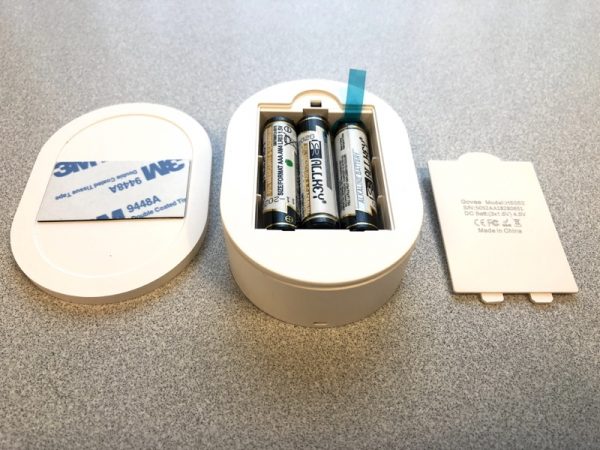
  1. Two wireless temperature and humidity sensors.  They both had a pair of triple A batteries inside and I simply removed the cover and pulled a tab to make the batteries touch the contacts.
  2. One user manual
  3. One gateway hub that plugs into a standard US socket.  It only works with 2.4 GHz WiFi not 5 G.

Setup and Use

Setup for this set of sensors is pretty painless.  The first thing you do is to install the Govee Home app on your phone.  It is available for both Android and IOS.  The next series of screens will take you through the setup starting with the 4 screenshots above. When you first open the app you are presented with this screen.  I clicked on the top left blue badge titled ‘Become a Savvy User’.  It took me to the next screen explaining the benefits of becoming a Savvy User.  I like discounts and I like voicing my opinion (go figure!) so I joined.  The next page is the signup page where you enter in your email and pick a password.  The fourth screen shows me logged in and now a Savvy User.

The next four screens now show the steps I went through to set up the gateway and temp-humidity sensors.  I clicked on the home screen icon at the bottom of the page.  From the home screen, I then clicked on the plus sign on the top right hand of the screen to add a device.

The first screen above shows the plethora of devices they offer.  This particular screenshot is on the second page of products and I picked the Wi-Fi Smart Gateway.  The user product manual that came with it specified that I was to add the gateway first so that is why I picked it instead of the Wireless Thermo-Hygrometer.

Once I picked the gateway, I was presented with the second screen.  I followed the instructions after plugging in the device into an outlet that was in the same room as my router.  The third screen popped up quickly and I switched over to my phone’s WiFi connections and connected to the Govee Gateway.  I then went back to the app and saw the 4th screen above.  What you don’t see is the next screen where I had to enter in my WiFi password and connect the gateway to my router.  Now the gateway is on my WiFi network.

Immediately after I was connected to the network I was presented with the top left screen above.  I was happily surprised to see the Gateway found my two sensors and immediately connected to them.  The top one is the one outside and the bottom one is the one in my living room.  Note that I have since changed the name of both devices to something meaningful through the settings screen offered on each device.  You can see the main screen gives a nice overview of the current temp and humidity of each device.  If you click on any one of the devices you are presented with the second screen which is the hourly screen.

The detail screens (these are the ones you get when you click on a device from the main screen) all default to display the hourly screen.  From there you can pick day, week, month or year.  You can also see the settings icon on the top right of the page.  The second screenshot above shows the hourly screen.  The third and fourth screens show you the popup that happens when you touch one of the points on the screen.  I like how it pops up the detail to show the temp and time/date it happened.  This works for both temp and humidity.

The next screenshot above is the weekly screenshot.  We had a front come through early Sunday morning and you can see the drop in temperature and humidity.  The next two screenshots are the monthly displays.  The third one is how it pops up very compressed.  The app lets you use two fingers and expand the data points which is really cool.

The second screenshot is the month expanded.   Something else that is really cool for a data nerd like me is the export data button you can see on the bottom of the third screen.  If you click on that you get the fourth screen.  You can specify intervals down to the minute and then pick start and end times.  When you click the little paper airplane up top the app will send you a CSV file in the mail with all of the detail.  Very cool!!

This last screenshot shows you the devices settings page.  I have scrolled down a bit, but at the very top is where you can give the device a meaningful name. The rest of the screen is dedicated to alarm notifications.  You can set the min and max temp and humidity and if the device exceeds either one you will get a notification from the app.  This works exactly as it should.  I set the min temp for outside to 57 degrees and I started getting notifications the moment it dropped below that.  There are also calibration options which I also think is a nice feature.  If you have another thermometer that you trust implicitly, you could use it to calibrate the ones from Govee.

What I like

I love how easy the device is to use.  The app is very flexible allowing you to see temp and humidity values across any number of time periods.  I also find the ability to export the data into a CSV file a big plus.  Being able to set alarm notifications would also be a big plus for anyone putting these sensors in sensitive areas like a baby’s room, greenhouse or cigar humidor.  They also offer a fast return service.  If you ever experience a problem with the device, the app lets you put in your Amazon order number and they will send you a replacement right away with no need for you to send the old one back.  They have a two-year replacement warranty.  I personally never tried that feature, but it seems to be a cool option to have.

What needs to be improved

I cannot find anything that needs to be improved.  What can I say, I love this device.

Price: $79.99
Where to buy: Amazon
Source: The sample for this review was provided by Minger.

Filed in categories: Reviews

Tagged: , ,

Minger Govee Wireless Thermo-Hygrometer with WiFi Gateway Review originally appeared on The Gadgeteer on January 26, 2019 at 9:00 am.

Note: If you are subscribed to this feed through FeedBurner, please switch to our native feed URL http://the-gadgeteer.com/feed/ in order to ensure continuous delivery.

SAM is a virtual alarm for a physical mailbox

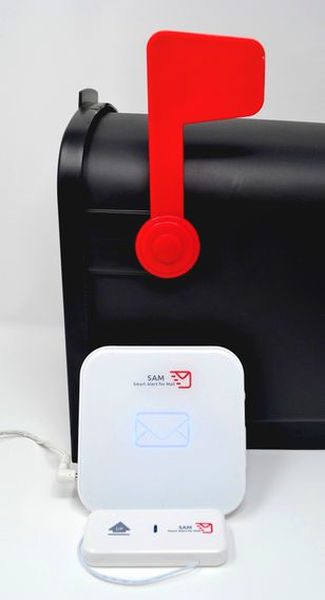
NEWS – Smart Alert for Mail has developed a hardware gadget called SAM – the world’s first purpose-built cloud-enabled alert system for a residential mailbox. This patent-pending system is composed of a transmitter, receiver, and optional mobile app. The SAM transmitter is a motion activated switch that transmits a signal to the SAM receiver. This is mounted to the mailbox door or a location which will register movement when mail is delivered. The rated range of the unit is 300 feet, line of sight.  The transmitter has a short external antenna which can improve signal transmission when used with a metal mailbox.  Upon detecting a signal from the transmitter, the envelope symbol on the receiver switches from green to blue and begins glowing. The receiver also plays an alert tone or a user selected mp3 (the AOL “You’ve got mail” announcement seems like the most obvious choice) and sends a signal through a connected Wi-Fi network to a mobile app. Through the mobile app, users are able to monitor their mailbox activity from anywhere cellular service is available. Pressing the receiver or acknowledging the detection in the app resets the transmitter notification for the next parcel delivery.

SAM has been designed to work with all USPS-approved curbside mailboxes, but it can also be used in a variety of motion detection applications. The retail cost of the SAM is $59.00 and $10.00 shipping. All of the wireless services are provided without subscription fees along with the purchase of the unit. For more information and to place an order for SAM, please visit https://smartalertformail.com/SAM is available for pre-order today and will begin shipping in early December.

Filed in categories: News

Tagged:

SAM is a virtual alarm for a physical mailbox originally appeared on The Gadgeteer on November 5, 2018 at 8:00 am.

Note: If you are subscribed to this feed through FeedBurner, please switch to our native feed URL http://the-gadgeteer.com/feed/ in order to ensure continuous delivery.
Minger Govee Wireless Thermometer/Hygrometer Review

REVIEW – Are you one of those folks who think it’s too cold at work? I’m the opposite! I always think it’s too dang hot. Our office building HVAC system seems a little funny to me sometimes, so I thought something like the Govee wireless thermometer/hygrometer that logs data might come in useful.

What is it?

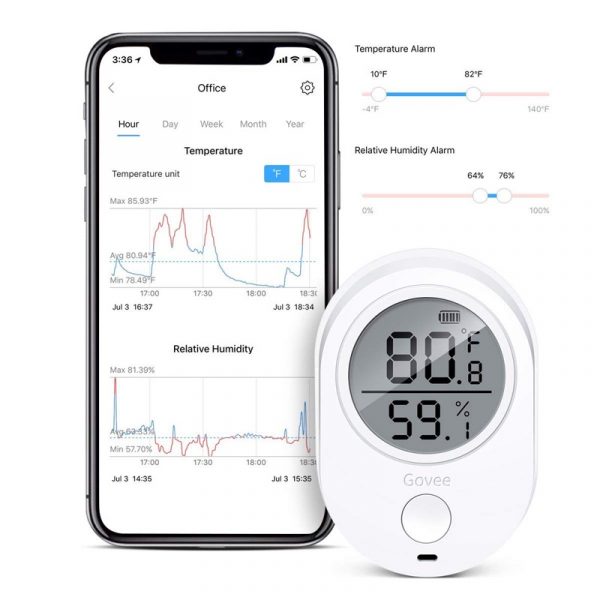
The Govee is a battery-powered device that displays temperature and relative humidity on an LCD screen. The party trick is the ability to record up to 32,000 data points view the records over your smartphone via bluetooth.

Hardware specs

  • Temperature Accuracy: -20°C to 60°C (-68°F – 140°F)
  • Humidity Range: 0 – 99%
  • Humidity Accuracy: ±3%
  • Dimensions: 40mm x 40mm x 16.5mm / 1.57″ x 1.57″ x 0.65″
  • Weight: 40g / 1.4oz
  • Battery: AAA (included)
  • Battery Life: Typ. over 1 year (more in normal conditions, less in extreme cold)
  • Sampling Interval: Every 2s
  • On-board Data Storage: 20 days
  • In-App Data Storage: 2 years
  • Compatibility: iPhone, Android

What’s in the box?

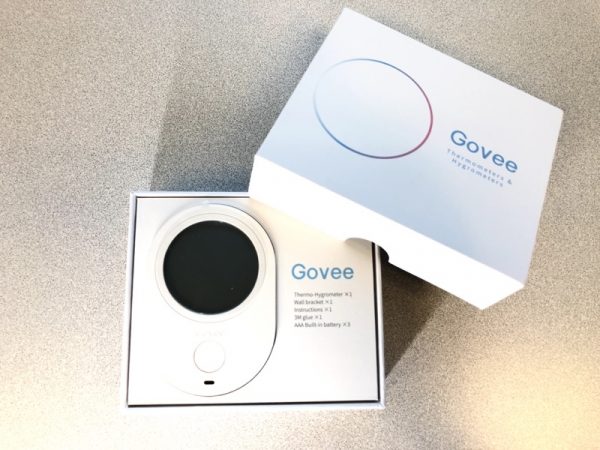
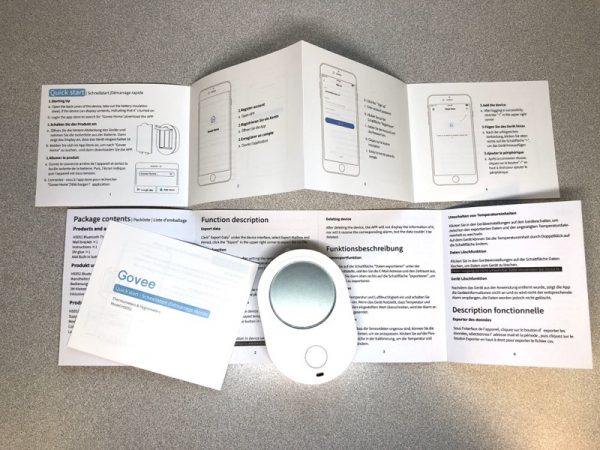
You get the Govee device, a mount with peel-off adhesive, and documentation. AAA batteries included!

Design and features

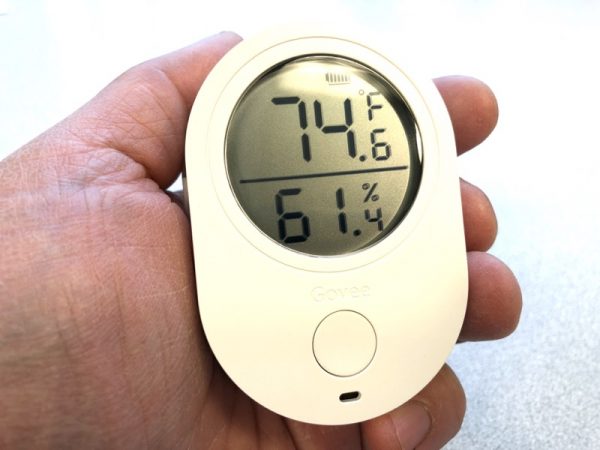
There’s not a whole lot with the device itself. There’s only one button on the front to switch between Celsius and Fahrenheit.

Don’t forget to pull the little plastic tab from the included batteries!

The device itself fits in the palm of your hand, with an easy to understand LCD display with a battery icon on top.

Setup

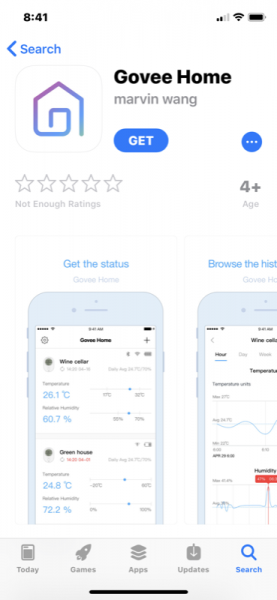
I downloaded the iOS app “Govee Home”, shown below. It’s free.

For some reason, you have to sign up with an email and password. I don’t know why and I’m not too crazy about this.

Performance

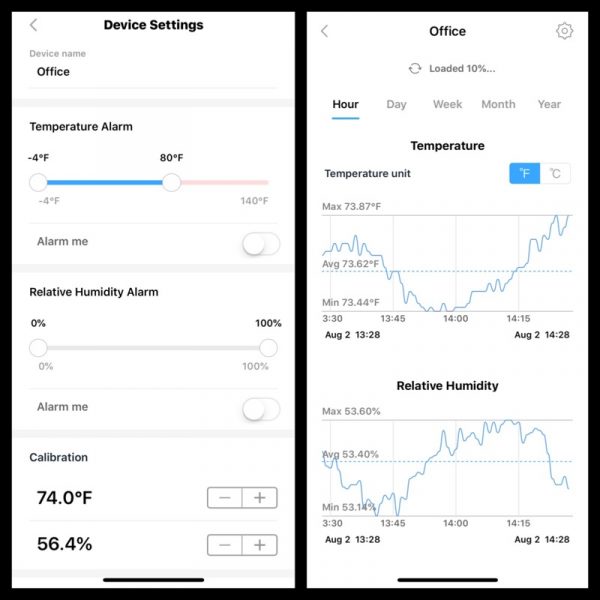
Once your smartphone is paired with your Govee, you can make changes to your settings. Note the temperature alarm slide on the left. I set the upper range to 80F to see what would happen. More on that later.

On the right is a snapshot of the data over a brief period. You can slide the records left and right in time.


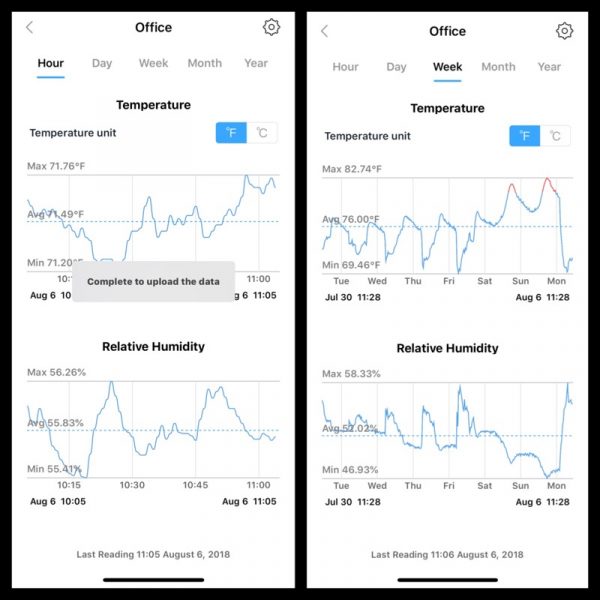
Once the data is uploaded to your phone, you get the grammatically questionable “Complete to upload the data”. (Attention programmers: “Data upload complete” is shorter and better.)

I let the Govee sit in my office for a week to get a sense of what was going on with the temperatures. See the red peaks on late Saturday and Sunday? Those are times when the recorded temperature exceeded the limits I set at 80F. It appears that over the weekend, the air conditioning (what little there is) is shut off to save energy.

What I like

Simple to set up. Data is easy to interpret on a smartphone.

What needs to be improved

Maybe not for you if you’re paranoid about setting up an email and password for an app. The grammar choices bug me a little.

Final thoughts

Easy, straightforward, and batteries included. I like it!

Price: $42.99
Where to buy: Amazon
Source: The sample for this review was provided by Minger.

Filed in categories: Reviews

Tagged:

Minger Govee Wireless Thermometer/Hygrometer Review originally appeared on The Gadgeteer on August 13, 2018 at 9:00 am.

Note: If you are subscribed to this feed through FeedBurner, please switch to our native feed URL http://the-gadgeteer.com/feed/ in order to ensure continuous delivery.
Constantly monitor temperature and humidity with the SensorPush wireless sensor

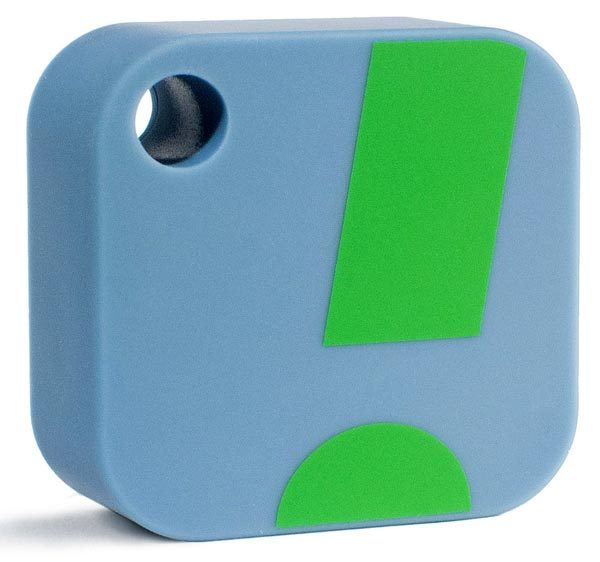
When we got a new fridge last year, I wanted to monitor its temperature for a while to be sure it was safe for storing my insulin.  My fridge had a temperature display, but it would only show me a snapshot of the conditions in there, so I could never be sure that the insulin had never been in freezing conditions.  That would be the same weakness for every other thermometer I had on hand.  After some research, I found the SensorPush.  It’s a little fob-like device about the same size as those tracking fobs you can add to your keyring.

The SensorPush connects via Bluetooth to an app running on your phone or tablet.  Inside, it has a Swiss-made sensing component that provides reliable, accurate measurements.  It can push readings via Bluetooth 4.0 to your mobile device, and you can monitor hourly, daily, monthly, and yearly records of both temperature and humidity so long as you are within Bluetooth range.  You can also get alerts if the readings are outside your desired limits.  You can add an optional SensorPush G1 WiFi Gateway for data and alerts via the internet.

The SensorPush is $49.99; the optional G1 gateway is $99.95.   You can purchase them at Amazon.

Filed in categories: Reviews

Tagged:

Constantly monitor temperature and humidity with the SensorPush wireless sensor originally appeared on The Gadgeteer on March 4, 2018 at 9:00 am.

Note: If you are subscribed to this feed through FeedBurner, please switch to our native feed URL http://the-gadgeteer.com/feed/ in order to ensure continuous delivery.
OVAL Sensor system review


Many people (myself included) like to use security cameras like the Nest Cam to keep an eye on our home and property from anywhere in the world. Cameras are great at catching visual problems, but how can you be alerted if the temperature in some part of your house goes too high or too low, or if there’s water on the floor in your basement? That’s where you need a sensor system like OVAL. Let’s take a look.

What is it?

OVAL is a system of sensors and a gateway that monitors temperature, motion, light, moisture, proximity, and flood conditions.

What’s in the box?

OVAL gateway
OVAL sensor
Sensor adapter housing
AC adapter
Ethernet cable
6 CR2477 Lithium sensor batteries
Mounting hardware
* I was also sent a flood detector which is an optional purchase ($39) not included with the system kit

Hardware design and features

The OVAL gateway is the brains between the OVAL sensors and your network.

It won’t come as a huge surprise that the gateway is an oval shaped plastic module. On top is the OVAL logo and a status LED that glows green when the gateway is powered on.

The gateway has an Ethernet jack on the back with a micro USB connection for power. The gateway has to be hardwired via the included Ethernet cable to your router, but it talks to the sensors wirelessly.

The OVAL system comes with one OVAL sensor (additional sensors are $79).  Like the gateway, the sensor is an oval shaped white plastic module.

The sensor has a cover that can be removed. It’s mainly needed if you use the optional flood sensor.

A cover on the back of the sensor protects the battery compartment.

The OVAL sensor is powered by a CR2477 Lithium battery which should last for about 2 months with moderate usage and with battery savings mode turned off. That’s not a long time, which explains why there are 6 batteries included in the package. That means you have enough batteries for a year. I did a quick search on Amazon for CR2477 batteries and found that they aren’t too expensive. You can buy them in packs of 5 for less than $12 if you go with a no-name brand.

The battery can last up to twice as long if the battery savings mode is turned on. However, while in this mode, you can’t monitor proximity or light and you can’t use the visual or sound alerts. More about that later.

I mentioned the optional flood sensor earlier. The sensor has a long cable that connects to the OVAL sensor.

The flood sensor connection is held in place by the OVAL housing cover.

Setup, installation, and daily use

Setup is really easy. You just install the iOS or Android OVAL app on your mobile device and follow the prompts which will lead you through the steps to connect the gateway to your router and then connect the sensor to the gateway.

I connected the gateway to my Amplfi wireless router which is connected to a CISCO router for my AT&T managed T1 line. I had a little trouble getting the gateway to talk to the sensor but after a few hours, it started working on its own and has been fine ever since.

FYI: Although the OVAL system only comes with one sensor, you can purchase additional sensors and connect up to 15 of them to the gateway.


After the gateway is setup and connected to the sensor, you can program the sensor to alert you when there is a change in temperature, humidity, motion, proximity, moisture, light, and flood if you have the flood sensor connected to the sensor.


You can choose to be notified one way or multiple ways when the sensor sends an alert. Notification types include text messages, or push message on your mobile device, to email, phone calls and more. You can also enable visual alerts which blinks the LED on top of the sensor or audible alerts which is chirping sound that’s not loud enough that you’ll hear it from another room or even across a large room.


OVAL is an all-in-one sensor that can monitor six different types criteria. You can monitor all six or only enable exactly what you want to monitor.


The OVAL monitoring system is really powerful because you can customize the criteria for an alert. If you want to know when the temperature in a room gets to 80 degrees, it will let you know.


There are also presets that you can choose that make it easy to use the OVAL sensor to monitor different events.

The sensor is really sensitive and sends alerts in rapid succession with almost no lag. Last week I had my roof replaced, and if you

Last week I had my roof replaced, and if you’ve ever had that done before, you’ll remember how noisy it is when there are a bunch of people on your roof banging away with hammers or nail guns. I had the OVAL sensor sitting on a shelf on the first floor of my house in a room with a cathedral ceiling, and it sent a LOT of alerts because it detected the vibration / motion from all the activity on the roof.

I tested the light detection, flood detection, humidity and proximity detection. Everything worked as expected, with alerts sent very quickly.

Some examples of ways to use the OVAL system include:

  • Put a sensor in your mailbox and know when the mailman opens the lid
  • Put a sensor with the flood detector in your basement, near a hot water heater, or washer to check for leaks
  • Put a sensor on a door or window to know when it is opened
  • Put a sensor in the case of your expensive guitar to make sure the humidity level doesn’t drop too low which can cause wood to crack

Final thoughts

I’ve been testing the OVAL system for several weeks. It’s worked very well and has never given me a false alarm.

The only complaint that I have is the price. $199 is expensive considering that the system only includes one sensor and additional sensors are $79 each. I think the system should include at least three sensors for the same price.

If the OVAL system’s price isn’t a problem for you and security cameras don’t offer enough peace of mind that your home or property is protected when you’re not there, consider an all-in-one sensor system like OVAL. It’s quick and easy to setup, but powerful enough to alert you to almost any situation that you can think of.

Source: The sample for this review was provided by OVAL. Please visit their site for more info and Amazon to order.


Product Information

Price: $199.00
Manufacturer: OVAL
Pros:
  • Easy to setup
  • Multiple monitor types
  • Multiple notification options
  • Comes with enough batteries to power the sensor for a year
Cons:
  • Only comes with one sensor
  • Additional sensors are expensive

Filed in categories: Reviews

Tagged: ,

OVAL Sensor system review originally appeared on on June 6, 2017 at 12:36 pm.

Note: If you are subscribed to this feed through FeedBurner, please switch to our native feed URL http://the-gadgeteer.com/feed/ in order to ensure continuous delivery.