Julie’s favorite gear, SnapRays Guidelight, Hairmax LaserBand, and more – Review updates

REVIEW – You have probably wondered what happens to the products after we review them. Do they break shortly after the review is posted or do we continue to use them for years and even decades later? To answer these questions, we regularly add quick updates to our reviews so you can read our comment on how well the product has held up over time. Check out these latest review updates by clicking on the review titles below and then scroll to the bottom of the page to read the latest dated updates.

Julie’s favorite gear

Pixel 2 XL review By Julie Strietelmeier

Snap Power SnapRays Guidelight review By Julie Strietelmeier

Zibra Open It! review By Julie Strietelmeier

Hairmax LaserBand 82 hair growth laser light device review By Samuel Pair

Filed in categories: Reviews

Tagged:

Julie’s favorite gear, SnapRays Guidelight, Hairmax LaserBand, and more – Review updates originally appeared on The Gadgeteer on May 24, 2019 at 10:00 am.

Note: If you are subscribed to this feed through FeedBurner, please switch to our native feed URL http://the-gadgeteer.com/feed/ in order to ensure continuous delivery.

Wyze Sense review

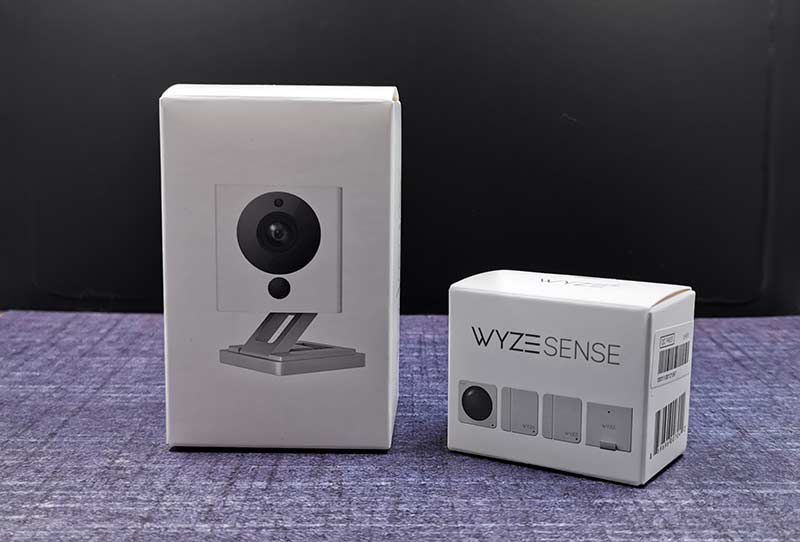
REVIEW – Let me get this out of the way right from the start… I love Wyze products. I reviewed the Wyze Cam and have gone on to buy additional cameras and help my neighbor purchase and set up more cameras for his home. I think they are an awesome bang for your buck when it comes to small home security cameras and now Wyze has added two new sensors that work with the Wyze Cam to create an affordable basic home security system. Let’s check it out.

What is it?

Wyze Sense are small contact and motion sensors that work with Wyze cameras to create a basic home security system.

What’s in the box?
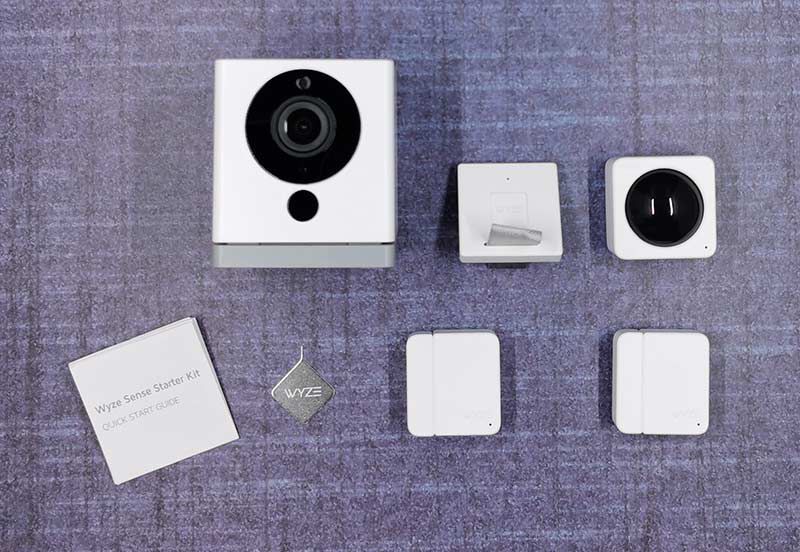
Starter kit comes with:

  • 2 Contact sensors
  • 1 Motion sensor
  • 1 Sensor bridge
  • Reset tool
  • Instructions

A Wyze Camera is NOT included in the starter kit, but one camera is required for the setup.

Design and features

The starter kit comes with 2 sensors.
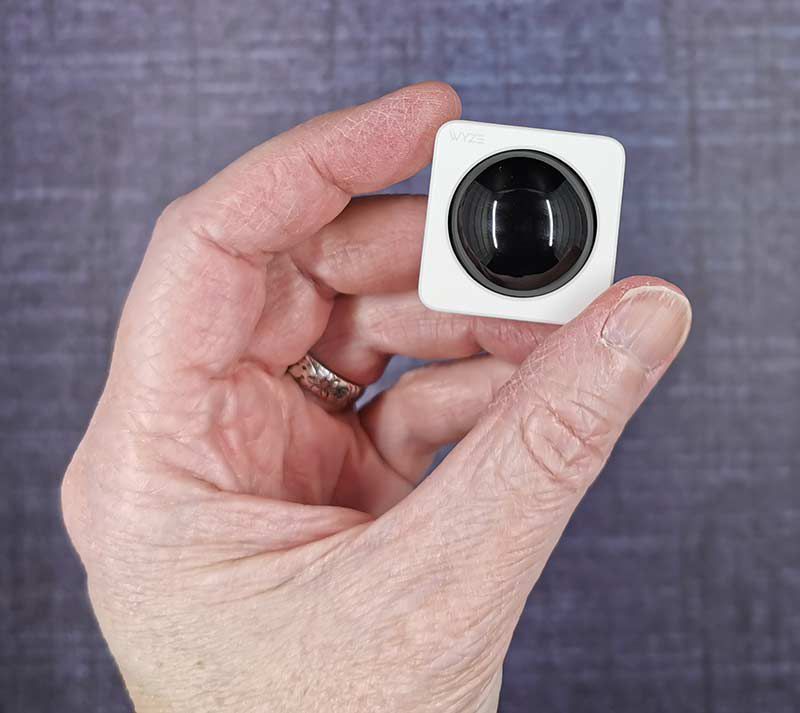
There’s the small motion sensor shown above which can detect motion 120° up to 26′ away. Just place the sensor about 6 ft up on a shelf and it is good to go.
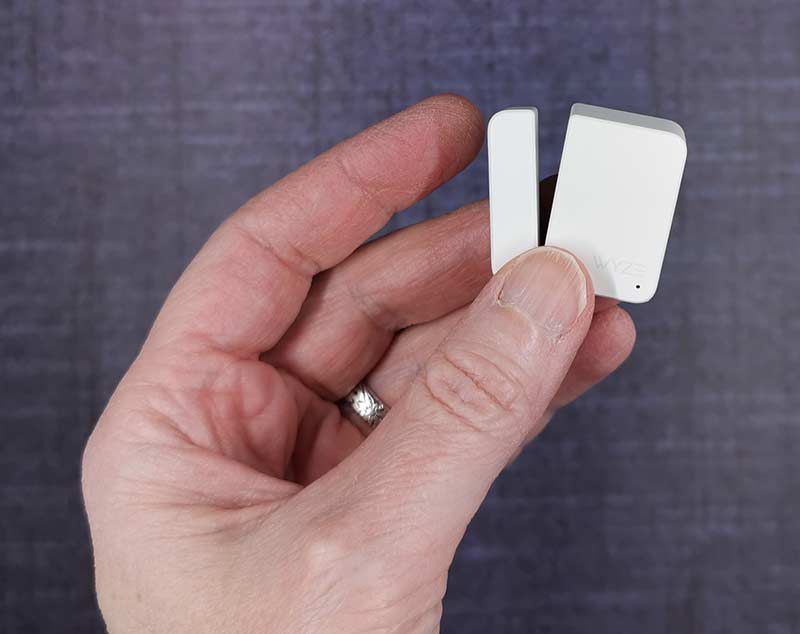
The contact sensor has two pieces that use a magnet to know when the contact between the pieces has been opened or closed.

Installation
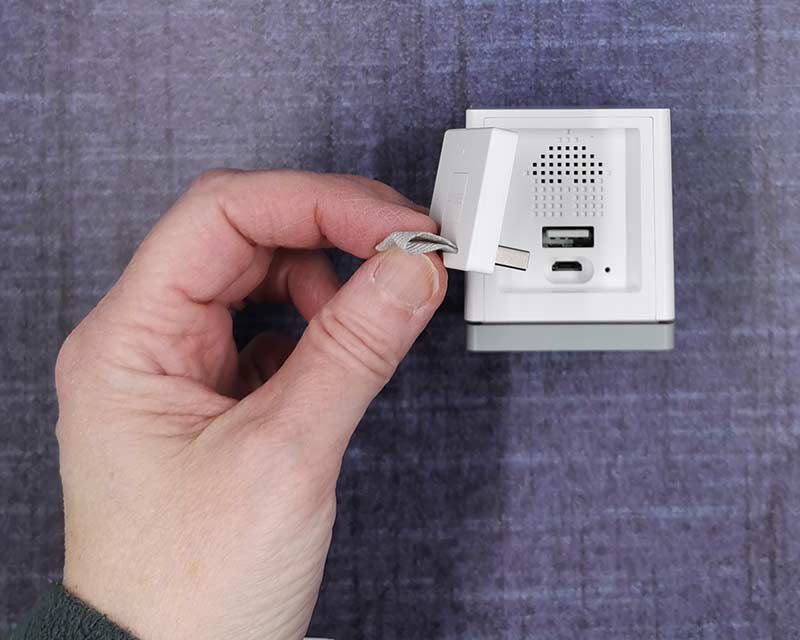
Wyze knows how to design a system that anyone can install. The Wyze Sense installation isn’t any different. It takes only a couple of minutes to get up and running and most of that time is just figuring out where to place the sensors.

You will need a Wyze camera though. The camera is needed for the Sensor Bridge which plugs into the USB port on the back of the camera.
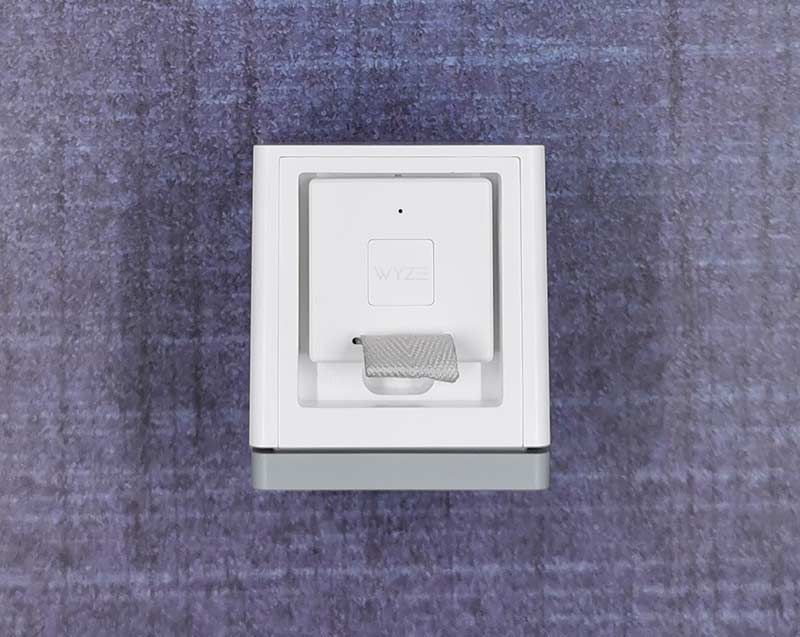
The Bridge is the module that the sensors will talk to.

To install the contact sensor, you remove the adhesive on each piece and then stick them on something that will open, like a door, a window, a cabinet, etc.
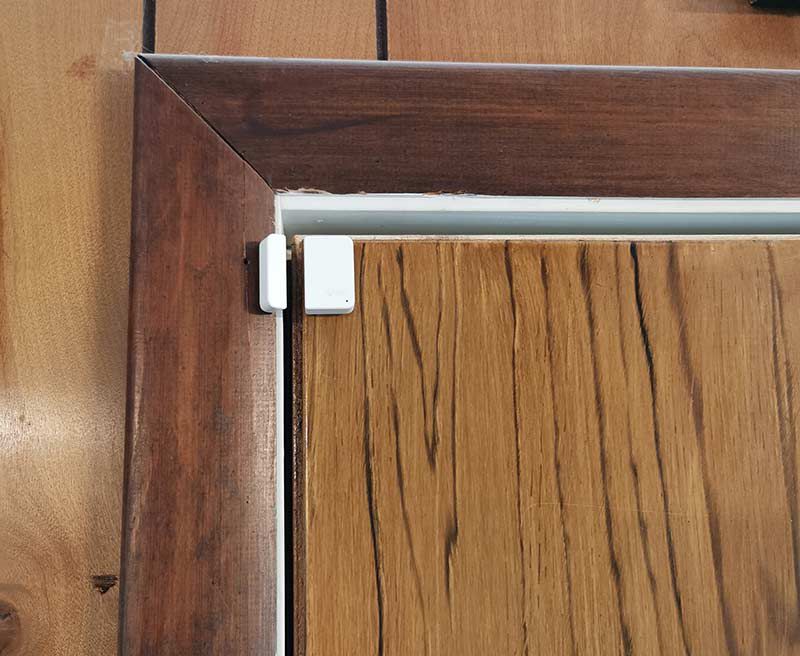
I placed mine on the front door so that when the door opens, the contact between the two pieces is open and when the door shuts, the contacts close.

For the motion sensor, I placed it on a high shelf. Can you find it in the image above?

The only criticism about the sensors that I can think of is that they are bright and stick out since they are made of white plastic. It would be great if Wyze offered them in black too.



The next step in setting up the sensors requires you to launch the Wyze app on your mobile device and add the new products. The app leads you step by step through the process which only takes a couple of minutes. As you can see, you have to link the sensors with one of the Wyze cameras so that any triggered events will capture a video clip.
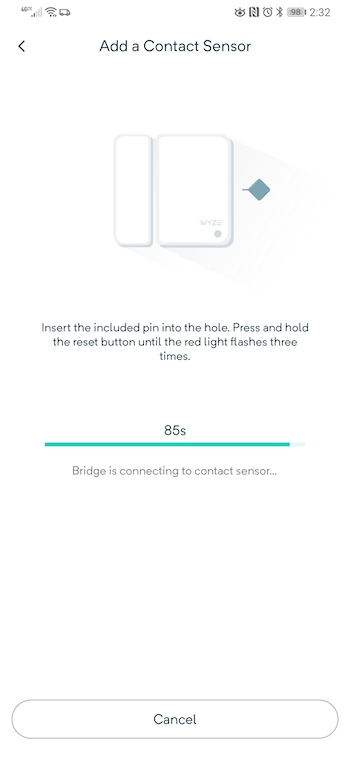
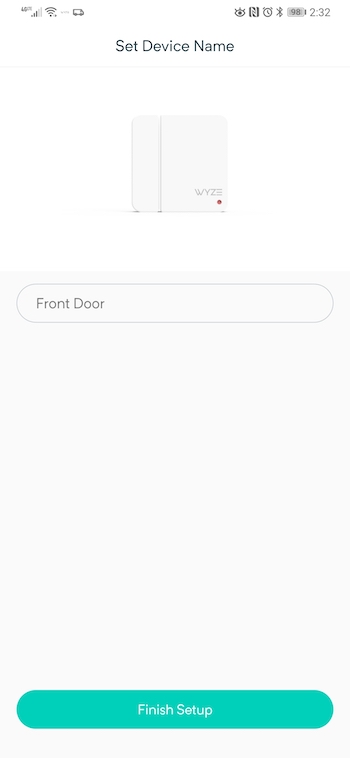

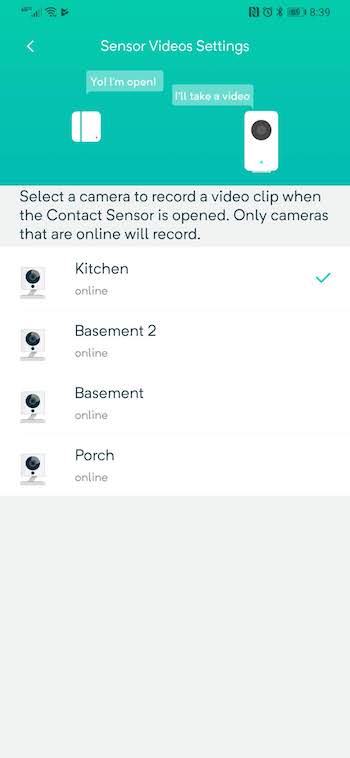
When the setup is complete, the sensors will show up in the Wyze app dashboard where you can quickly see their status.


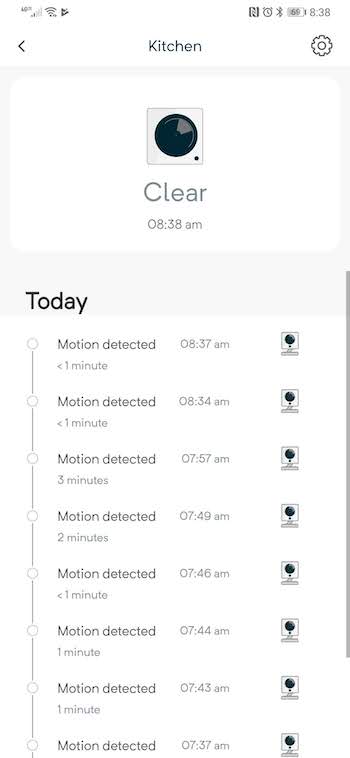

Going into each sensor from the dashboard will allow you to see more info including times when the sensors detected an event. The sensors also send alerts just like camera motion events do.

I’ve been testing these sensors for the past few weeks and have had zero false positives on the contact sensor and the motion sensor has been rock solid too. Just know that it will detect your pets which may or may not be an issue for you.

What I like

  • Inexpensive
  • Simple to install
  • Reliable

What needs to be improved

  • More sensors please! 🙂

Final thoughts

Wyze has done it again. Not only do they offer the absolute most affordable and best experience in security cameras, now they are branching into sensors to create a basic home security system. If I sound gushy that’s just because I have loved using Wyze products in the past and am truly excited about what they will come up with next. FYI, I already know what’s next. It’s a smart light bulb and of course, I’ll have one to review soon.

Price: $19.99
Where to buy: Wyze
Source: The sample for this review was provided by Wyze.

Filed in categories: Reviews

Tagged: , ,

Wyze Sense review originally appeared on The Gadgeteer on May 24, 2019 at 9:00 am.

Note: If you are subscribed to this feed through FeedBurner, please switch to our native feed URL http://the-gadgeteer.com/feed/ in order to ensure continuous delivery.

Slitit helps you open plastic packaging the easy way

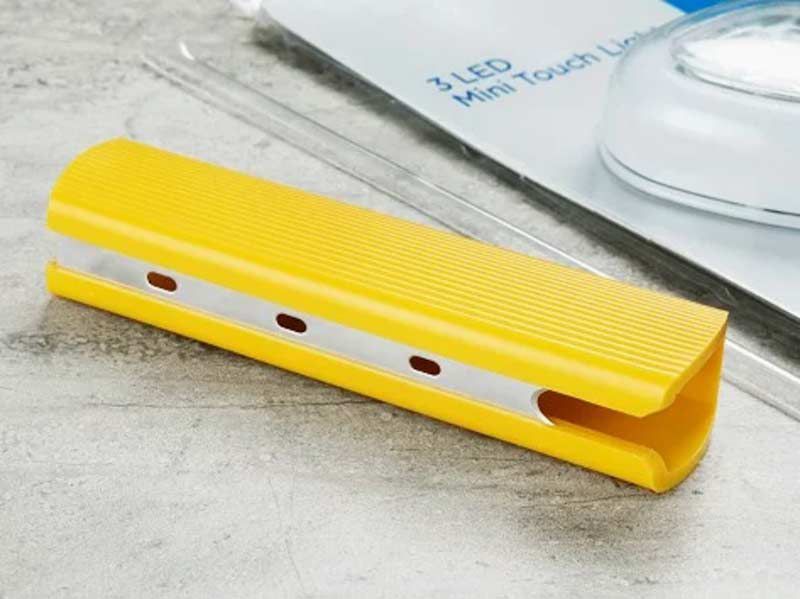
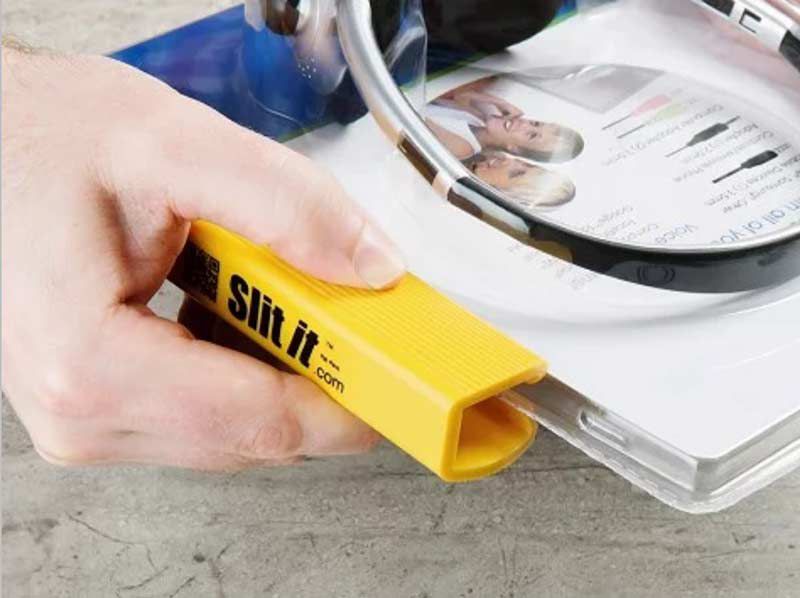
NEWS – Eleven years ago I reviewed the Zibra Open It! and I still use it today when I receive or buy a product that is packaged in a sealed clamshell plastic container. That tool has worked pretty well over the years but I just stumbled upon the Slitit package opener tool while surfing for cool products to share with all of you this one looks like it can do the job much easier and faster.

The Slitit package opener isn’t designed like a heavy duty pair of sheers. It’s just a hollow plastic tube with a blade on one side that makes it easy to slice through the edges of blister packs and sealed clamshell package. Want one? You can buy a Slitit for $9.95 from The Grommet or Amazon.

Filed in categories: Reviews

Tagged:

Slitit helps you open plastic packaging the easy way originally appeared on The Gadgeteer on May 23, 2019 at 1:09 pm.

Note: If you are subscribed to this feed through FeedBurner, please switch to our native feed URL http://the-gadgeteer.com/feed/ in order to ensure continuous delivery.

MECO Power Spin Scrubber review

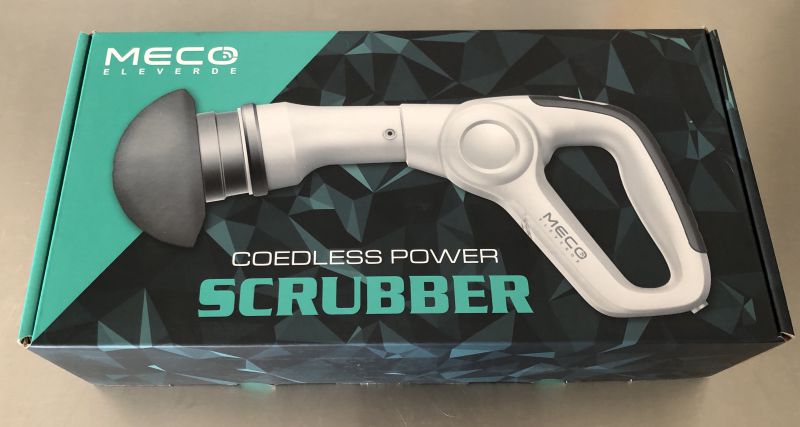
REVIEW – Cleaning the bathtub has quickly become one of my least favorite chores as I’ve gotten older and my back has gotten more stubborn. Anything I can add to the process to ease the strain on my back and legs is welcome, so the Meco Cordless Power Scrubber is a welcome addition to the household cleaning regimen.

What is it?

It is a cordless electric power scrubber with three removable heads for a variety of cleaning functions.

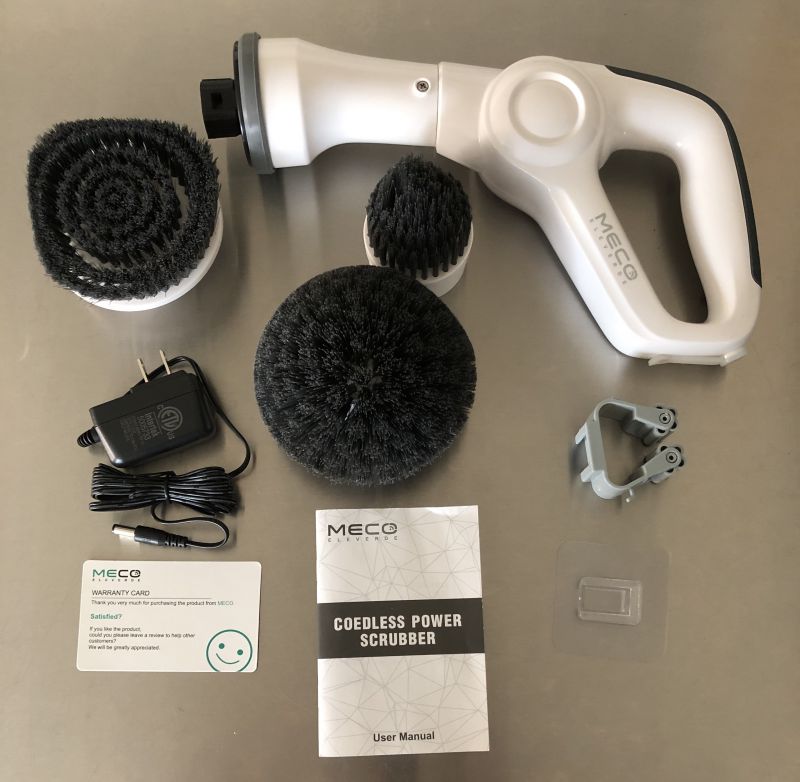
What’s in the box?

  • Handheld Scrubber
  • Three removable heads: Flat, Rounded and Pointed Corner Brushes
  • Power cord
  • Warranty Card
  • User Manual
  • Adhesive clip for hanging from wall, with clip to attach to handheld unit

Design and features

The power scrubber has a simple design, with an on/off style power button on the handle. The different heads pop off and on with minimal exertion. The unit does come with an optional clip and adhesive mount if you want to attach to/hang from a wall or cabinet. When powered on, there is one speed.

Setup

Simply charge the unit and then attach the desired scrubber head.

  • Rounded Brush: Suggested for Sinks and Tubs
  • Flat Brush: Suggested for Tile
  • Pointed Corner: Suggested for window sills

Performance

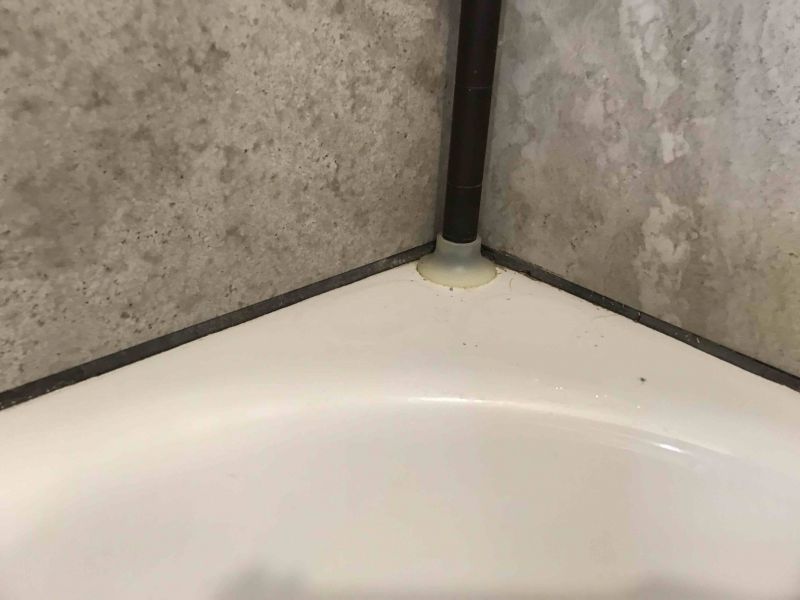
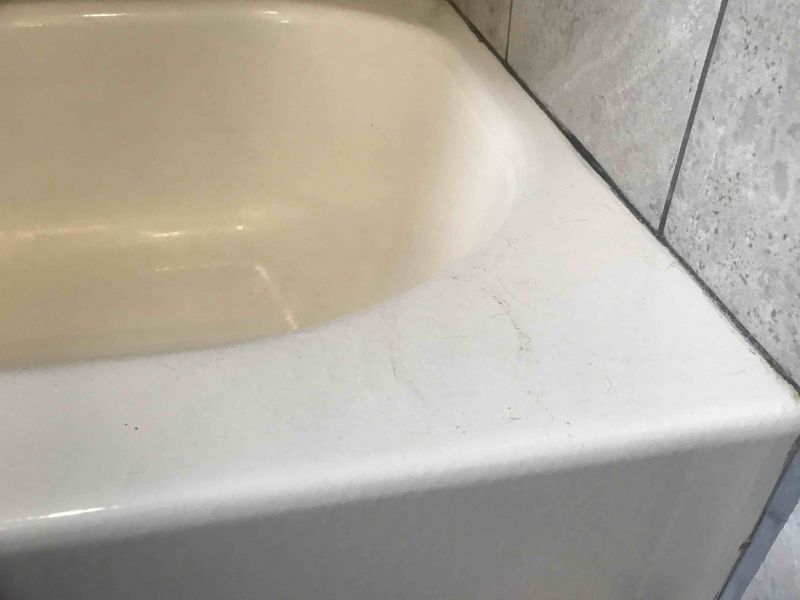
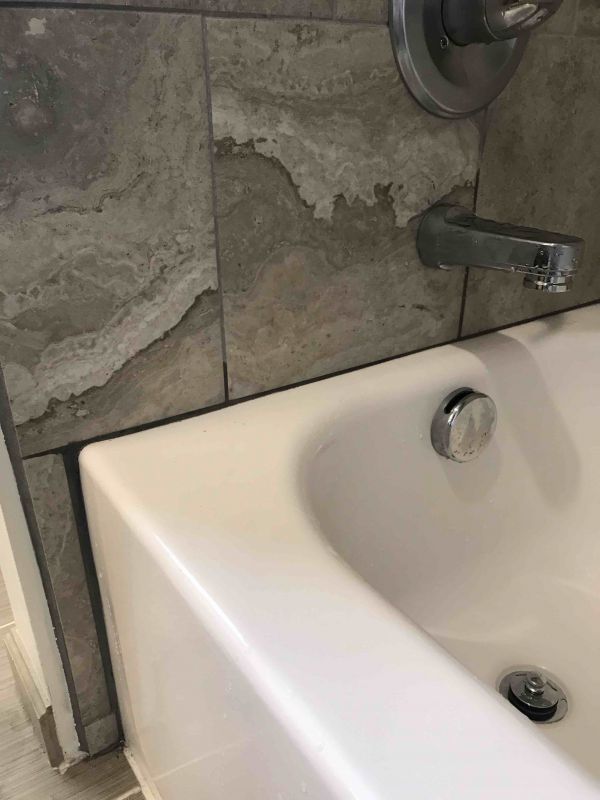
We used the power scrubber to extensively clean our tub and shower after letting it get a bit dirtier than usual for the purpose of the test. Here are some before pictures:

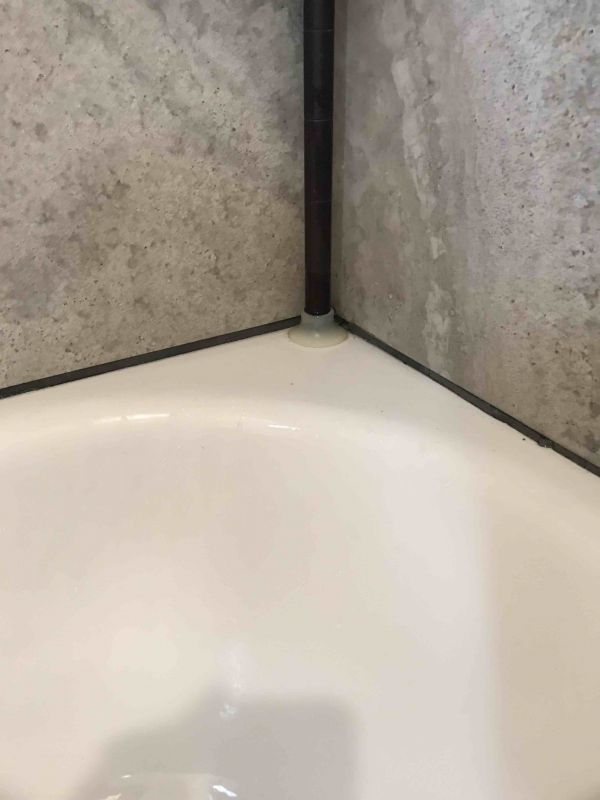
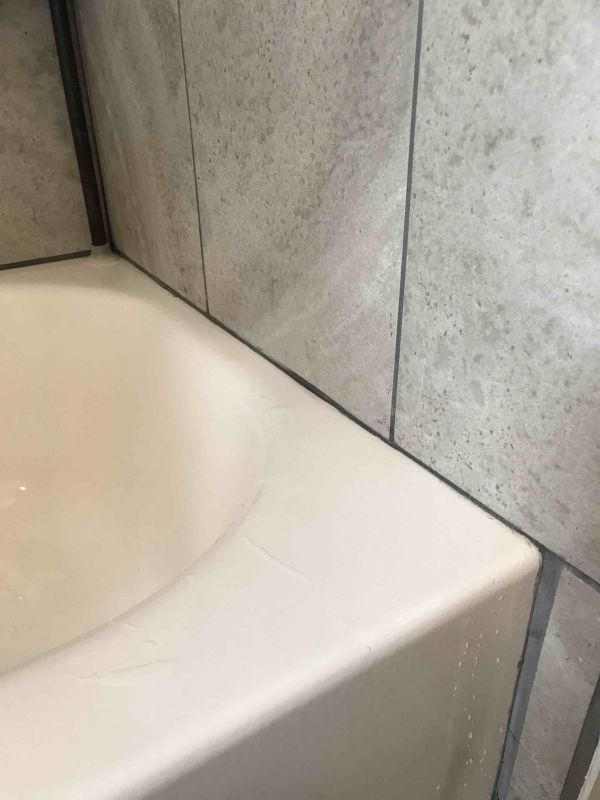
For the tub, we used the rounded brush, for the grout seams and corners we used the pointed corner brush and then for the walls we used the flat brush. With our dark tile, you couldn’t really see the difference with the flat brush, but we could tell a difference for sure. Along with the power scrubber we used water and a tub cleaning foam product. Here are the after photos:

The actual scrubbing was pretty easy, just turn the unit on and it starts spinning at 350 rpm. Occasionally, the head would sort of grip a section of the tub and shoot off to the side if you didn’t keep the right pressure or have it at the right angle. It was easy to stop the unit and swap heads as we went along. The only real issue we had was the inability to adjust the speed of the unit, it is limited to a simple ON or OFF setting. It has a nice long handle, so we were able to clean all areas of the tub without having to stoop low or bend over completely at the waist.

What I like

  • Long handle takes pressure off the back and knees
  • Easy changing of cleaning heads
  • Powerful cleaning, it did a great job and make the cleaning process much faster, didn’t have to go back over areas with a magic eraser to get completely clean, as was our previous method
  • Fast charging and ability to hang from the wall
  • Light weight and comfortable on the hands/arms.

What needs to be improved

  • Storage – it comes with no where to put the heads when not in use.
  • One Speed – Would be very nice to have a low, medium and high setting to control the speed

Final thoughts

The Meco Power Scrubber was a great find, it is a powerful cleaning tool that takes a huge physical load off of cleaning difficult areas. Additionally, the different heads allow you the ability to customize your cleaning. I would highly recommend for anyone to add this device to their cleaning tools, as it will probably eliminate a few already in use. The storage issue can but mitigated by possibly buying a plastic storage bin of some sorts, or keeping the cardboard box (though this may not hold up over time). The speed controls would be my biggest suggestion for improving this unit to give the user some options especially if you have any areas, for instance, with weak grout that may get damaged at 350 rpm.

Price: $43.99
Where to buy: Amazon
Source: The sample of this product was provided by MECO.

Filed in categories: Reviews

Tagged:

MECO Power Spin Scrubber review originally appeared on The Gadgeteer on May 23, 2019 at 11:00 am.

Note: If you are subscribed to this feed through FeedBurner, please switch to our native feed URL http://the-gadgeteer.com/feed/ in order to ensure continuous delivery.

HyperX QuadCast USB Gaming microphone review

REVIEW – I record training videos in my day job so it is important that my voice is captured under the best possible conditions.  For a while I used a HyperX gaming headset but I had complaints from my audience that the sound was a little “tinny” and that plosives were a real problem.  I switched to a Blue Yeti mic and while the sound was greatly improved, between the size of the mic and the pop filter I disliked the amount of space the solution consumed on my desk – not to mention how it blocked the bottom of my monitor when in the desk stand.  So when the opportunity came up to review HyperX’s new gaming mic, I jumped at the chance.  Would this be the best of both worlds?  Read on to find out…

What is it?

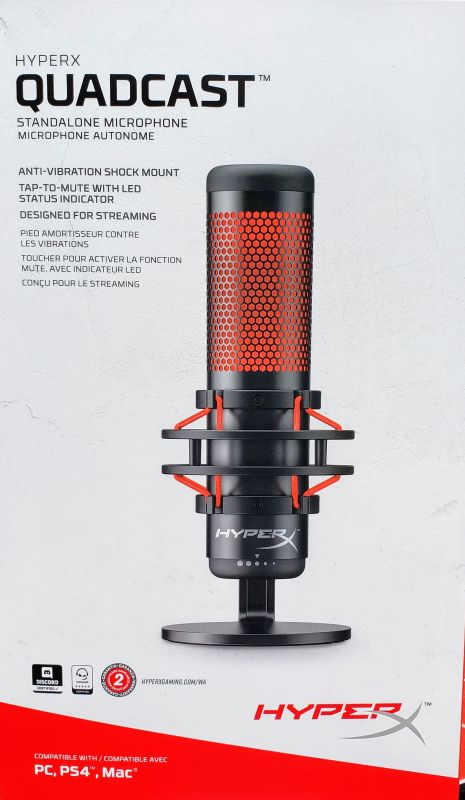
The HyperX QuadCast is a standalone USB microphone aimed at the gaming community.
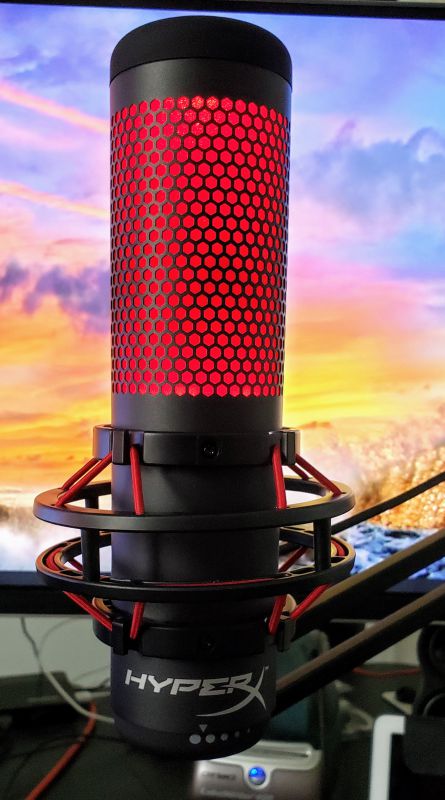
What’s in the box?

  • HyperX QuadCast microphone with built in pop filter
  • Shock mount
  • Desk stand
  • Mic mount adapter
  • Micro USB to USB type A cable

Design and Features

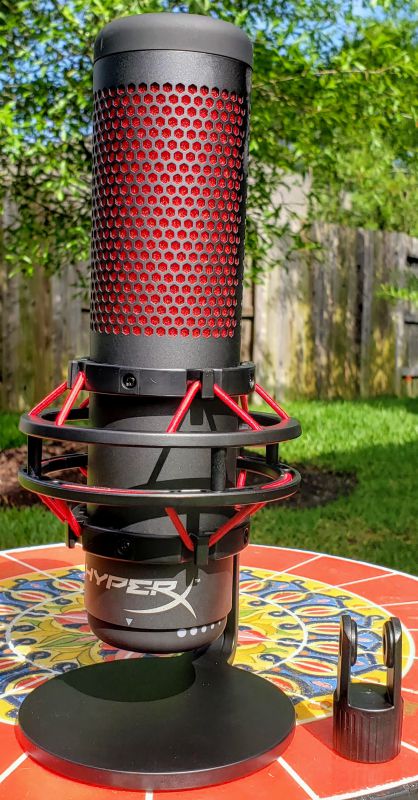
The body of the mic is metal which gives it a solid feel and the impression of longevity.  Top to bottom, the mic is about 8.5 inches tall, so it is by far not the shortest mic out there.  With the shock mount, it is 4 inches wide, but that is a tad less wide than competitors so what you lose in height you make up for here.  The top half of the mic glows red when the mic is on and not muted.  Here is the mic connected to my mic arm:

On the bottom of the mic is the gain control – simply rotate to increase/decrease the input volume.

On the back of the mic is the polar pattern selector.  Starting on the left side, you have:

  • Stereo – collects sound from the left and right sides of the mic
  • Omnidirectional – gets sound from every side, so great if you are recording a meeting or other event where you can’t control sound source
  • Cardioid – only from the front of the mic, which is the go-to for streaming and podcasting
  • Bi-directional – front and rear (as opposed to stereo’s right/left), a great choice for interviews

Behind the mic mount is the micro-USB plug and the monitor jack.  While it might seem like an awkward place to put these connections, there is actually plenty of room and will allow you to run the cable attached to the boom arm.  This makes the connections less messy on your desk.

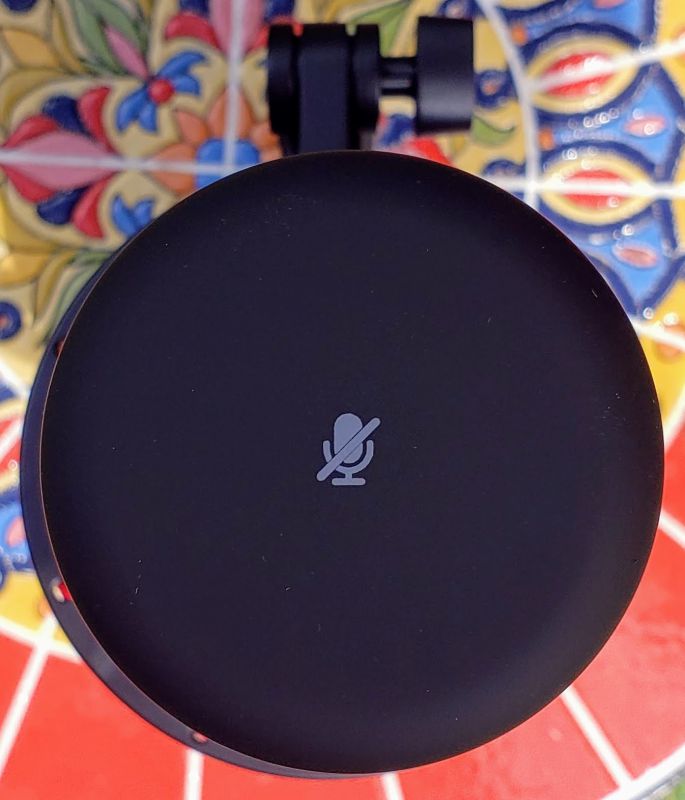
The top of the mic has the mute button.  Simply tap the button to mute/unmute.  When muted, the red glow dims considerably, giving you a visual cue that your sound is off.

The on-paper specs for the QuadCast are similar to the Blue Yeti – sampling at 48 kHz and 16 bit depth, and a response range of 20 Hz to 20 kHz.  Not as good as a studio mic, but more than you need for most purposes.  The sound is warm and seems perfectly matched for voice recording, whether that’s spoken word or singing.  After sampling with this mic and the Yeti I find I prefer the quality the QuadCast produces – it just feels richer and like it has more depth, something my voice could use help with.

The mic is plug and play on Windows – plug it in and the OS finds it.  A few seconds later you are good to go.  No special drivers or other software needed.

A word on the pop filter – it stops a fair amount of plosives (the sound most people make when words start with the letters “B” or “P”) but it is not a match for a real external pop filter.  After a few recordings I added my trusty Knox filter and the quality of recordings improved.  I am willing to concede that it is perhaps the way I speak, but just be aware you may have this issue as well.

And a word on the gain control.  You’d think that you would want to turn the volume up to 100% in Windows and then use the gain control to adjust the actual volume.  You’d think wrong – that produces a “static-y” white noise that sounds horrible.  In testing I found that for solo, cardioid recording I needed to keep Windows and the mic volumes both at about 50% to get the best quality and volume.  Bi-directional, I needed to bump up the mic volume to get a balance between front and back.  Never, though, did I adjust Windows volume beyond 50%.

What I like

  • The sound is warmer and fuller than comparably priced mics
  • Intelligent design – everything you need is easily accessible
  • The polar patterns gives the mic a wide range of applications – it isn’t a “one trick pony”

What needs to be improved

  • The pop filter should be higher-quality
  • You should be able to turn off the red glow – while you would lose the muted visual cue, the glow can be distracting to the eye

Final thoughts

As a first standalone effort, the QuadCast comes off as remarkably polished and ready for (almost) any kind of use.  The sound quality is at least as good and perhaps subjectively better than other mics in the same price range.  While on paper the mic is priced higher than others, by the time you factor in a shock mount and adapter, it might actually be less money.  Because of the red glow I am not sure I would want to use this as a gaming mic, but for podcasts, videos and other uses it seems like a great device.

Price: $139.99
Where to buy: Amazon
Source: The sample for this review was provided by HyperX

Filed in categories: Reviews

Tagged: ,

HyperX QuadCast USB Gaming microphone review originally appeared on The Gadgeteer on May 23, 2019 at 9:30 am.

Note: If you are subscribed to this feed through FeedBurner, please switch to our native feed URL http://the-gadgeteer.com/feed/ in order to ensure continuous delivery.