Airthings Wave Mini smart indoor air quality monitor review

REVIEW – Last year I reviewed the Airthings Wave smart radon detector and it revealed a significant radon gas problem in my home which prompted me to have a radon mediation system installed. Then earlier this year, I reviewed their new Airthings Wave Plus unit which adds an air quality feature to the radon detector. These units help me keep an eye on radon levels and the air quality levels where the Wave Plus unit is located. Now Airthings has a smaller sensor that you can place in various places around your home to keep an eye on air quality. Let’s take a look at the Airthings Wave Mini smart indoor air quality monitor.

What is it?

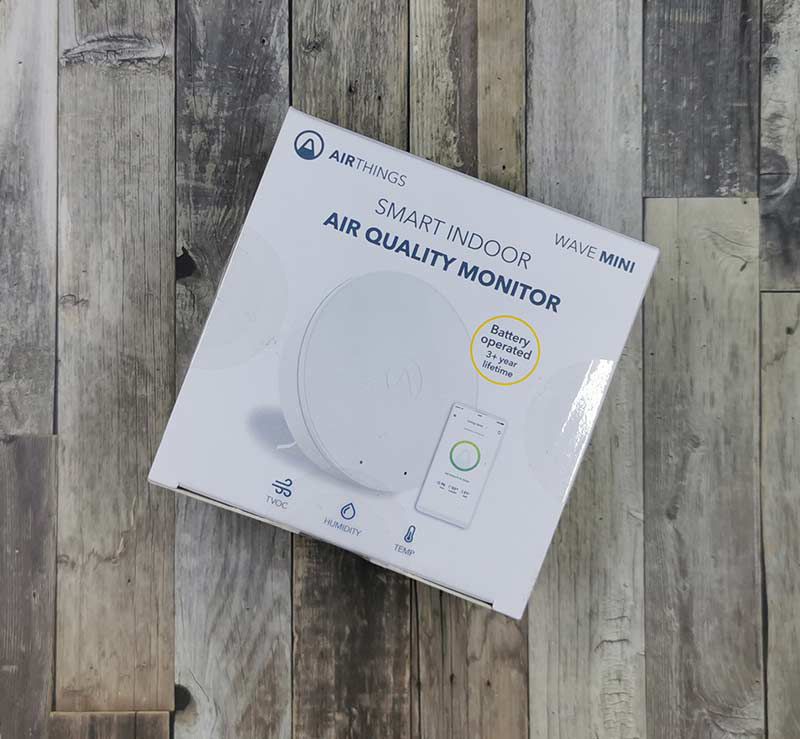
The Airthings Wave Mini is a small battery-powered sensor that the tracks air quality by providing TVOC, humidity, and temperature levels.

What’s in the box?

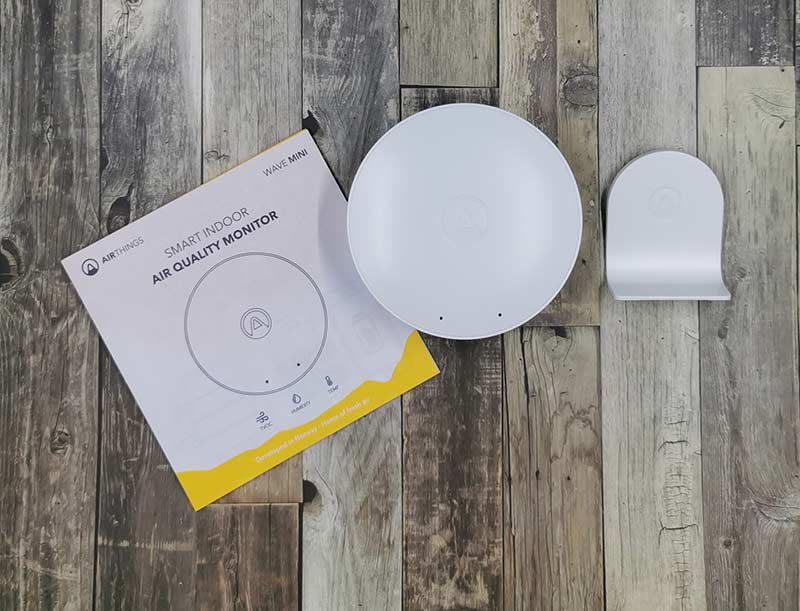
  • Airthings Wave Mini
  • Batteries
  • Device stand
  • User guide

Design and features

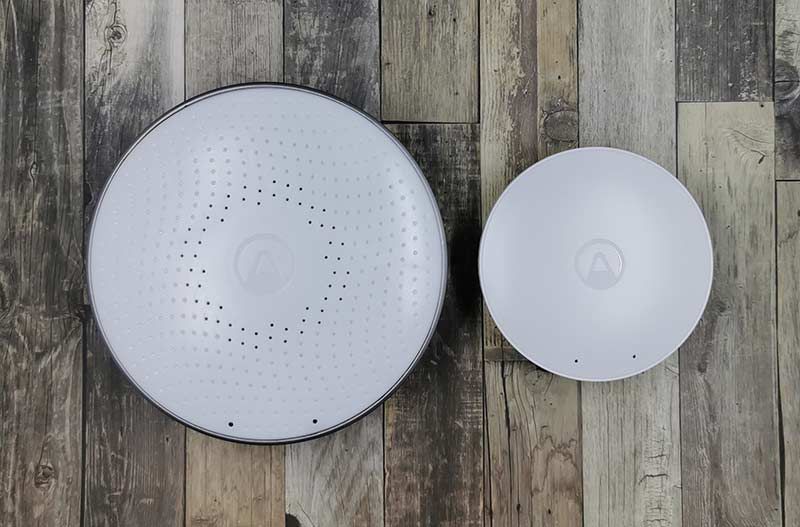
For size comparison, in the image above you see the Airthings Wave on the left and the new Airthings Wave Mini on the right.

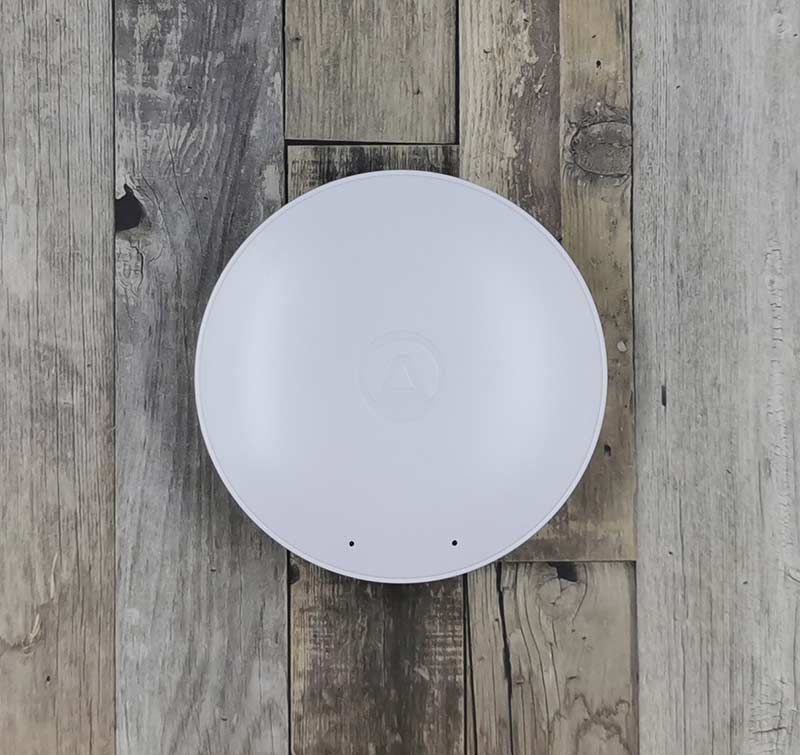
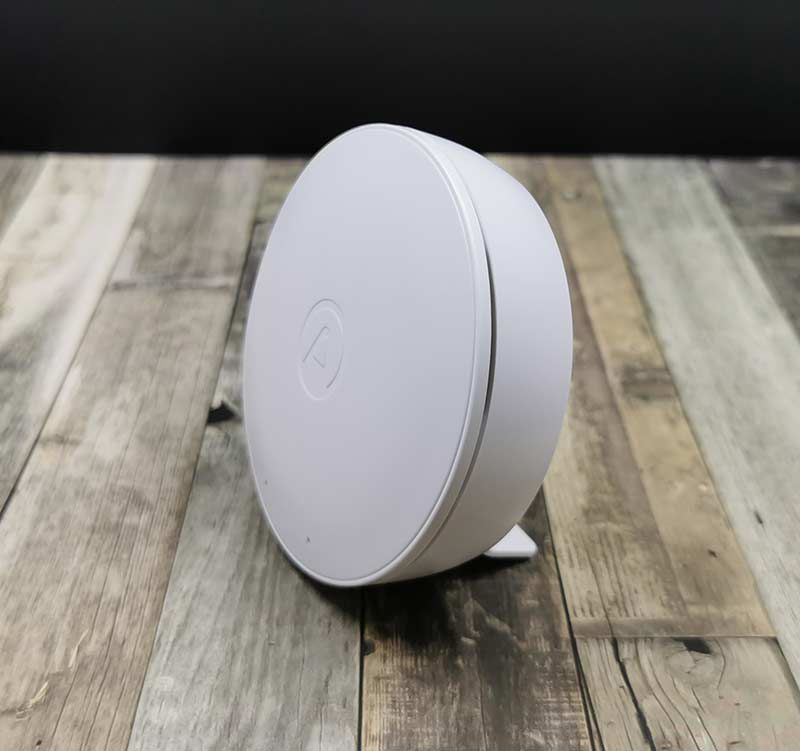
Like previous Airthings devices, the Mini is made of white plastic with the Airthings logo embossed into the top. Although you can’t see it, there’s a status LED under the top of the device that glows through the plastic when you wave your hand over it. The LED glows green, yellow, or red depending on the air quality levels.

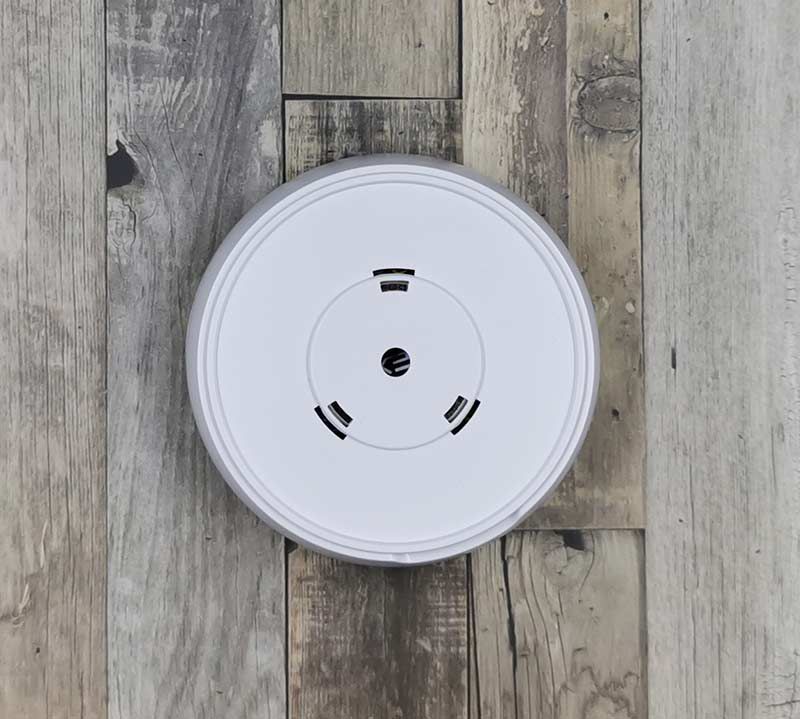
The back of the Mini has a magnetic cover that protects the battery compartment.

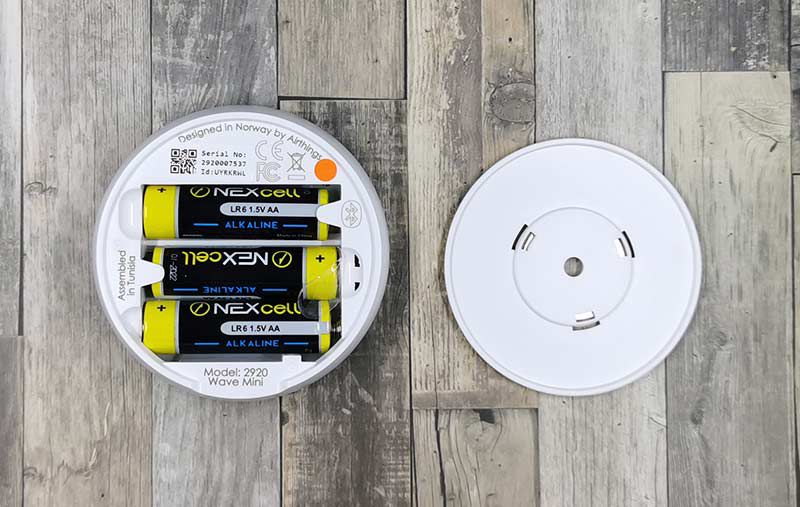
When you pry off the cover, you see 3 AA batteries that are included with the sensor and are rated to last for up to 2 years.

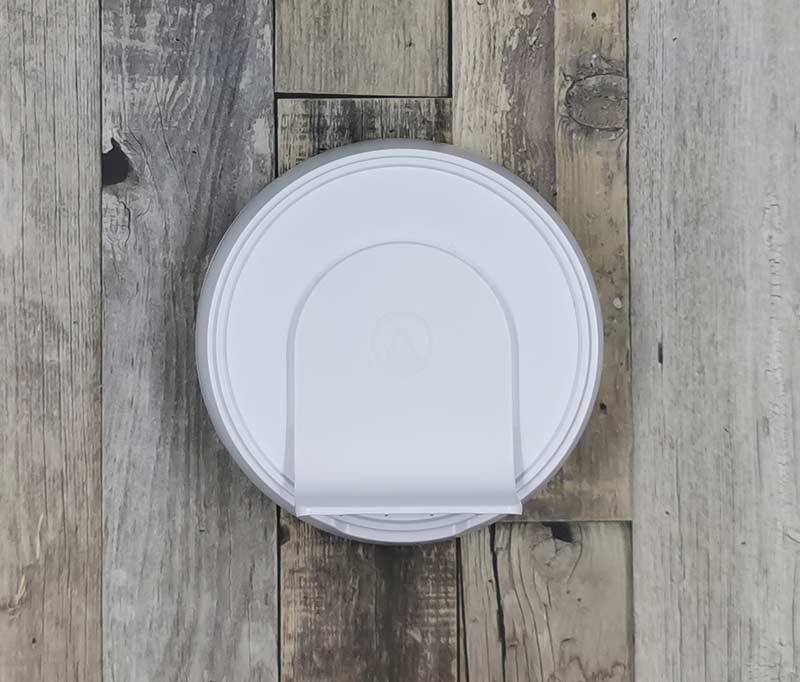
If you don’t want to mount the sensor on the wall, included in the box is a small plastic table stand that snaps into the battery cover.

The Wave Mini is designed to provide insights into the chemical and odor levels (TVOCs – total volatile organic compounds) in the air inside your home that can negatively affect your health with short term problems like headaches, nose and throat irritation, and more. Long term exposure to high levels of TVOCs can include liver damage, cardiovascular disease, asthma, and more.

Some examples of VOCs include the smoke and fragrances from burning candles, air fresheners, cleaning products, paints, varnishes, and more.

To start using the Airthings Wave Mini sensor, you will first need to set it up in the Airthings mobile app.

Airthings app


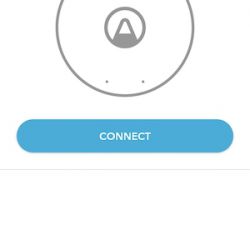
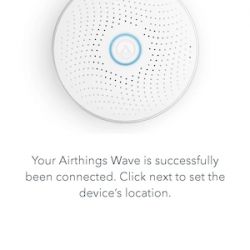
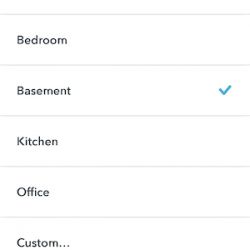
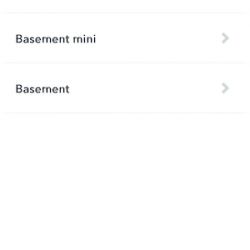
Set up is quick and easy. Basically, you install the app, make sure the batteries are installed in the sensor, and prompt the app to search for new devices. Then you are asked where the device will be located and are also asked for location data.

After the set up is complete, the sensor will start a calibration phase for 7 days.

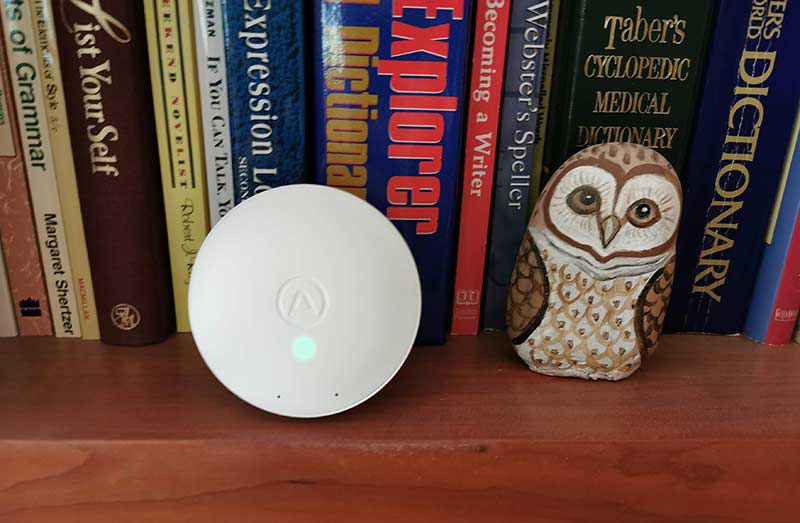
At any time, you can wave your hand over the front of the Wave Mini and see a visual indicator of the air quality in your home. If the LED is green, all is good. If yellow, it’s time to check the settings for TVOCs, humidity, and temperature. If the LED is red, you definitely should go to the app and check the level information.


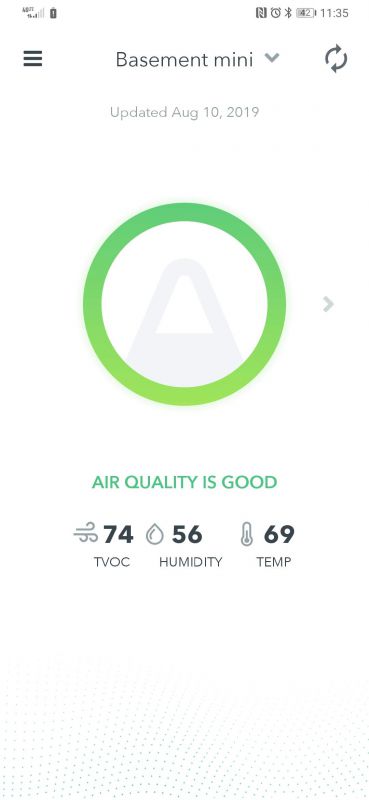
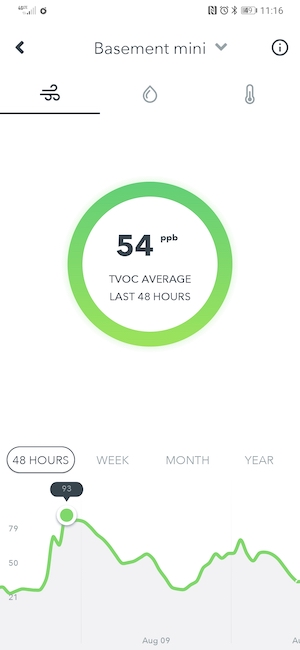
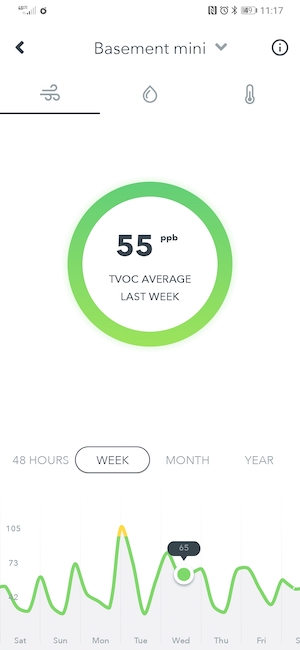
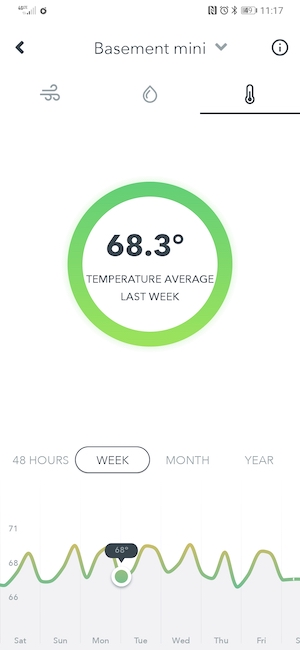
Here you can see how the app provides information for TVOC, humidity, and temperature levels. Levels in the “good” range are shown in green, and the color changes to yellow and red when the levels start getting too high.


You can filter the data based on time by choosing just to see the last 48hrs, a week, month, or year graphs.

What I like

  • Small enough to place on a shelf
  • Long battery life

What I’d change

  • None

Final thoughts

Unlike the Airthings Wave and Wave Plus units that I reviewed, the Wave Mini sensor is considered to be an entry-level product for indoor air quality beginners to begin tracking their indoor air quality levels without spending a lot of money on devices that can be difficult to understand and set up. The Airthings Wave Mini air quality monitor is affordable and easy to use.

Price: $79.00
Where to buy: Amazon
Source: The sample for this review was provided by Airthings.

Filed in categories: Reviews

Tagged: ,

Airthings Wave Mini smart indoor air quality monitor review originally appeared on The Gadgeteer on August 15, 2019 at 12:00 pm.

Note: If you are subscribed to this feed through FeedBurner, please switch to our native feed URL http://the-gadgeteer.com/feed/ in order to ensure continuous delivery.

Mophie Powerstation Hub Portable Battery review


REVIEW – By now, those of you that regularly read my reviews can likely conclude that I am a USB power hub gadget junkie!! :-). I use numerous devices that can either run off of a USB power pack and/or can be recharged via the same. Since I shoot many photography gigs at various locations, I always carry several accessories including my iPad, etc, that depending on the length of the shoot, need “juice” at some point. The Mophie Powerstation Hub Portable Battery looks like another nice addition to my growing USB power pack arsenal. Let’s see if it ends up in the “HOT” or “NOT” pile.

What is it

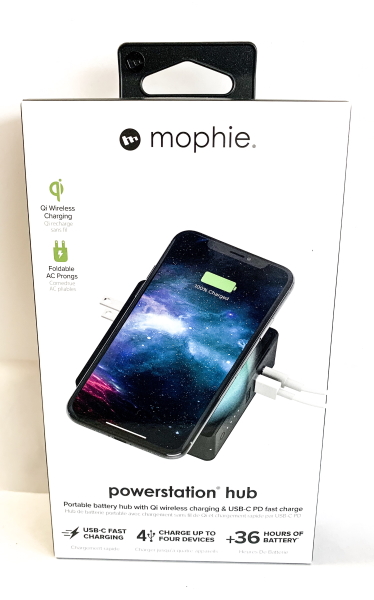
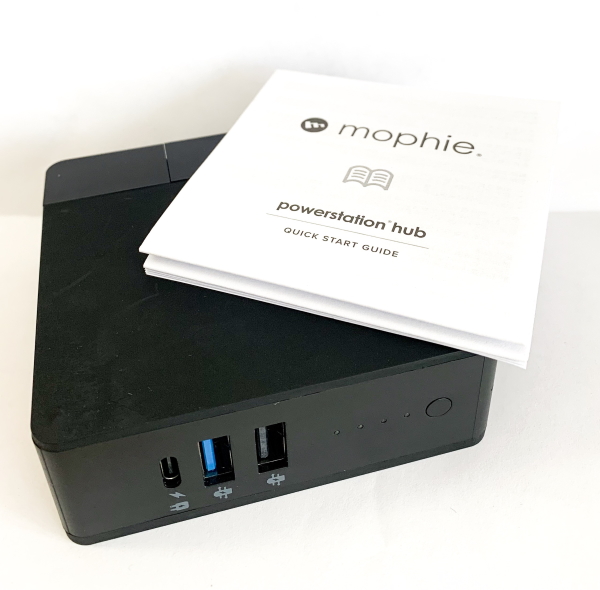
The Mophie Power Station Hub is a portable hub with built-in battery and Qi-enabled wireless charging that features multiple fast charging options and includes a USB-C Power Delivery port.

What’s in the box


1 x Mophie Powerstation Hub
1 x User Guide

Design and features

Specifications
Battery capacity: 6,000mAh
Compatibility: Qi-enabled devices
Dimensions: 3.31 x 3.31 x 1.16 in (84 x 84 x 29.5mm)
Weight: 9 oz (255.15g)

Features
Fast Charge USB-C PD: Use the USB-C PD port to recharge the Power Station Hub or use that same port to charge a device at the fastest speed possible.
AC Power Prongs: No cable needed to charge the Power Station. With the built-in AC power prongs, you can recharge it by plugging into any wall outlet.
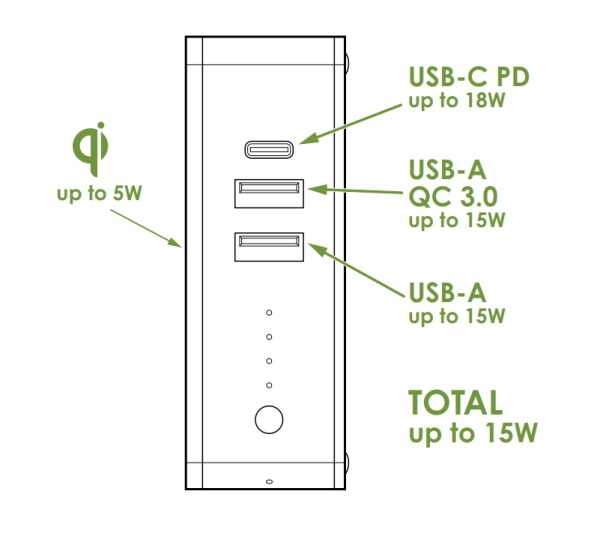
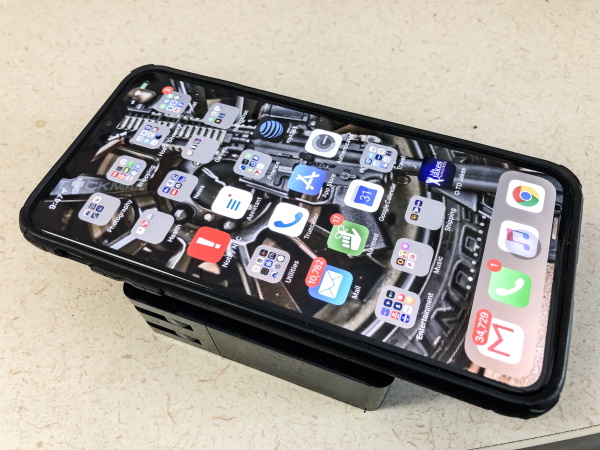
Wireless Charging: Simply place you QI-enabled smartphone on the Power Station Hub’s charging surface and push the button to power to your device.
Charge Multiple Devices: Conveniently charge multiple devices simultaneously with the two USB-A ports, USB-C PD port, and wireless charging surface.
Compact and Portable Design: The ultra-portable design allows the Power Station Hub to fit easily in your bag so it can charge your devices anywhere.
Check Your Status and Save Battery: Turn the Power Station on and off with the LED Status Indicator button or press it to display its battery levels or charge status.

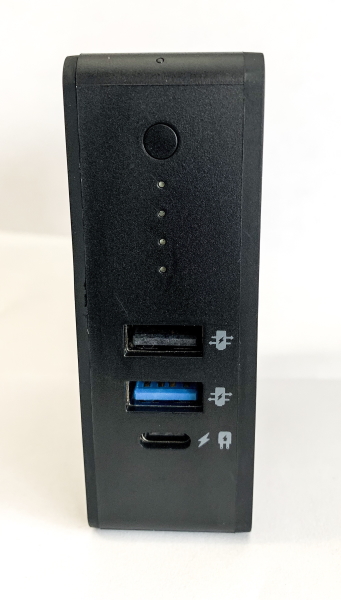
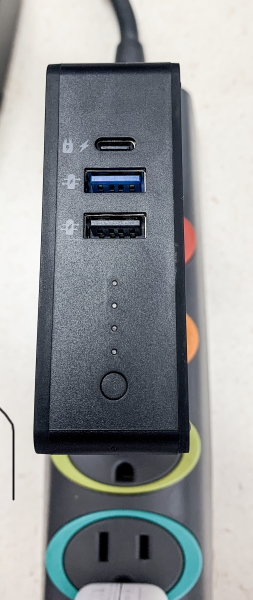
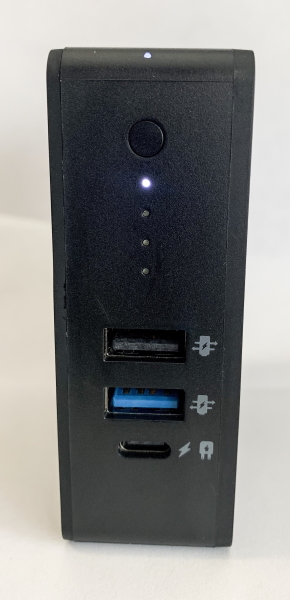
As shown below, on one side of the hub there is the power on/off button, four LED charging status lights that show the level of charge at 25% per LED, 2 USB A ports and 1 USB-C port.


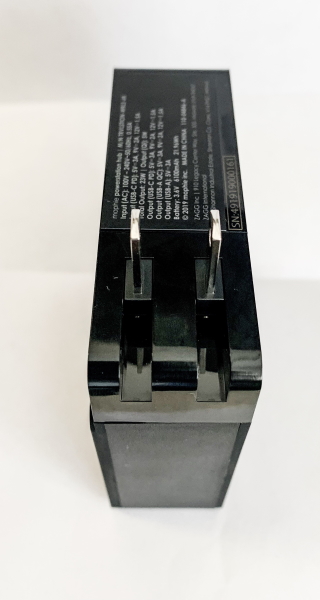
The hub has a foldable 2-prong AC plug built into the device.

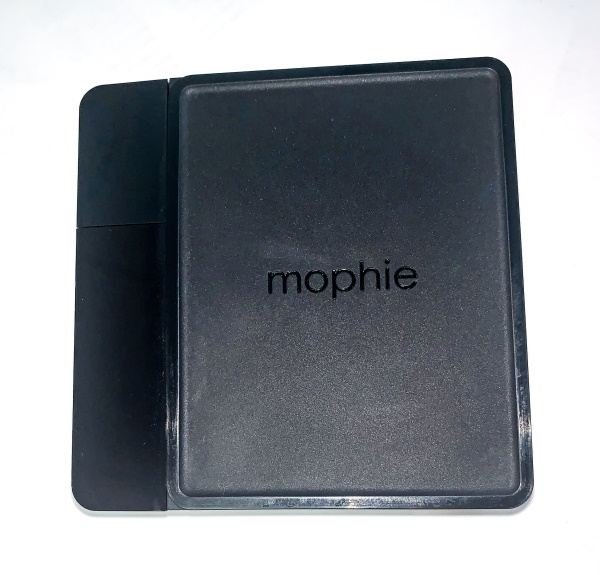
On one flat side of the hub, there is the Mophie brand name engraved. This is the Qi wireless charging side.

Performance

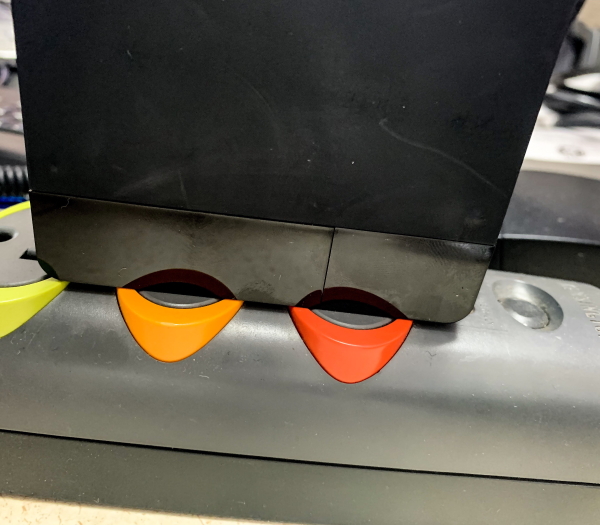
The Mophie is very easy to use right out of the box. For most situations, the foldable built-in AC plug adds ease to the use. I say for most situations because, in a tight space such as on a power strip with other devices plugged in, space becomes an issue. As shown below, it just about takes over 3 outlets on that power strip and while it can be reversed to face the opposite direction, it then became an issue with the on/off power switch for the strip that I was using.


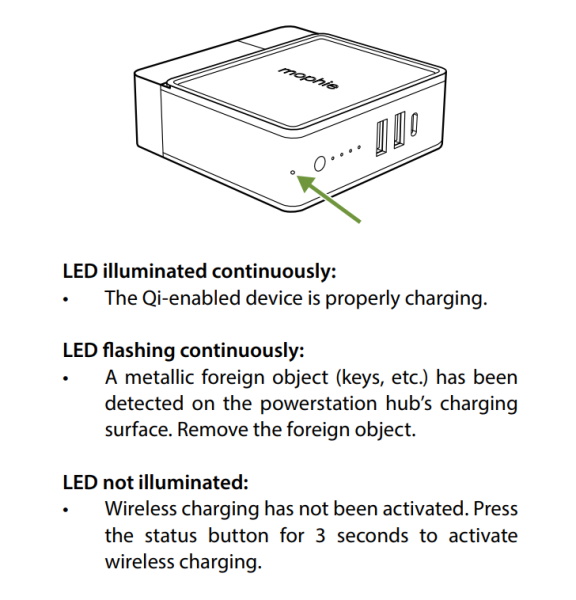
When the hub is on, there is a LED status light at the top that indicates the wireless charging status. See the photo and illustration below.


Qi wireless charging

What I like

  • The compact size
  • The built-in folding AC plug
  • The charging options including the Qi wireless charging option

What I’d change

  • Increase the capacity of the built-in battery
  • Include a USB-c to USB-C cable

Final thoughts

The Mophie Power Station Hub is a handy device to add to your EDC gear bag. It is not too heavy and offers the convenience of charging via USB including USB-C Power Delivery fast charging. It also offers quick charging via USB cable and Qi wireless charging. The fact that the AC plug is built-in means that there is no additional power supply and cable to carry with you to recharge the device. It would be nice if the internal battery was a higher capacity battery,  but I am guessing that there may be some trade-off in regards to weight. While this is a nice device, it is up to the consumer to be satisfied with the cost to feature ratio.

Price: $99.95
Where to buy: Mophie website and Amazon
Source: The sample for this review was provided by Mophie

Filed in categories: Reviews

Tagged: ,

Mophie Powerstation Hub Portable Battery review originally appeared on The Gadgeteer on August 15, 2019 at 11:00 am.

Note: If you are subscribed to this feed through FeedBurner, please switch to our native feed URL http://the-gadgeteer.com/feed/ in order to ensure continuous delivery.

Scout Indoor Camera review

REVIEW – Scout has a new Indoor Camera. Why should this interest you? Scout is a DIY alarm system and service that installs in as little as a few minutes. There are no screws and monitoring can be turned off and on as you need it. It’s great for anyone that wants to slowly build their home security system and possibly the perfect solution for renters that aren’t allowed to make changes to their apartments.

What is it?

The Scout Indoor Camera is an IOT USB powered camera that you can use standalone with the Scout Hub or as part of their larger security system.

What’s in the boxes?
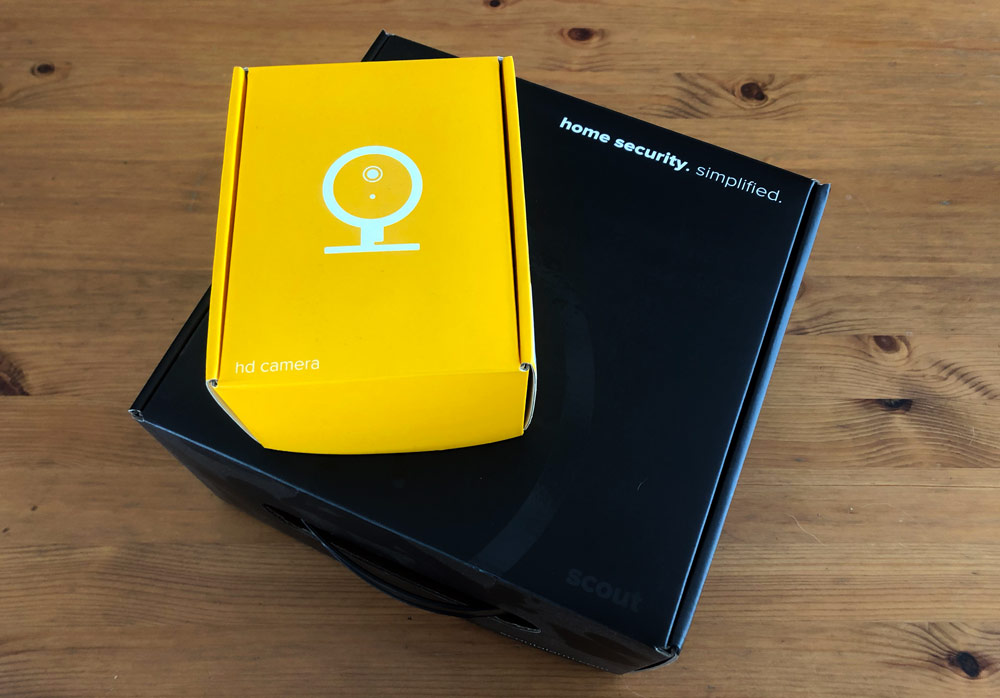
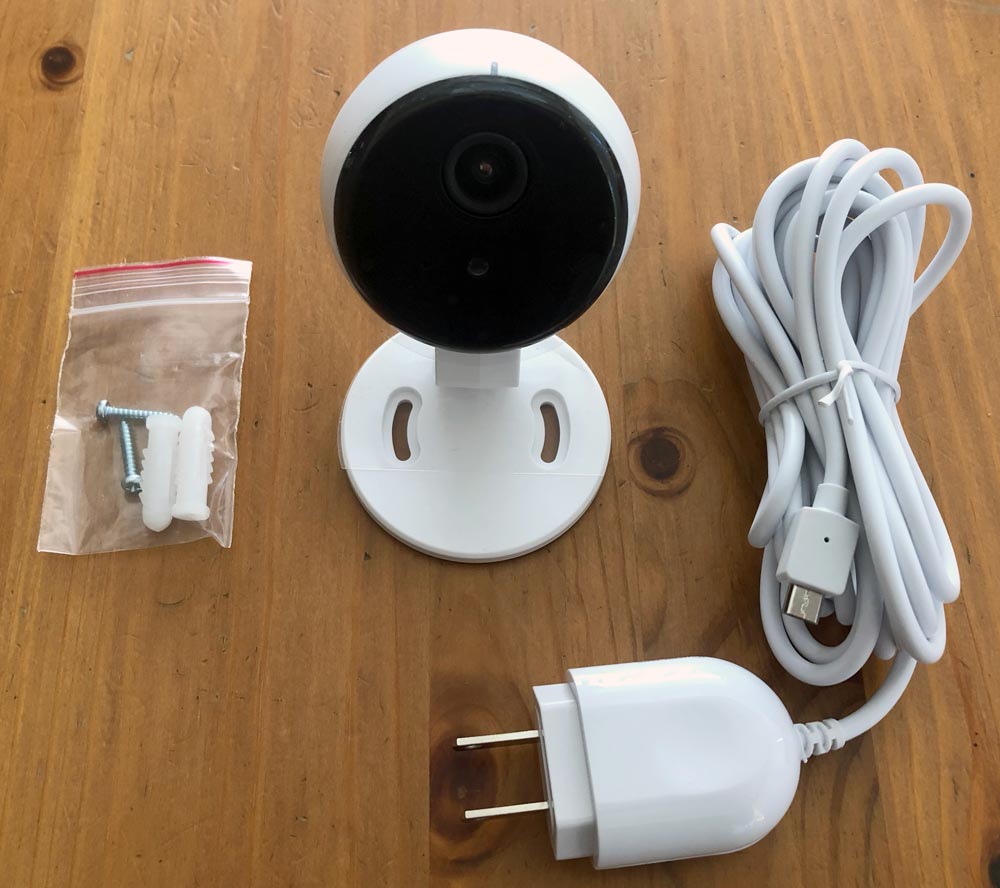
Scout Indoor Camera
(1) Camera, (1) USB-Micro B wall adapter w/ 10′ cord, (1) Mounting screw package with drywall anchors
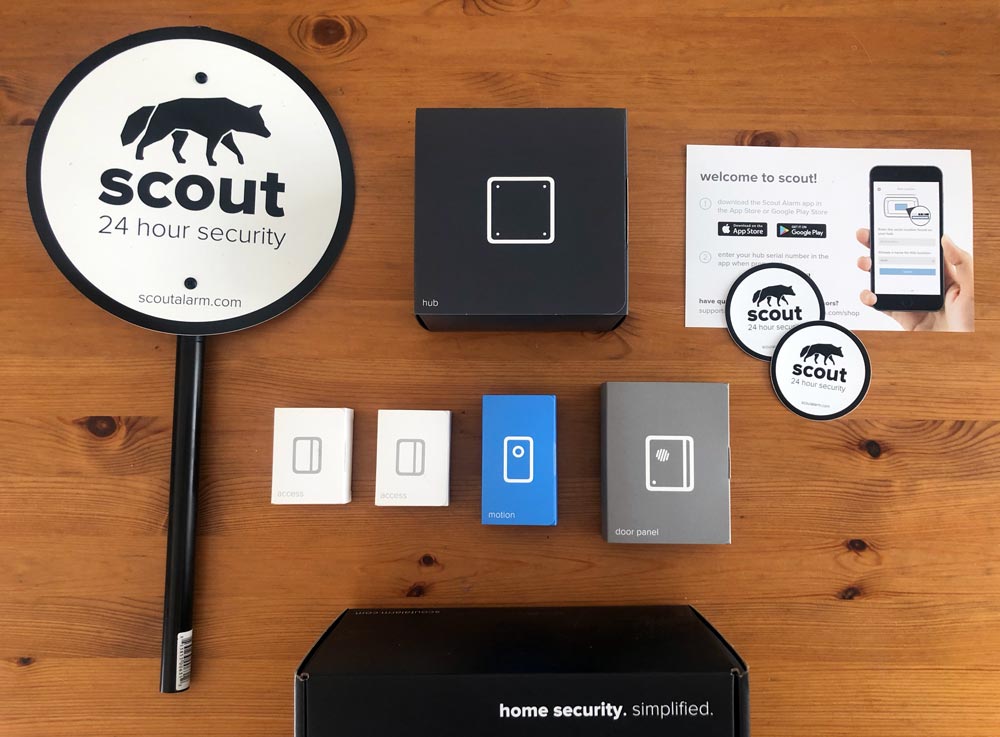
Scout Small Pack
Hub, Door Panel, Motion Sensor, Access Sensors (2), Key Fobs (2), Yard Sign, Info card
Hardware specs

  • 1080p HD video
  • 115º field of view
  • Infrared for night vision
  • 84 x 60 x 60mm
  • Wall adapter with micro-USB cord

Design and features

The system is modular and designed to be easy to install and use. In fact the App is the installation manual and deals with the process quite well. All of the components are available in Arctic (light theme) or Midnight (dark theme) to help them blend in with your home. Out of the parts of the Scout Small Pack, only the Scout hub is hardwired. All of the remaining components are battery powered with CR12 or CR123 batteries. The App is also clean and easy to navigate.

The Indoor Camera is small and inconspicuous.
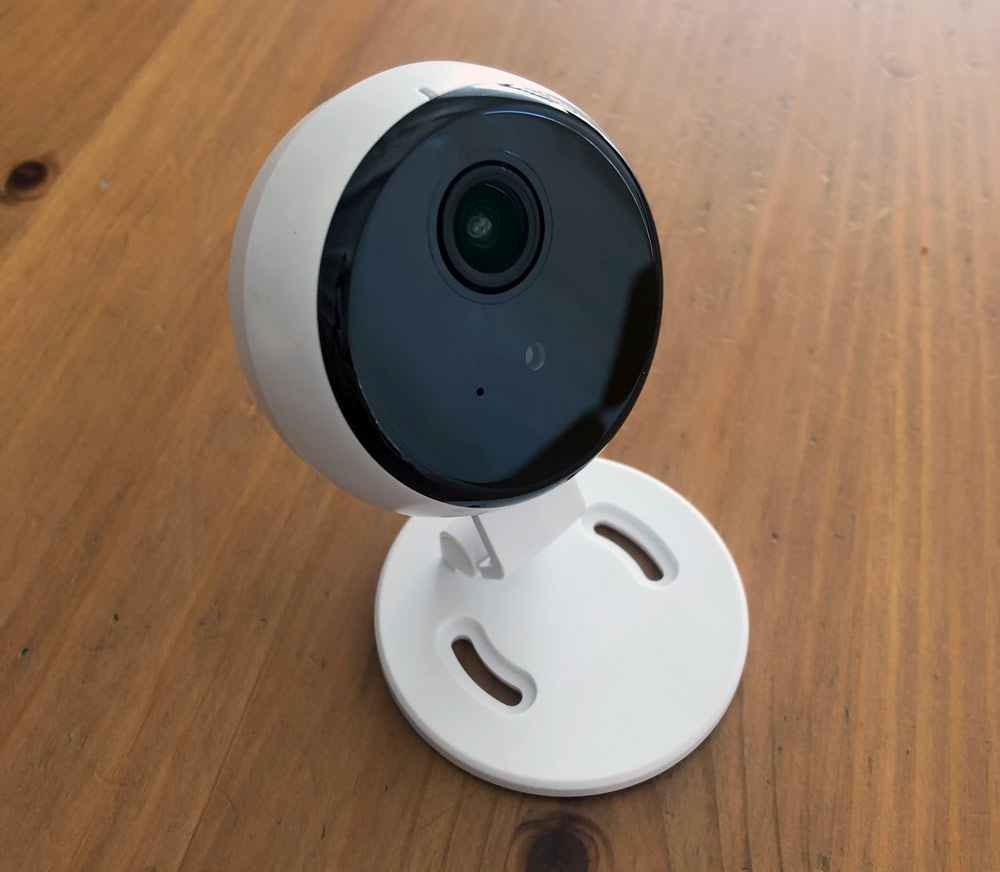
On the top front there’s an LED and behind it a reset button should you need to use it.
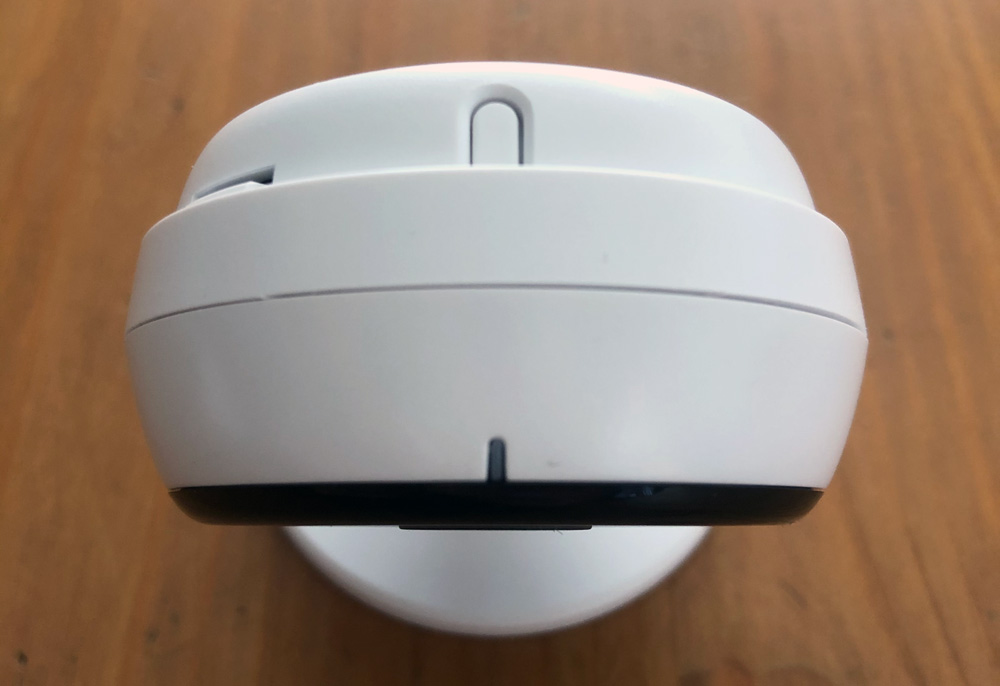
System Setup

Here’s a quick primer on setting up the main security system as it’s really the camera we’re reviewing here. As mentioned, all the installation instructions are in the App which will walk you through setup step by step, so make sure you download that first.

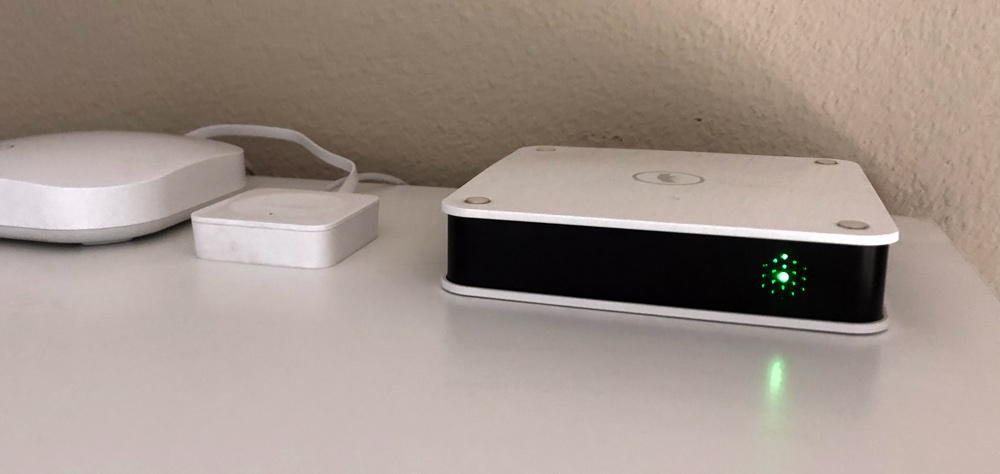
To get started, plug in the Scout Hub’s power cord and connect it to the wall. You’ll also need to connect it to your router with ethernet and then set it up in the App. Mine sits next to our Wemo Bridge and is connected to our eero router. Follow the App instructions to get it set up and it will glow green when all is good.
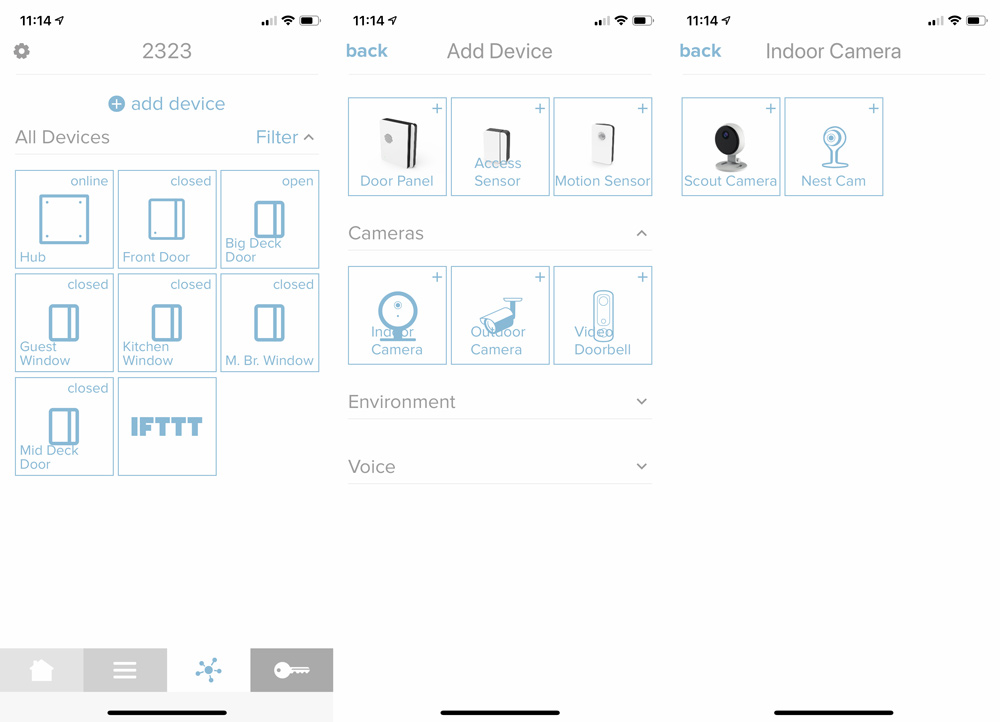
Now you’ll want t0 install and add your additional sensors. In the App, go to the 3rd tab (with the asterisk type logo shown in the left image below) and click (+) Add Device at the top. Choose the appropriate sensor type (screenshot on the right is after choosing Indoor Camera). I’m on the iOS 13 beta, which I think is causing the font/logo overwriting issue on the middle image.
Both the door panel and access sensor have a similar install process. Determine a location where you have room for the panel and the magnet side. Peel the backing off the adhesive to attach the larger side to the door (or moving side of a window) and then pull the label hanging out to engage the battery. The App will find the device and then ask you to temporarily place the magnet side and confirm open/close status before adhering in place. Repeat the install process for any additional sensors and then you can jump into individual settings.

Here’s what each of the modules look like before and after install.
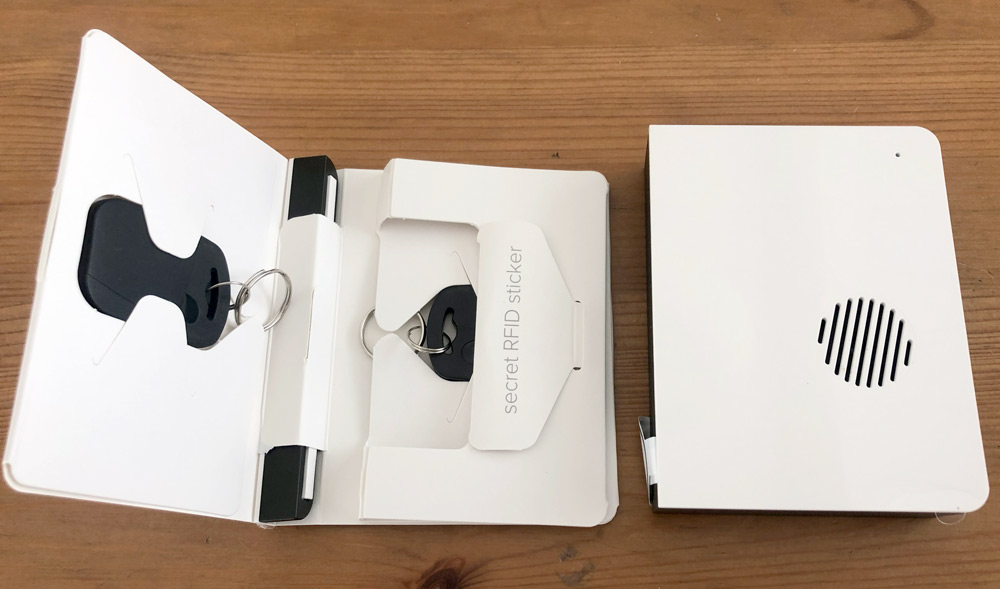
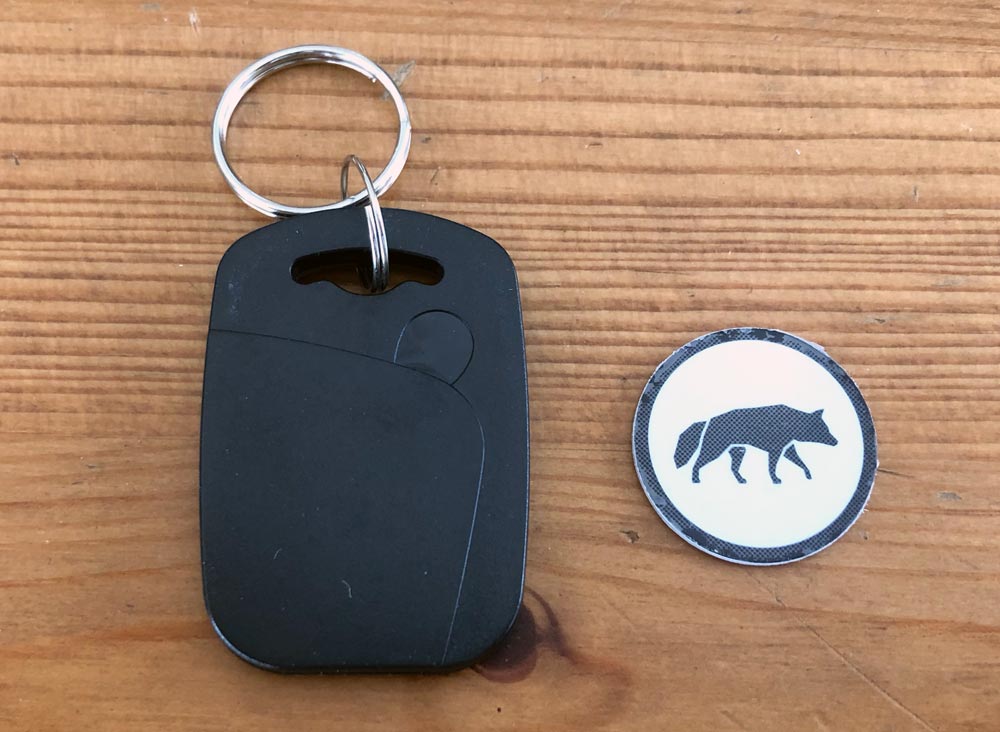
This is the Door Panel on the right. In the envelope is a key fob, the Door Panel magnet, another key fob and an RFID sticker. Here’s a closer look at the fob and sticker.
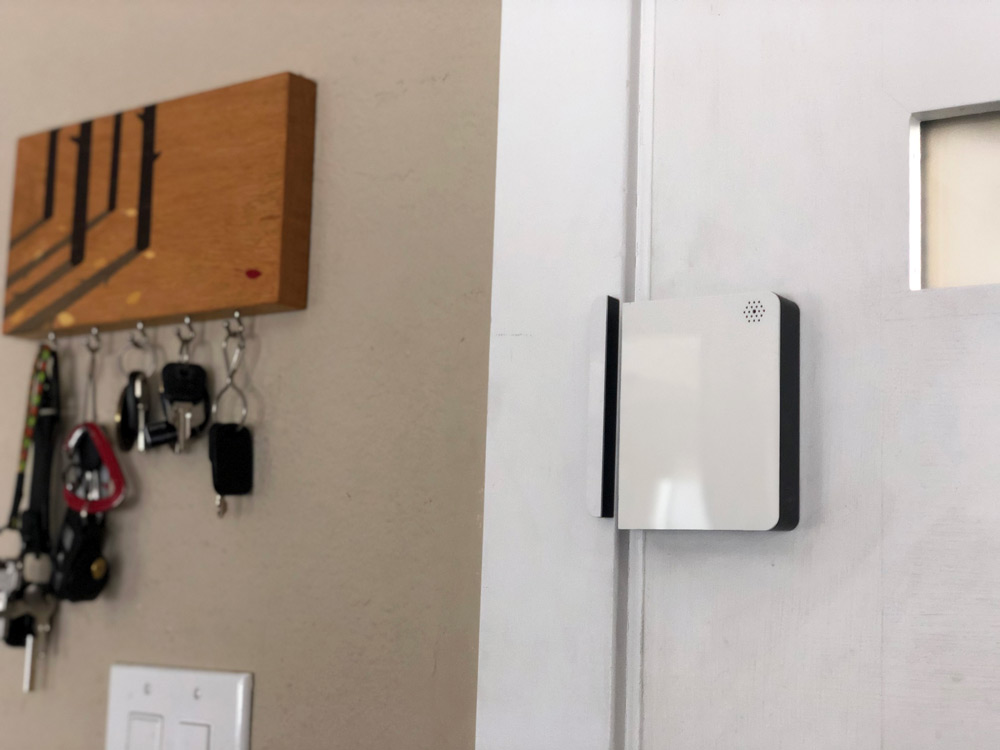
We mounted the Door Panel on the door at roughly chest height and the receiver on the molding of the door jamb. We didn’t have enough room to mount the magnet piece inside the molding edge, but it is shallower and sits pretty flush with the front of the Door Panel even though it’s sitting on higher molding. My Scout door panel is an older unit without the speaker grill passthrough of the newer model.
To arm or disarm the system, you just hold a fob or RFID sticker to the lower right corner of the door panel.
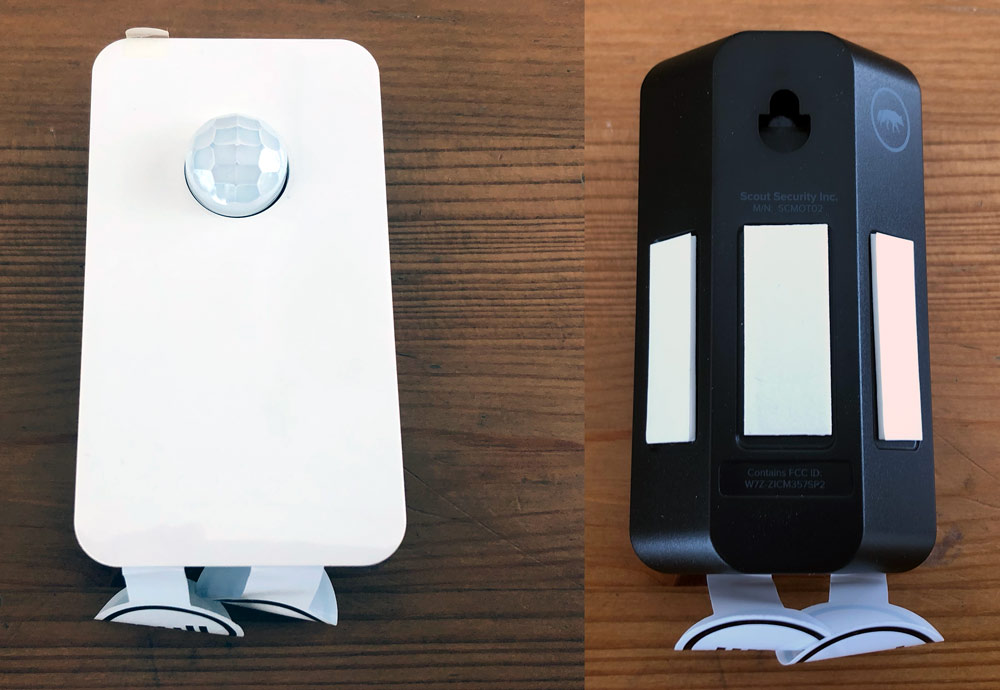
The Motion Sensor is very unobtrusive and has a 90º shape with a flat back so it can be mounted in a corner for a better room view or flat on the wall if necessary.
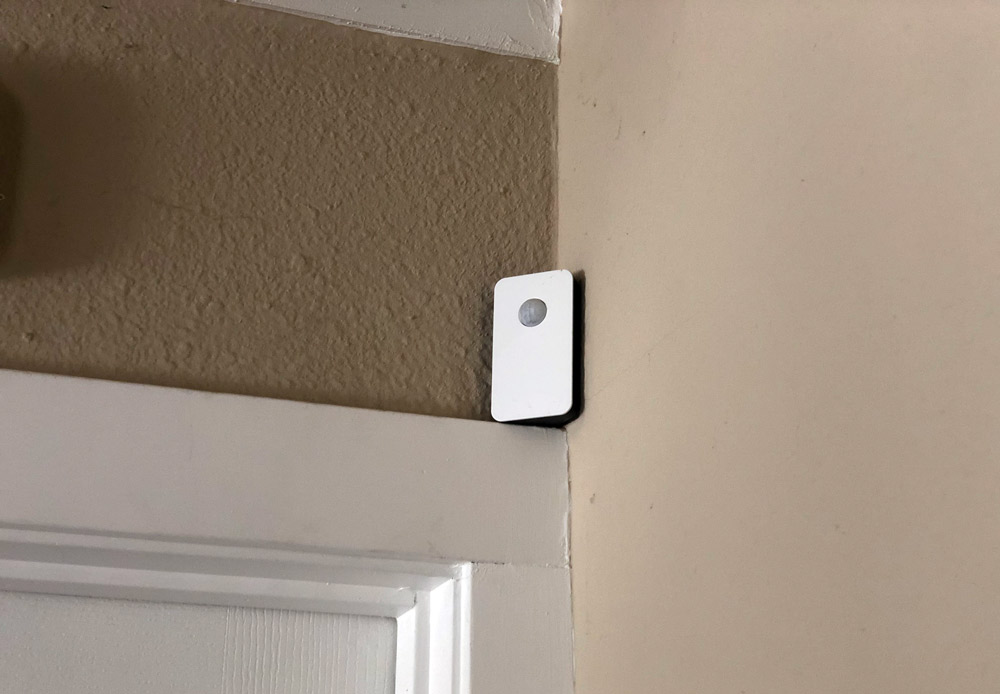
We’ve got ours tucked into a corner resting on a door molding.
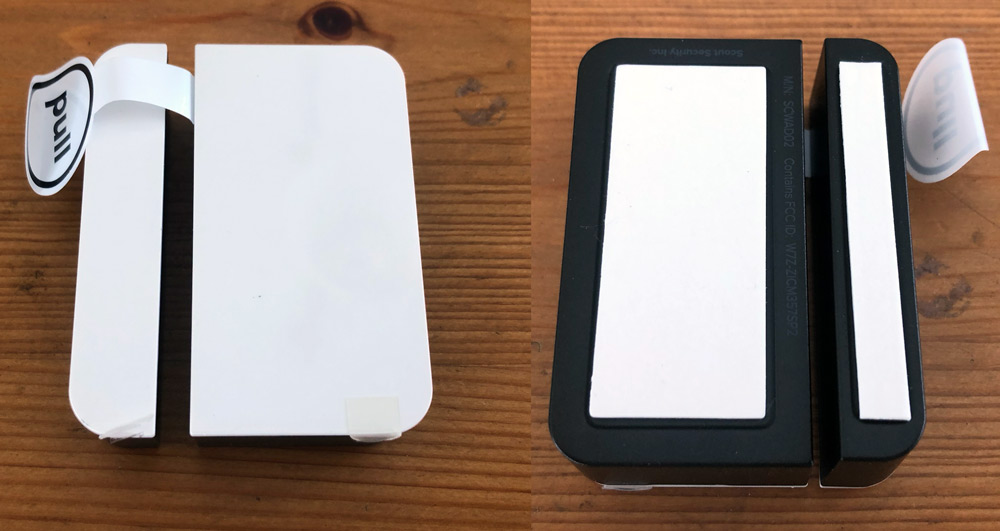
This is an access panel. It can be used on doors or windows, but ones that you aren’t using to arm and disarm the system.
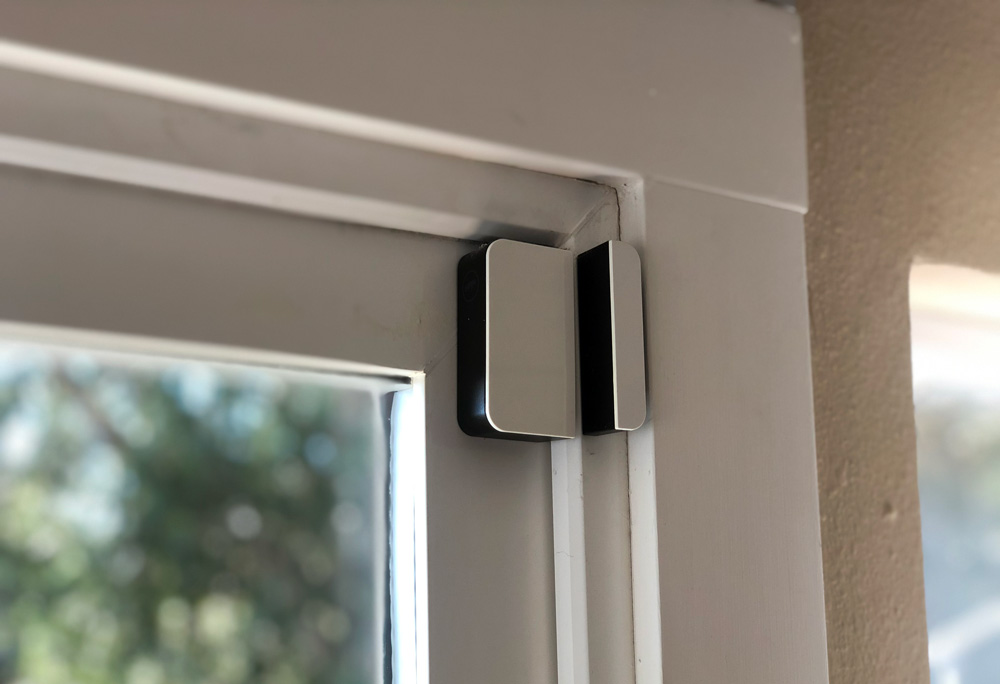
Here’s one installed on the sliding door to our deck.

You can order and install as many as you need, or start with the critical elements and build as you go.

Camera Setup

Having setup other sensors, the camera isn’t too different although there are few more steps.

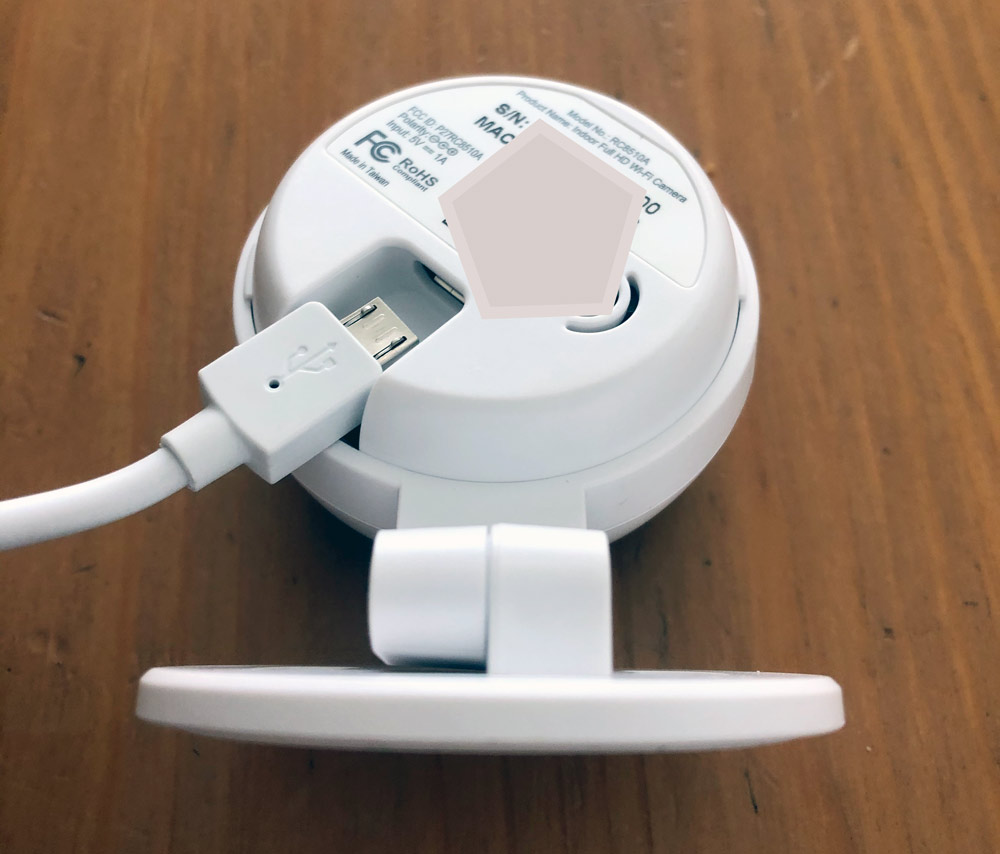
Connect the included cable to the wall adapter and a wall outlet near your install location. On the back of the camera, the USB-Micro port feels very cramped and the foot doesn’t completely bend out of the way.
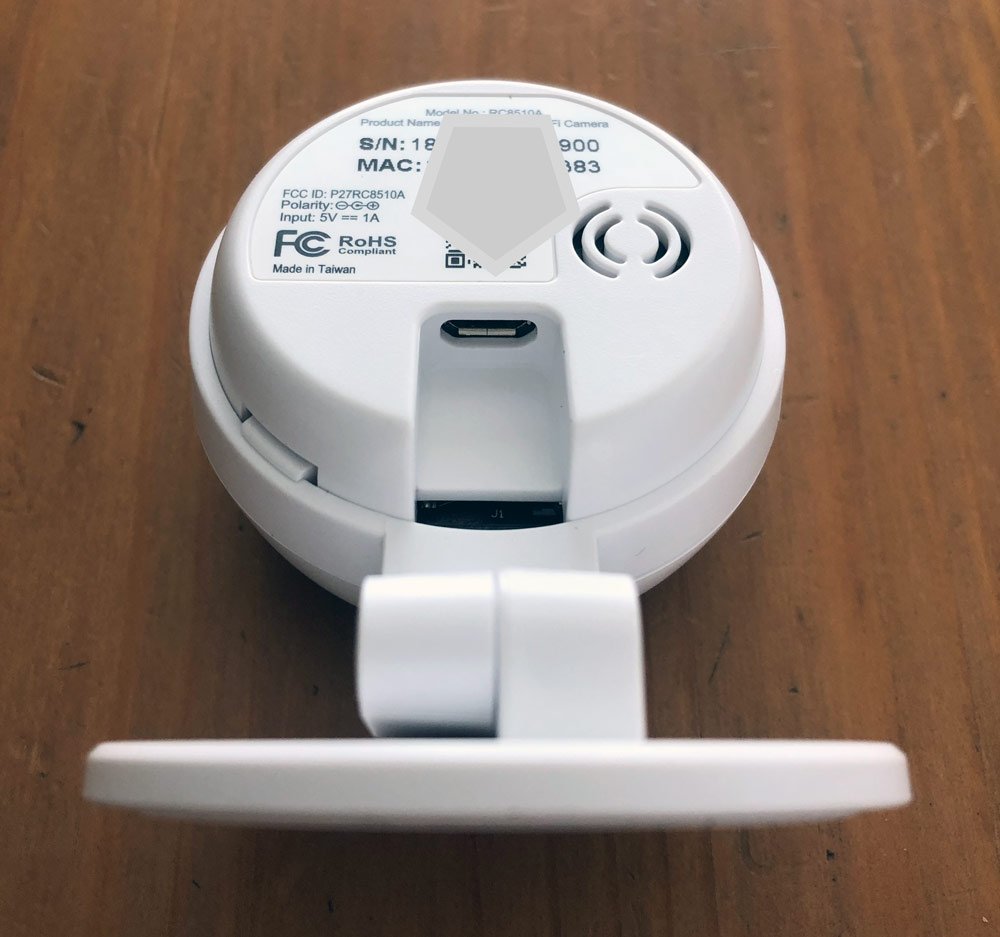
Fear not though, the camera rotates in the holder so you can spin it to get a better angle. Very helpful for installation and even more so for opening up additional mounting opportunities like mounting upside down if necessary.
Now you’ll want to open the App and go through all the steps. I’d recommend doing this near the area where you’ll mount the camera, but don’t worry about installation yet as you’ll want to see what the camera sees and may choose to change location based on that. Follow those previous steps to select the Indoor Camera for setup.
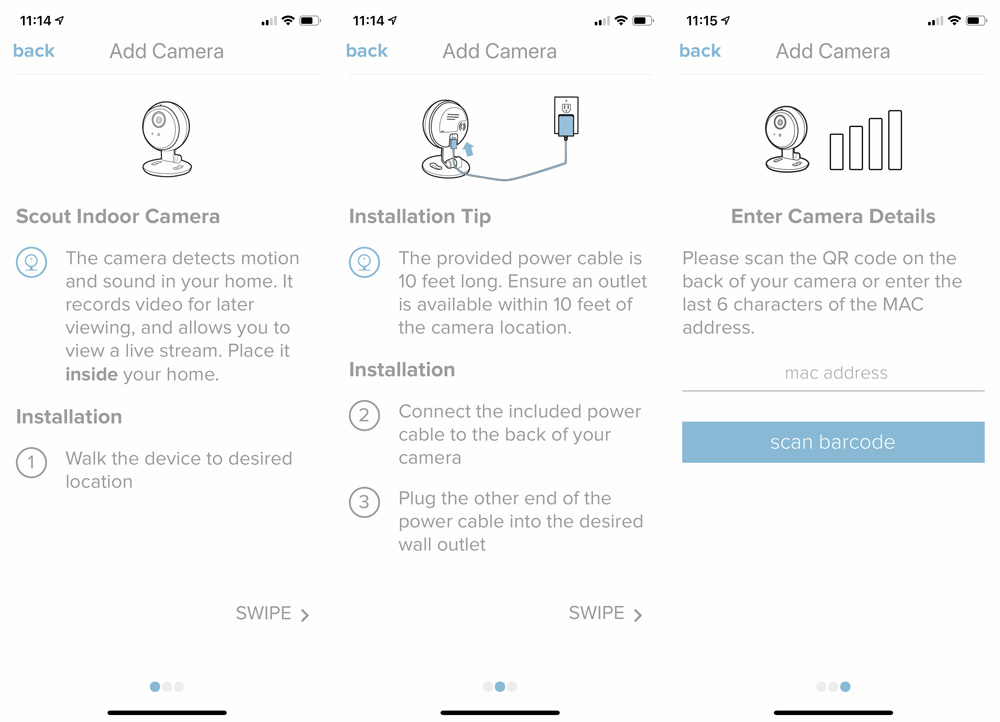
You can scan the QR code or manually enter the last 6 characters of the MAC address. Scanning worked just fine for me.
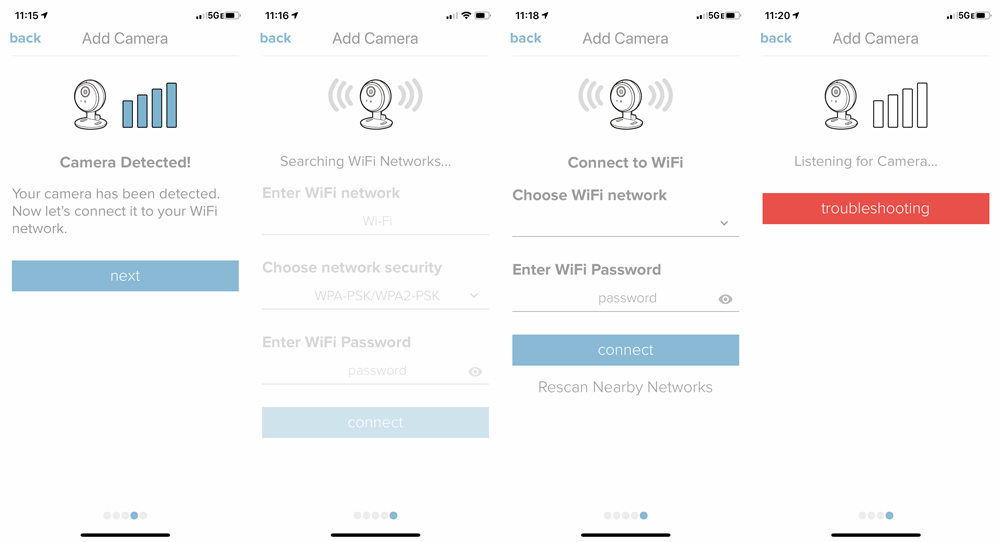
It should find your camera and move you along to choosing your wifi and entering your password. I did have an issue where the app kept failing to connect my camera to my network. I’m not sure, but I believe that my phone was disconnecting from the camera’s wifi too early and returning to my home network automatically. I told my phone to forget my home network, and then tried again and it worked right away. I was then able to re-join my home network with my phone with the password and all was right with the world again. Again this could be my beta iOS acting up.
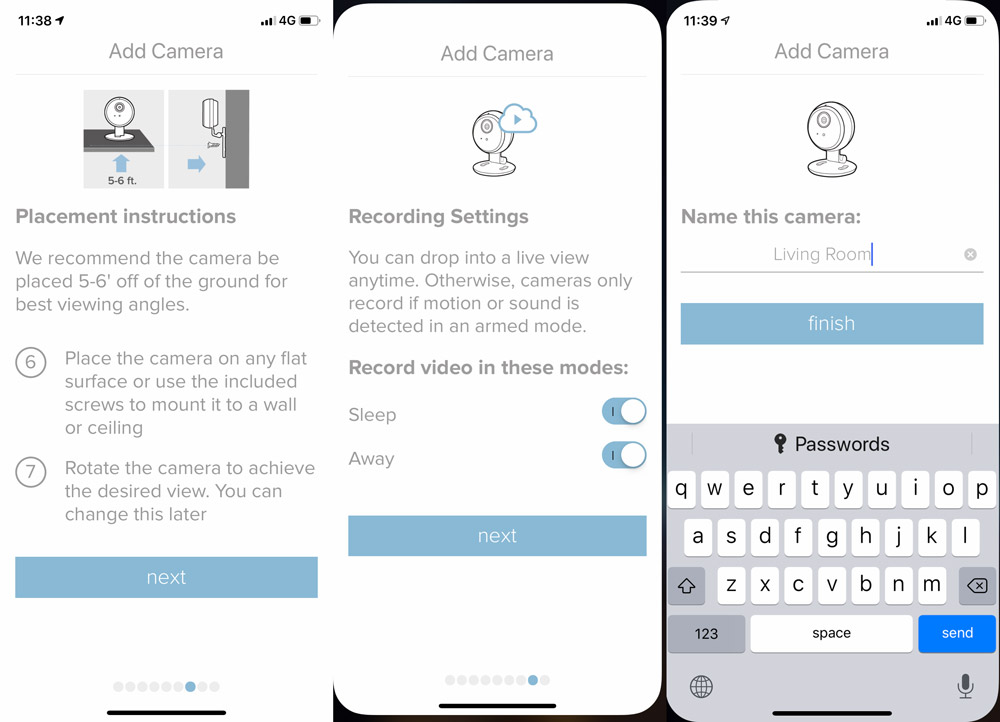
Now you’ll want to place the camera, select recording settings and name your camera.

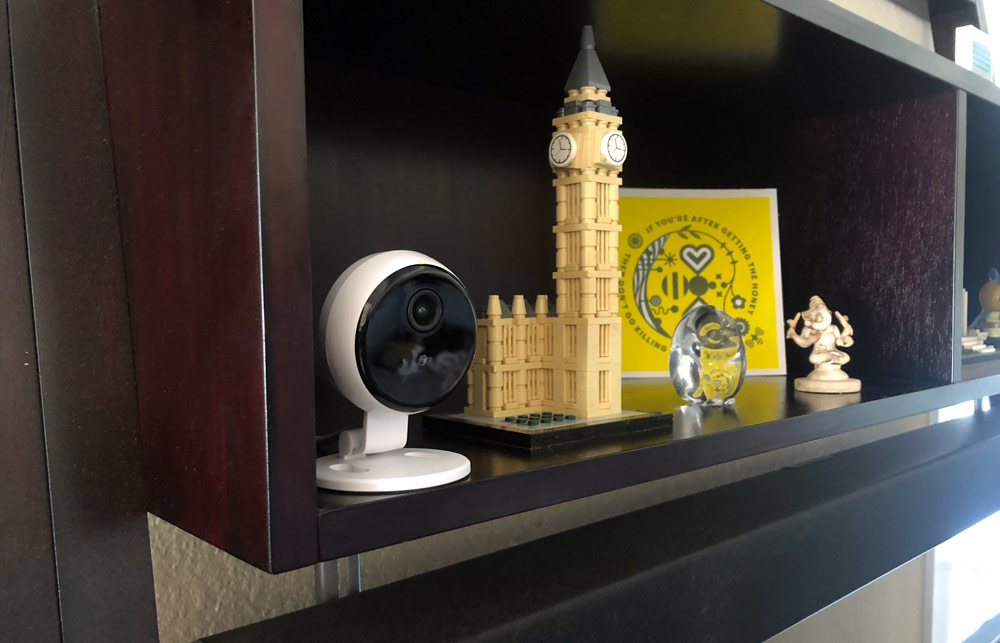
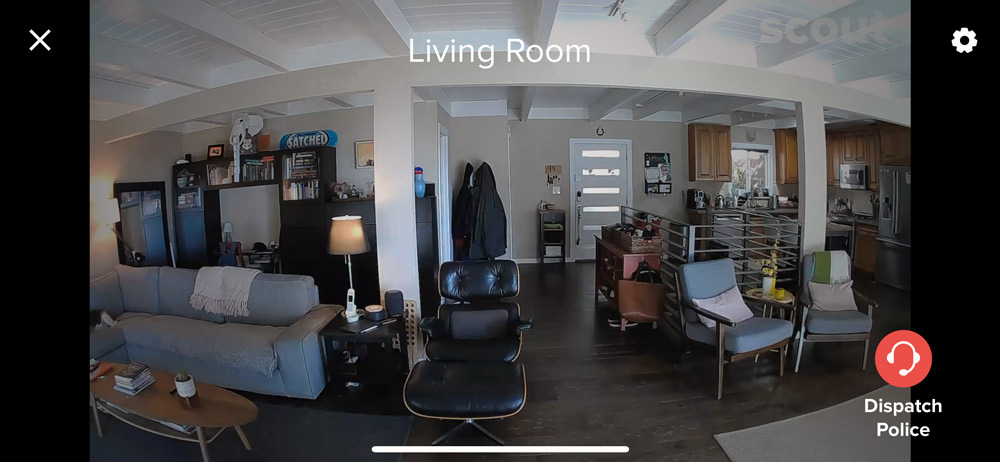
We’ve got an open floor plan in our house and some of the typical mounting areas (high corners) result in sections of the room that feel too far away. I found it helpful to take a picture with my phone from each location to rule out some options before even getting to the camera. In the end we found a good spot in the furniture above the TV. There’s enough knick knacks that it doesn’t scream camera.

This location provides a majority view of the room as well as a clear shot of the front door which is likely to be the point of any unauthorized entry. Here’s a live screen capture from the App.
Performance

Let me start with this. I purchased Scout’s security system over three years ago shortly after we purchased our home. We wanted an easy to use system that didn’t require paying for installation or require a monthly monitoring plan. At the time there were only a couple of options and it was actually the promise of Scout’s camera at that time that sold me on the system. I went ahead and sprang for it even though that camera didn’t end up materializing until this Indoor Camera was announced this year.

What I want to get to is that the system has been great. It installed easily and outside some early generation battery drain issues (which have been solved), it worked exactly the way we hoped it would. The motion sensors didn’t trip with our small dog, although we deactivated those after getting two much larger puppies (45 and 70lbs). The Access sensors reliably detect if windows or sliding doors are open or closed, and the front entry panel worked really well when we all carried keys.

As we upgraded to a smart door lock, and keyless lives in general, we moved from key fobs to one of the RFID stickers that we have on a unique item in the entry area for us to use. Just unlock, enter, grab that item and swipe on the door panel to disarm. Simple. Repeat in reverse to arm the system.

On to the camera. The first thing I did once set up was use it to troubleshoot my DirecTV dish placement. We just had the aging roof replaced and the dish had not been reinstalled. I set the camera up on a stool pointed at the TV, zoomed in much further than this shot below and then got up on my flat roof.
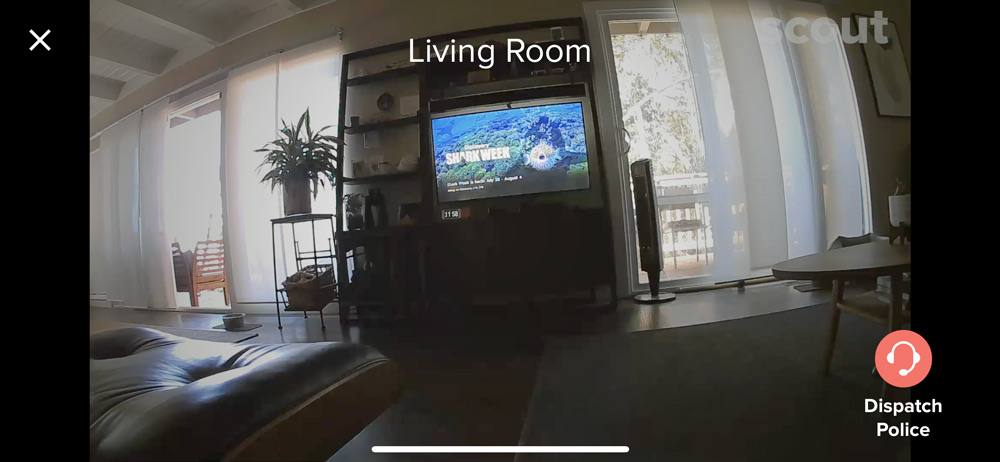
Using my iPad Pro and the Scout App with the volume turned up I watched and listened for the TV to start getting reception as I maneuvered the dish into a good position. It actually worked pretty well once I got the elevation and azimuth for my zip code. Yay!

As for camera performance, it always a bit tricky to review products that are there for ‘in-case-of’ reasons. Security systems can be that way if you don’t use them daily. Right now it’s the middle of summer and my kids are usually home so the system doesn’t get activated. Over the last week however they’ve been out of state, visiting grandmothers.

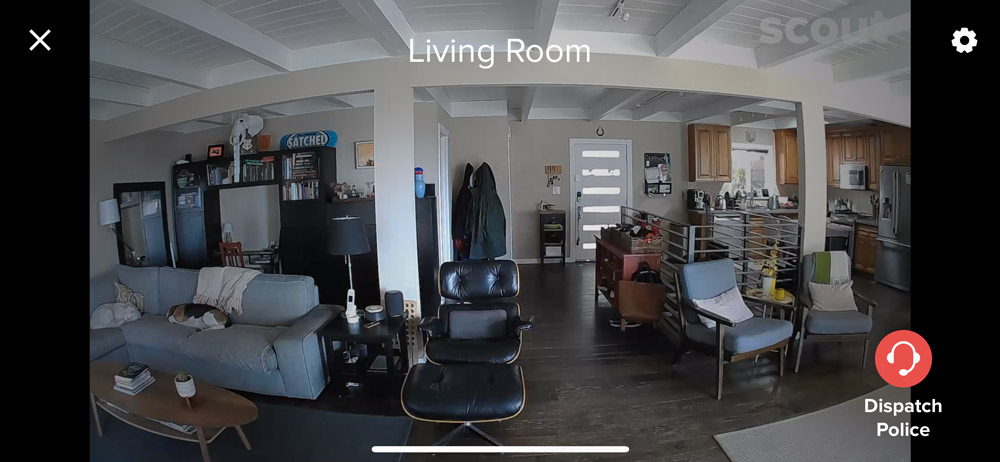
I’ve been able to open the App during the day to check on the dogs. A quick click on the thumbnail I can look and see that yep, there they are on the sofa where they like to spend their days.
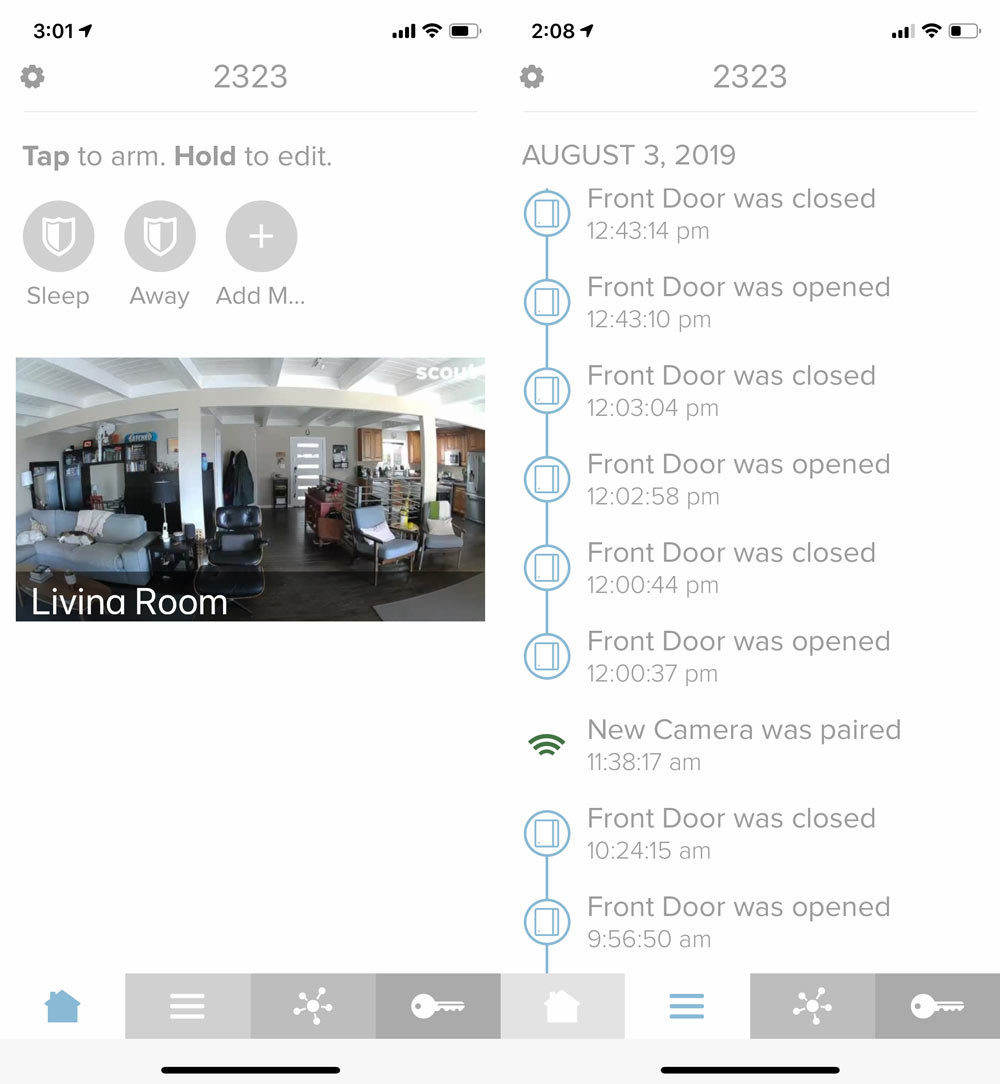
From the main screen in the App, the Home tab shows you the active camera(s) and lets you change the alarm mode. The 2nd tab shows recent activity which details out doors and windows opening/closing as well as new device installations.
I didn’t get a chance to actually test the alarm getting tripped and recording video. A little cautious when it comes to inadvertently dispatching police and having to deal with any false alarms.

So it’s not all rosy. I did find that the thumbnail above doesn’t auto-update until you click into it, so it’s not always a ‘live’ view there. Good thing to keep in mind.

If you log into the website, the Indoor Camera does not show as being part of the system. Not sure what’s going on there, but my guess would be the majority of users live in the iPhone App.

I also found that the night time view is overstated. Here’s a shot of the room at 10pm with the lights out.
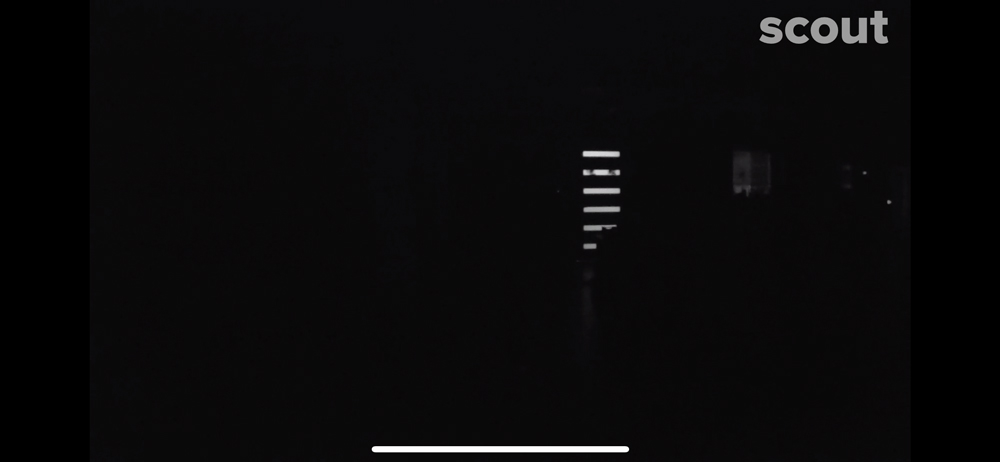
Tried lightening it up in Photoshop, but to no avail. This is the one area where Scout’s Indoor Camera seems to falls short. Google’s Nest Cameras have a much better implementation of this. Funnily enough, you may have caught that Nest Cam was listed as compatible in devices you can add. As you may be aware, ‘Works with Nest’ is undergoing some changes, and the Scout App would not let me connect. Hopefully this is something they’ll sort out soon.

Let’s conclude.

What I like

  • Small size with multiple mounting positions and a long cord
  • Clear video with a good wide view during the day
  • Good live view with the ability to pan and zoom within the field of view

What I’d change

  • Night time visibility needs work. Couldn’t see much at all.
  • Would like to see a “Midnight” or dark color option as well
  • Camera doesn’t seem to be supported by their website log in, only their app

Final thoughts

I’ve been happy with the setup and performance of the Scout Alarm System for the 3 years we’ve been using it. The camera is a great addition and adds a much needed component they were missing. Unfortunately, the performance of the night vision isn’t good enough to recommend the camera as the right solution. Hopefully, this is something they can address with a firmware update as everything else is pretty thought through.

Price: $99
Where to buy: Scout Alarm and Amazon
Source: The sample of this product was provided by Scout Alarm.

Filed in categories: Reviews

Tagged:

Scout Indoor Camera review originally appeared on The Gadgeteer on August 15, 2019 at 9:00 am.

Note: If you are subscribed to this feed through FeedBurner, please switch to our native feed URL http://the-gadgeteer.com/feed/ in order to ensure continuous delivery.
Brightech Owen Nightstand review

REVIEW – It’s back-to-school time, and folks are thinking about changing where they live, setting up dorm rooms, and generally getting ready to snuggle down and study. Having a cozy corner with a lamp and a place to sit your coffee/tea/adult beverage has been a necessity since students read by oil lamps and candles. Nowadays, however, having places to charge laptops, tablets, or phones are just as important. BrightTech has recently released a table they call Owen that incorporates a lamp, a wireless charger, and both a USB port and an AC plug. I was sent a sample to test and have been using it for a few weeks now.

What is it?

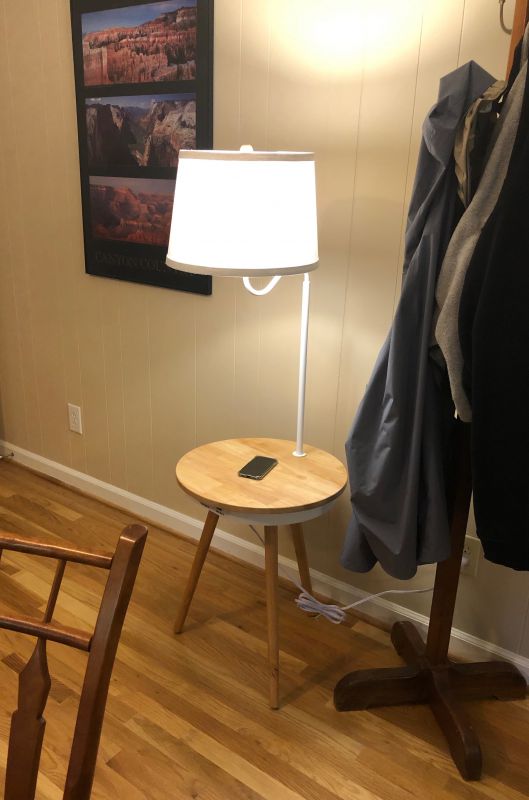
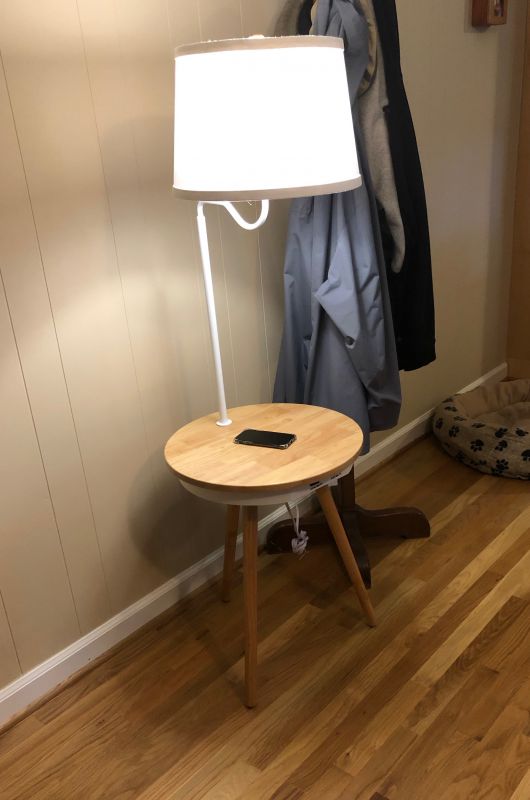
A wooden table 19” diameter and 23.5” high with a built in lamp, power ports, and a wireless charging area.

What’s in the box?

Everything you need except a power outlet!

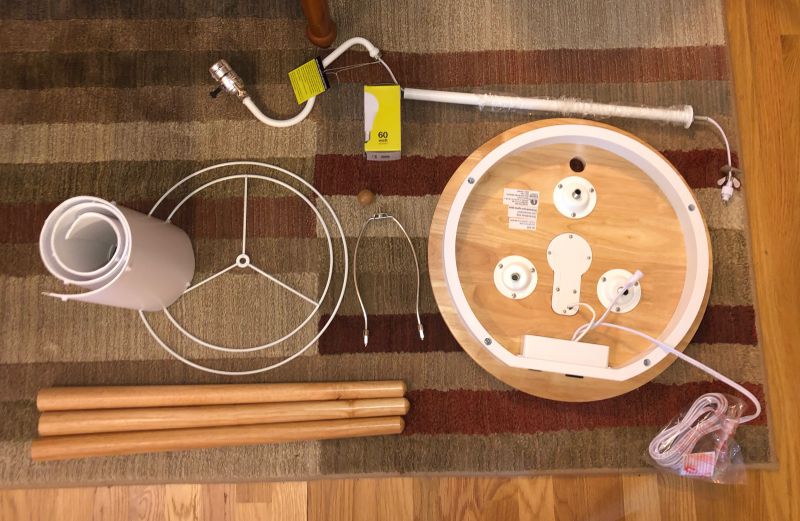
  • Wooden tabletop 19” in diameter with charger, leg sockets, and lamp connection kit assembly
  • Top and bottom powder-coated rings for the shade
  • Collapsable shade cover
  • Two-piece prewired lamp with socket
  • Harp and wooden finial
  • Three solid wood legs with metal sockets installed

Design and features

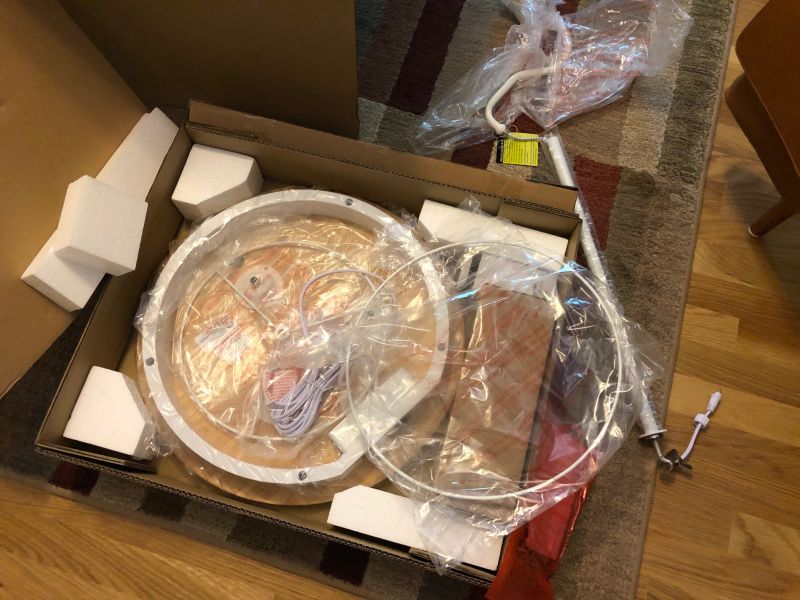
When the box containing the Owen table arrived, I was sure it was something else. Even when I opened the outer box and saw the picture, I was sure there would be another box with the shade or something. When I opened it, I was amazed at the compact and complete packaging. All the pieces are cleanly finished, made of quality materials, and fit together on the first try. I think it took all of 15 minutes to unpack, take photos, and assemble.

Setup

Setup is pretty straightforward.

  • Screw in the legs to the pre-attached threaded studs.
  • Connect the two tubes of the lamp assembly (prewired).
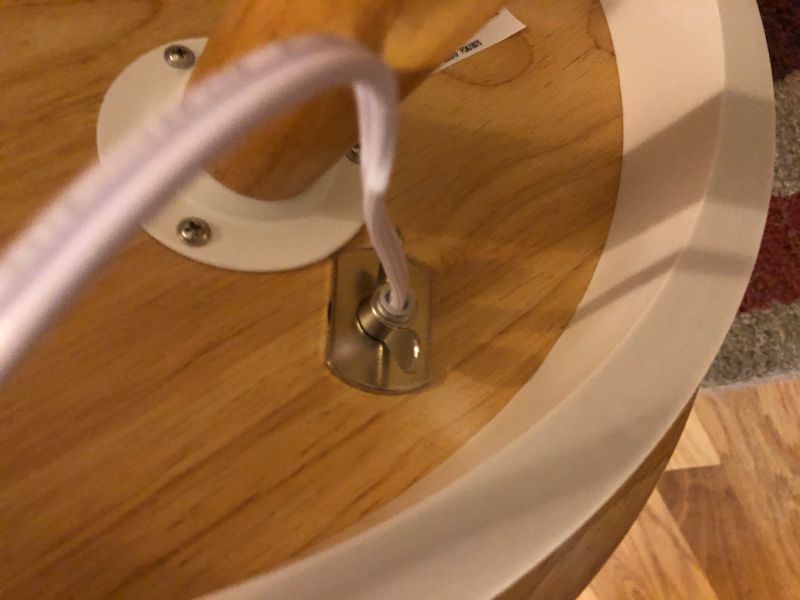
  • Pass the wires through the hole in the table.
  • Tighten the threaded holder for the lamp. (See detail in picture above.)
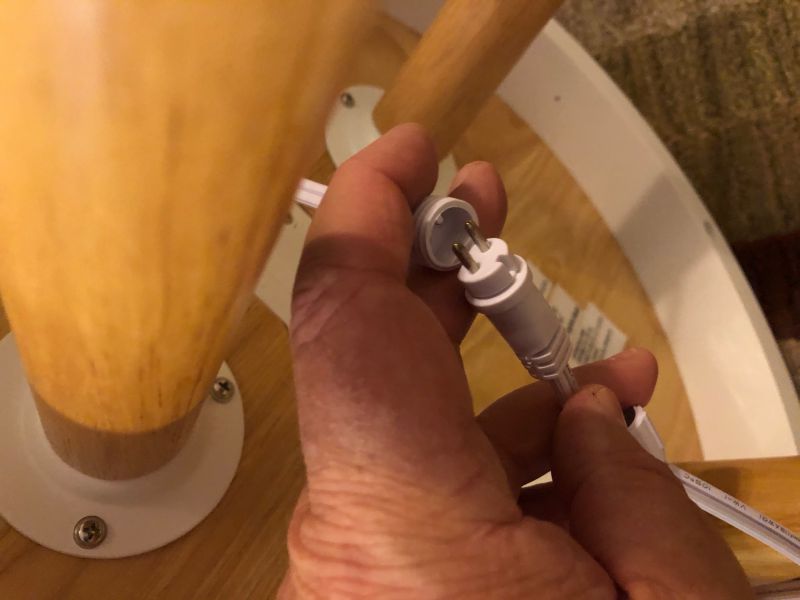
  • Attach the power cable to the table’s electronic assembly. (See detail in picture below.)
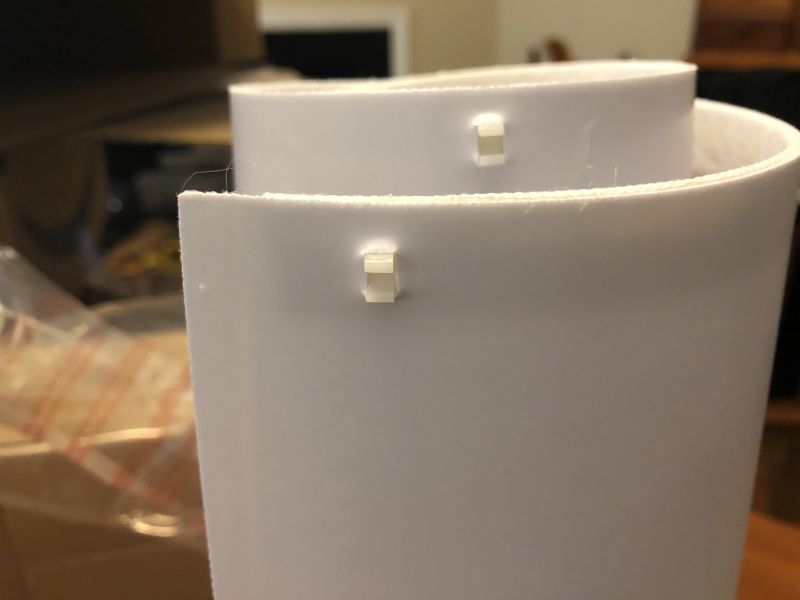
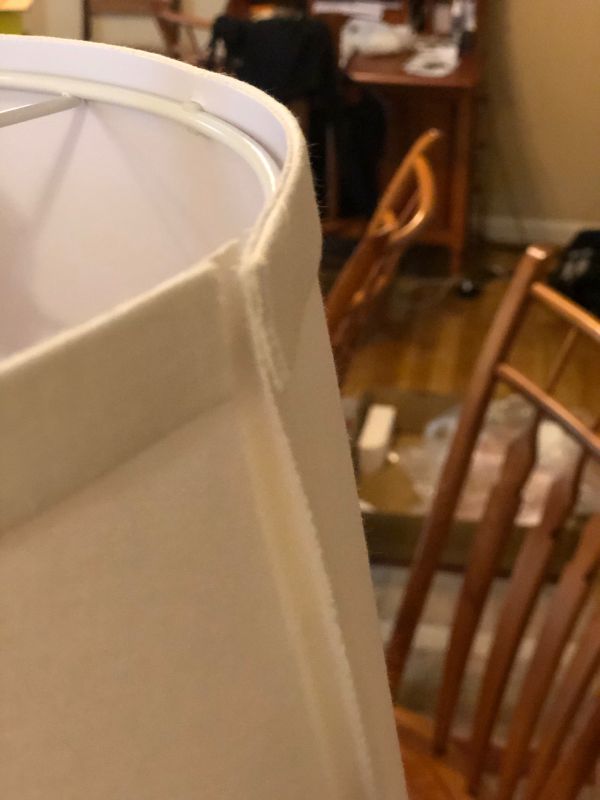
  • Unroll the shade cover and click the two wire circles into the clips of the shade and press the Velcro seam together. (Shade clips shown in second picture below.)
  • Attach the harp to the two clips on the side of the socket and screw in the bulb.
  • Attach the shade to the harp with the included finial.
  • Place the table where want it and plug it into the wall.

Performance

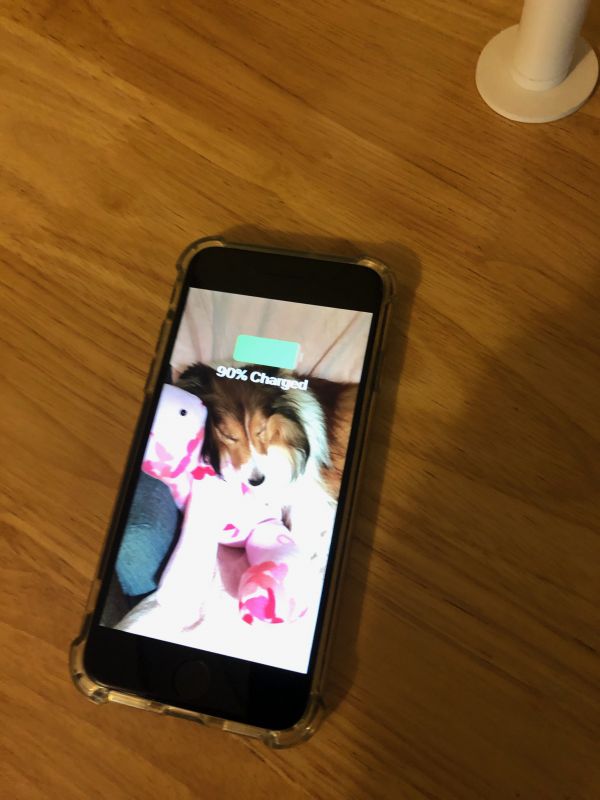
The built-in wireless charger works really well. It’s not fiddly or touchy, like some disk chargers that let the phone slide off the sweet spot due to the vibrations of walking nearby. The switch for the light is tight and always works. The light from the bulb is a very white light, but the shade diffuses it well.


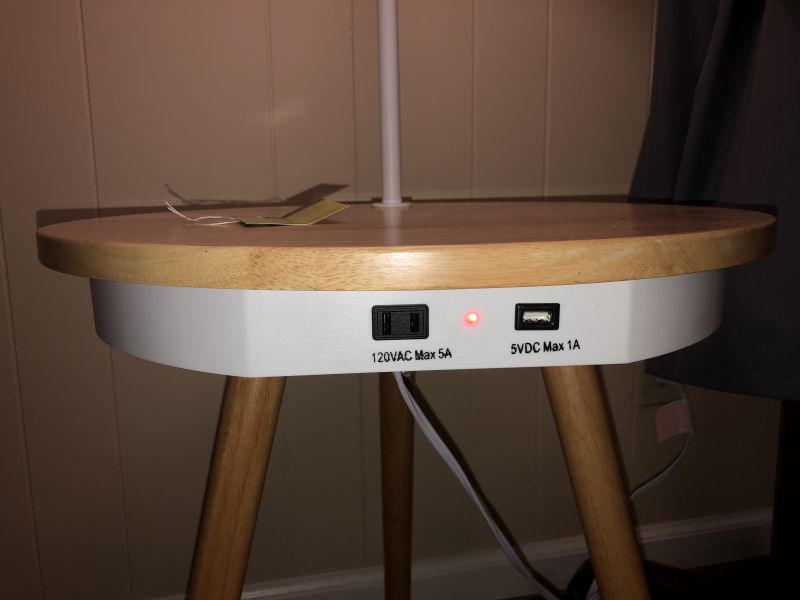
The AC and USB ports have a red light that glows when the unit is plugged in, which is really bright if you’re using this for a night table. I wish they would have mounted the plugs in the back or under the table so that light wasn’t always shining out and the ugly plugs didn’t show. Be aware, this table is not heavy-duty (Load limit is 2.5 pounds), so don’t pile it up with huge volumes.

What I like

  • Easy to assemble
  • Looks surprisingly good for a kit table
  • Everything you need is in the box

What I’d change

  • I wish the red power light wasn’t so bright or visible.
  • Plugs could be around back, rather than on the front.
  • The Velcro seam in the shade is really ugly.

Final thoughts

For what it is, it’s a really nice little piece of furniture for a casual room like a reading nook, dorm room, or man-cave. I would have liked to have something like this when I was grad school, rather than the whale oil lamps we used back then!

Price: $80.99, on sale for $79.99
Where to buy: BrightTech website
Source: The sample of this product was provided by BrightTech.

Filed in categories: Reviews

Tagged: , ,

Brightech Owen Nightstand review originally appeared on The Gadgeteer on August 14, 2019 at 10:00 am.

Note: If you are subscribed to this feed through FeedBurner, please switch to our native feed URL http://the-gadgeteer.com/feed/ in order to ensure continuous delivery.
Lepow 15.6-inch USB-C portable display review

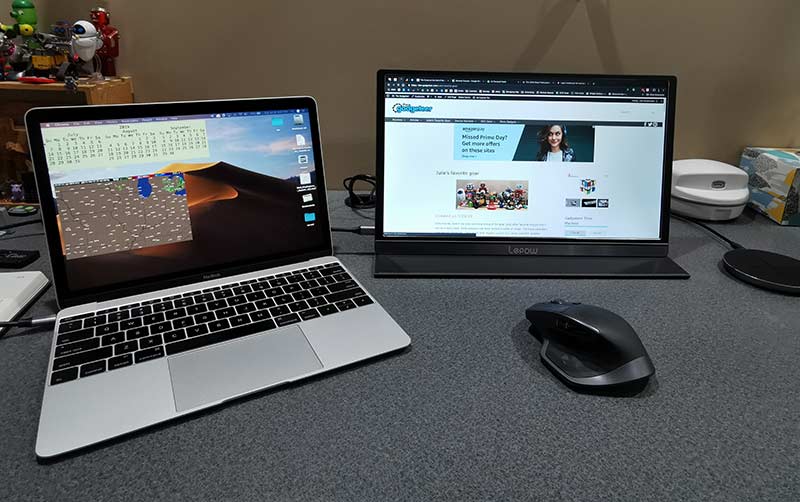
REVIEW – I switched from a huge 27″ iMac to a MacBook more than 7 years ago and although I still use an external monitor with it when I work in my office (Gadgeteer HQ), I sometimes wish for some extra screen real estate when I’m working away from home. One solution is to buy a bigger MacBook, but that’s not a solution I want to take. Another solution is a portable monitor like the Lepow USB-C display. Let’s check it out.

What is it?

The Lepow USB-C display is a 15.6-inch portable display that connects to laptops and mobile devices with a USB-C cable.

Hardware Specs

Screen size: 15.6 inch
Visual area: 344.16 x 194.59mm
Panel type: IPS
Dimensions: 368 x 225 x 8.8 mm
Aspect ratio: 16:9
Resolution: 1920×1080
Display color: 16.7M
Color temperature: 6800K
Visual angle: H: 85/85Min V:85/85Min
Contrast ratio: 1000:1
Brightness: 300cd/m2
Output interface: 3.5mm headphone jack
Speaker: 1Wx2

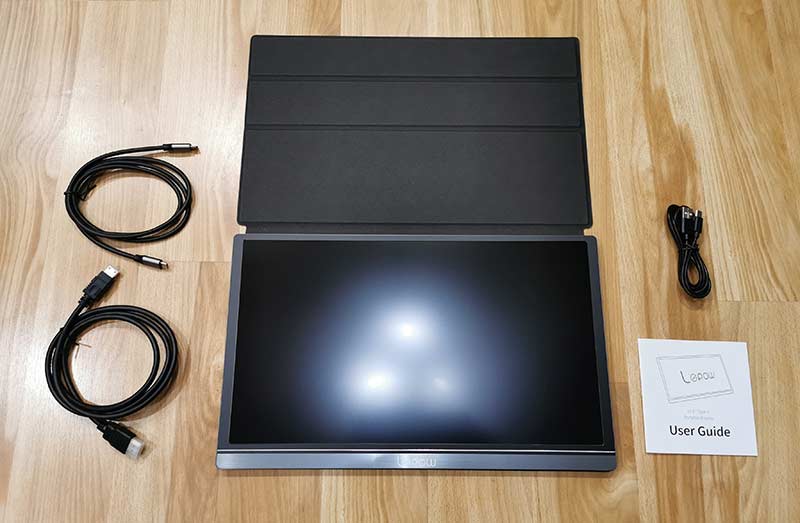
What’s in the box?

  • Lepow USB-C monitor
  • Magnetic cover
  • Screen protector
  • USB-C to USB-C cable
  • HDMI to mini HDMI cable
  • USB-A to USB-C cable
  • User Guide

Design and features

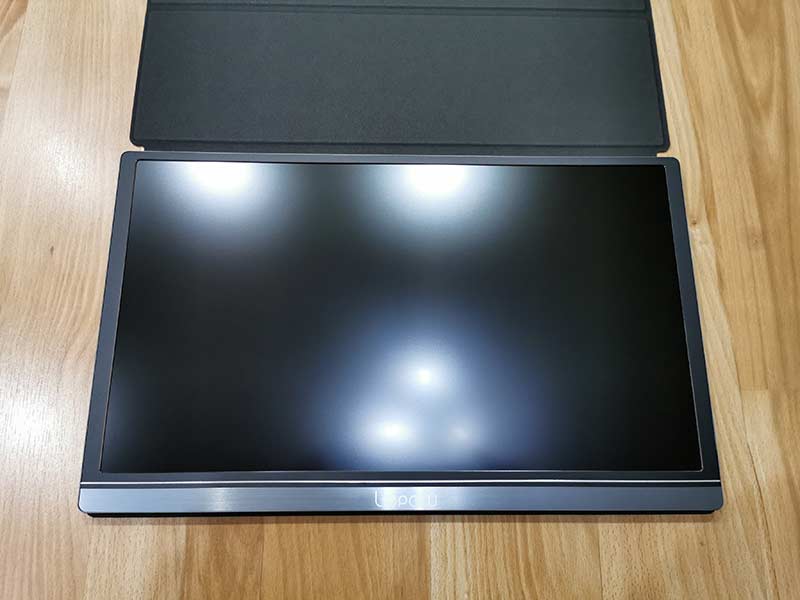
The Lepow 15.6-inch USB-C portable display immediately reminded me of a supersized iPad Pro with an Apple smart cover. It’s designed like a slab/tablet, without a built-in stand. That’s what the case is for.

The display has slim bezels and a dark grey shell that holds a matte screen that unfortunately is not a touchscreen.

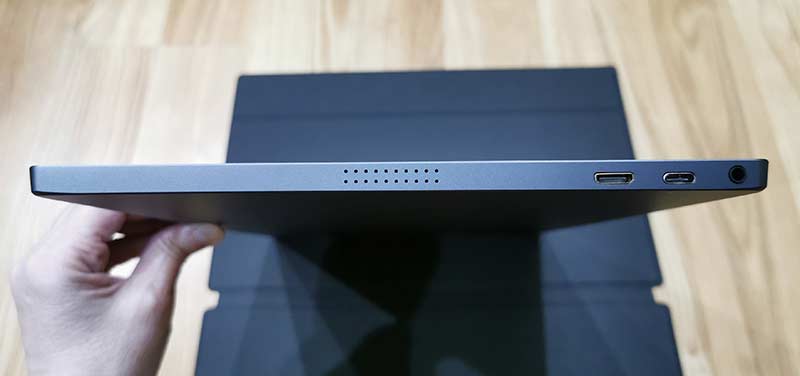
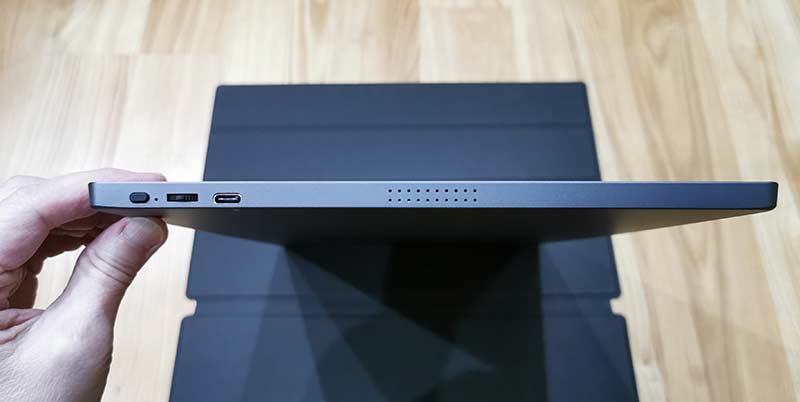
Both sides have ports and speaker vents. The left side has a mini HDMI port, the main USB-C port, and a 3.5mm headphone jack.

The right side has another speaker vent, a power button, a roll key for menu selections, and a PD USB-C port.

The monitor does not have a built-in battery so it requires an outside power source. It can pull power from a laptop, a smartphone, a tablet, or you can connect a USB-C cable and an AC adapter to the USB-C PD port on the side and use that to power the monitor and charge the device (laptop, phone, etc.) connected to the other USB-C port on the opposite side of the monitor.

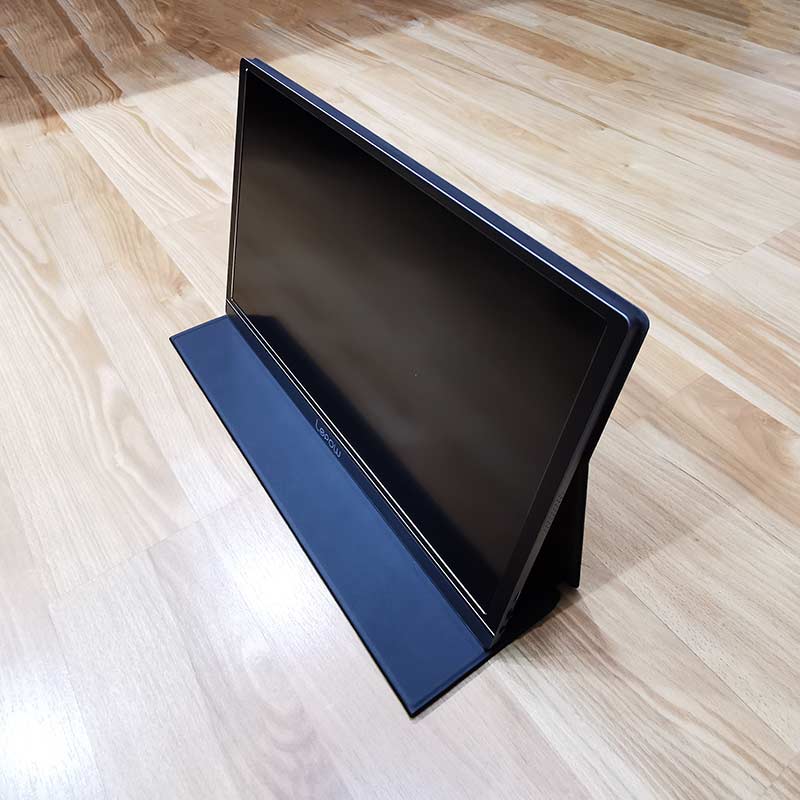
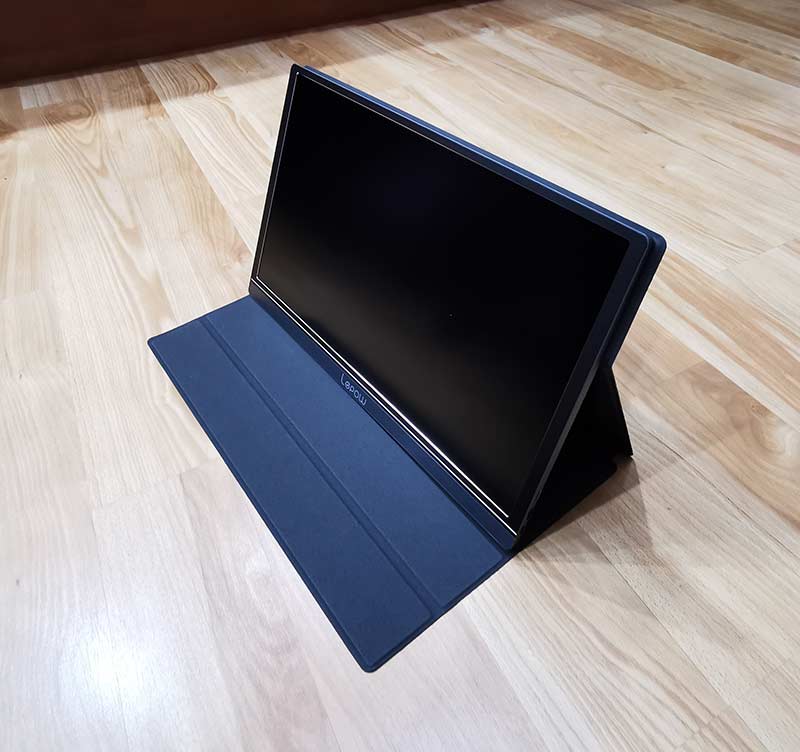
As mentioned above, the Lepow monitor does not have a built-in kickstand, but the included smart cover not only protects the screen when you’re not using the display, but it can fold into a stand.

The cover has grooves so you can customize the viewing angle and small magnets at the edges hold the cover to the monitor for ease of use.

Using the Lepow USB-C portable monitor with a laptop

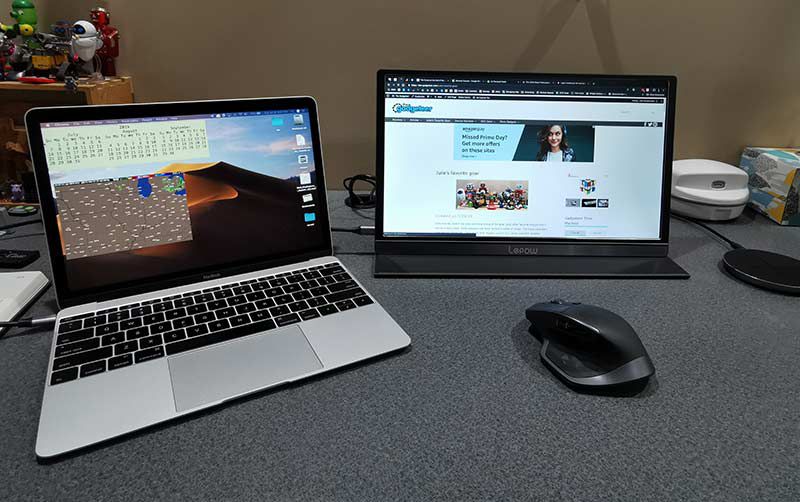
I tested the Lepow monitor with my 2016 12in MacBook and my Huawei P30 Pro smartphone, both of which have a USB-C port for easy connection. The Lepow also has a mini HDMI port that you can use with the included mini HDMI to HDMI cable to connect the monitor to full-sized HDMI port.

One of the best things about the monitor is that it doesn’t require its own power source because it pulls the power it needs from the connected device. That means that you won’t need to carry a bulky power supply with you or need to be near a wall outlet to use the display because it powers on as soon as it’s connected to the laptop or phone.

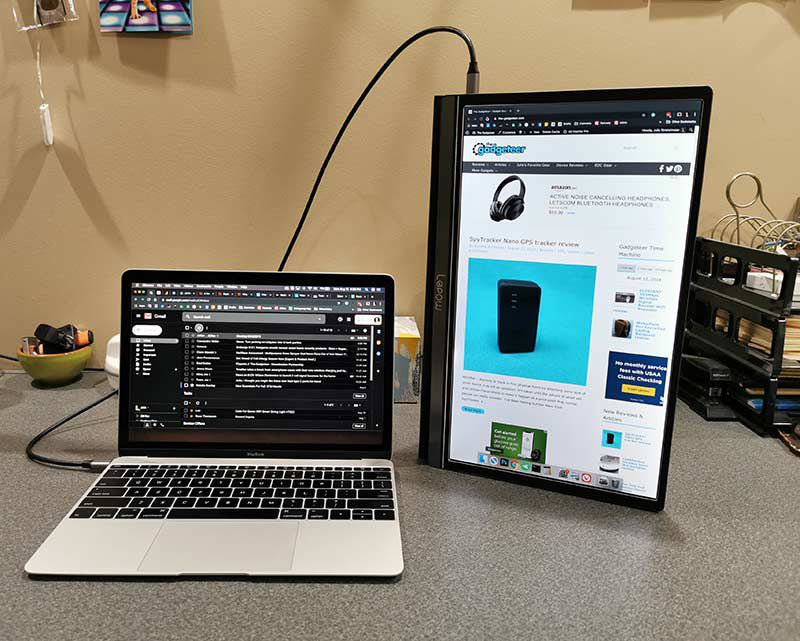
By default, the monitor is in landscape orientation when connected to a macOS or Windows laptop.

However, you can go into the settings on the computer to rotate the display like you see above. The only problem is that when you physically rotate the Lepow USB-C monitor, the folding cover doesn’t make a very sturdy stand in that orientation. And even worse is the fact that there’s the cable sticking out of the top of the monitor when it’s in this orientation and the monitor will rest on the roll key which when pressed, will bring up the onscreen menu. All that said, it is doable in portrait orientation, just not very convenient compared to a traditional landscape orientation.

The monitor’s built-in speakers on both sides of the display are not impressive when it comes to volume or audio quality. Even at full volume, the audio is weak and definitely not loud enough if you’re using the monitor in a noisy environment.

Using the Lepow USB-C portable monitor with a smartphone or tablet

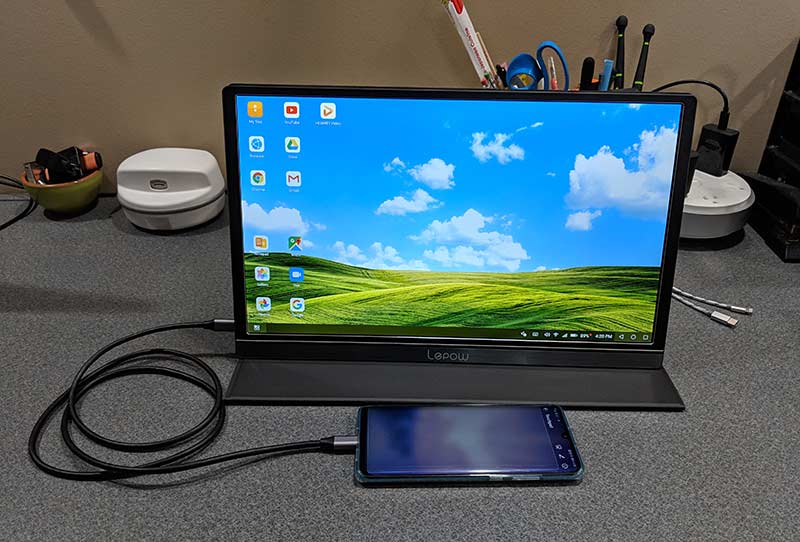
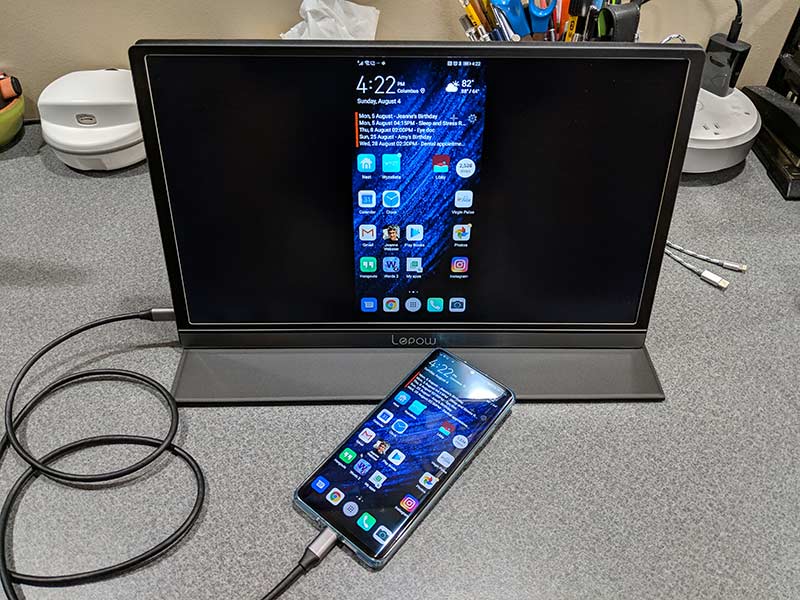
If you happen to own a smartphone or tablet that allows for video out though USB-C like the Huawei P30 Pro (shown above) or a Samsung Galaxy device, the Lepow monitor can turn your mobile device into a computer-like device with a full screen experience.

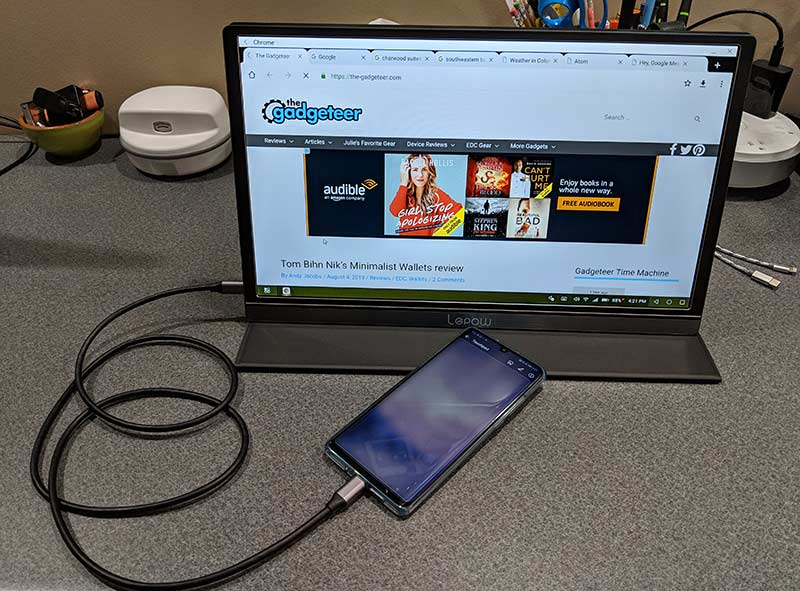
Depending on the device that you use, it really does feel like your phone becomes a computer. With the Huawei connected to the Lepow, it becomes a touch pad.

I tested the monitor with normal everyday activities like using it to surf my favorite sites, work in spreadsheets, work in documents, editing images using Photoshop, and watching videos. Note that I did not use the monitor for gaming as I don’t play games. But for all the tasks that I did try with the Lepow, it worked fine.

The colors are good, the image was clear and crisp, and viewing angles are decent. I’m not going to say that the Lepow is better than my BenQ 27inch monitor which has a resolution of 2560×1440, but the Lepow’s 1920×1080 resolution is perfectly adequate for its intended use as a portable companion monitor for travel or small workspaces.

One thing I did notice early in the review process was that the monitor defaults to 30% brightness and doesn’t save changes to the brightness setting or other settings. So even if the computer times out and the monitor goes idle, when you wake it back up, the Lepow screen’s brightness goes back down to 30%.

I also noticed that routing all the audio through the Lepow monitor’s built-in speakers was not a very good experience. Volume levels are low even with the volume setting cranked to the max.

What I like

  • No power adapter needed
  • Portable
  • Pass through power port

What I’d change

  • It would be nice if settings were saved between sessions
  • Volume through the built-in speakers is very weak

Final thoughts

There are 100’s of excellent full-sized monitors on the market but the selection of ultra-portable monitors is limited, especially monitors that only need a USB-C connection to work. No bulky AC adapter needed.

If you don’t mind that the monitor doesn’t save settings like brightness and volume, the Lepow 15.6-inch USB-C portable display has a lot going for it. It has a nice screen, with vivid colors, and crisp text. It’s portable enough to fit in a gear bag along with your laptop and it comes with a magnetic case that doubles as a stand.

Price: $169.99
Where to buy: Amazon
Source: The sample for this review was provided by Lepow.

Filed in categories: Reviews

Tagged: ,

Lepow 15.6-inch USB-C portable display review originally appeared on The Gadgeteer on August 14, 2019 at 9:00 am.

Note: If you are subscribed to this feed through FeedBurner, please switch to our native feed URL http://the-gadgeteer.com/feed/ in order to ensure continuous delivery.