
REVIEW – Scout has a new Indoor Camera. Why should this interest you? Scout is a DIY alarm system and service that installs in as little as a few minutes. There are no screws and monitoring can be turned off and on as you need it. It’s great for anyone that wants to slowly build their home security system and possibly the perfect solution for renters that aren’t allowed to make changes to their apartments.
What is it?
The Scout Indoor Camera is an IOT USB powered camera that you can use standalone with the Scout Hub or as part of their larger security system.
What’s in the boxes?

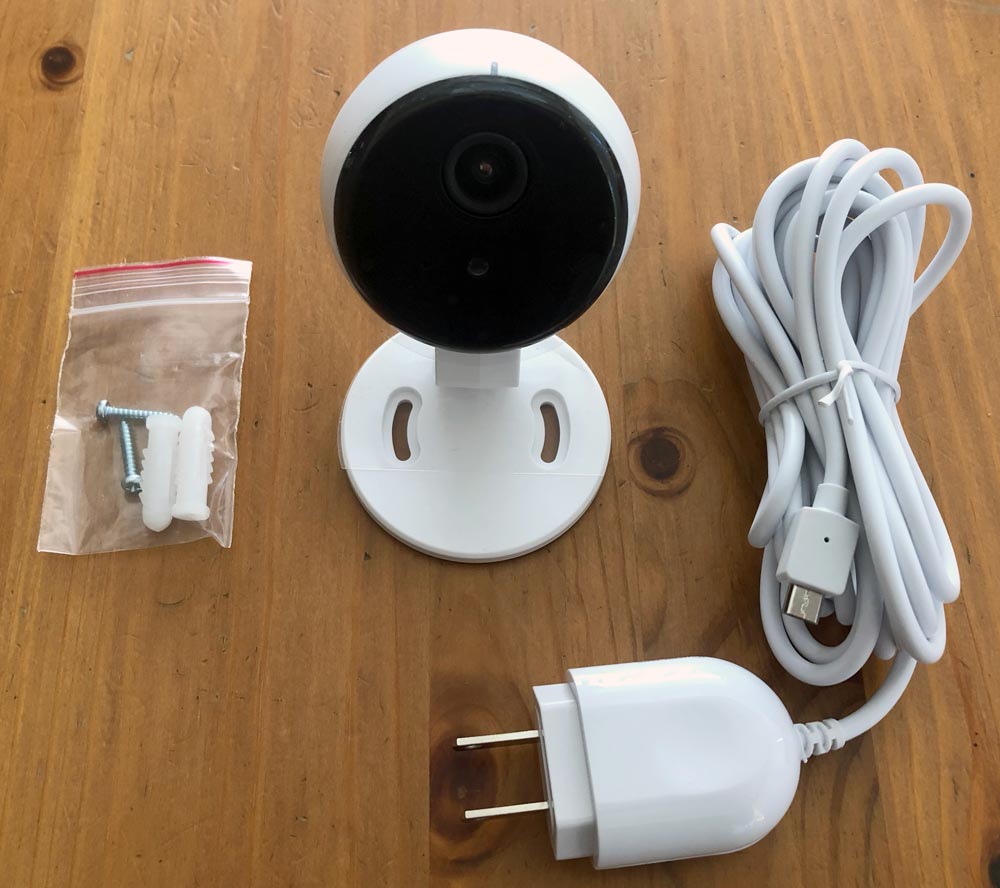
Scout Indoor Camera
(1) Camera, (1) USB-Micro B wall adapter w/ 10′ cord, (1) Mounting screw package with drywall anchors
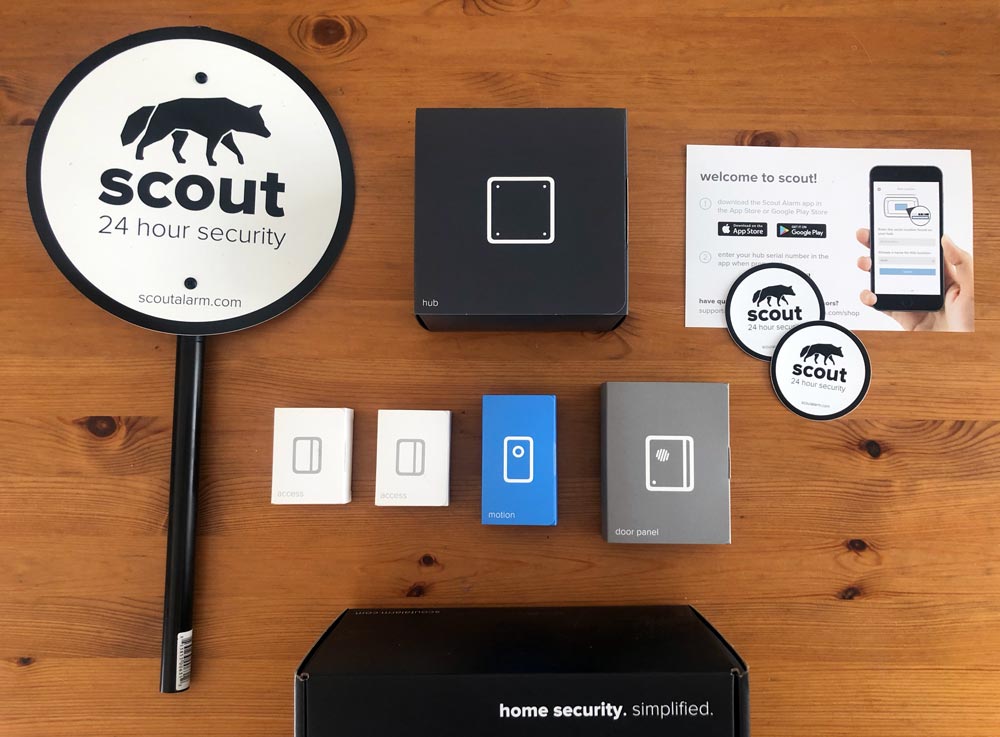
Scout Small Pack
Hub, Door Panel, Motion Sensor, Access Sensors (2), Key Fobs (2), Yard Sign, Info card
Hardware specs
- 1080p HD video
- 115º field of view
- Infrared for night vision
- 84 x 60 x 60mm
- Wall adapter with micro-USB cord
Design and features
The system is modular and designed to be easy to install and use. In fact the App is the installation manual and deals with the process quite well. All of the components are available in Arctic (light theme) or Midnight (dark theme) to help them blend in with your home. Out of the parts of the Scout Small Pack, only the Scout hub is hardwired. All of the remaining components are battery powered with CR12 or CR123 batteries. The App is also clean and easy to navigate.
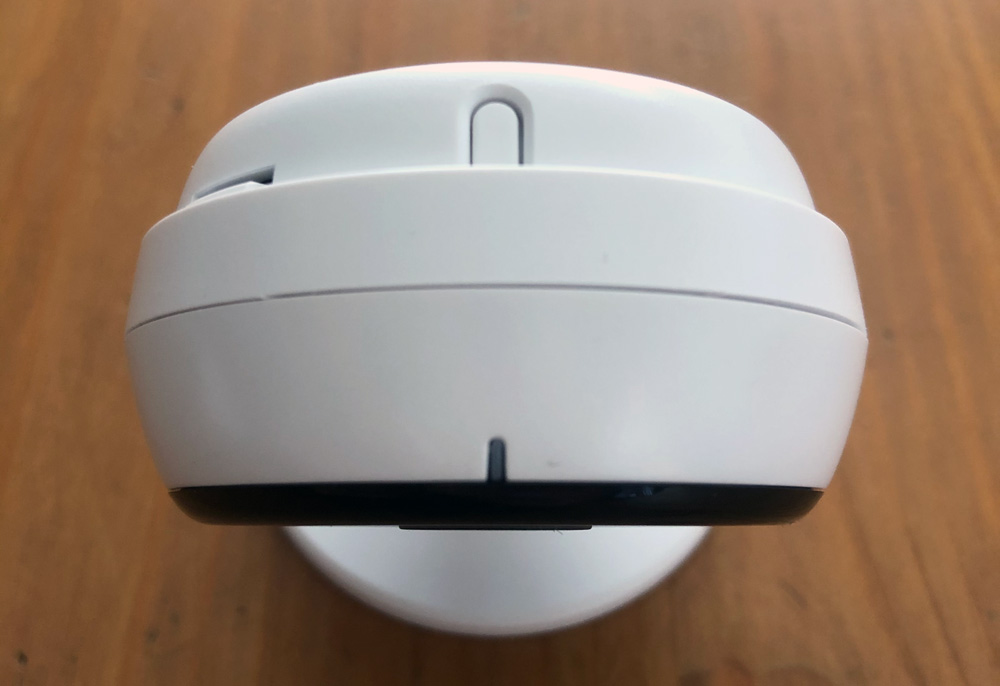
The Indoor Camera is small and inconspicuous.
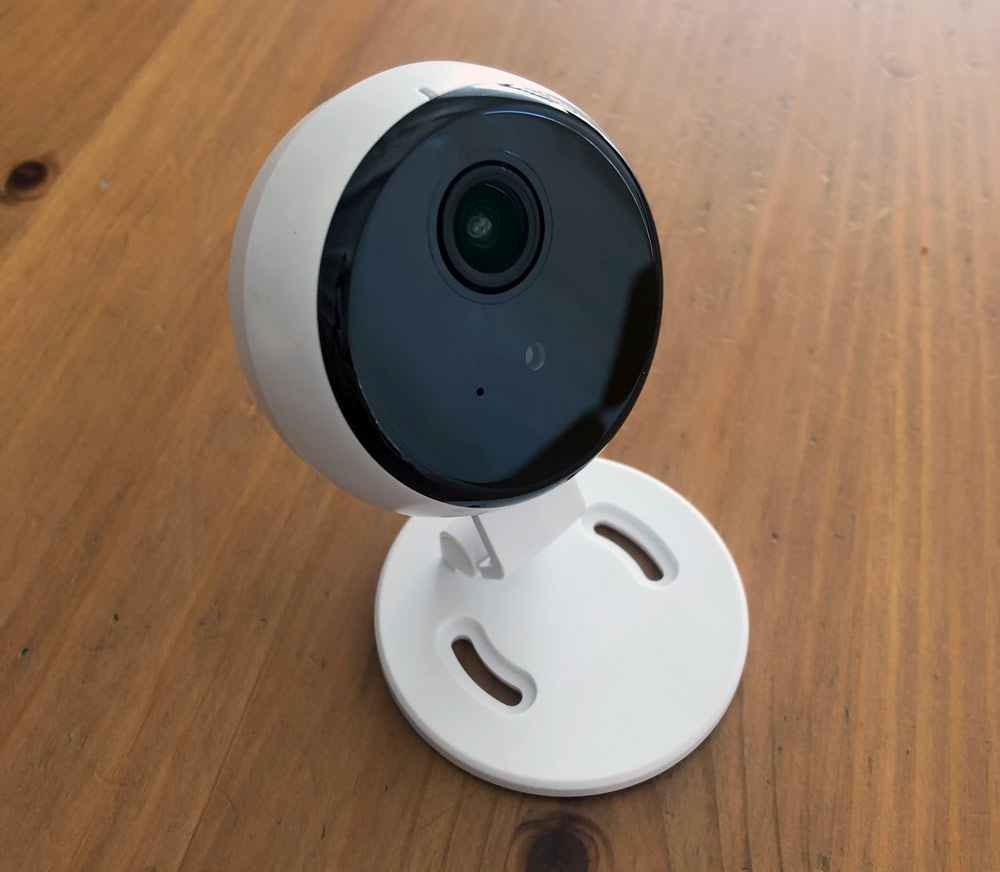
On the top front there’s an LED and behind it a reset button should you need to use it.
System Setup
Here’s a quick primer on setting up the main security system as it’s really the camera we’re reviewing here. As mentioned, all the installation instructions are in the App which will walk you through setup step by step, so make sure you download that first.
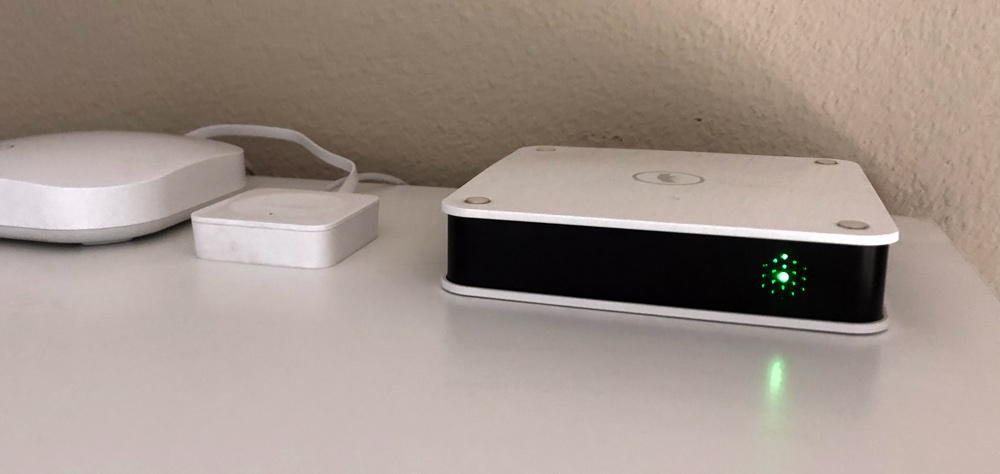
To get started, plug in the Scout Hub’s power cord and connect it to the wall. You’ll also need to connect it to your router with ethernet and then set it up in the App. Mine sits next to our Wemo Bridge and is connected to our eero router. Follow the App instructions to get it set up and it will glow green when all is good.
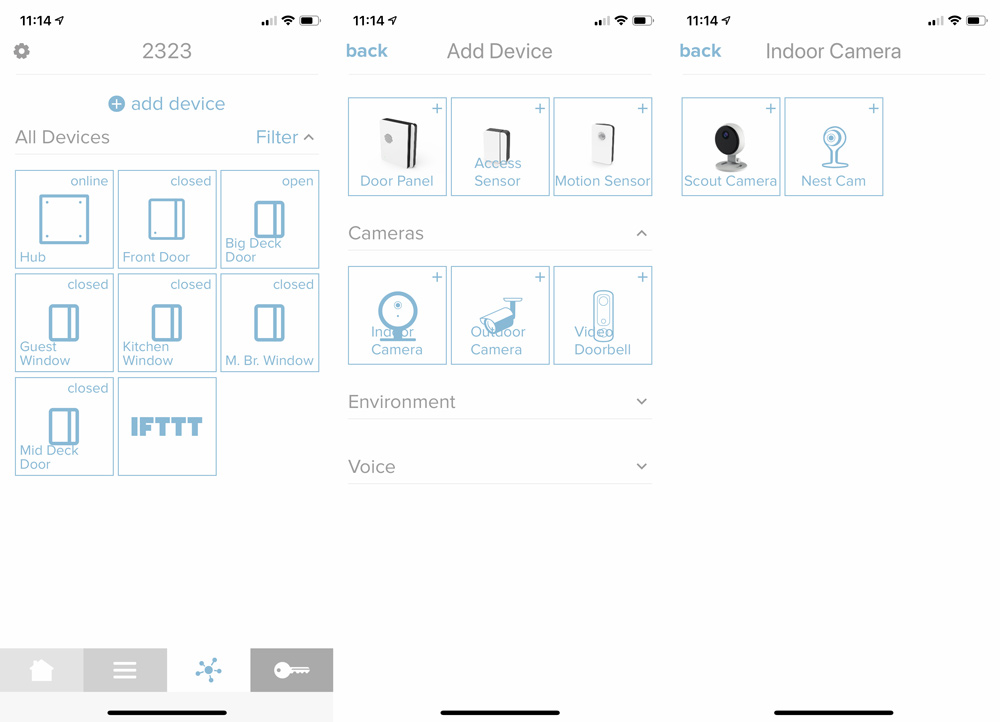
Now you’ll want t0 install and add your additional sensors. In the App, go to the 3rd tab (with the asterisk type logo shown in the left image below) and click (+) Add Device at the top. Choose the appropriate sensor type (screenshot on the right is after choosing Indoor Camera). I’m on the iOS 13 beta, which I think is causing the font/logo overwriting issue on the middle image.
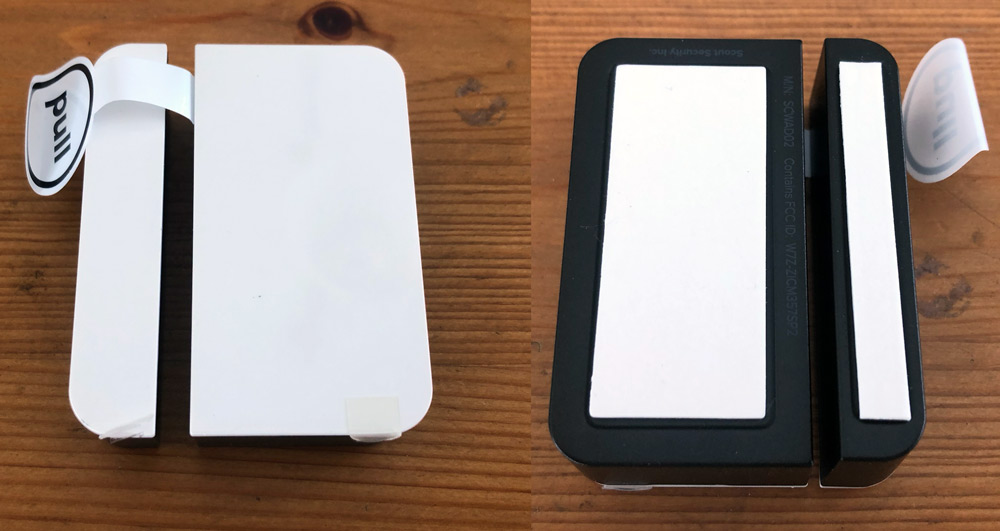
Both the door panel and access sensor have a similar install process. Determine a location where you have room for the panel and the magnet side. Peel the backing off the adhesive to attach the larger side to the door (or moving side of a window) and then pull the label hanging out to engage the battery. The App will find the device and then ask you to temporarily place the magnet side and confirm open/close status before adhering in place. Repeat the install process for any additional sensors and then you can jump into individual settings.
Here’s what each of the modules look like before and after install.
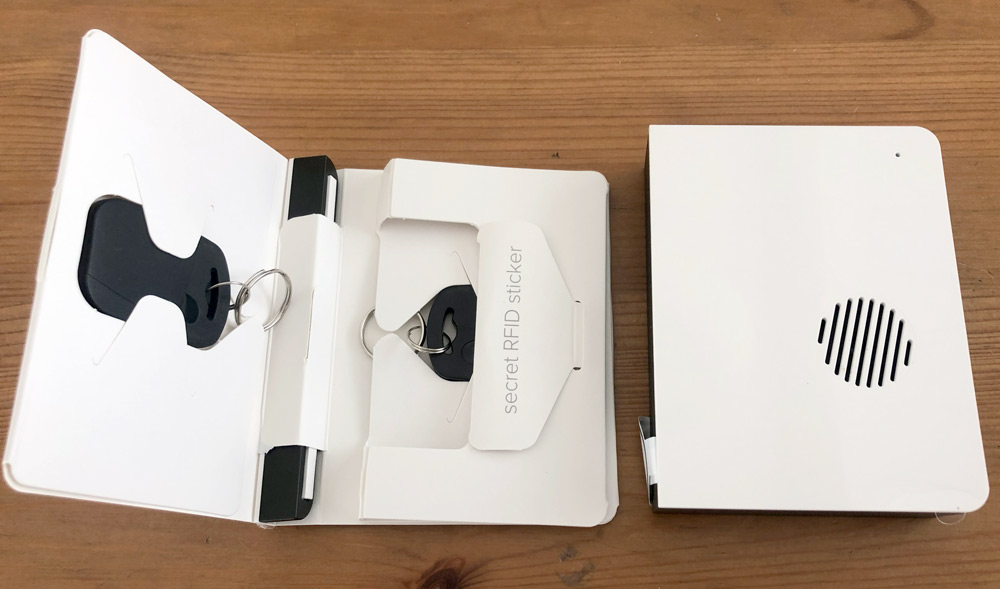
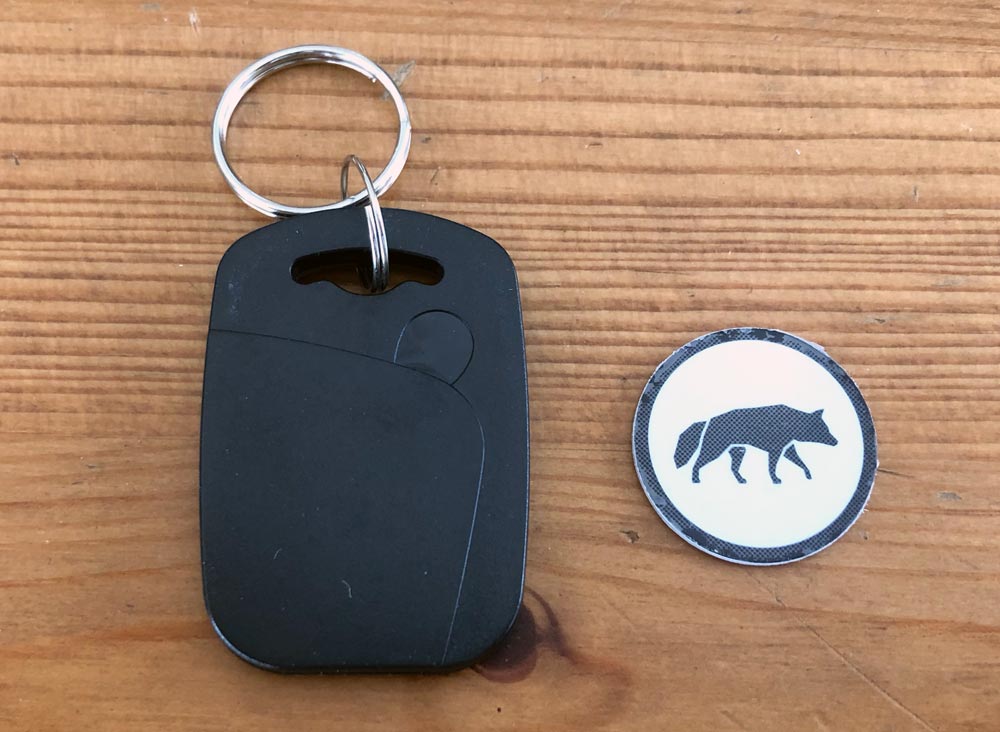
This is the Door Panel on the right. In the envelope is a key fob, the Door Panel magnet, another key fob and an RFID sticker. Here’s a closer look at the fob and sticker.
We mounted the Door Panel on the door at roughly chest height and the receiver on the molding of the door jamb. We didn’t have enough room to mount the magnet piece inside the molding edge, but it is shallower and sits pretty flush with the front of the Door Panel even though it’s sitting on higher molding. My Scout door panel is an older unit without the speaker grill passthrough of the newer model.
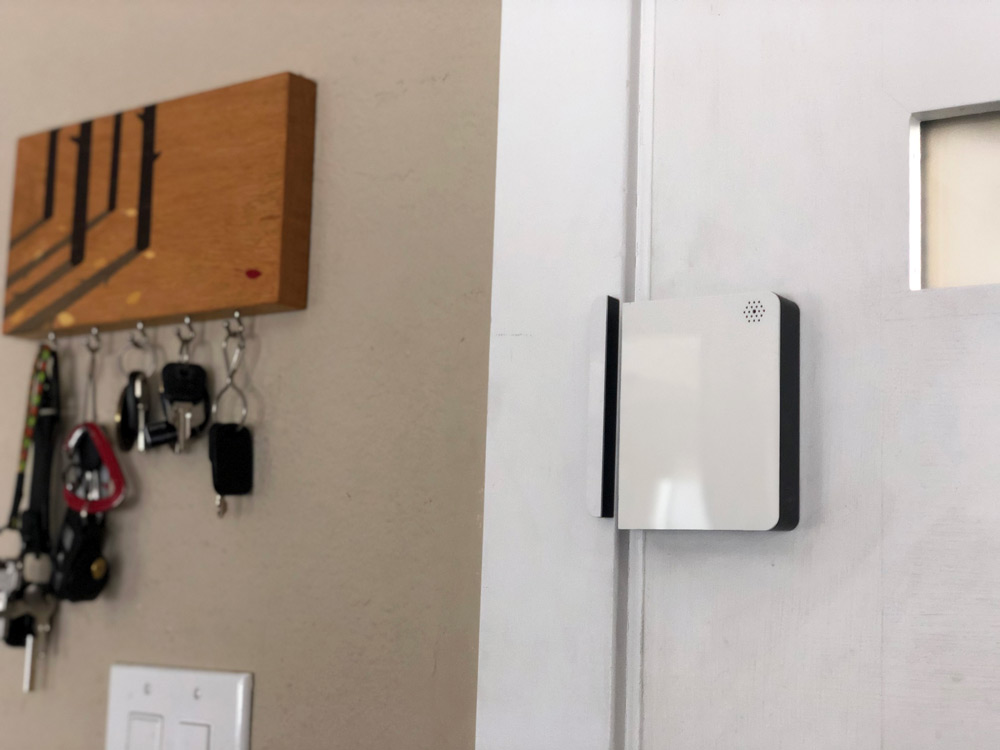
To arm or disarm the system, you just hold a fob or RFID sticker to the lower right corner of the door panel.
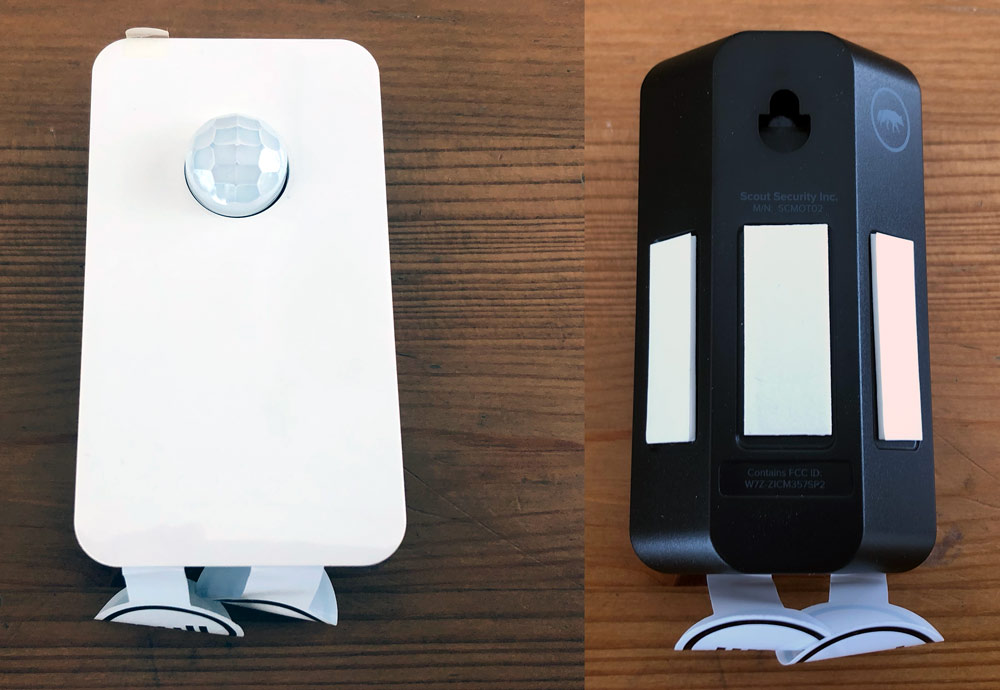
The Motion Sensor is very unobtrusive and has a 90º shape with a flat back so it can be mounted in a corner for a better room view or flat on the wall if necessary.
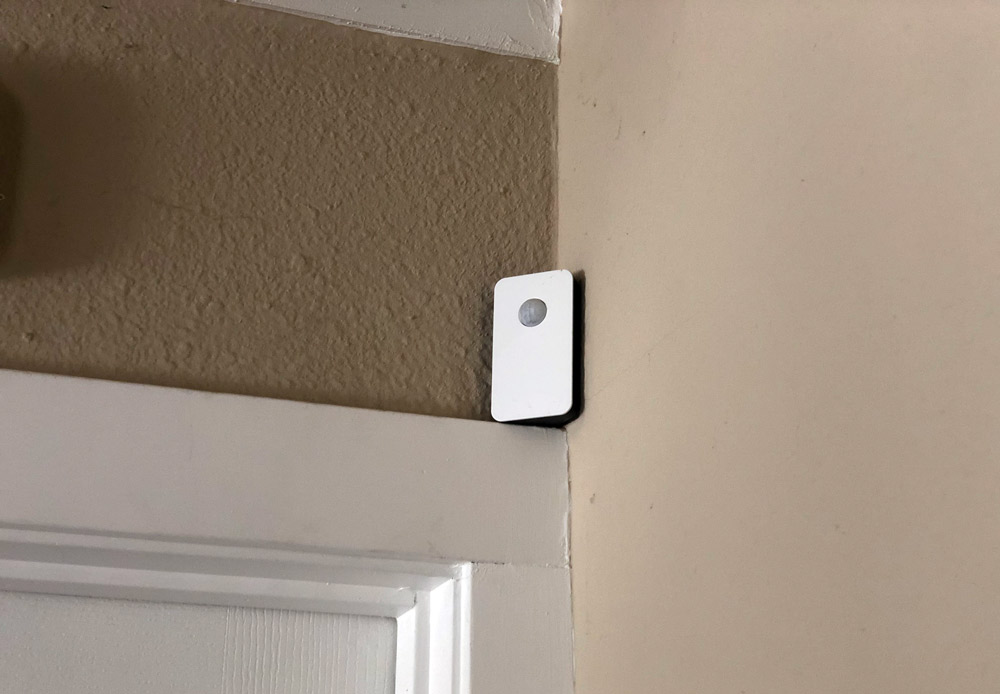
We’ve got ours tucked into a corner resting on a door molding.
This is an access panel. It can be used on doors or windows, but ones that you aren’t using to arm and disarm the system.
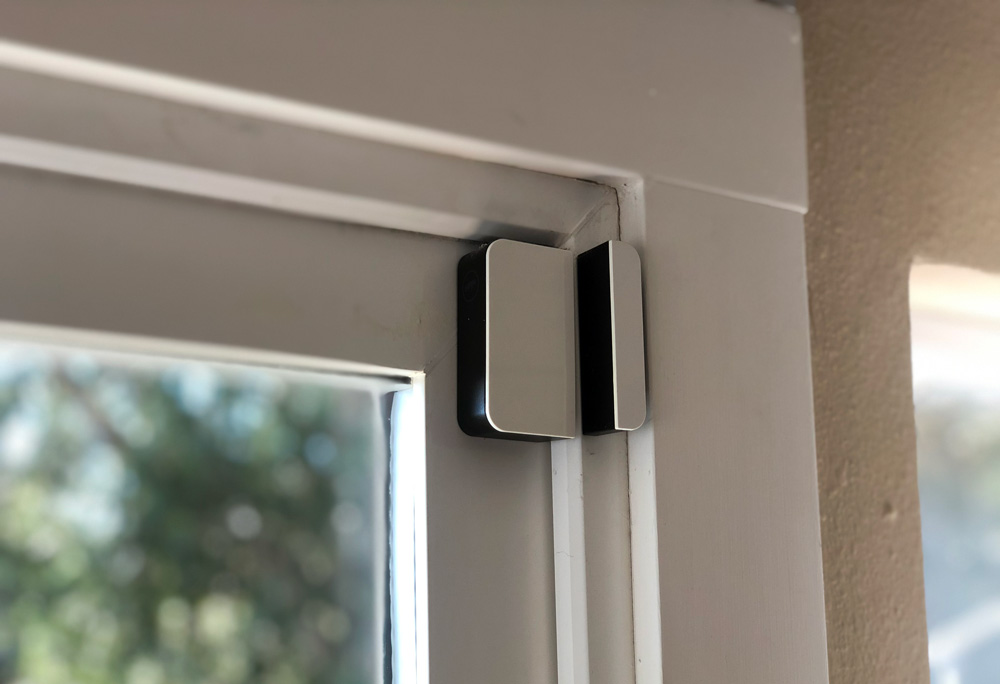
Here’s one installed on the sliding door to our deck.
You can order and install as many as you need, or start with the critical elements and build as you go.
Camera Setup
Having setup other sensors, the camera isn’t too different although there are few more steps.
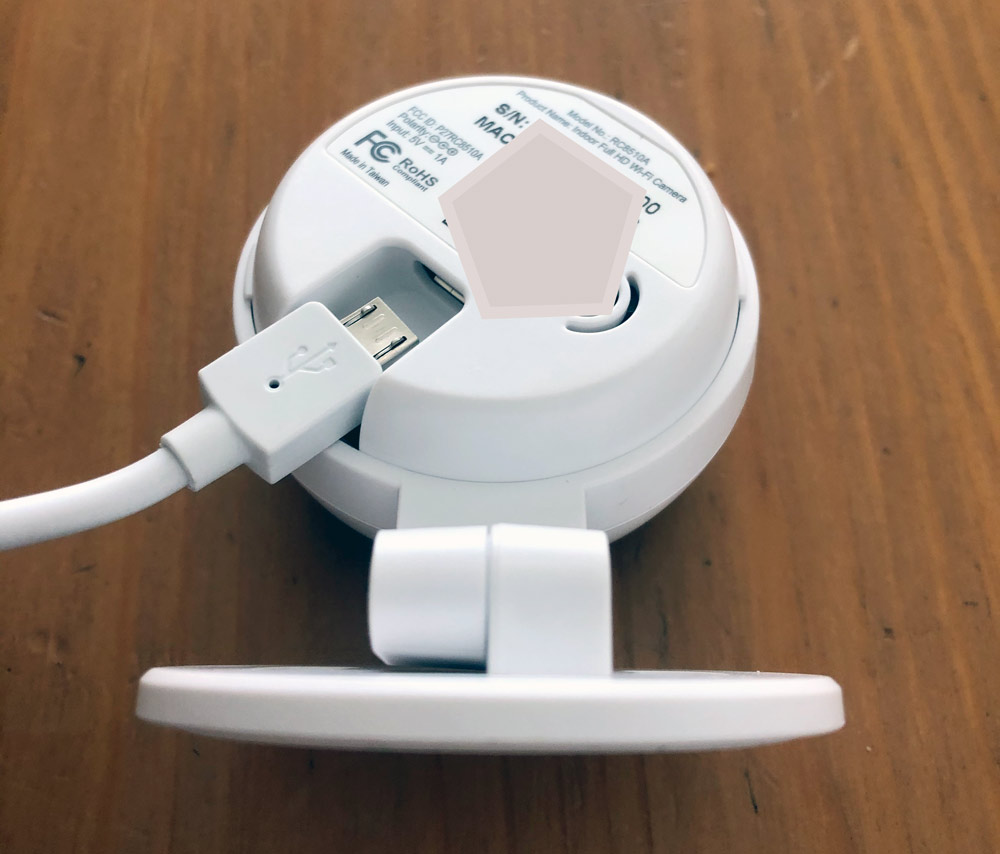
Connect the included cable to the wall adapter and a wall outlet near your install location. On the back of the camera, the USB-Micro port feels very cramped and the foot doesn’t completely bend out of the way.
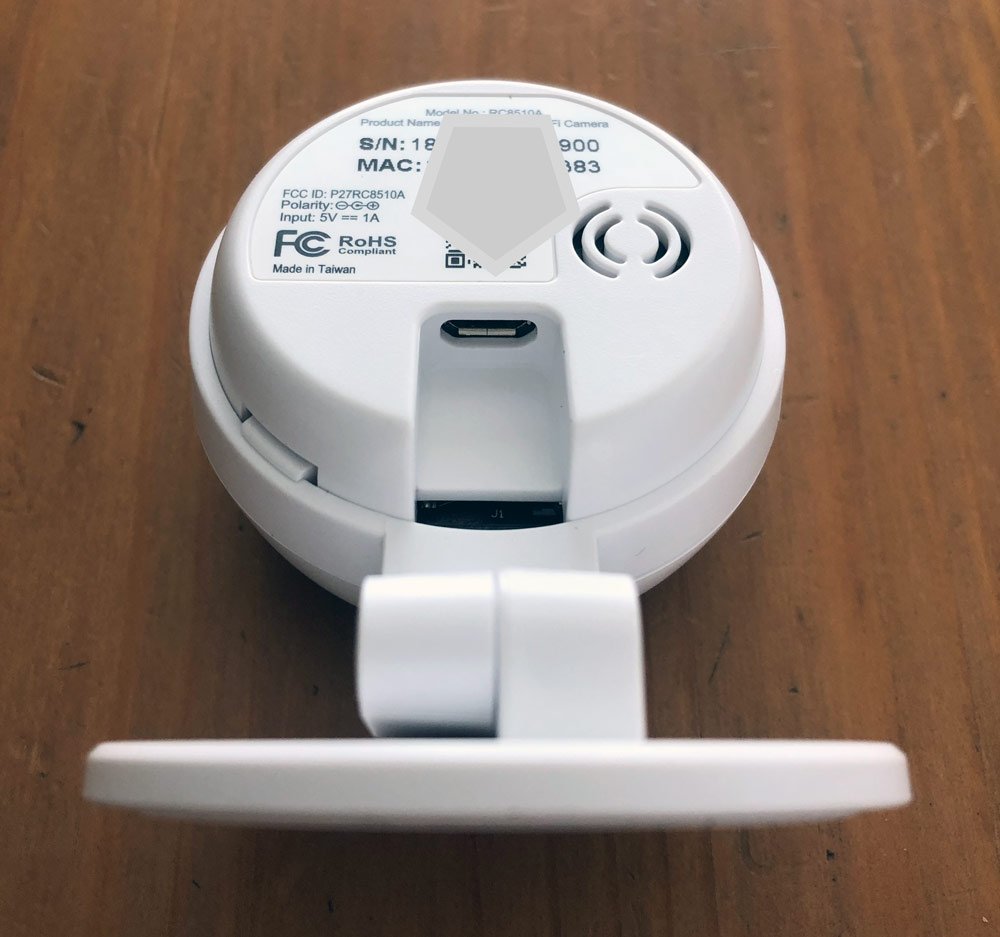
Fear not though, the camera rotates in the holder so you can spin it to get a better angle. Very helpful for installation and even more so for opening up additional mounting opportunities like mounting upside down if necessary.
Now you’ll want to open the App and go through all the steps. I’d recommend doing this near the area where you’ll mount the camera, but don’t worry about installation yet as you’ll want to see what the camera sees and may choose to change location based on that. Follow those previous steps to select the Indoor Camera for setup.
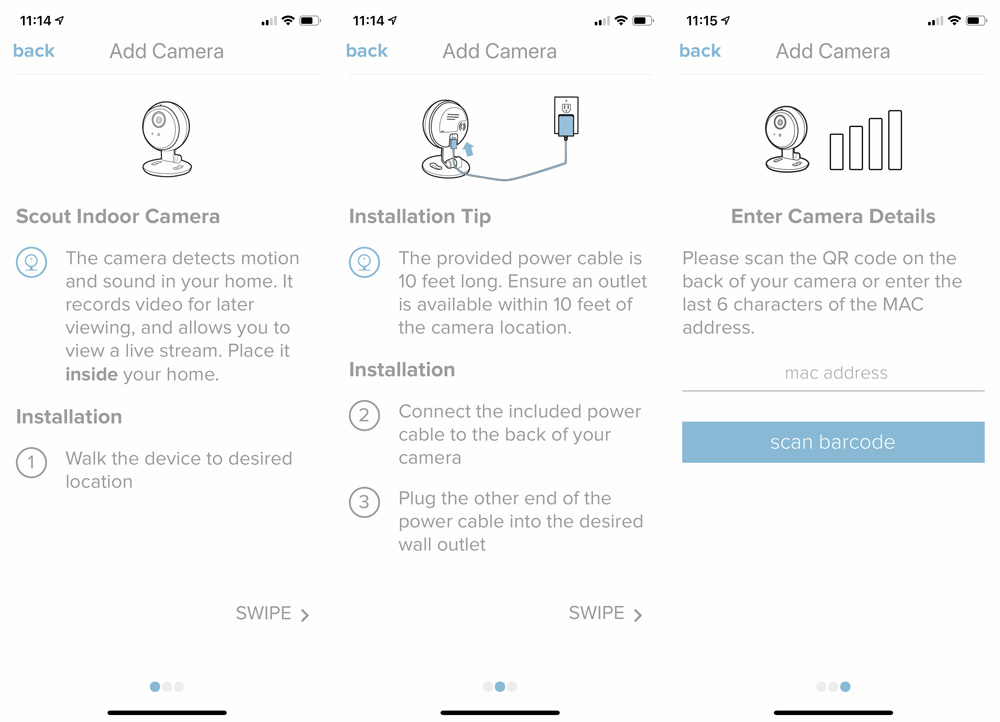
You can scan the QR code or manually enter the last 6 characters of the MAC address. Scanning worked just fine for me.
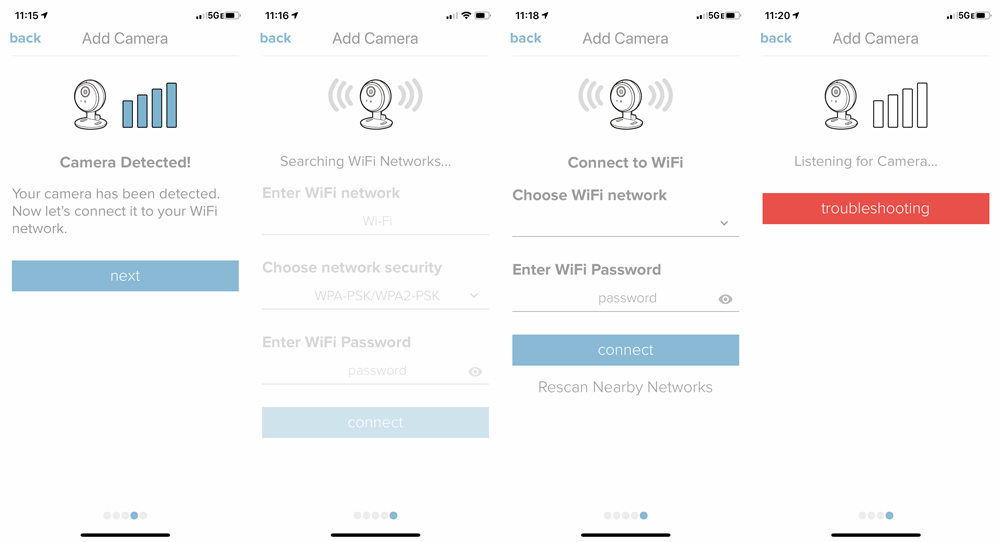
It should find your camera and move you along to choosing your wifi and entering your password. I did have an issue where the app kept failing to connect my camera to my network. I’m not sure, but I believe that my phone was disconnecting from the camera’s wifi too early and returning to my home network automatically. I told my phone to forget my home network, and then tried again and it worked right away. I was then able to re-join my home network with my phone with the password and all was right with the world again. Again this could be my beta iOS acting up.
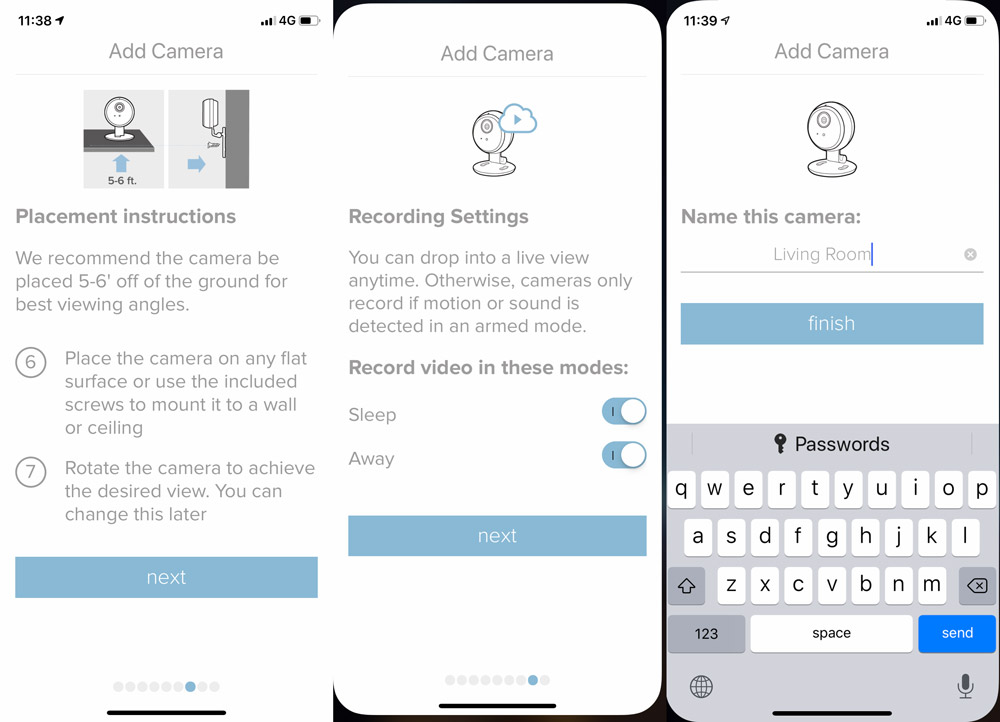
Now you’ll want to place the camera, select recording settings and name your camera.
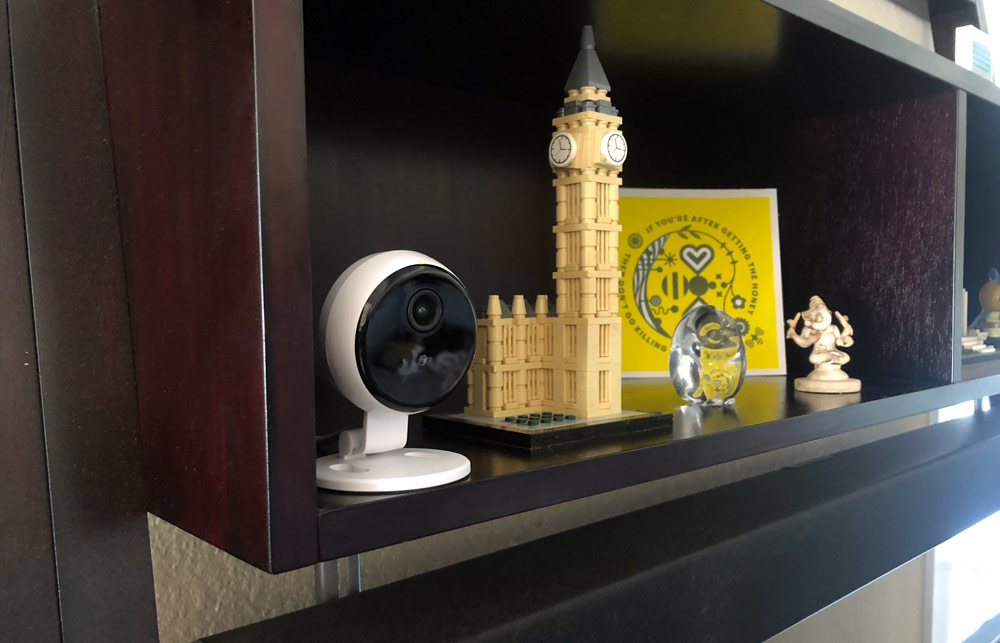
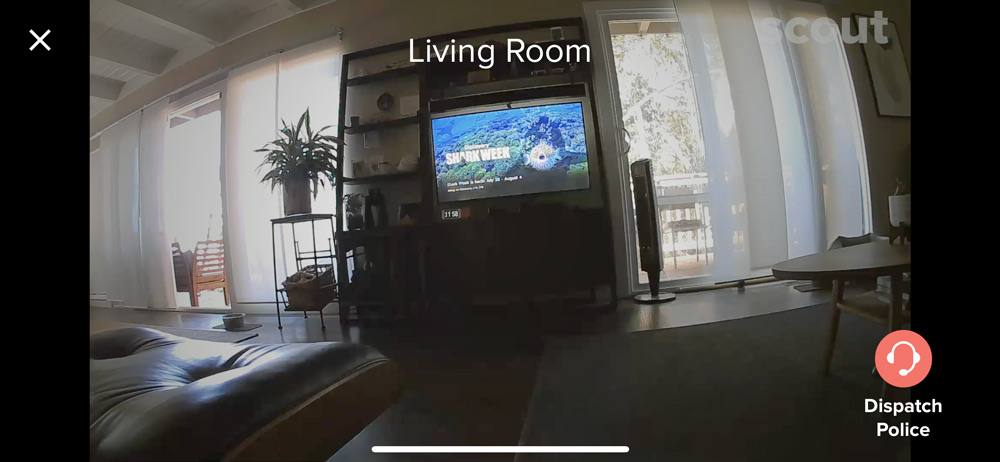
We’ve got an open floor plan in our house and some of the typical mounting areas (high corners) result in sections of the room that feel too far away. I found it helpful to take a picture with my phone from each location to rule out some options before even getting to the camera. In the end we found a good spot in the furniture above the TV. There’s enough knick knacks that it doesn’t scream camera.

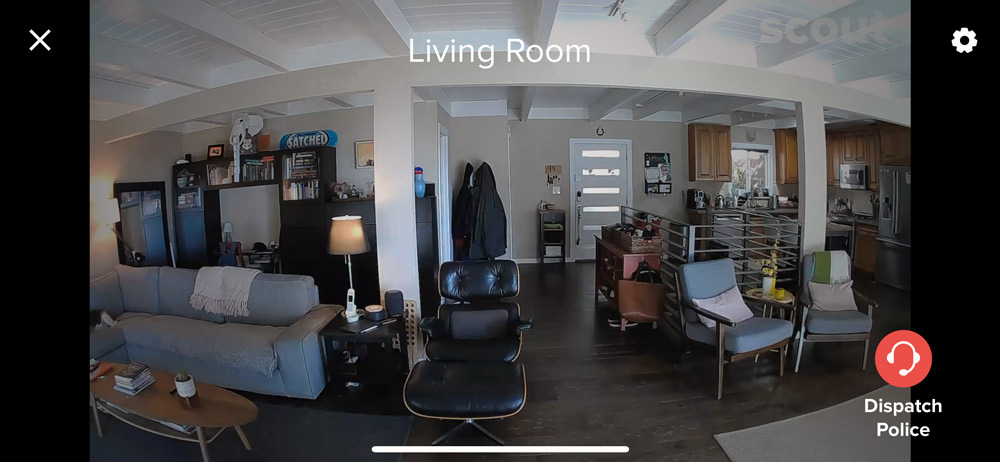
This location provides a majority view of the room as well as a clear shot of the front door which is likely to be the point of any unauthorized entry. Here’s a live screen capture from the App.
Performance
Let me start with this. I purchased Scout’s security system over three years ago shortly after we purchased our home. We wanted an easy to use system that didn’t require paying for installation or require a monthly monitoring plan. At the time there were only a couple of options and it was actually the promise of Scout’s camera at that time that sold me on the system. I went ahead and sprang for it even though that camera didn’t end up materializing until this Indoor Camera was announced this year.
What I want to get to is that the system has been great. It installed easily and outside some early generation battery drain issues (which have been solved), it worked exactly the way we hoped it would. The motion sensors didn’t trip with our small dog, although we deactivated those after getting two much larger puppies (45 and 70lbs). The Access sensors reliably detect if windows or sliding doors are open or closed, and the front entry panel worked really well when we all carried keys.
As we upgraded to a smart door lock, and keyless lives in general, we moved from key fobs to one of the RFID stickers that we have on a unique item in the entry area for us to use. Just unlock, enter, grab that item and swipe on the door panel to disarm. Simple. Repeat in reverse to arm the system.
On to the camera. The first thing I did once set up was use it to troubleshoot my DirecTV dish placement. We just had the aging roof replaced and the dish had not been reinstalled. I set the camera up on a stool pointed at the TV, zoomed in much further than this shot below and then got up on my flat roof.
Using my iPad Pro and the Scout App with the volume turned up I watched and listened for the TV to start getting reception as I maneuvered the dish into a good position. It actually worked pretty well once I got the elevation and azimuth for my zip code. Yay!
As for camera performance, it always a bit tricky to review products that are there for ‘in-case-of’ reasons. Security systems can be that way if you don’t use them daily. Right now it’s the middle of summer and my kids are usually home so the system doesn’t get activated. Over the last week however they’ve been out of state, visiting grandmothers.
I’ve been able to open the App during the day to check on the dogs. A quick click on the thumbnail I can look and see that yep, there they are on the sofa where they like to spend their days.

From the main screen in the App, the Home tab shows you the active camera(s) and lets you change the alarm mode. The 2nd tab shows recent activity which details out doors and windows opening/closing as well as new device installations.
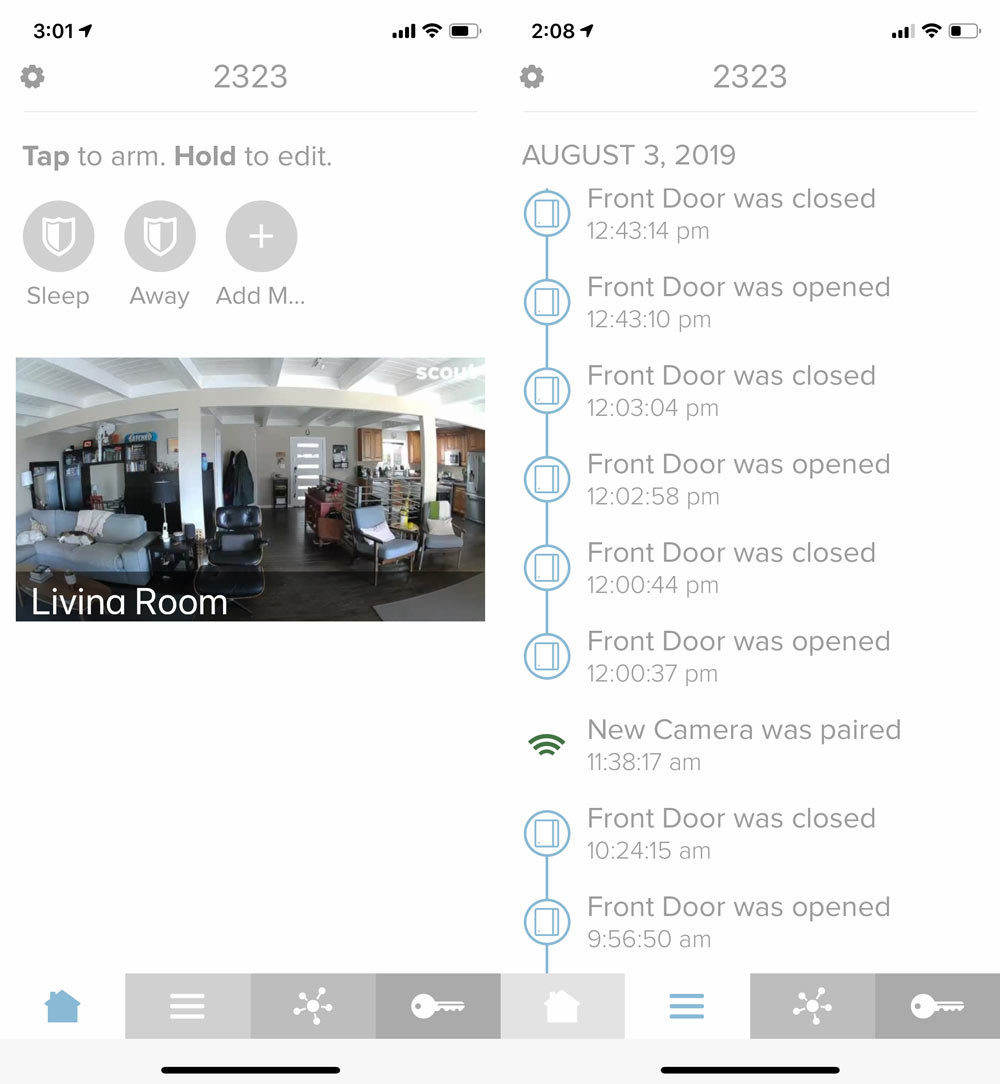
I didn’t get a chance to actually test the alarm getting tripped and recording video. A little cautious when it comes to inadvertently dispatching police and having to deal with any false alarms.
So it’s not all rosy. I did find that the thumbnail above doesn’t auto-update until you click into it, so it’s not always a ‘live’ view there. Good thing to keep in mind.
If you log into the website, the Indoor Camera does not show as being part of the system. Not sure what’s going on there, but my guess would be the majority of users live in the iPhone App.
I also found that the night time view is overstated. Here’s a shot of the room at 10pm with the lights out.
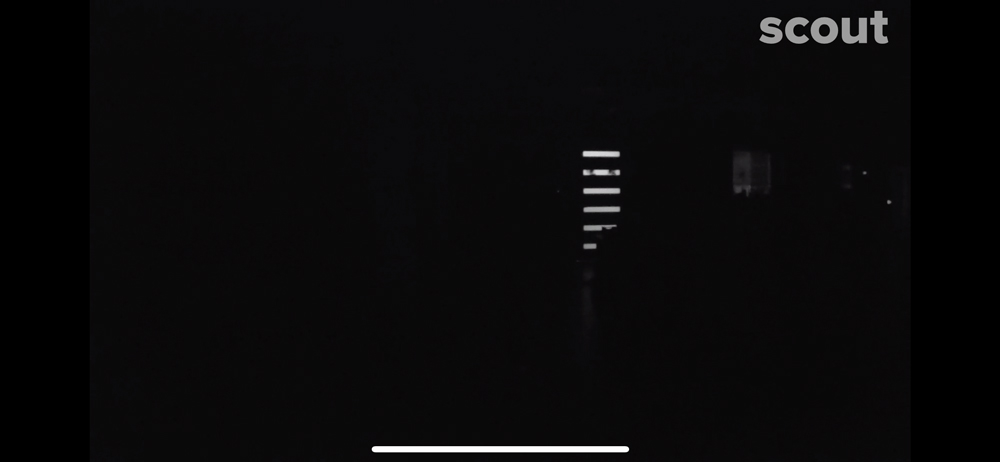
Tried lightening it up in Photoshop, but to no avail. This is the one area where Scout’s Indoor Camera seems to falls short. Google’s Nest Cameras have a much better implementation of this. Funnily enough, you may have caught that Nest Cam was listed as compatible in devices you can add. As you may be aware, ‘Works with Nest’ is undergoing some changes, and the Scout App would not let me connect. Hopefully this is something they’ll sort out soon.
Let’s conclude.
What I like
- Small size with multiple mounting positions and a long cord
- Clear video with a good wide view during the day
- Good live view with the ability to pan and zoom within the field of view
What I’d change
- Night time visibility needs work. Couldn’t see much at all.
- Would like to see a “Midnight” or dark color option as well
- Camera doesn’t seem to be supported by their website log in, only their app
Final thoughts
I’ve been happy with the setup and performance of the Scout Alarm System for the 3 years we’ve been using it. The camera is a great addition and adds a much needed component they were missing. Unfortunately, the performance of the night vision isn’t good enough to recommend the camera as the right solution. Hopefully, this is something they can address with a firmware update as everything else is pretty thought through.
Price: $99
Where to buy: Scout Alarm and Amazon
Source: The sample of this product was provided by Scout Alarm.
Filed in categories: Reviews
Tagged: security camera
Scout Indoor Camera review originally appeared on The Gadgeteer on August 15, 2019 at 9:00 am.
Note: If you are subscribed to this feed through FeedBurner, please switch to our native feed URL http://the-gadgeteer.com/feed/ in order to ensure continuous delivery.