Mpow Bluetooth Selfie Stick review

“Selfie Sticks” were all the rage a few years back. And although the craze has dwindled a bit, they are still in use and can definitely still be useful, especially in certain situations. Our family had tried a selfie stick a few years back, but we were very unimpressed with it—it had a cable that connected to the phone to control the phone’s shutter, which was a bit cumbersome, and its quality was low for the cost. When Julie provided the chance to try out the MPow Bluetooth Selfie Stick, its Bluetooth connectivity and some of its other features looked appealing. Let’s check it out! Gadget on!

Options

The Mpow Bluetooth Selfie Stick is available in the following colors.  Note that the pricing on Amazon fluctuates a bit, so the prices listed below are as of the writing of this review:

  • Rose Pink (reviewed here) – $22.49
  • Gold – $21.94

Specs

Below are listed the technical specs of the MPow Bluetooth Selfie Stick:

  • Built-in Bluetooth remote shutter control
  • 270-degree pivoting adjustable head
  • 360-degree fill light with 3 levels
  • Mirror
  • 1500 mAh battery for 72 hours of fill light time, 30 hours of Bluetooth time or 3 years standby with full charging time of 2.5 hours
  • Weight 181 grams
  • Telescoping length is 7.3 inches at shortest position and 34.3 inches at longest position
  • Holder accommodates phones 1.8-3.3 inches wide 

Packaging
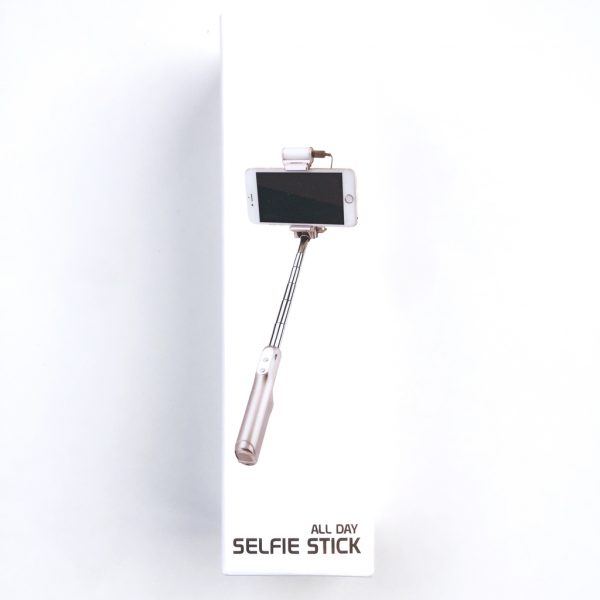
The MPow Bluetooth Selfie Stick arrived in some fairly standard packaging, which consisted of a white cardboard box with a few photographs showing the product.  Inside, the Selfie Stick was inside its storage pouch, which was enclosed in a bubble-wrap bag for protection.


Contents

  • Mpow Bluetooth Selfie Stick
  • Drawstring carrying bag
  • USB to micro USB charging cable
  • Lanyard
  • Instruction sheet

Features & Functions

Let’s dive in, starting with the included drawstring pouch, which the Selfie Stick had been placed in for shipping.  The pouch is made of a quality mate al, and feels like it may be fairly water-resistant.  The pouch will accommodate the Selfie Stick itself, with room to spare for the USB charging cable.

After removing the Selfie Stick from its pouch, the first thing I notice about it was that it certainly appeared to be feature-rich.  In fact, I was a bit intimidated by it at first.  How the heck was I going to figure out how to use this thing?  The reality is that it is a fairly easy-to-use device, which you will see below.

The Selfie Stick fit into my hand quite nicely, and overall it is not excessively large to handle and operate.

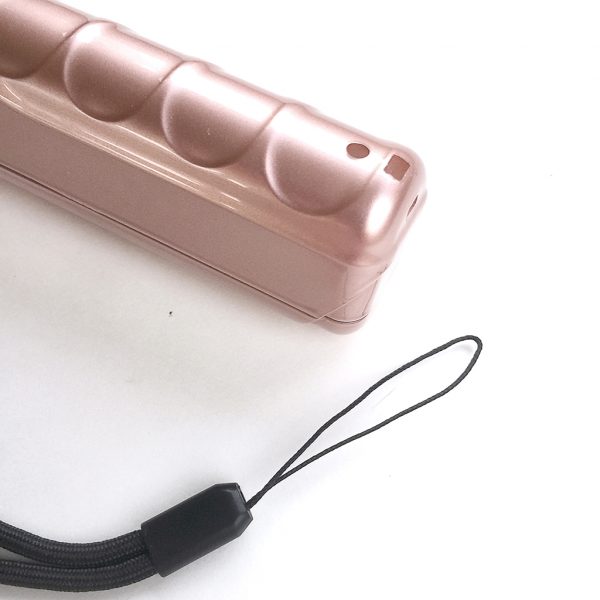
Additionally, the handgrip has some minor contouring, as see above, to fit your fingers and help prevent you from dropping it during use.The Selife Stick has a polycarbonate plastic body with an appealing metallic appearance.  Despite its impressive feature set, it’s fairly compact.  It folds down to just 7.3 inches in overall length.  It’s a bit large to fit in your pants or shorts pocket (unless you are wearing ones with seriously deep cargo pockets), but will fairly easily fit into most purses or just about any backpack.In the photo above, I’ve started to “unfold” the Selfie Stick into operating position by pivoting the head away from the main body.

The telescoping stainless steel rod, shown above, extends out to over 34 inches, so you can get your whole family (and maybe event some photo-bombers) in the photo.

Another handy feature is a “wing-nut” that can be tightened down to fix the Selfie Stick’s head in place. However, I found that I didn’t have to use this much, since the head would actually stay in place quite well on its own without using this.

This Selfie Stick also includes a small mirror on the “back” side of the clamp mechanism.  This could be used to check your hair or your makeup, or the angle of your shot, before shooting the perfect selfie.

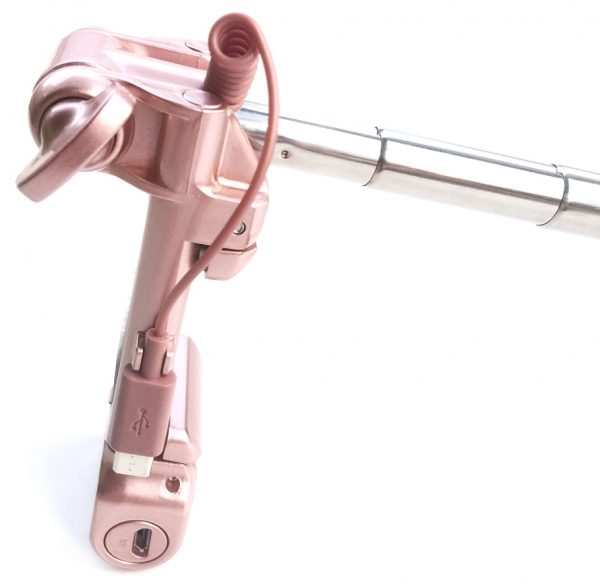
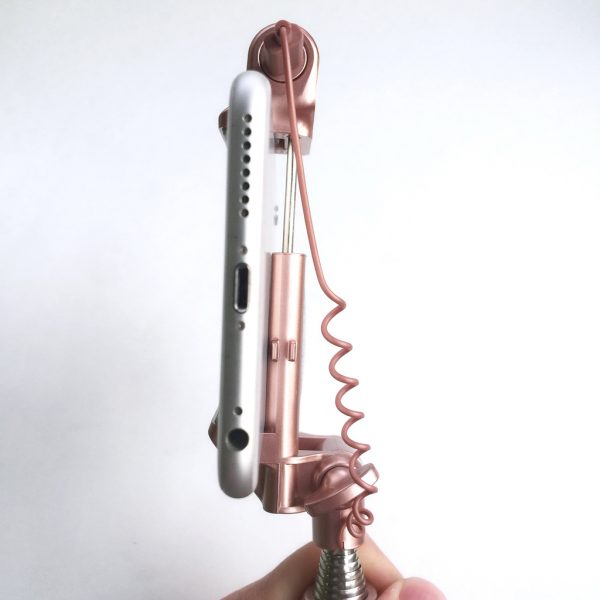
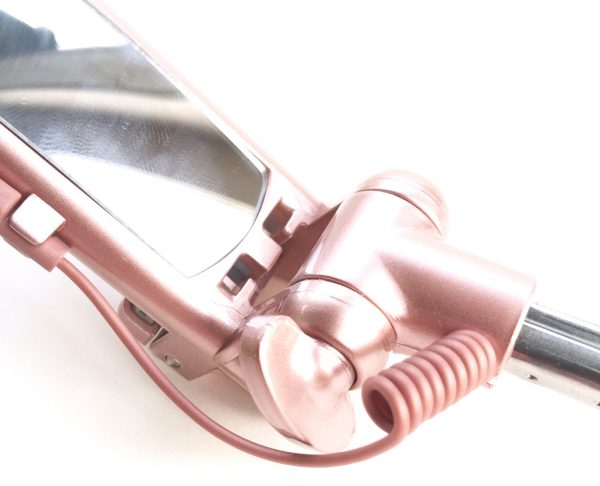
The Selfie Stick has a small, coiled Micro-USB cable attached to its side.  This cable is NOT for charging the device.  Instead, it provides power to the fill light.  In order for the fill light to work, the micro-USB cable must be plugged into the micro-USB port on the side of the bracket that holds the light.  I found this a bit strange; I’m not sure why the power to the Fill Light couldn’t have been directly incorporated into the body of the Selfie Stick.  It means an extra setup step.  Still, it’s not all that difficult to do.
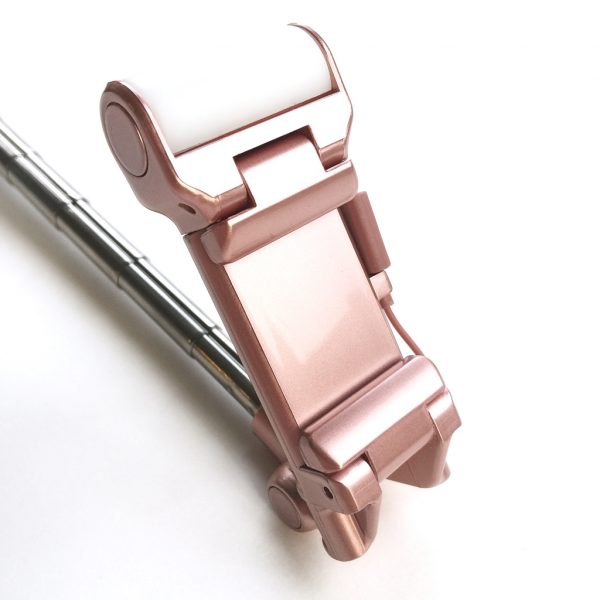
Another interesting feature of the Mpow Bluetooth Selfie Stick is the fill light, which sits atop the clamp mechanism, as seen in the image above.  The Fill Light has a build-in diffuser, to soften the light’s intensity and reduce the “harshness” or glare from it.  The light level can be fine-tuned by rotating its barrel shape from fully open, as seen above…

…to partially closed, as seen above…

…to fully closed, as seen seen above.  The fill light can spin 360 degrees for the ultimate in fine-tuning.
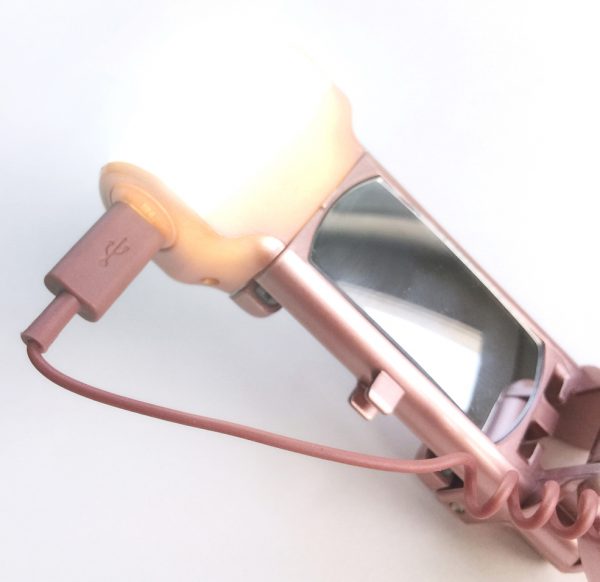
The fill light has three levels that can be used, the brightest of which is shown illuminated above.

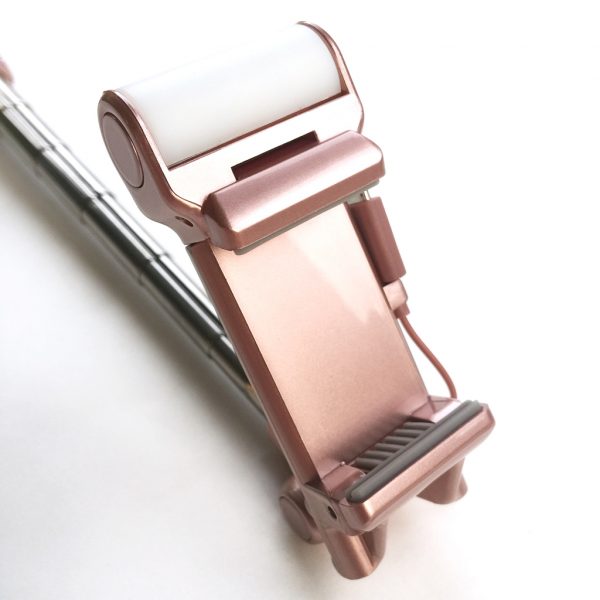
Above you can see the clamping mechanism that holds your phone. The clamp consists of two pivoting jaws with soft silicone grips that hold your phone securely.  The jaws can be folded down, as shown above, when not in use.

When in use, the clamp’s jaws are folded outward, as shown above.  The gray silicone grips on the insides of the clamps are visible in the photo above as well.

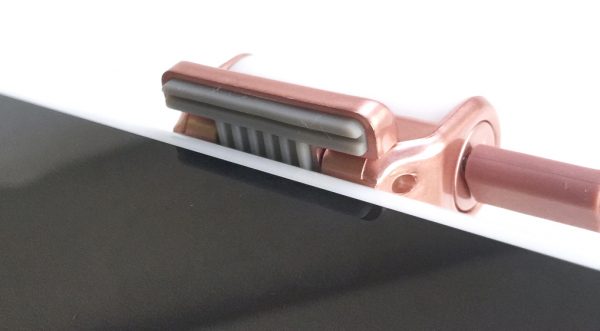
Above, a closeup of the top clamp jaw’s gray silicone grip.

An iPhone 6 Plus will fit into the clamp mechanism, but it is a tight fit, and I had to pry the jaws apart a bit to get the iPhone to fit, but not excessively so.  However, if this iPhone 6 Plus has been in a case, it would have been questionable whether it would have fit.  Phones smaller than an iPhone 6 Plus should fit with no issues (my daughter used her iPhone 6 with it and the fit was perfect, even with the iPhone 6 in a case).
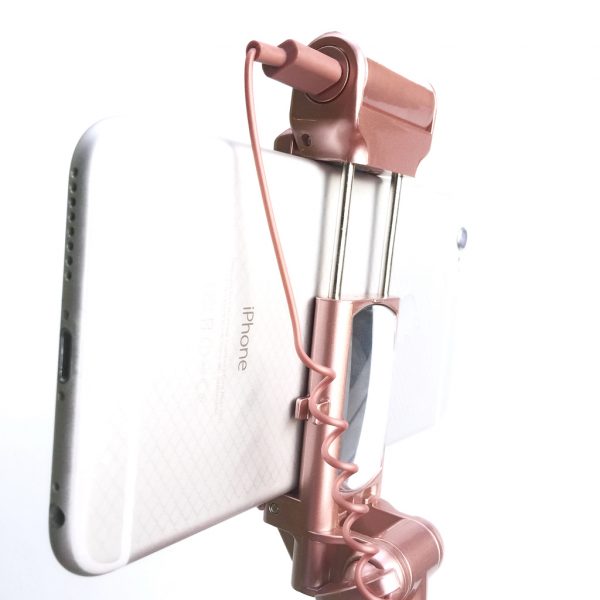
Above you can see how far apart the clamp mechanism’s jaws will stretch to accommodate a phone.  The clamp is spring-loaded, so it will firmly grip your phone.  It can accommodate phones from 1.8 to 3.3 inches in width.
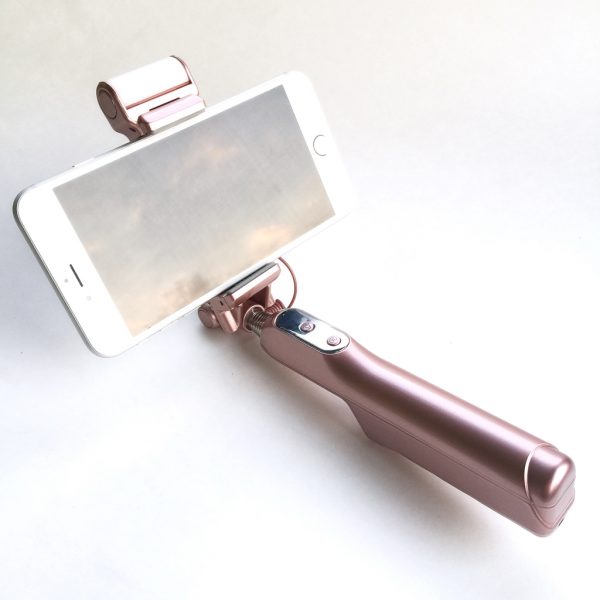
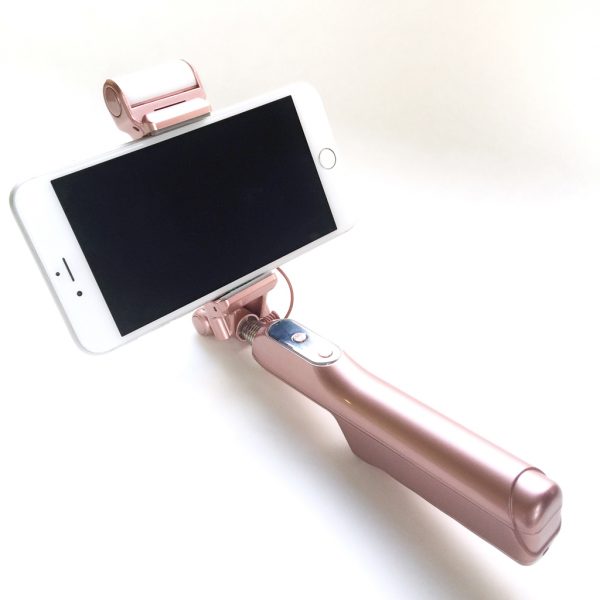
Above, the Selfie Stick with my wife’s iPhone 6 Plus loaded into its clamp mechanism.  The spring-loaded clamp with its silicone grips helps provide a stable platform for your phone, and I didn’t worry about it accidentally falling out on its own.

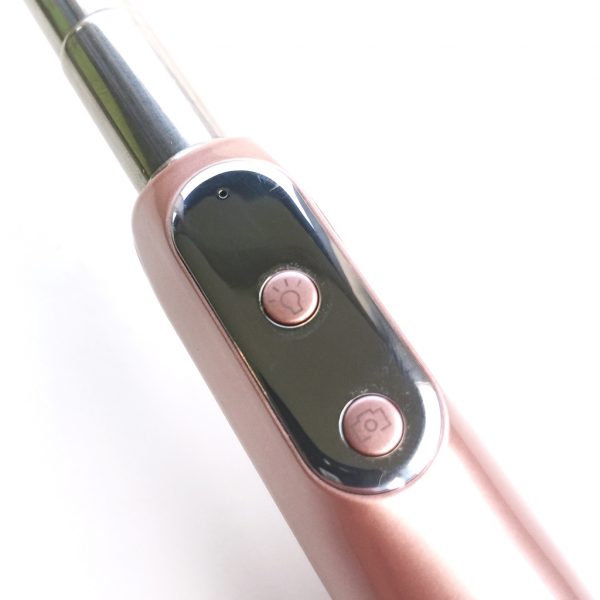
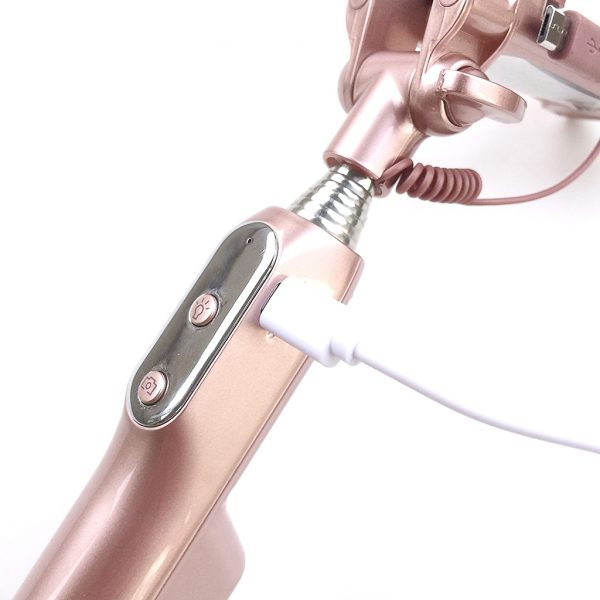
The Selfie Stick has two buttons on the handle: Light (top) and Camera (bottom).  To pair the Selfie Stick with your phone, press and hold the Camera button for 3 seconds.

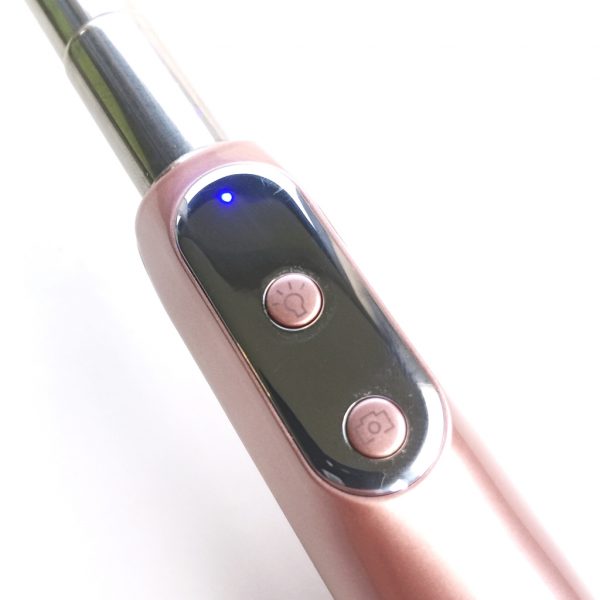
Once in Pairing Mode, a tiny blue LED light begins to blink off and on.

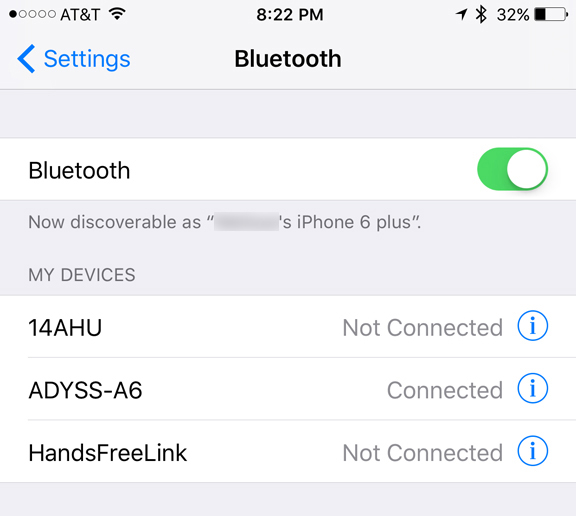
Next, activate Bluetooth on your phone and search for devices (Full Disclosure: I used my wife’s iPhone 6 Plus for this).  In the device list, you should see “ADYSS-A6.”  Select this and Boom!  You’re done.  Once fully paired, the blue LED on the handle will stop blinking and you are cleared to start shooting.  Pics, that is. To turn off the Selfie Stick, press and hold the Camera button again for 3 seconds.
Above, a shot of me pushing the Light button and as you can see, the Fill Light is illuminated atop the phone.

An optional accessory included with the Selfie Stick was a wrist lanyard, as shown above.  In theory, this should be easy to install, but in practice, I found it very difficult—I couldn’t get that thin cord down into the hole and out the other side!  I ended up not using the lanyard, but it would probably be a good idea to use it, especially if you trying to take pics in a crowded area, and so forth.

The Mpow Bluetooth Selfie Stick runs on battery power, but not standard AA or AAA cells, it has its own internal, rechargable battery that can be charged using the included USB to micro USB cable, shown above plugged into the side of the Selfie Stick.  The battery powers the Bluetooth connection as well as the Fill Light.

To use the Selfie stick, press the Camera button once to activate the shutter on your phone’s camera.  It’s just that easy.  Above, a pic of me taking a selfie.  I know, mind-blowing, right?
Above, a selfie I took of…well…myself…with the Mpow Bluetooth Selfie Stick.  Of course, using the iPhone’s front-facing camera, the quality of the pic will be a bit lower than if it had been taking with the rear-facing camera, but the Selfie Stick allows easy orientation and quick pic snapping.  Above, another selfie at a bit further range, where I’ve extended the telescoping stick out a bit further.Lastly, I wanted to check out the Fill Light.  Above and below, I took a couple of selfies inside my house, where the lighting was not as good as the outdoor selfies I took above.  The pic above was taken without the Fill Light.  The pic above was taken with the Fill Light at full illumination. It does look a bit brighter, and its built-in diffuser prevented glare, but admittedly indoor photos in lower light with the iPhone’s front-facing camera do look a bit rough.

We took the Mpow Bluetooth Selfie Stick on our most recent family vacation to the East Coast this summer.  It came in handy when we wanted to get some family pics in front of several landmarks and other touristy sites, including the Bunker Hill Monument in Boston (above).  I delegated control of the Selfie Stick to my teenage daughter, who has an iPhone 6, and it worked very well; however, it did drop the Bluetooth connection once unexpectedly, it for some reason it was difficult to get it reconnected, but that was a rare occurrence.  (The above pic was taken from the Statue of Liberty Island; New Jersey can be seen on the left and lower Manhattan, NYC on the right.  Please ignore the dude in the blue shirt—he wouldn’t get out of way.)

Conclusion

I like the Mpow Bluetooth Selfie Stick.  It has a lot of nice features, and it was easy to use.  For starters, it was very easy to Bluetooth pair with my Phone 6 Plus, and easy to use once paired.  The adjustable Fill Light with built-in diffuser feature is handy, but probably most useful for indoor or nighttime outdoor selfies.  Still, it’s a nice feature to have handy.  The 34-inch telescoping shaft extends quite far, which helped with getting lots of peeps into the pics for group selfies.  Additionally, it can be charged with a micro USB cable, which means you don’t have to lug batteries around (but you do have to remember to charge it). Overall, I think the MPow Bluetooth Selfie Stick is a great value for its price.

Source: The sample for this review was provided by Mpow. For more info or to order, visit Amazon.


Product Information

Price: $21.94 (Gold), $22.49 (Rose Pink)
Manufacturer: Mpow
Retailer: Amazon
Requirements:
  • Fits phones from 1.8 to 3.3 inches wide.
  • Bluetooth connection needed.
Pros:
  • + Easy Bluetooth pairing and use
  • + Compacts down to 7.3 inches for easy storage
  • + Lots of features for the price
  • + USB charing
Cons:
  • – None

Filed in categories: Reviews

Tagged:

Mpow Bluetooth Selfie Stick review originally appeared on The Gadgeteer on August 16, 2017 at 9:00 am.

Note: If you are subscribed to this feed through FeedBurner, please switch to our native feed URL http://the-gadgeteer.com/feed/ in order to ensure continuous delivery.

DxO ONE camera attachment for iPhone and iPad review

I have been a digital photographer for over 15 years now. I started with the equivalent of an Instamatic, and moved up to a prosumer, then full DSLR cameras. I have bought and sold lenses, filters, and other equipment. While I don’t pretend to know how to adjust f-stops and ISO for challenging conditions, I have made some nice photos, been paid for some and awarded prizes for others. I’m rarely ashamed or embarrassed by my work. I’ve also bought into the iOS ecosystem hook, line, and sinker. So it was only a matter of time before I subsumed to the Siren call of the DxO ONE iOS camera. I pre-ordered this about three years ago, and my Lovely Bride kept asking “What is this charge on our credit card?” to which I would reply “It’s a new camera. It’ll be here any day now.” She’s sweet to believe in me. And she’s seen much more funneled into my photography habit. And it only took nine months to ship!

Note: Photos may be tapped or clicked for a larger image.

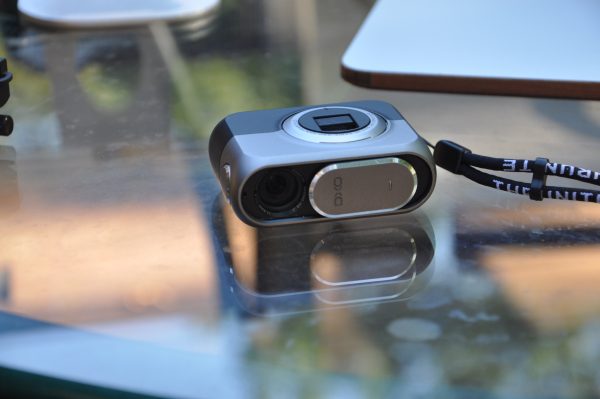
DxO has a long history in Photographic software. Their measurement software for photo accuracy is an industry standard for many. The DxO ONE, however, is the first piece of hardware they have produced. It doesn’t look much like a standard camera. For one, it doesn’t have a viewfinder of any kind. Second, there is no way to see what your settings are. The first version, before the first firmware update, could only shoot from within an app on a connected iOS device.

A physical release pops out a lightning connector, and attaching it to your iPad, iPod touch or iPhone launches the software that controls the camera and turns your device’s screen into a viewfinder.

While that was cool enough (and the DxO ONE’s 25-megapixel sensor easily bested the resolution of the 8 megapixel iPhone 5s I was using at the time), the first firmware update added the ability of the unit to take pictures independently of the iPhone using the black-and-white screen as a rough viewfinder. (Yes, black-and-white. Zero shades of gray. Think original Macintosh. See picture below – loads of dithering. Those are the boards of my deck, through a glass table.)

Crazy as it sounds, this is a James Bond/Man from U.N.C.L.E-type spy camera. I can pull something out of a cigarette pack that doesn’t look like a camera and grab a really, really good photo in dim light. In full color. My 10-year-old self would be screaming for joy about now. I regularly use it for concerts and candid shots, but just this weekend, I discovered what the newest firmware update added: remote control. As in, I can turn this camera on, set it up, and walk away, and snap photos from it at will from anywhere on the same wifi network. (Pictures below are of me snapping hummingbird photos. The first pic is focused on my phone, the second photo is focused on the DxO ONE on the tripod. Since the devices are both on wifi, I could have been anywhere on my network monitoring the camera.)

And the camera is so quiet and unassuming, it’s more stealthy than some nanny-cams. And, as I was researching further, I found it can also be controlled from an Apple Watch! Sure, you don’t get the nice preview with the watch like you do with the iPhone, but you can hit the shutter release without touching it, or looking at your camera screen.

Another advantage of using the Lightning Port is that you can easily pull the camera off and turn it 180° to make a selfie camera of amazing quality. (It doesn’t help the subject matter, sadly, but you get more details to edit out.)

Sometimes, you find a case that doesn’t give good access to the flat area around your Lightning port, but there are many on the market that do. I recently spent some credit card points on a tripod mount and lens mounting adapters, in hopes of finding a decent telephoto lens to fit.

Since this is a camera review, I guess I should have some comparison shots from a known camera. I shot three scenes on full auto indoors with no flash, outdoors with full sun, and indoors in a dimly lit area with flash. The ones on the left were taken with the onboard iPhone 6s Plus camera. The ones on the right were taken with the DxO ONE attached to the same phone. (The DxO is attached to the lightning port, so it’s on the opposite end from the built-in phone. This is what accounts for the slight shift in point-of-view.) The only changes to the basic auto setting I made was to force flash to fire in the indoor flash shot. There are no lights turned on in the room, or in my mini-studio, only the camera flash. The images are full-frame with no cropping or enhancement added.


In the first shot, it’s easy to see the increase in light the ONE’s sensor makes. There is some fuzziness, but that’s to be expected with handheld shots. The shutter button on top of the ONE makes you have to pay much more attention to camera shake since it’s a physical button, rather than the virtual button on the iPhone app.

In the outdoor shot, things look equal in the well-lit areas, but the details under the shade, like the bark on the tree left of center, fall apart on the iPhone. If you’re wanting to get all CSI on the background, like my neighbor’s garage or porch area, the DxO has way more data to play with.

In the final flash set, the body of the camera is about the same, with a little fuzziness on both shots. The texture of the strap in the DxO shot is far more clear when you blow it up, however. Given the distance from the light source, the lighting is better, too.

So, is the difference worth the price? Hard to say. Three years ago and two generations of camera phones, it was to me. On our last vacation, most of my travel photos were taken with just the iPhone 6s Plus. While I always wish for more glass for zoomed shots, I was very happy with the outcome. Adding a clip-on polarizing filter (which is not easily doable with the DxO) made a lot of difference in sunny outside shots.

Computational photography is making the size of the sensor obsolete much faster than the “camera guys” are improving the optics of camera hardware. Given Cupertino’s income from sales, they have far more resources to spend in this area than companies like Canon and Nikon, let alone poor little DxO. But, still, it’s a neat gadget, and I don’t regret purchasing it. Meanwhile, the price is down $100 from what I paid, but with the software updates, I’m still up to date. I love living in the future.

Source: The item for this review was purchased with personal funds. Please visit DxO for more info and Amazon to order.


Product Information

Price: $469.99 (retail is $499)
Manufacturer: DxO, Inc.
Retailer: Amazon
Requirements:
  • iOS device
Pros:
  • Small and light.
  • Tight build quality.
  • Software under active development.
  • Easy to connect to iOS device.
Cons:
  • It's so small, attaching lenses is difficult, and finding quality lenses is difficult.
  • Some cases don't let it fit device fully.

Filed in categories: Reviews

Tagged: , ,

DxO ONE camera attachment for iPhone and iPad review originally appeared on The Gadgeteer on August 14, 2017 at 8:30 am.

Note: If you are subscribed to this feed through FeedBurner, please switch to our native feed URL http://the-gadgeteer.com/feed/ in order to ensure continuous delivery.

This crystal ball won’t let you see the future but it can help you take amazing photos

Hey, all of you amateur and not so amateur photographers, iPhoneographers, and photobugs out there. I have something very cool to show you. It’s the Lensball and it might just take your everyday photos to the next level.

The Lensball is a photo accessory that doesn’t require a special mount for your camera or smartphone and it doesn’t require batteries. It is an actual crystal ball that is made of hard scratch resistant K9 crystal which is the same crystal that is often used to make optics like camera lenses.

Lensball makes two sizes. There’s the 80mm (3.1in) size which weighs 650 grams (1.4lb), and the smaller 60mm (2.4in) size which weighs 250 grams (.55lb).

The idea is that you shoot through the ball to capture some really interesting images.

Be sure to check the Lensball on Instagram for some examples of the types of images that you can capture while using this unique accessory.

You can buy the 80mm version of the Lensball for $34.95 and the smaller 60mm version is $24.95. Visit Lensball.com for more info. You can find similar crystal balls on Amazon that cost less, but they don’t all say that they are made of the K9 crystal and some comments mention that they arrive scratched or with flaws.

Filed in categories: News

Tagged: ,

This crystal ball won’t let you see the future but it can help you take amazing photos originally appeared on The Gadgeteer on August 5, 2017 at 11:30 am.

Note: If you are subscribed to this feed through FeedBurner, please switch to our native feed URL http://the-gadgeteer.com/feed/ in order to ensure continuous delivery.

Plotagraph iOS image animation app review

The iPhone’s camera can take amazing pictures, but if static images bore you and you want to take your photography up a notch, you need to check out Plotagraph.

What is it?

Plotagraph is an easy to use image animation app for the iPhone or iPad.

How does it work?

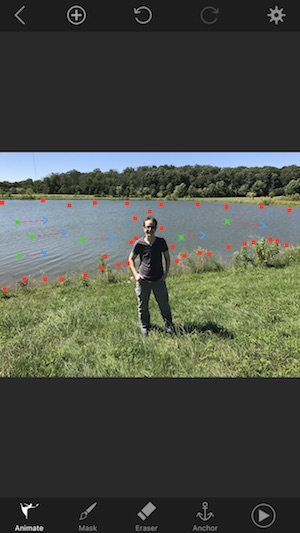
First, you take a static image that can be improved with an animated element. The image above looks fine as it is, but wouldn’t it be cool if the water showed movement? Plotagraph can’t do that with just a few clicks.

The app has a very simple interface with the tools at the bottom.

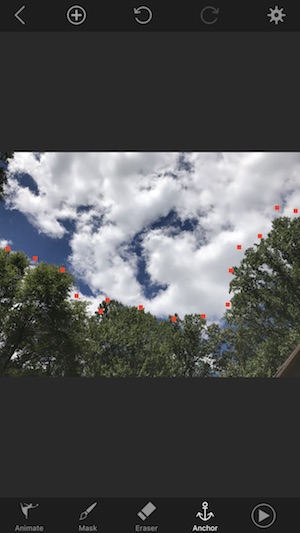
I like to anchor or mask all the parts of the image that I don’t want to animate first. This is can be done using the mask or anchor tools at the bottom of the screen. I like the anchor tool best. All you do is tap around the areas that you don’t want to move.

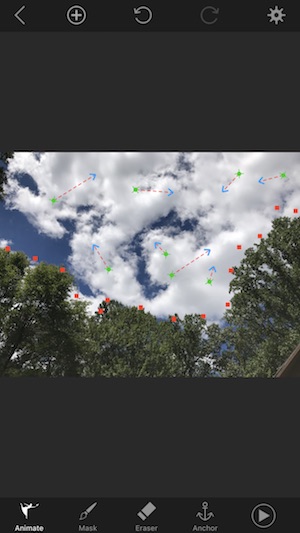
Then you use the animate tool to draw little lines in the direction that you want the image to move. That’s it! When you press the play button, you’ll see the results which are pretty freaking cool. I’ve exported this example as a 3 second MP4 video clip below.

Pretty cool right? The app will also let you crop the image and adjust the speed of the animation.

Let’s do another.

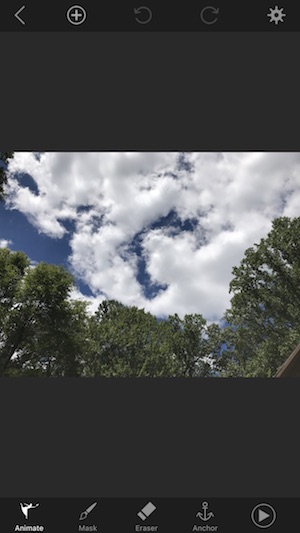
Water and cloud images are a good choice to animate.

Load the image from your existing camera roll.

Mask off or anchor the area of the image you don’t want to move.

Draw some animation lines.

And check the results. This app is a lot of fun because it’s so easy and fast to use.

Here’s another one saved as a PNG.

In the Plotagraph app, you can choose different time lengths for the clips and export them to your device’s camera roll as an MP4 video or animated PNG. You can then submit them to your favorite social media sites like Instagram or Facebook. Unfortunately, you can’t share directly to those sites from the Plotagraph app.

Watch the video below which shows the whole process.

Final thoughts

I had a lot of fun playing around with the Plotagraph app on my iPhone 7 Plus and my iPad Pro 10.5. Animate images like this remind me of Harry Potter. 😉

I found it was easier to use the app on the iPad Pro just because the screen is larger and it’s easier to do a better job masking off areas that you don’t want to animate. With the iPad Pro, you can also use the Apple Pencil to make things even easier.

If you’re wondering why I haven’t mentioned using this app with Android device, that’s because this app is not available for Android devices yet. Supposedly a version for Android is in the works but there’s no info when it will be available.

Source: The sample for this review was provided by Plotagraph Inc. Please visit their site for more info and App store to buy it.


Product Information

Price: $4.99
Manufacturer: Plotagraph
Retailer: App store
Requirements:
  • iOS device
Pros:
  • Easy to use
  • Transforms old photos into living photos
  • Can't see where there loop starts and ends
Cons:
  • Can't share directly to social media from app
  • No Android version

Filed in categories: Reviews

Tagged: , ,

Plotagraph iOS image animation app review originally appeared on The Gadgeteer on July 31, 2017 at 9:00 am.

Note: If you are subscribed to this feed through FeedBurner, please switch to our native feed URL http://the-gadgeteer.com/feed/ in order to ensure continuous delivery.
Hasselblad True Zoom Camera Moto Z Mod review

When you shop for a new smartphone, do you base your decision on how good the camera is? It’s a determining factor for me. I wouldn’t consider buying a phone that has a sub par camera because my phone is my main camera. That’s why I’ve been fascinated with camera accessories like clip on lenses that might improve my images and when Motorola and Hasselblad created the True Zoom camera Moto Mod, it perked my interest and I was happy to get the chance to try one out for a few days. Let’s take a look.

What is it?

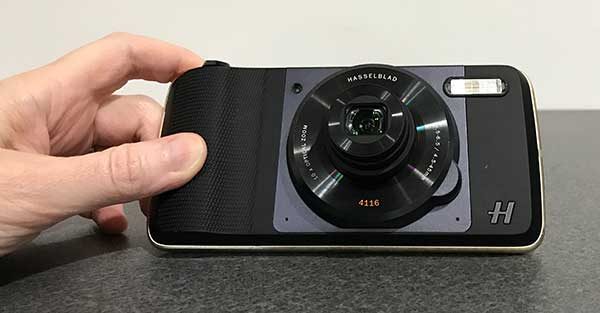
The Hasselblad True Zoom is a Moto Mod for Motorola Moto Z smartphones that turn the Moto Z into a true pocket camera with a zoom lens.

This quick review isn’t going to be super technical because I’m not a professional photographer and I don’t know all the ends and outs of lenses and camera gear. I just am a casual photo snapper who mainly uses automatic mode to snap a few images every day. But I am always interested in making those images look better with the least amount of effort.

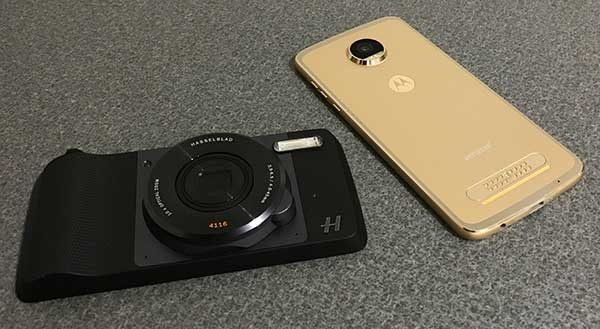
You probably already know what Moto Mods are by now, but just in case you don’t, they are magnetic attachments for Motorola Moto Z phones that offer extra functions and customizations. There are decorative covers for the back of the phone, Bluetooth speakers, projectors, gaming controllers, and more.

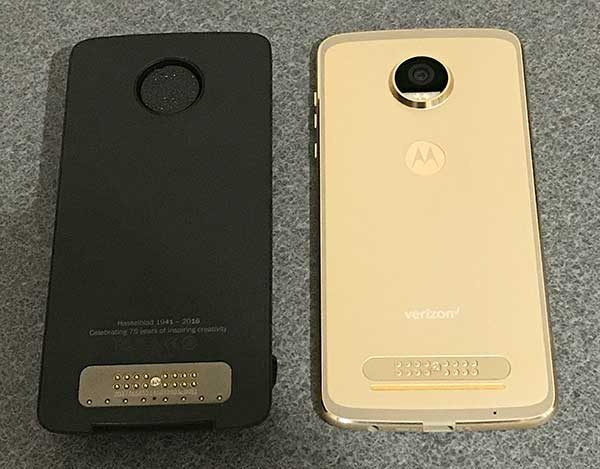
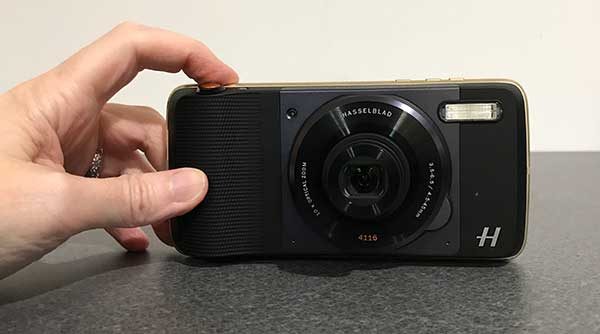
The Hasselblad True Zoom Camera Moto Z Mod shown above on the left has electrical contacts that match up with contacts on the back of a Moto Z phone to create an electrical connection. The mod is also magnetic which allows it to attach to the back of the phone without clips or latches.

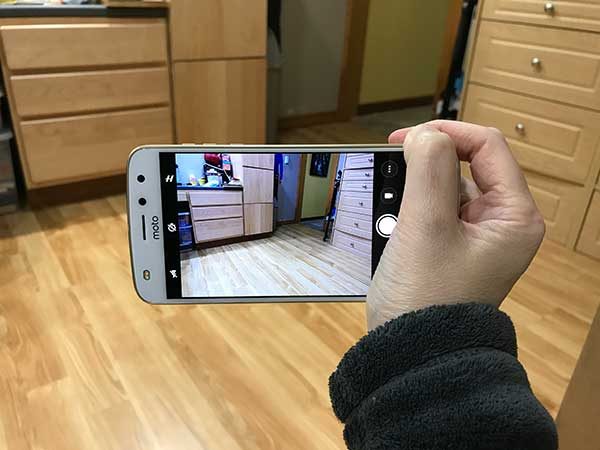
At first glance, the True Zoom looks like a point-and-shoot camera. But upon closer inspection, you will notice that it doesn’t have a viewfinder, a display or a memory card slot. That’s where the Moto Z comes in.

The True Zoom snaps securely to the back of the Moto Z to turn it into a full fledged 12MP camera with 10x optical zoom, a xenon flash, shutter button, and zooming mechanism.

What’s in the box?
Hasselblad True Zoom Moto Mod
Protective carrying case
User guide

Camera specs
Sensor type: BSI CMOS
Sensor size: 1/2.3-inch
Pixel size: 1.55 um
Aperture: f3.5-6.5
Zoom: 10x optical/4x digital
Focal length: 4.5-45 mm (25-250mm 35mm equivalent)
Macro: 5cm @1x – 1.5m @10x
Image stabilization Still: OIS Video: EIS
ISO equivalent: Auto, 100, 200, 400, 800, 1600, 3200
Dimensions: 152.3 x 72.9 x 9.0 – 15.1 mm
Weight: 145g

The True Zoom doesn’t need to be charged as it gets all the power it needs directly from the phone it’s attached to. It also doesn’t need its own software because it uses the built in camera app. So all you need to do is snap it on the back of the Moto Z and you’re ready to shoot.

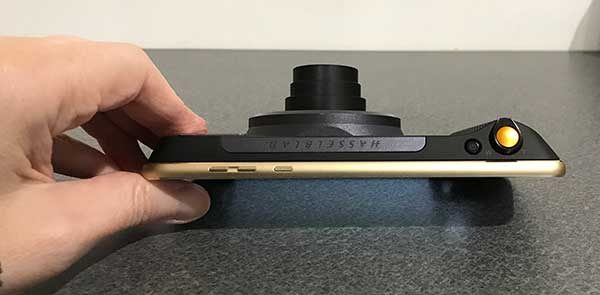
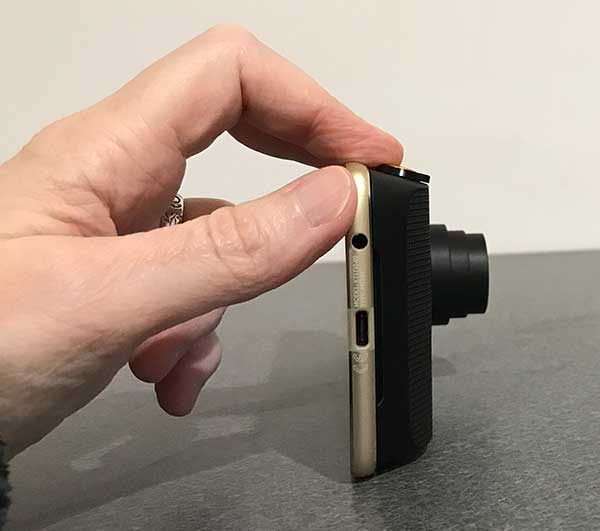
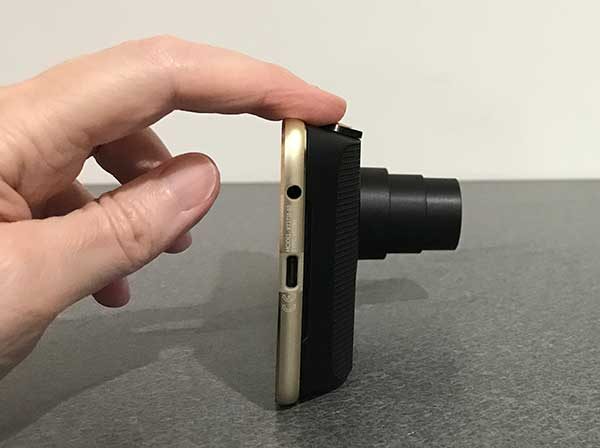
The True Zoom Moto Mod adds considerable thickness to the very thin Moto Z2 Play Android smartphone that was included with the True Zoom for my evaluation. It’s a bulky mod and as such, it’s not something that you would leave attached to your phone all the time.

The True Zoom lives up to its name because it does indeed have a built in lens that zooms from 4.5-45 mm (25-250mm 35mm equivalent).

The Hasselblad True Zoom Moto Mod has a small power button on top and a larger shutter button with a spring loaded collar around it that is used to zoom the lens in and out.

Just like true cameras, you can press the shutter half way to focus and then all the way to snap the image.

The mod also offers a nice grip that adds even more to the pocket camera feel when you’re using it.

Let’s check out some images to see if the True Zoom makes a noticeable difference shooting images compared to capturing the same images with just the Moto Z2 Play.

Example images

I tried to frame the comparison shots as closely as I could and snapped them one after the other. So I would take a picture with the Moto Z2 Play and then put the Hasselblad True Zoom Moto Mod on the back and shoot the same image in that order. Also, all shots are taken without a tripod.

All images can be clicked to see the original full size photo.


Indoor shot with bright backlight. Both were taken with no zoom applied.


Both images above were taken without any zoom applied. They are similar except that I think the True Zoom captures colors that look more natural compared to the Moto Z2 Play’s image on the left which has too much green/yellow tint to it.


Both images have zoom applied and we start to notice that the True Zoom is sharper than the digital zoomed image from the Moto Z2 Play without the moto mod attached. The color tinge on the Moto picture is still noticeable.


More zoom applied to both. Both are blurry when you view the full sized image but the True Zoom pic looks considerably better in small sized web images.


Max zoom applied to both. The Moto Z2 Play image looks very blurry compared to the True Zoom pic. But if you click to see the full sized image, the True Zoom is also a little blurry. That could be because the picture was taken without a tripod which probably should be used with 10X zoomed pics. A threaded tripod socket on the True Zoom would be a nice feature that is lacking.


The yellow mailbox in the True Zoom image looks better than the Moto Z2 Play’s image because the color on the top curve of the mailbox is smoother and not over exposed like in the Moto Z2 image.


Again, the True Zoom’s image looks better when you compare the two Android figures.


When it comes to indoor low light pics, the Moto Z2 Play’s image without flash is brighter than the True Zoom’s image.

Using flash, the True Zoom’s image looks better. Check out the window in both images and notice how you can see the trees in the True Zoom’s picture (FYI: this is a basement window).

Note: you can shoot in RAW format with the True Zoom.

Using the Hasselblad True Zoom Moto Mod was easy for the most part because all I had to do was place it on the back of the phone and launch the camera app. No other special changes are needed. But I did notice a few issues.

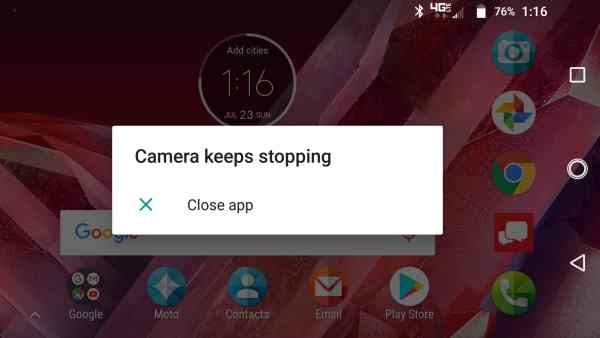
The camera app seemed to crash on a semi-regular basis while the True Zoom was connected to the phone. I also noticed that sometimes the lens would extend when I would pull the phone with the attached mod out of my pocket because it was easy to press one of the buttons on the mod which sometimes (but not always) cause the mod to activate and wake the phone.

Final thoughts

I like the idea of the Hasselblad True Zoom Moto Mod, but when it comes down to the images improvements over a Moto Z without the True Zoom, I wasn’t overly impressed especially with non-zoomed images. I’d personally only carry this mod with me when I knew I’d be taking a lot of telephoto (zoomed) shots. Otherwise, I wouldn’t bother using it due to the added bulk. There’s also the price which puts this accessory in the “I’d like to have this but I don’t want to pay this much for it” category for most people.

Source: The sample for this review was provided by Verizon Wireless. Please visit their site for more info.


Product Information

Price: $249.99
Manufacturer: Hasselblad / Motorola
Retailer: Verizon Wireless
Requirements:
  • Moto Z family of smartphones
Pros:
  • Easily snaps on the back
  • No charging necessary
  • 10 X zoom
Cons:
  • Bulky
  • Expensive
  • Camera app crashes regularly
  • Lacks a tripod socket

Filed in categories: Reviews

Tagged: , , ,

Hasselblad True Zoom Camera Moto Z Mod review originally appeared on The Gadgeteer on July 28, 2017 at 4:53 pm.

Note: If you are subscribed to this feed through FeedBurner, please switch to our native feed URL http://the-gadgeteer.com/feed/ in order to ensure continuous delivery.