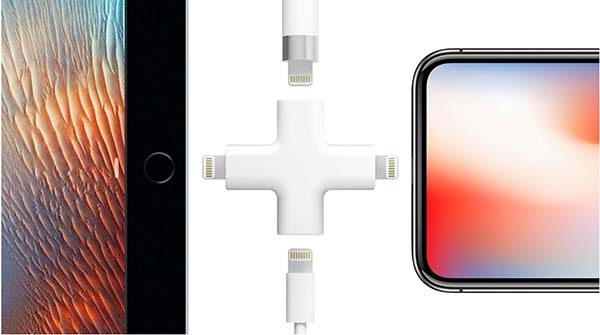
This little adapter will let you charge your iPhone, iPad, and Apple Pencil at the same time

The Node adapter from ilovehandles is a small adapter that has been designed to allow you to charge three iOS gadgets at the same time with just one cable. The Node adapter has two male lightning connectors for your iPhone and iPad, and 2 female lightning connectors for an Apple Pencil and a lightning charging cable. The ilovehandles Node adapter is priced at $19.95 and will start shipping on February 15 at ilovehandles.com

Life without Windows, transitioning to iOS only

So, it finally happened. It’s not like I didn’t want to transition, but am I ready. What happened you may ask? My Windows computer crashed after a long hard fought life. To be honest, I was expecting it to happen, the signs were there, really. I woke up every day to a warning message saying my system was destined for imminent disk failure, I was just hoping that I would have a little more time. As a result, I’ve had to push forward with my plans to transition to an all iOS setup.

I have been prepping myself for this transition ever since I purchased my first iPad, but iOS and the iPads themselves just could not handle all that I wanted to do on them. You may ask yourself what has changed besides my loss of a Windows computer.  Two things mainly.

First the hardware, Apple has released the iPad Pro (I have the 10.5-inch second-generation version). Having a device that can handle the workload of a laptop or desktop system is important. I will admit that my iPad can never fully replace the functionality of a desktop or laptop, but it should be close enough to allow me to function without one.

The second reason is the operating system – iOS 11. Apple has continually improved the iOS software to the point that I feel that I can live without a desktop or laptop.

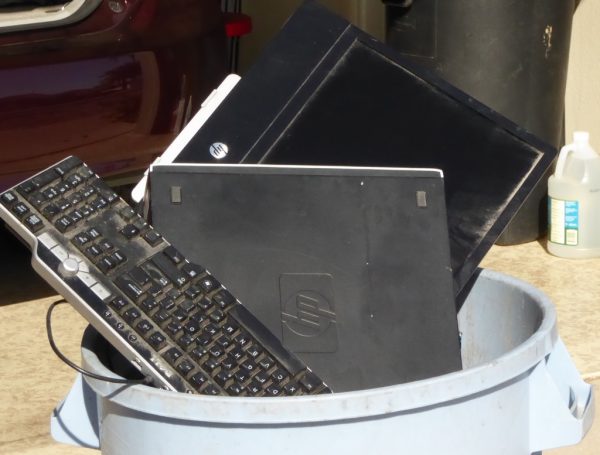
I am not kidding myself, I know this transition will not be without its trials and tribulations, just trying to figure how to set up my desk to best utilize my new set up is a challenge. Before, when I would work at my desk I would basically have two screens. I had an HP Elite L2201x monitor that was hooked to my Windows machine, a keyboard, and mouse. I also had my iPad, my Apple Magic Keyboard and my iPhone with its Qi charging stand. As far as accessories I have BYBLIGHT and my iClever multi-port USB charger. I did most of my writing on my iPad and used my desktop for reference. I have been a two monitor user for many years now and don’t think I could function well without that kind of setup.

My first inclination was to try to replicate a setup similar to my old one using my iPad Pro and my iPhone 6. I have the Apple Lightning Digital AV Adapter and figured I could use that to run my iPad or iPhone into my HP monitor. In theory, I could do this by buying an adapter that would allow me to run my HDMI cable into the monitors DP (Display Port) port. In reality, this was a no go. My thinking was to use my iPhone similar to my desktop, basically for reference and minor research. Mind you I could go out and buy a bunch of peripherals to make things work, but to be honest I may be a little on the cheap side so I would like to try to use what I have on hand.

I had to move to plan B. This plan consists of me using my original iPad 2 and my iPad Pro. The good thing about this solution is that I have my iPad 2 and it works. The bad thing with the iPad 2 is that it is obsolete and is no longer supported. For now, this will work as I really only use the iPad 2 to browse the internet and to look up reference info while I write. Some alternatives that may exist that I am not ready to explore yet are a newer iPad, a Monitor that accepts HDMI input, or a different tablet device I may have access to. For now, I am not prepared to try any of these alternative solutions, so plan B it is.
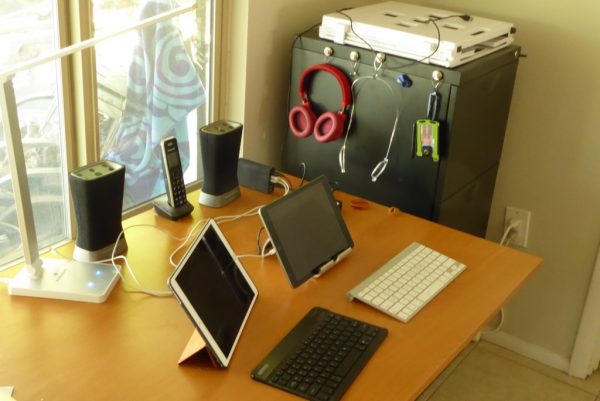
Plan C, yes I know I said it would have to wait, but while writing this article I had the good fortune to be the recipient of a 2016 iPad. To be honest, I was happy to receive it, my old iPad 2 was a dog, it would work but it was slow. So, now that my base setup was determined and setup it is time to try to function in this matter.
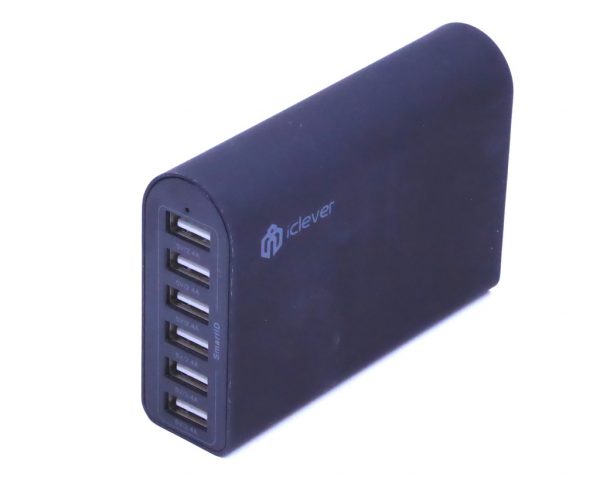
Switching to this new methodology means I will have to look at software and accessories that will help my set up feel more like a real work environment. The first item that I think I will need is a second Bluetooth keyboard. My main keyboard for my iPad has been my Apple Magic Keyboard, and while I love it, it is pricey and to be honest, lacks a little pizazz. I think I found what I was looking for in an Arteck HB030B keyboard (more on this at a later date) the keyboard is backlit rechargeable and priced at $19.99 from Amazon (it has a high user rating). The next item I decided I need is something for power management. I settled on the iClever multi-port USB charger that I had reviewed in the past. The iClever has 6 USB ports, more than enough to charge my iPads and the accessories I use. As far as other accessories, I will be using a BYBLIGHT as my lighting source (it has various brightness and temperature levels), A Cooler Master stand for my iPad (my iPad lives on my desk), The Apple Smart Cover on my iPad Pro (I carry this one around with me), a set of Supertooth Disco Twin Bluetooth speakers (for true stereo sound), and a Thecus NAS server for backup and storage. I have reviewed most of these items and they are linked if you are interested in reading about them.

Software for this transition may be a different animal for me. For the basics, I am happy to use the Apple suite of products (Number, Pages, and Keynote), but for other things such as video and photo editing, I am still looking for the one. For photo editing, I am using a program called Filterstorm Neue. Knowing that we are trying to standardize some things here at The Gadgeteer I am not sure this program will meet my needs (it may also be a little too sophisticated for my rudimentary skill level). The program lets me crop, resize and touch up photos but I am not sure I am getting full use out of it so I am always open to suggestions. Other useful software apps I have so far, are Grammarly, Google Chrome, and Dropbox.

So, what’s my bottom line here? Seeing as I am just getting started on this journey I cannot say for sure. I do not see myself going back to a desktop or laptop so I am basically in the “damn the torpedos full speed ahead mode”. I do like my setup and I seem to be functioning well with it so we shall see. I am always looking for suggestions and feedback so if you have any drop me a note in the comments section.
Naztech Xtra Drive Mini review

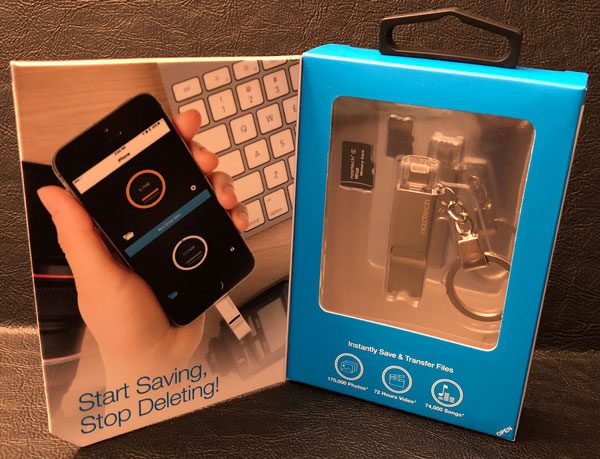
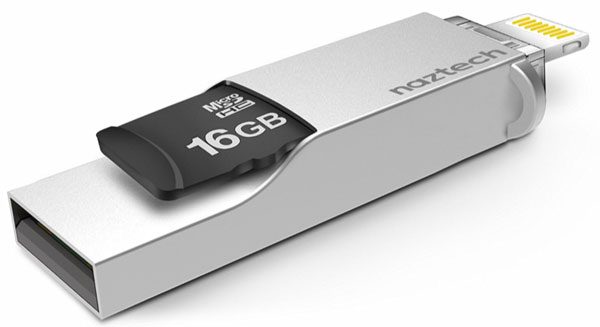
The Naztech Xtra Drive Mini is a device designed to access, store, and transfer photos, videos, and music to and from your iOS devices whenever you desire. This thumbdrive sized/shaped device is a microSD card reader engineered for plug & play connectivity with built-in lightning connector, standard USB connector, and memory card slot… 100% meant for those iOS junkies with space/capacity/backup issues in mind 😉 .

Design and features

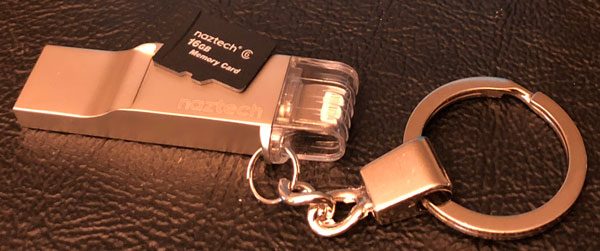
As I mentioned above, the Xtra Drive Mini is a thumbdrive sized microSD card reader that can add up to 256GB of extra storage space (on a single card) to any lightening port enabled iPhone, iPad, or iPod. It can also act as a memory storage device for any standard USB enabled computer as well. This small iOS accessory is made from an aircraft grade aluminum alloy, is relatively lightweight (8 grams), and comes with a built-in keychain.

What’s in the box:

  • Xtra Drive Mini
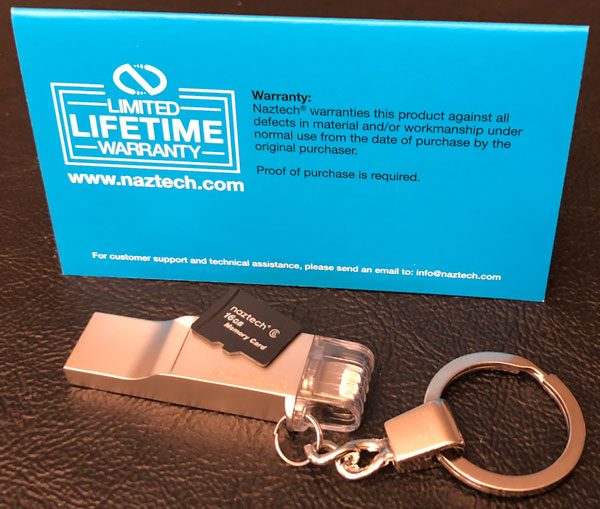
  • 16 GB microSD card
  • User manual/warranty card

The Xtra Drive Mini is designed to effortlessly transfer and/or store photos, videos, music, and data from any iOS device to your computer or other storage medium. Or simply to back up your important files and toss the microSD card in a safe place as a last chance/resort of recovering priceless 1’s & 0’s if need be.

One of the potential design issues I see with the Xtra Drive Mini drive is its standard USB connection. If this iOS accessory is truly meant for Apple fans, the MacBook and MacBook Pro users are a bit out of luck. USB-C only laptops will need some sort of adaptor, dongle or dock…shame Naztech didn’t include one out of the box.

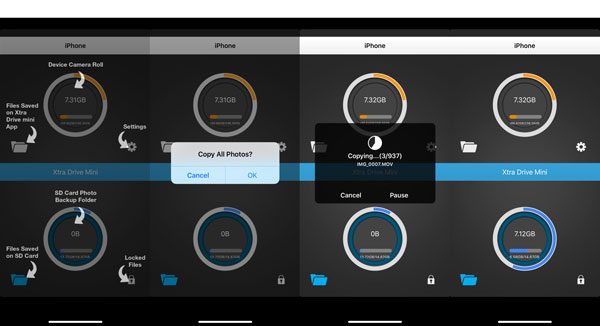
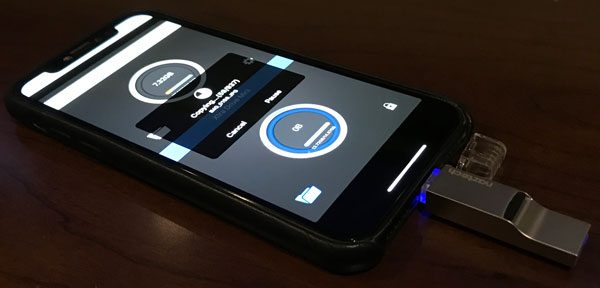
Before getting started, you will need to download the Xtra Drive Mini app from the App Store. But once installed, my iPhone X and iPad Pro both recognized the drive without issue. The app found all my photos and videos and copied them to the microSD card just as advertised.

The nearly 1000 files weighed in at just over 7gb in size and took approximately 15 minutes to transfer to the 16gb microSD card Naztech includes with the Xtra Drive Mini. The 16gb card is a class 6 and transfer speeds may increase with a better microSD card. That said, half gigabit per minute (approximately) is not unreasonable. Though a 64, 128, or 256gb class 10 card would hold a lot more data and theoretically have better transfer rates…but that might be overkill. All depends on how you use it.

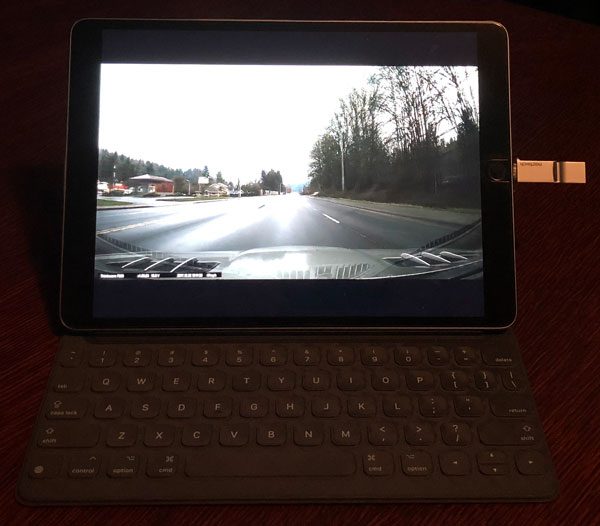
I also was able to view and transfer video files from my Thinkware F800 dashcam‘s microSD card to my iPad Pro. You can view files directly off the Xtra Drive Mini or transfer them onto whatever iOS device you choose without the need of computer or the Cloud. Streaming 2k video footage from the Xtra Drive Mini was smooth with no lagging whatsoever.

Positives

  • Small, transportable form factor
  • Very convenient way to move files around
  • Provides nearly limitless additional capacity to any lightening enabled iOS device
  • Well polished iOS app
  • Nicely constructed

Negatives

  • iOS only device
  • Naztech should include a larger/faster microSD card & USB-C adapter

I found the keychain awkward, clunky, and in the way a majority of the time. Removing it was easy and made the Xtra Drive Mini much more streamlined.

Final thoughts

The real question in today’s world, where you can buy iPads and iPhones with more than half a terabit of space and nearly unlimited Cloud storage available, is this already niche device relevant??? The Naztech Xtra Drive Mini is specifically made for Apple iOS users, with those needing extra space or greater file flexibility in mind. The Xtra does give you more control, convenience, and flexibility when transferring or backing up files if you need it.

Price: $59.99
Where to buy: Naztech or Amazon
Source: The sample of this product was provided by Naztech.

Other Gadgeteer posts that you might like…

iOS Hacks: Put your icons where you want them… sorta

Regular readers of The Gadgeteer know that there is an ongoing – umm – discussion among the writers and regular commenters here about the two most popular mobile operating systems – Android and iOS – and which has the better feature set. I’m not here to stoke those fires or to say if the feature I’m showing is even worthwhile. I’m just here to make this community aware of a workaround available to mitigate one feature missing from iOS that seems to be high on the list of items Android users prize. What “feature” is this? Being able to place an icon anywhere you want on a screen, rather than being limited to the top-left-to-bottom-right regimentation of the iOS icon arrangement grid. How is this magic accomplished? As it turns out, it’s not really alchemy, and requires no slaughter of any animals or visiting graveyards at midnight. It does require that you set your background to a solid black, however. My friend, Manton Reece, recently featured a blog post pointing to the process below. He uses it to bring the entire set of apps on his home screen down a row, but you can put gaps anywhere.

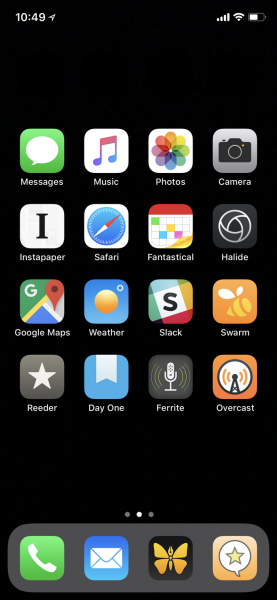
David Smith has created all the pieces you need at his blog. Basically, you just set the background to black and put in black icons with no name everywhere you want to have a gap. So, there really is something in that gap, but, since it’s the same color as the background, has no display name, and does nothing if you click on it, it’s essentially a blank spot on your SpringBoard. But your eyes don’t see it.

Plotagraph iOS image animation app review

The iPhone’s camera can take amazing pictures, but if static images bore you and you want to take your photography up a notch, you need to check out Plotagraph.

What is it?

Plotagraph is an easy to use image animation app for the iPhone or iPad.

How does it work?

First, you take a static image that can be improved with an animated element. The image above looks fine as it is, but wouldn’t it be cool if the water showed movement? Plotagraph can’t do that with just a few clicks.

The app has a very simple interface with the tools at the bottom.

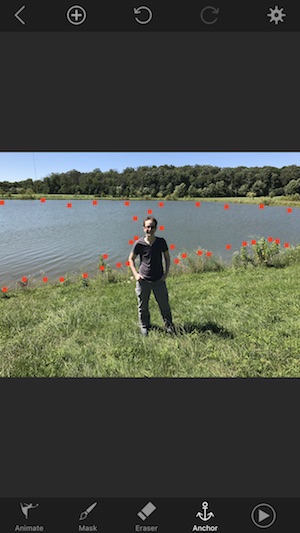
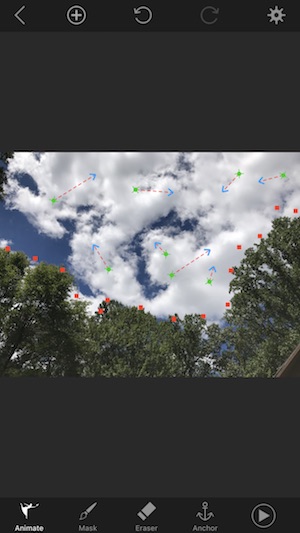
I like to anchor or mask all the parts of the image that I don’t want to animate first. This is can be done using the mask or anchor tools at the bottom of the screen. I like the anchor tool best. All you do is tap around the areas that you don’t want to move.

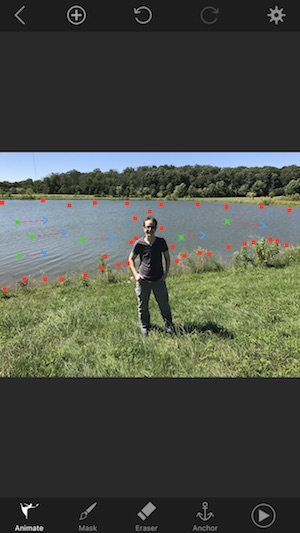
Then you use the animate tool to draw little lines in the direction that you want the image to move. That’s it! When you press the play button, you’ll see the results which are pretty freaking cool. I’ve exported this example as a 3 second MP4 video clip below.

Pretty cool right? The app will also let you crop the image and adjust the speed of the animation.

Let’s do another.

Water and cloud images are a good choice to animate.

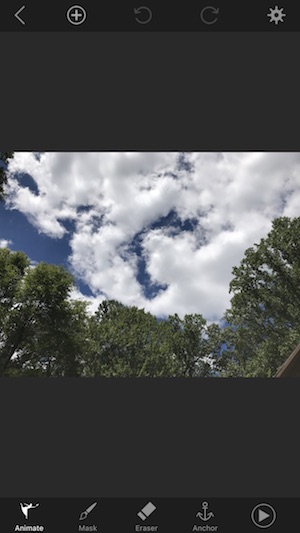
Load the image from your existing camera roll.

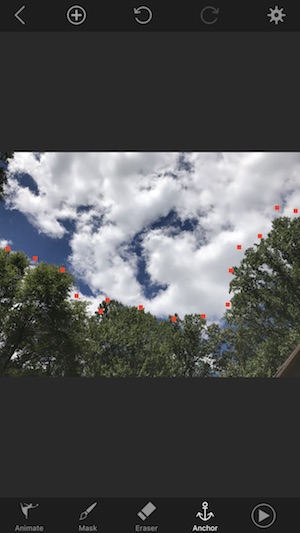
Mask off or anchor the area of the image you don’t want to move.

Draw some animation lines.

And check the results. This app is a lot of fun because it’s so easy and fast to use.

Here’s another one saved as a PNG.

In the Plotagraph app, you can choose different time lengths for the clips and export them to your device’s camera roll as an MP4 video or animated PNG. You can then submit them to your favorite social media sites like Instagram or Facebook. Unfortunately, you can’t share directly to those sites from the Plotagraph app.

Watch the video below which shows the whole process.

Final thoughts

I had a lot of fun playing around with the Plotagraph app on my iPhone 7 Plus and my iPad Pro 10.5. Animate images like this remind me of Harry Potter. 😉

I found it was easier to use the app on the iPad Pro just because the screen is larger and it’s easier to do a better job masking off areas that you don’t want to animate. With the iPad Pro, you can also use the Apple Pencil to make things even easier.

If you’re wondering why I haven’t mentioned using this app with Android device, that’s because this app is not available for Android devices yet. Supposedly a version for Android is in the works but there’s no info when it will be available.

Source: The sample for this review was provided by Plotagraph Inc. Please visit their site for more info and App store to buy it.


Product Information

Price: $4.99
Manufacturer: Plotagraph
Retailer: App store
Requirements:
  • iOS device
Pros:
  • Easy to use
  • Transforms old photos into living photos
  • Can't see where there loop starts and ends
Cons:
  • Can't share directly to social media from app
  • No Android version

Filed in categories: Reviews

Tagged: , ,

Plotagraph iOS image animation app review originally appeared on The Gadgeteer on July 31, 2017 at 9:00 am.

Note: If you are subscribed to this feed through FeedBurner, please switch to our native feed URL http://the-gadgeteer.com/feed/ in order to ensure continuous delivery.