Instant Pot Ultra 6 Qt review

I prefer to cook my own food than eating in a restaurant because it’s cheaper to cook at home and I by cooking it myself, I know exactly what is in my food. But the biggest downside to eating at home is the time that it takes to cook a meal and cleaning up the mess afterward. I’m happy to tell you that I’ve found a wonderful solution to both of those problems; it’s the Instant Pot Ultra Qt.

What is it?

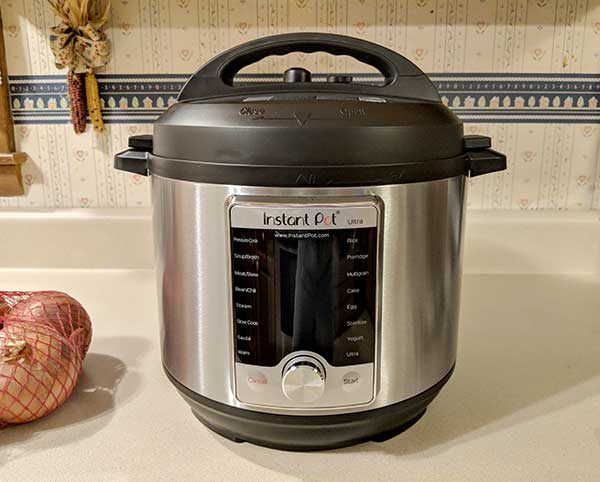
The Instant Pot Ultra 6 Qt is an all in one electric pressure cooker that speeds up cooking by 2-6 times and can be used as a slow cooker like a crock pot, rice cooker, yogurt maker, sauté/browning pan, steamer, and a warming pot.

What’s in the box?
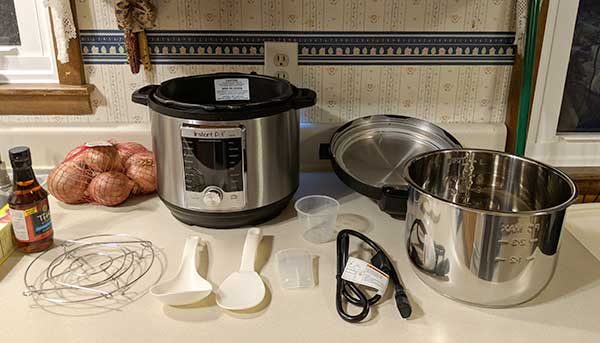
Instant Pot Ultra 6 Qt
6 quart stainless steel pot
Power cord
Wire steam rack
Plastic tools
Condensation drip catcher
Instructions

Design and features
First all, you’re probably wondering how a glorified crockpot can be worthy of a Gadgeteer review. I’m here to tell you that this thing is life changing for me even if I only use it to cook a few different things.

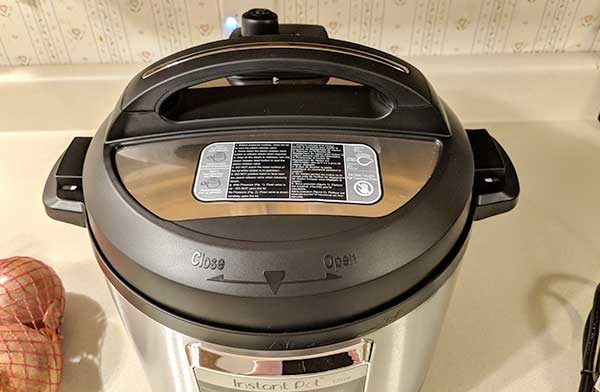
At first glance, the Instant Pot does look like a crockpot except that the lid isn’t made of see-through glass like most crockpots. That’s because the Instant Pot is a pressure cooker.
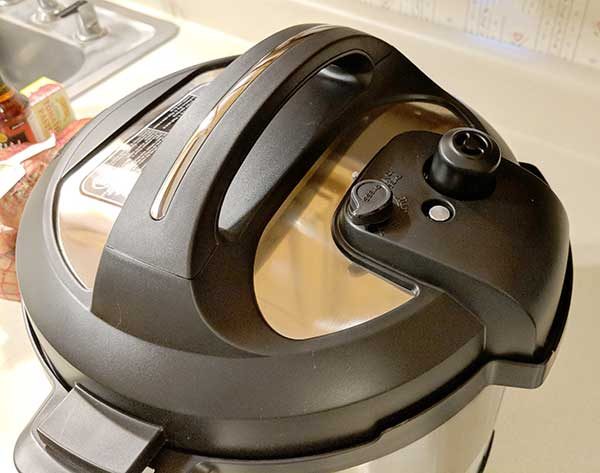
On the back of the lid is a steam release valve (large black knob shaped object), float valve (small silver object), and a stem release reset button (black comma shaped button).
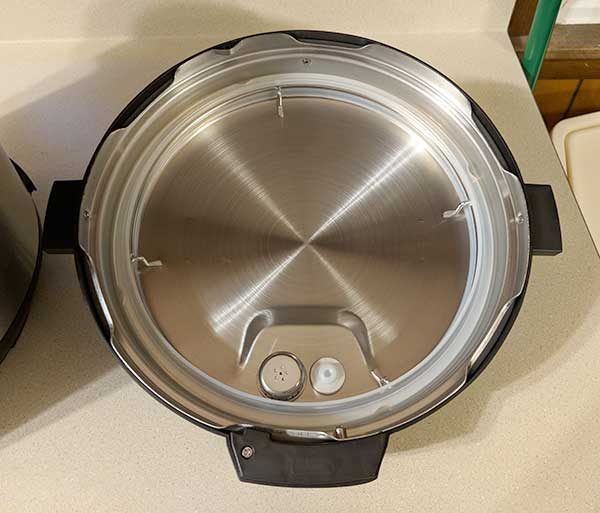
The lid locks and unlocks with a twist to reveal the stainless steel interior.
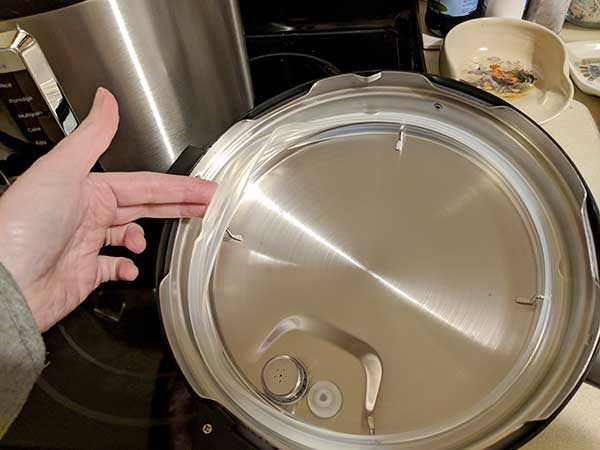
You will notice the removable and replaceable silicon seal which keeps the pot pressurized.
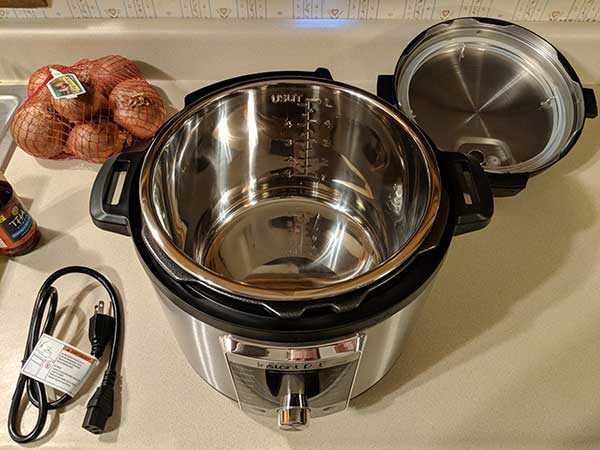
In the bottom half of the Instant Pot is the dishwasher-safe stainless steel cooking pot which has marks inside to show fill levels for pressure cooked foods. Instant Pot sells different models of their cookers but the one they sent to me has a 6 quart pot.
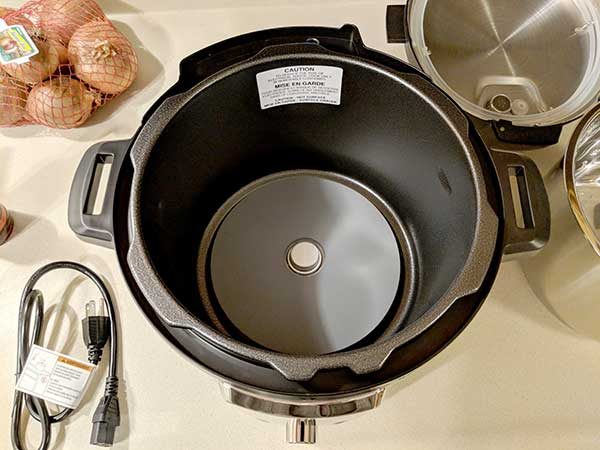
The 6 quart stainless steel pot lifts out of the bottom of the Instant Pot to reveal the cooking element at the bottom. It should be common sense that you never put food in this area of the Instant Pot.
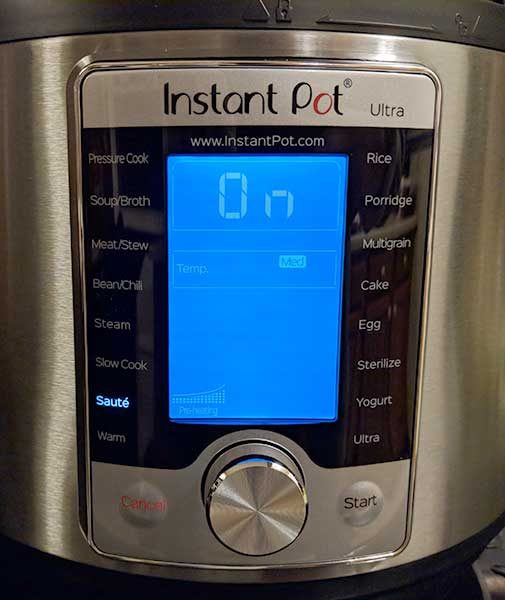
The front of the pot has a white on blue backlit display that lights up when the Instant Pot is plugged in. The Instant Pot has 16 cooking programs listed on the sides of the display: Soup/Broth, Meat/Stew, Bean/Chili, Cake, Egg, Slow Cook, Sauté/Searing, Rice, Multigrain, Porridge, Steam, Sterilize, Yogurt, Warm, Pressure Cook, and Ultra.

The program is selected by turning the knob below the display and pressing the knob to select the mode. In the image above, I’ve chosen the Saute mode. It’s also important to note that some of the modes like Saute have different temperature settings that can be customized by using the knob after the mode has been selected.

The Ultra mode is also available to give the cook full control of pressure, non-pressure cooking and time. There’s also a timer that you can use for up to a 24-hour cooking delay start time.

My first test of the Instant Pot Ultra 6 Qt was to cook beef stew. Although I was excited to try the Instant Pot, I wasn’t expecting to be wowed by my first try and definitely didn’t think I’d be wowed by cooking a beef stew in it.

We usually cook a beef stew in a crockpot all day and in all my years cooking one, I’ve probably never uttered the words YUM after taking my first bite. Beef roasts in the crockpot are usually kind of blah, but we use the meat for soups that we make with the leftovers, which always taste better than the original dish.

So in anticipation of cooking the beef stew in the Instant Pot, I googled a couple recipes and settled on this one from Nom Nom Paleo. I picked it because it included ingredients like fish sauce and coconut aminos that I’ve never used in a beef stew before and thought what the heck, let’s see what happens! I couldn’t find any coconut aminos at my local grocery store, so I used soy sauce instead.
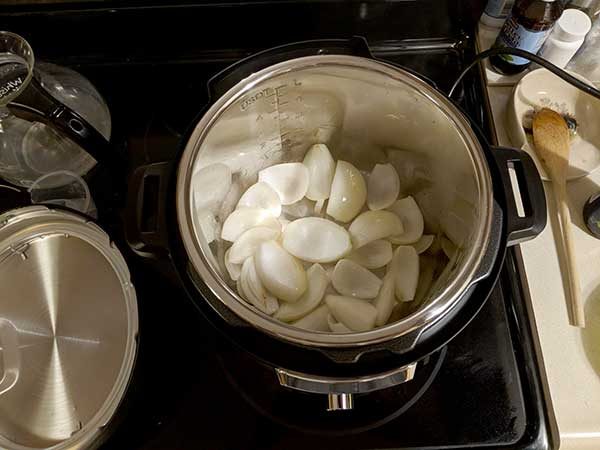
The first thing I did was put a little olive oil in the bottom of the pot with rough chopped onions. I used the saute program to cook them for a few minutes.

Then I cut up the beef in big chunks and added the meat, and other ingredients into the pot along with some baby potatoes instead of mushrooms because I hate mushrooms.
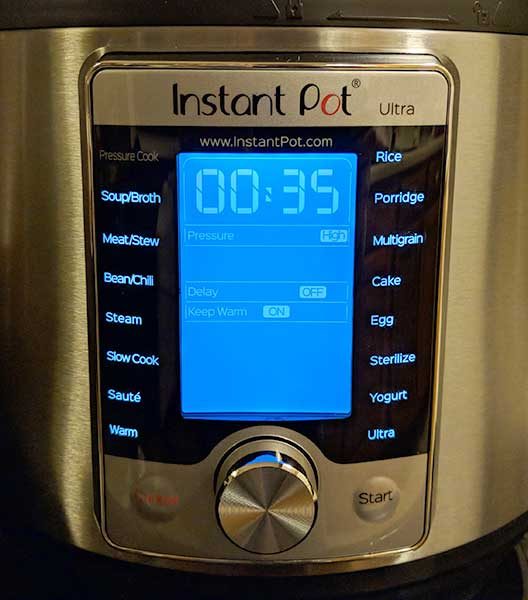
I put the lid on top, chose the pressure cook mode for 35 minutes and walked away. Yes, 35 minutes. I was very skeptical that it would be done that quick.
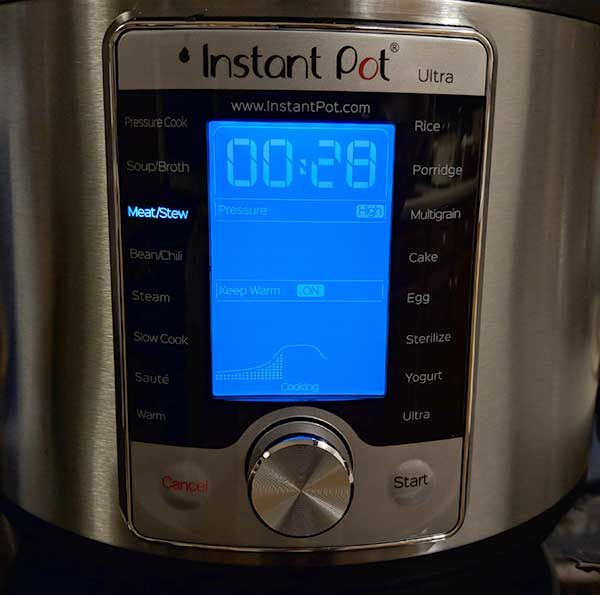
As soon as you put the lid on top, you’ll hear a video game style tune to let you know that it’s starting to cook. Then at the bottom of the display, you can see a graph which shows the temperature/progress indicator. The indicator provides a visual on the cooking progress from preheating through to cooking and the Keep Warm mode which is activated by default.

Although the beef stew is only supposed to take 35 minutes to cook, that’s actually the pressure cooking time. The 35-minute countdown doesn’t begin until the pot is pressurized, which can take 10-15 minutes or so depending on the temperature of the ingredients.

But the great thing is that you can set the mode and time and then just go do something else. When the cooking is done, you’ll hear a beep. You can release the pressure by pressing the pressure release button and wait about 5 minutes till all the pressure is disappate dand you can open the pot, or you can allow the pressure to release on its own and the food will be kept warm for you.

When I opened the Instant Pot, I was greeted with a drool-worthy aroma, but I still wasn’t impressed until I took my first bite. I have to tell you, that the beef stew I made in the Instant Pot was the best beef stew I’ve EVER had in my life. And no, I’m not just saying that. I’m being 100% serious. The meat was perfectly cooked and tender and the potatoes were perfect too. Just thinking about it makes me want to make it again.
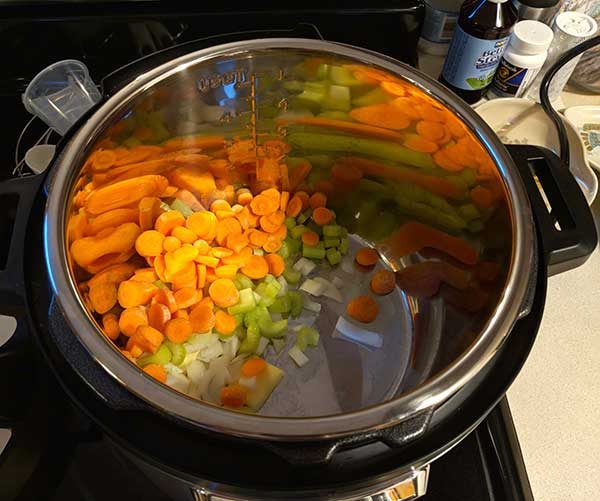
For Instant Pot cooking test #2, I decided to try using up some Thanksgiving leftovers by making some turkey noodle soup. This time I didn’t have a recipe to go by. I just used leftover turkey broth that Jeanne’s brother gave us from their Thanksgiving day turkey that we shared with them. I used a couple cups of leftover turkey meat cut up into bite-sized chunks.

But I started out adding mirepoix and some butter to the pan in saute mode to sweat the veggies. If you don’t know what mirepoix is, it’s just a fancy name for diced carrots, onions, and celery.

Then I added the turkey broth, the turkey, some dry noodles I found in the cabinet that were probably 2 years old, ground pepper, and a hodgepodge of herbs. I gave all the items a quick stir, locked the lid, chose the soup mode and let the Instant Pot do its thing.

About 30 minutes later I opened the pot to another great meal.

With just those two dishes, I was already a huge fan of the Instant Pot, but then I also used it to cook some steel cut oats for breakfast one morning. They turned out decent but I need to tweak somethings before I use the Instant Pot to cook them from now one.

I also used the Instant Pot to make spaghetti using this recipe. I love pasta, but it’s a pain in the rear to pull out a frying pan to brown the hamburger, use a saucepan to heat up the tomato sauce, and use a big pot to cook and drain the spaghetti. With the Instant Pot, I only needed one pot for the whole meal.

You can brown the meat right in the Instant Pot using the saute mode. Then drain the fat (or if you use ground turkey like we do, you don’t even need to drain it), pour in the sauce, break up a pound of uncooked spaghetti noodles in half, pour in 1.5 jars of water, add some spices and herbs, shut the lid, pressure cook for 8 minutes and you’re done. It turned out perfectly yummy. Imagine a whole pot of spaghetti cooked in about 20 minutes with only one pot to wash (it can go in the dishwasher too). It’s truly a game changer in my house.

What I like

  • Fast cooking
  • One pot easy cleanup
  • Safety features prevent you from opening the lid if there is pressure in the pot

What needs to be improved

  • I seriously can’t think of anything

Final thoughts

I love the Instant Pot Ultra 6 Qt and know that I’ll be using it regularly from now on. I can’t wait to try making chili, steaming vegetables, and other recipes. If you like to cook or even if you don’t, you should really check out the Instant Pot. It makes cooking so easy, fast, and flavorful while making cleanup a breeze.

Price: $149.95
Where to buy: Amazon
Source: The sample for this review was provided by Instant Pot.


CouchCoaster solves the problem of where to put your drink

No matter how carefully your furniture is arranged, sometimes you find yourself without a convenient, secure place to put your drink while you read or watch TV.  With the CouchCoaster, you can have a steady, easily reachable place to hold a bottle, cup, or can right on the arm of your sofa or chair – without leaving behind stains or rings.  Made of flexible, weighted, BPA-free silicone, the CoachCoaster has a tacky base to hold it in place over the arm of your sofa or chair. The arm must be at least 5.5″ thick with gently sloping sides; the furniture can be made of leather or fabric.  If the arm won’t work, you can open the coaster and lay it along the seat, tuck it between the cushions, or even lay it over the back of the seat.

CouchCoaster holds bottles, glasses, bottles, or cups up to 3.5” in diameter; a slot in the side accommodates cup handles, and an insert gives a tighter fit for smaller bottles and cans.  CouchCoaster was created by Barry Freeder from London, UK, but it’s available to us in the USA for $25.00 through Amazon.

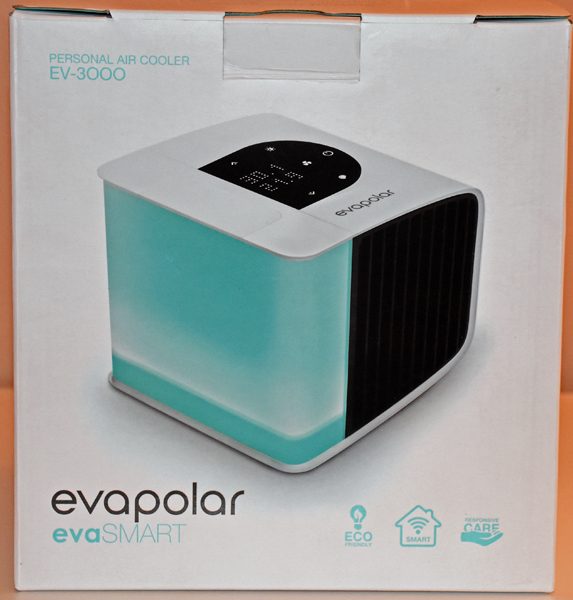
Evapolar evaSMART EV-3000 Personal Air Cooler review

Evapolar makes small evaporative air coolers designed to cool your personal space, be it in your office, bedroom, or a nursery.  The evaSMART EV-3000 adds WiFi connectivity so you can control the functions through a mobile app or through home automation interfaces.

What is it?

The Evapolar devices use evaporative cooling to drop the temperature in your personal space to keep you cool in environments where you can’t control the ambient temperature.  It also adds humidity into the local environment, which is good for your skin and hair.  And it filters out dust particles for cleaner air.

Hardware specs

  • 7.24″ × 8.54″ × 8.14″; 4 pounds
  • Water tank holds 44 ounces
  • Cooling power: 340-1360 BTU/hr
  • Cooling area: Up to 43 ft
  • Noise level: 25-40 dB
  • Power consumption: 12W
  • USB Type C (5V, 2.5А)
  • Works with USB power bank

What’s in the box?

  • Evapolar Evaporative Cartridge (installed)
  • USB power cord
  • USB power adapter
  • Quick Start Guide and user manual
  • Stickers

Design and features

The top of the unit has a display panel that incorporates some manual controls, too.  You can see the lid of the water tank is open in the above image.

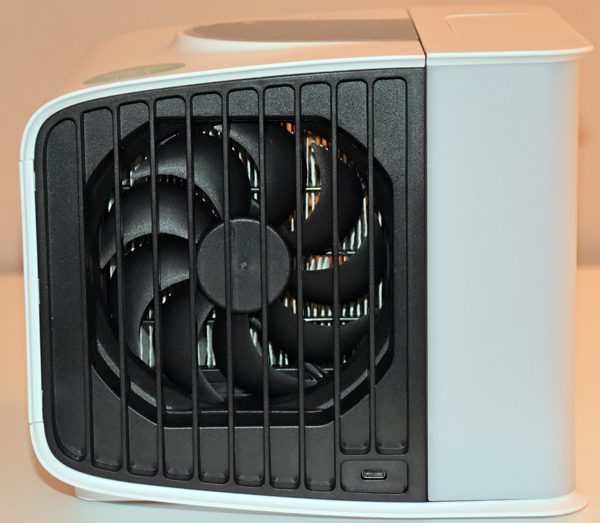
The back of the evaSMART has a fan that blows air through the evaporative cartridge.  The cartridge is visible behind the fan; it’s the white folded paper just visible through the fan blades.

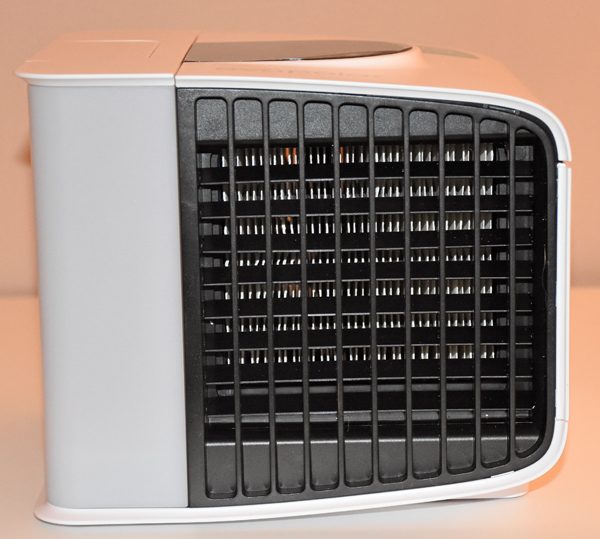
The front of the cooler has movable vanes that can adjust the direction of the air exiting the evaporative cartridge.

This slider, opposite the water tank, adjusts the movable vanes on the exit side of the cooler.

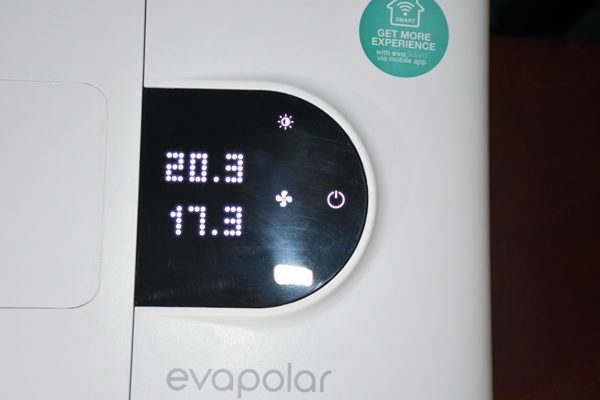
The evaSMART cooler defaults to displaying temperatures in Celsius.  You can select Fahrenheit only in the mobile app.  The touch panel lets you control fan speed, brightness of the water tank light, and the color of the light.  The top number is the temperature of the air entering the unit, and the bottom number is the temperature of the exiting air.

The water tank light can function as a nightlight, if wanted.  You can choose a static color, or you can set a color playlist.  You can turn it off, if a nightlight isn’t needed.

Setup

Since the Evapolar evaporative cartridge was already installed, setting up the device itself was simple.  Simply remove the water tank, fill it with water, and re-seat it in the evaSMART device.  Connect the USB cable to the power supply and plug it in.  Press the power button to turn it on.  You can use the top panel on the device to adjust the brightness and color of the water reservoir light, or to turn the light off, or to adjust the fan speed.

You need to download the Evapolar app to your mobile device to be able to connect the evaSMART to your home network.  You can use the evaSMART cooler without first installing the app, but there are some functions, such as changing the temperature display from Celsius to Fahrenheit, that can only be done via the mobile app.  Naturally, you can’t control the evaSMART using your home automation setup without the WiFi connection.

Performance

Once the evaSMART has water in the reservoir and is plugged in to power, you can begin cooling your personal area.  I was interested in this little personal air cooler because my husband and I often disagree on a comfortable room temperature for sleeping.  It seems that Butch always has hot feet, and he wants a cold room to keep his feet cool while he huddles the rest of his body under blankets.  I like a cool room, but I don’t like it cold.  Since I sleep next to the window that he wants opened, we both are often unhappy.

To test the cooler, I closed the window and set the evaSMART on a little table near his feet.  He was happy to report that his side of the bed was cooler that first night, and I was happy to report that I wasn’t freezing on my side of the king-sized bed.  He continued to use the evaSMART (with manual controls) for a few nights, and he even had to turn it off one night because his feet actually got cold.  The evaSMART personal cooler worked well to cool down the area where Butch slept to keep him more comfortable without requiring us to open a window and cool down the entire room.

You can see in the image showing the nightlight, the incoming air is about 6 degrees warmer than the exiting air (displayed in Celsius).  I used an external thermometer and found that the average temperature difference was about 6 degree F cooler in our room.  The cooling ability of the personal cooler depends on the ambient temperature and humidity.  The higher the ambient humidity, the less cooling can occur.  Our room humidity was only about 30% and ambient temperature was about 70 degrees F.  Evapolar claims it should be able to cool to as low as 63F under certain temperature/humidity conditions.  It might have worked more efficiently in an enclosed space, but it did work well to cool Butch’s micro space in our large bedroom.

We got about 4-5 hours of cooling from a tankful of water.  Evapolar says you should expect 4-8 hours, again depending on your ambient conditions.

Mobile app and WiFi connectivity

Attempting to use the mobile app is where my troubles began.  The app requires you to first set up an account.  My first attempt resulted in an error, so I tried several times to enter a password that would be accepted.  I got error codes of “2” or “4” or “Json not a dictionary”.  I finally found information on the Evapolar website that said one of those codes meant that the password didn’t fit the criteria and another meant that an account already existed for that email address.  Since one of my attempts had been successful – but I didn’t know which one, I tried the “forgot my password” route of storing a new password a few times.  I’d request a reset, I’d get the email enabling the reset, enter a password that was supposedly accepted, but I could still never log in because my password was incorrect.  After a couple of emails with online help, I was told that one of my passwords had been accepted and an account was set up, and that was the only password that could be used to log in, and it apparently couldn’t be changed.  I had no idea which one was the right one, so I ended up having to use a different email address to set up a new account.  BTW, there was plenty of room to display a message that my password wasn’t an acceptable format on the error line.  Having a code more useful than a “4” would have let me know what the problem was and would have saved all that trouble getting an account set up.

My troubles continued when I tried to connect the evaSMART to my home network.  I could easily connect my iPhone to the temporary local network with the evaSMART, but it always failed when I tried the next step to connect the cooler to my home network.  After more digging around on the Evapolar website, I found that the device was only compatible with 2.4GHz networks.  It wouldn’t connect to 5GHz networks, and it wouldn’t connect to dual-band networks.

Without being able to connect to the internet, and being unwilling to replace my dual-band router, I was unable to test out controlling the evaSMART with Alexa, and I was unable to change the temperature display to Fahrenheit.

Positives

The evaSMART EV-3000 does cool the air in a small area, so it’s great for your desk in your office or for a bedside table for those people who want a cooler sleeping environment than their partner does.

Negatives

The mobile app and WiFi connectivity, which is the function that separates this product from the cheaper evaLIGHT model, has confusing error messages when you’re trying to create an account and doesn’t let you know when you successfully entered an acceptable password and created that account.  Worst of all, you can’t use the app to connect the evaSMART to the internet at all if you have a router that isn’t 2.4GHz only – it doesn’t work with dual-band routers.

Final thoughts

The evaSMART device itself does work to cool a small area, and I like how it looks and performs.  If I were purchasing an Evapolar personal air cooler today, I would stick to the less expensive evaLIGHT model.  The evaSMART’s premium price doesn’t seem worth it until the app problems are worked out.

Price: $256.00
Where to buy: Evapolar and Amazon
Source: The sample of this product was provided by Evapolar.

Your drinks will be shaken, not stirred, with the Mixology cocktail shaker

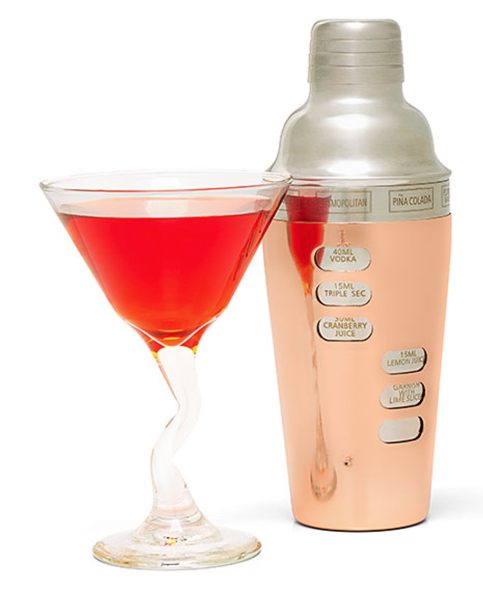
If you like to mix up your own drinks in your home bar, you know you need various tools, including a cocktail shaker.  Unless you have an incredible memory, you’ll also need a recipe book, or you’ll find yourself asking Siri or Google how to make drinks.  With the Mixology Cocktail Shaker, you’ll have recipes for eight drinks, like Mai Tais, daiquiris. cosmos – even shaken Martinis – right there on the shaker.  You just twist the outer cover to select the drink you want, and you’ll uncover the ingredients needed.

The Mixology shaker is made of stainless steel and copper plating.  It has a 750ml capacity (about 25.4 fluid ounces), and the recipes are listed in milliliters.  And you’ll be glad to know you can throw the shaker in the dishwasher after you’ve worn out your arm muscles shaking up all those drinks!  The Mixology Cocktail Shaker is $29.99 at ThinkGeek.

Safely extinguish kitchen fires with a Kovenex blanket

Do you keep a fire extinguisher in your kitchen like safety experts recommend – and sometimes homeowner’s insurance policies require?  If you have one, do you know how to use it?  Or even how old it is?  If you have a kitchen grease fire and don’t aim the spray from the extinguisher correctly, you can spray burning oil all over the kitchen and yourself.  There are other ways to put out kitchen fires – baking soda and pot lids, for example – but you have to have them in easy reach to be effective.  If you mount the red nylon packaging of a Kovenex fire retardant blanket near the stove, you’ll be able to extinguish that fire before you could find the fire extinguisher and pull out the pin.

The Kovenex blanket is a 35″ x 32″ piece of high-performance fabric with inherent fire-resistant, heat-blocking, burn-protection, and tear-resistant properties.  Simply rip open the Velcro closure of the red mounting package, unfold the blanket, and place it over the fire to quickly put it out.  The fabric is not chemically treated and doesn’t emit toxic fumes.  It’s safe for contact with your skin and even protects your arms as you lay the fabric over the fire.  In addition to smothering a fire, you could wrap the Kovenex blanket around someone as they escape from a fire.

With fire extinguishers, you have to worry about their fill level, but it’s never a problem with the washable and reusable Kovenex blanket.  The Kovenex Home Safety Fire Blanket is $36.00 at The Grommet.